
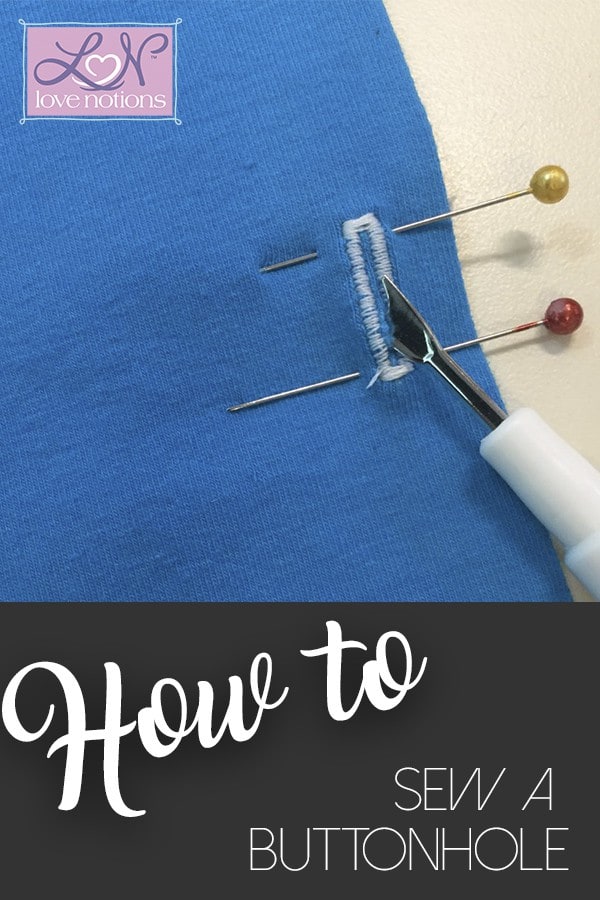
How to sew buttonholes and buttons
Buttonholes elevate a garment to another level and give it a professional look. When I was looking for a new machine I had a couple of “must-haves” and the number one item was one-step buttonholes! Now all machines do it a little differently, so consult your manual to find your machine’s specifications, but here’s how I do mine.
Interface the buttonholes.
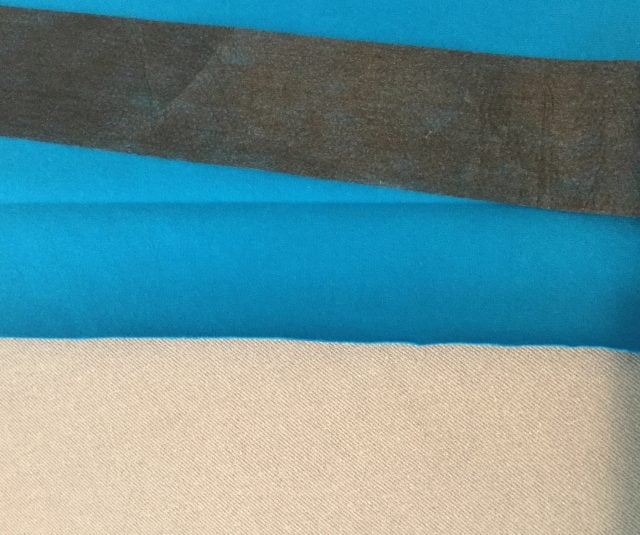
I iron a strip of interfacing to the wrong side of the fabric directly behind where the buttonholes will be worked. This stabilizes the fabric – especially important if you’re putting buttonholes in knit fabric as I am in the demonstration.
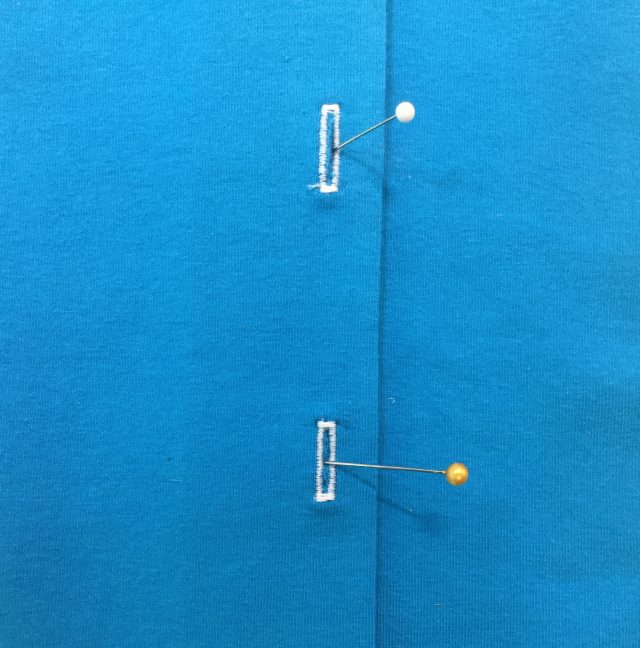
Mark the buttonholes.
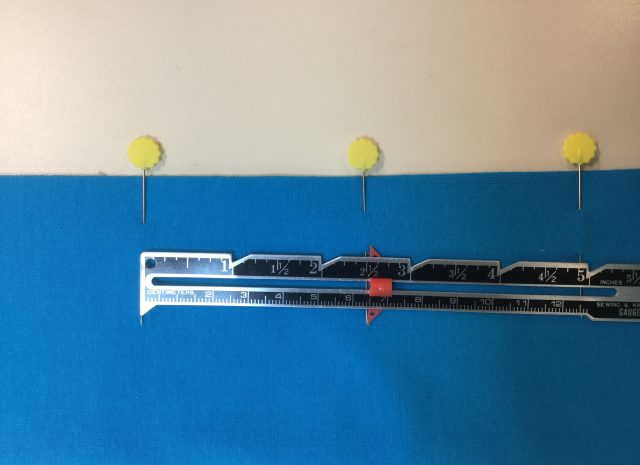
Where you mark depends on how your machine stitches the buttonholes. I’ve marked mine where my machine will start. I’ve marked them 2.5″ apart which is a common measurement between buttons.
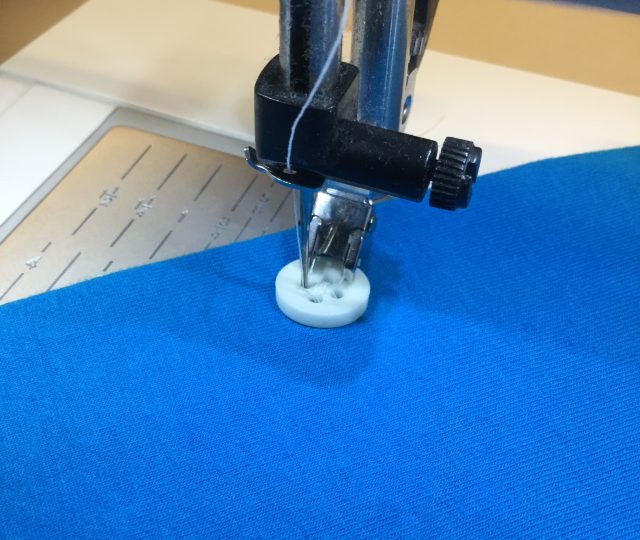
Set your machine in place for the first one.

My machine has a special foot for buttonholes. I set it on the starting point and make a mental note of how it sits on the fabric so I can do all the buttonholes the same distance from the edge. Sew all the buttonholes and now you’re ready to open them.
Place pins to protect the bar tacks at top and bottom.
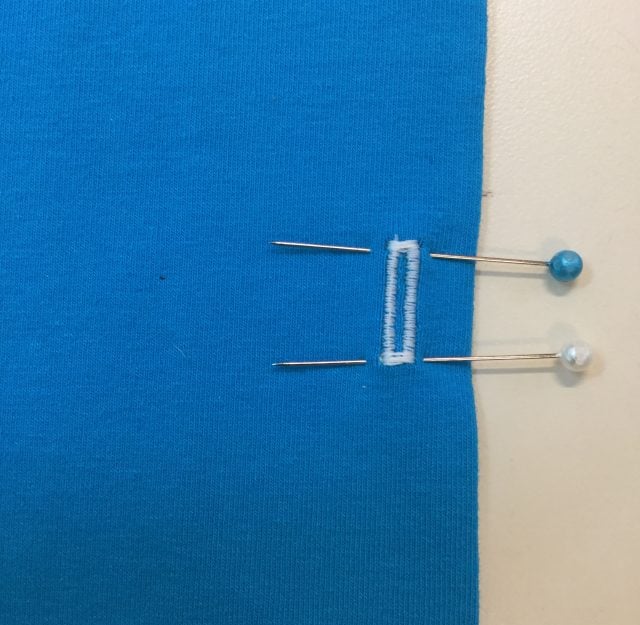
When you’re getting ready to cut the buttonholes if you place pins at top and bottom you protect the bar tacks from accidental snipping.
Start the top and bottom.

With my sharpest stitch ripper, I start the openings at the top and bottom of the buttonhole. The pins prevent me from catching the bar tacks.
Finish opening the buttonhole.
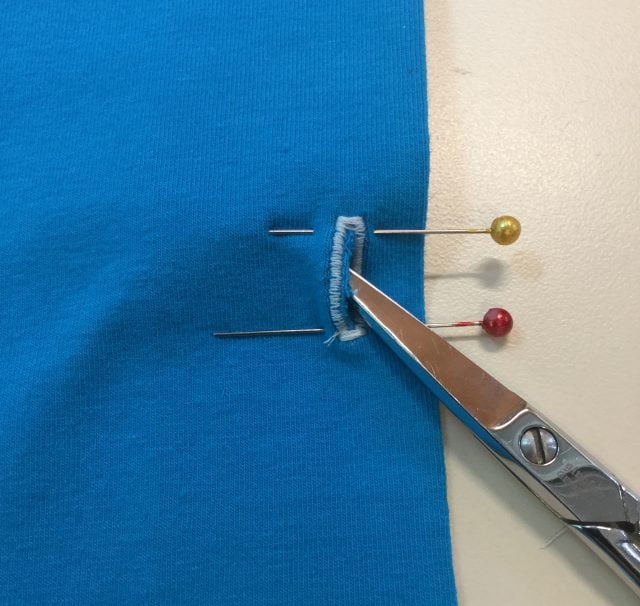
I use embroidery scissors to cut the rest of the buttonhole. Cut each buttonhole and remove the pins. Now you’re ready to sew on the buttons.
Now for the buttons!
It took me a long time to get the courage to use my machine to sew on buttons, but now that I’ve done it, I wouldn’t sew them on any other way! Such a time-saver and also saves my aging hands! I have a special foot for sewing on buttons, but you can do it without. My machine also has a stitch for sewing on buttons, but if yours doesn’t I’ll tell you how to get around that. But for now we’ll do it with my machine.
First, establish where the buttons will go.
If you’re working on a garment that has a placket, with the placket folded in place, stick a pin through the middle of the buttonholes to mark the spot.
Set the buttons in place.
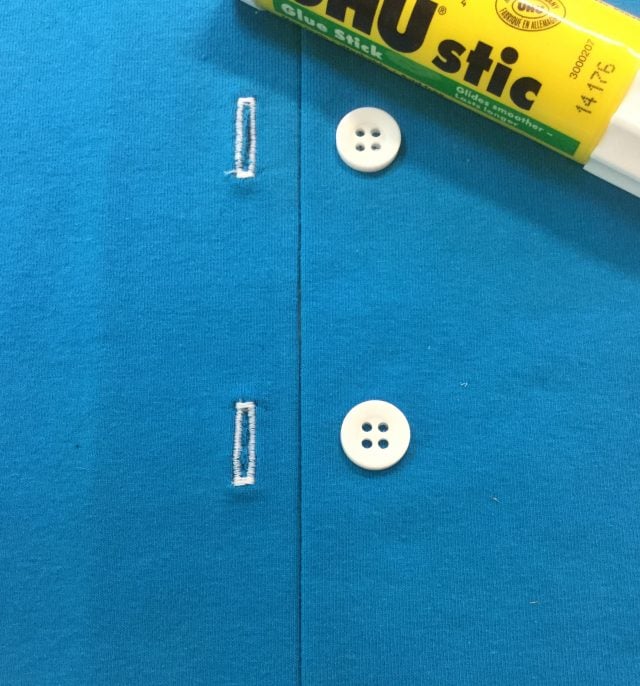
If you’re working with a garment where you can place the two halves of the front side by side, even better. Now whichever you’re dealing with, dab the backs of each button with a glue stick and place them where you’ve marked, or right beside the buttonhole. The glue won’t harm your machine’s needle and by the time you’re ready to sew on the buttons, it will already be dry.
Stitch the buttons.
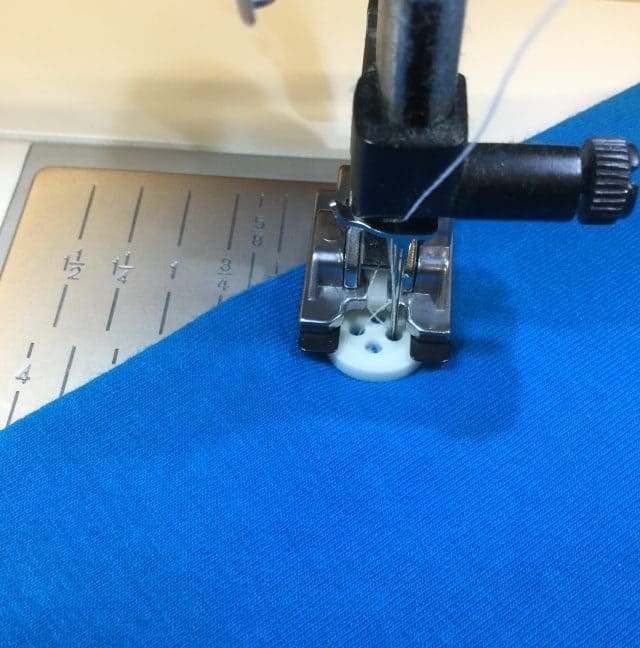
My buttons have 4 holes and the stitching will go in diagonally, crossing in the middle. I place the button under the foot and lower it. I manually stitch the first couple of stitches to make sure the needle will slide comfortably into the holes and when I’m sure I have the button positioned correctly, I let the machine do the work. First do one diagonal side, clip the tails and then do the other diagonal side. I finish off with a dab of Fray Stop on the back, just to seal the deal. Finally, loosen the buttons from the fabric – and you’re done!
Don’t have a button foot?
Machine doesn’t have a button stitch? You can sew on buttons without these. Take off your machine’s foot, and lower the post onto the button. Set your machine to zig zag and adjust it so that the needles will go into the holes. Turn off the feed dogs so that the button stays in one spot. Set your zig zag to the shortest length stitch you can. Manually do the first few stitches to make sure that you’re positioned correctly and when everything is right, do about 8 stitches. You can tie off at the back and dab with Fray Stop. That’s it!
And once you have a taste of how quick and easy it is to sew your own buttonholes and buttons by machine, there’s no going back!


Thank you so much for this post! My goal for fall sewing is to become comfortable with buttonholes, zippers and snaps! Your instructions and photos are all excellent!
Thanks!!