
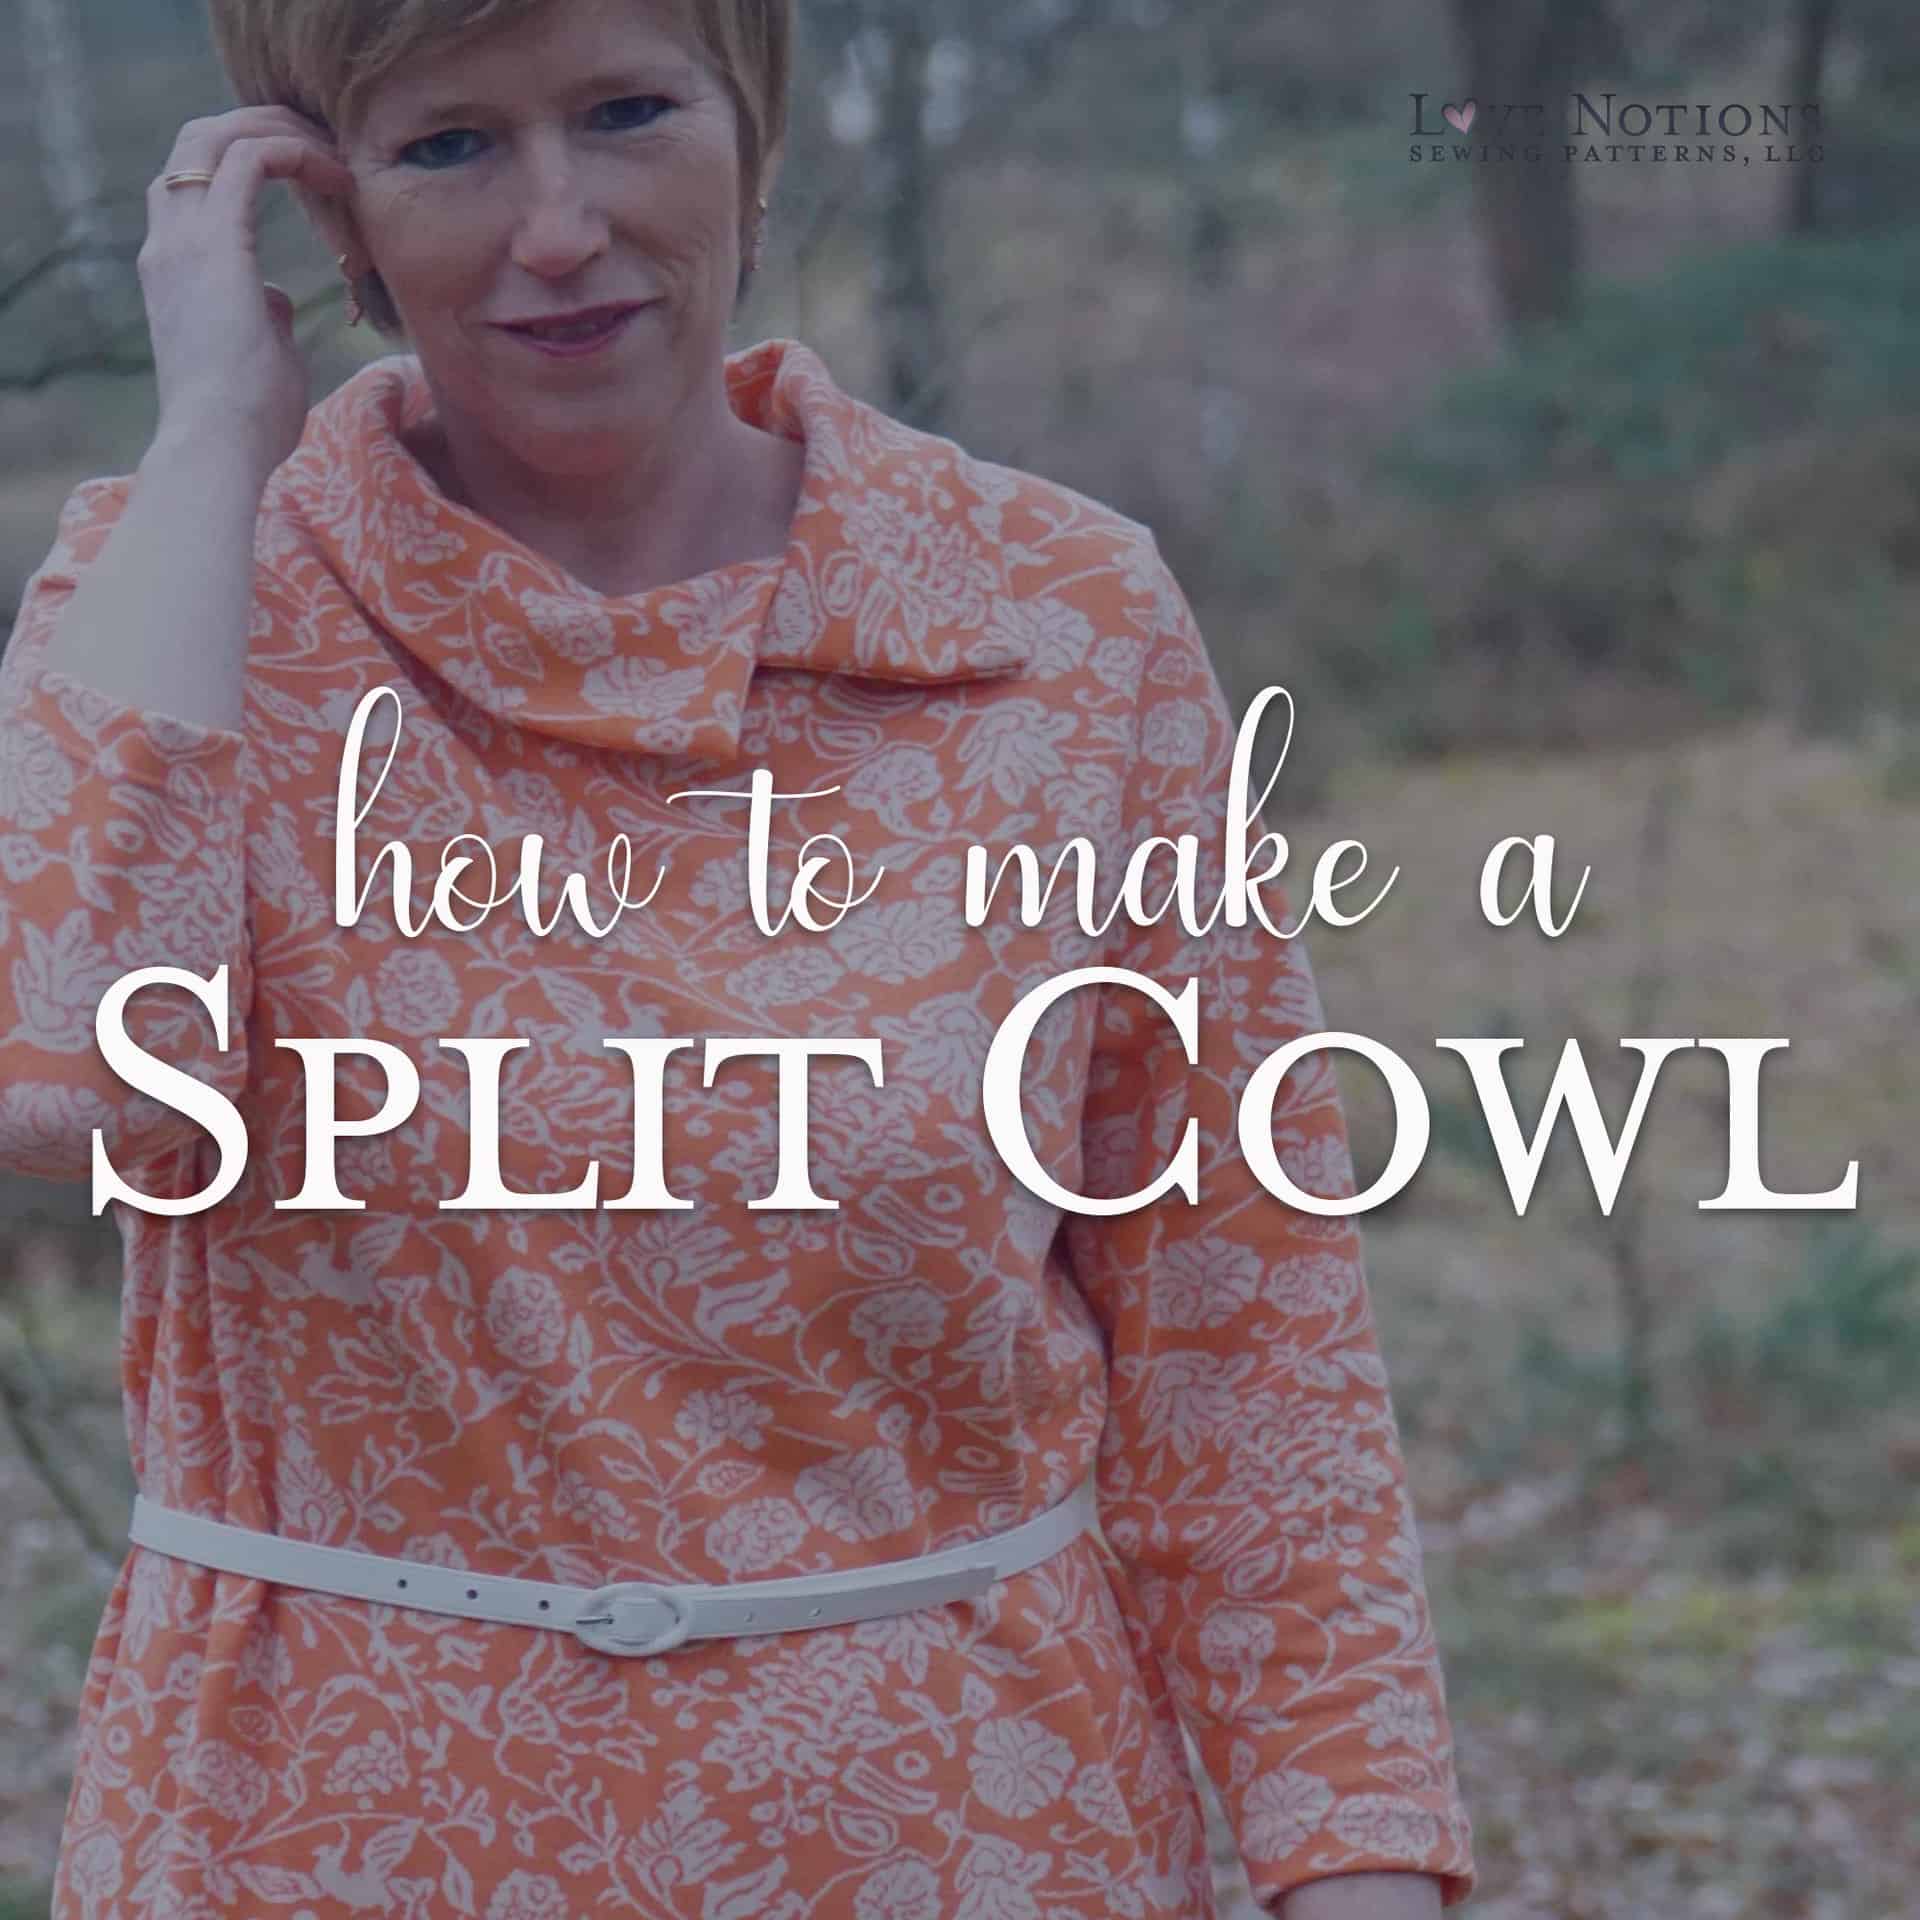
In this blog post I will show you how to add a split cowl to any knit top or dress. Now would that not be fabulous if you could add this type of collar to basically any knit top you want?! Hello everyone, here’s Ilse from @sewsewilse at Instagram and from my blog Sewsewilse.
What pattern works with this split cowl?
I’m starting with the Terra Tunic pattern as a base. But like I said, you could use it with nearly any other as well. Below I will show you how to make a wide overlapped collar or a split cowl and depending on which neckline you will use from the Terra Tunic, the collar will fall quite differently.
Actually, it’s a very simple technique, so once you understand the process you can create endless variations.
A bit about the pattern I’m using
So today the Terra Tunic is the Feature Friday pattern at $5. As usual, with a Love Notions pattern, you have tons of options. And after reading this blog post of the split cowl, you have plenty more to unleash your creativity on!

Before you start
First, sew the shoulder seams of your Terra and then spread the top open on your table. First we are going to measure the circumference of your neckline and we will do that by putting the tape measure on its side. This is the easiest way if you need to measure a curve.

Let’s do it! Version 1: Dress with Overlapped Collar
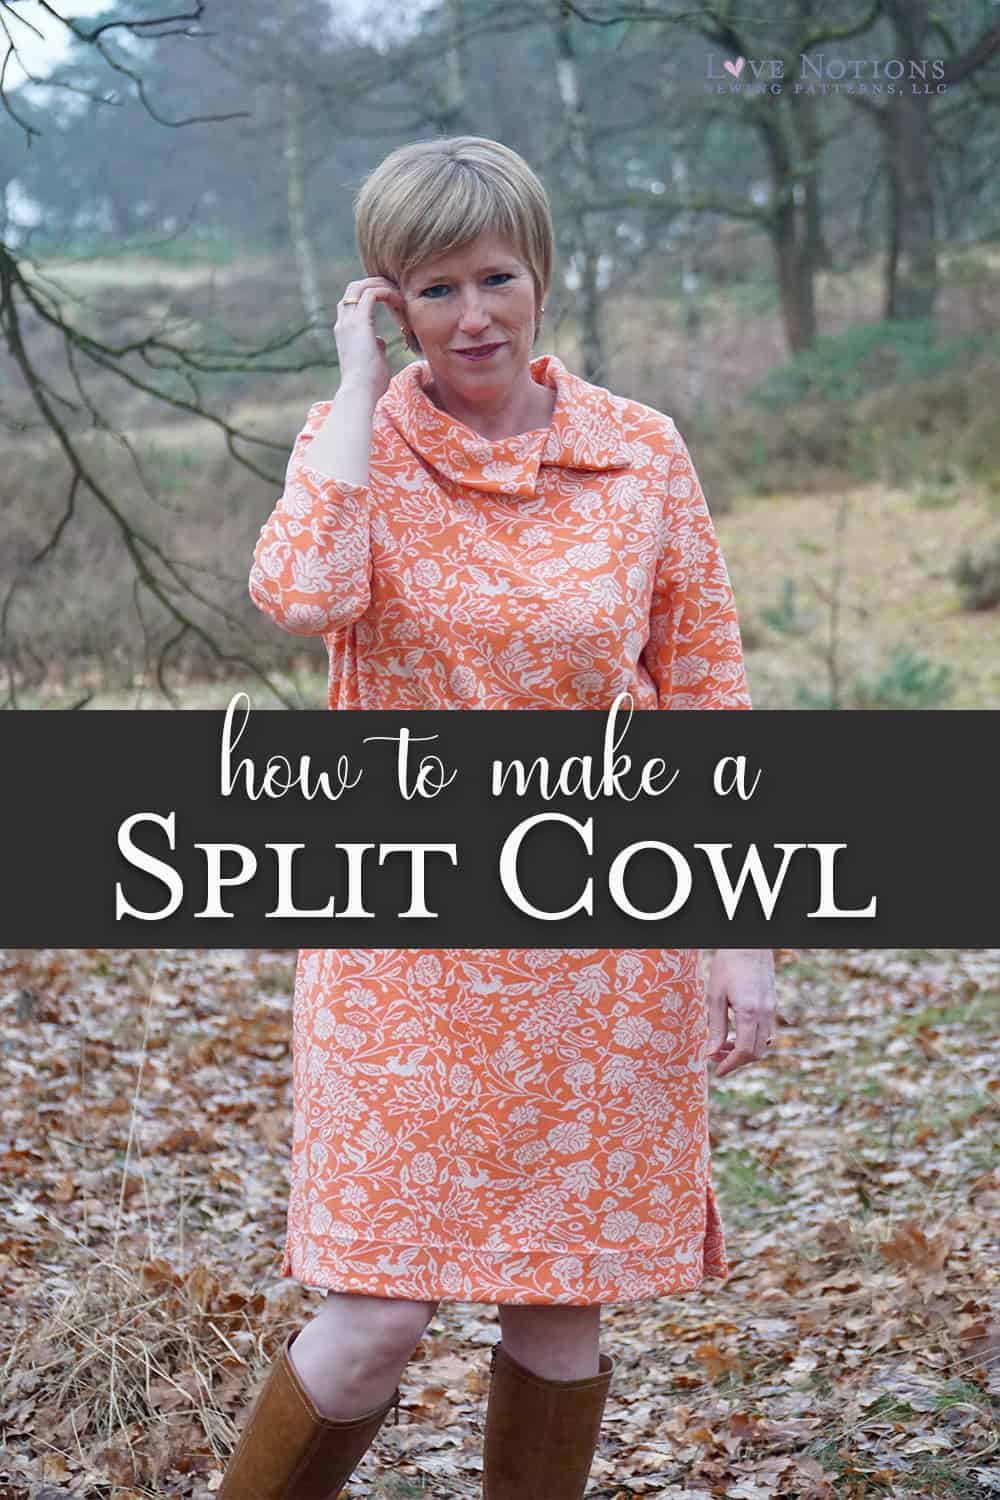
I’m going to show you two ways. The first Terra is a dress version for which I used a jacquard knit. Both the dress and the collar are made of the same material. You can, of course, use any other color or material for the collar. I will use the boat neckline for this version.
Step one : Add length to your collar.
-Since we are going to overlap the collar it is not necessary to be extremely precise. Now suppose your neck circumference measures 24″, as mine. Add for example 3” to 4″ for overlap and seam value included. This will be the length.
-As the pattern piece of the collar will be a rectangle, the length will be 28″ and the width 10″.
Yep, we are just going to sew a rectangle to the neckline, but depending on how you do it you will have a different effect!

Step two: Sew short ends.
Fold your rectangle in half lengthwise and sew the short ends with a ⅜ seam allowance.

Step 3: Overlap to the length of the neckline.
Turn your collar right sides out.
Pin your overlapped part. Overlap it so the circumference of your collar has the same as your neckline.
I indicated here my center back of my top and collar and my overlapped piece to show you how the whole thing will slide, you don’t have to.

Step 4: Place it and pin.
Slide your collar about 2″ to the right (or left), or where you want the overlap.
Pin your overlap first and then gradually continue to pin your collar. Everything will slide together nicely without having to stretch your fabric.
Turn your top and look at your pinned collar from a distance. Be sure to fit the top before attaching it. Do you want the overlap more to the back or to the front? Re-pin and sew in place.

Tadaaa! My final dress length Terra with split cowl.
Here you see my dress length Terra Tunic Top, euh dress 😉
How easy was it to lengthen it to a dress? VERY. I just used the lengthen/shorten line and lengthened the tunic with 9”.

Version 2: Peter Pan Collar from Asymmetric pattern piece
My second version is a top with short sleeves using the funnel & asymmetric neckline pattern piece. I really wanted to make a cute Peter Pan collar. Wondering how I did it?

Step one: Measure the neckline, round off the corners, add SA.
The first step is the same. You measure the circumference of your neckline after you have sewn your shoulder seams. My circumference in size L is 20”.
For the Peter Pan collar, you first have to round off your rectangle on one side until you have the right curve to your liking. To get the right shape to my liking, I had to experiment some. Drawing the half is enough, since you’ll put it against the fabric fold anyway. Mirror your pattern piece and paste it against it.
For your total length you only need to add seam allowance because this collar doesn’t need an overlap. I took a SA of ⅜”.
The width of my single pattern piece is 4”, mirrored it’s 8”.
If you are working with a thinner knit, it is better to stabilize your collar first.

Step two: Sew.
Fold it in half lengthwise and sew with a 3/8 “ seam allowance. The picture shows where I started and ended.
Be sure to decrease your seam value toward the bottom and keep the curve nicely.

Step three: Turn, Mark.
Turn your collar and iron it. Mark your center back and center front of your neckline with a pin. Mark your center back from your collar too.

Step four: Attach to neckline.
Turn your top right side in. Pin your collar, right sides together at the neckline. Start with your center back and then center front. In the front you won’t get an overlap, the two collar pieces only touch. Gradually pin the rest in place. When you are sure, sew the collar in place.

Tadaaa!

An easy tweak:
Did you see I shortened this one? I shortened it with 4” to achieve this look.
Now it’s up to you and I’m so curious about your creation!
Get your copy today and play with necklines!
If you don’t own the Terra Tunic yet, be sure to claim it today now it’s only $5!
The highlighted links bring you to the pattern on sale.
Want to see my dress option in motion? Be sure to visit my Insta @sewsewilse
Thanks for passing by,
warm regards, Ilse

Save the article to your sewing pinterest board


Love both of these ideas! Terra Tunic is one of my favorites and now I can change the look Will definitely try them.
That’s so nice to hear! Curious about your versions.! Be sure to tag me!
Thanks for this easy explanation.
Wonderful blog post. The pictures, especially the Peter Pan cutting layout are very helpful.