


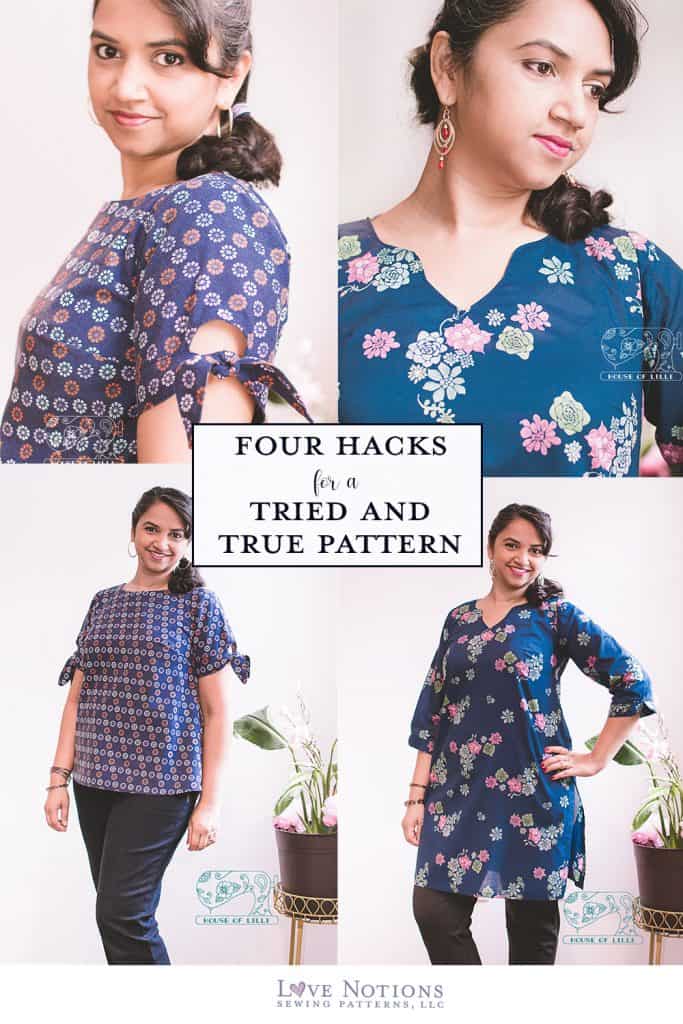
So, you saw a cool new style in RTW like sleeve ties or a notched neckline. You know you can hack those details but what tried and true pattern will be the foundation? Try Cadence Top and Dress. Here, Anjori shows how it’s the perfect blank canvas for all those interesting details for sleeves and necklines.
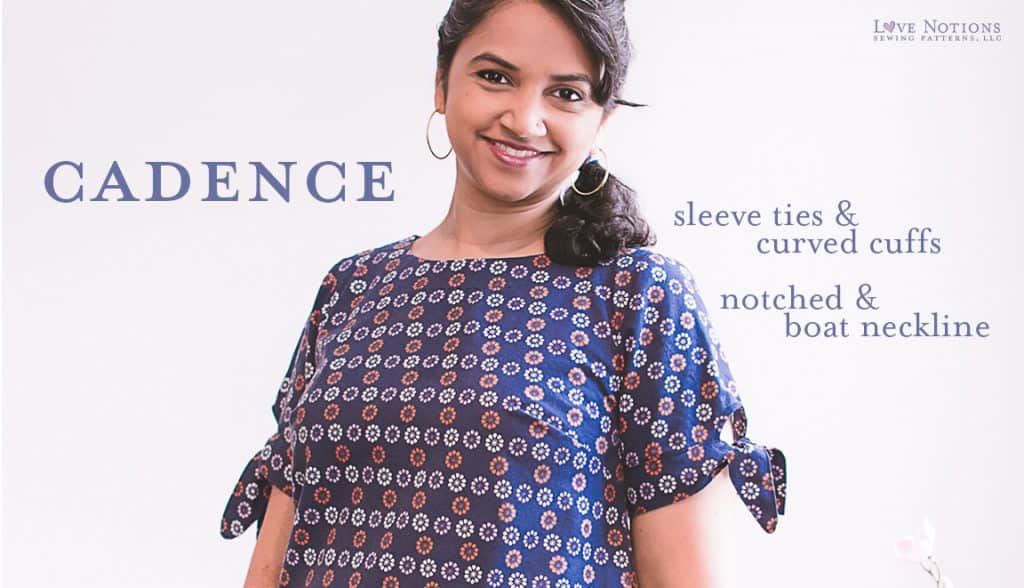
Cadence Sleeve and Neckline Hacks
Hello Love Notions family!!
I’m Anjori from Bee Threadly.. I am back and super excited to share with you the Cadence Dress & Top and the changes you can make to it. A classic pattern like the Cadence, it is really like a blank canvas. Have you heard of the phrase “tried and true pattern” (TNT)? This can definitely be a TNT after it is well fitted. Then it can be modified to your heart’s content.
Cadence Top and Dress Sewing Pattern
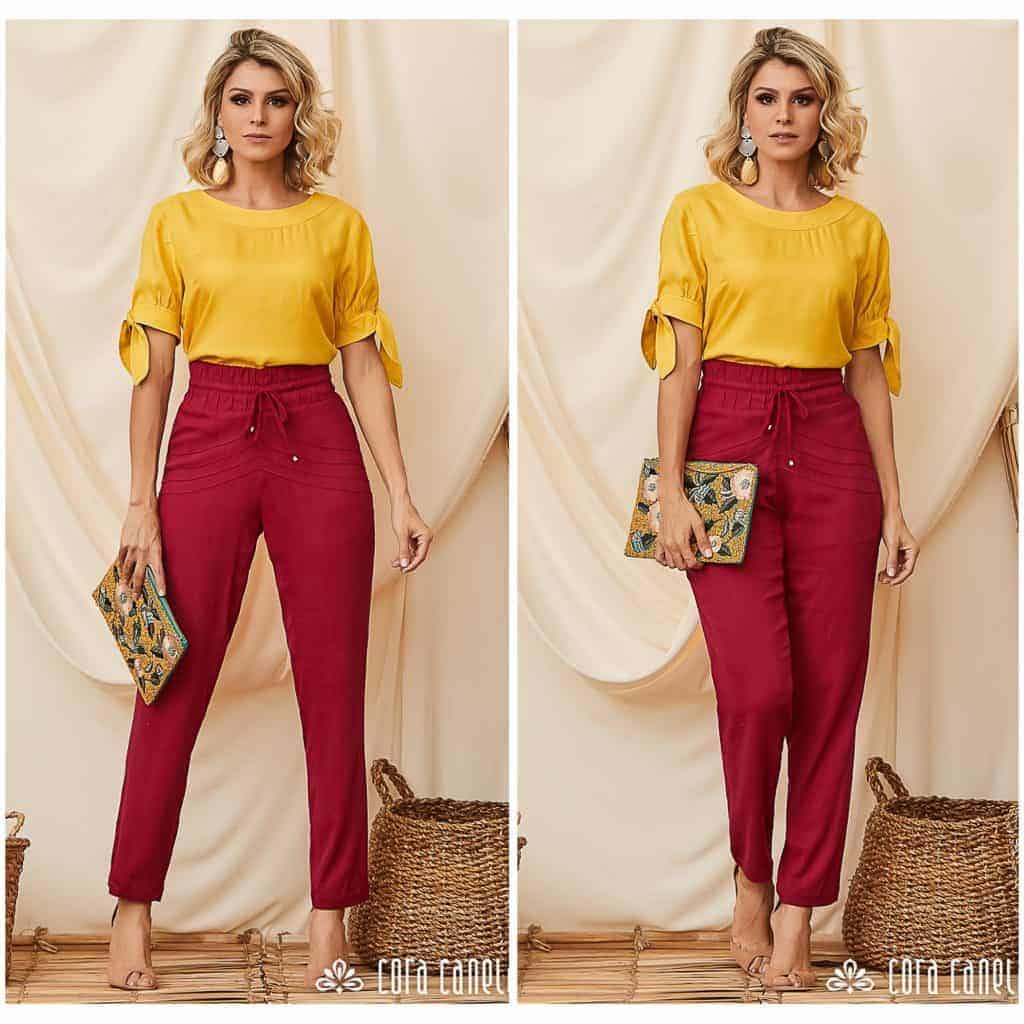
Even by itself, the Cadence Dress & Top a is packed full of options. Shaping comes from a bust dart and back seam. You have the choice of 3 different lengths (shirt, knee and maxi dress) with 5 sleeve options (tank, short, 3/4, flare and bishop), and 2 necklines (scoop and notched scoop). Not to mention a full bust adjustment already done for you, should you need. And the best news, the Cadence is on sale for $5, but only for today!

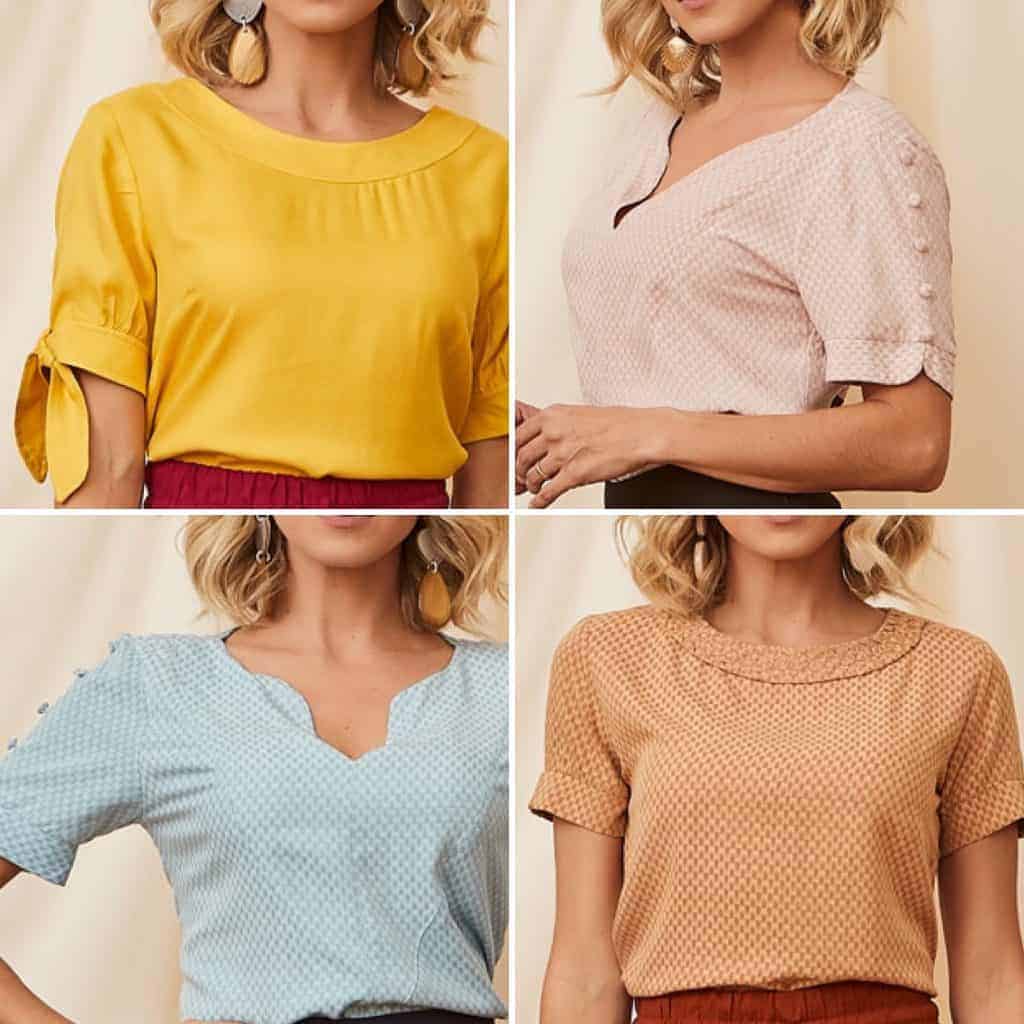
Pinspiration = Sewing Pattern + Hacks
While perusing Pinterest one day, I found this collection of shirts — a classic shirt with statement necklines and sleeves. I immediately thought the Cadence would be a perfect candidate to work with.
My versions look just as good, if I do say so myself.

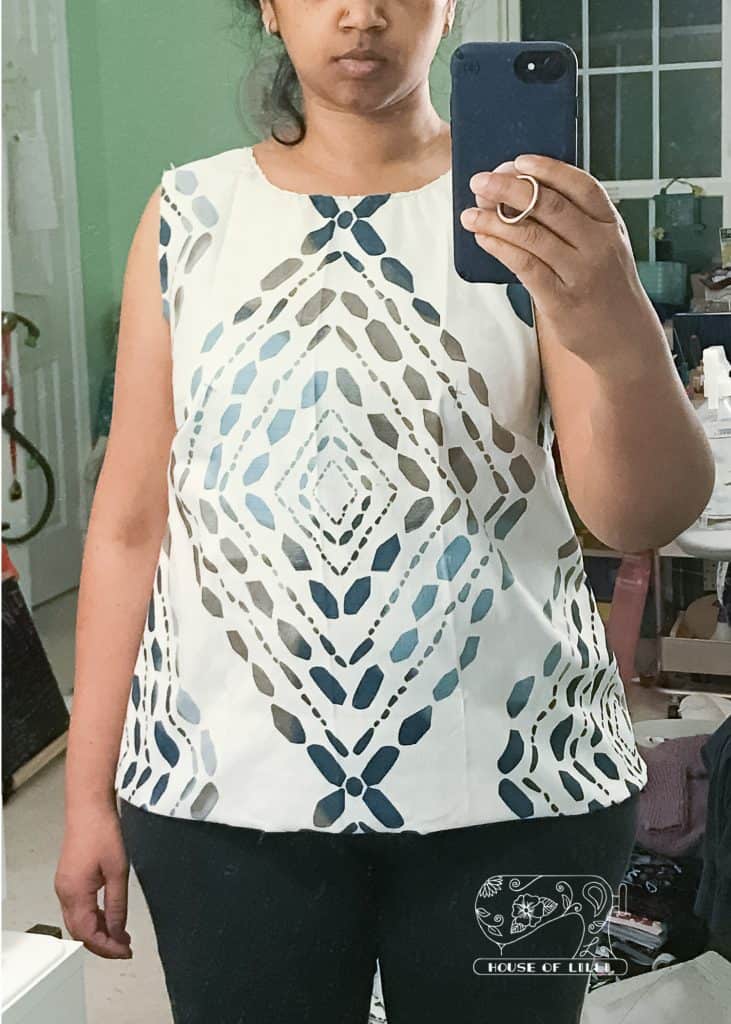
I have made the Cadence once before, and it was a commission. So it was fun to finally make it for myself.

Picture of my commission
Inspiration #1 – Boatneck Neckline Hack + Tie Sleeves Hack
The first inspiration is a high neck with tie sleeves. The high, almost boatneck hack is a fairly simple change. The sleeves are cuffs with added length to tie them. I’ll walk you through how to get this look.
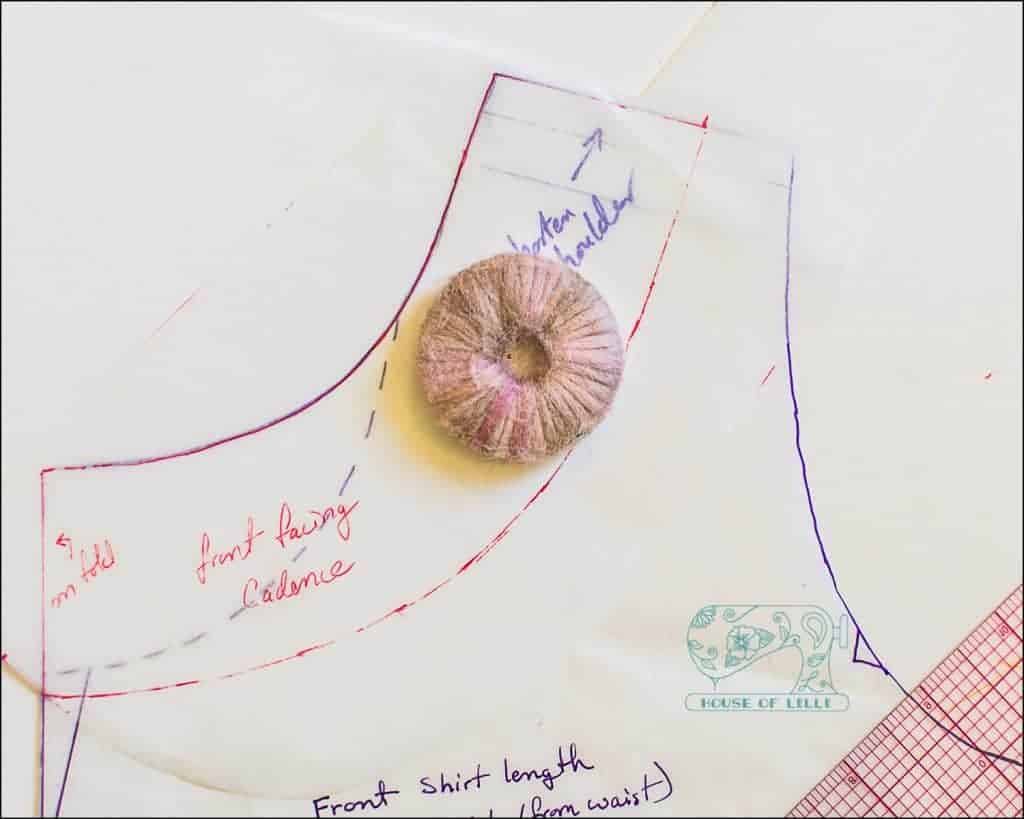
High Neck or Boatneck Hack
Notice the neckline hitting right at the clavicles on the model? That’s the point to mark on the pattern paper when held up against you. Taking that mark on the pattern, use a French curve to draw a new neck. I noticed that the curve wasn’t sitting right with the pattern’s shoulder length, you will need to shorten the shoulder by ⅞” from center front. Remember to change the back shoulder to match.
This is a good time to make a toile/muslin of the top. However, even though it’s a toile, you’ll still want to stay stitch the necklines to accurately see how the neck sits.
My toile showed that my bust dart needed to move up AND I needed to raise the armscye. Instead of making two separate adjustments, I removed height from the shoulders, effectively doing both adjustments together. Of course, this also meant I could no longer get the neck opening over my head. After dropping the neckline, I also did a swayback adjustment, changing the back neckline as well, which meant changing the back facing too.
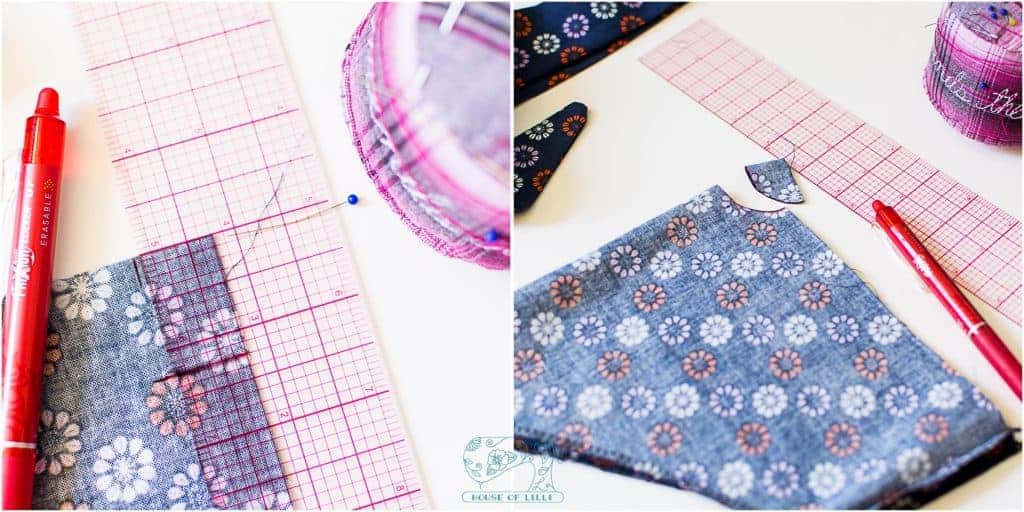
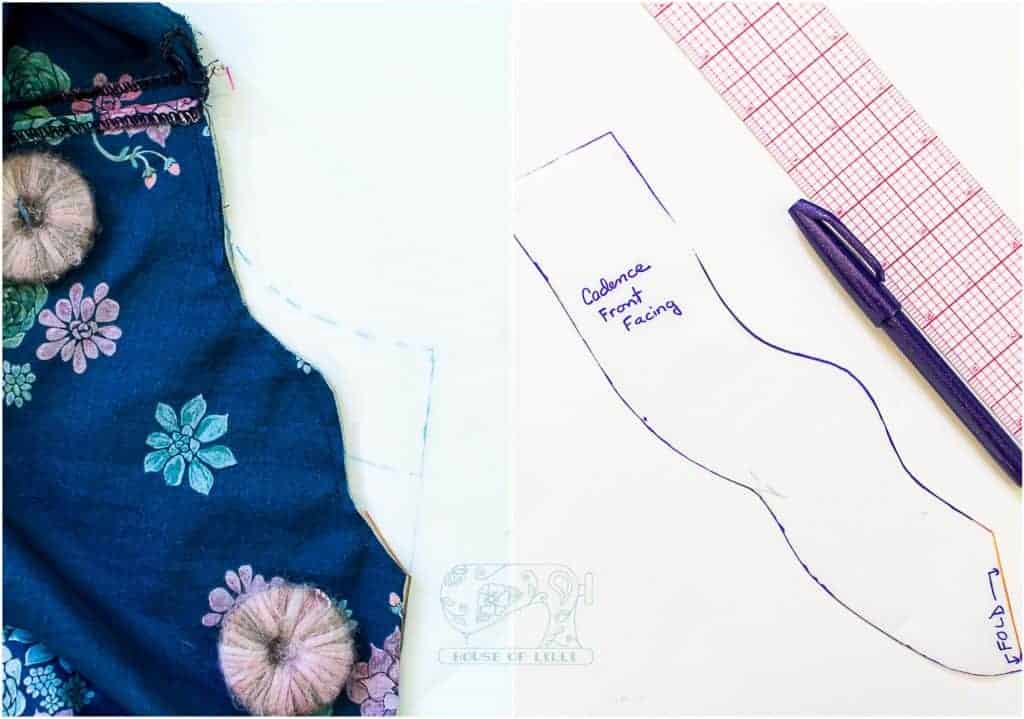
Since we altered the neckline, we also need new facing pieces. The facing pieces that come with the pattern are roughly 2″ tall so we’ll make them the same height.
Trace Neckline (Pattern Tracing Method)
- First lay out your front Cadence pattern.
- Layer a piece of blank tracing paper, making sure it covers the neck and shoulder.
- Using the pattern, trace the shoulder line and center front lines on the tracing paper.
- Trace the neckline on to the tracing paper.
Mark and Create Facing
- With the new neckline traced on a new paper, mark 2″ down from the bottom of the neckline down the center front
- Mark 2″ in on the shoulder.
- Using a hem gauge or see through grid ruler, mark 2″ along the length of the neckline.
- This is your new facing, to be cut on the fold. Repeat this process for the back if you modified the back neckline.
The process is the same for any neck design you can dream up! Once you have the new facing, follow the steps in the instructions to attach the facing to the bodice.
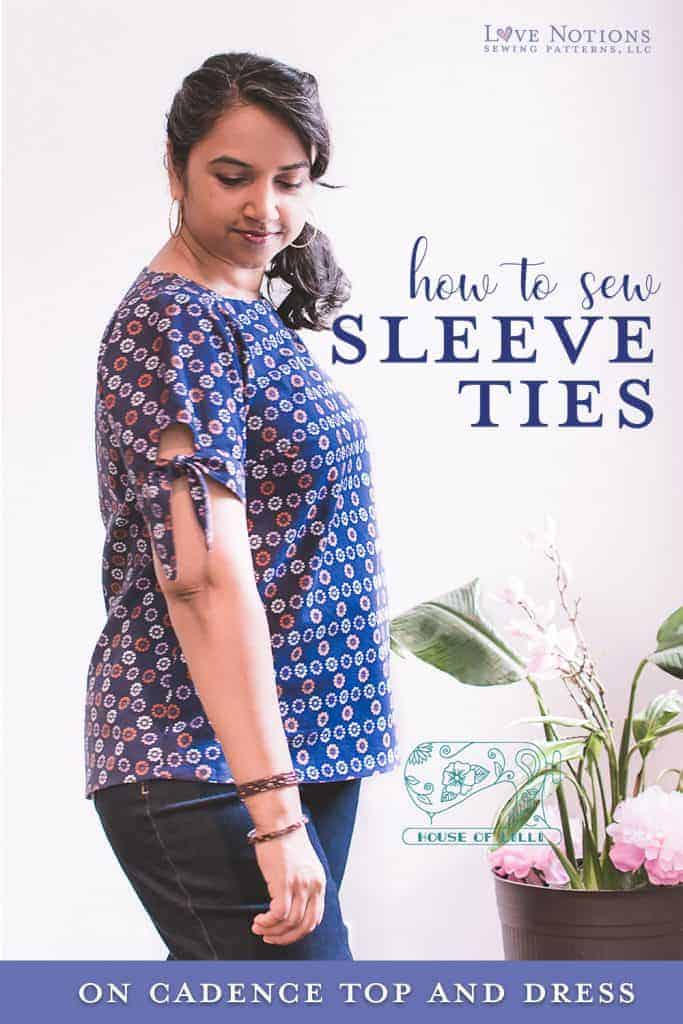
Tie Sleeves Hack
Don’t be intimidated with the tie sleeves, it looks harder than is.
We start out with the short sleeve pattern, cut out the fabric and finish the raw edges as you would normally. I like to serge my edges before sewing seams. It may add a bit of bulk, but allows flexibility to rip out the seam without ripping overlock threads too.
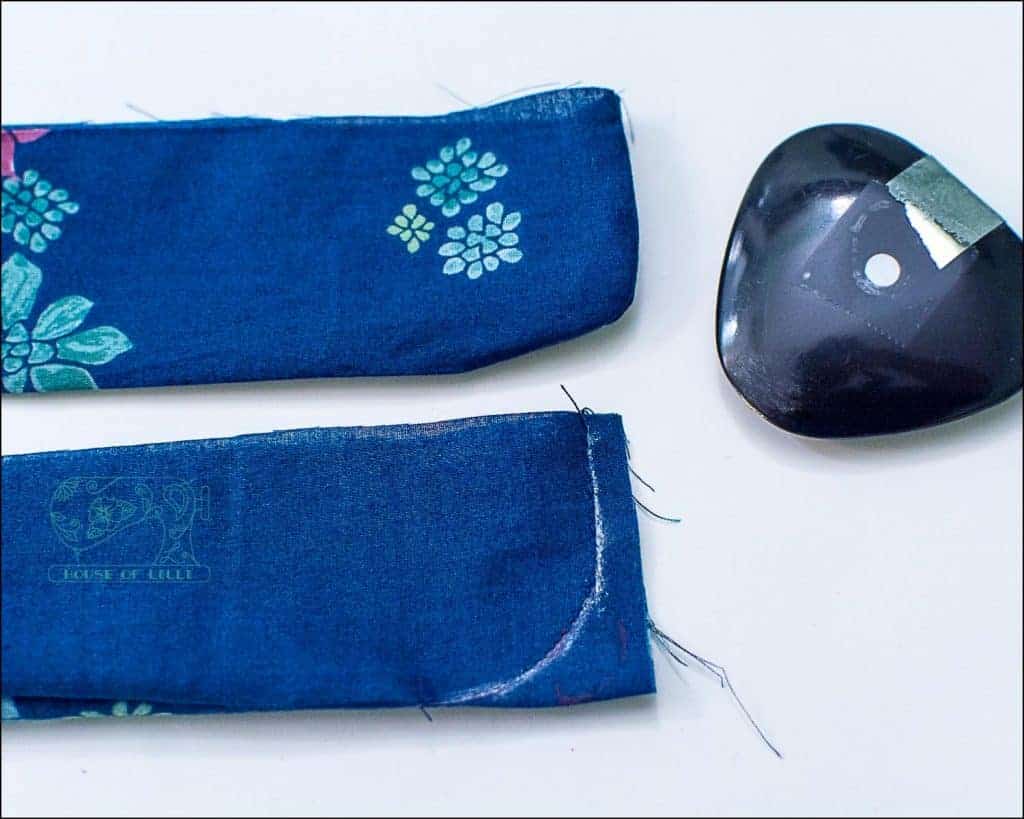
Make the Sleeve Cutout
We’ll make a half circle cut out and bind it to allow space for the ties. This step is best done BEFORE sewing the sleeve seams.
- Folding the sleeve in half, cut out a small half circle out of the bottom center (where the fold is). I measured 1 ¼” from the fold, and ¾” from the bottom.
2. Then cut out some bias strips or use pre-made ones to bind the half circle.
- Attach binding to right side
- Understitch
- Fold to the inside, then fold once more and sew binding to sleeve
Making Ties
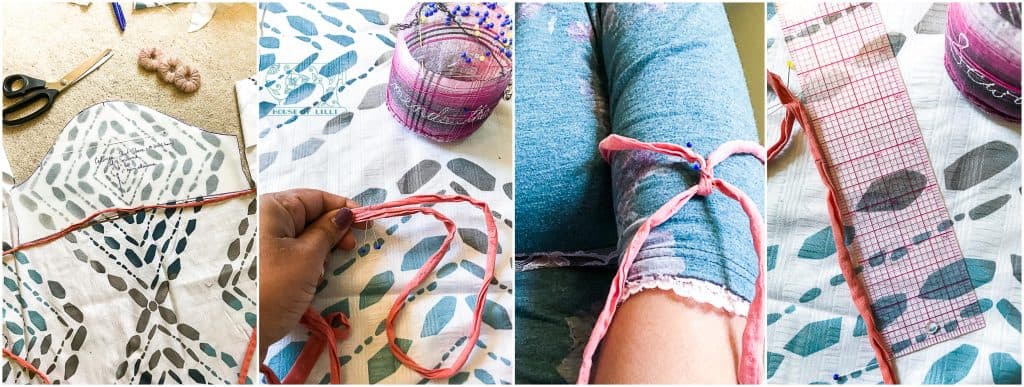
I designed the ties for a double knot, so it doesn’t come undone. To determine the length of the ties, I used some scrap strips of fabric to do a pseudo tie.
3. Take some scrap strips of fabric (selvedges are great for this exercise).
-
- Mark the length of the sleeve bottom, using the pattern piece.
- Tie the strip on to your arm, roughly where the cuff would go, make sure it isn’t too tight.
- Place pins on both sides indicating where the ties will end.
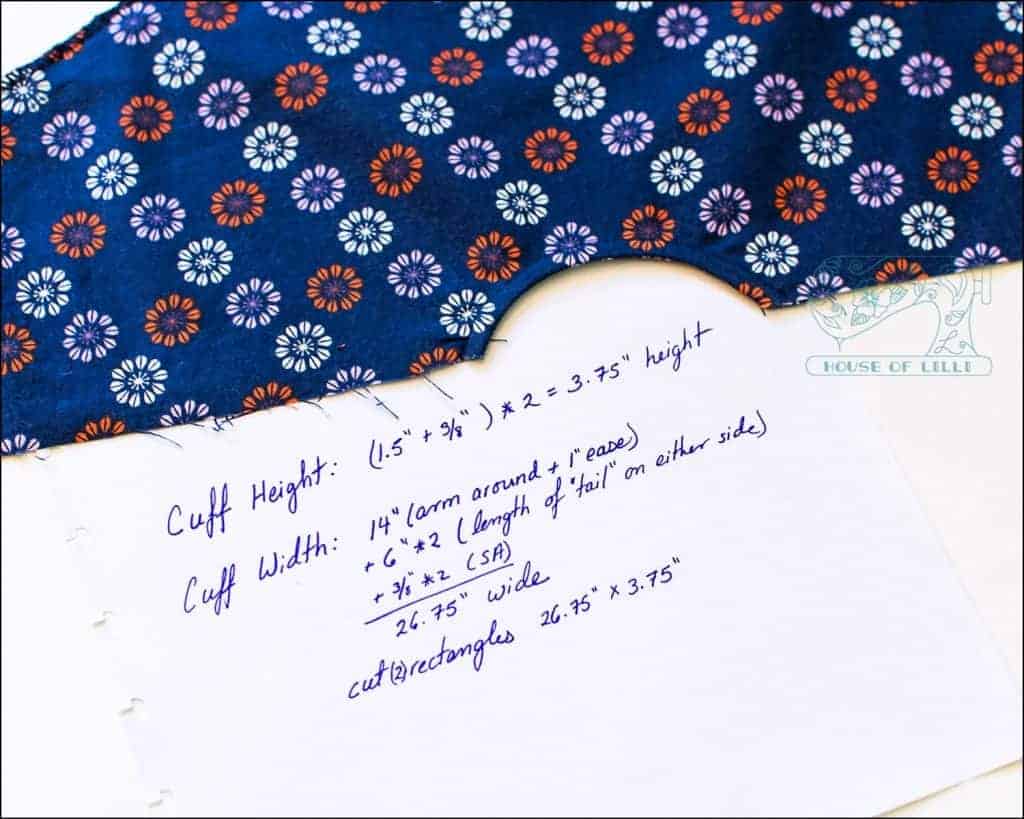
- Once you open up the tie, measure from one pin to the other. Mine was 6″ on both sides
4. Take the length you measured and add seam allowance. This will be the length of your strips.
5. The height of the strips is personal preference. The math (don’t run away, it’s easy) is Height = (desired cuff height + ⅜” seam allowance) * 2.
I wanted it a bit thicker -> (1.5” + ⅜”) * 2 = 3.75″
6. Cut two strips using the measurements you calculated in steps 2 and 3.
7. With the strips folded in half (long ends together), cut the ends into a curve.
8. Mark 6” in from the edge (if your tie length is different, use that number). Fold the strips long ends together and right sides together. Start sewing at the mark, all the way to the end and around the curve. Repeat this for the other three edges.
9. Trim away excess fabric, turn right sides out, and press.
10. Align center of cuff piece to the sleeve seam, right side of cuff to wrong side of sleeve.
11. Pin around the sleeve and sew the seam. Turn the cuff downwards and iron.
12. Pin the other end of the cuff to the sleeve’s right side, enclosing the sleeve edge.
13. Sew all around the cuff and ties.

All done, finish the top as per the pattern instructions.
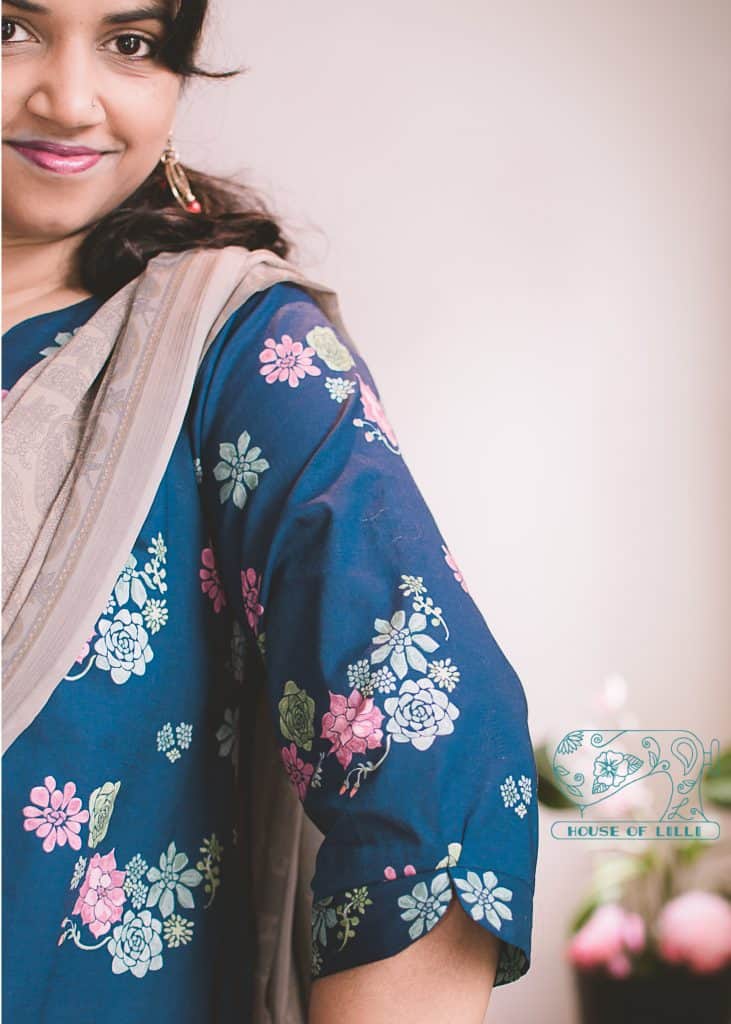
Inspiration #2 – Notched neck with Curved Cuff Sleeves
My second inspiration has a fun neckline with a split cuff that has been curved at the ends. Because I was not sure of the shape of the neck, I used a different method of creating the facing.
Notched neck
First thing is to draw a similar shape directly on to the fabric, and cut. Stay stitch the neckline and try it on to make sure it works to your taste. Using a fabric marker/chalk, modify the neckline until it works for you. I had to modify mine after I tried it on, the neck was too high for my liking, and the curve was not sitting well. Next, we are going to use the front pattern to lay the fabric and trace the neckline you created.
Trace Neckline (Fabric Tracing Method)
- First lay out your front Cadence pattern.
- Layer a piece of blank tracing paper, making sure it covers the neck and shoulder.
- Using the pattern, trace the shoulder line and center front lines on to the tracing paper.
- Then fold your front fabric in half at the center fold and lay on top, taking care to align the armscye and center front.
- Trace the neckline to the tracing paper.
You can now follow the steps under Mark and create facing to finish the facing. (See above)
Making Sleeve Cuffs
This cuff is going to be the same length as sleeve hem. But instead of a straight cuff, the cuff will be split and the ends curved.
1. Measure the sleeve hem, this is the cuff length including seam allowance.
2. The height of the strips is again personal preference. Calculate using this:
Height = (desired cuff height + ⅜” seam allowance) * 2
This was mine -> (1.25” + ⅜”) * 2 = 3.25″
3. Cut two strips using the measurements you calculated in steps 1 and 2.
4. With the strips folded in half (long ends together), cut the folded corner into a curve.
5. Fold the strips long ends together and right sides together. Sew the end closed, going around the curve. Repeat this for the other three edges.
6. Trim away excess fabric, turn right sides out, and press.
7. Align center of cuff piece to the sleeve seam, right side of cuff to right side of sleeve.
8. Pin both layers of the cuff around the sleeve and sew the seam.
9. Finish the edges (overlock, zigzag or pinking shears) and turn the cuff downwards and iron.
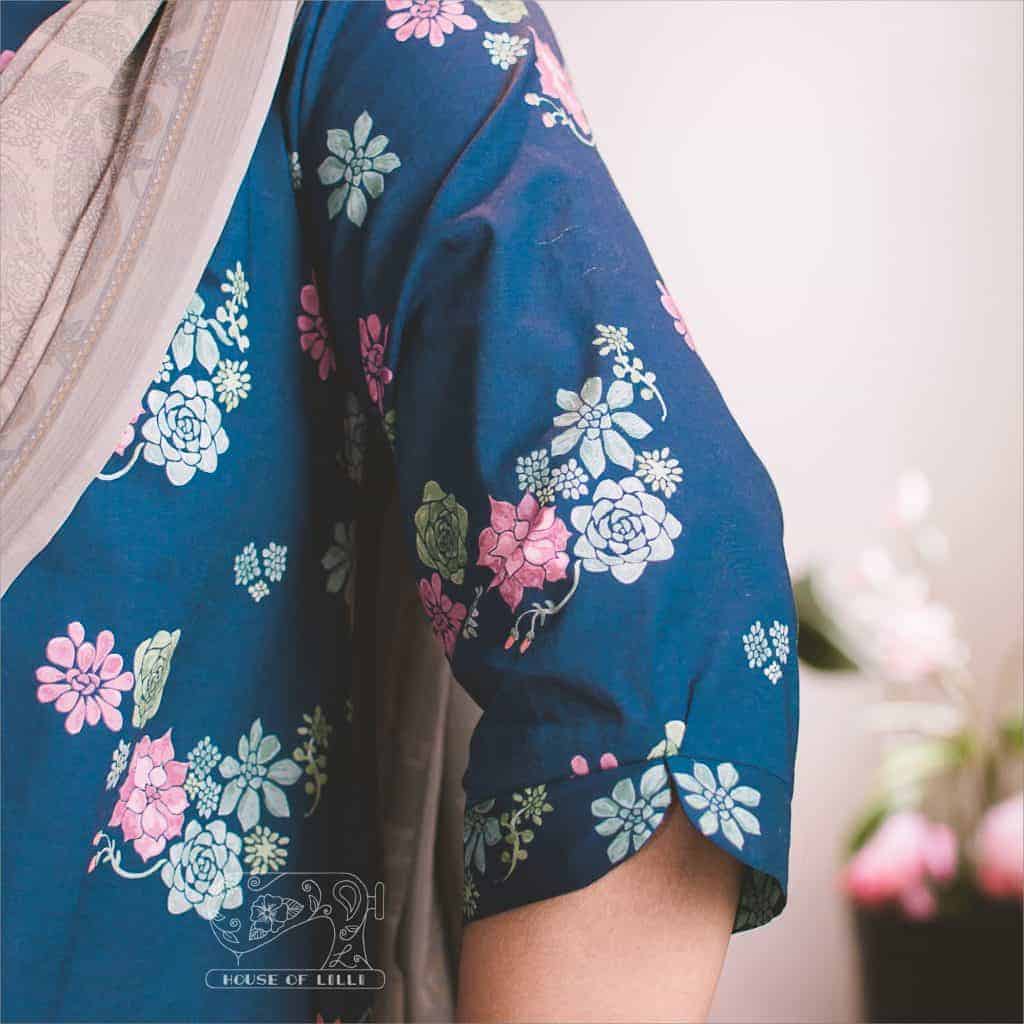
For my top, I curved the hem slightly more than the original.
All done, finish the top as per the pattern instructions!
Cadence + Neckline and Sleeve Hacks = Full Closet
The Cadence is perfect for all occasions and seasons, making it the perfect go-to pattern. And with these sleeve and neckline hacks, you can have a closet full of Cadence where no two look the same! So make sure you grab a copy today!
My Cadence Tops with Neckline and Sleeve Hacks

I curved the back seam even more to fit the curve of my spine better.


Hand stitching the facing with visible “running stitches” for a Sashiko affect.


And the top works well tucked into a skirt. The skirt was made using the bottom half of Olympia Dress.

I have a love for Indian kurtas, so I’m always on the hunt for patterns that I can use to make kurtas. The Cadence was perfect for this purpose. The split hem starts much higher for this style, and the sides fall straighter from the hip.
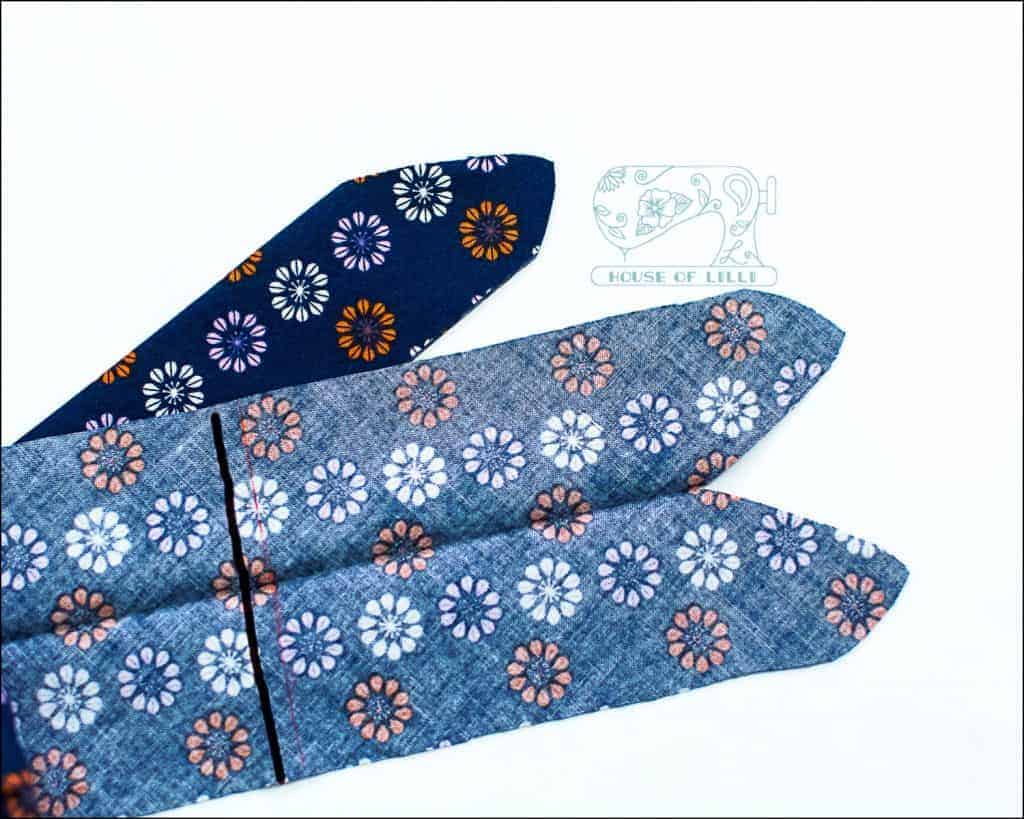
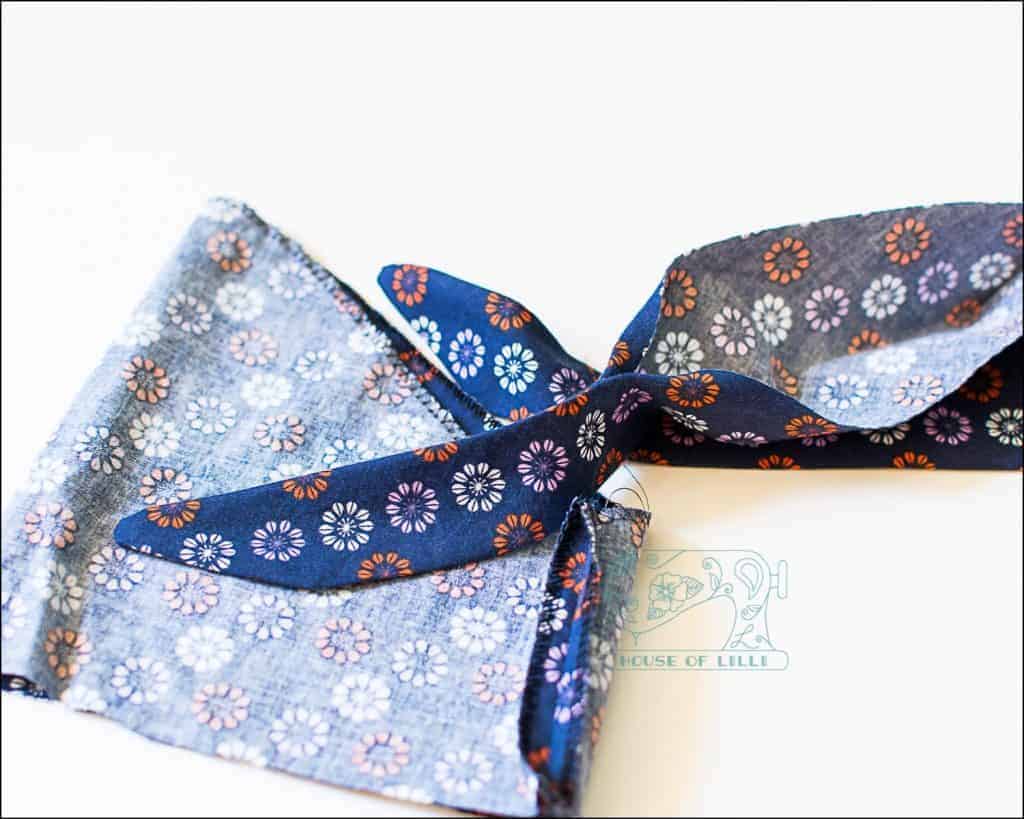
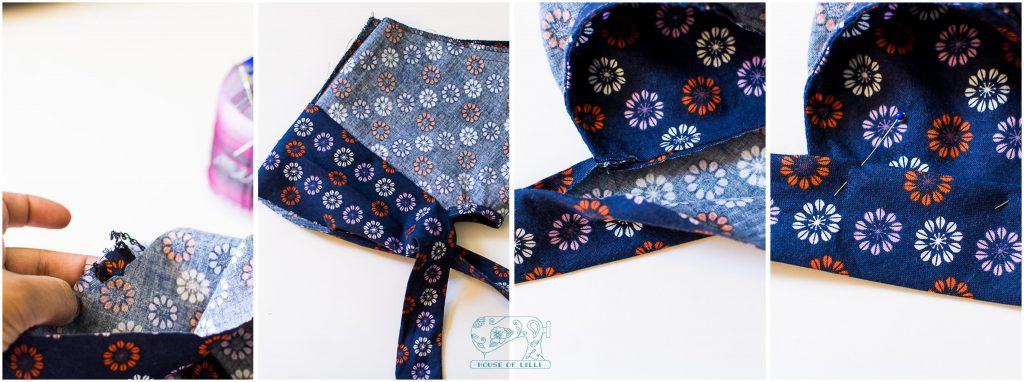
Here I paired it with Indian pants called a salwar and a scarf.

But, it works just as well with the Sabrina Slims I made earlier this year.

See that split hem? Perfect for looking fancy and being comfortable, which is just my style.

For this version, because the style calls for a more fitted look, I added vertical darts to the back, to accommodate the significant swayback I have.

I love the neckline for this one. Reminds me of the kurtas I would get made in India when I was growing up.

And who doesn’t love a cute sleeve like this?!
Thank you for reading and please let me know if you have any questions with it. I hope you can get the most out of the Cadence just like me. I’ll definitely be making more of these!
You can follow me on Instagram @bee.threadly and my blog
~*~*~ Links to Love Notions patterns contain affiliate links, where I earn a percentage of the sale, as commission, at no extra cost to you. Thank you for your purchase. ~*~*~
Pin these for later!

Shop for more Tried and True Patterns
[carousel_slide id=’427963′]

