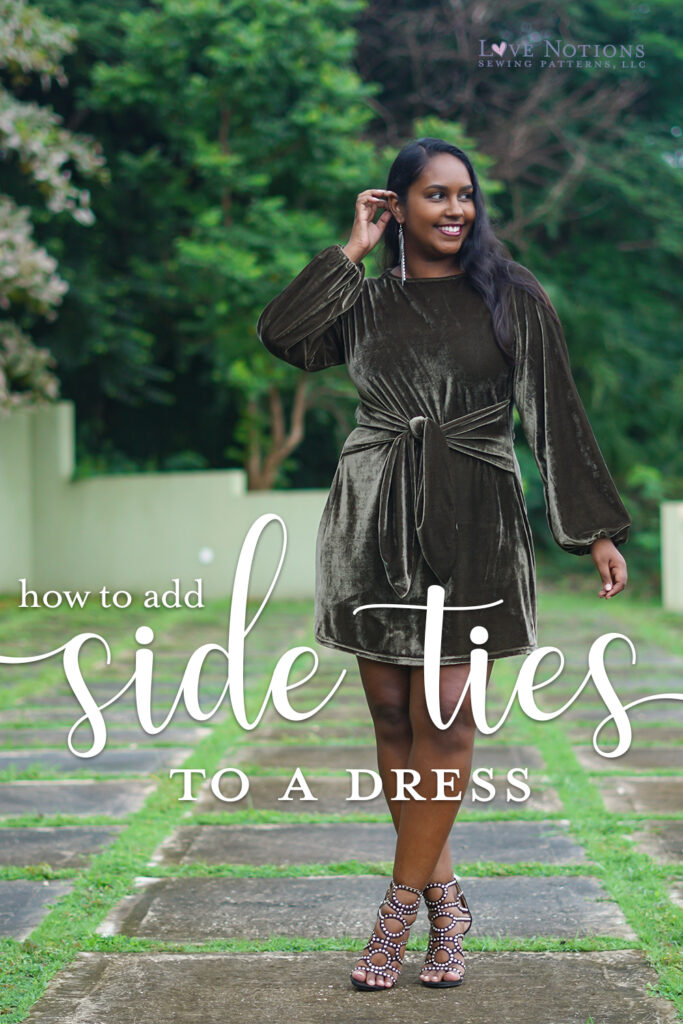
Want an easy way to add shaping and interest to your Tessa Sheath Dress? Try Keira’s lovely hack for a side tie with a front knot! We are thrilled to have Keira on the blog with lots of style tips and inspiration for taking your Tessa Sheath Dress up to the next level — thanks Keira!!
‘Knot’ your average Tessa Sheath Dress: Side Ties + Bonus Billowy Sleeves
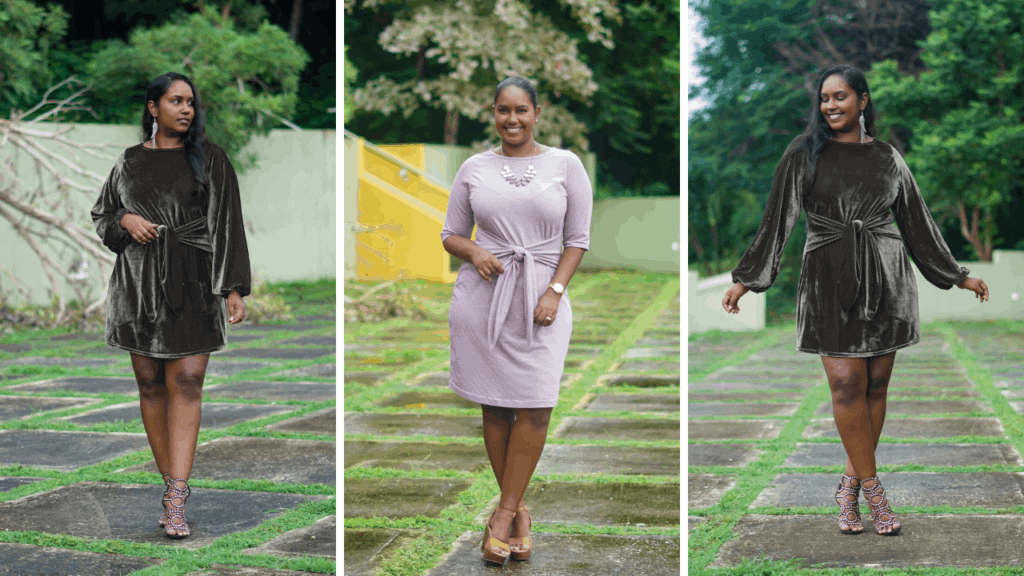
Hi I’m Keira, an island girl who loves everything sewing! You may recognize me as Island Sewcialist from my Youtube Channel, my Blog or my colourful Instagram profile where I share all of my makes. I love to splash my creativity on everything I sew and truly make it my own. I am quite new to the Ambassador team here at Love Notions and I am so excited to bring you my first Feature Friday post. I hope you are ready because this is ‘knot’ your average Tessa! I’ll be sharing how to add front ties to your Tessa Sheath Dress. I really wanted to emphasize the versatility of this hack so I made two versions.
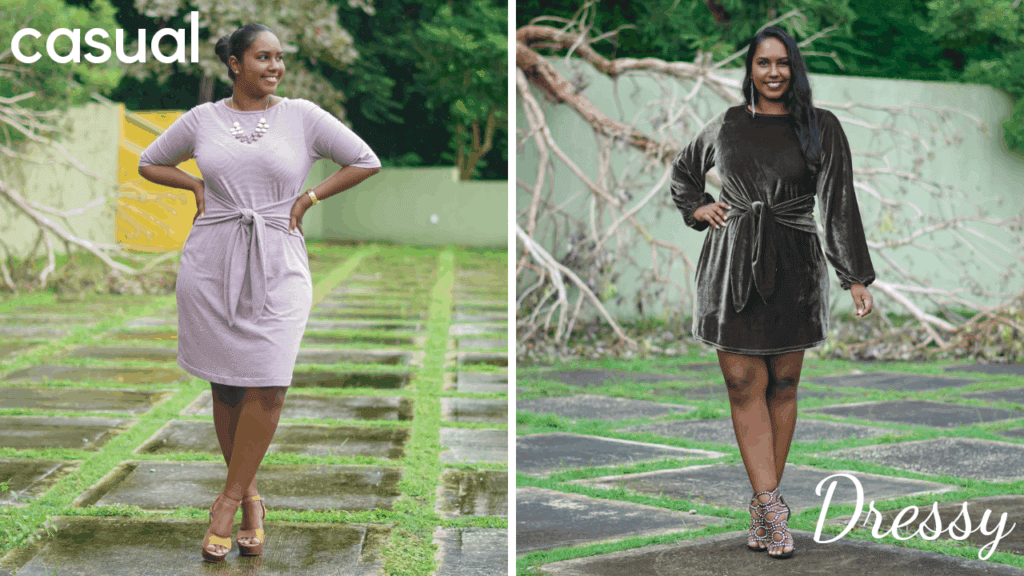
One is more casual and could make the perfect Fall or Spring dress. The other is totally fabulous for holiday events and with the right styling could transform into winter glam.
The Tessa Sheath Dress Pattern
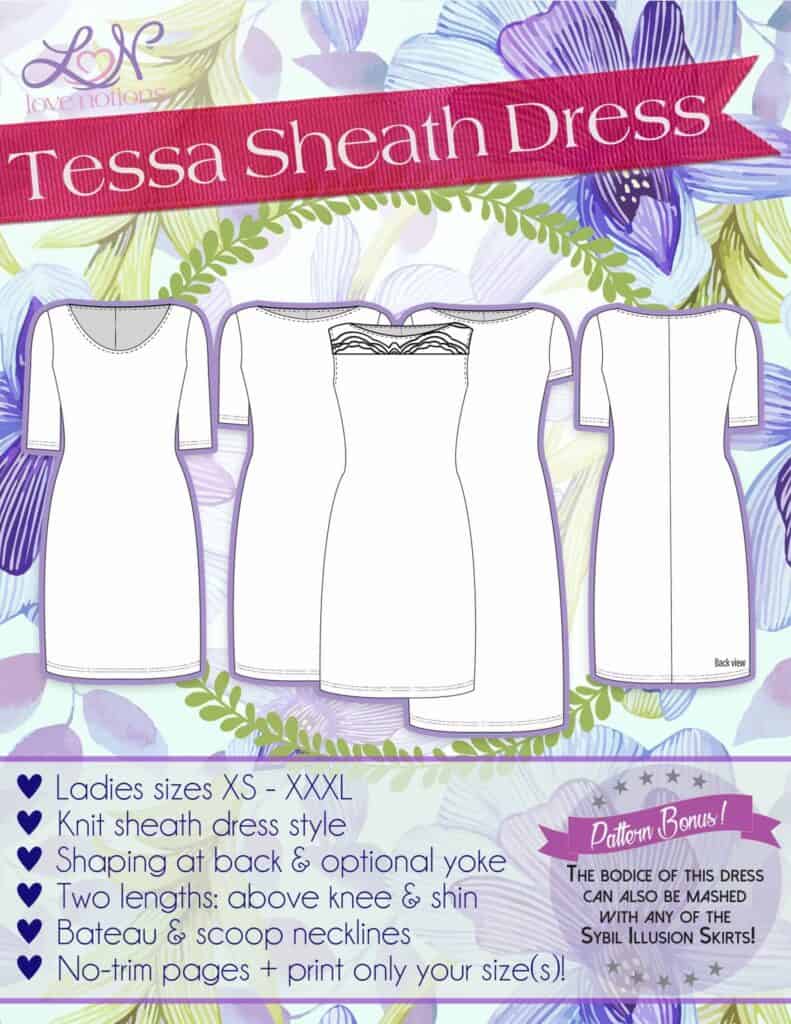
The Tessa Sheath Dress is an amazing base for hacking. With such a simple silhouette, the possibilities are endless. It is a knit dress pattern with two neckline options; bateau and scoop. There is an optional yoke detail and five sleeve lengths; sleeveless, short, elbow, 3/4 and long. You can choose between knee length and shin length. And a bonus? The bodice part of the pattern can also be easily mashed with the Sybil Skirt Collection! I love the fact that the bust, waist and hip lines are marked on this pattern. We will be using the waistline mark for this hack. The back piece also has subtle shaping perfect for those of us who usually need a sway back adjustment. And the best part? No closures or darts which means Tessa sews up in a jiffy! Recommended fabrics are stable knits with at least 20% stretch. We’re thinking cotton interlock, scuba, double knit, ponte, liverpool, and cotton lycra. You can grab the Tessa Sheath Dress pattern today for only $5.00!
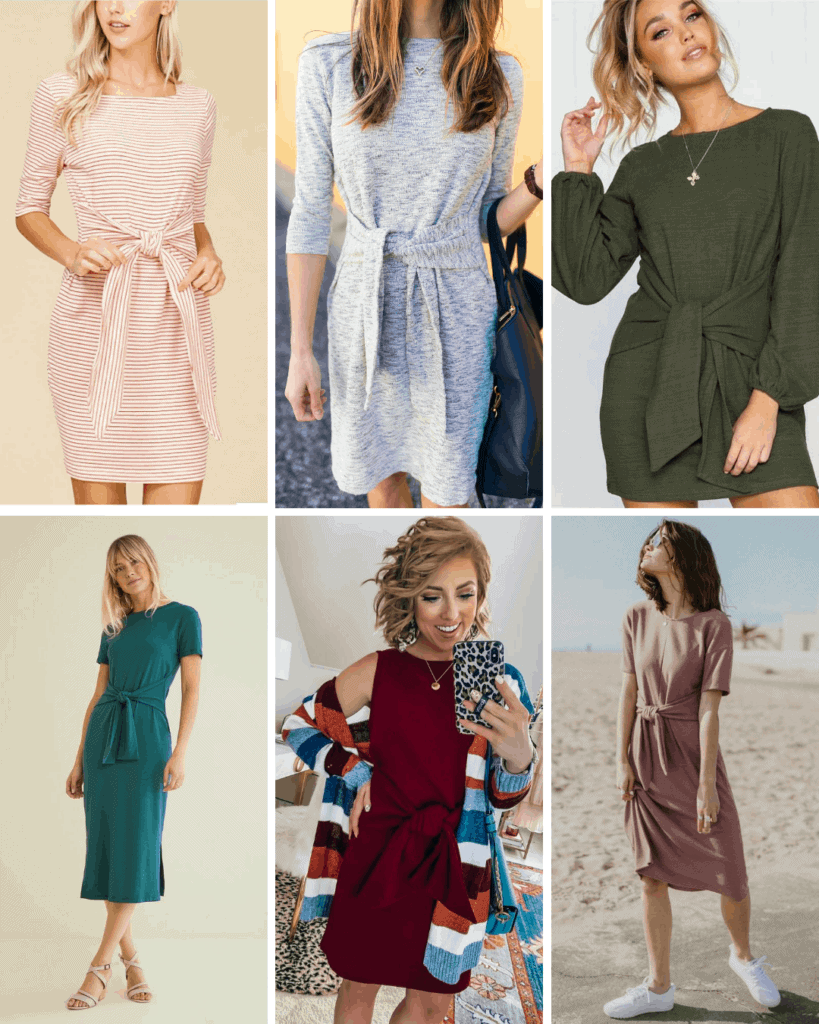
Side Ties Pinspiration
Here are some of my inspiration photos from Pinterest. Front ties are really popular right now and such a great way to spice up a simple dress. There are different shapes and lengths of ties so you can adjust yours to suit your personal preference. Choose different fabrics to fit different seasons. I love that gray sweater dress version for Fall & Winter! Go with short sleeves and add side slits for Summer. My bishop sleeved mini dress would look stunning with tights and boots for winter! (And of course a warm coat!) My purple striped knee length dress is accessorized for Spring. Look up front tie dresses on Pinterest and enjoy going down the rabbit hole!

Let’s get hacking on those side ties!
Grab some pattern making paper, a straight ruler, curved ruler, and a pencil and let’s make some waist ties! It’s super easy!
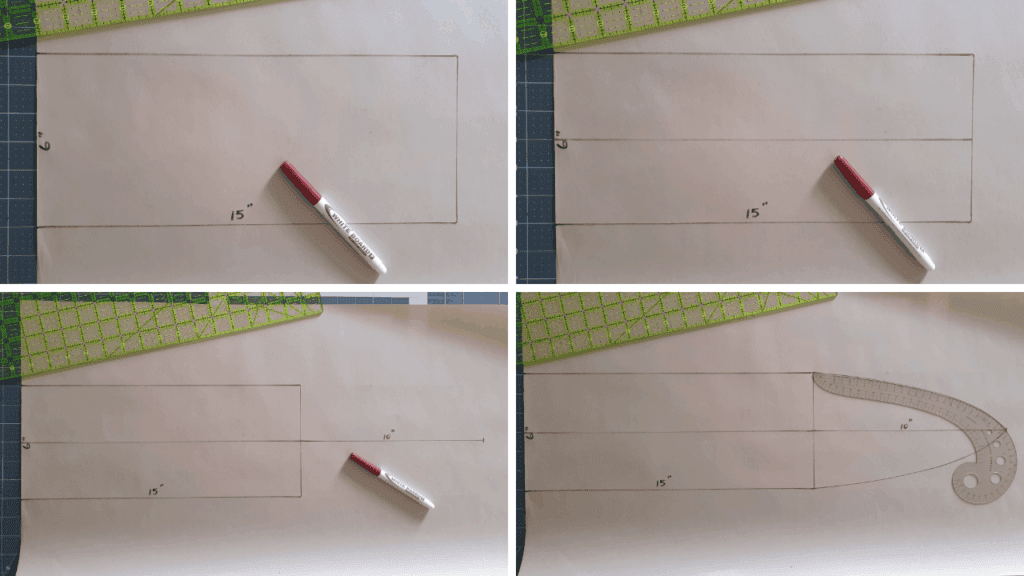
Step 1:
Draw a rectangle 6” long by 15” wide.
Step 2:
Divide this rectangle in half lengthwise (3”) and draw this half way mark along the width of the rectangle.
Step 3:
Extend this half way mark a further 10” past the end of the rectangle.
Step 4:
Use your curved ruler to connect the corners of the rectangle to the point at the end of your 10” line. You’ll end up with a bunny ear shaped pattern piece.
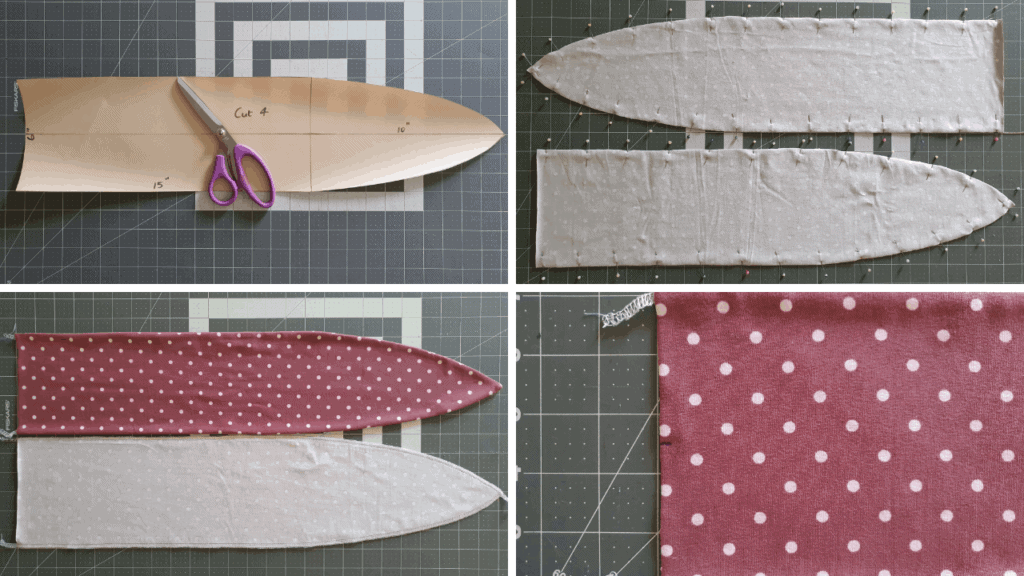
Step 5:
Go ahead and cut 4 tie pieces from your fabric and make your ‘Cut 4’ note on your pattern piece so you’ll remember for next time.
Step 6:
Place your two pairs of ties right sides together and pin all around leaving the squared side open. This open end will get concealed in the side seam.
Step 7:
Serge or sew using a stretch stitch then turn right side out and give your ties a good press. Make sure you poke out your point.
Step 8:
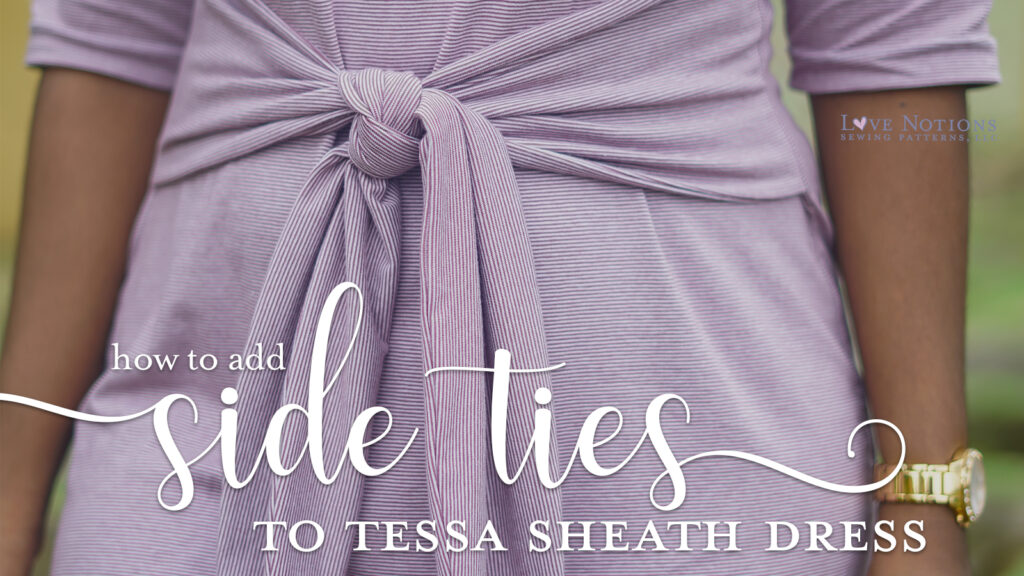
Use the waistline on the pattern pieces to make a mark on the right side or a notch on both front and back pieces. Mark the center of your waist tie along the open end. Match the center mark on your ties with the waist mark on your front and back pieces. Sandwich the waist tie between your front and back pieces when pinning together and then sew up the side seam.
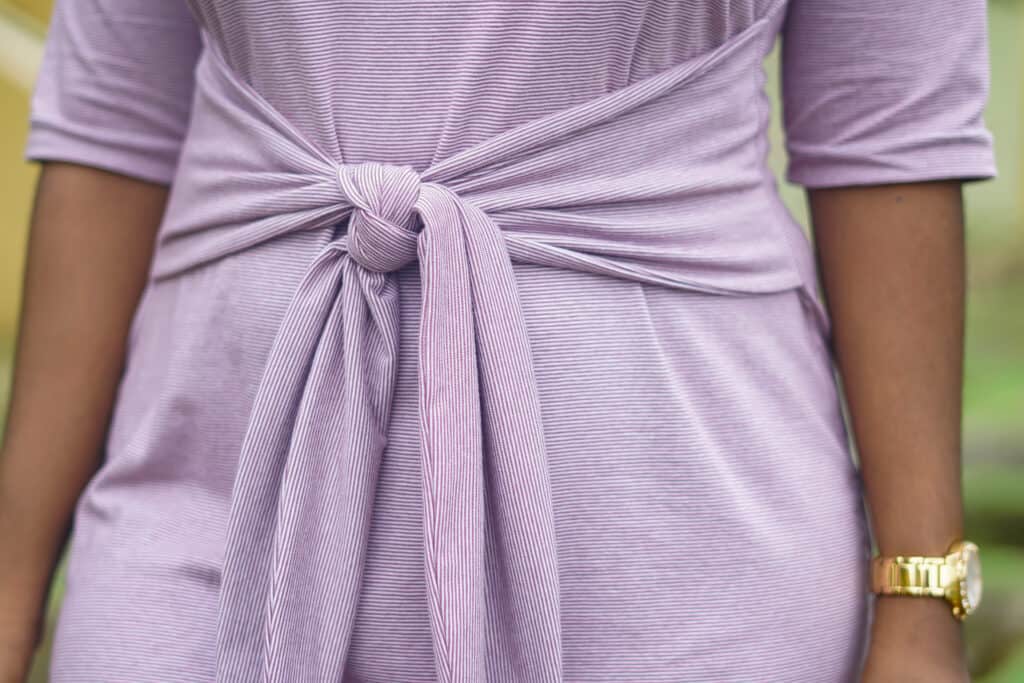
Voila! You’ve just installed waist ties into your Tessa Sheath Dress!
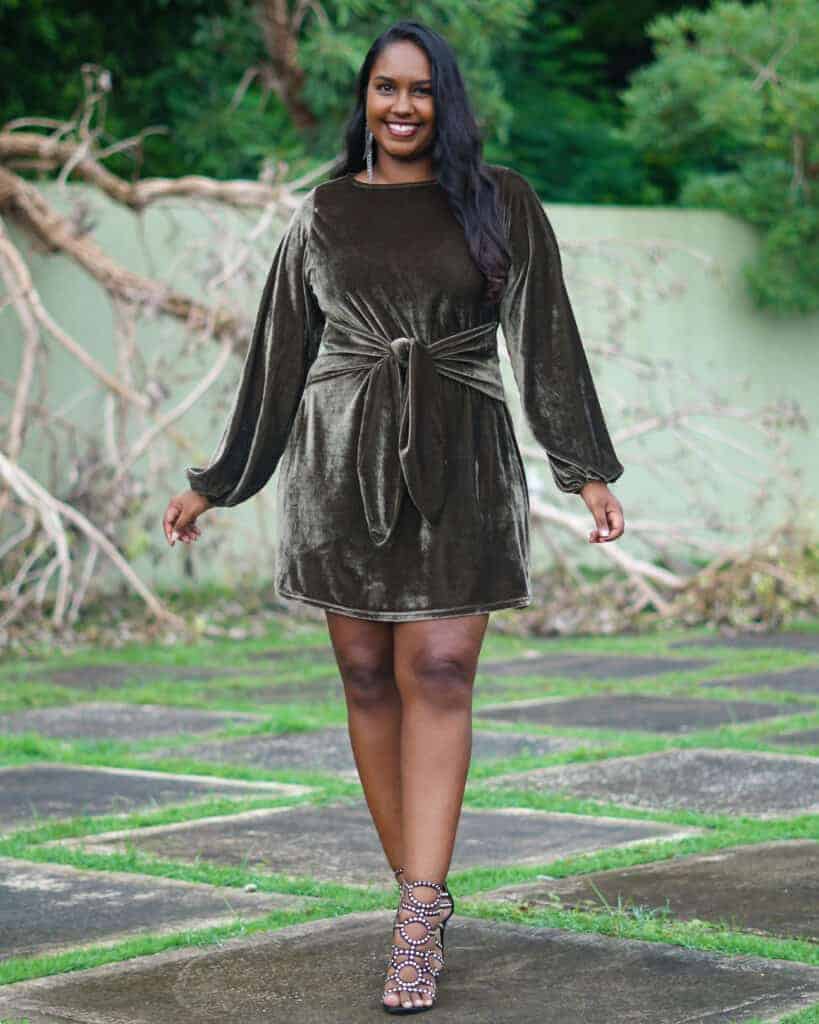
One of the major perks of this style is that it helps to hide that area that a lot of us are sensitive about. The ties really accentuate the waist line while disguising any pudge or food babies that could deter us from wearing a more fitted dress. And of course how tight you tie it is up to you. You can even tie it just once but I prefer to make a knot.
Let’s talk Fabric
For my casual version, I was really inspired by that striped dress on Pinterest. My fabric is cotton spandex with purplish and white baby stripes. Cotton spandex is soft and breathable and so comfy! It’s pretty stable and definitely does not have as much drape as your lighter weight knits but just enough so the ties fall nicely without losing the fitted shape of the dress. My fabric was a little more stretchy than other cotton spandex fabrics I’ve used so I did make a few mods to account for that. I fell in between L and XL so I went with XL to achieve that looser fit of my inspiration dress but then tapered in from the hip to size M at the hem. I also took in the elbow length sleeves a smidgen.

For my glam holiday dress, I used the most stunning olive green stretch velvet. Since this fabric was more stable than the cotton spandex and because I chopped off 4″ to make it mini length, I made a straight XL for a more A-line shape; no tapering at the hem this time. It worked perfectly! Though the velvet had less stretch than the cotton spandex, it draped more and I thought some billowy bishop sleeves would be a gorgeous match! I pretty much recreated that green dress from Pinterest but glammed it up x100! With the holiday season approaching, I thought this would make an amazing Christmas-y date night dress. Not that we can really go anywhere right now, but maybe a fancy at home dinner date with Christmas lights and candles? Or maybe Thanksgiving dinner with the family? Honestly, I’d take any excuse to dress up right now! It’s been a hard year!
How to add sleeve drama with a bishop sleeve hack
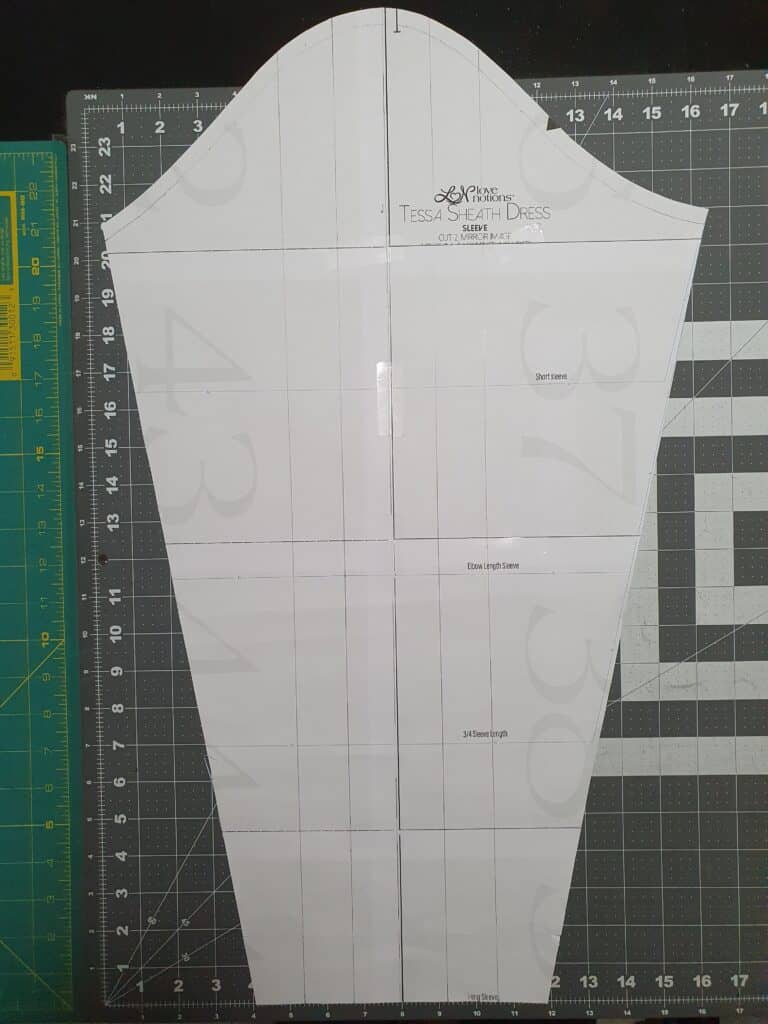
Bishop sleeves or balloon sleeves or billowy sleeves, whatever name you prefer, are the easiest sleeves to create! It looks like it took a lot more work than it actually did. I used the slash and spread method which is probably the most popular method for making this type of sleeve. I started with the long sleeve pattern shortened 1″. It’s time to get out your pattern making supplies again – paper, ruler, pencil, scissors, and tape.
Step 1:
Draw out your seam allowances along the sleeve cap. In this case, ⅜”.
Step 2:
At the hem, divide your sleeve in half. Mark that point.
Step 3:
Divide each half into 3 equal parts. You should now have 5 points marked.
Step 4:
Draw straight lines from your 5 points up to the seam allowance line.
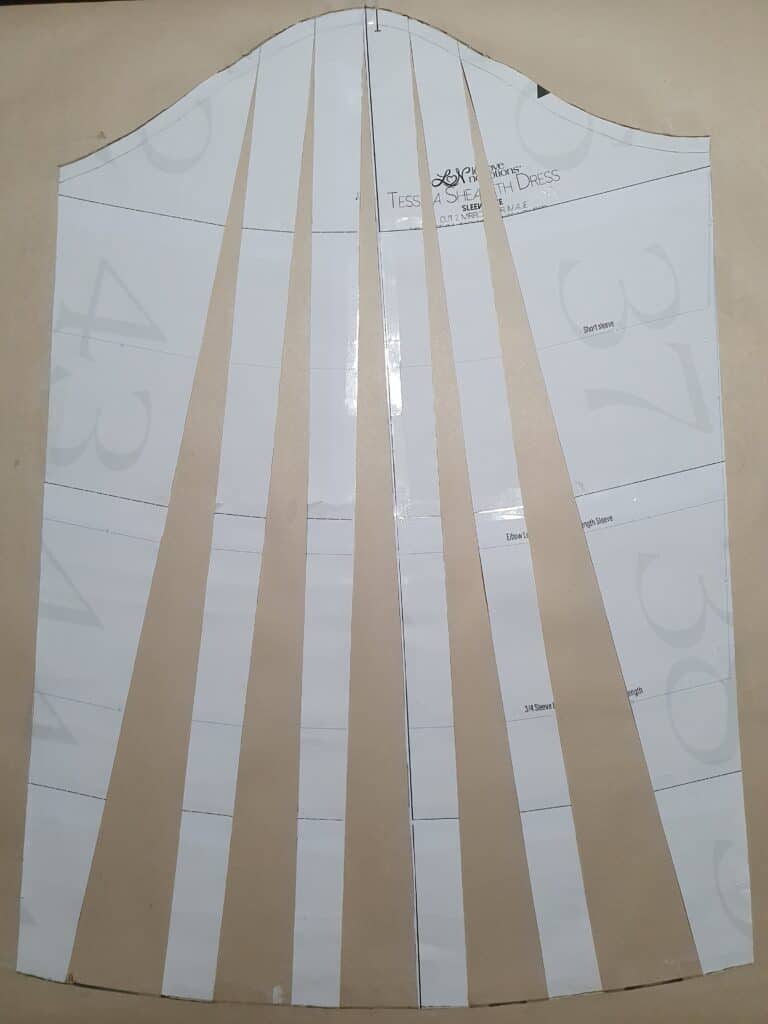
Step 5:
Cut along these lines stopping at the seam allowance. I then taped my sleeve piece by the shoulder point onto a large piece of paper.
Step 6:
Spread each cut line as far as you would like. The more distance, the more volume. I spread my middle 3 lines at 2″ and then my outer 2 lines at 2.5″. This added some balance to help avoid my sleeve cap skewing too much.
Step 7:
Redraw the hem connecting the points and this is your new sleeve piece. You can now trace this new pattern piece onto tracing paper.
Step 8:
Sew your sleeve as normal and then for hemming, turn under ⅜” twice, and sew leaving an opening. Insert elastic according to your wrist measurement and then sew the opening to finish the hem.

And there you have it. A mini dress with front ties and billowy sleeves. I wish I could style it with tights and boots the way I see it in my head but I live on a tropical island so someone needs to recreate this to make my winter dreams come true! Be sure to tag me on Instagram @islandsewcialist if you do! I hope you feel inspired to try these hacks. Remember the Tessa Sheath Dress is on sale for $5 today if you haven’t yet grabbed a copy!
Thank you for reading and I’ll see you again soon!
*Links in this post are affiliate links. I will earn a small commission at no extra cost to you. Thank you for your purchase!
Save this to pinterest