Getting to “The Point”– Machine Needles 101
Alright class, settle down…ohh actually, go ahead and go crazy if you like! After all, it *is* Friday, and if you’re going to be taking a class at the end of the week, Love Notions’ Sewing School is the place to take it. Welcome to Sewing Machine Needles 101. My name is Jessica (you can find me on Instagram and Facebook, and anywhere there is excellent sourdough bread), and I’ll be your teacher enthusiastic-explainer today as we cover some sewing machine needle basics. I’ll also be your even *more* enthusiastic explainer as we talk a bit about the La Bella Donna, the Feature Friday pattern for this week!
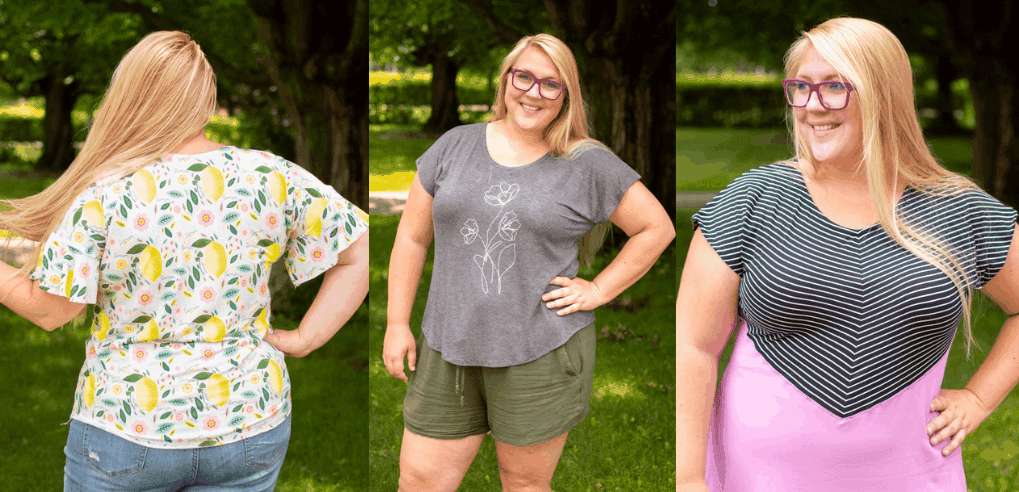
The first thing to note about La Bella Donna is that it frequently goes by the alias “LBD.” You’ve probably seen that acronym used all over the Love Notions Facebook group, as well as the greater world of sewing-social-media. And hey, if an oft-used acronym isn’t the sign of a great pattern, I don’t know what is. La Bella Donna is a beautiful, classic knit dolman pattern, drafted for XS-5X, with excellent shaping and lots of options. There are three sleeve lengths, three neck finishes (including a really beautiful faced binding!), tunic or shirt lengths, optional in-seam pockets, and an optional hemband for the shirt. I’ll share a couple of quick and easy hacks with you today, as well, and I hope you’ll see what a workhorse the LBD can be.
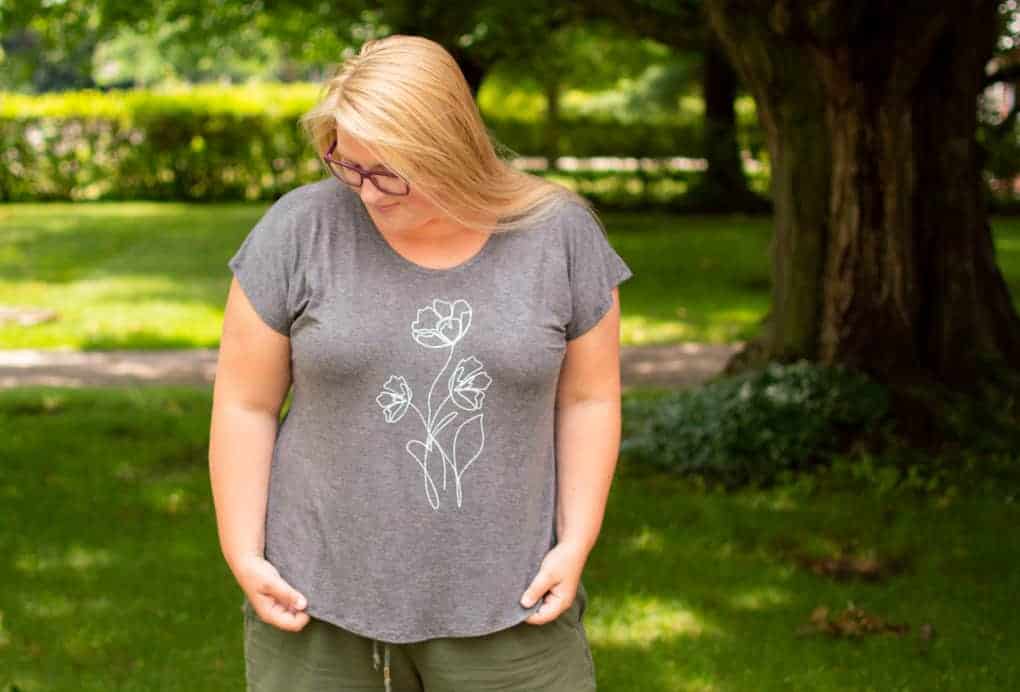
Dolmans are such a quick and satisfying sew! In its simplest form, the LBD is only two pieces of fabric–front and back–plus the neck binding, if you don’t want to just turn and hem the neck opening. I made up this gray version per the pattern in about 45 minutes, from cutting to finish. Even the HTV made it into that time, plus all of the regularly-scheduled distractions! I adjusted for my height, but otherwise this is the standard LBD, no mods. I seem to always be needing another easy and comfy tee shirt on hand, and the LBD is the perfect pattern!
Now, maybe you happen to have 45 minutes available *right now*, and the perfect knit fabric waiting in your stash, and you’re about to dash off and sew one up. Wait just a second before you go, because we need to make sure you have *everything* you need to get the very best LBD. So let’s talk about needles!
If your experience was anything like mine, you didn’t really think much (or know much!) about the variety of needles available until a little *too* far into your sewing journey. I inherited both instruction in and equipment for sewing from my mom and my grandma, and so for a long time just reached for the little stash I had been given to grab any new needle…usually after I had managed to break the one in the machine! In time, I ran out of those hand-me-down needles and had to venture out to buy my own. That was when I found myself asking the same questions I’m sure many of you have faced:
Which brand should I get? Which type should I get? What difference will it make? What’s with all these numbers?
I won’t attempt to bring us all the way to “needle expertise” today, but hopefully we can find answers to these questions and cover enough tips that you don’t have to find yourself experiencing “needle overwhelm” in the middle of the store! Using the right needle will help your project come out its best, will help extend its longevity, and can help keep your machine running well. Choosing the wrong needle can result in uneven seams, torn and damaged fabric, shredded thread, and puts stress on your machine, and can cause skipped stitches and general sewing-induced misery. Important stuff, right? So let’s get to the *point* (ALL puns intended!) and start covering some needle options.
Just a note: I’ll be referring to the Schmetz brand throughout this post, as it’s what I use and am familiar with, and is widely available. (I can even get them at Walmart, which is the only store nearby, ha!) There are other brands out there, but this information should be more or less transferable.
Universal, Ballpoint, Microtex, or Twin?
I think the best place to start is at the end: the point and tip of the needle. The area of the needle where the sharp end begins to taper, just below the eye, is called the point, and the veeeeery very end, the part that pierces the fabric, is referred to as the tip. The specific parts of any needle will vary according to needle type, such as ballpoint/jersey, universal, microtex, stretch, leather, denim, embroidery, topstitch…well, there are many types! I have a Schmetz needle pocket guide (which I got, incidentally, at a *super cool* sewing retreat with my favorite pattern company [it was Love Notions!] a few years ago) and it lists nearly thirty types of needles. Whew! We’re going to keep it simple today, though, and cover four commonly used types, their tips, and their uses.
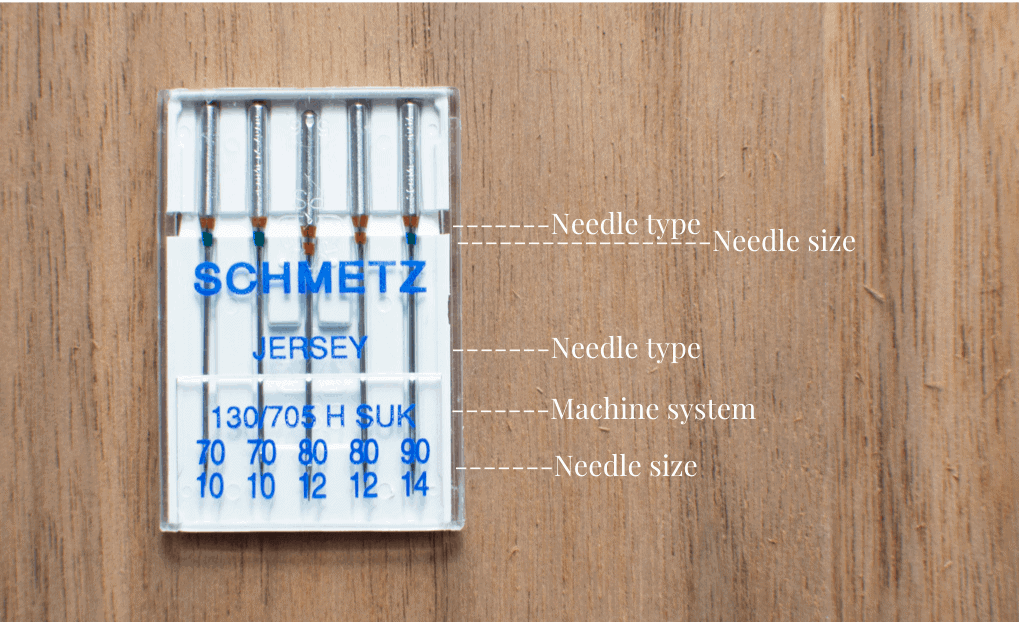
Here’s a reference photo for how to read a needle package. If you’re searching for any of the needles I’m going to cover here, you’ll look for these words where it says “Needle Type” toward the bottom of the package, not necessarily at the color coding. (I’ll get to that later.)
Ballpoint Needles
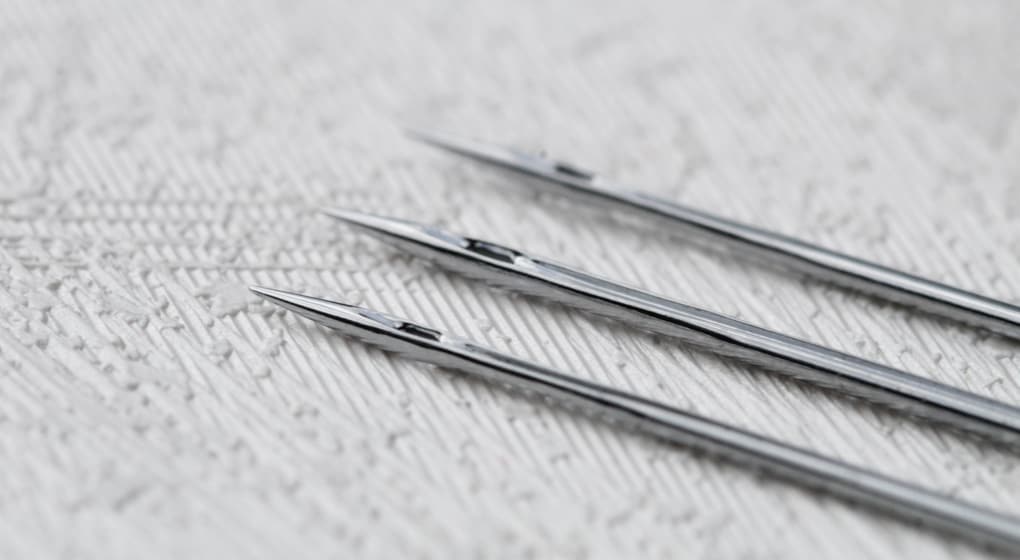
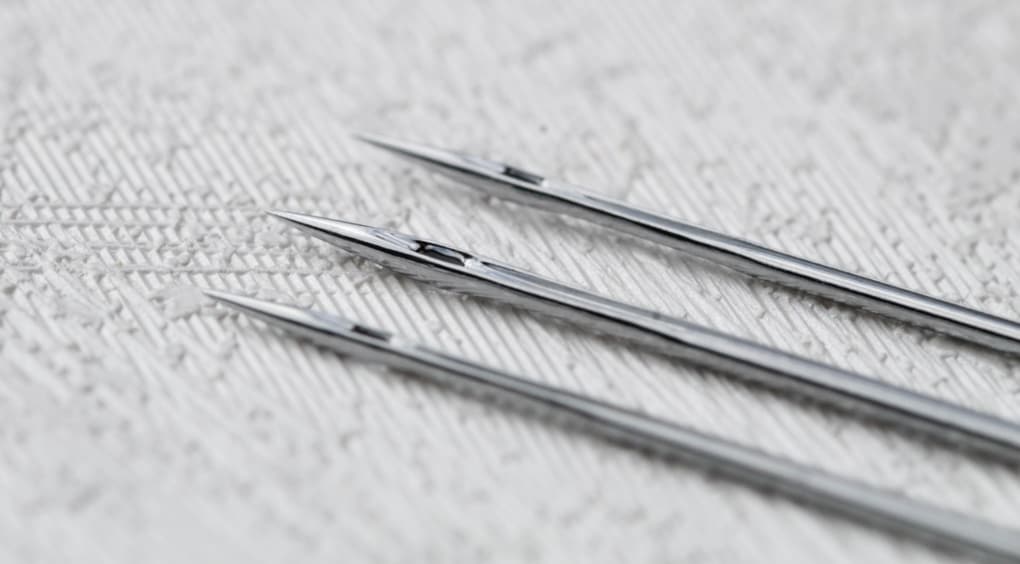
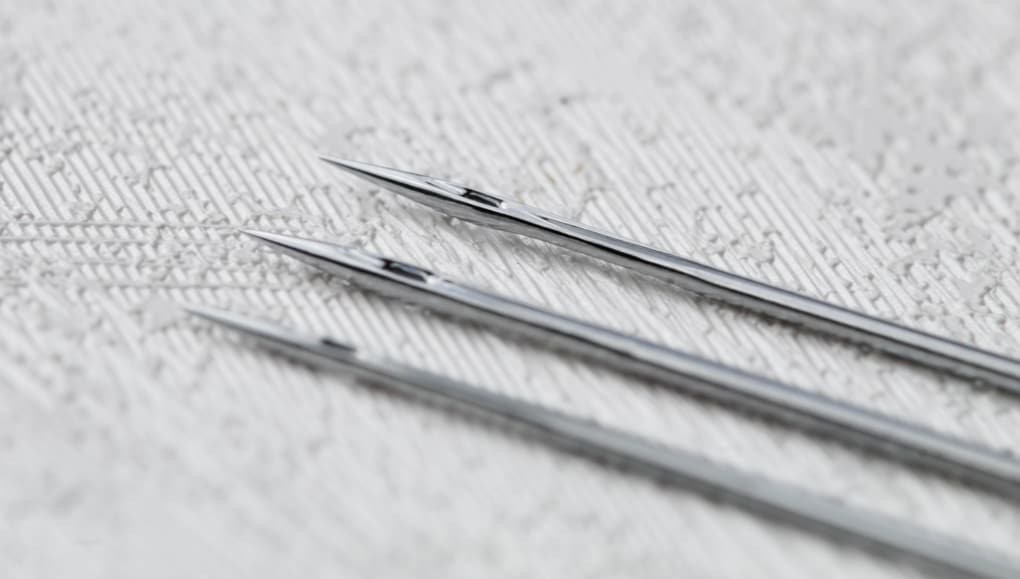
If you’re sewing with knit fabrics, like when you make up your LBD, you’ll want a ballpoint needle. These are sometimes also labeled as “Jersey” needles; the terms are interchangeable. The tip of a ballpoint needle is rounded so that it slips through the fibers of the knit, rather than piercing a hole. If you zoom in on the photo above, on the lowest needle, you can see the rounded tip. This keeps the fabric intact and keeps it from unraveling or creating small holes. Having a packet of ballpoint needles on hand will cover your bases for so many Love Notions patterns!
*Note: there are also “stretch” needles available. These have a rounded tip as well, but it differs slightly from a regular ballpoint’s tip. “Stretch” needles are a good choice for sewing elastic, or for use on fabrics with high elastic content, like swim or athletic knits.
Microtex Needles
Microtex needle tips come to a sharp end and have a fine point, as you can see again in the photo above, which is focused on the middle needle. This enables the needle to easily and smoothly pierce the fabric. If you are sewing with finer woven fabrics such as silk or chiffon, you can trust a microtex needle not to catch and snag any of the fibers. You *do not* want to use these with knits, as they will damage the fabric. These probably won’t be the most regularly used needles in your arsenal, but they are good to have on hand if you find that a woven is responding poorly to a universal needle–just switch it out for the microtex and try it again!
Universal Needles
Universal needles, shown here in focus as the topmost needle are a sort of middle ground between ballpoint and microtex needles. They have a slightly rounded point, and therefore they *can* work with both wovens and knits. Yes, they *can.* But. Keep an eye on your fabrics as you are sewing, and listen to your machine. If you are working with a woven and it is snagging, switch to a microtex. If you are sewing knits and you notice that the needle is causing holes, switch to a ballpoint. If you are using a universal needle and don’t notice either–you’re good! I like to keep universal needles in my sergers, as I don’t change those needles except for when absolutely necessary. I also use them with most wovens and many knits, only switching out for more appropriate needles if I notice an issue. It would be *better* to *start* with the right needle, but…I am who I am!
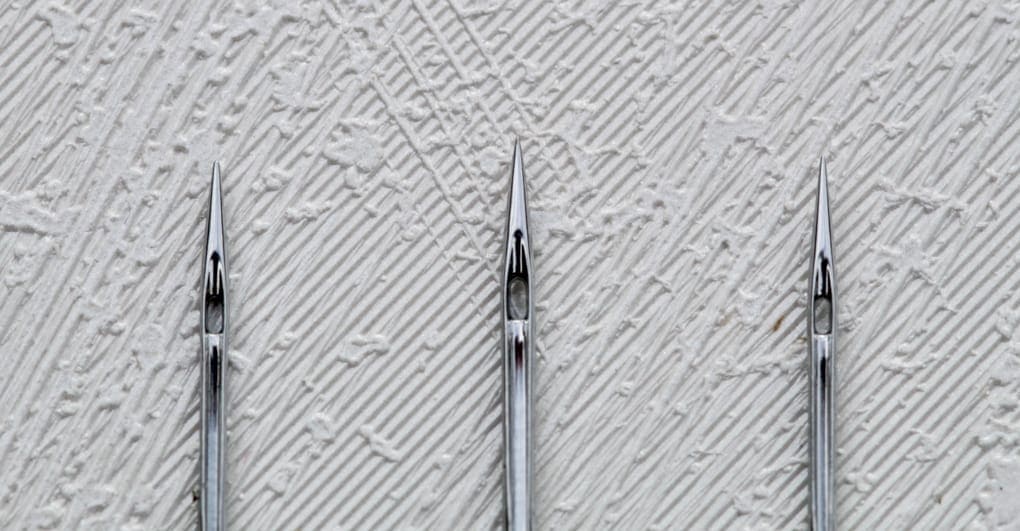
Here is a comparison shot of the three needle tips we’ve already covered; Ballpoint on the left, Microtex center, Universal left.
Twin Needles
Twin needles are kind of an interesting thing. They are essentially two separate needles anchored to one shaft (the part which fits into your sewing machine’s needle housing), so that you can create a double line of stitching. You need two separate sources of thread (two separate spools, for example) to thread both needles on a twin needle. However, there is still only one bobbin thread, so as the bobbin hook moves back and forth, it creates a zig zag pattern on the backside of the stitch. This means that you can sew a double line of straight stitches that have a fair bit of stretch to them. They are often used for hems and necklines to create a faux-coverstitch look. Personally, I don’t often fuss with them because I almost never have two spools of the same color thread on hand, and I tend to feel completely overwhelmed at the thought of winding a bobbin just for a twin needle, ha! However, if I am sewing up something which I really want to look nice and professional (like something I’m going to gift!) I will use a double needle. You can find these with universal or stretch tips, as well as a few other varieties like Jeans which can be useful, depending on your fabric type!

About those numbers…
We’ve covered some basic needle types, but you may still be stressing about all those numbers on the needle package. I’ve got good news–it’s much simpler than it seems, and there is no math involved! The numbers simply refer to size, and–bizarrely–both numbers on a needle mean the same thing! The top is a European measurement that refers to the diameter of the needle as a percentage of a millimeter, so 80 is 80% of 1mm. The second number is an arbitrary labeling system that an American company used to refer to those measurements back when they were first importing them from Europe. It’s sort of like the difference between reading metric and imperial measurements. The numbers always stay together: 70 is always with 10, 80 is always with 12, and so on. Also, if you’re wondering, the numbers are spoken as a set, so when you see 70/10, you say, “seventy-ten.” Now you’ll sound sewing-savvy the next time you’re shopping needles!
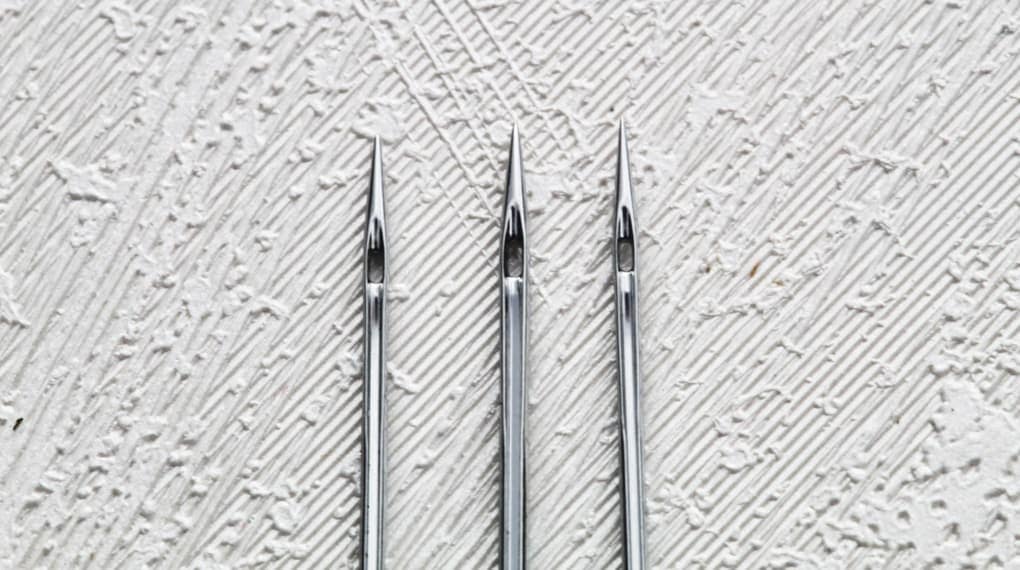
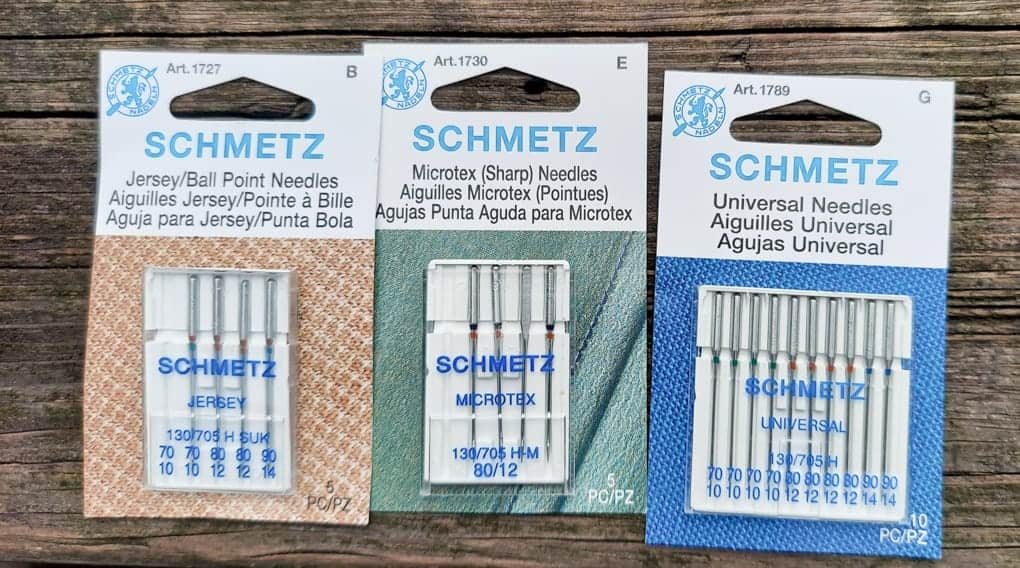
The best thing is, it’s a simple system, both for shopping and for sewing. The higher the number, the bigger the diameter of the needle. You can see in the photo above the variances in diameter. The thick needle in the center is an 80/12, and the others are 70/10. Many needle packs will contain a variety of sizes, like in the photo below, so you can get a feel for the differences at home.
A good rule of thumb is this: The heavier/thicker the fabric, the higher the number you need. The lighter/thinner the fabric, the lower the number.
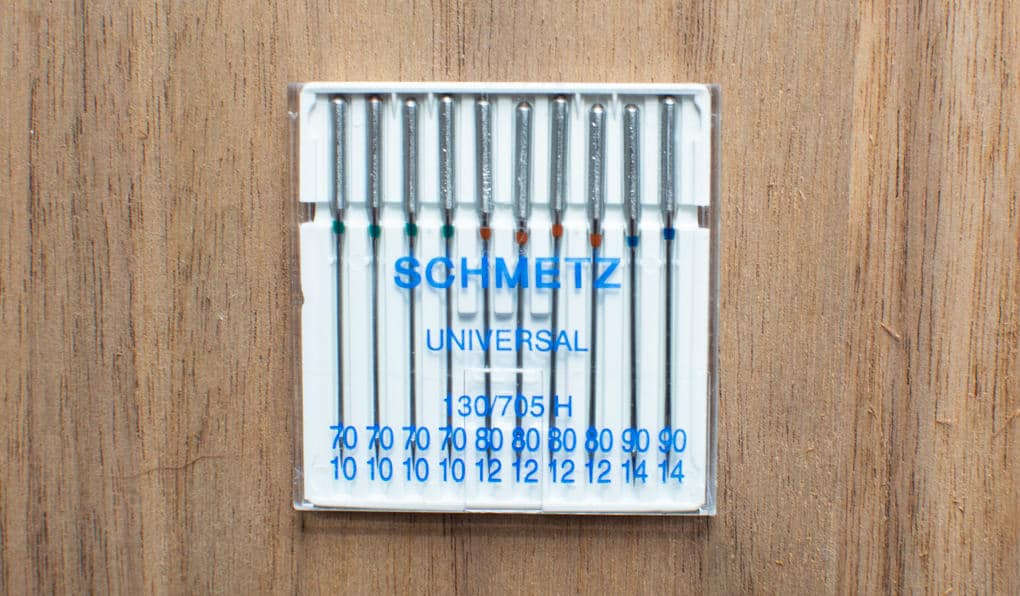
*Note: You may notice another set of numbers followed by a letter, such as 130/705-H on Schmetz Universal needles. This refers to the needle system, which simply means that these needles are designed for home sewing machines and have a flat backed shank.
General Needle “Tips”
So you know your stuff on needle types, and you’ve got the numbers all figured out. Here’s a handful of general needle tips to help you as you sew:
- Needles should be changed after they’ve been used for about 8 hours’ worth of sewing time.
- Popping sounds, snagged fabrics, broken or shredded threads, skipped or uneven stitches, and puckered or damaged fabrics are all signs that you need to replace your needle.
- If you’re not sure which needle to use, try practicing on a scrap of fabric first.
- Some needles have a color coding system that can be helpful for organization! Schmetz needles in particular may have one or two colors on them: the top refers to needle type and the bottom to needle size. Some needle types (like Universal) do not have a colored designation, and those needles have only one band, which refers to size. Check the color coding before you remove them from the package, and make a note or reference sheet to keep by your sewing machine, and you’ll be able to easily identify mystery needles that don’t get put away!
- Look for a variety pack the next time you’re shopping for notions so that you can try out some different types at home!
I hope those help you! And since I think I’ve “needled” you enough on needles for one day, let’s turn our attention back to the amazing La Bella Donna. Here are a couple of very simple hacks you can try out when you’ve sewn up “enough” easy, breezy tees and tunics!
La Bella Donna Hack Ideas
Flounce on the sleeve
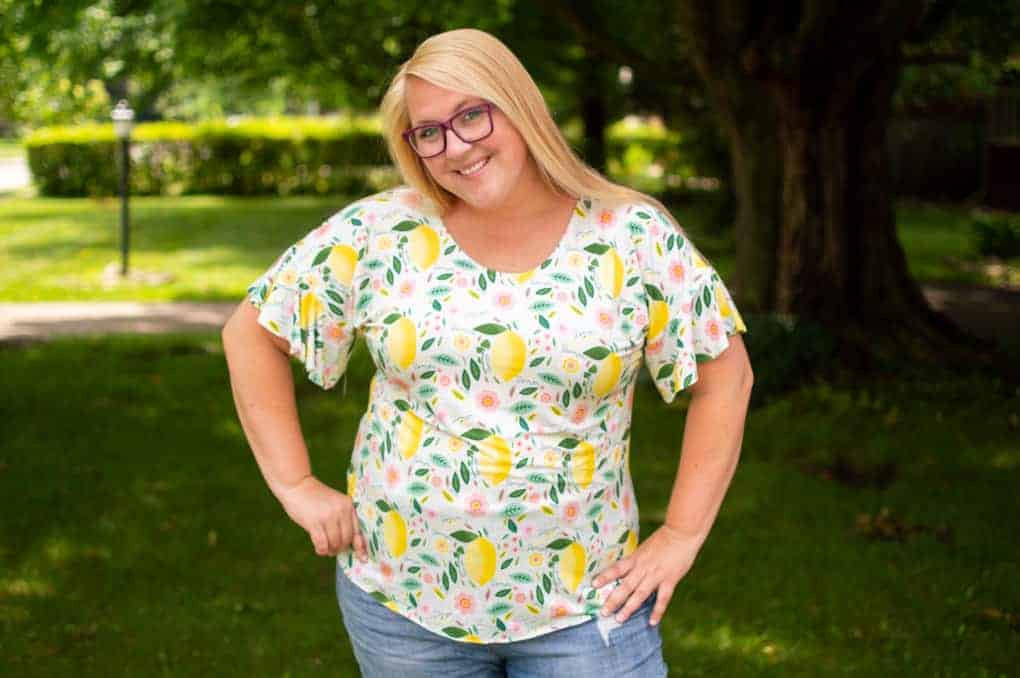
The bodice of this LBD was sewn exactly as the pattern dictates. Instead of hemming the sleeves, however, I borrowed a flounce from the Forte Top to attach to the sleeve. I simply measured the hem of the LBD sleeve and compared it to the inside curve of the Forte Top’s flounce (on several sizes) until I found a close match! This is great for when you want a “fancy tee,” but you want it in a hurry. Easy and beautiful!
Colorblock with stripes
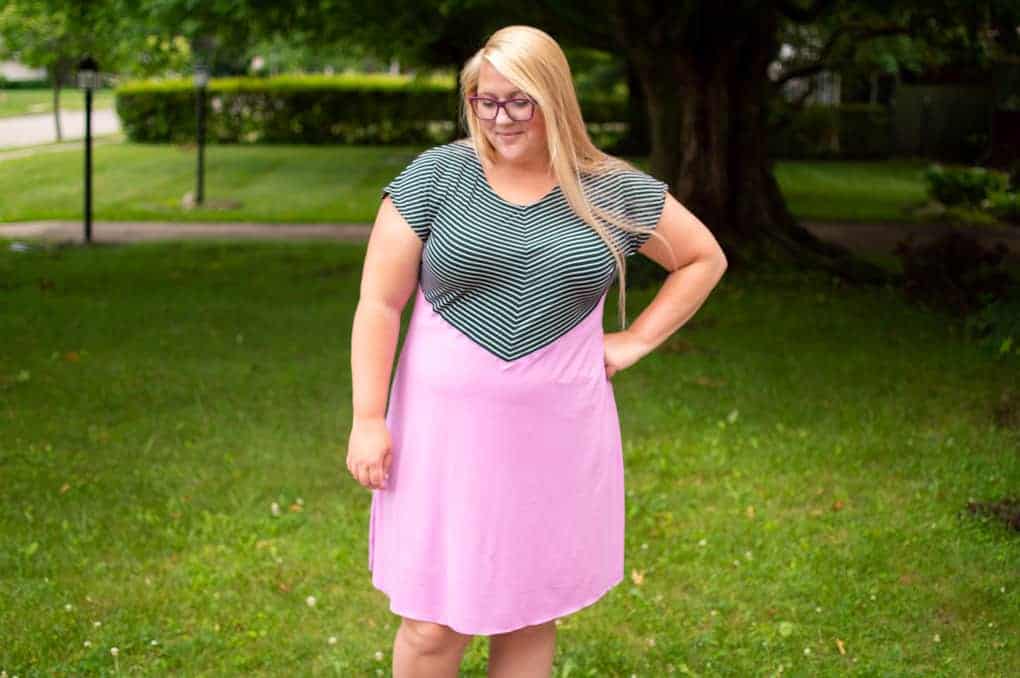
I love this hack! I saw a dress similar to this on a Facebook ad and knew that the simplicity of the LBD would be perfect to recreate it. It’s as simple as slicing your pattern piece at an angle–from just above the bustline to right about where your bellybutton is–and adding seam allowance for the colorblock. I added about ten inches of length to the tunic so that it wears as a dress! I did some stripe play with mine as well by cutting the bodice on the bias not on the fold, as two mirrored pieces, with added seam allowance. I then pieced the bodice together along the center to create the V stripes. Big visual drama for such a simple hack!
Whew! We did it! I know there was a lot of information packed in there, but I hope you’re leaving this with a good sense of needles, and excited to return to your sewing. I know I am!
Til next time,
Jess
P.S. MANY thanks to my friend Emily, for her help with the excellent photos of the needle points!
Save this needles article on your sewing Pinterest Board