Sewing School: A Guide to Sewing Machine Feet
What sewing machine feet do YOU need to create the most professional garment? If this is a question you’ve asked before, then this post is for you!
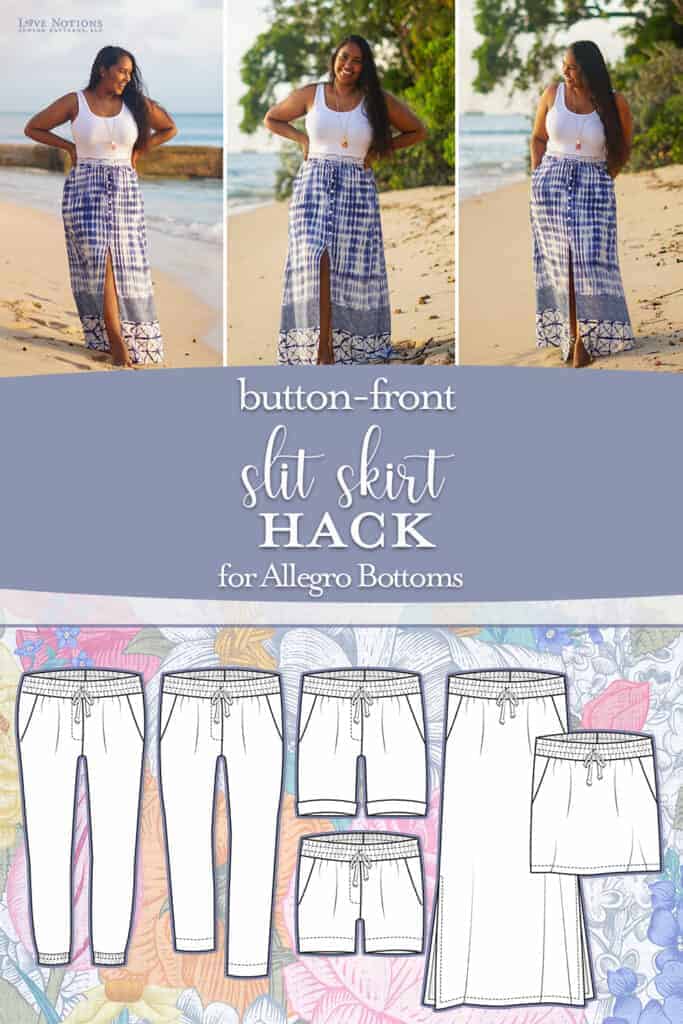
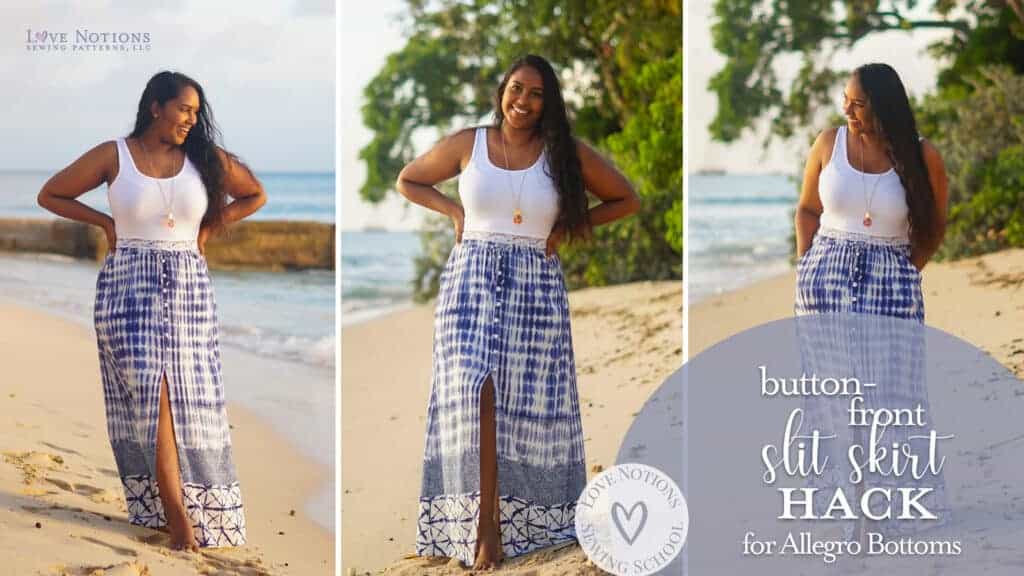
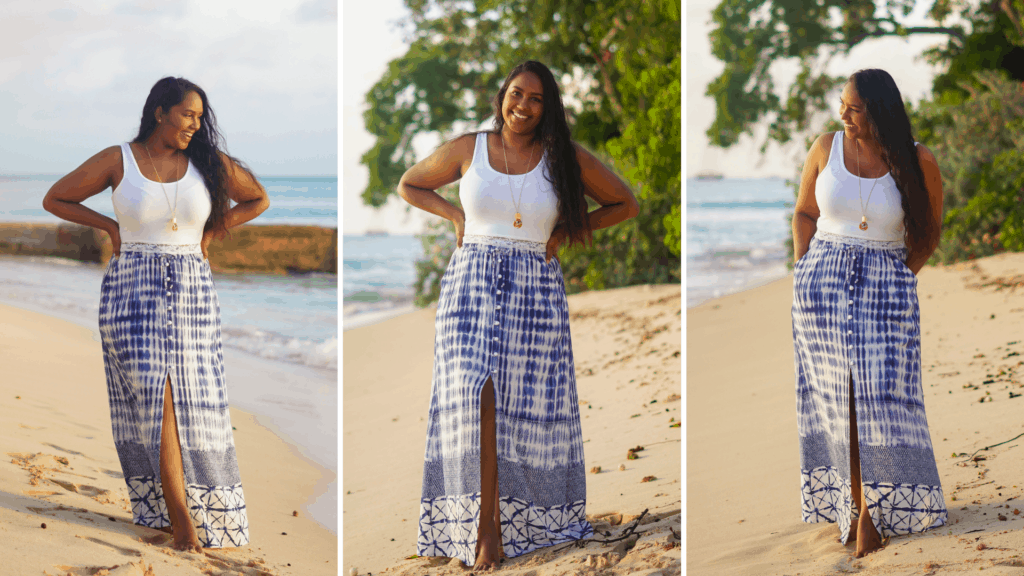
Hi sewing friends, Keira here, your favorite island girl! You may recognize me as Island Sewcialist from my Youtube Channel, my Blog or my colorful Instagram profile where I share all of my makes. Today I’ll be transforming the Allegro Skirt into a floor length, beachy maxi with the cutest button and loop detail and an eye catching front slit. And for today’s lesson in Sewing School, we’ll be chatting all about my favorite sewing machine feet that help to give you a professional looking garment.
The Allegro Bottoms Pattern – uses different sewing machine feet
The Allegro Bottoms pattern is meant for woven fabrics and features pants, shorts and skirts that make up 7 views. All views feature a pull-on style with front slash pockets, back patch pockets, a faux fly and elastic waistband with drawstring. There are four length options for the pants: full length, cropped, 9″ shorts, 5″ shorts and two length options for the skirt: knee & ankle. There is a jogger option and optional cuffs for the shorts as well. The ankle length skirt features two slits up to the knee. The Allegro Bottoms pattern is available in sizes 0-32 and you can grab it today for just $5.00!
Let’s get hacking!
First let’s discuss the adjustments we need to make to our pattern pieces to achieve this look. My buttons are not functional and I promise this hack is actually really simple.
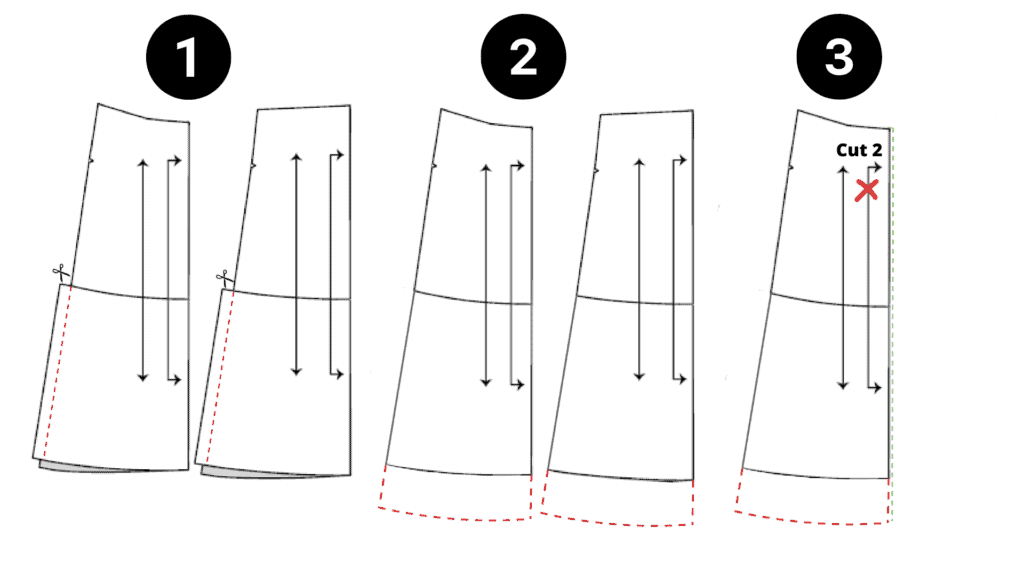
Step 1: Remove the side slit extension on both front and back skirt pieces.
Step 2: Add length to make it floor length. I added 5” at the hem which also added extra volume.
Step 3: Add ½” seam allowance to the center front skirt so you’ll cut 2 separate pieces instead of cutting on the fold.
Now you can go ahead and cut out your pattern pieces. Don’t forget your pockets, waistbands and drawstring and you’ll need some extra fabric for your Rouleau loops as well.
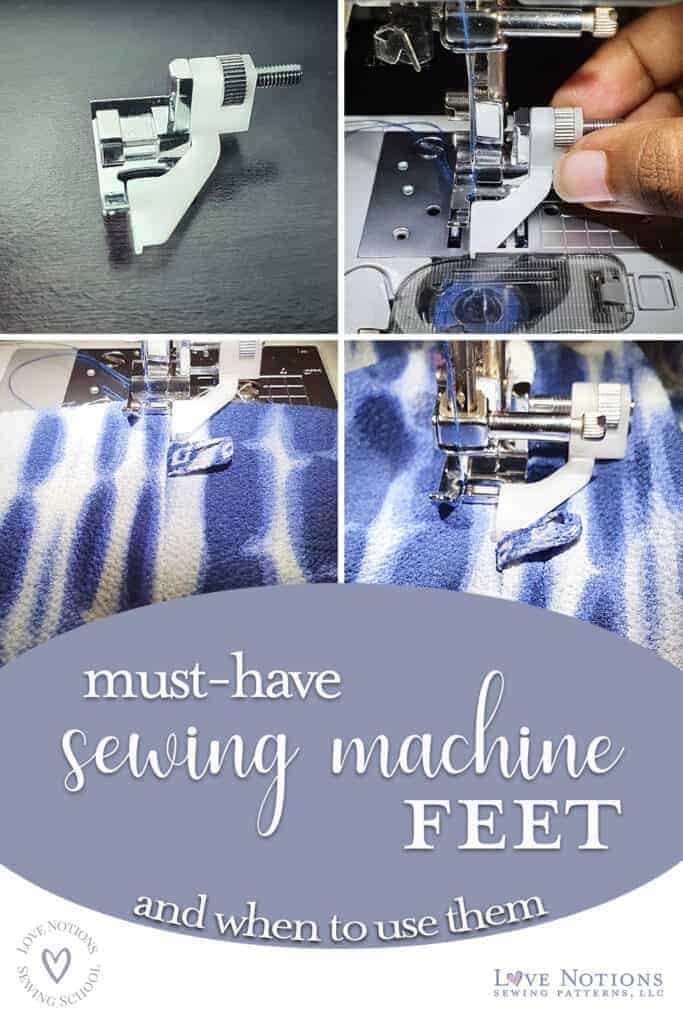
Let’s talk Sewing Machine Feet
A presser foot is essential for your machine’s basic operation. It holds the fabric against the machine’s throat plate and keeps it in place while you sew. There are lots of different feet that attach to your machine to fulfill various purposes. Some machines come with extra feet and others, you have to purchase extra feet separately. I find it useful to use different feet to perform different tasks. Some feet assist with motion, some help with thick fabrics, and others help with special design details. Changing out your machine’s presser foot can help to make sewing so much easier and can contribute to a more professionally finished garment.
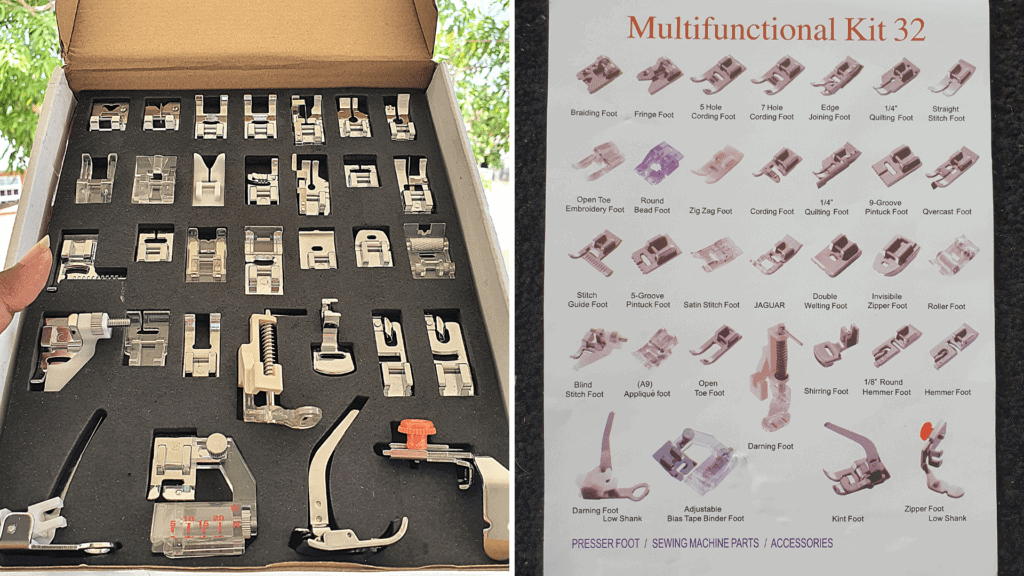
In modern times, the most common presser feet are snap on feet. They are incredibly easy to snap on and off saving time. I have a low shank sewing machine and I can find low shank feet to purchase very easily. However, a shank adaptor allows you to use universal snap-on feet no matter what brand machine you have. For reference, I use two very basic Brother machines, BM3700 and CS6000i. Both of my machines came with a few extra feet but there were some additional ones I wanted to have on hand so I purchased a Set of 32 feet from Amazon. Today I’ll be demonstrating how some of these feet work.
Sewing Machine Feet: Edge Stitch Foot
The Edge Stitch Foot or Edge Joining foot is used for edge stitching, stitch-in-the-ditch stitching and heirloom sewing. My favorite use for the Edge Stitch foot is understitching. The metal guide slides along the seamline as you sew, enabling you to get a perfectly straight and neat understitch. Here’s how I used this foot to understitch my pockets:
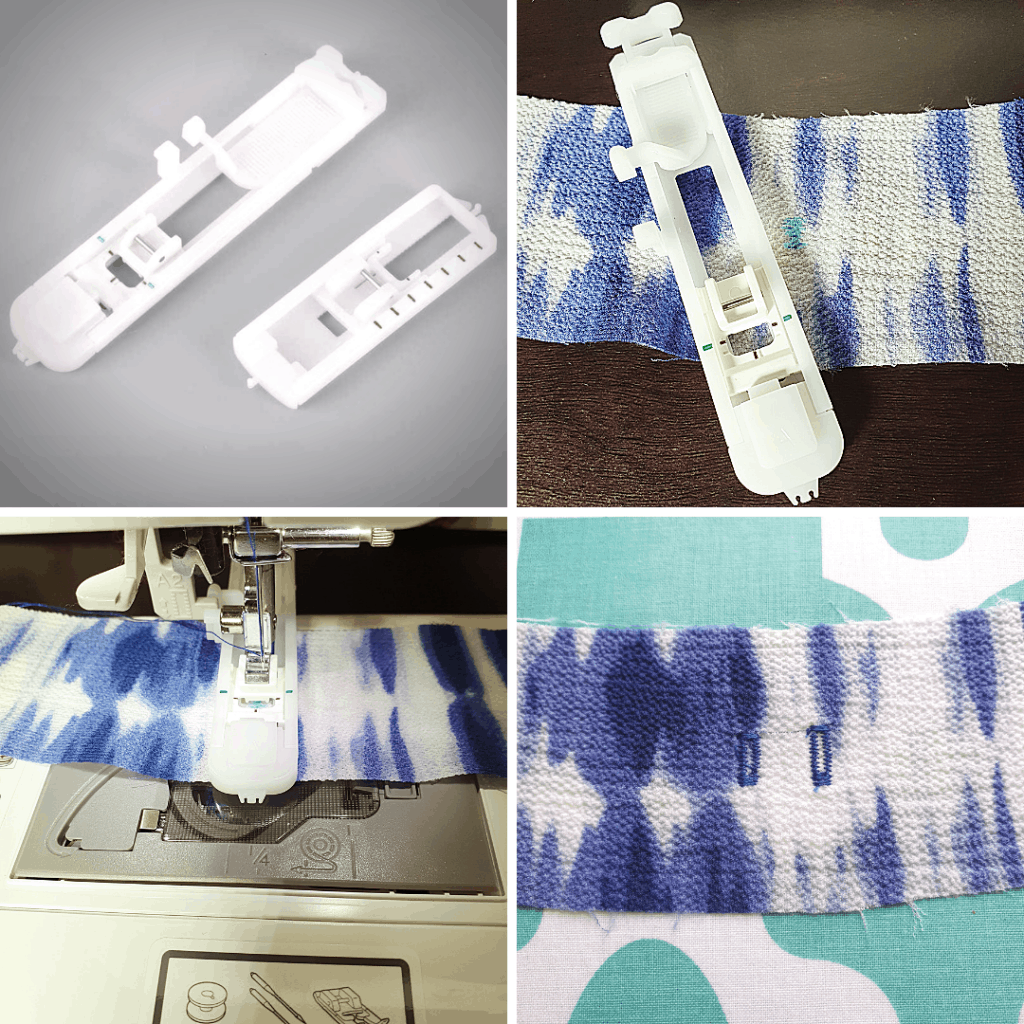
Sewing Machine Feet: Buttonhole Foot
The automatic Buttonhole foot uses measurement markings on the foot to start and stop sewing the buttonhole. It’s a really nice tool for replicating identical buttonholes and is so much easier to use than trying to make a manual buttonhole. There are two really common buttonhole feet: one with red markings and a sliding frame, and one that actually holds your button and uses it to measure. I prefer the one that holds the button; it’s the reason I am no longer terrified of sewing buttonholes!
To sew my drawstring buttonholes, I didn’t put a button in the holder. Instead I manually set the button holder to a really small size and the machine did all the work for me.
Cutting the Rouleau Loops
Let’s take a quick break from sewing machine feet and discuss one of my Allegro skirt hacks. I hacked my Allegro to have a button front and to make it even more special, I added Rouleau Loops for their closure. These are loops that include a bit of cording on the inside to make the loop nice and sturdy. Here’s how I did it:
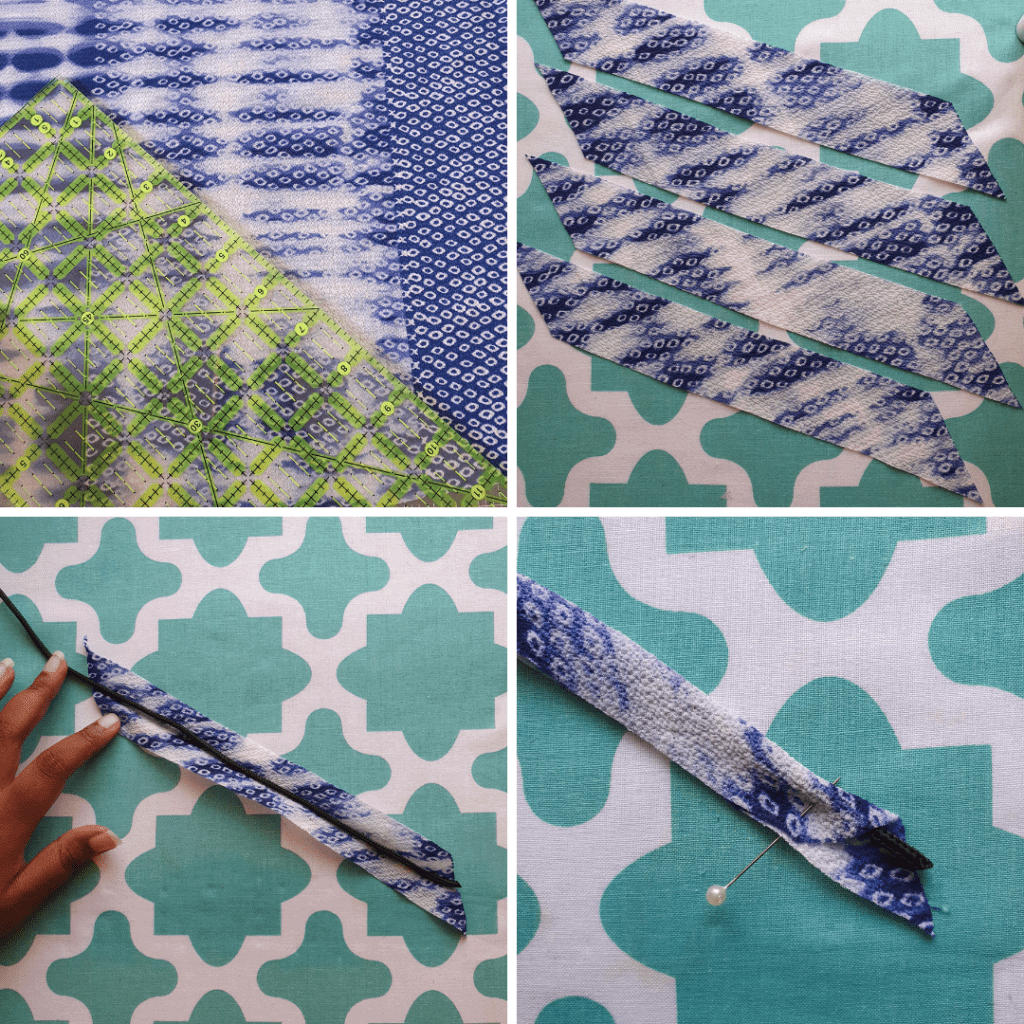
Step 1: Cut bias strips on a 45 degree angle. I used my quilter’s ruler as a guide and I cut 4 strips 1.5” wide by about 8” long. You can just cut one long strip, but I used smaller strips because I was cutting from a particular part of my border print.
Step 2: Press your bias strips in half lengthwise right sides together.
Step 3: Cut a length of ⅛” cord longer than your bias strip and place down the center of your strip.
Step 4: Fold over your strip encasing your cord and prepare to sew along the top short edge.
Now it’s time to sew those loops – and back to our next sewing machine foot:
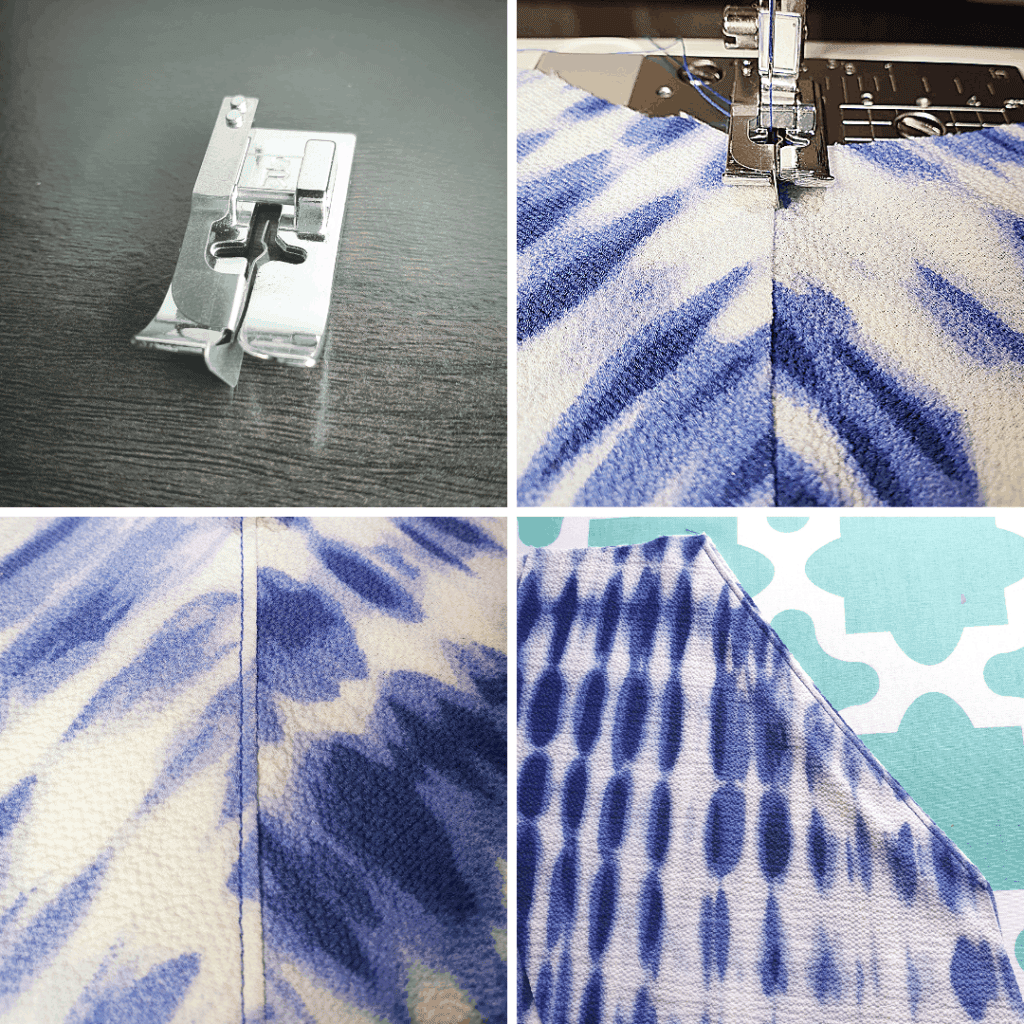
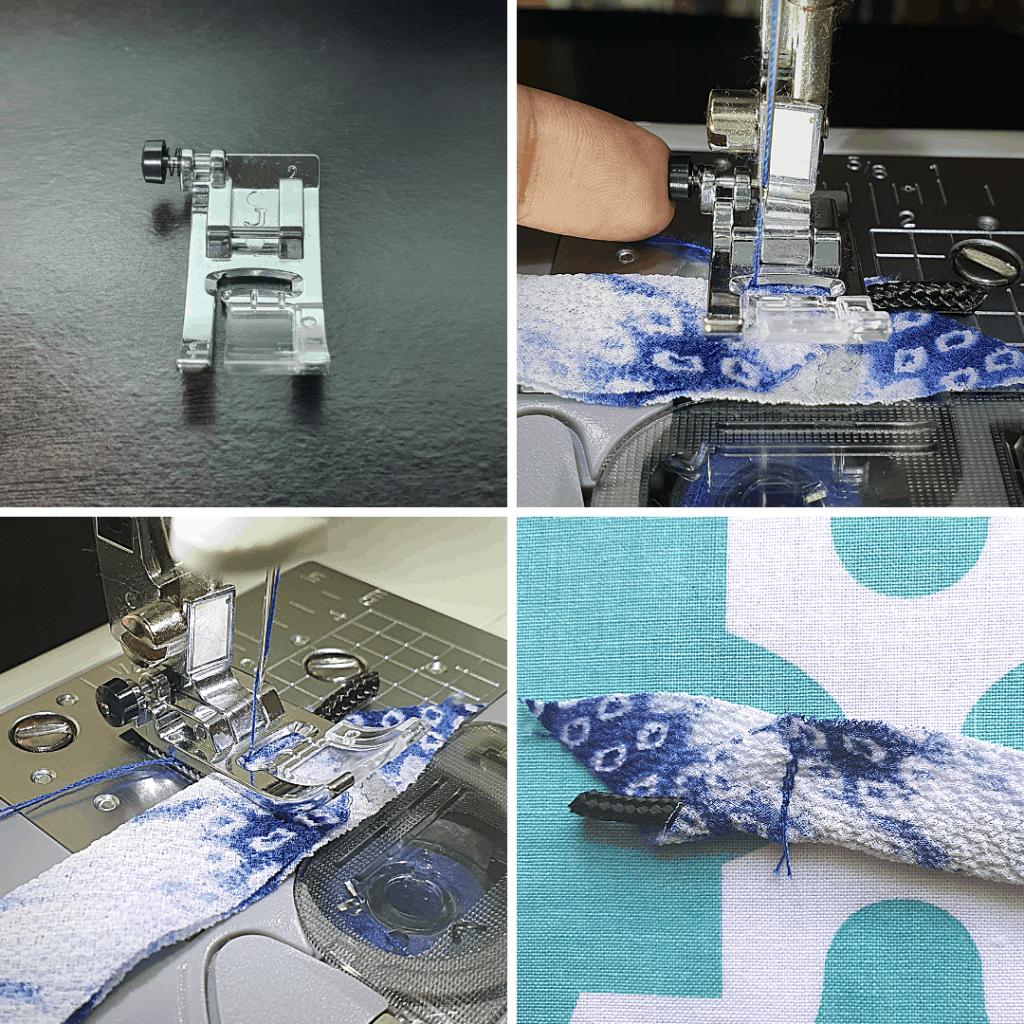
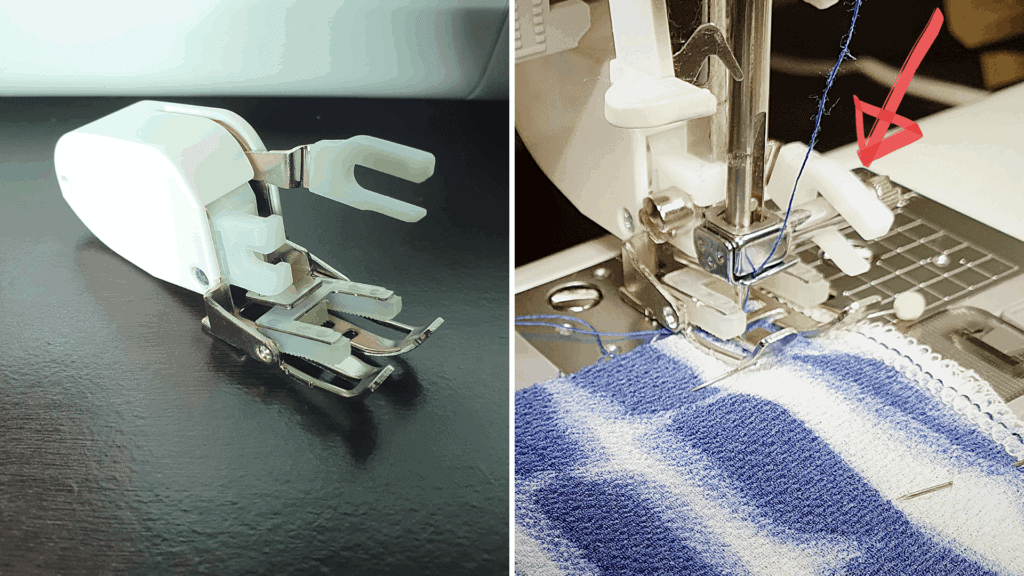
Sewing Machine Feet: J foot – with black button
The J foot/ Zigzag foot/ General Purpose foot is the main sewing foot that comes with a lot of machines. My CS6000i came fitted with the J foot, specifically the one with the black button which I really want to highlight. The little black button helps you sew over bulky seams by levelling the foot & eliminating skipped stitches. When you press the button, the foot adjusts to meet the level of the bulk and locks in at that horizontal level as opposed to sitting on a slant. Perfect for sewing over cord right? Check this out:
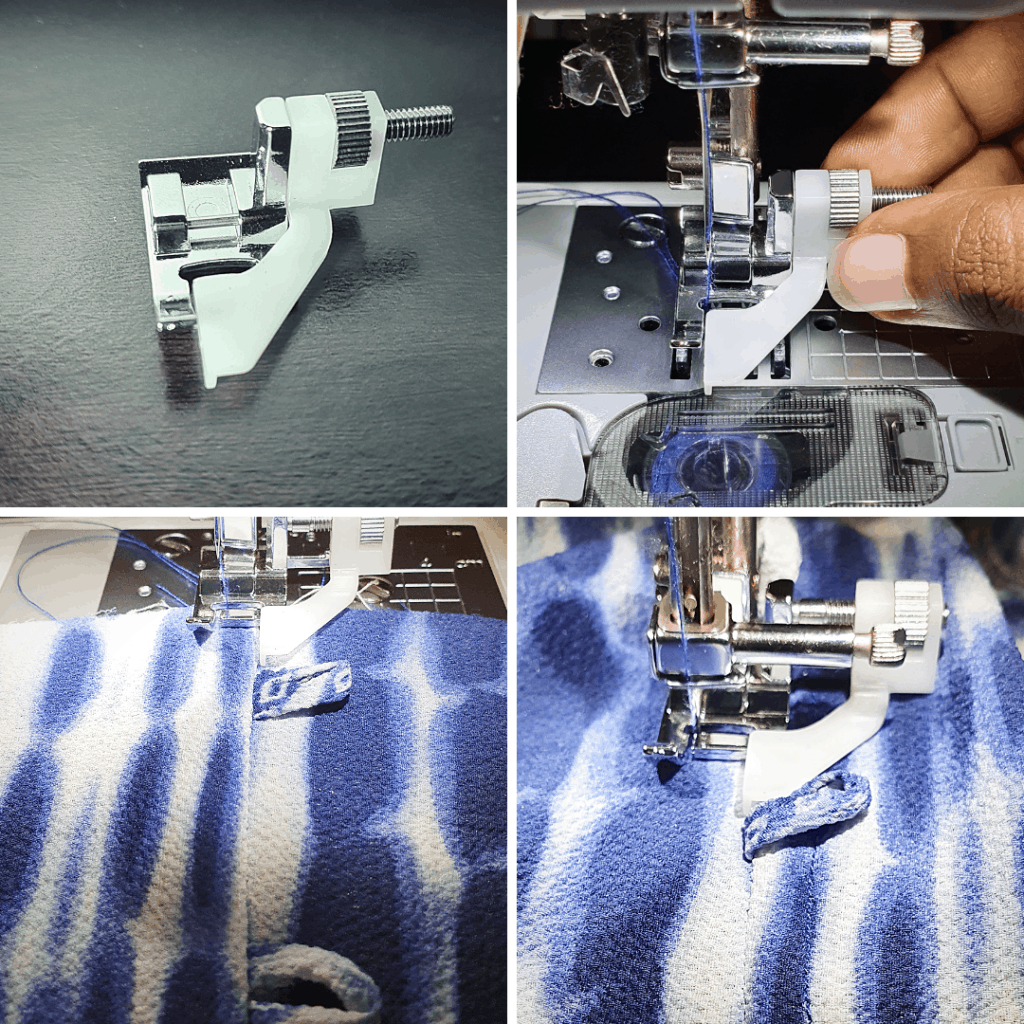
Sewing Machine Feet: Piping Foot
The Piping Foot/Double Welting Foot is designed with grooves on the underside and will hold and cover the cord when making piping tape. It can also be used for attaching piping. But did you know you can use it to make rouleau loops? (An invisible zipper foot can also work for this method – shown on right of 1st photo) Here’s how:
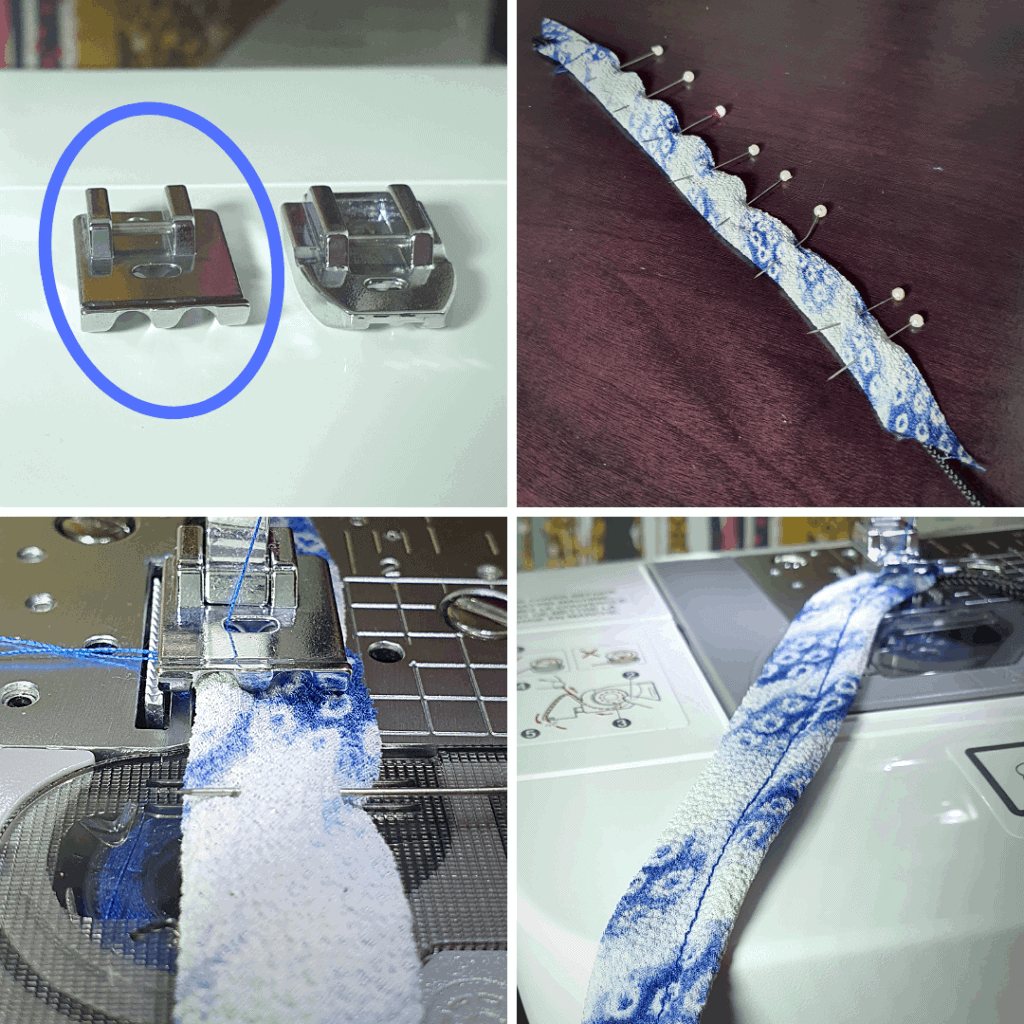
Step 1: Once you’ve sewn across the top short edge of your bias strip to anchor the cord, go ahead and pin your bias strip folded in half right sides together encasing that cording.
Step 2: Place your pinned strip under your presser foot, making sure that the cording fits into one of the grooves.
Step 3: Adjust your needle to sew about ¼” from the left edge where the cording is. If you sew too close to the cording, you won’t be able to turn the loop after.
Step 4: Starting at your horizontal stitching at the top short edge, sew all the way down the length of the strip.
Turning the Loops
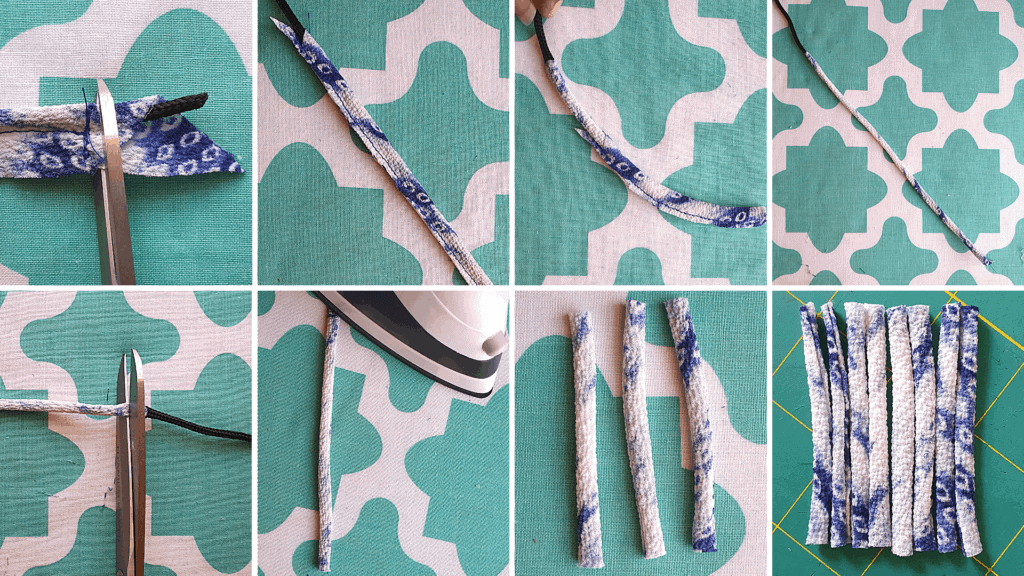
Step 1: Snip off that top edge right above your horizontal stitch line.
Step 2: Trim your lengthwise seam close to the stitching.
Step 3: Pull the cord to turn your loop right side out.
Step 4: You should end up with a nice long loop still attached to the cord at one side. No stitching should be visible from the outside.
Step 5: Snip off the edge where the cord was anchored.
Step 6: Give your loops a nice press.
Step 7: Cut your loops into 2.5” pieces.
Step 8: Repeat until you have 8 rouleau loops.
Attaching the Loops
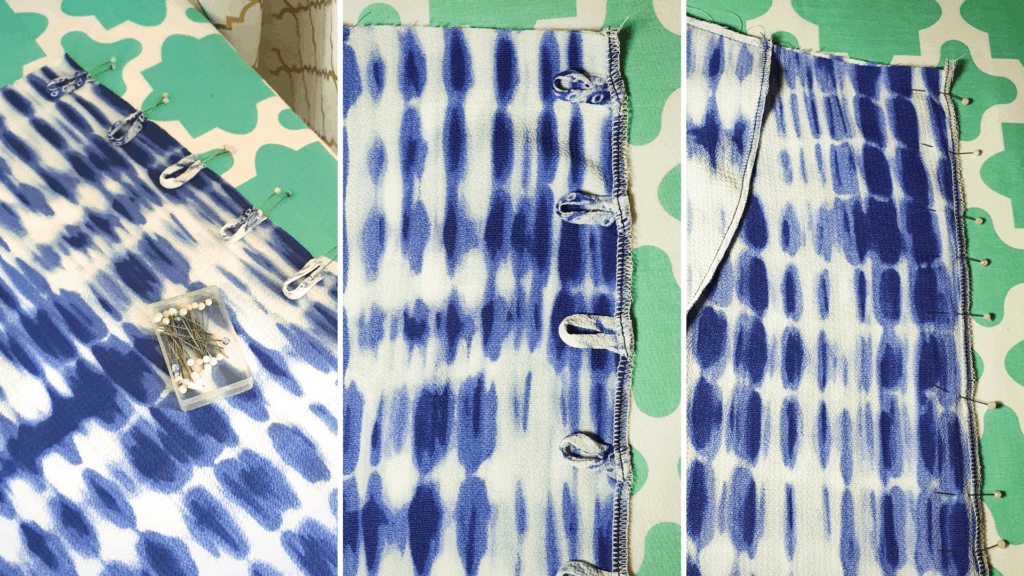
Step 1: Pin your loops to the center front of the right (when worn) skirt piece. I pinned my first loop 1” down from the top edge, and all the other loops are 2” apart.
Step 2: Finish the raw edges of both center front skirt pieces. I hand basted my loops first to hold them in place.
Step 3: Place center front skirt pieces right sides together and prepare to stitch.
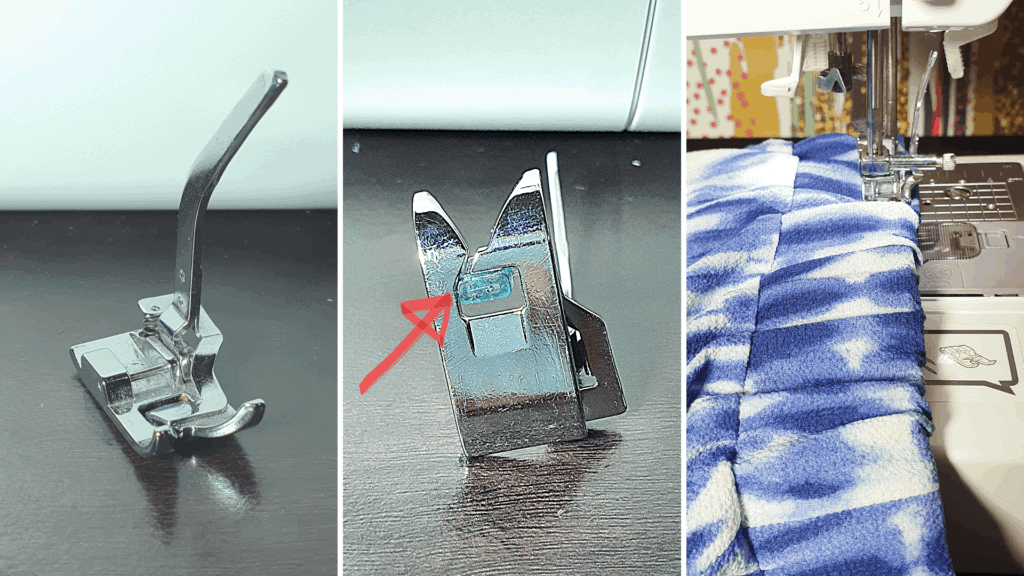
Sewing Machine Feet: Walking Foot
The Even Feed Walking foot adds top-side feed dogs that hold your fabric from the top side, giving you better control while you sew. It is designed specifically for sewing multiple layers of fabric together like quilts, denim, or thicker fabrics and can be really helpful for fluid fabrics like rayon, silk and satin as well. It is also very useful for matching patterns like checks, stripes and plaids because the layers move together and there is less chance of slipping. My CS6000i came with a walking foot. I used it to stitch my front pieces together since I needed to pass over 8 rouleau loops. To attach the walking foot, take off your normal foot and shank adapter, install the foot making sure the ‘claw’ attaches around the needlebar – this is what gives the foot that lifting motion.
Creating the Slit
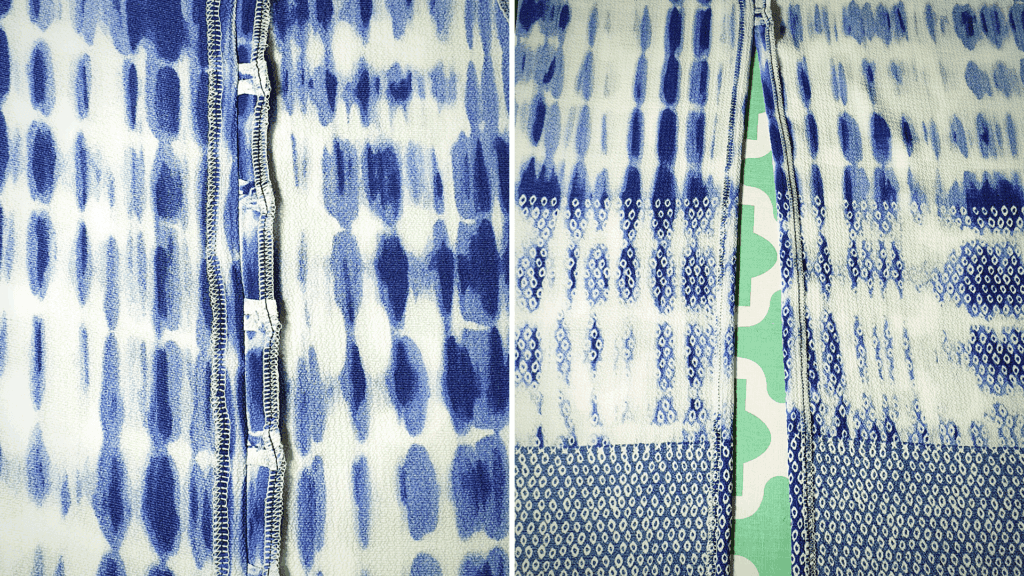
I stitched down to just about ¼” pass the last rouleau loop.
Step 1: Press your seams open.
Step 2: Continue pressing ½” on both sides all the way down to the hem.
Sewing Machine Feet: Blind Hem Foot
The Blind Hem Foot pairs with the blind stitch on your machine to give your garment that tailored-finish where only small dots of thread show from the right side. The screw on the side of the foot allows you to adjust the position of the guide.
If you haven’t noticed by now, I also use my presser feet to perform tasks other than the intended purpose. I used my blind hem foot to topstitch my center front skirt seams. Similar to the Edge Stitch foot, it was easy to line up the guide with the seamline. But what I really love about the Blind Hem foot is that it’s adjustability makes it more versatile. I turned the screw until I had about a ¼” topstitch line. The plastic guide rolled right past the rouleau loops and when I was ready to topstitch the other side, I just flipped the rouleau loops the other way.
I haven’t actually used my blind hem foot for hemming yet but I am so excited to give it a try. Sounds like it could be a game changer!
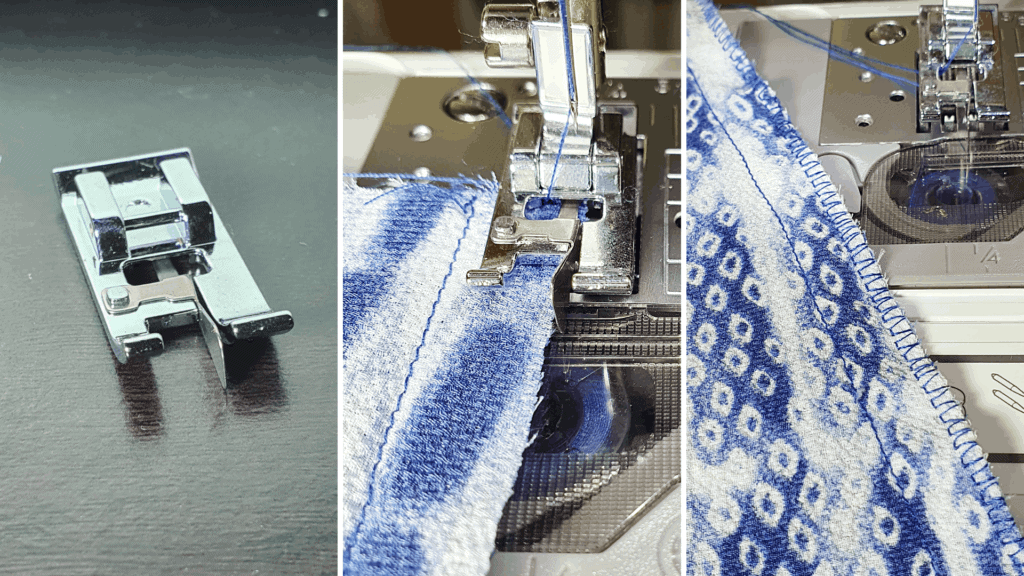
Sewing Machine Feet: Overcast Foot
The Overcast Foot/Overlocking Foot/Overedge Foot allows thread to wrap around the edge of the fabric to prevent unraveling. It is pretty much the alternative to a serger. The finish is so much nicer than your standard zig-zagged edge. I really wanted to highlight this one because it blew my mind when I got it and I wish I had it before I got my serger. There is no blade, just a metal guide that lines up at the edge of your fabric and it just works with the overcast stitch on your machine. I used this foot to finish my skirt’s side seams. If you don’t have a serger, this foot is a must have!
Sewing Machine Feet: Knit Foot
The Knit Foot is the little sister to the Walking Foot. It uses pressure from both above and below the fabric to control unruly knitted/stretch material. It has a similar lifting motion to the Walking Foot that is controlled by a long arm that sits behind the needle screw. But what makes this foot stand out is the rubber grip on the bottom. This is my second most used foot after the general purpose foot. This foot almost always stays on my machine, even for wovens. It is great for slippery fabrics on a whole. I used my knit foot to topstitch my waistband after inserting the elastic.
Sewing Machine feet that I’ve found really useful for other projects are the Gathering Foot, Narrow Hem Foot, ¼” Quilting Foot, Roller Foot and the Stitch Guide Foot.
Sewing Machine feet from the set I am excited to try are the Bias Binding Foot, Pintuck Foot, and Applique Foot.
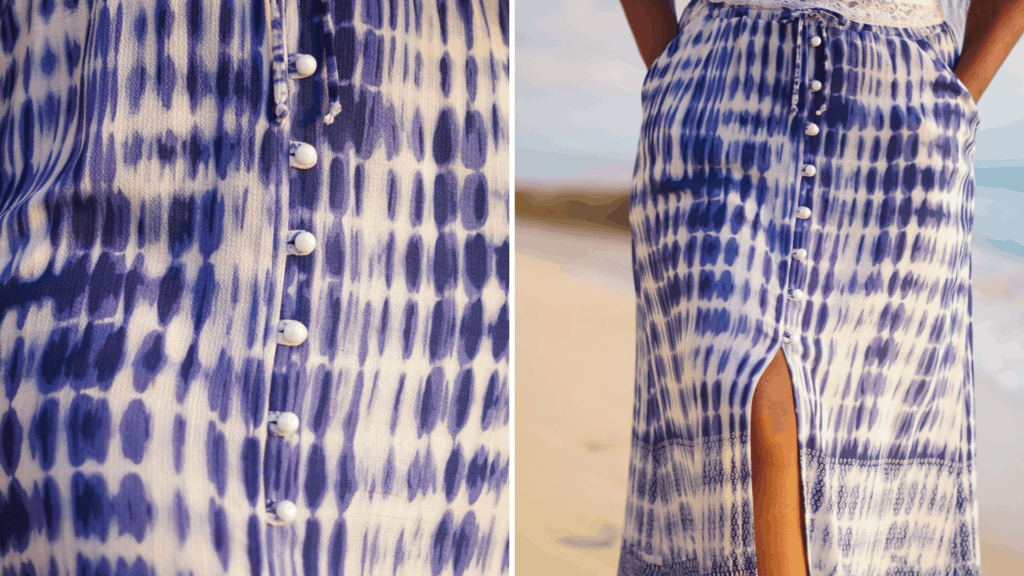
I hope after reading this post, you’ll want to be a little more adventurous with your Sewing Machine Feet and I would love to see you try my Allegro Skirt hack! Just in case you are wondering about fabric, I used a very lightweight flowy crepe which gives this pattern a whole new vibe. It almost looks like print blocking but it’s all one fabric with a stunning border. I went with pearl shank buttons to add to that beachy feel and I couldn’t be happier with my new maxi skirt!
Don’t forget to grab your copy of the Allegro Bottoms for $5 on sale today!
*Links in this post are affiliate links. I will earn a small commission at no extra cost to you. Thank you for your purchase!