


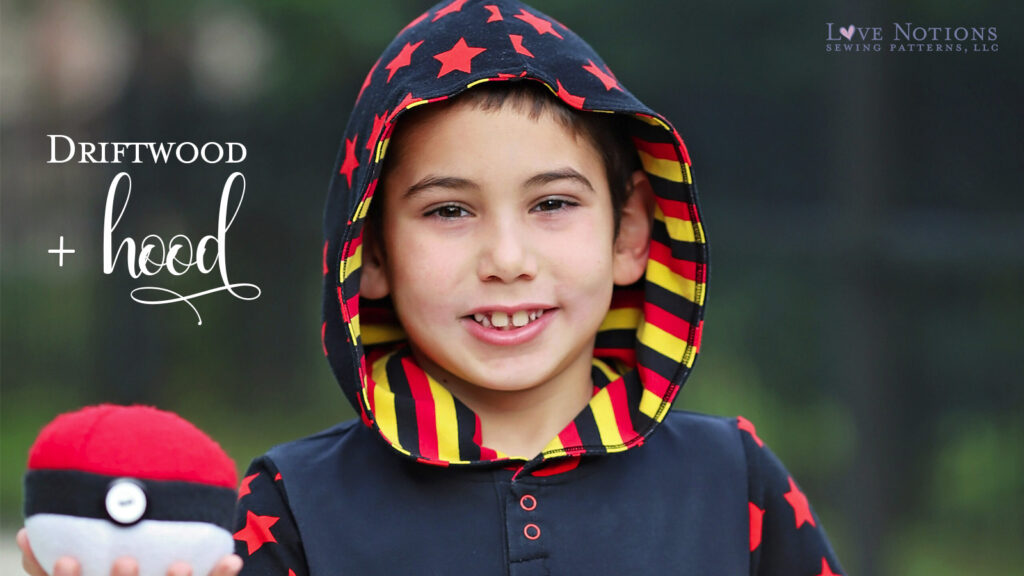
Today on the blog Alex is showing an easy hood hack for the handy Driftwood Polo, Henley and Crew shirt. Grab some fun fabric, your Driftwood pattern (or even the men’s Dockside version!), and add a hood that will make your model cozy and comfy.
DriftHood
A Driftwood with Vanguard Hood
─
By Alex Radu
It’s that time again! Feature Friday is showcasing the Driftwood pattern and I couldn’t be happier about it. My oldest son wore his testing version until I hid it from him…at one point clothes do become small…who would’ve guessed? 🙂 Once you purchased the Driftwood pattern (it’s only $5!!!) come back to the blog to read how to add one more option to the shirt.
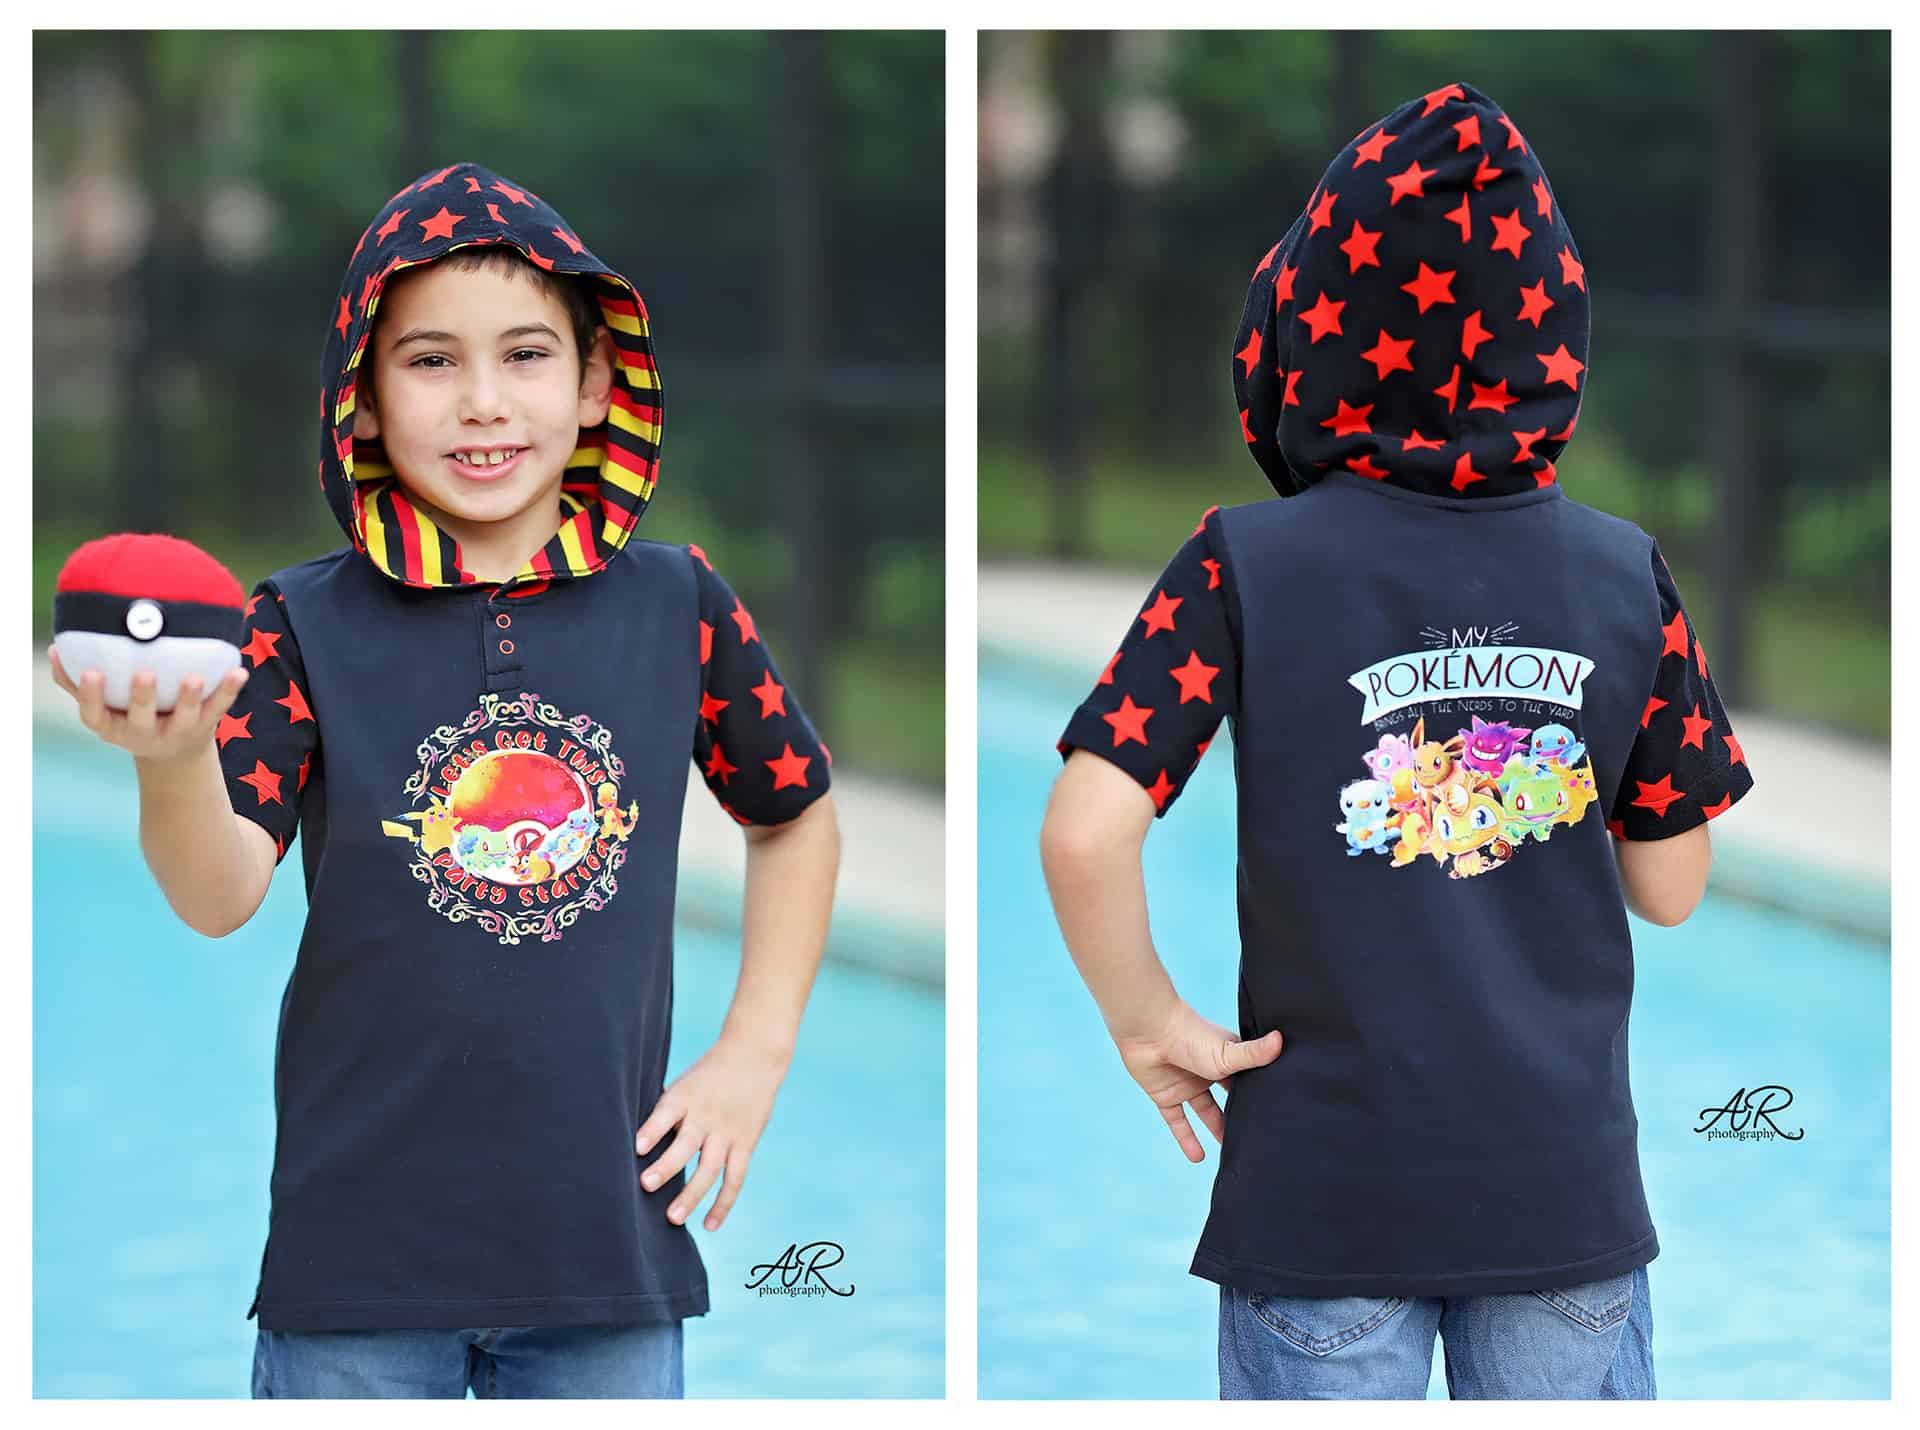
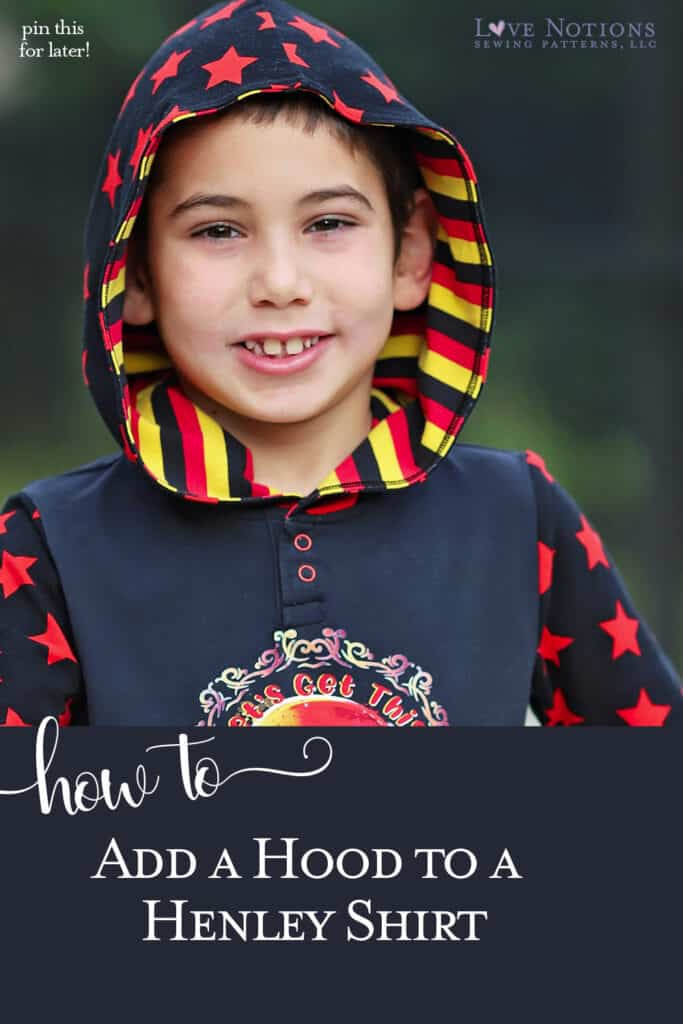
The pattern includes a crew neck, a Polo and a Henley neckline. My little dude had to have a hooded Pokemon (™) inspired shirt so it was my mom duty to make it happen, no? Today I will show you how I added the Vanguard hood to the Driftwood shirt, making it…wait for it, wait for it … .a DriftHood shirt. 😉
HOW TO MAKE A DRIFTWOOD HOOD
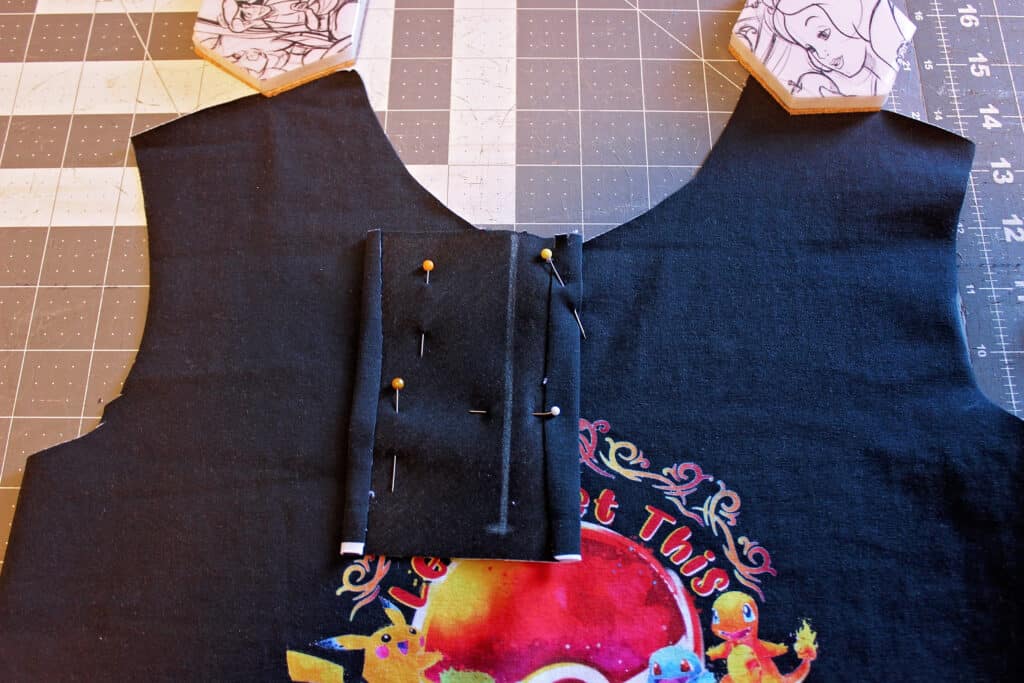
Let’s start by sewing the Driftwood pattern as instructed in the tutorial. You might have noticed in the first picture that the button placket looks shorter than the pattern. You are not wrong. I cut the placket as in the instruction but noticed that if would cut the image of the Pokeball…unforgivable move, had I done that 😉 . Easy fix, I simply put a horizontal pin where the image ends. I sew only to that pin and removed half an inch past this mark. Flexibility is the name of the game!
I have sewn the shirt, skipping the collar or henley neckband. Now we need a hood! I used the same size (8) hood from the Vanguard tshirt. I found that hood to be matching perfectly. You may be able to use the Samson hood too, but I have not tried it yet. Let me know in the comments of Facebook group if you do! I’d love to see it!
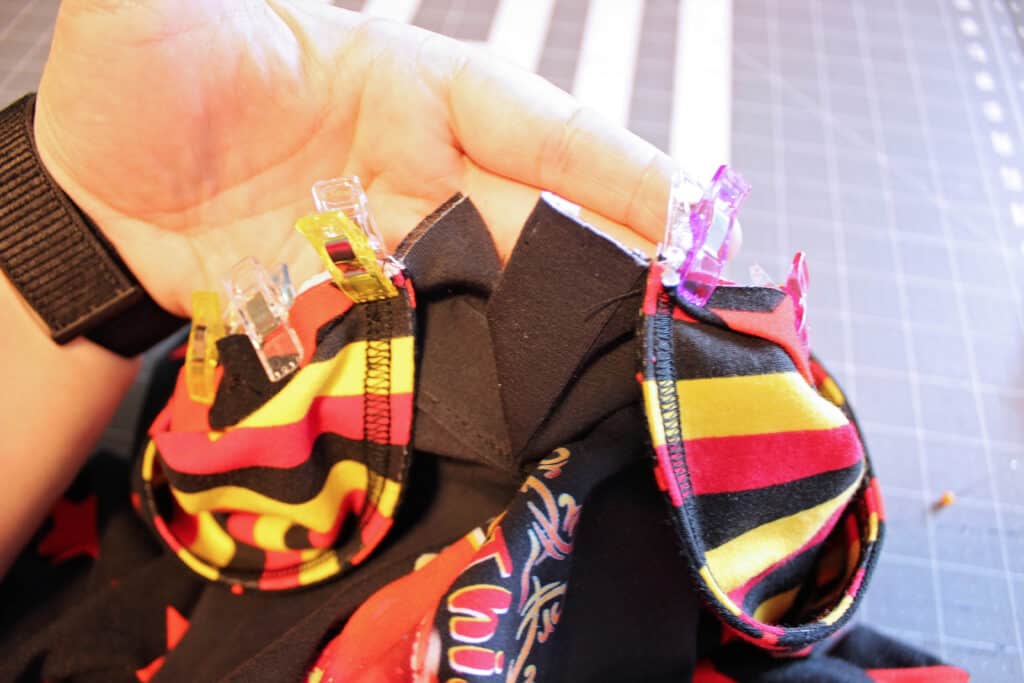
Using a pin, a clip or a marking pen/chalk, mark the neck opening’s center back and the hood.
Tip: You can serge or baste the two layers of the hood together at the opening. This will help you when attaching it to the neckline, especially because we will be working with 5 layers!
Make sure you cut the binding pattern piece too! That simple touch will make a huge difference! Your shirt will look so much more polished and will feel more comfortable to wear since there will be now exposed seams on your little’s neck.
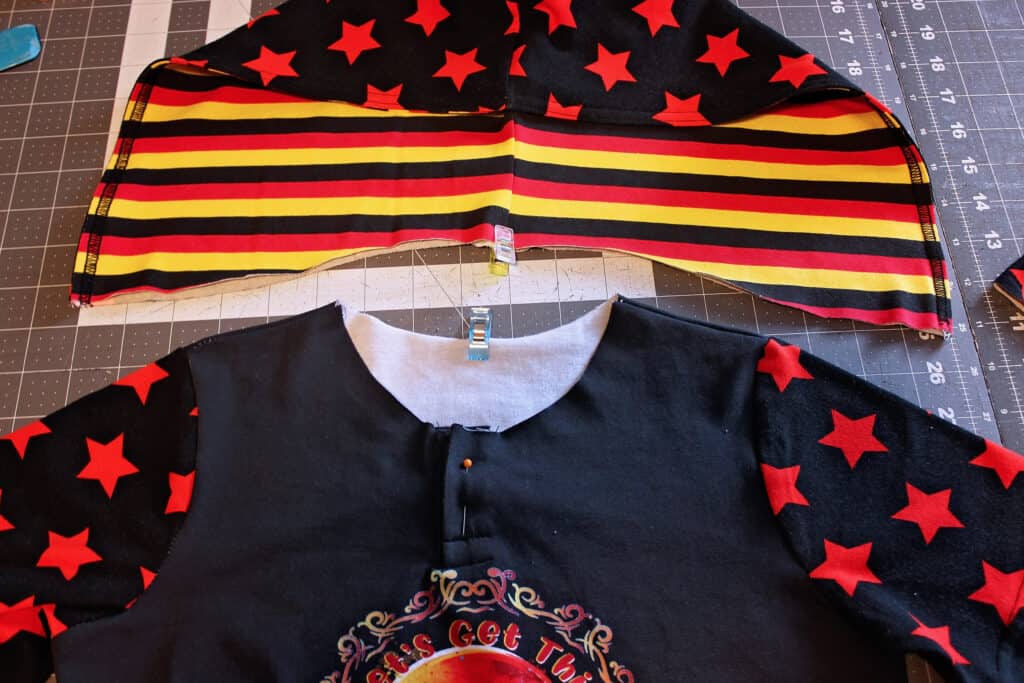
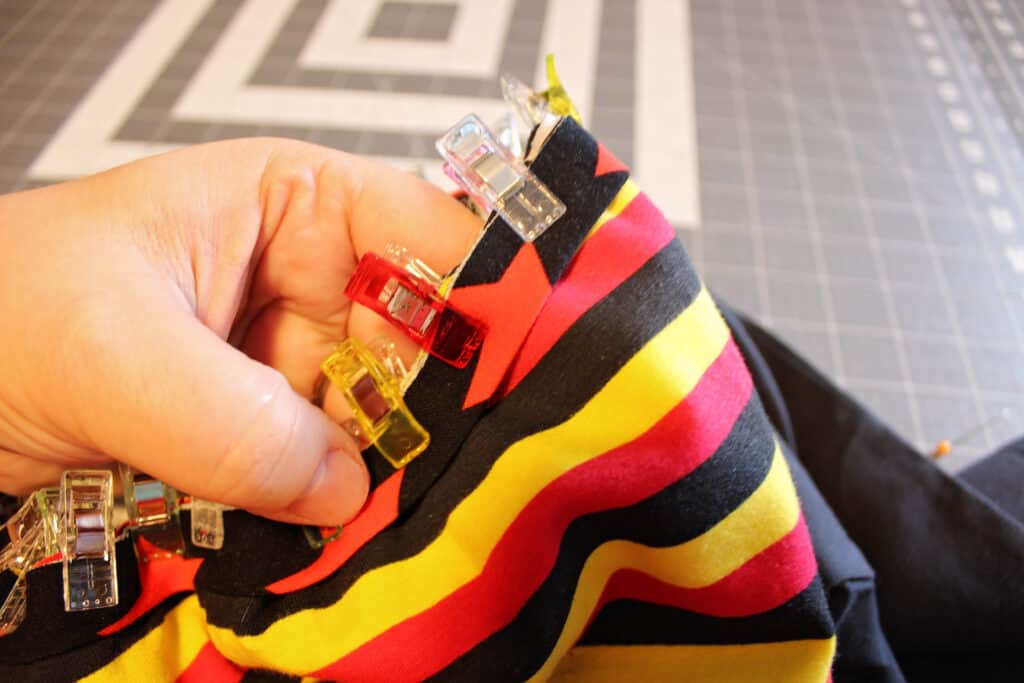
Let’s attach the hood! Match the center back of the neckline and hood, right sides together. Open the placket and pin the end of the right side of the hood at the fold line. Pin the left side of the hood to the beginning of the placket. See the picture below! Doing this will help enclose the raw edge in the placket.
Short cut: Don’t care about enclosing the neckline seam? No problem! Skip the binding, sew the placket and attach the end of the hood right where the placket opens. I personally prefer the cleaner look but I promise I won’t check your Driftwood necklines 🙂
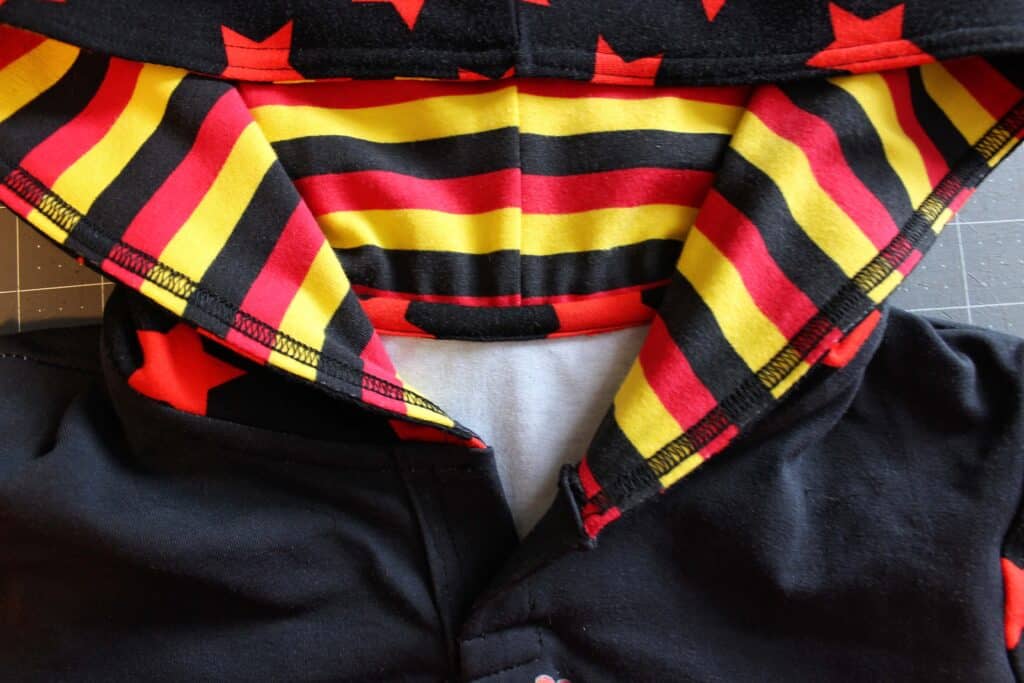
Take the binding and ford it lengthwise wrong sides together. Mark the center of the binding. Match that mark with the center back of the neckline opening. Pin the ends of the binding to the opening, matching the hood fronts. You will now attach all layers with a serger or triple stretch stitch.

These are the 5 layers I mentioned above, from top to bottom, two from the folded binding (black and red stars), two from the hood (stripes) and one from the shirt neckline.
You are almost done! All you have to do now if stitch the binding down, just as the tutorial instructs it. The front sides of the hood will be enclosed in the placket (just like the Henley neckband in the pattern).
ALL DONE WITH THE DRIFTWOOD WITH HOOD!
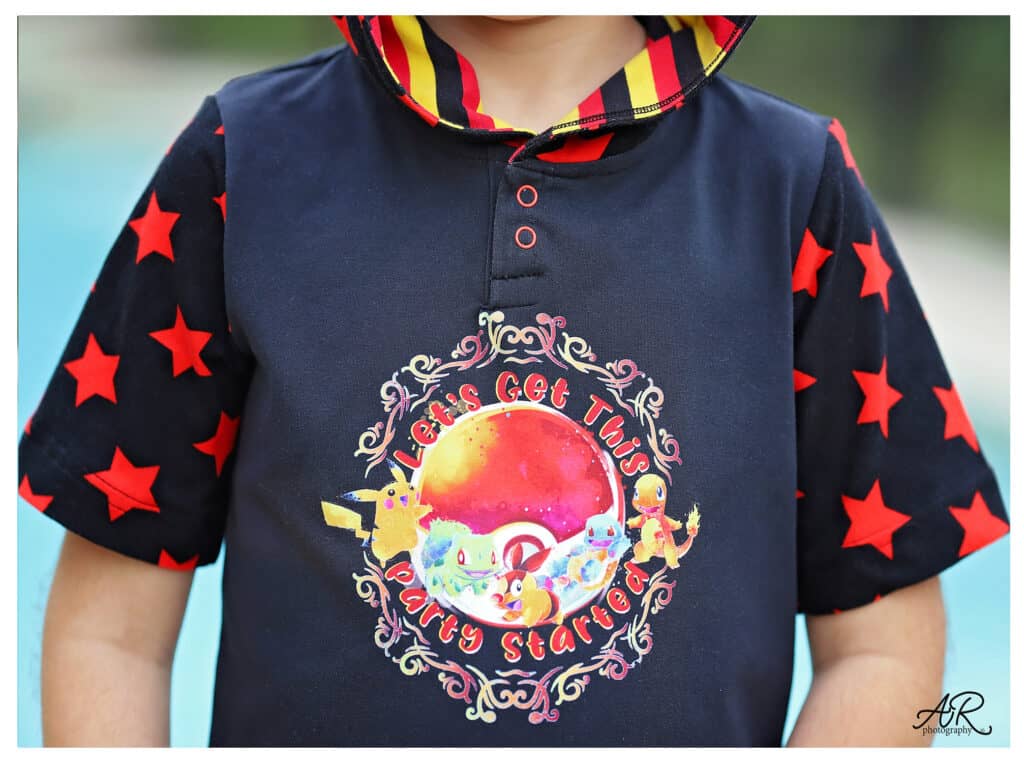
Tadah! You are done. All you have to do is add your buttons or snaps. I went with snaps because I like the look better. But let’s face it, it is easier to add snaps than buttons and buttonholes too. These little metallic snaps are my favorite and come in many colors (I get them on Amazon). I would not recommend using plastic snaps (like the Kam diaper making ones) for this because the feel of plastic on the collarbone may be bothersome to kids.
I am all for easy mods and hacks to get the most out of patterns. I hope this blog encouraged you to try new options for your Driftwood shirt. If you are sewing the adult pattern, the Dockside Henley and Polo but would like to add a hood, I recommend using the North Star hood. There you go, two patterns, many possibilities!
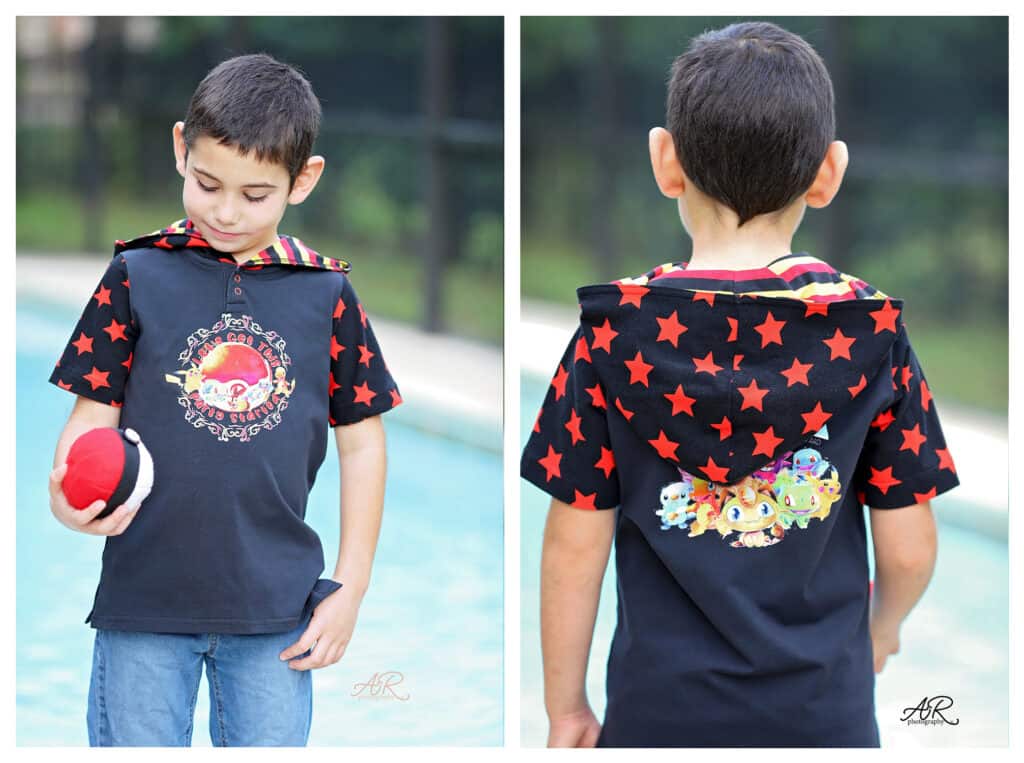
I can’t wait to see all your hooded Driftwood shirt! I will leave you with my kiddo’s directorial debut photo shoot. He was telling me exactly which pose he needs to do and which character has to join him. Don’t ask me the name…I have no idea. He was very adamant that this exact character is a MUST to accompany him while adventuring in his new Driftwood shirt.
Alex
Start Shopping for Kids
[carousel_slide id=’366612′]

