


Swayback adjustment
This article is all about how to do a swayback adjustment and is an installment in our Focus on Fit series. This adjustment is a common alteration – and once you see how to do it, you’ll be able to have an even better fit for your sewing project. Thanks to An for an excellent tutorial! Check out this link for even more fitting and sewing resources.
Hello dear fellow sewists! I’m Annick, An Ca, and I’m a new ambassador for Love Notions patterns. I am so proud to be joining this team with hugely inspiring women. Maybe you already know me from my blog, Flaxfield Sewing or from Instagram. If you like my post today, I’d be so honored if you would follow me.
Back to business now ????. Today it’s time for a new “Focus on Fit” with my blog post about a very common adjustment: the swayback adjustment. I am happy to help you throughout the entire process of this adjustment in such a way that it will also be a breeze for you after reading this post.
What is a Swayback?
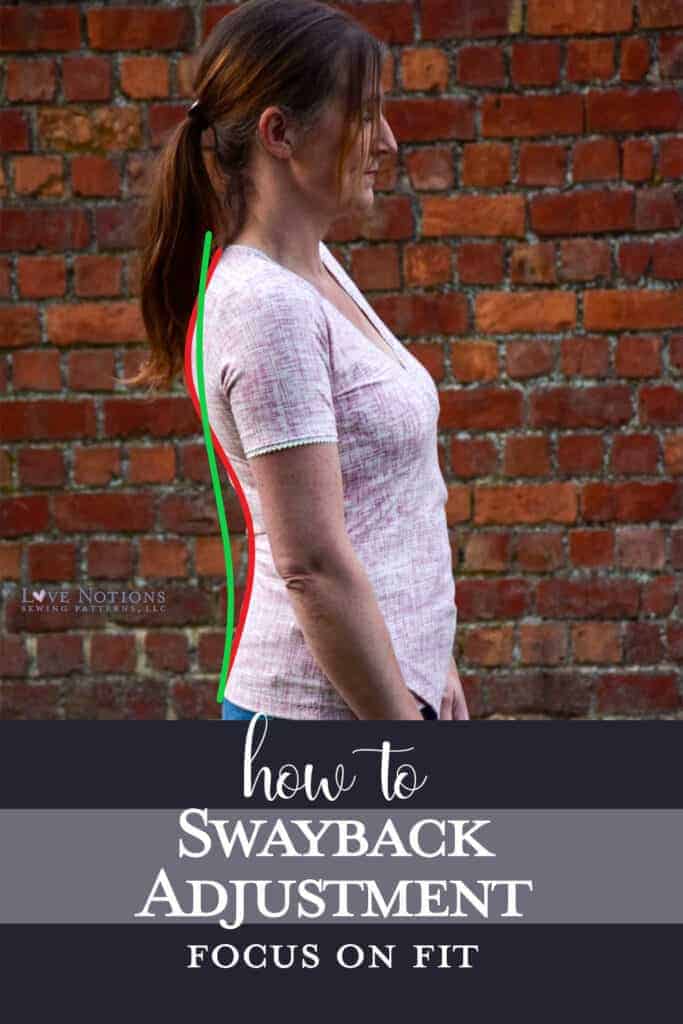
To start, I would like to explain to you what a swayback is by using my own back as a base.
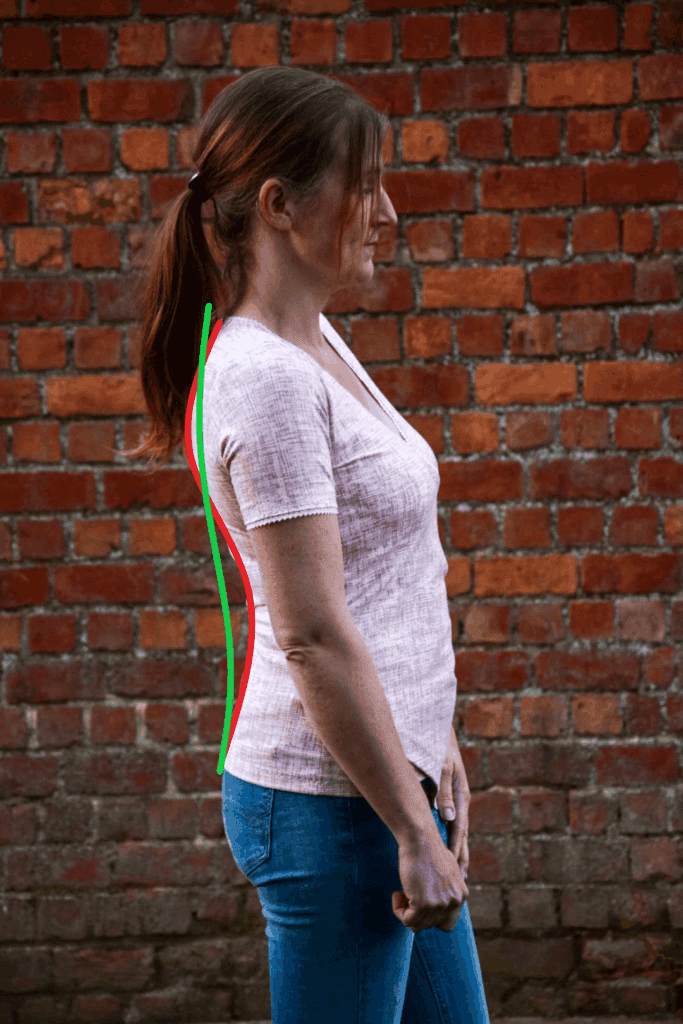
A “normal” back (or a back that patterns are typically designed for) bends a little at the neck, at the chest and at the waist (the green line). When you have a swayback the spine curves a lot more inward at the waist (red line).
What’s the consequence of this?
The vertical distance between your bust line and your hip line is shorter than usual in the middle of your back, the length of the side of your back remains unchanged. When you fit the garment you get a lot of horizontal wrinkles across the back waistline. The excess of the fabric, because of the shorter back, accumulates there.
How do we fix this?
You got this problem too? Don’t worry! The solution is actually quite simple: we shorten the back at the center back seam. I will show you how to do this with some simple steps based on the beautiful Willow Wrap Top pattern. (If you love this pattern as much as I do then this is your chance to buy it because it’s the Feature Friday pattern for this week!)
The nice thing about this adjustment is that, once you know how much length you need to put out of your center back, you can always adjust it to any pattern with a straight center back without making a muslin first.
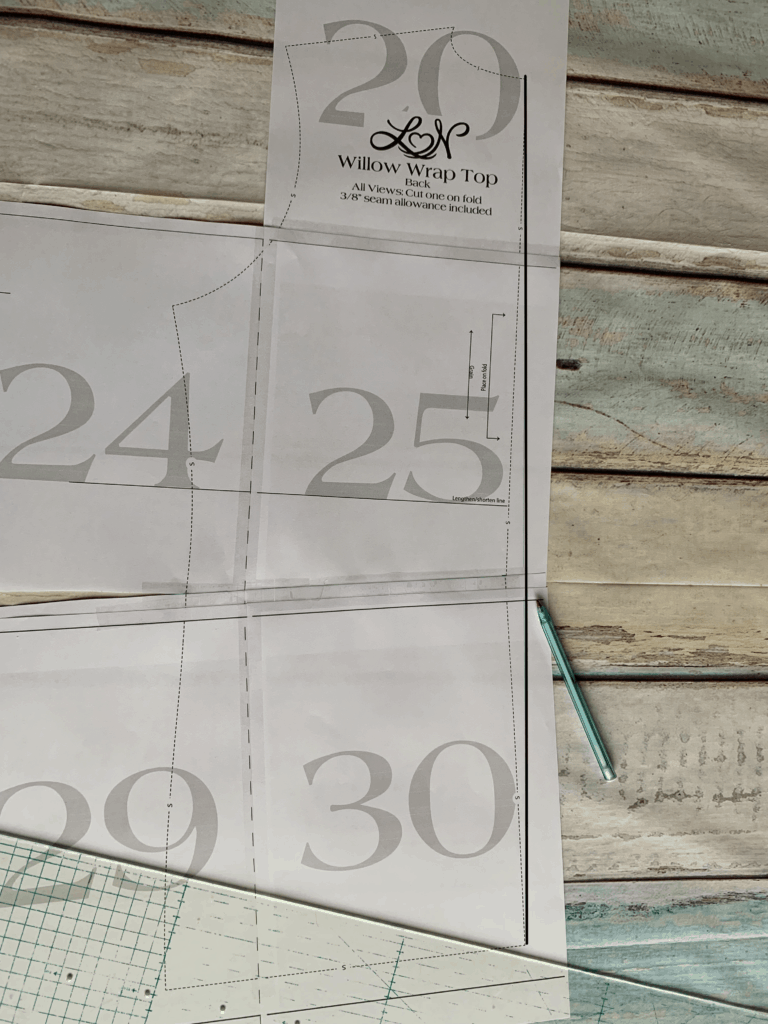
1. Measuring is knowing
When you want to do a swayback adjustment for the first time you need to start making a muslin. In my case, it’s a muslin from the Willow Wrap Top.
Put on your garment and pin out the excess fabric in the back. You start at the center back and gradually pin out to zero on the side seams.
Now measure how much you need to reduce in the middle. For me this is 2 cm or 3/4″ in total.
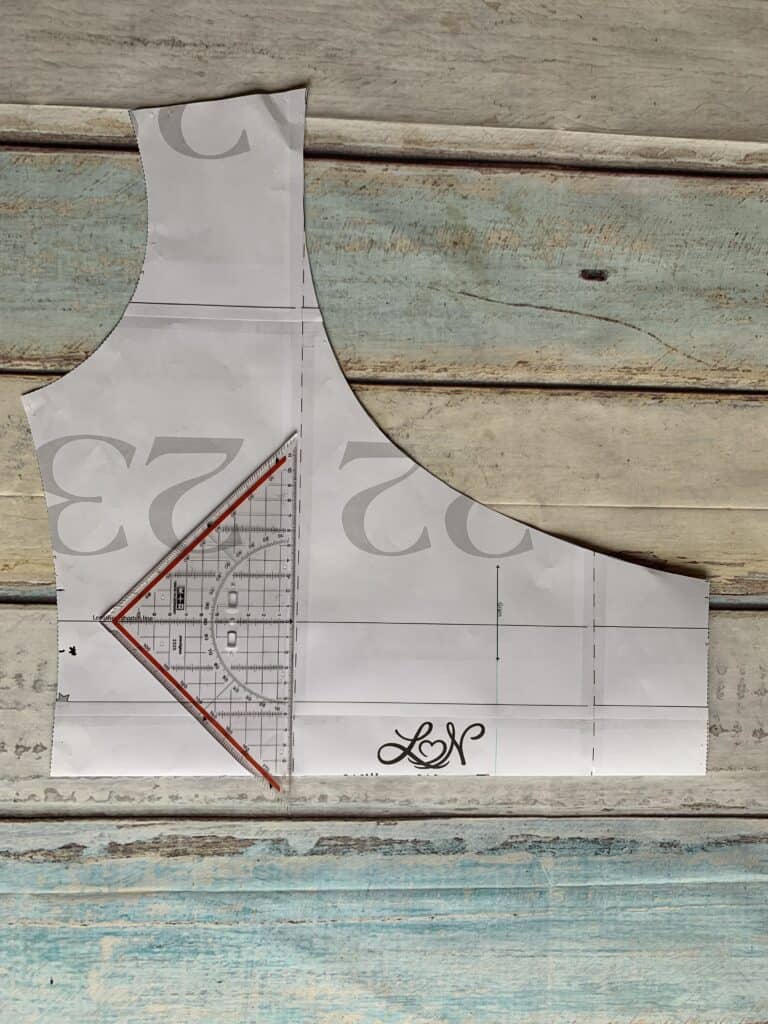
2. Determine your waistline on the back pattern piece
Then, draw a horizontal line here, perpendicular to the center back.
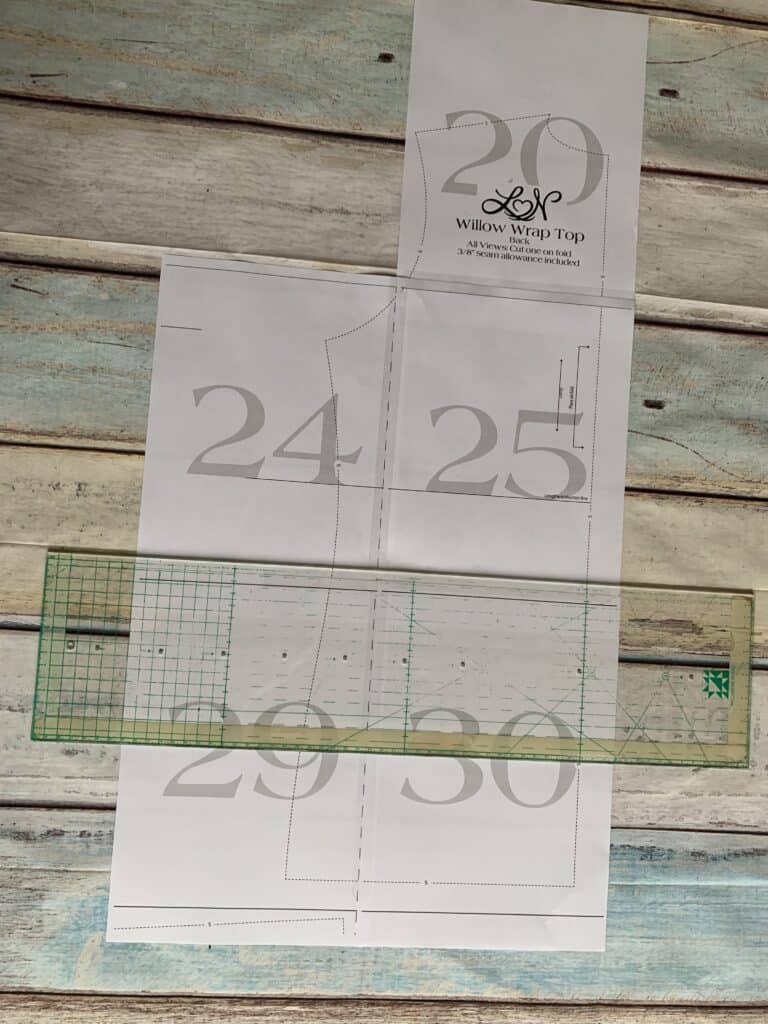
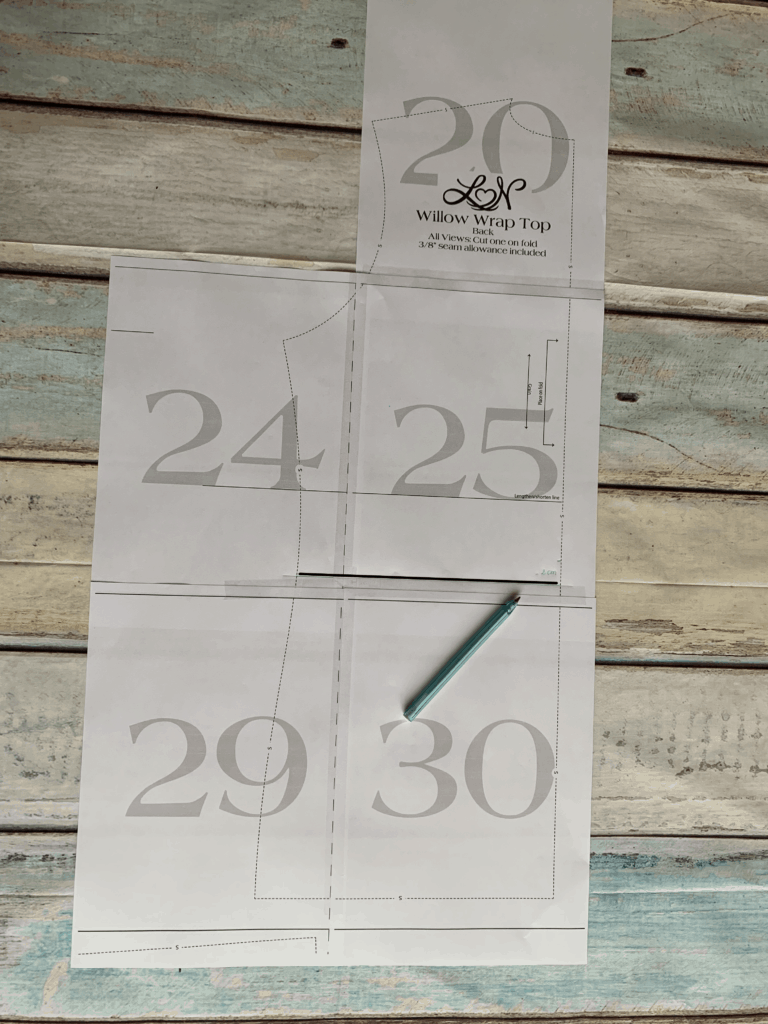
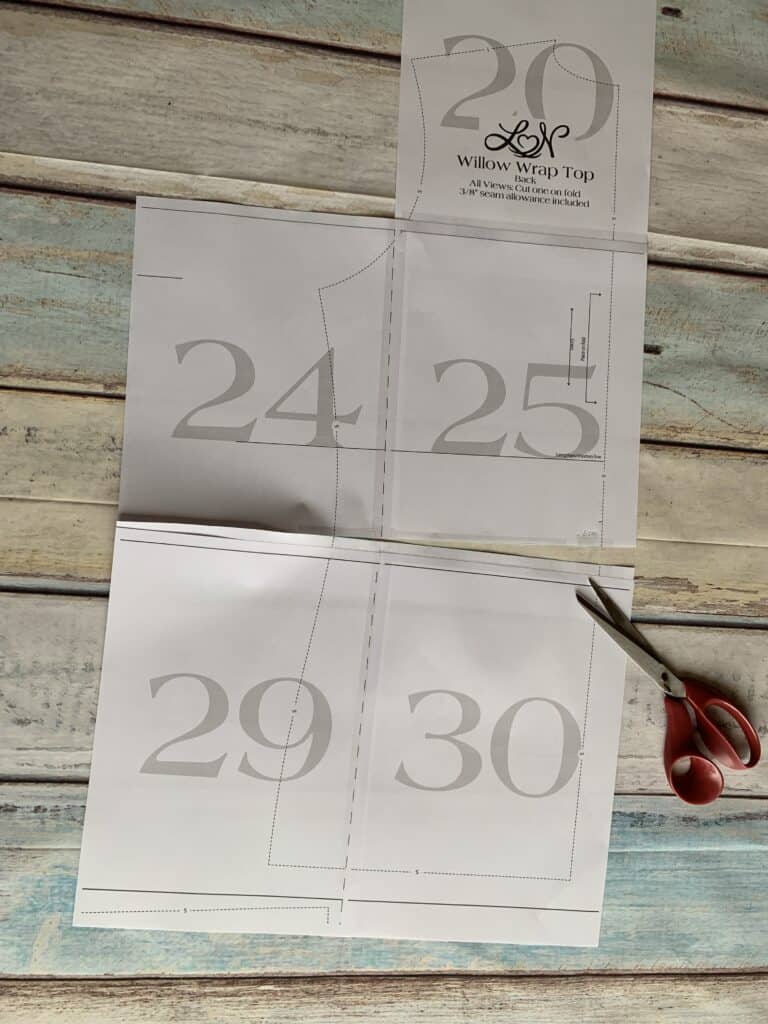
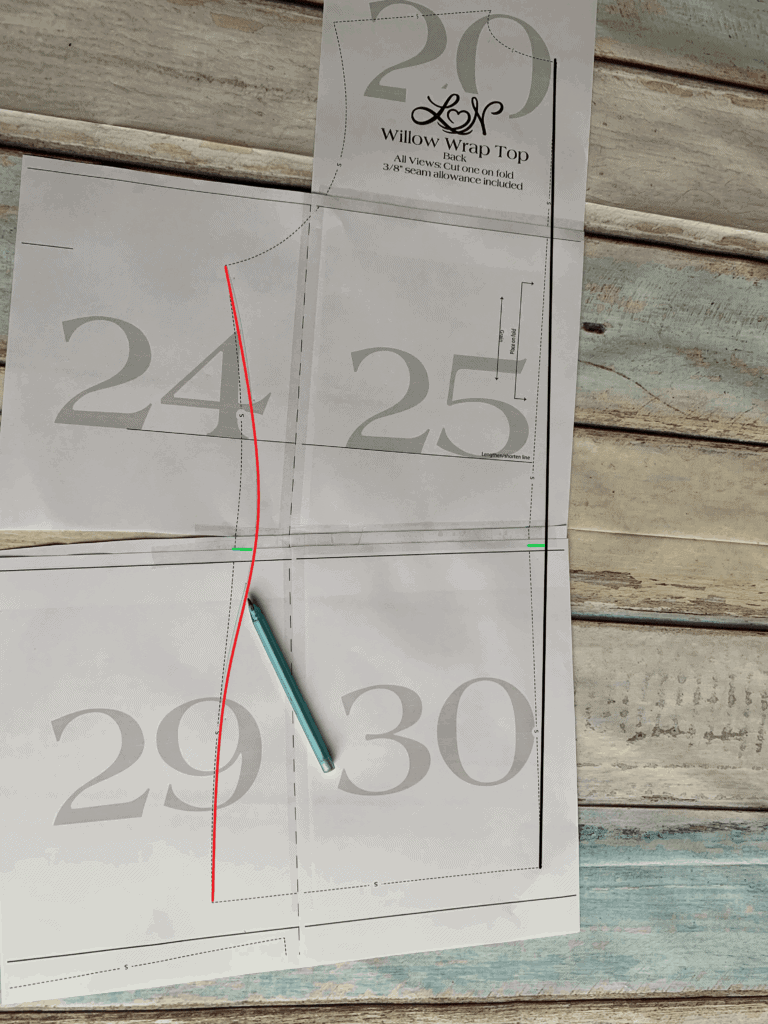
3. Cut this horizontal line.
Start cutting at the center back and leave a small piece attached at the side seam. Overlap the center back with the same amount as you need to shortened it (measured in step 1). Tape together.
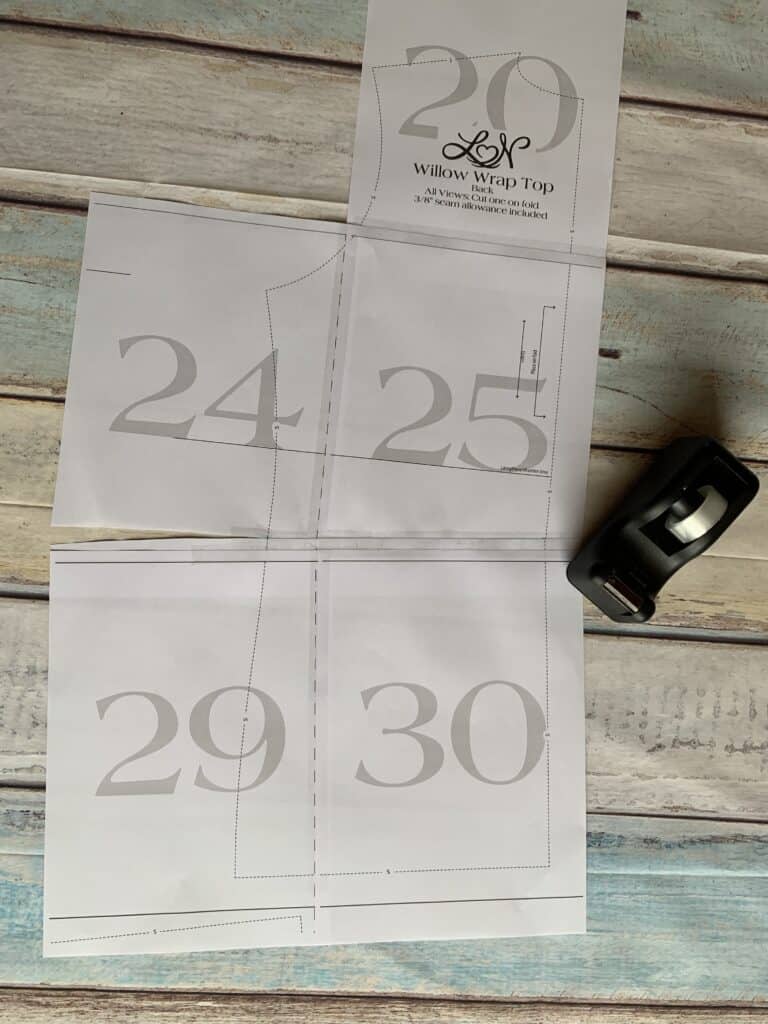
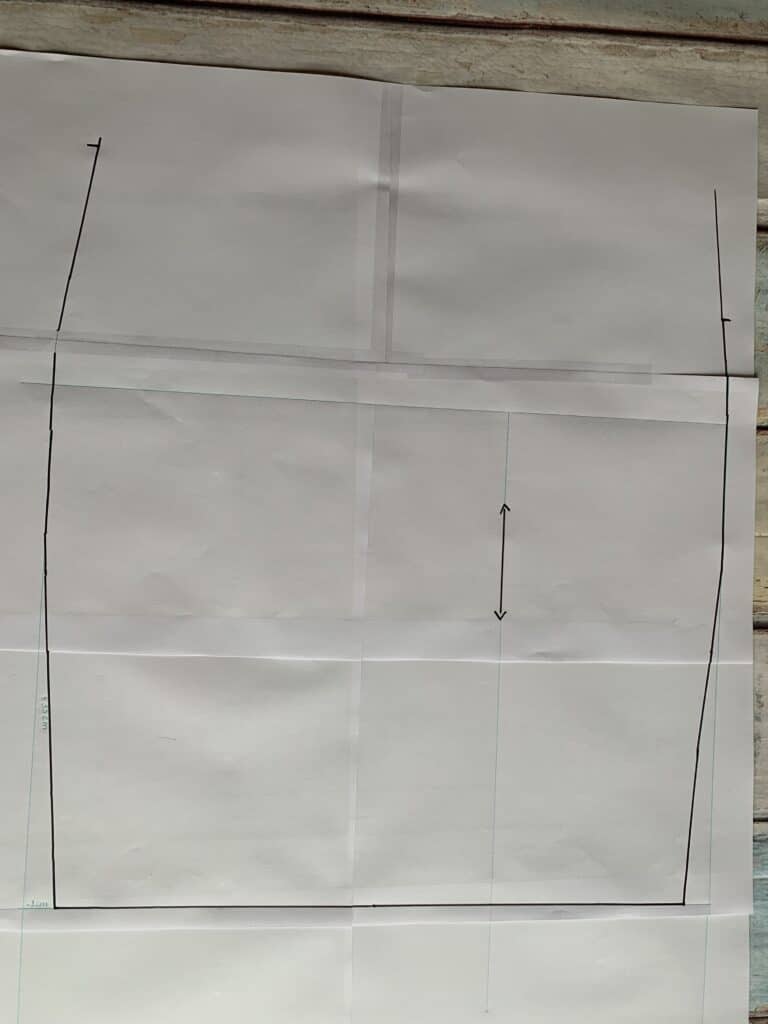
4. Draw a new straight Centre Back line (black line).
You can see that there is now a lot of waist circumference added. We’re going to delete this by redrawing the side seam and by taking away as much excess width from the side seam as you have added at the center back seam (red line).
It’s as simple as that! You have a new back pattern piece with a swayback adjustment. You can now sew your beautiful Willow top by following the normal instructions.
Doesn’t this look much better?


And I have a bonus for you …
Did you know that you can also use the Willow wrap top to sew a super cute dress?

And it’s so easy! Do you follow the steps?
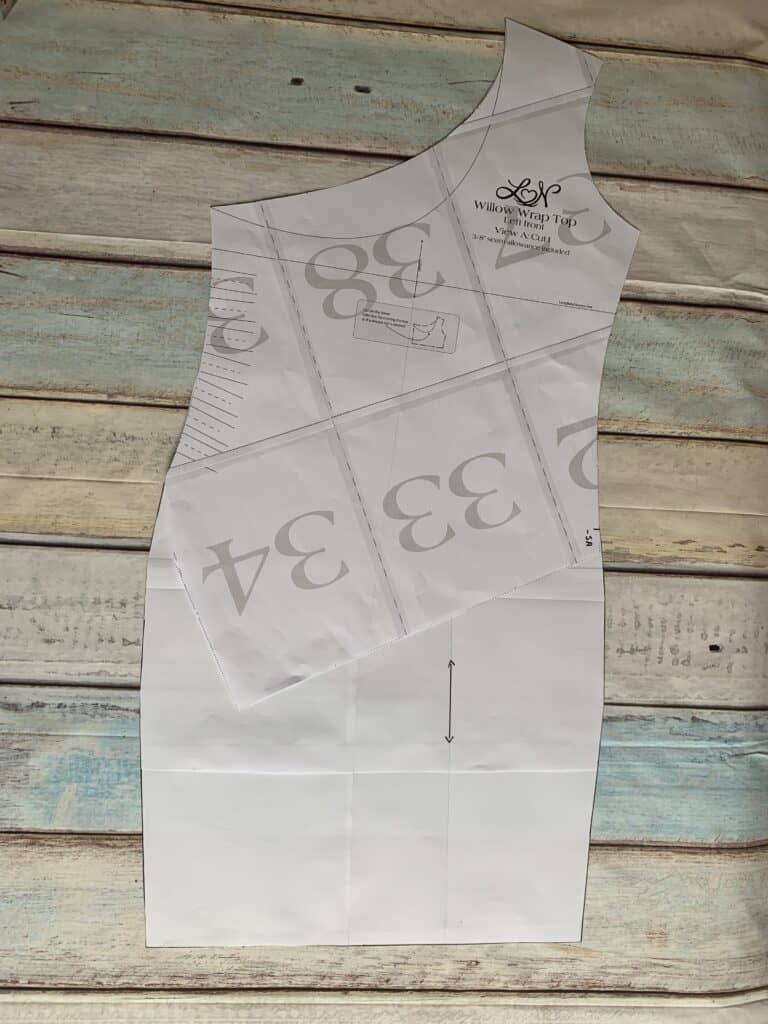
Left front:
- Tape together a few sheets of white paper.
- Take your right front.
- Take over the marking points on your white paper ( red circles).
- Draw the side seam from the markings all the way down and extend the side seams as long as you want them to be (I took 35 cm/14 inches) (green lines).
- Connect the bottom of your new side seams (blue line).
- Let the bottom of the green line come in slightly. Draw a new, lightly rounded, side seam from that point to the hip (black line).
- Take the left front. Take away the seam allowance on the right side and mark that point.
- Align the bottom of the gathered part of your front with the marking on the left side of your new skirt pattern. Align the right bottom part (without de seam allowance) with the right marking on your new skirt pattern. Tape together.
Your left front pattern piece is now done.
Right front:
- Take again your right front pattern piece. Because the underside is completely invisible under the left front, you can shorten the right front quite a bit. I’ve cut of this pattern piece 10 cm (4 inch) below the lengthen/shorten line.
Back
You have to extend the back piece as much as you did with the left front piece. Please note that if you want to do a swayback adjustment, you’ll have to do it after extending the back pattern piece!
Sewing the dress
You can follow all the steps of the instructions of the top to sew this dress. The only adjustment you need to make is that you have to hem the right front 2.5 cm (1 inch) before sewing it into the side seams.


I hope this fit adjustment and this little hack on the Willow wrap top pattern were useful.
At least I was glad I could share this information with you. Be sure to download the Willow wrap top today because it’s the Feature Friday pattern for this week!
See you soon!
Xxx
Annick
Save this to your sewing Pinterest board
More Sewing Patterns

