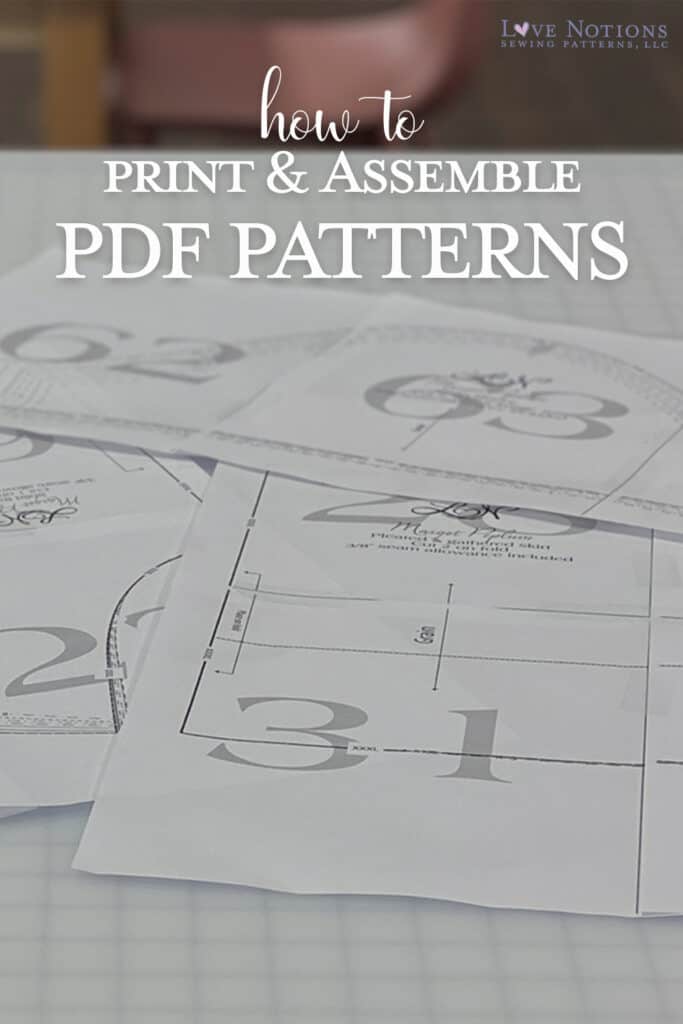
This post is all about how to print and assemble pdf patterns from Love Notions. One of the most common questions we get at Love Notions Sewing Patterns is something along the lines of: “Help! I’ve bought a digital pattern. Now what?!” If you are a newbie to sewing, or just a newbie to sewing with PDF patterns, this post will demystify the downloading and assembly process and help you get to the fun part — the sewing!
If you prefer a video, these instructions can be found on our youtube account here:
First, let’s examine the differences between a Love Notions PDF sewing pattern and a regular pre-printed sewing pattern.
Love Notions Digital PDF Patterns
- Instant download at home
- Print or project from your device
- Files Never Expire
- Re-printable (use it again and again!)
- Layers
- Print only what you want
- Trimless assembly for US Letter paper size
- Variety of formats: US Letter, A4, A0 copy shop, projector
- Requires assembly of the pattern pieces with glue or tape
- Free access to updates and add-ons
Pre-Printed, Tissue Paper Patterns
- Not instant
- One copy
- All sizes and options are together
- Usually on fragile tissue paper
- No assembly required
- Once cut, the other sizes and options are typically unusable
How do I DOWNLOAD a PDF Sewing Pattern from Love Notions on my computer?
- Purchase a pretty new pattern. BTW, we are loving Margot Peplum right now — it’s a quick sew and so fun and flirty with the options for princess seams and skirt styles and BONUS it was just updated with sizing XS-5X! (Remember that updates and add-ons are always free from Love Notions — if you’ve previously purchased the pattern you can access those updates by re-downloading from your pattern list on your LN account.)
- Download the “print-at-home” pattern from your Love Notions account. When you click on the download button, several options appear. Choose the “print-at-home” version if you are planning to print from your regular home printer. This option includes both the tutorial and the individual pattern pieces. The other options are for download A0 (large format) and a projector file. For this post, we are just covering how to print at home but we’ll have another post with the other printing options discussed soon!
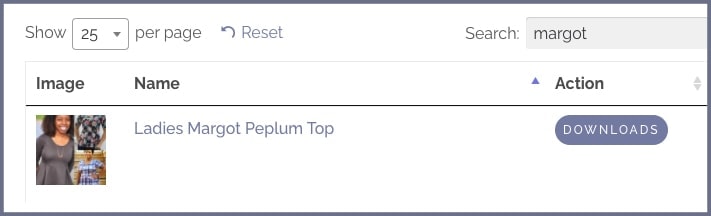
Find your pattern in your Love Notions Account. 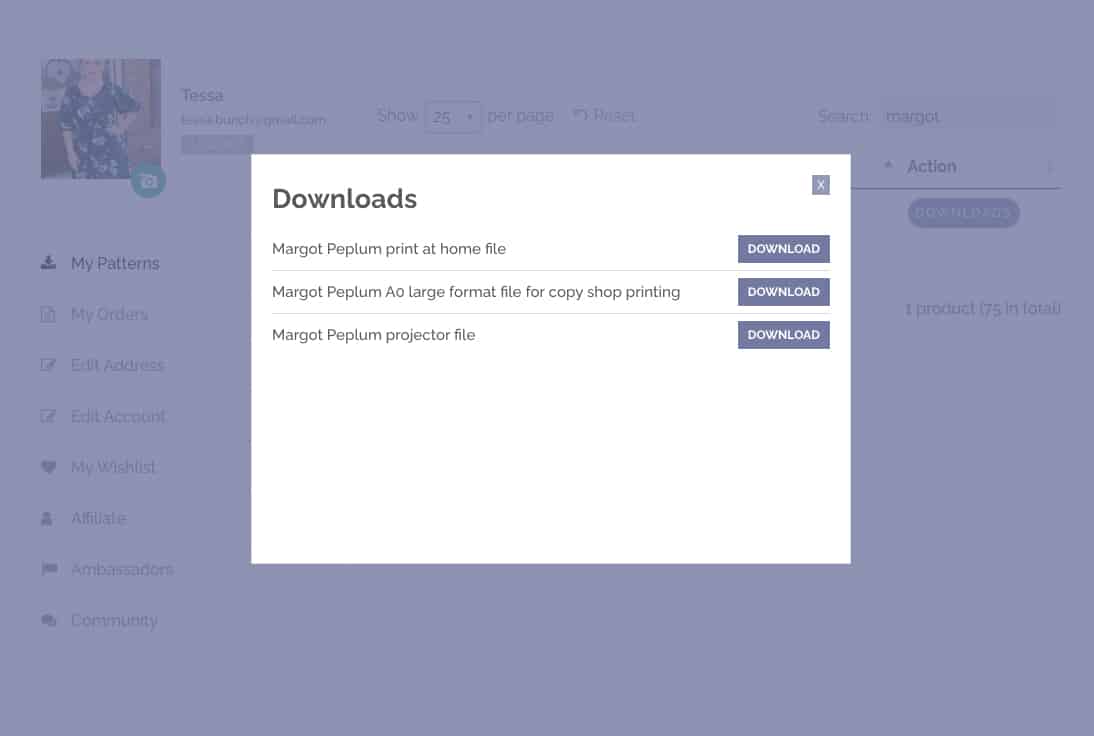
Download the print-at-home version. This contains both the tutorial and the home printer pattern file. 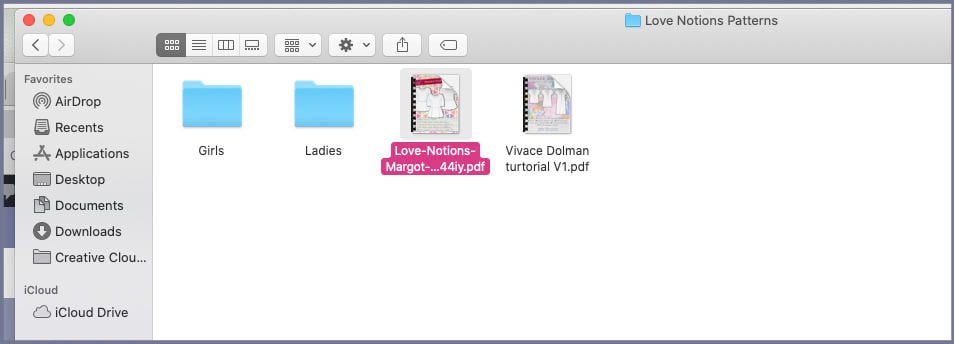
Save the pattern to your computer.
How do I print a PDF Sewing Pattern from Love Notions from my computer?
- THIS NEXT PART IS CRUCIAL Next, you need to use a special program to print your pattern piece accurately. If you just print from the downloads on your computer desktop, chances are things won’t print correctly. We recommend using the free Adobe Acrobat Reader program. Click here and download the program to your computer. You’ll need to use this program every time you want to print your pattern pieces.
- Open your downloaded pattern in the Adobe Reader program on your computer.
- Select your size layer by clicking the icon that looks like three pieces of paper on the left of the screen. You can choose to keep any size layers you prefer which is helpful if you plan to blend sizes. Turn the size layers off and on by clicking the little eyeball icon.
- Reference the print chart on page 3 or 4 of the pattern so you only print exactly the pattern options you want — this handy page contains all the options, a pattern piece layout guide, and a listing of the pages you need to print for each option. Some patterns have lots of pages but thankfully you get to print just the pages you need for your preferred options. Also this page is helpful because I like to zoom in on the print layout guide to double check my assembly later on.
- Print! Make sure you select “Actual Size” in the set up options — you never want to scale a printed pattern because it will drastically change the precisely measured pattern pieces. Also, make sure you have deactivated double-sided printing! You’ll end up with a stack of papers that you’ll then need to tape together according to the guidelines printed on the pages.
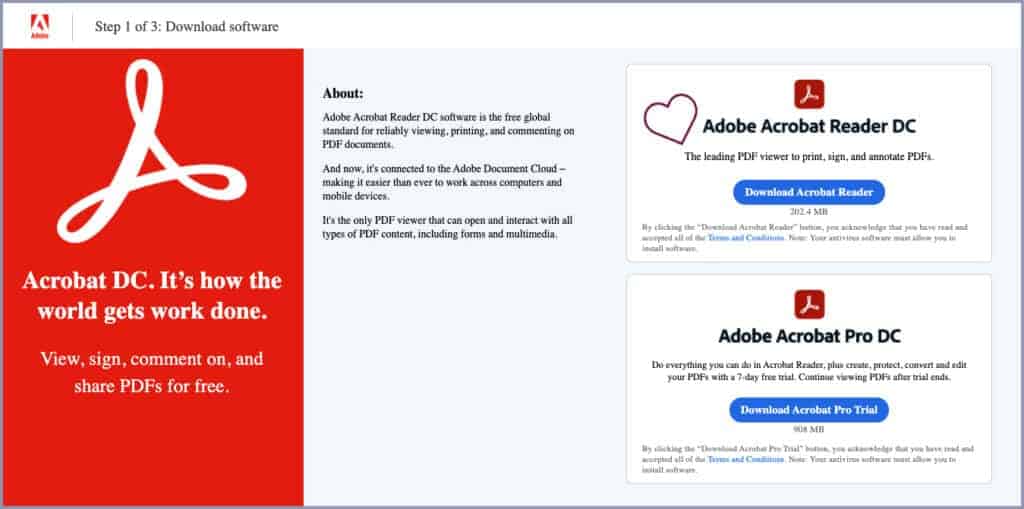
Download the free Adobe Acrobat Reader program. This is the program you need to use to view and print your pattern pieces. 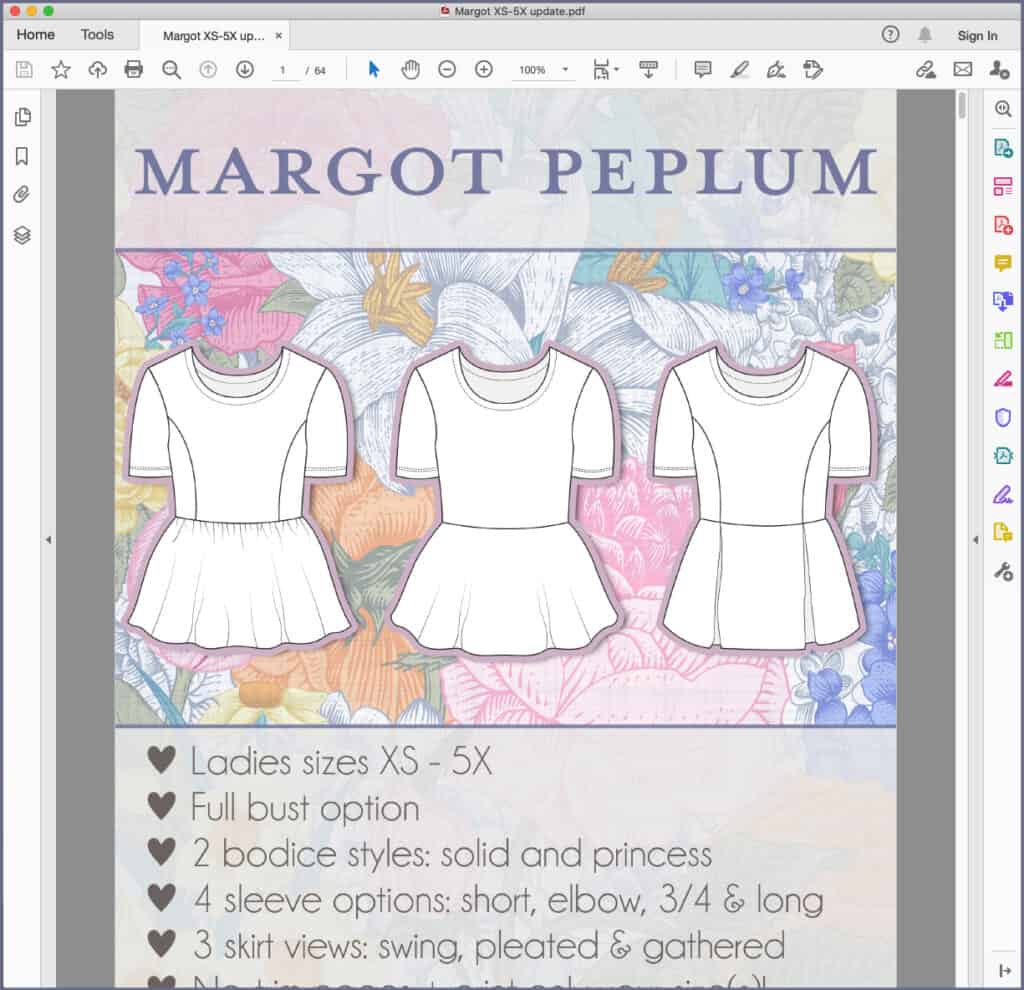
Open the pattern in Adobe Acrobat Reader. 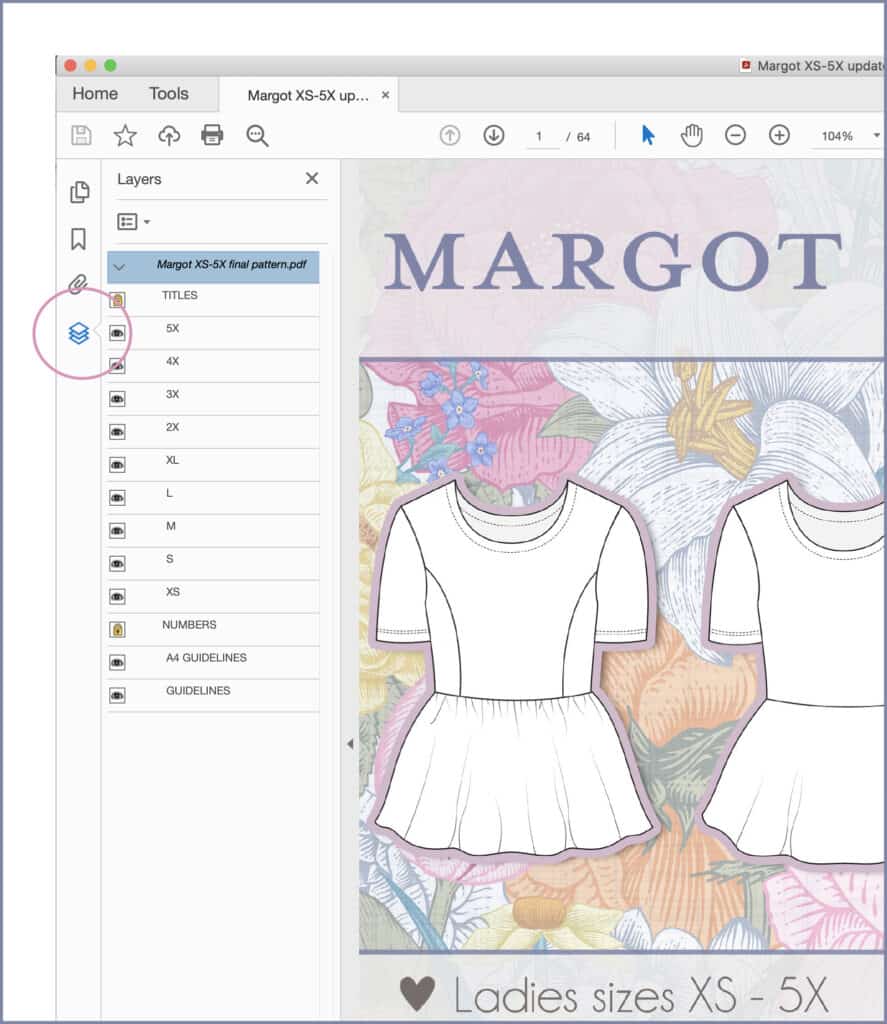
Click on the icon that looks like three pieces of paper to see the layers available. 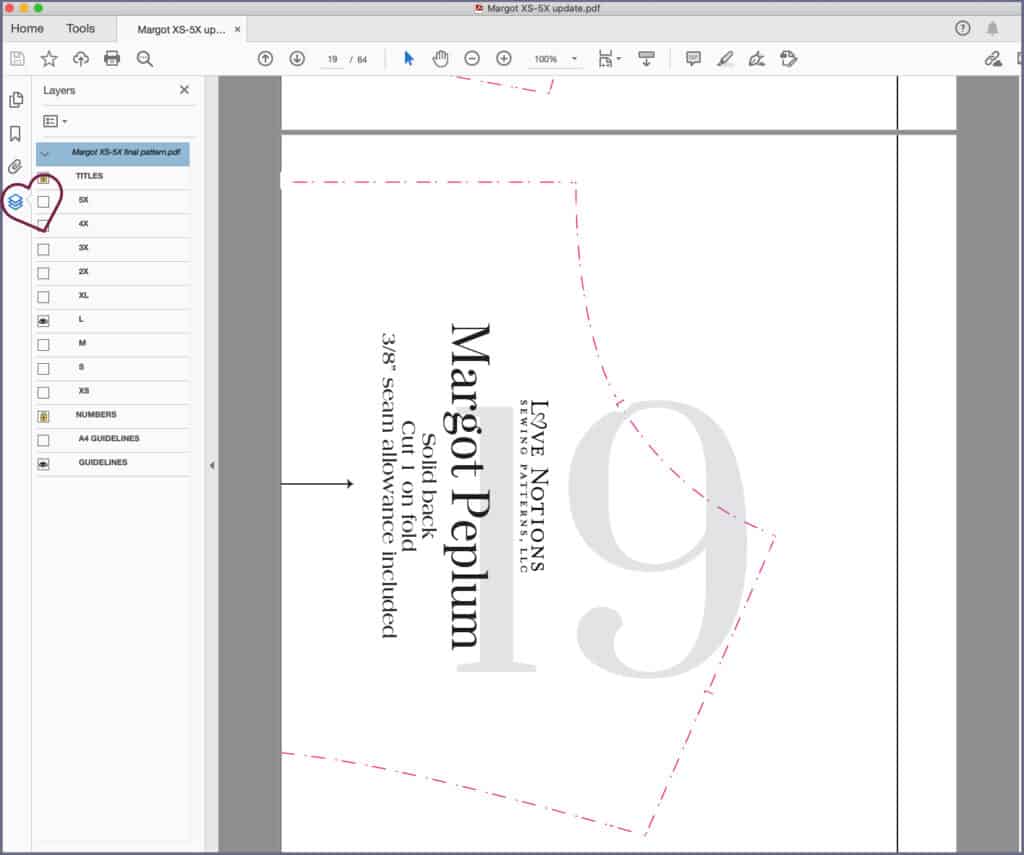
Use the layers function to select only the sizes you need. Make sure to keep on the guidelines! 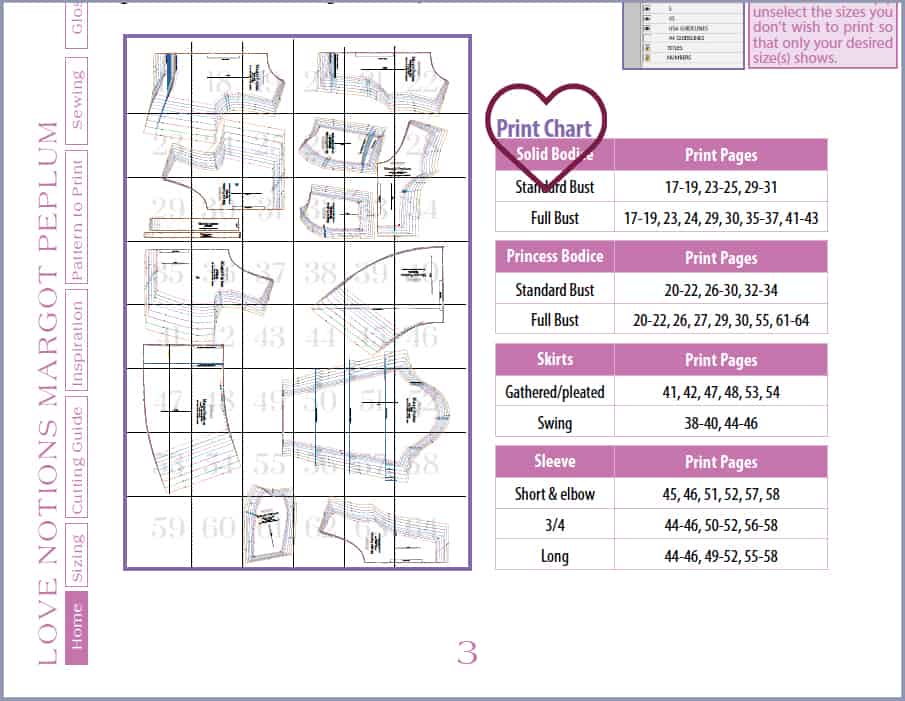
Look at the print chart to decide which options and views you want to print. This page also has the layout guide which shows how each page is arranged when you are assembling. 
Print the pages you need. Be sure to select “actual size” and turn off the double-sided printing feature.
How do I Assemble PDF Patterns from Love Notions?
Now comes the fun part! At this point you’ve successfully printed your PDF patterns, but they need to be attached together to make the full pattern pieces that you can cut out and use with your fabric. I highly suggest watching this pattern assembly video for those who like to visualize — but here is the step-by-step process for those who prefer written directions.
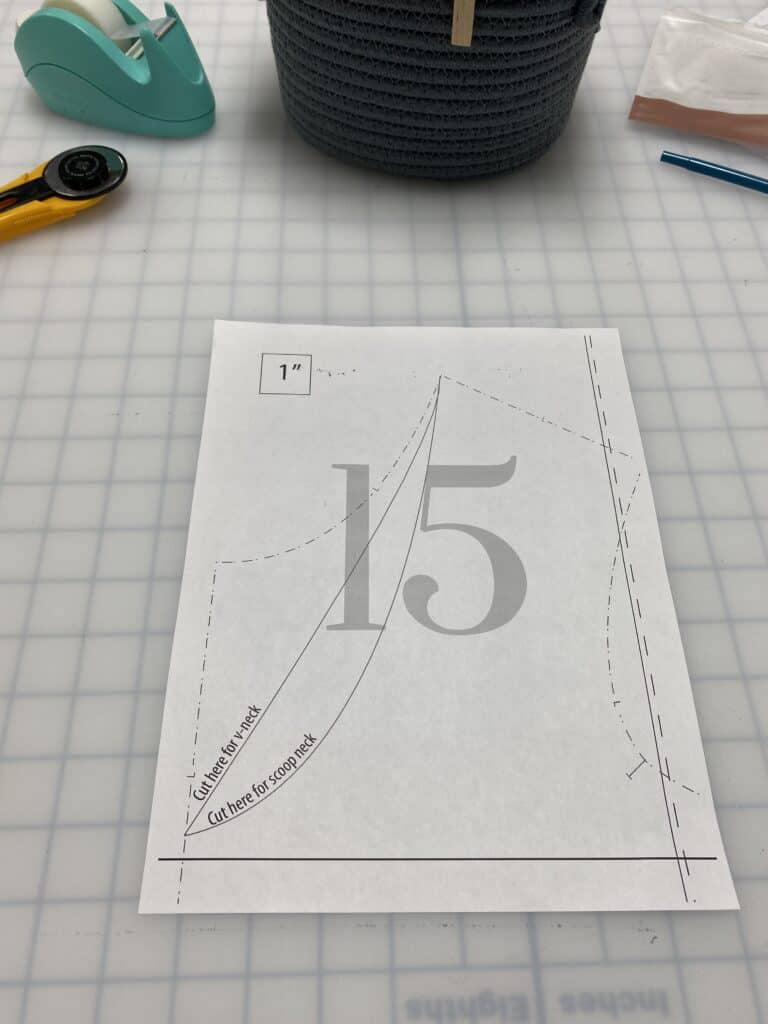
First, here is the general anatomy of a PDF pattern page.
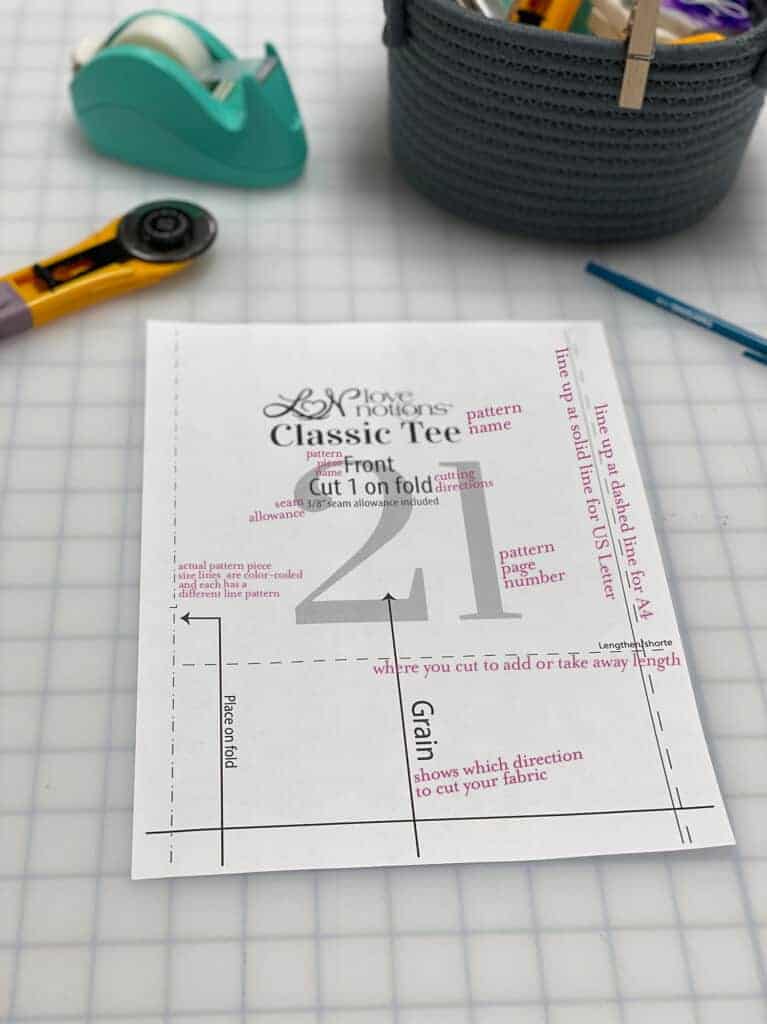
Place the first pattern piece down on a wide open space. You’ll see that the page has the pattern piece lines, label, pattern markings, etc. Each page also has a number in the center that is kind of faded that indicates which page of the pattern it is. Remember, the print chart and pattern layout guide are super helpful for understanding which pattern page goes where.
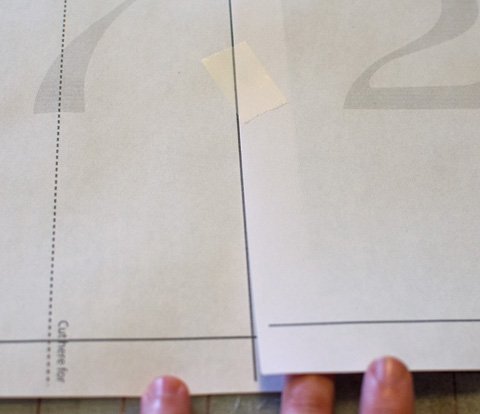
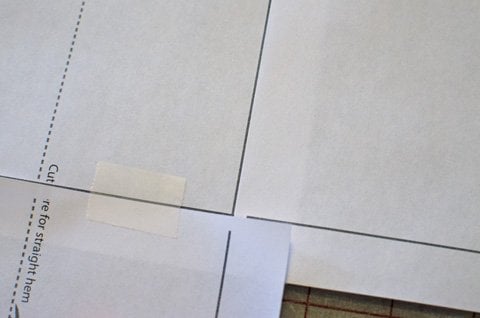
Now that we know what we are looking at, we can assemble. Grab some tape (we prefer tape, but others like gluesticks). Lay out the first printed pattern piece (usually number 17 or so) and then lay the next page on top, butting the left edge up to the guideline but not covering the guideline. Continue on for that row. For the second row, lay the first page in the row (for the Classic Tee, it’s page 23 as you can see in the chart above) on top of the bottom of that very first page, again right up to but not over the line. Continue on that row as you did row 1. You will notice there is a small piece of line that won’t print due to the printer margins. Just cut like normal and fill in the line if you wish.
Wanna check your print accuracy?
Every pattern has a 1 inch square that you can measure to check that your pattern printed at the correct scale. This “test square” is usually on one of the first pattern pages of the pattern. If you have had trouble with getting accurately printed patterns before, try printing just the page that has the test square first before printing the rest of the pattern. Then you’ll know if you are on the right track. 🙂
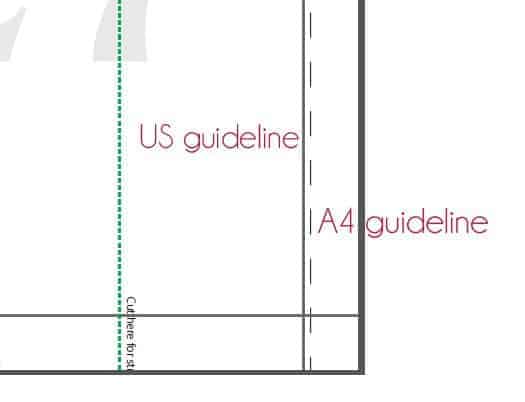
How do I Assemble A4 PDF Pattern Pages?
Love Notions patterns can be printed and assembled with A4 paper too! However, there is a small change in the way they are assembled versus the US Letter size. First of all, A4 printing paper is almost the same size as US Letter — A4 is just slightly taller and US letter is slightly wider.
When printing layers and assembling, instead of butting the pages up to the solid vertical lines, you’ll need to make sure you use the A4 guidelines which are the dashed lines that go up the height of the page. Another key difference with A4 paper is a solid line prints 1/4″ from the top of A4 paper. You can either trim off this small section or just overlap as usual. It is easier to see the pattern lines if you do trim that section.
Now you’re ready to get sewing!
Your pattern is now assembled and ready to cut out. If you have any questions or need further help we are only an email away. Feel free to post in the Facebook group for help or email [email protected].
Save this to Pinterest