If you are like me, you may find yourself falling between sizes in many patterns. For relaxed fit patterns, sizing up or down is a pretty simple solution to that issue. But when sewing a more fitted garment such as the Sybil Pencil Skirt, I found that simply grading between sizes did not give me the best fit. My waist measurement put me between medium and large and my hips fell squarely in the medium.
On one of my first attempts at sewing this skirt, I sized up due to my waist.
What I achieved was not a bad fit, but it wasn’t the fitted, pencil style skirt I wanted. The skirt hung more straight and I had gaping at the waist (see below). After studying the fit of the garment, I discovered that my waist measurement was actually affected by my belly. So, I went into a deep dive on how to make a full belly adjustment on a skirt without a dart and I am happy to share with you what I found!

The Fitting Issue:
When I first sewed Sybil Skirt, I sized up due to my waist measurement, but didn’t get the fitted pencil skirt style because the skirt hung more straight and I had gaping at the waist. I realized my waist measurement was affected by my belly and that threw off the intended fit. Turns out, I need a full belly adjustment and didn’t need to size up .Making a full belly adjustment is the same concept as making a full bust adjustment. Just like at the bust, I really only needed to make an adjustment to give me more room at the front of the skirt. So, just like an FBA, I used the slash and spread method.
1. Prep your pieces
- Since the Sybil Pencil Skirt uses the same pattern piece for the front and the back, I printed two pattern pieces because I did not want to make the same adjustment on the back piece.
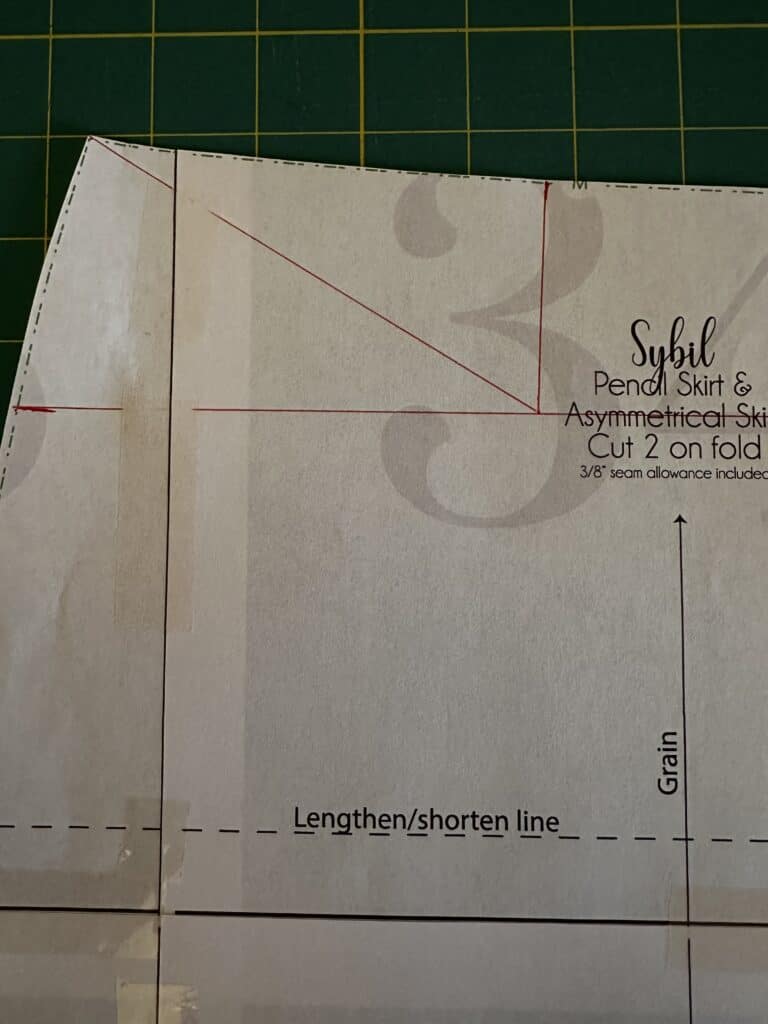
- Using one of the pattern pieces, I held the pattern piece against my body accounting for the waistband (which does not have a pattern piece) and measured down to the fullest part of my belly. For me, that was 2 inches down from the top of the front pattern piece. Next, I drew a horizontal line at the 2 inch point across the pattern piece.
- Since the Sybil does not have a dart at the waistline, I drew a vertical line from the center of the waist (which on my pattern piece was at 4.5 inches) to that horizontal line I drew in the previous step.
- Then to be able to pivot these pieces in the next step, I needed a diagonal line from the side waist in to the point at which the two lines crossed.
Off topic for a minute, but I really need to show this blog to my Geometry students so I can show them all the Geometry terms I am using in real life!!


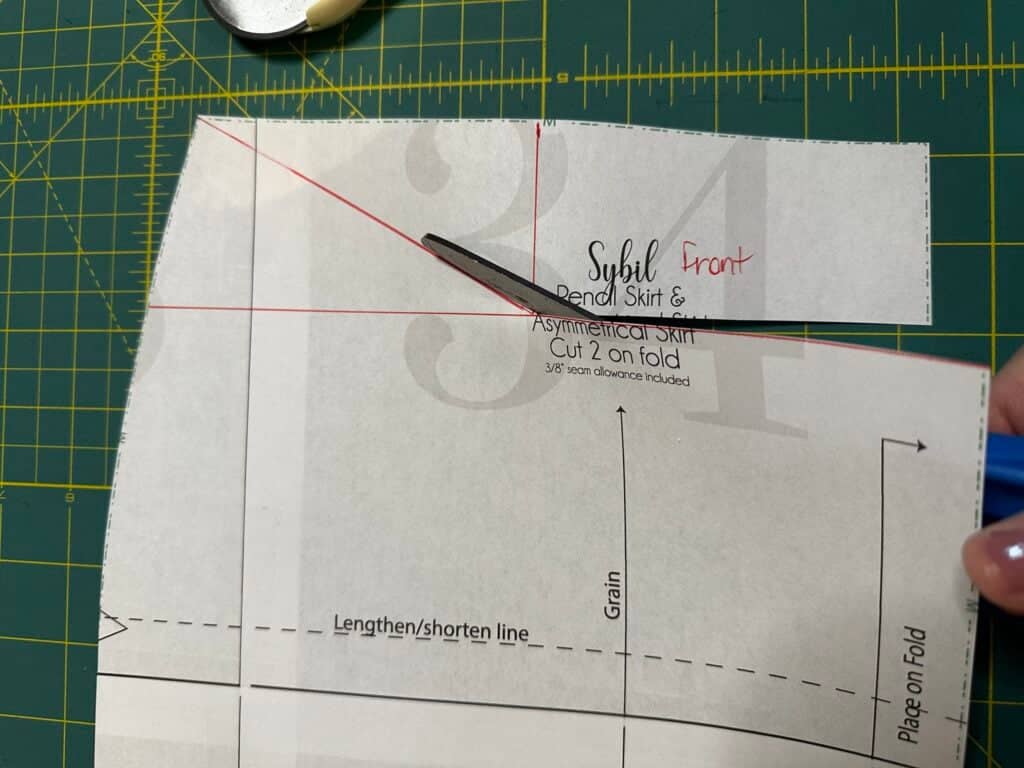
2. Cut your pieces
- Now, working from the center front, cut at the horizontal line, pivoting at the diagonal line, to within ⅛ inch of the side.
- Working from the vertical line you drew in, do the same…cut down to within ⅛ of the pattern piece. You should now be able to stretch the top of the pattern.
- You’ll want to tape the rest of the pattern piece to another larger sheet of paper (I use sheets from my error pile and just tape them together) to anchor it at this point.


3. Add extra room
Here is where a bit of guessing comes into play and why it is important to make a toile using fabric remnants when making fitting adjustments.
- I wasn’t sure how much extra room I needed so I started with ½ an inch. If you find this is not enough or too much, you can adjust on your next garment.
- Above the anchored pattern piece, I drew another line ½ above the cut I made on my larger sheet of paper then stretched my skirt top to line up horizontally on that line.
- After taping that piece down, you will need to draw a new center front line.
- Make note of how much your new center front is from the original and add that same amount to you waistband measurement. Then cut out your new skirt front piece.
Then, you are done!


This method may take a bit of trial and error but achieving a preferred and flattering fit is so worth it!
Happy Sewing!
Before and After Full Belly Adjustment

Add this post to your sewing Pinterest Board