


How to adjust a Cowl Neckline to change drape depth featuring the Chorus Top and Dress

Hi everyone!
Livia here.
I’m super excited to be back on the LN blog with another how-to post.
Playing around with patterns is one of my all-time favorite things to do, especially when the pattern is already amazing to begin with. For me, it’s all about expanding the possibilities and finding new ways to reuse a favorite again and again! 😄
Today we’ll be working with Chorus, and this one is extra special.
Chorus was Love Notions’ very first community-designed pattern.
Every design element was chosen by the amazing members of the Love Notions Pattern Support Group. It was such a fun experiment, and the result? A stunning pattern with a beautifully draped neckline.
Cowl necklines are a timeless, fluid way to add elegance to any garment, and Tami truly knocked it out of the park with this one. The drape is gorgeous, and the variety of sleeve, length, and neckline options makes it super easy to customize to your style.
If you don’t have the pattern yet, I have great news for you: Chorus is this week’s Feature Friday pattern and is on sale today!
And as fantastic as the pattern already is, that doesn’t mean the fun needs to stop there! 😉
In this post, I’ll show you how to modify the depth of the cowl neckline using the slash and spread method—so you can dial the drama up (or down!) on your top or dress.
And if you want a quick-and-easy shortcut method, stick around until the end—I’ll show you that too. 😉


What you’ll need:
- Chorus front bodice pattern
- Extra paper
- Tape
- Scissors
- Pen/pencil/marker
- Ruler(s)
A few tips before we start:
- This is a bit of a trial-and-error method, fabric choice can really affect how far the cowl will drape. I highly recommend making a muslin or at least cutting the front bodice piece first and checking the drape against your body.
- I eyeballed the depth I wanted by comparing the original pattern pieces and aiming for something “between shallow and deep,” but just “a bit lower than the deep option.”
- Also, note: the photos here were taken using a scaled-down pattern for demo purposes.
Step 1: Trace the Front Pattern Piece
Start by tracing the Chorus front bodice piece onto a new sheet of paper (or print an extra one). This keeps your original pattern intact and gives you room to work freely.
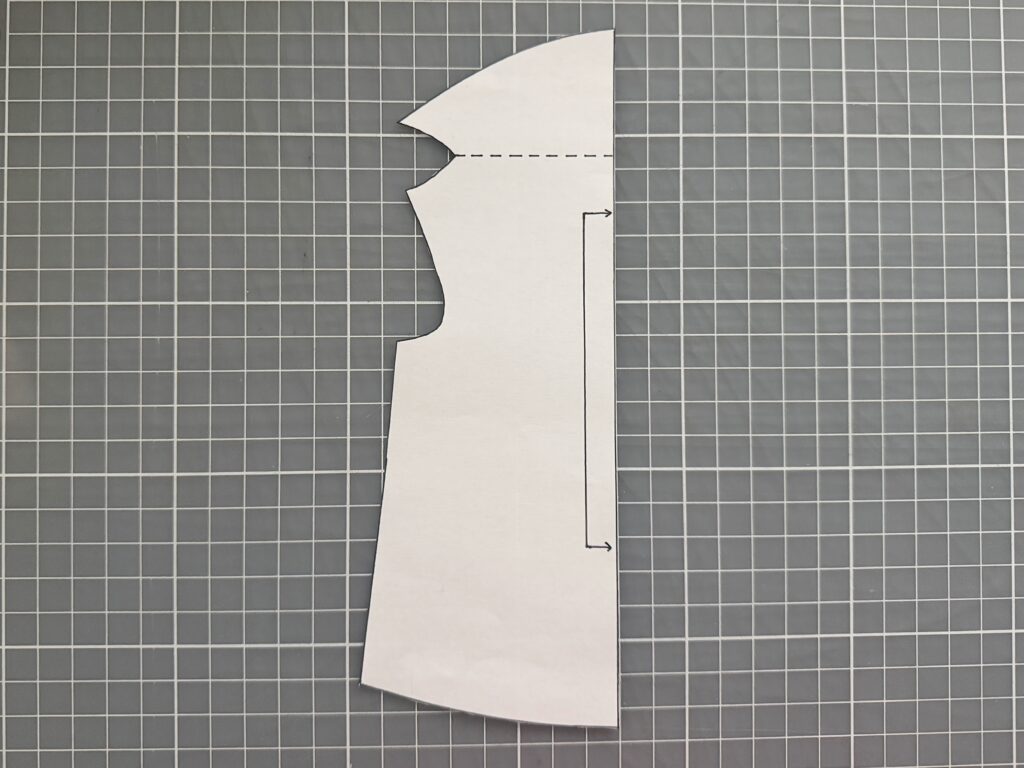
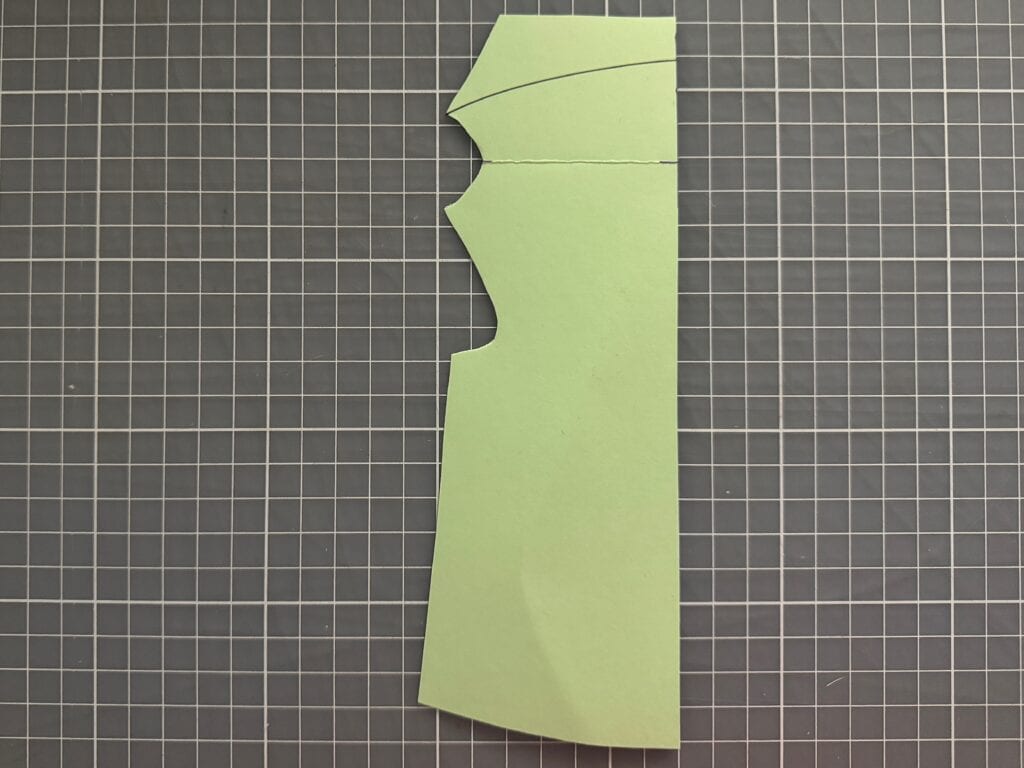
Step 2: Identify the Cowl Fold Line
Locate the cowl fold line—it’s perpendicular to the grainline and indicates where the fabric folds to create the cowl. Draw this line across the pattern and cut along it. The top portion can be discarded.

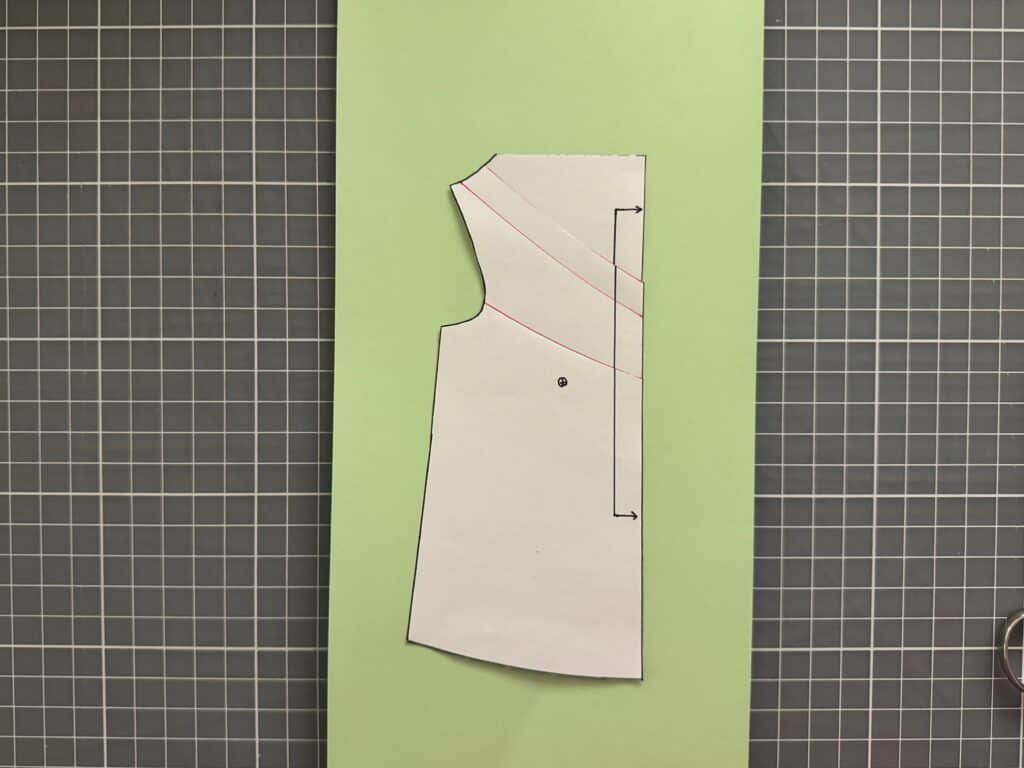
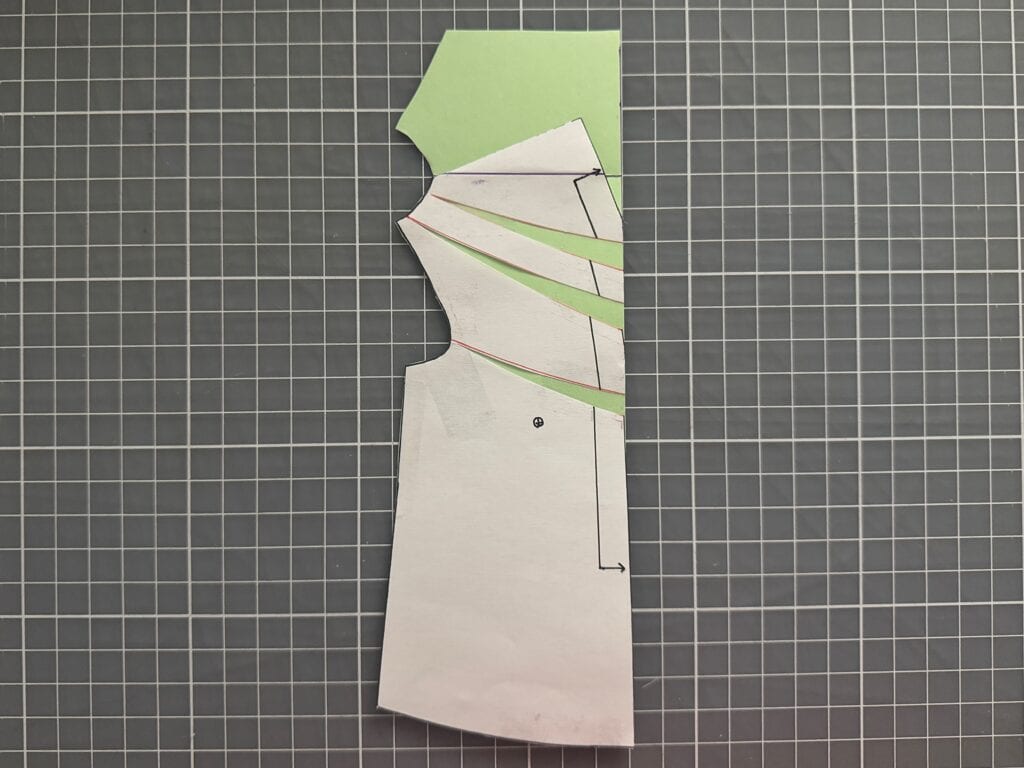
Step 3: Draw Your Slash Lines
Draw 2–3 slash lines from the center front to the shoulder seam, and one from the center front to the lower portion of the armscye.
These don’t have to be exact! I personally like to use curved lines. 😊

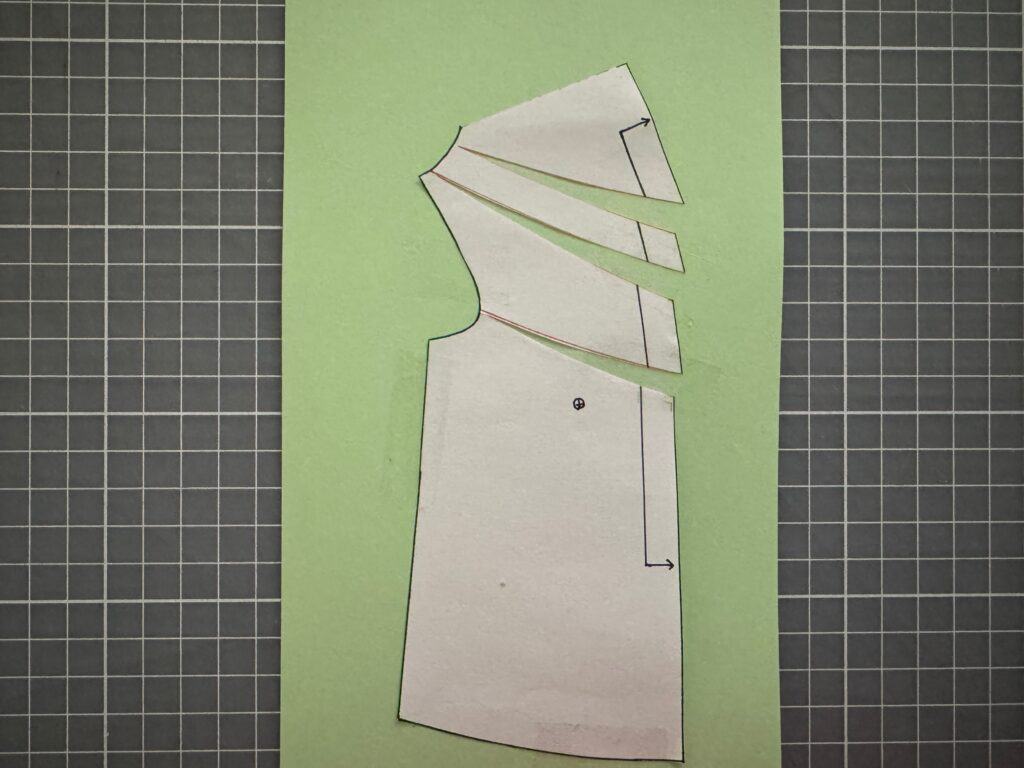
Step 4: Cut—Leaving Hinges
Cut along your slash lines, leaving a small hinge at the ends so the pieces stay connected and can pivot.
Place the pattern on a larger sheet of paper—this will be your new base.
Make sure to position it lower on the paper, leaving room at the top to recreate the built-in facing later.

Step 5: Create the New Neckline
Time for the fun part! 😄
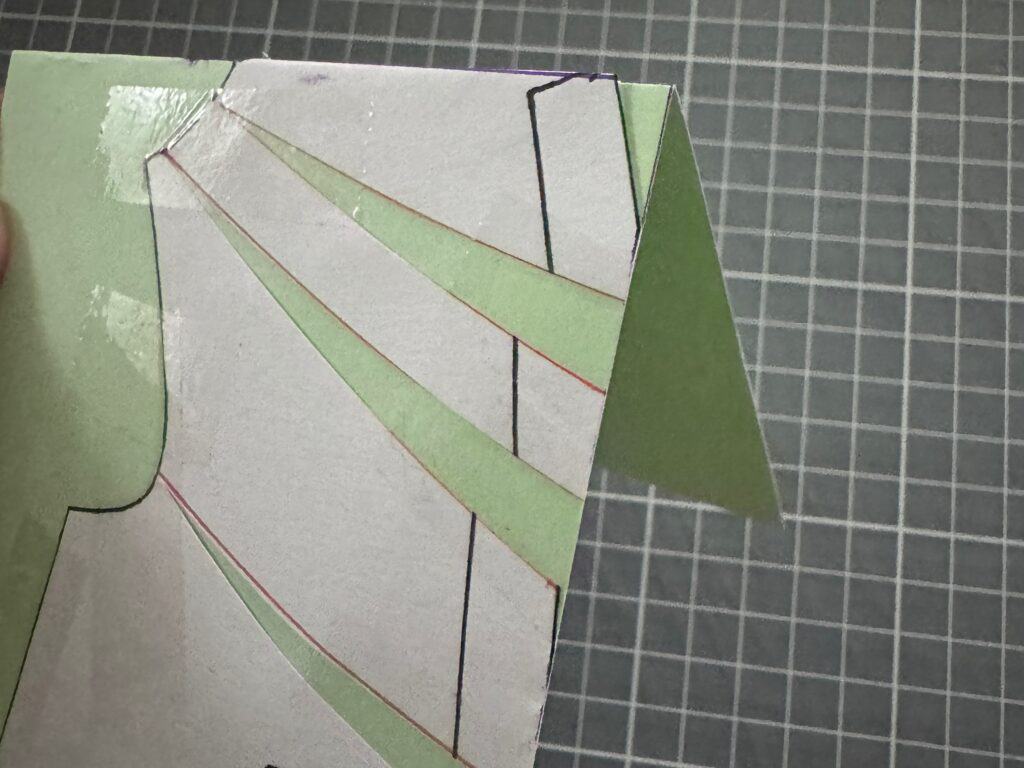
Tape the base of the pattern down, keeping the center fold line straight and leaving the slashed sections free to move.
Spread each slash open to deepen the cowl as desired, then tape them in place.
It’ll look a little wonky now—that’s totally normal! We’ll clean it up next. 😉

Step 6: Adjust Center Front and True the New Shape
Using the original pattern edge as a guide, redraw the center front line.
Then draw a new neckline curve from the shoulder to the center front, making sure the line is perpendicular at the fold.


Step 7: Create the New Facing
Remember that extra space you left at the top? Fold the paper back at the new neckline line you just drew in Step 6.
Now cut the pattern with the paper folded—that becomes your new built-in facing!
Unfold and smooth out the curve if needed, trimming off any excess paper.

Voilà! Your new front bodice piece is done!
You can now sew your Chorus top or dress as per the original instructions. 🙌
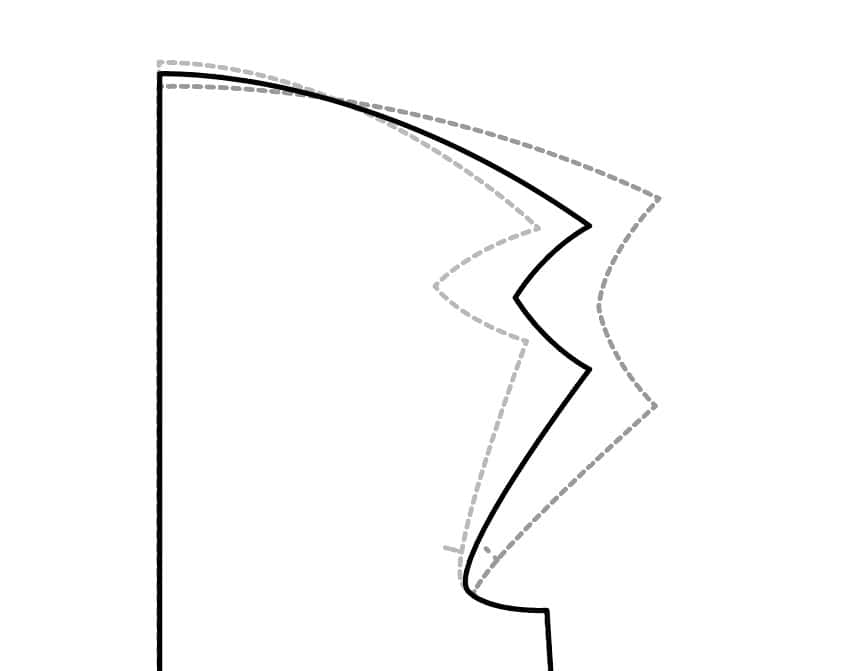
Bonus: “Quick and Dirty” Shortcut Method
If you’re not into all that slashing and taping and just want a moderate neckline—somewhere between the original shallow and deep options—you can go the shortcut route.
Here’s how:
Overlay the shallow and deep neckline options from the pattern. Then, draw a new curve in between the two. That’s it!
I did this digitally in Illustrator on the projector file, but you can just print the pieces and trace by hand.
For more dramatic changes though, I recommend sticking to the full slash and spread method—it offers more control and less guesswork.
And that’s it! With just a few simple tweaks, you can create a cowl neckline that’s tailored exactly to your taste. I love how versatile the Chorus pattern is, and this little hack just adds another way to make it your own.
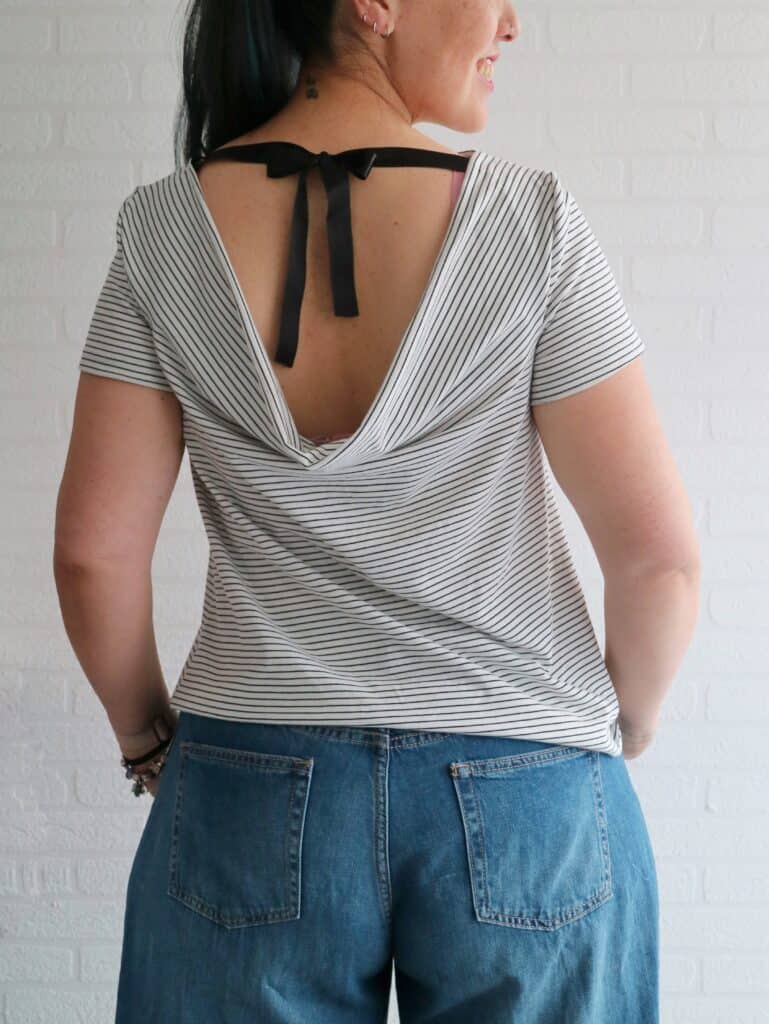
Here’s another fun way to use your modified cowl:
Keep the original shallow drape on the front and use the extra deep version on the back. Add a cute ribbon to keep it in place and you’ve got a stylish twist that’s perfect for summer! 😍🎀

If you give it a try, please tag me so I can cheer you on! 💖
You’ll find me as Livia Jonker-Yamada in the LN Pattern Support Group, Liviality on Facebook, and @livia.jy on Instagram.
Oh, and I was so inspired by Chorus that I ended up working on another hack.
Check it out on my website (www.liviality.com) for some extra fun! 😉

Happy sewing !
xxx, Livia

