


How to create Side Slit Legs using Sunday Romper Sewing Pattern
Side Slit legs are right up my alley – and this cute hack is just the thing to make your sewing projects even more fun! Hi everyone! I’m Kelly, a stay-at-home mom and avid fabric and pattern hoarder. I sew almost daily, and now that I have a few skills under my belt, I like to have fun with patterns and do little hacks here and there.
I’ve noticed a trend lately with pants that have a side split so that the leg is open on the outer seam, with ties or elastic at the ankle. I thought, why not? Let’s give this a try! The Sunday Romper (found here – affiliate link) is the perfect pattern for this hack because the legs are fun and flowy.
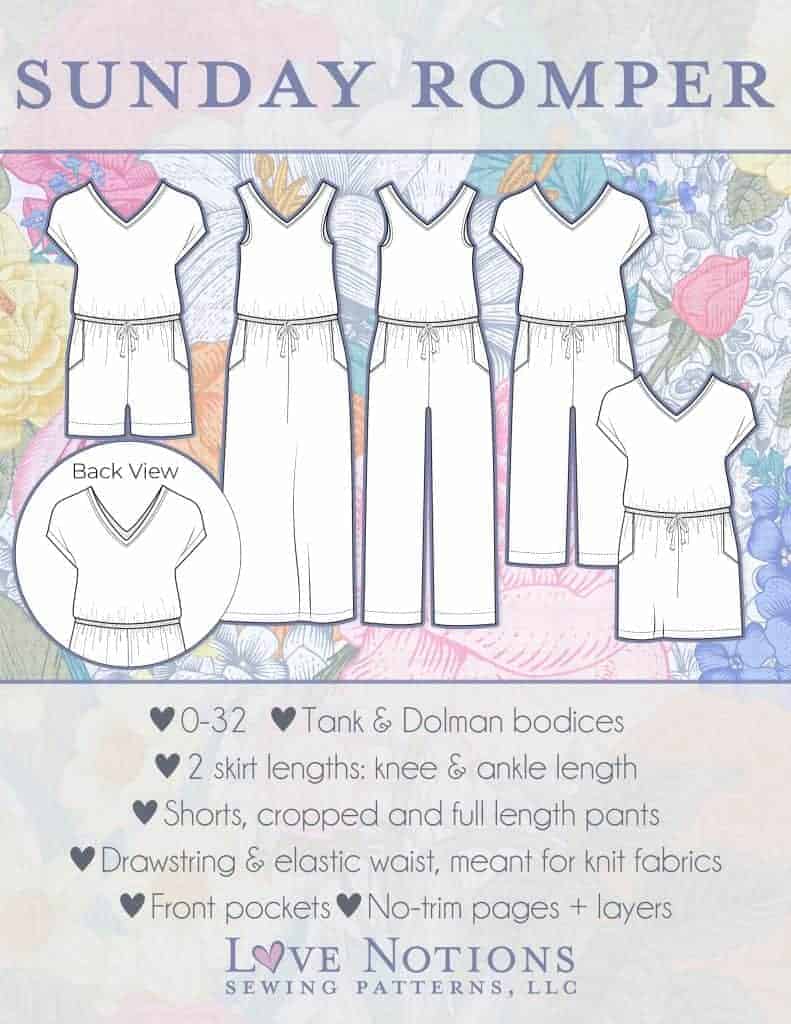
The Sunday Romper has a great tank/sleeveless bodice, or dolman sleeved bodice, both of which are easy to wear and fantastic for the spring/summer weather here in California. I chose to make a cropped and full-length version. I’ll be showing you three ways to close the ankle, two using channeling and one using gathering with ties.
HOW TO CREATE THE SIDE SLIT
First, determine slit height
For all of the versions, you will first complete the bodice as per the tutorial. I also completed my neckband and arms at this point as well.
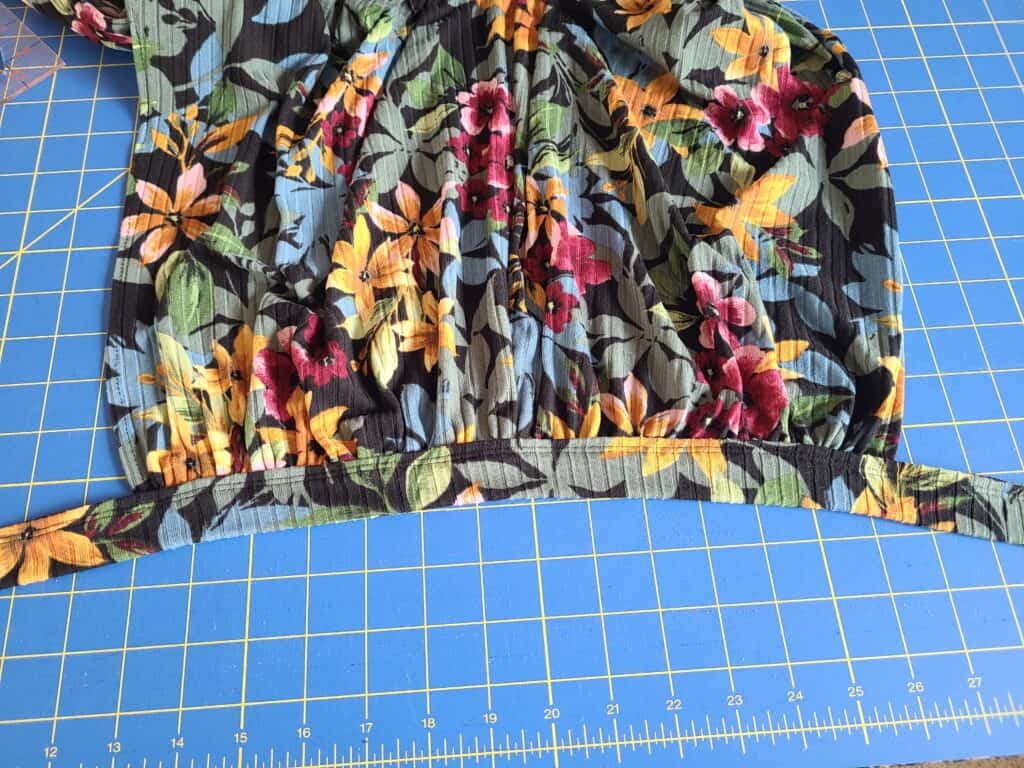
Step 1: Sew Outer Seam
When you get to the pants portion, sew up the inside seam of the pants, but only sew the outer seam about 10” down from the waist, or if you’re including pockets, then sew down to just below where the lowest part of the pocket ends.
Step 2: Attach
Attach the bodice and pants together as per the tutorial.
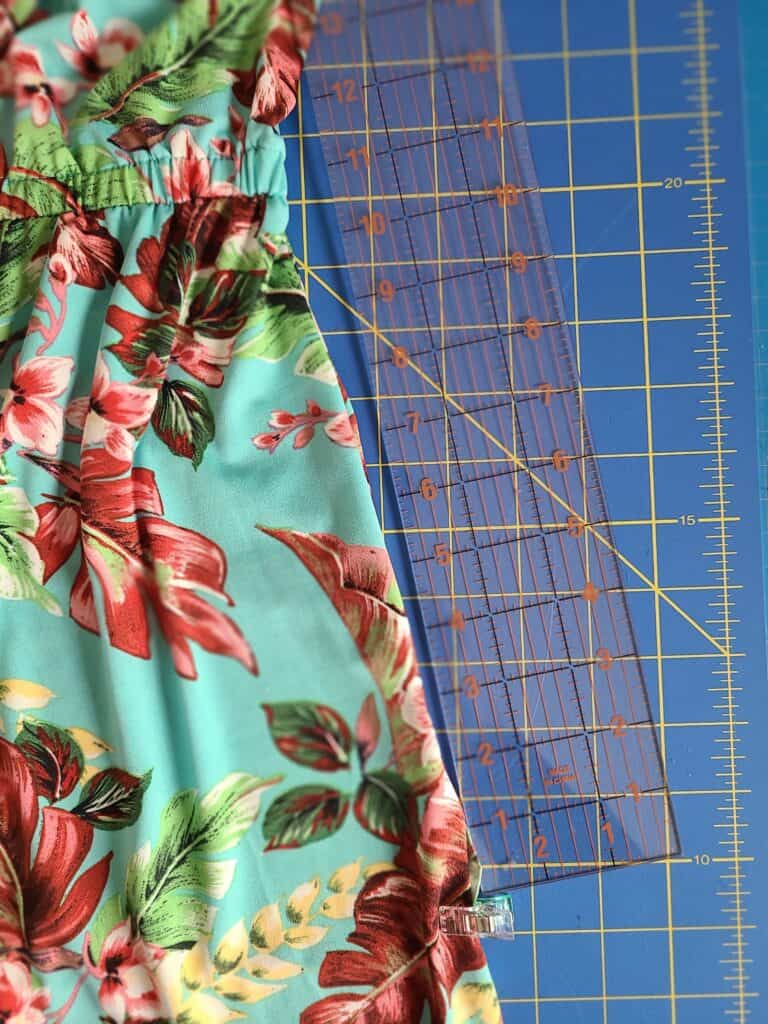
Step 3: Pick your side slit height
Now clip or pin your pant legs together at the ankle and then try on your romper. From here, you can play around with the side seam and see just how high or low you want the slit in the pant leg to be. For my longer length romper, I chose to have the seam stop just above my knee. For my cropped version I chose to have it close higher, about 11” down from the waist.


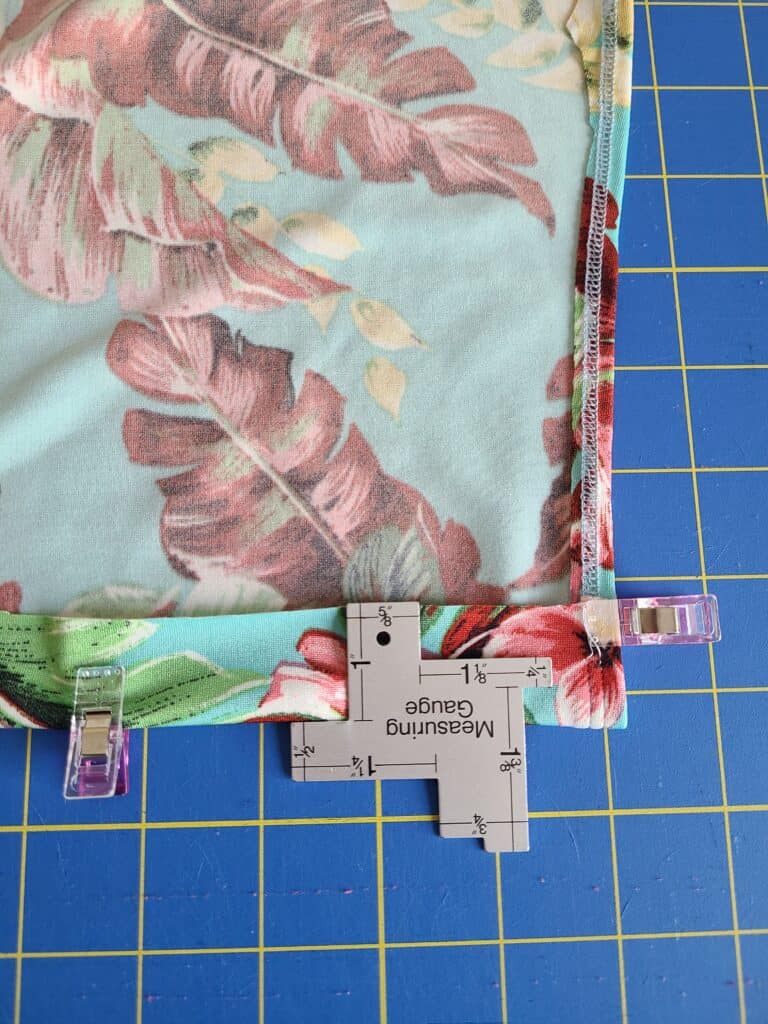
Step 4: Pin/Mark side slit height
Pin/mark the pant leg at your desired slit height. Also keep in mind that this is when you can check your ankle/cropped placement of the bottom of your leg. For the channel versions, we will turn the bottom hem up 1”. The gathered with ties version is bound so there is no hemming and you won’t lose any length, but depending on how wide you make your ties you may end up adding some length.
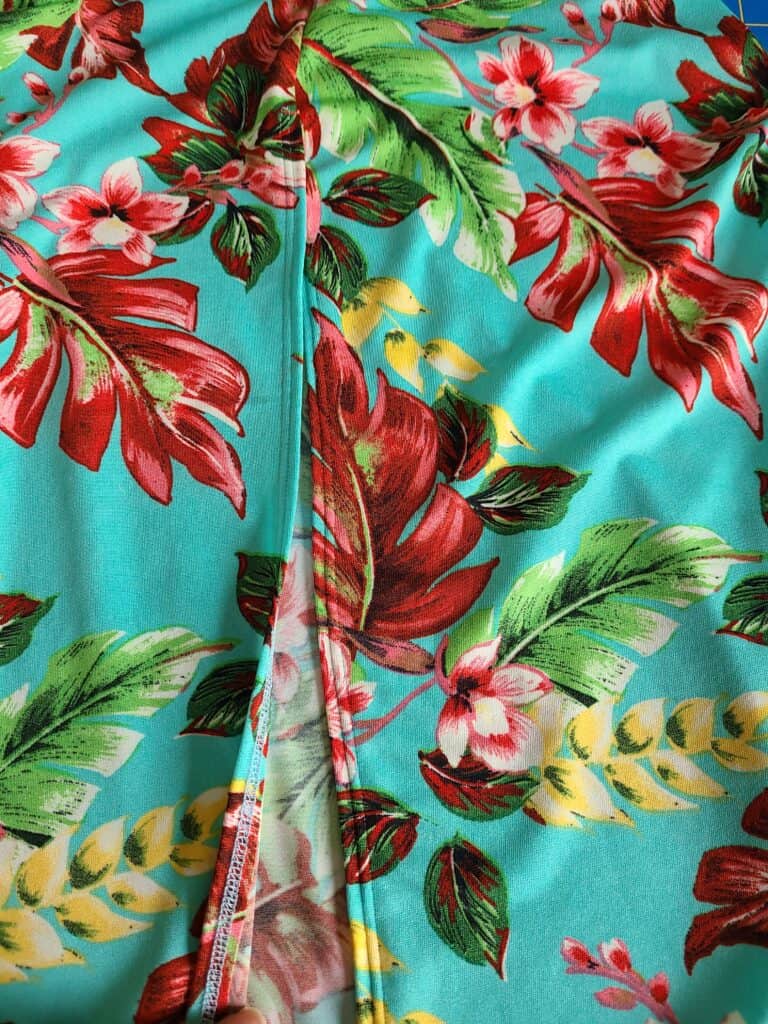
Now, sew the side slit
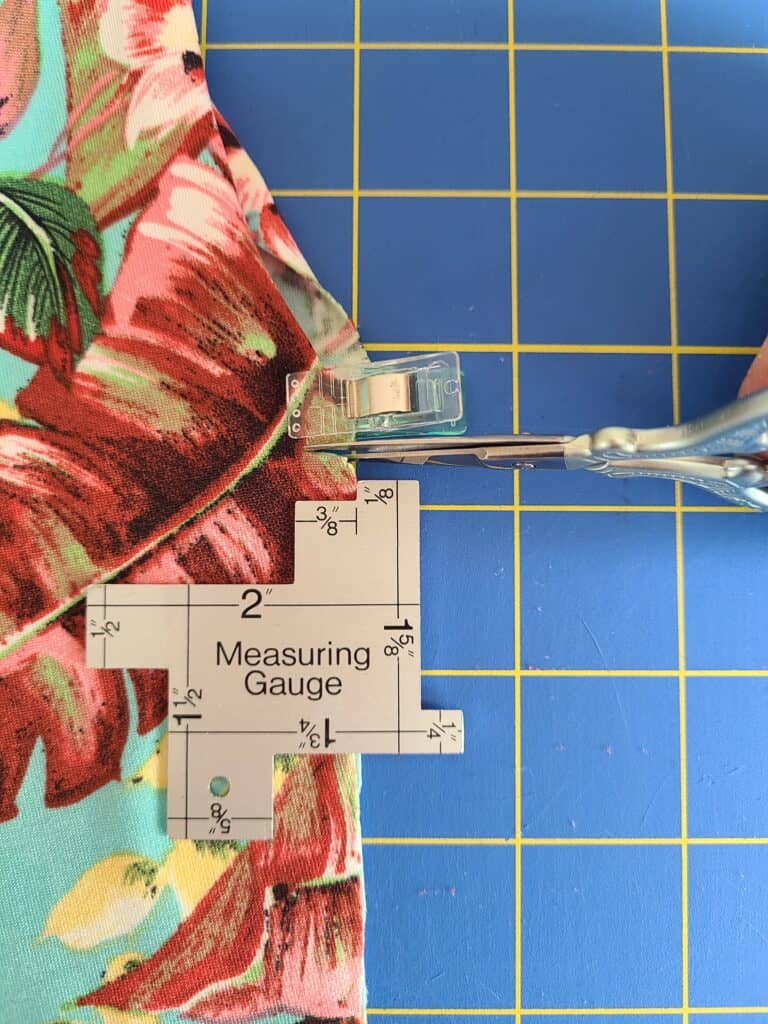
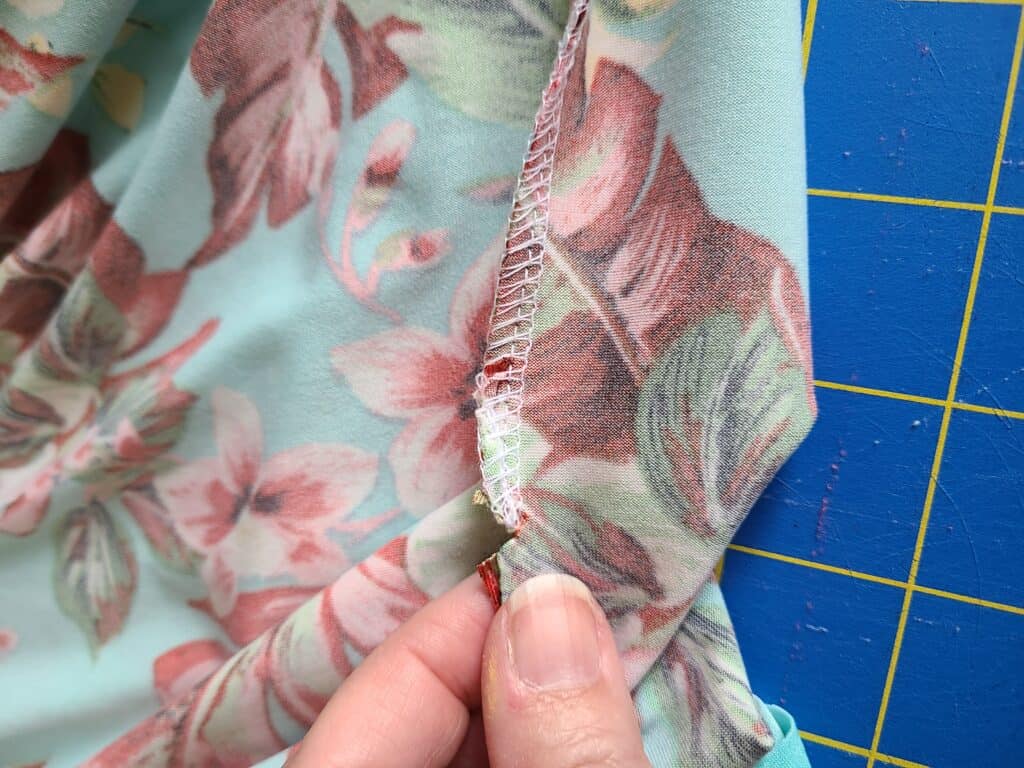
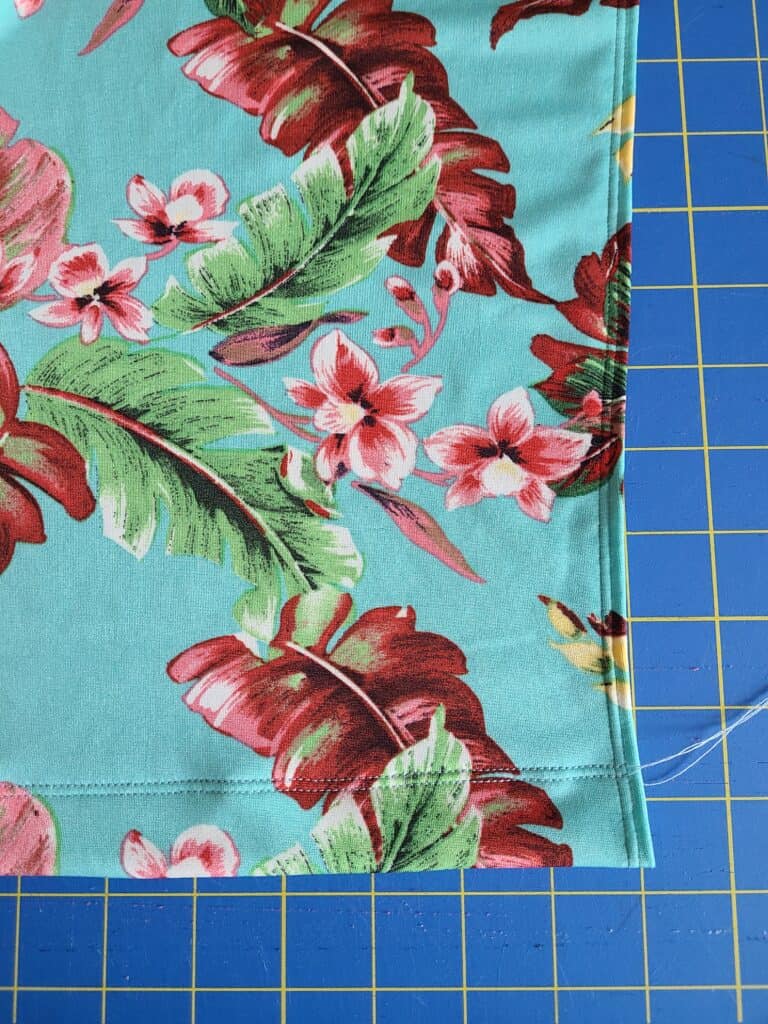
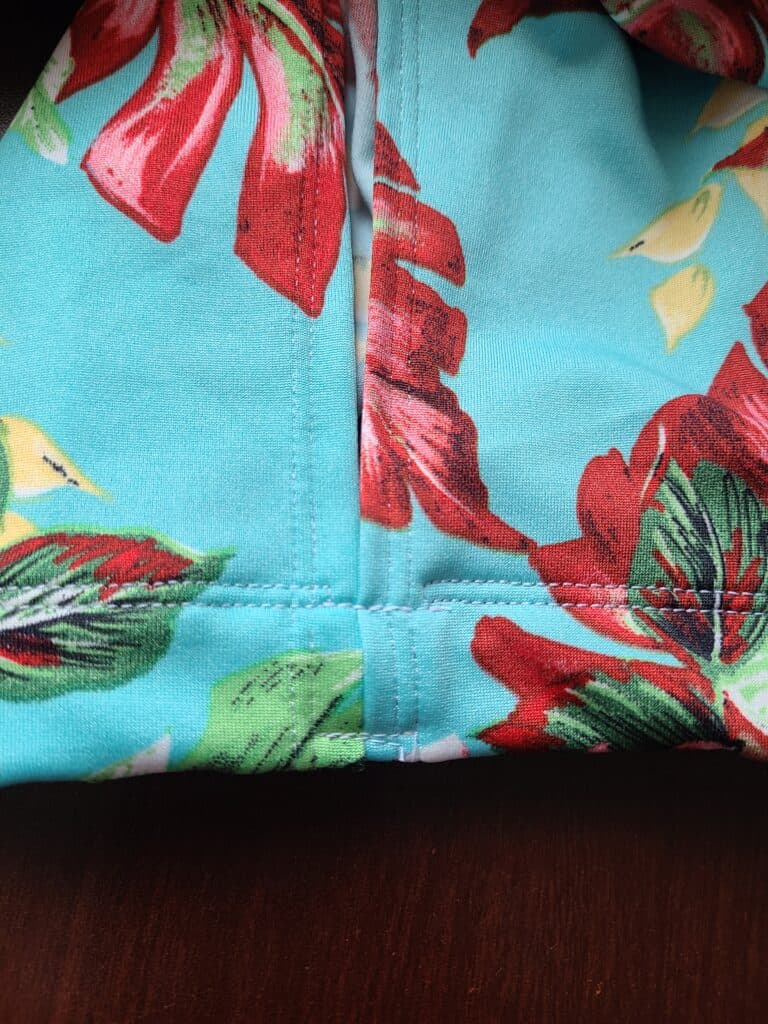
Step 1: Snip at marking and sew
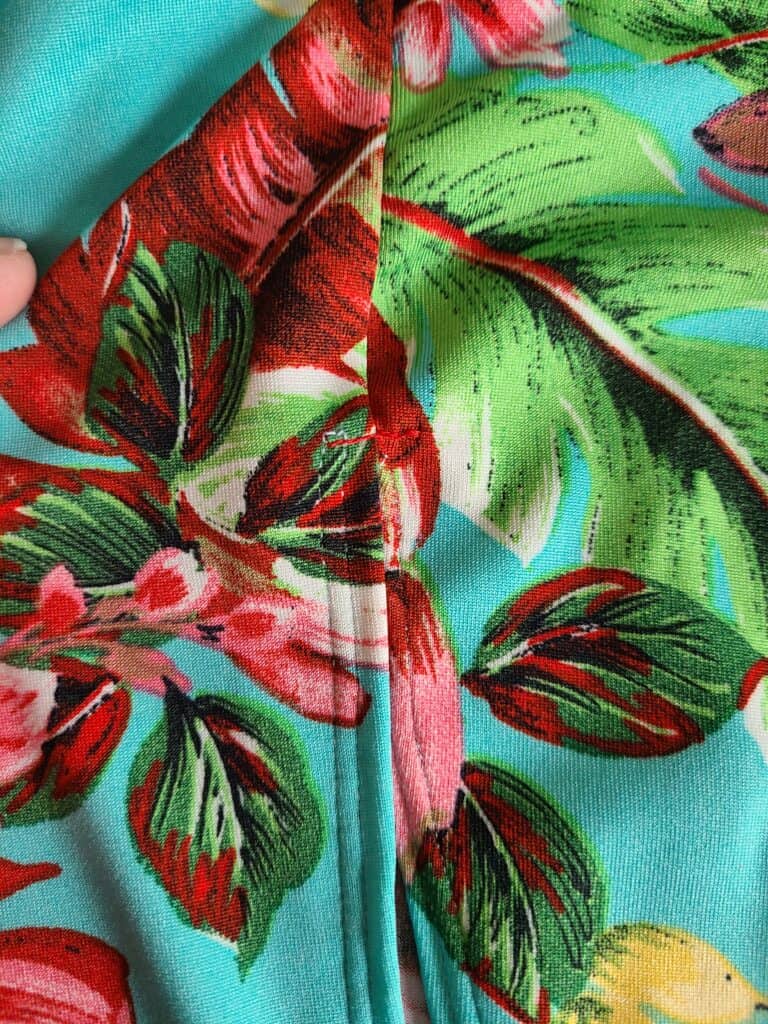
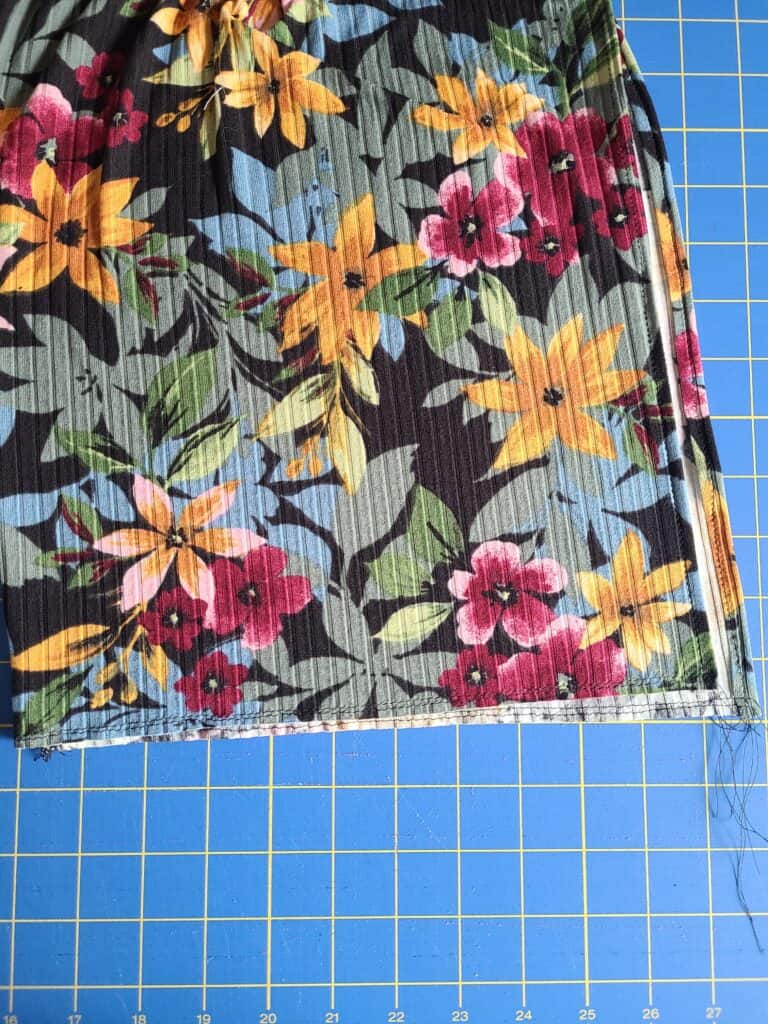
Now that you’ve chosen the height of your slit, you will snip ⅜” into the side seam right at your marking. Continue sewing down your side seam from the waist until you reach this cut. If you’re using a serger, tuck the serged end back into the seam for a neat finish.
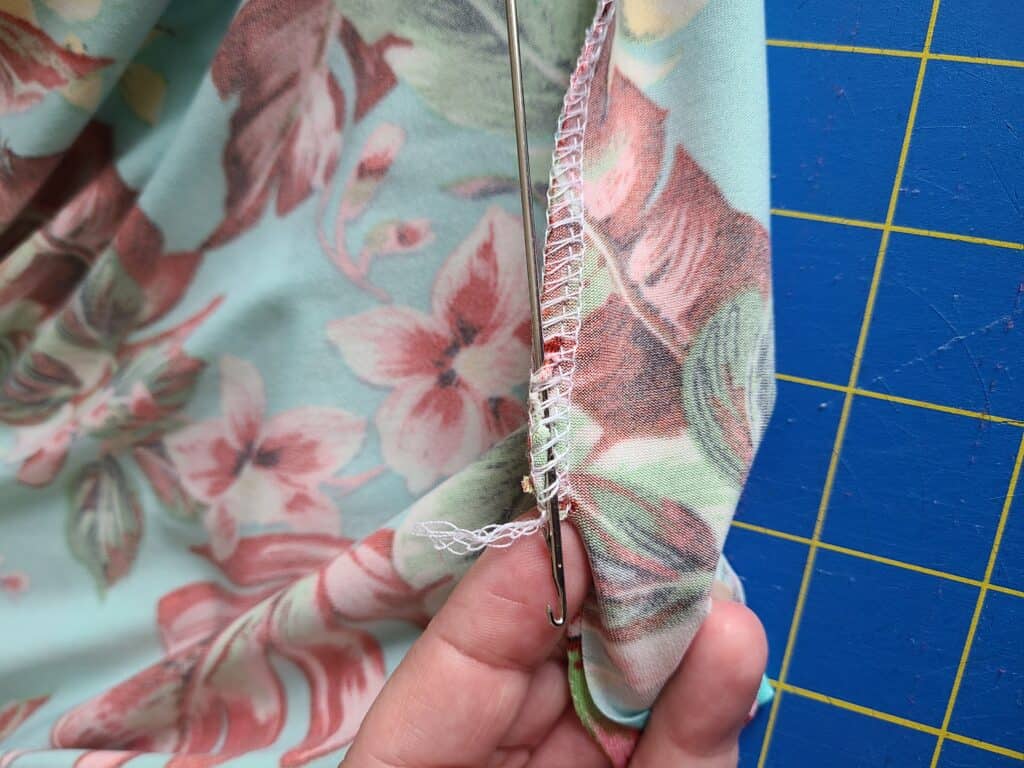
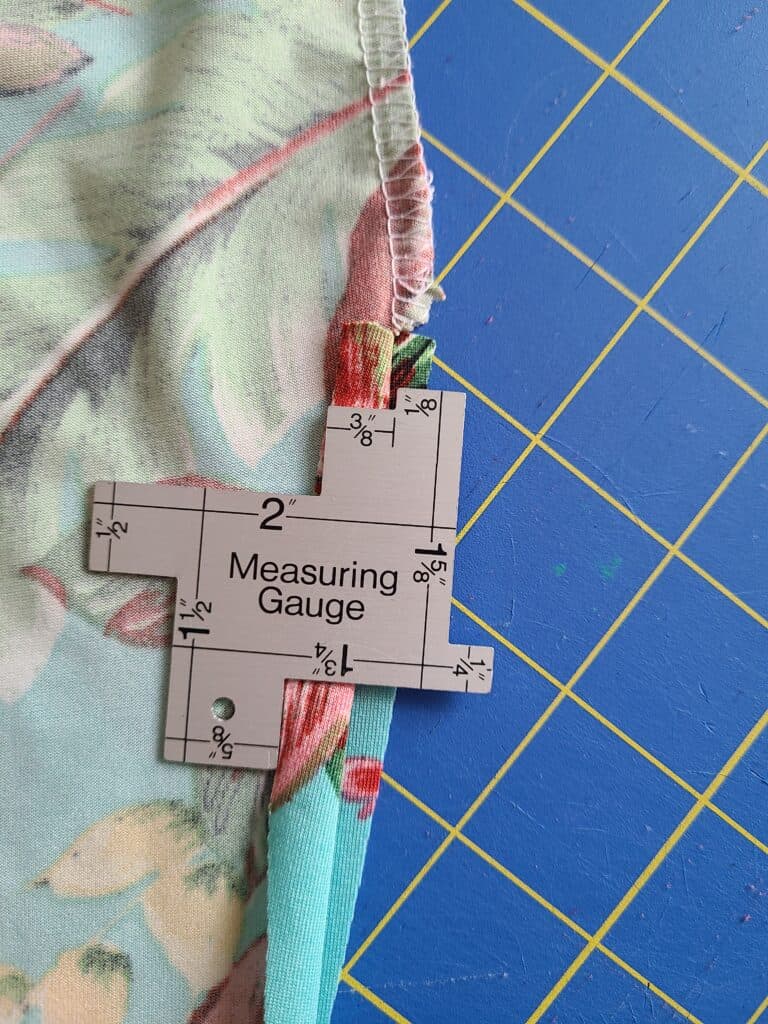
Step 2: Seam allowance
Now you can turn the remaining seam allowance ⅜” to the wrong side and topstitch in place down the entire length of the leg. (You can sew this with a straight stitch, twin needle, coverstitch – whatever kind of stitch that makes you happy!) Then, I like to sew a line across the top of the hemmed sides to make it extra secure.

ANKLE CLOSURE
I came up with 3 ways to close up the ankle. Yes, you can just leave the leg open for a different look, but I personally don’t like when pants get caught up in my legs while I’m in motion, and these different looks to bring the leg in at the ankle are just too cute!
Option 1&2: CHANNELING with elastic or ties
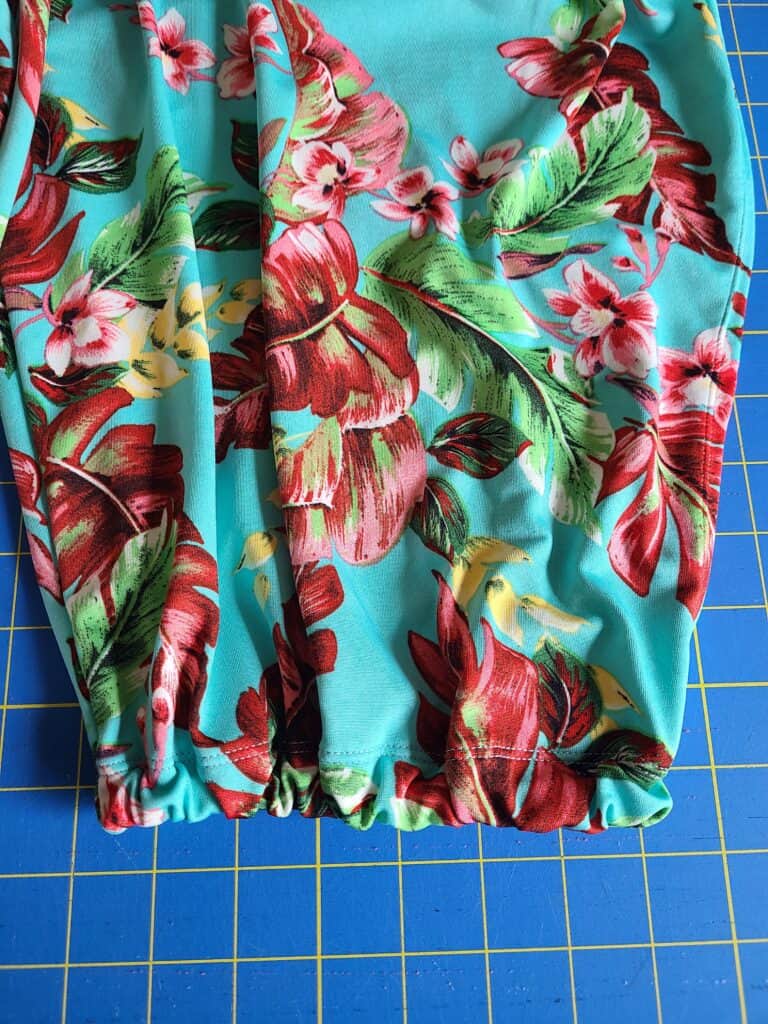
Using a channel for elastic or ties is the easiest method to close up the ankles. All you need to do is turn up the hem 1” to the wrong side and sew in place close to the raw edge. This has now created a channel.
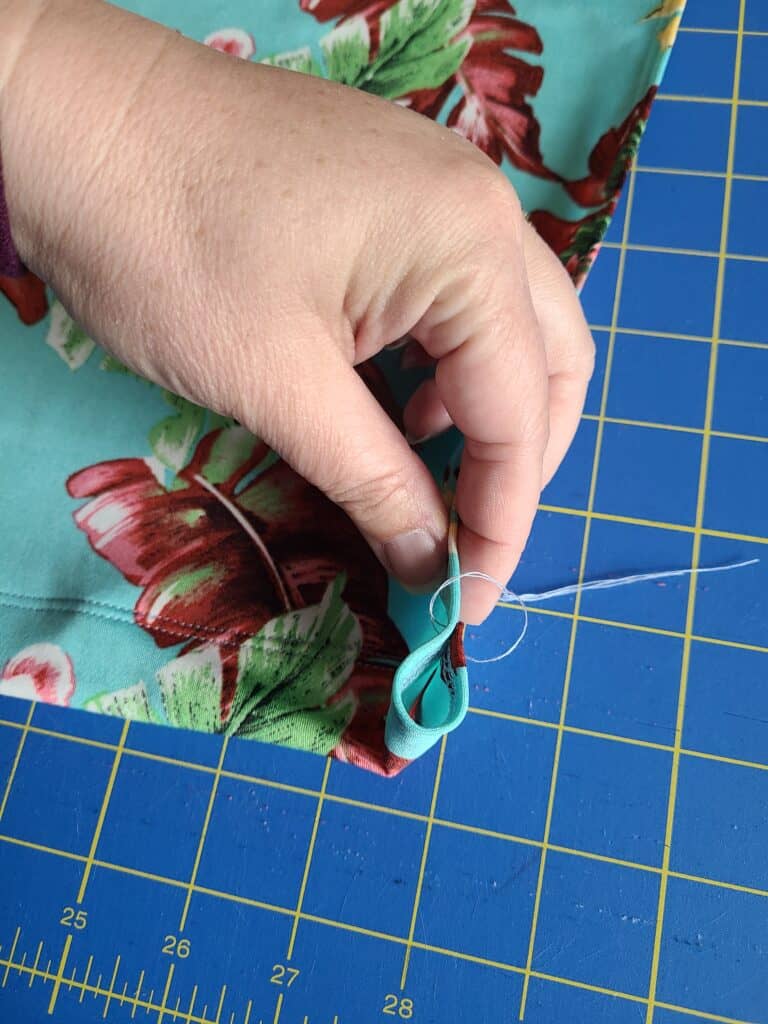
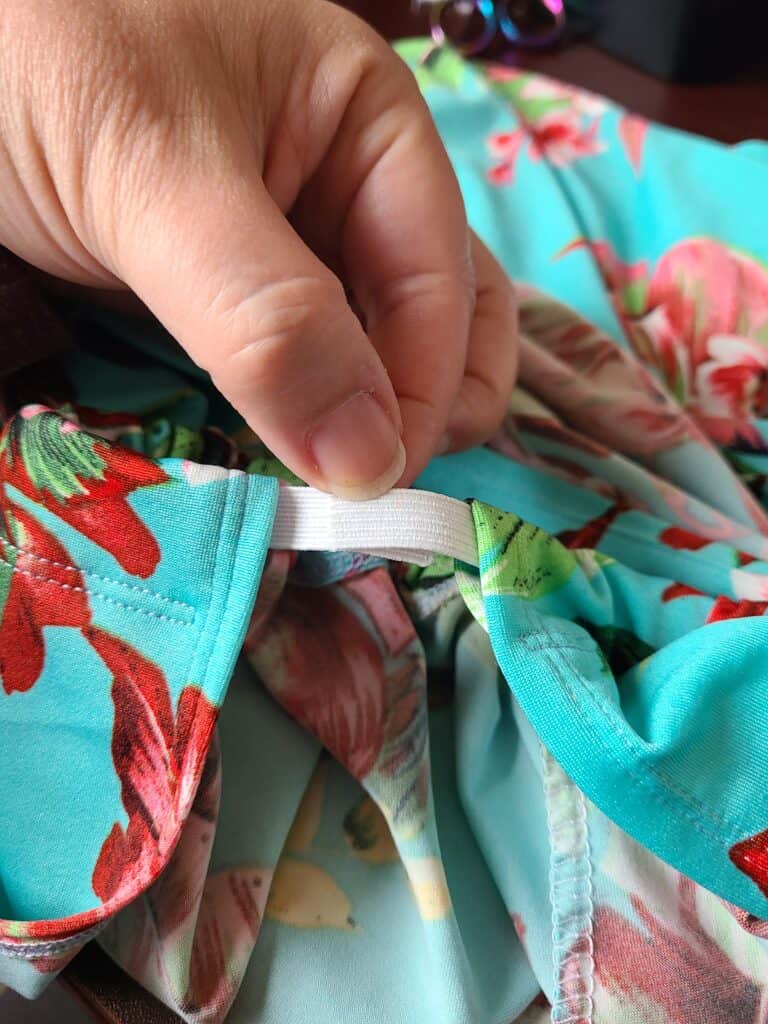
Option 1: Channeling with elastic method
Measure around your ankle or calf (depending on which length of leg you are making). Using elastic that is less than 1” wide (I used ⅜” wide elastic because I have a lot of it, but you can use any width that is less than 1”) cut two pieces that are an inch longer than your ankle/calf measurement. Thread the elastic through the channeling on each leg and overlap the elastic by a half inch and sew in place. You can tack the leg together at the ankle to keep the elastic from peeking out. You’re all finished!
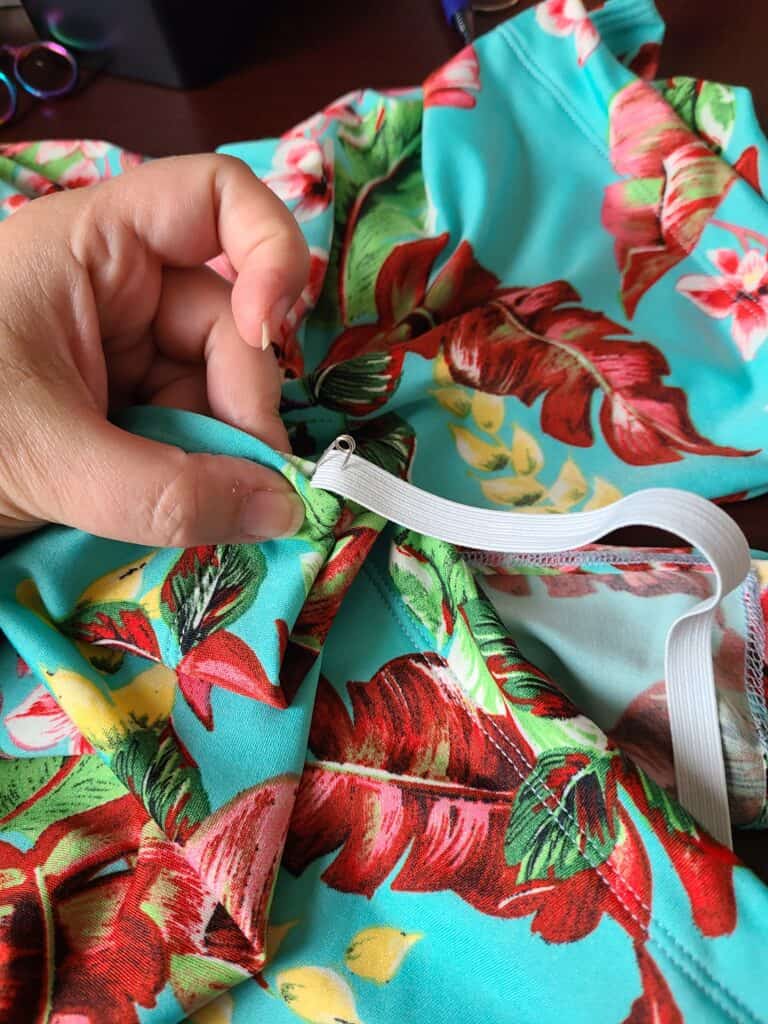
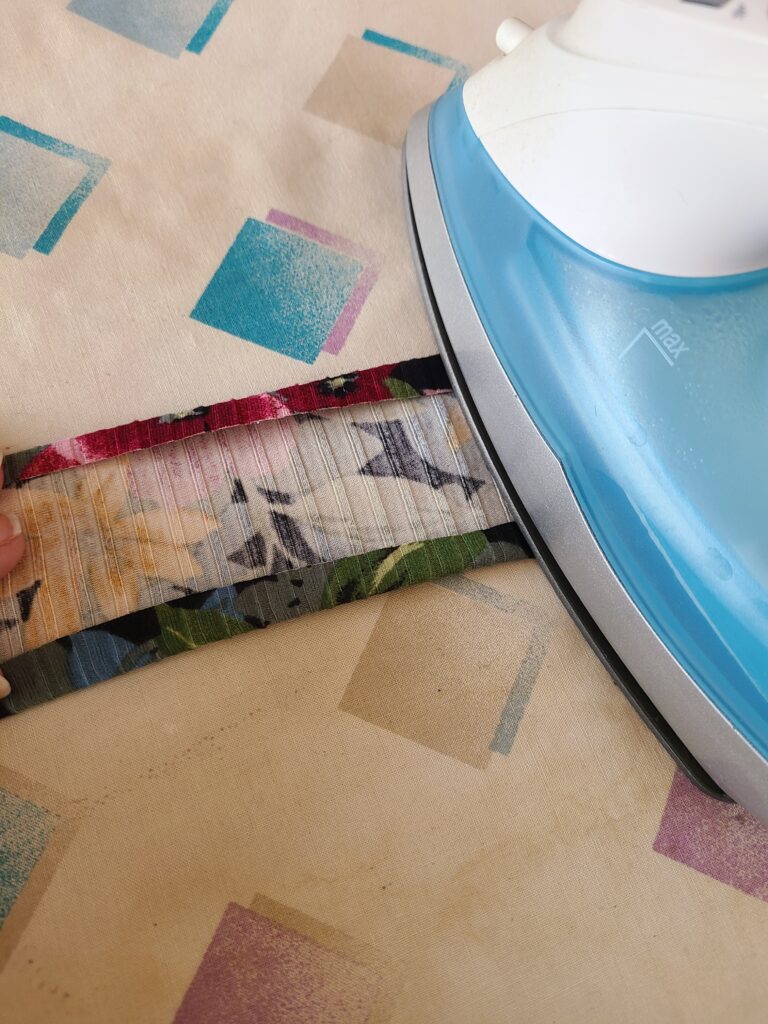
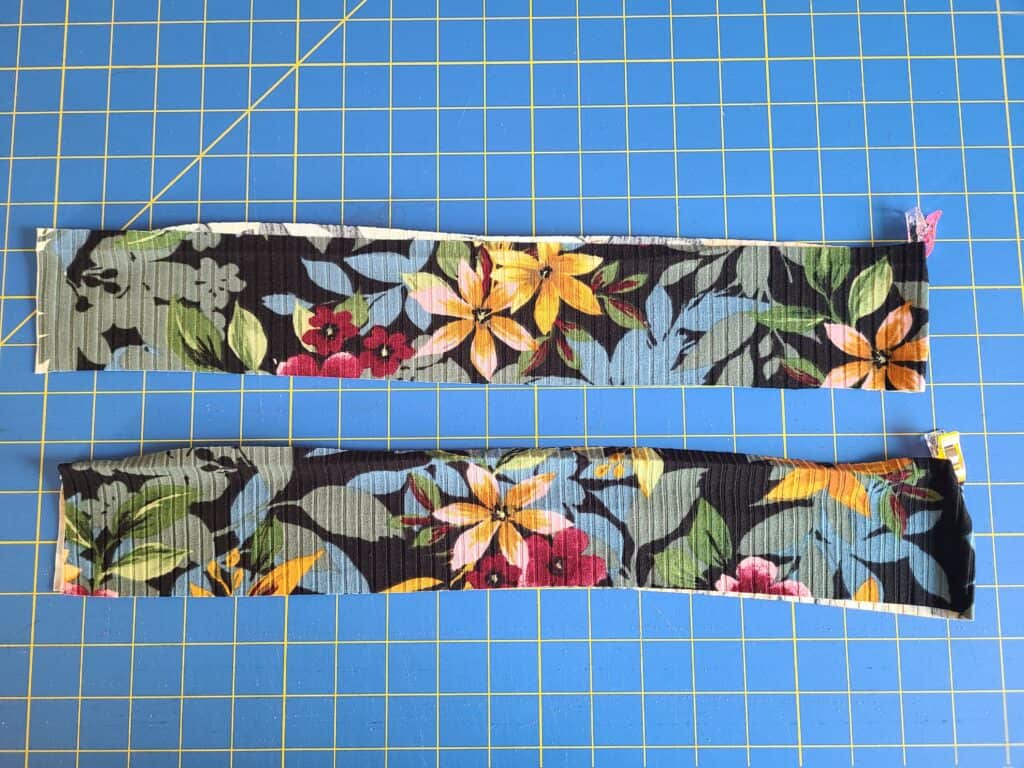
Option 2: Channeling with tie method
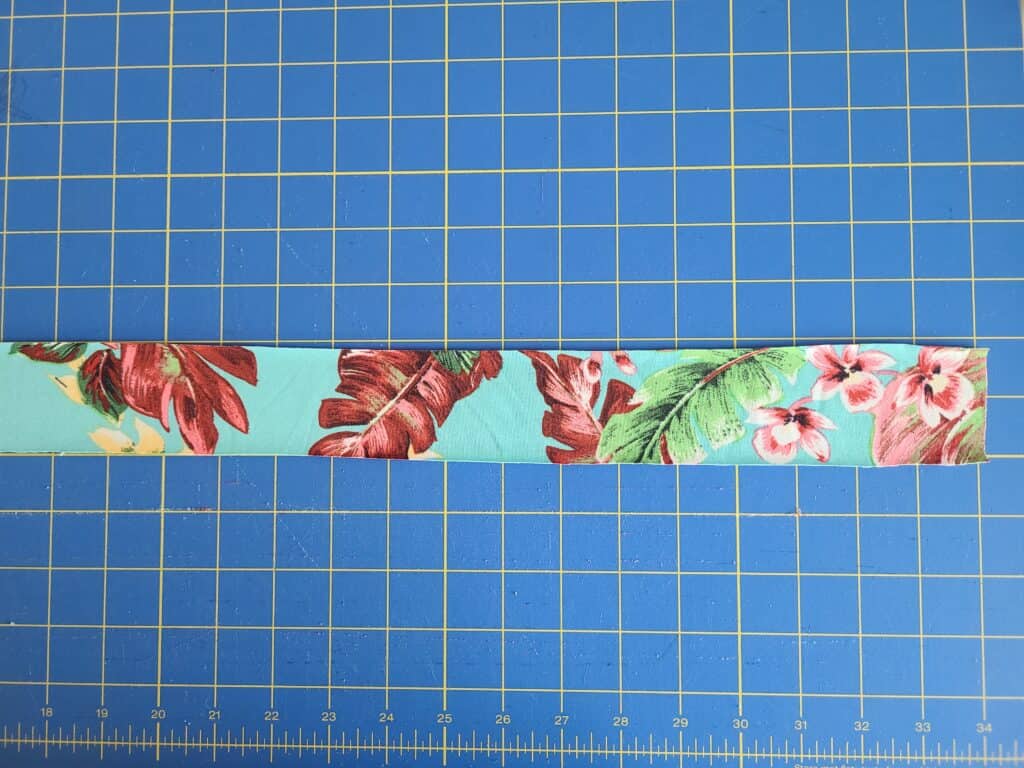
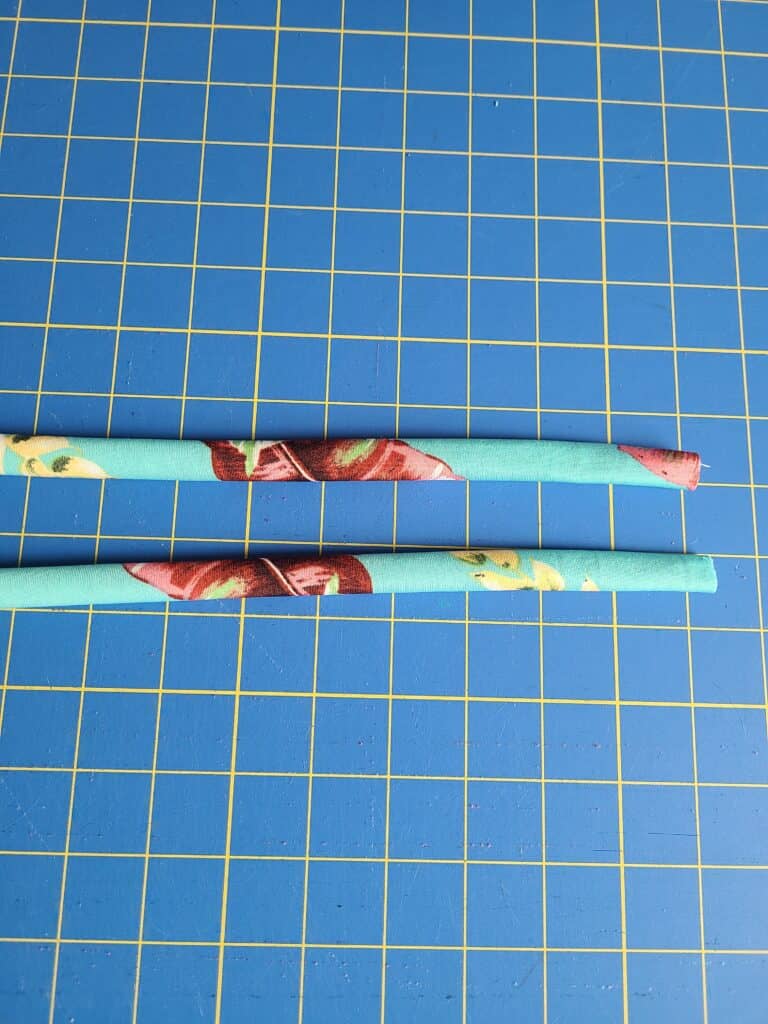
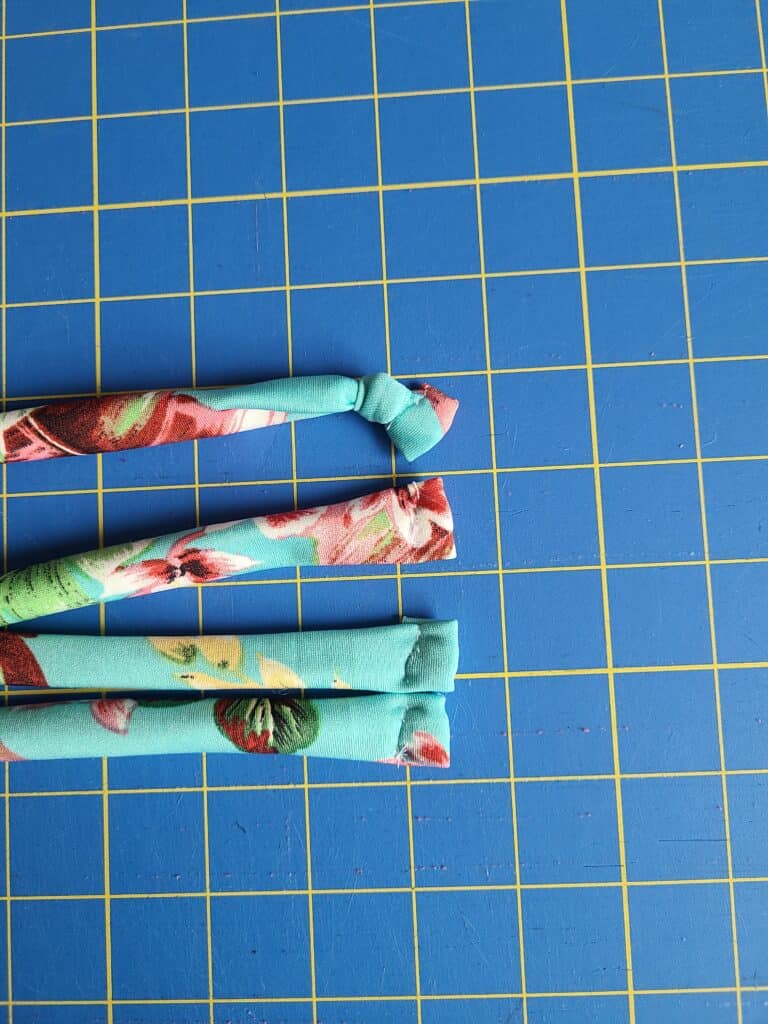
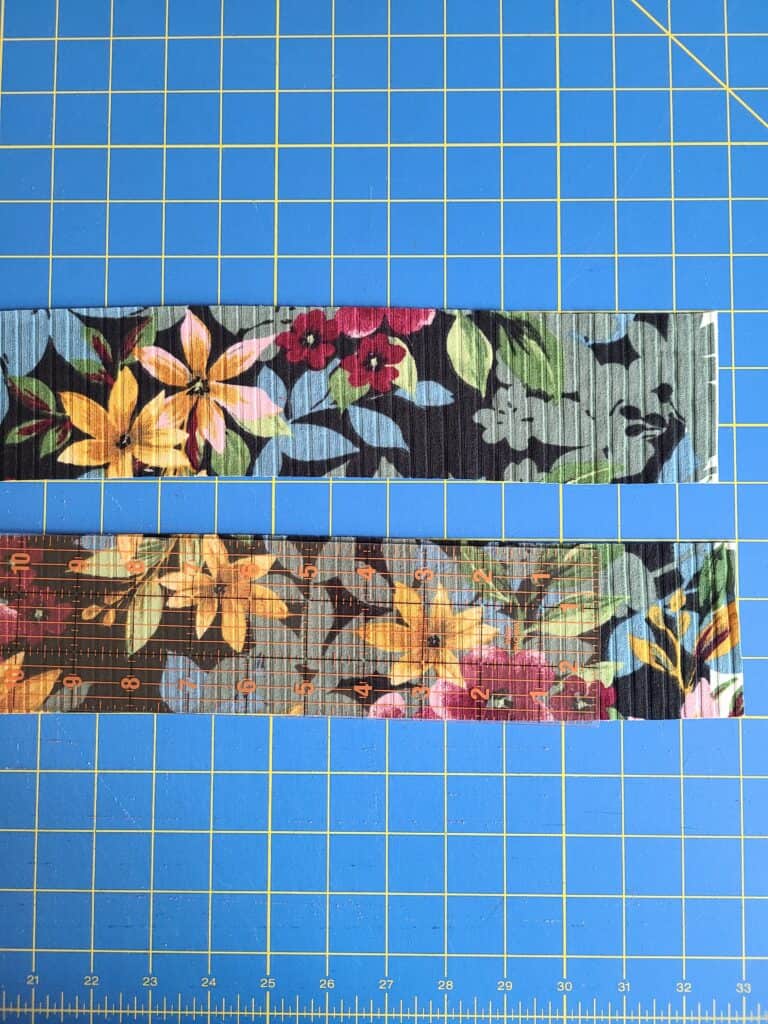
You can use your fabric to make ties, or get creative and use something else on hand like cording or even shoelaces. To make my ties, I used leftover fabric from my romper. I cut two rectangular strips that were 2” by 34”. (You can make your ties any length you want, just keep in mind that you don’t want them to drag on the ground!) Fold them right sides together and sew across the length with a ¼” seam allowance.
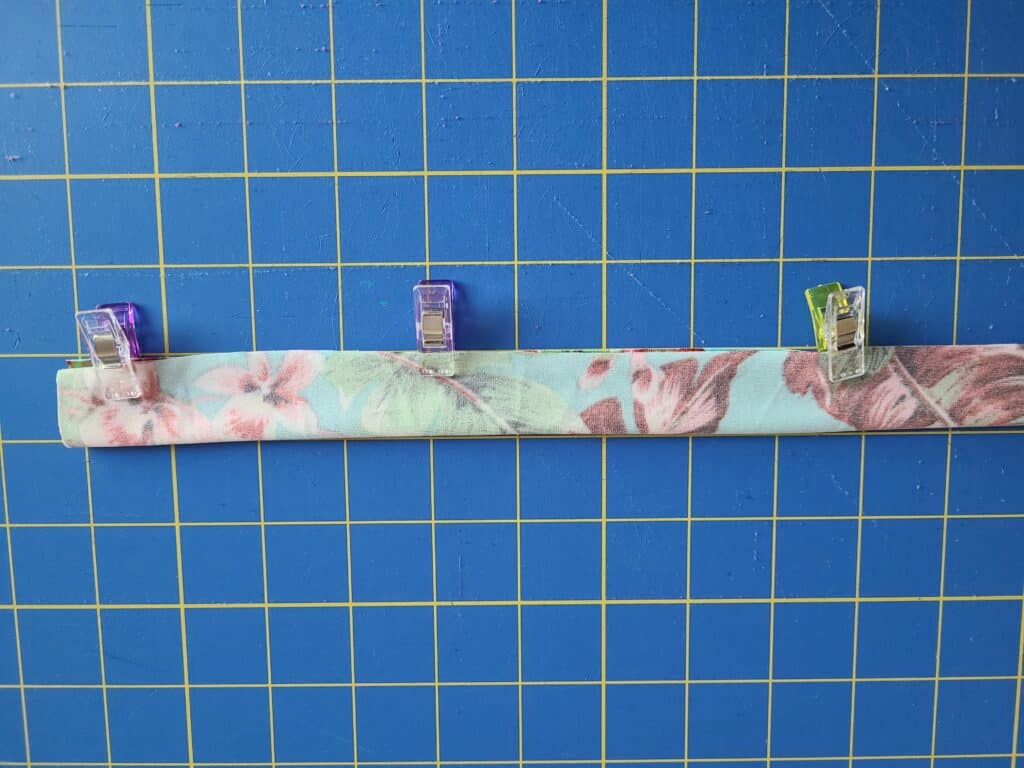
Turn the strips right side out and simply fold the ends over to sew them in place, and then tie a little knot at the end. Thread the tie through the channeling and tie in a bow or knot. All finished!
Option 2: Side Slit with Gathered Ankle
This method takes a bit more time, but looks so good that I couldn’t pass it up. Remember that we are adding a bit of length with this method (if you are making a wider tie), so make sure the bottom of your pant leg hits where you want it to on your leg before you start.
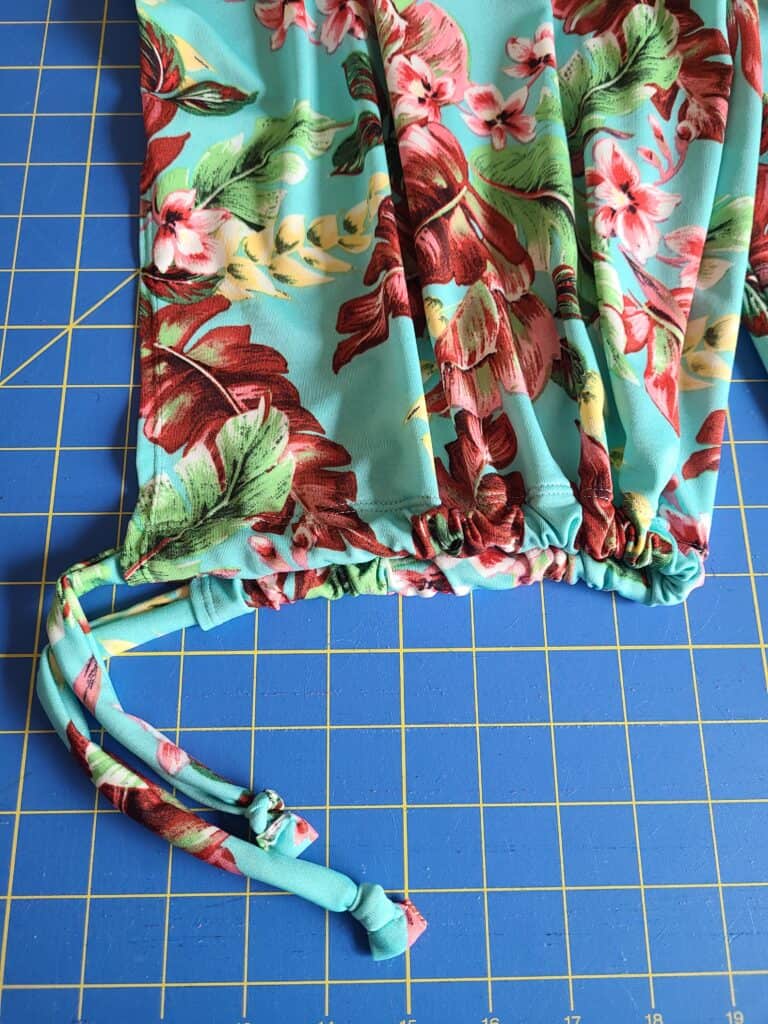
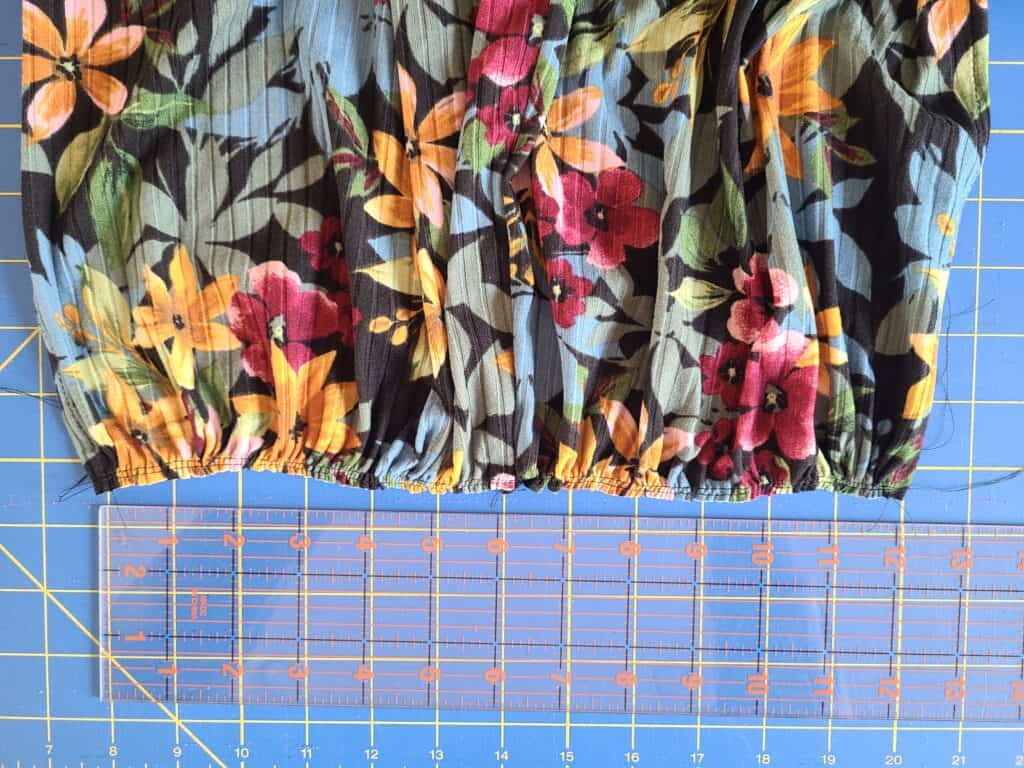
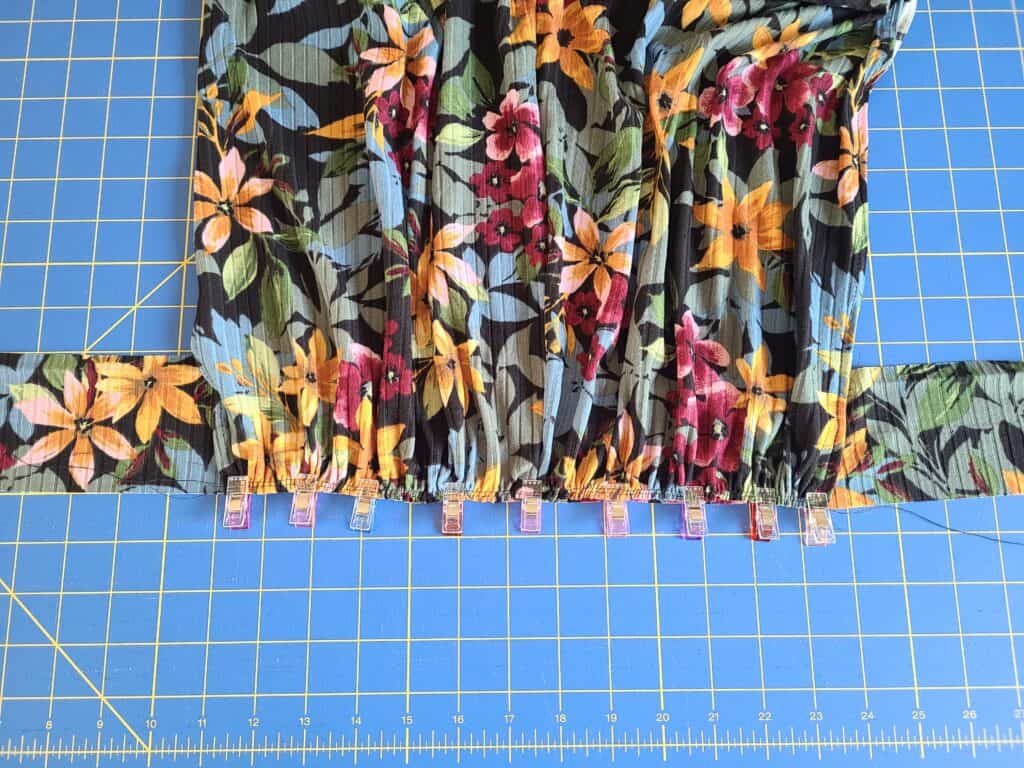
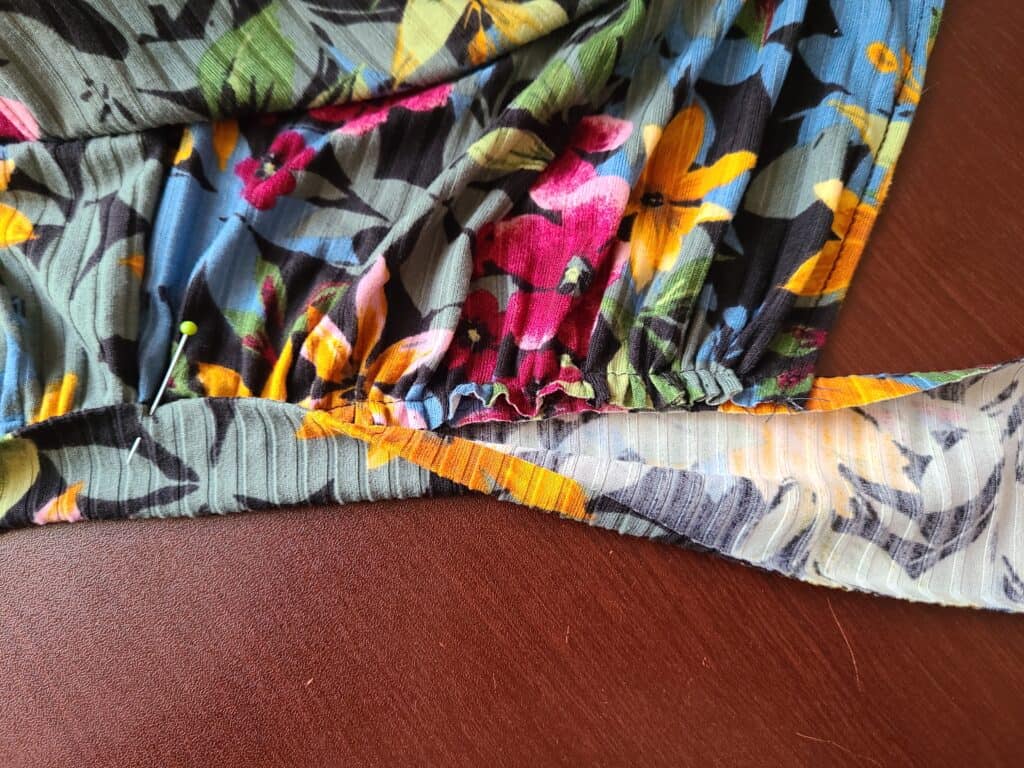
Step 1: Gather bottom.
First you will measure around your ankle/calf where the bottom of the pant leg will be ending. Run two gathering stitches at the bottom of each pant leg. Gather the bottom of your leg to match up with your ankle/calf measurement. (My measurement was 12”.)
Step 2: Create ties
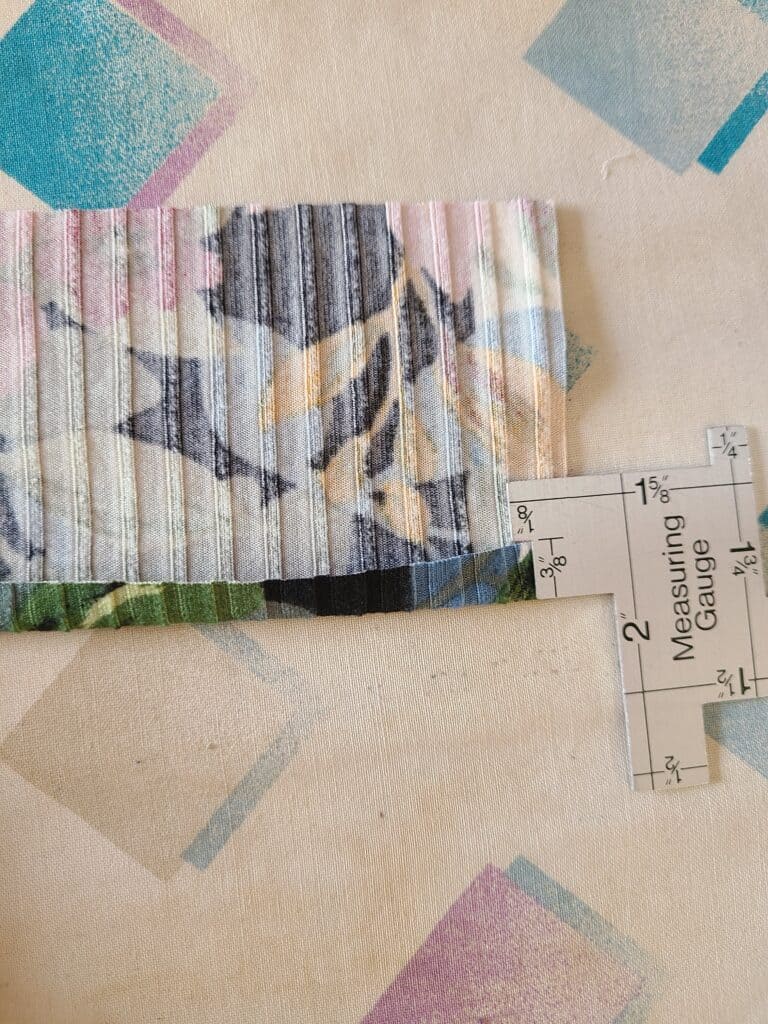
For these ties, I cut two strips of my fabric at 3” by 36”. You can play around with these numbers to get your desired look. Make a memory crease in the ties by folding up the long side ⅜” to the wrong side and pressing in place. Then fold it in half lengthwise to get a middle crease as well. Mark the middle of the ties.
Mark center.
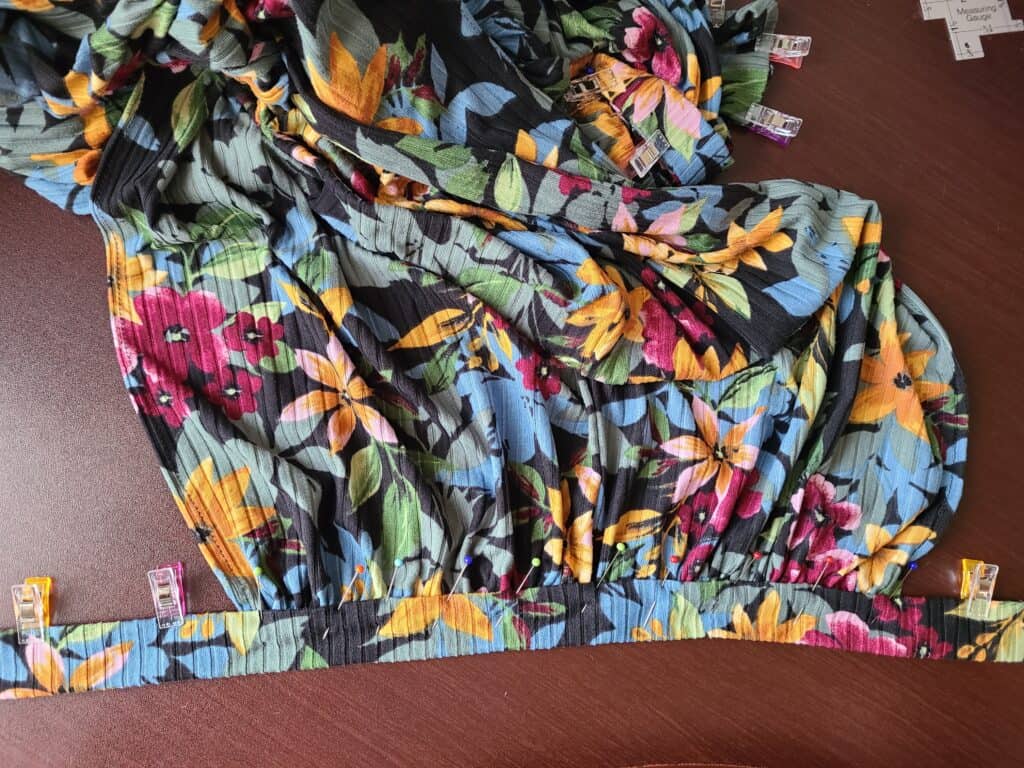
Step 3: Attach ties
With the right side of the tie against the back side of the pant leg, line up the middle of the ties with the inside seam of the leg. Pin the tie in place and sew with a ⅜” seam allowance. Take out your gathering stitches.
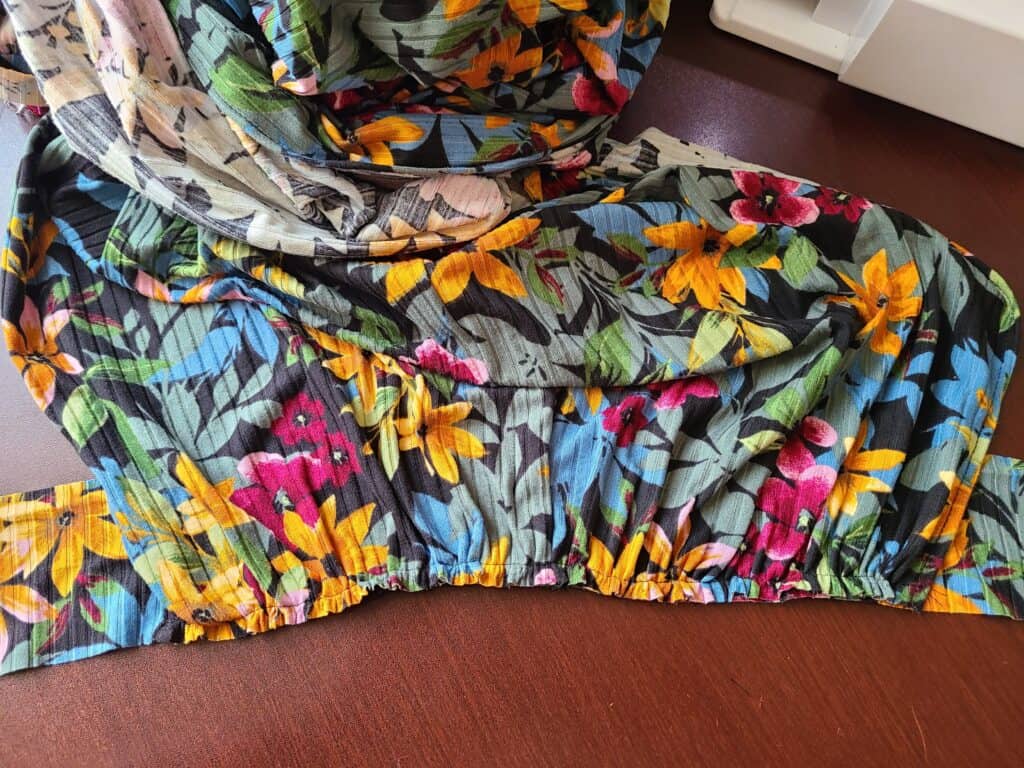
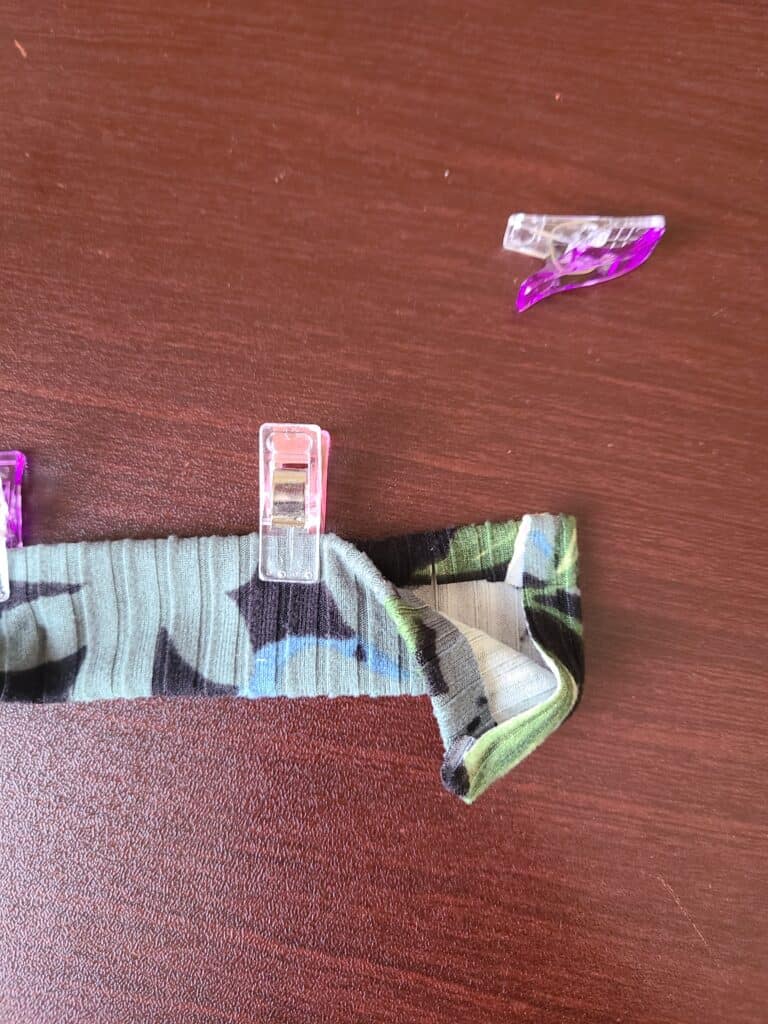
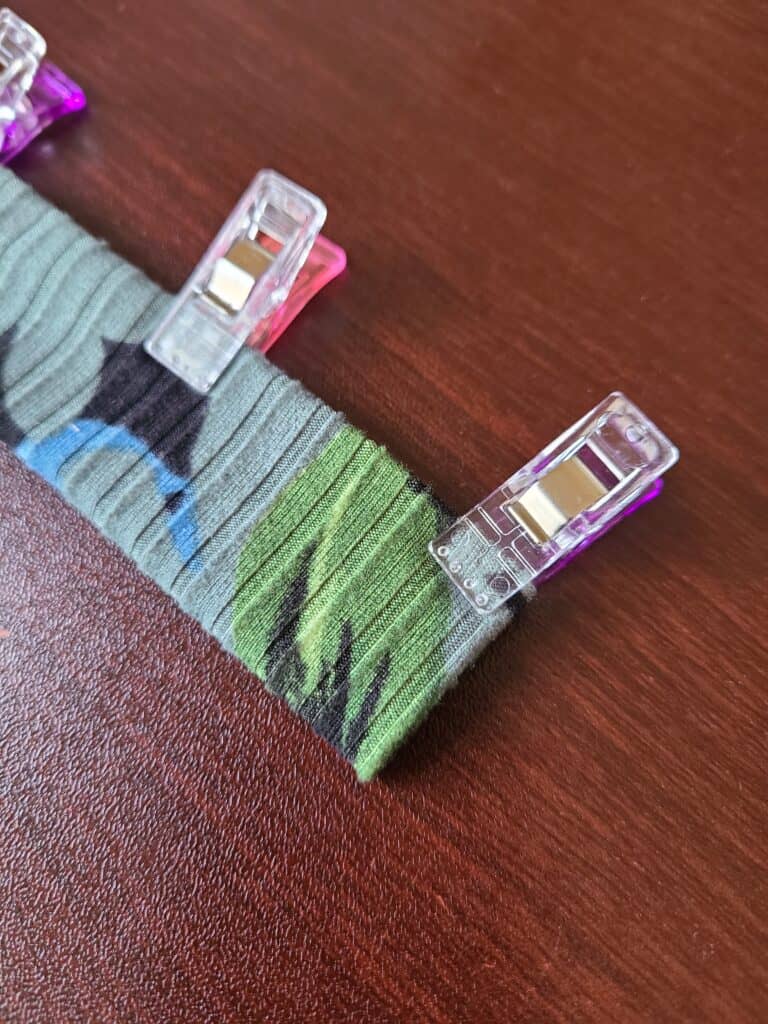
Bring the tie over to the right side of the pant leg, folding the ⅜” crease into place on either side and pinning along the entire length of the tie so the pant leg is encapsulated. Sew across the length of the tie to close it up, being sure to tuck in the ends for a clean finish.
All my Side Slit Sunday Romper Versions
Your romper is now complete – yay! (Pro tip: Tie the ties before stepping into your romper so you’re not having to bend over to tie them once it’s on.)


How fabulous would this romper be to wear on a cruise, or out for a bbq? I already wore my longer length romper to school pickup and had many compliments on the unique leg slits! I hope you have fun creating your own leg slit Sunday Romper and share your results with us.


I hope you have fun creating your own leg slit Sunday Romper and share your results with us.


*Kelly is 5’4” and sews a 3xl bust/waist, 2xl hips
Save this article on Pinterest

Shop more sewing patterns & courses
-
Product on sale
 Laundry Day TeeOriginal price was: $12.50.$5.00Current price is: $5.00.
 -
Product on sale
 Leggin’sOriginal price was: $9.00.$0.00Current price is: $0.00.
 -
Product on sale
 Classic Tee ShirtOriginal price was: $10.00.$5.00Current price is: $5.00.
 -
 Rhapsody Blouse & DressPrice range: $12.50 through $23.00
 -
Product on sale
 Skater SkirtOriginal price was: $9.00.$0.00Current price is: $0.00.
 -
 Allegro Bottoms$12.50
 -
 Sabrina Slims Pants$12.50
 -
 Cadence Dress & Top$12.50

