[vc_row type=”in_container” full_screen_row_position=”middle” column_margin=”default” column_direction=”default” column_direction_tablet=”default” column_direction_phone=”default” scene_position=”center” text_color=”dark” text_align=”left” row_border_radius=”none” row_border_radius_applies=”bg” overflow=”visible” overlay_strength=”0.3″ gradient_direction=”left_to_right” shape_divider_position=”bottom” bg_image_animation=”none”][vc_column column_padding=”no-extra-padding” column_padding_tablet=”inherit” column_padding_phone=”inherit” column_padding_position=”all” column_element_direction_desktop=”default” column_element_spacing=”default” desktop_text_alignment=”default” tablet_text_alignment=”default” phone_text_alignment=”default” background_color_opacity=”1″ background_hover_color_opacity=”1″ column_backdrop_filter=”none” column_shadow=”none” column_border_radius=”none” column_link_target=”_self” column_position=”default” gradient_direction=”left_to_right” overlay_strength=”0.3″ width=”1/1″ tablet_width_inherit=”default” animation_type=”default” bg_image_animation=”none” border_type=”simple” column_border_width=”none” column_border_style=”solid”][vc_column_text]Need a quick buttonhole review so you can make a closetful of Lyric Peplums and Dresses? Today, Rachel’s got you covered! Take notes on her raising neckline tutorial and her steps for installing buttonholes and buttons. Isn’t her lovely, transitional Lyric peplum JUST the perfect thing to take you from summer to fall?

LYRIC PEPLUM + RAISED NECKLINE + BUTTONHOLES
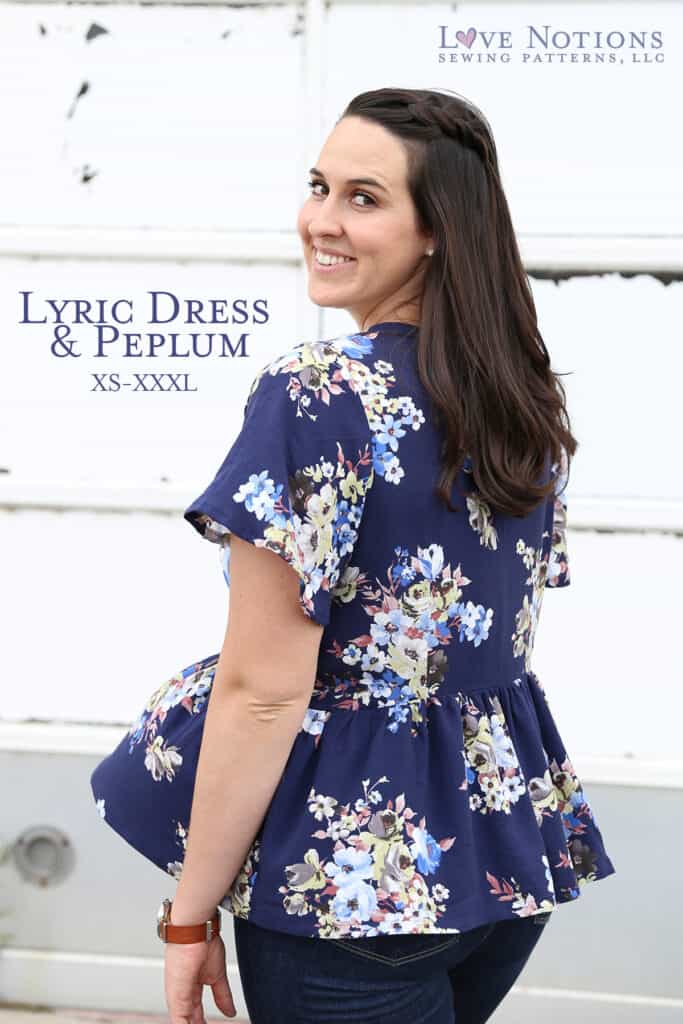
The Lyric Peplum is a gorgeous top for this fall and with a couple quick tips on neckline and buttonholes, it’s easier to whip up than you might think. Hi, I’m Rachel from Little Fish and I’m so excited to share this sew with you today. Today the Lyric Dress & Peplum is on sale for just $5, so I thought I’d tell you a little bit about the pattern, why I love it, and give some tips I found helpful during the making process, particularly when it comes to the neckline and buttonholes.

LYRIC OPTIONS
The Lyric pattern has a dress or peplum blouse option. With 2 skirt options, 3 lengths, 4 cup sizes and 6 sleeve options you are sure to find a style you like. One thing that drew me to this pattern was the cup size options. I love that it’s customizable to give a better fit in that way. Add in 2 sets of darts, and I was super pleased with the shaping of the blouse.
NURSING FRIENDLY
With a full button down placket, this is the perfect nursing-friendly top! I don’t know about you, but I’m not a huge fan of the subtle or obvious nursing hacks, but I do love a blouse or dress that already accommodates for nursing.

HOW TO RAISE THE NECKLINE
I chose a very lightweight rayon to make my Lyric blouse, and because of that I knew that the neckline might be a tad low for me. It’s my preference to have a little higher neckline so today I wanted to show you how I raised the neckline, in case any one else was wanting to do the same. Sometimes raising a neckline is complicated, but the way this pattern is designed makes this adjustment a breeze. Let me walk you through it.
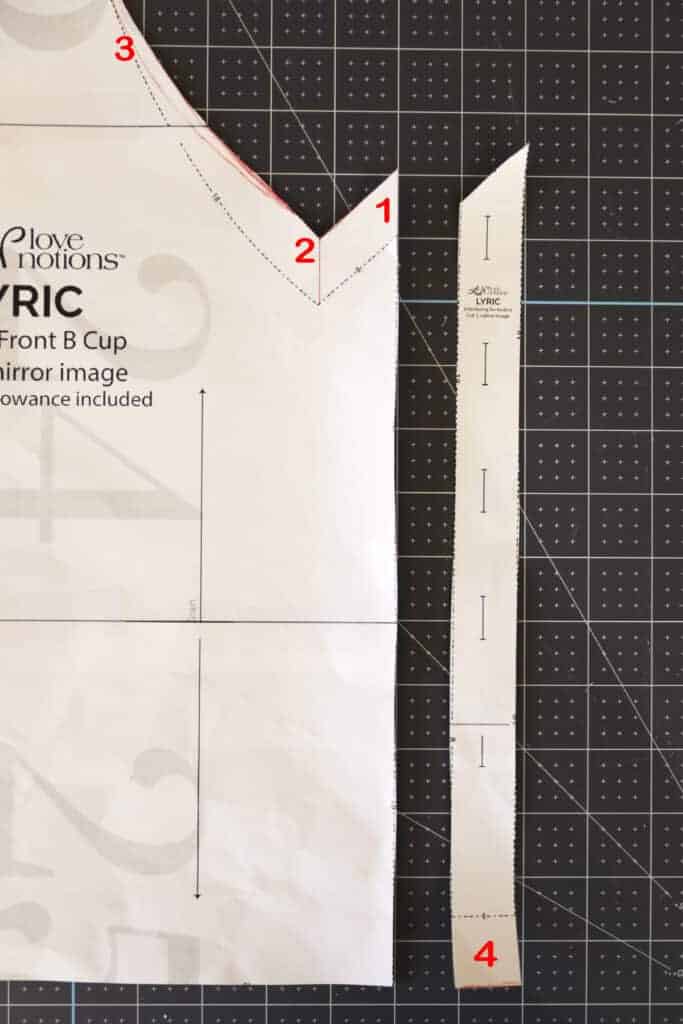

- I raised mine 1 inch, which I think was the perfect amount. I added paper behind the pattern and measured up 1 inch from the center front cut line.
- Measure up from placket point 1 inch. Create a right angle here toward the shoulder.
- Smooth the shape of the neck to meet this new point without disrupting the original shoulder shape. Trim extra paper away.
- Add 1 inch to the bottom of the interfacing and buttonhole guide pattern piece.
Now that I’ve shown you how I raised the neckline, let’s talk about buttonholes and buttons!
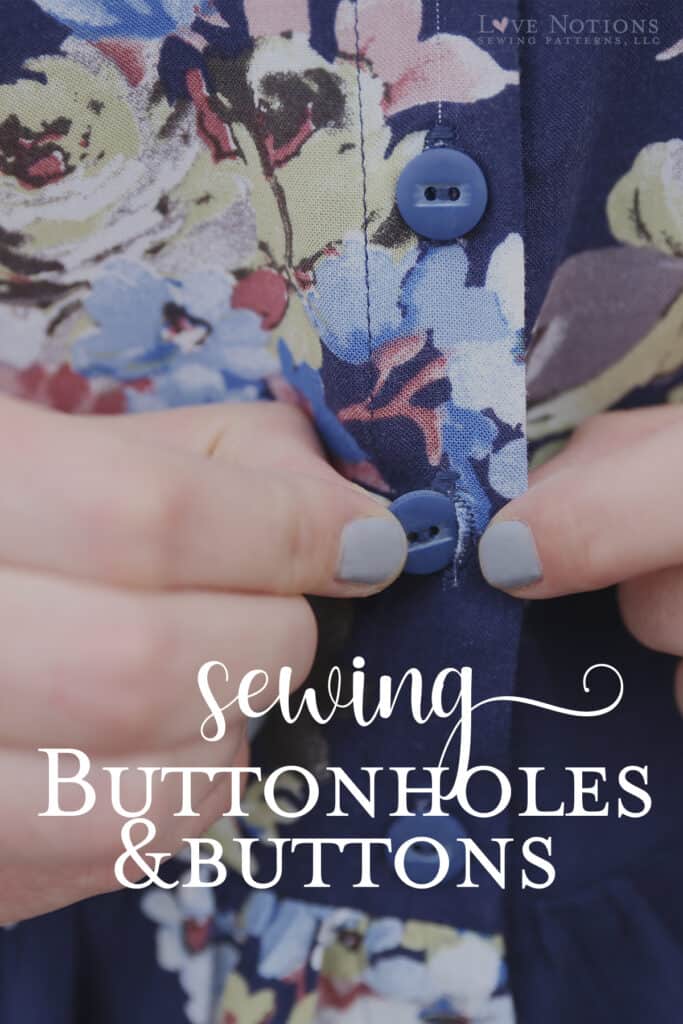
HOW TO INSTALL BUTTONHOLES
In the past I’ve stayed away from full button up shirts, in fear of the buttons and buttonhole placement. This can be intimidating to any sewist, but I have a few tips I practice to make the process a little bit simpler. I’d love to share those with you.
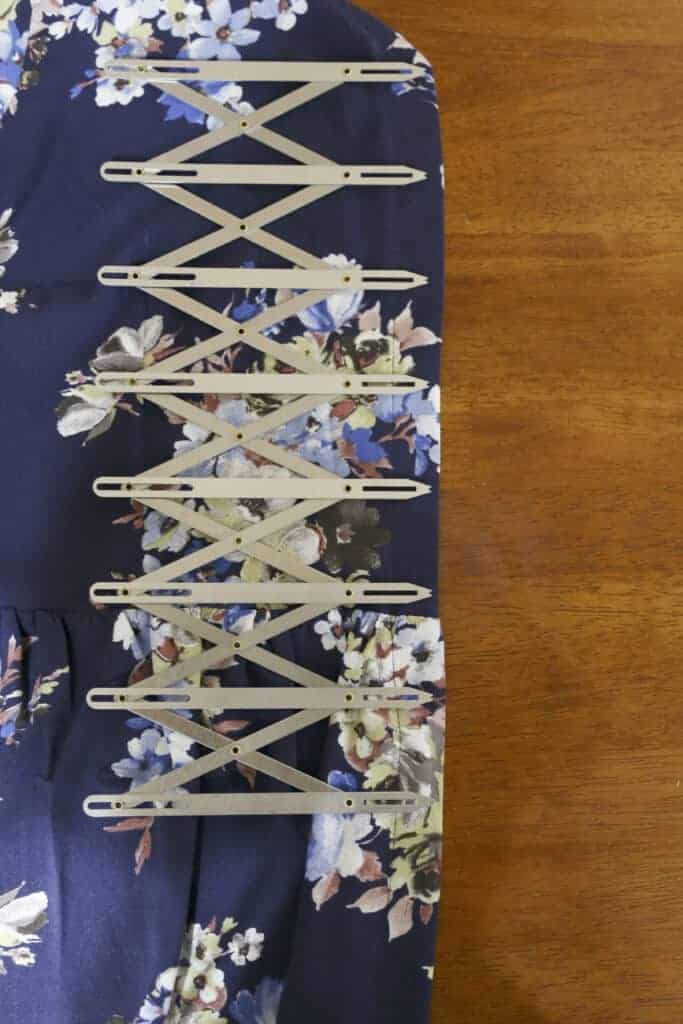
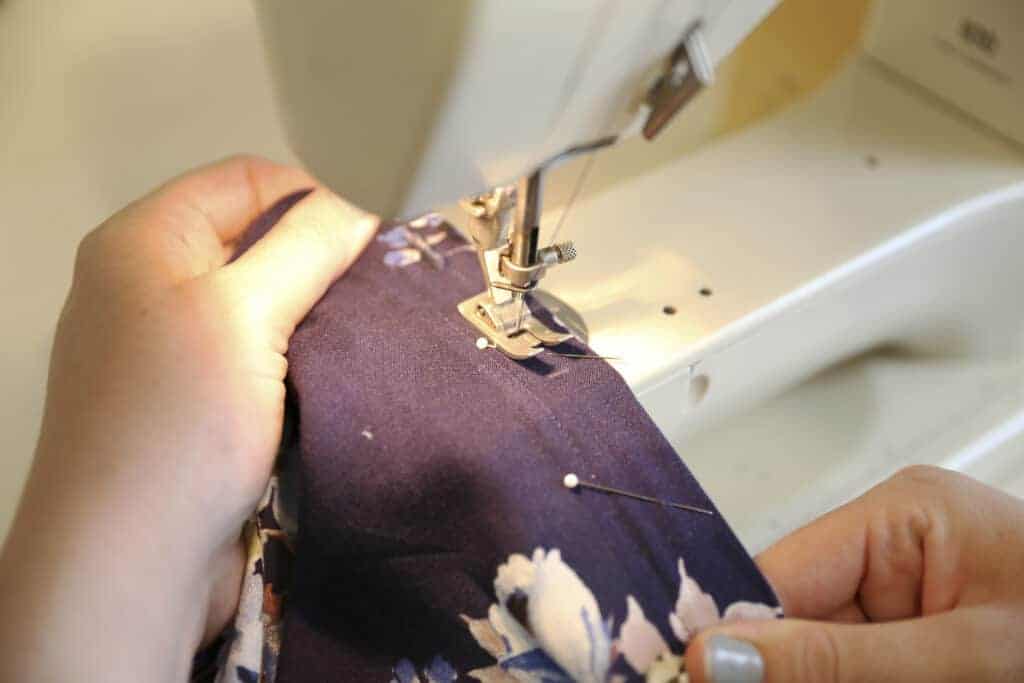
First I use my Simflex Sewing Gauge to space and mark my buttonhole spots accurately. I compared the spacing to the recommended buttonhole placement, then continued down the front of my placket. If this were a tighter blouse you would want to be very sure to have a button at the apex of your bust. This keeps your blouse from gaping open as you wear it. Once I have my gauge set, I mark and pin the center of each buttonhole.
Next I mark above and below my button to create a start and stop point for my buttonhole.
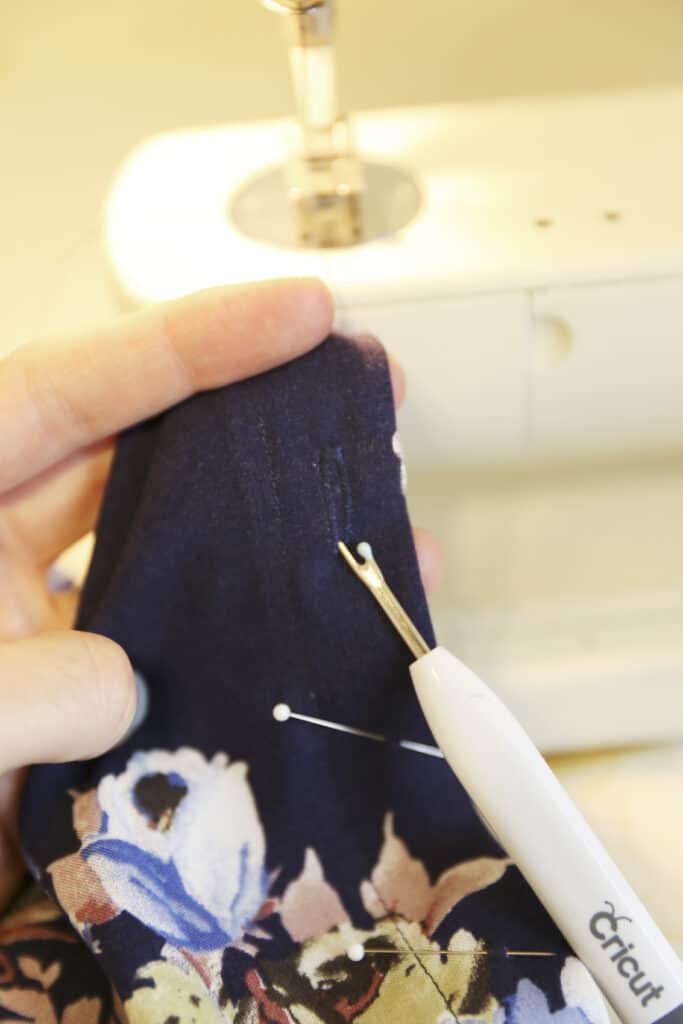
You can buy a special button hole cutter, but I use my seam ripper very carefully to open my buttonholes. I always start at the bottom of the buttonhole and cut toward the center. Then repeat from top of the buttonhole to the center. This will ensure you don’t cut through the buttonhole stitching you just created. I’ve done that before, and that’s why I stopped using my detail scissors and use this method only! Not a fun mistake to make!
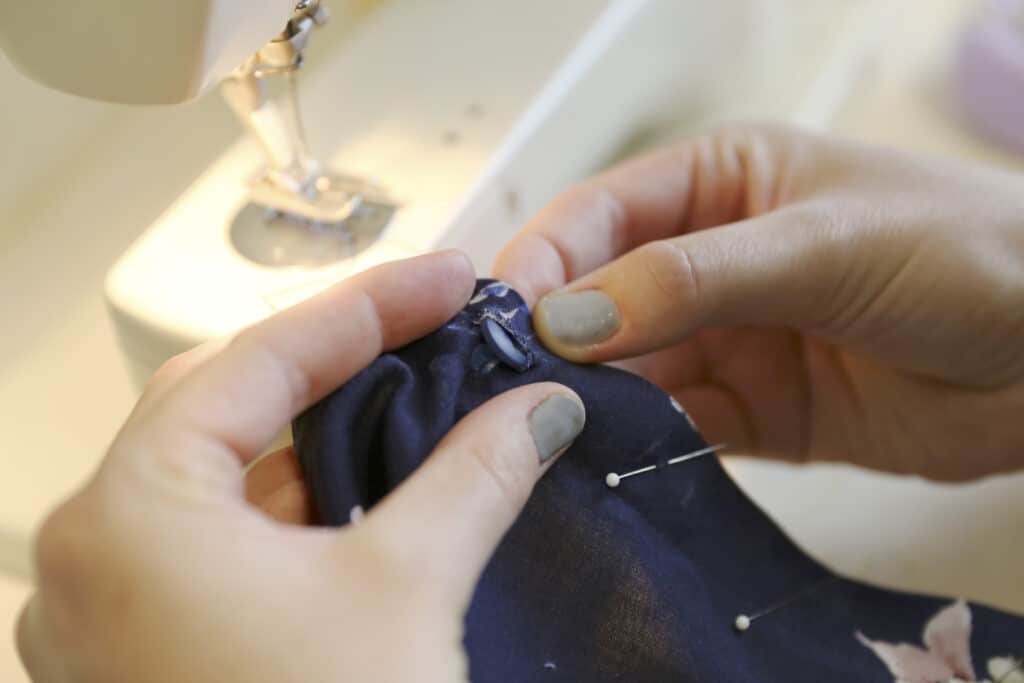
Finally I test the size of the buttonhole and fray check around it.

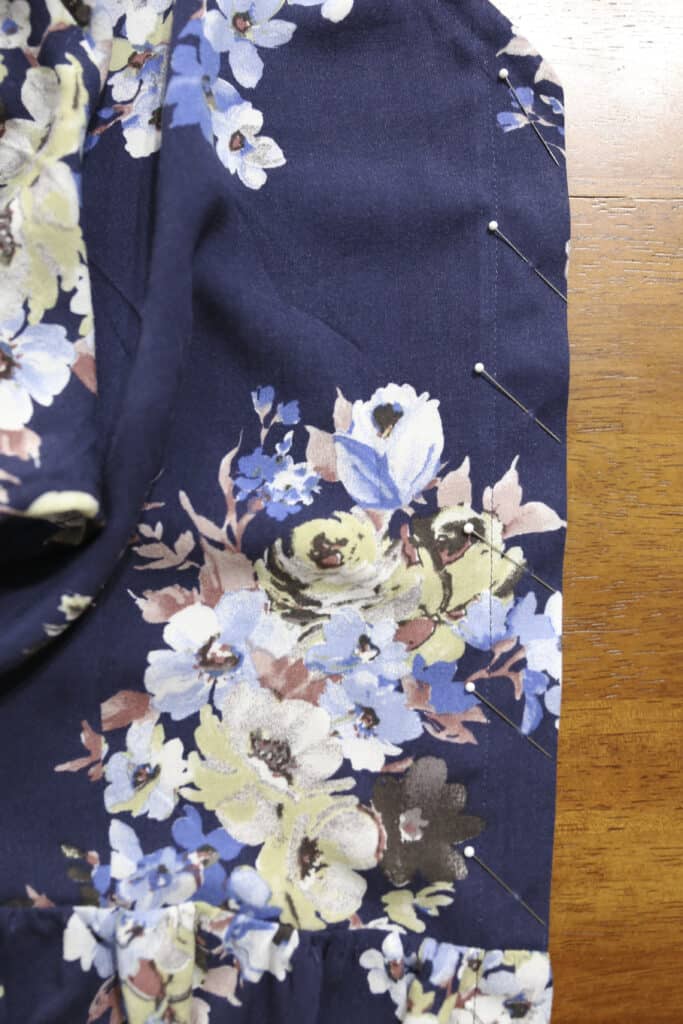
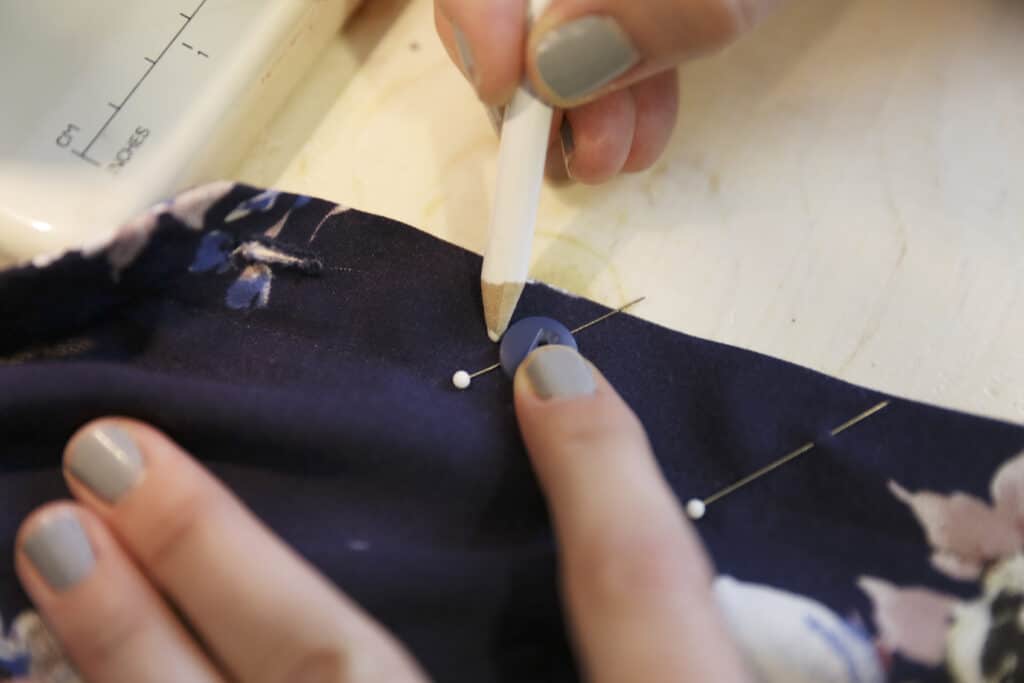
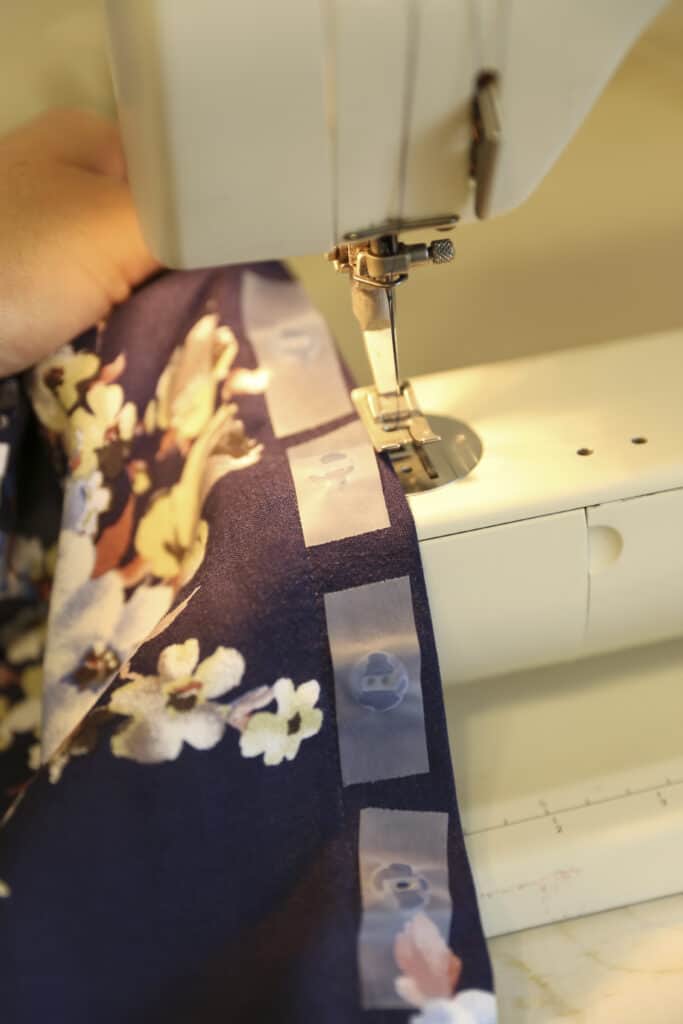
After completing all my buttonholes, I pin my plackets together. During this step I make SURE the crucial parts of the blouse match up. In this case, I started at the hem (which I had already completed to insure the plackets would match up perfectly) and worked my way up. Also being careful around the peplum seam to match it up well. I mark with a fabric pen through the opened buttonholes, and then attach all my buttons.
Tihana from Ammon Lane, gave me the advice to tape my buttons on before I sew them and I’ve done that ever since. This tip is super helpful!
I hope those tips help you conquer the buttonholes and placket on the Lyric. You can totally do it!

I had a lot of fun making this blouse and I love the fit and the way it turned out. Thanks for reading along and joining me here today, and be sure to get the Lyric Dress and Peplum and try out these tips.
[/vc_column_text][/vc_column][/vc_row]