Zipper + Cardigan = a Fall Sewing Essential. Chris Shapiro is on the blog today with an inspirational zipper post that is equal parts creativity and functionality. Be sure to snatch up that Boyfriend Cardigan and get your own creative juices flowing!
Zippers for Function and Fashion: Featuring the Boyfriend Cardigan!
Happy Fall everyone!
Chris here from http://sewjourns.com/ bringing you another Feature Friday Pattern and some pattern modifications for the Boyfriend Cardigan by Love Notions!
Feature Friday Patterns are just $5 for one day only! What a great way to try a pattern you’ve not tried before. The Boyfriend Cardigan is a great value at the regular price but for today’s Feature Friday price of $5 it’s really a must buy. You can purchase your Boyfriend Cardigan here. This is my affiliate link, thank you! https://www.lovenotions.com/product/boyfriend-cardigan-for-ladies/?affiliates=199
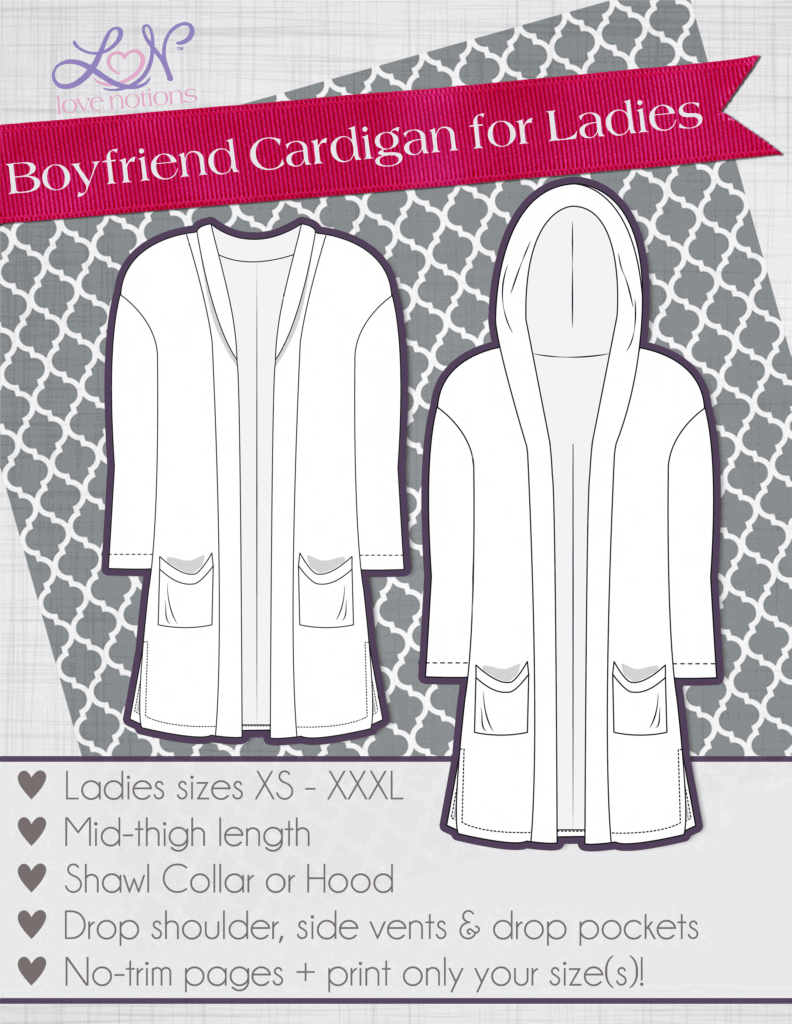
THE BOYFRIEND CARDIGAN
The Boyfriend Cardigan is an open front cardigan in sizes XS-XXXL. Designed for knit fabrics, it features drop shoulders, patch pockets, side slits, and either a shawl collar or a hood. You can also leave off the shawl collar or the hood for a super-fast sew.
ZIPPERED CARDIGAN, THREE WAYS
Today I will show you three different Boyfriend Cardigans utilizing zippers. For the first version we will sew a zippered hidden pocket. On the second version I’ll show you how to add a separating zipper to the front of the Boyfriend Cardigan to make it into a stylish warm and cozy jacket. For the final version of the Boyfriend Cardigan you will see how zippers can be used for a great and surprising fashion detail!

There are so many zippers on the market – different sizes, types, colors and on and on. Here are a few types of zippers.
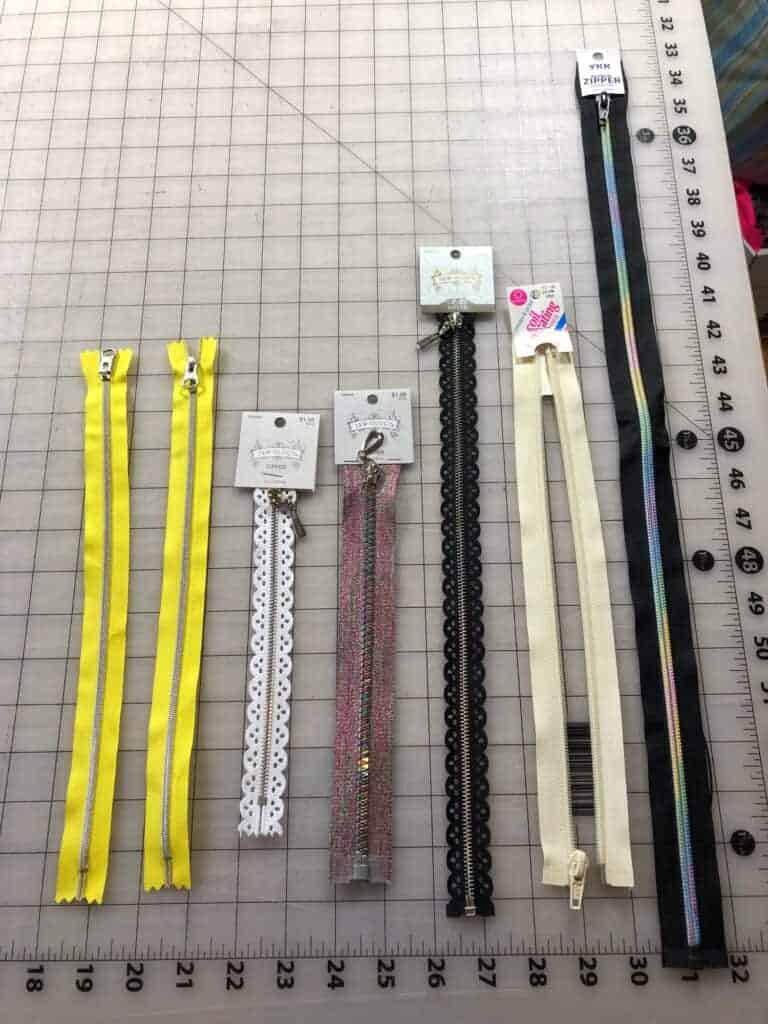
When I say zippers do you look away? Get shivers down your spine or automatically say “no way that’s too hard”? I get it – I was there once too a long time ago. Please let me encourage you to give at least one of these zipper applications a try. As with every new technique we learn, it may take a few attempts to get your zipper installations on point but isn’t that the way it is with everything? I know you can do it! So here we go!!
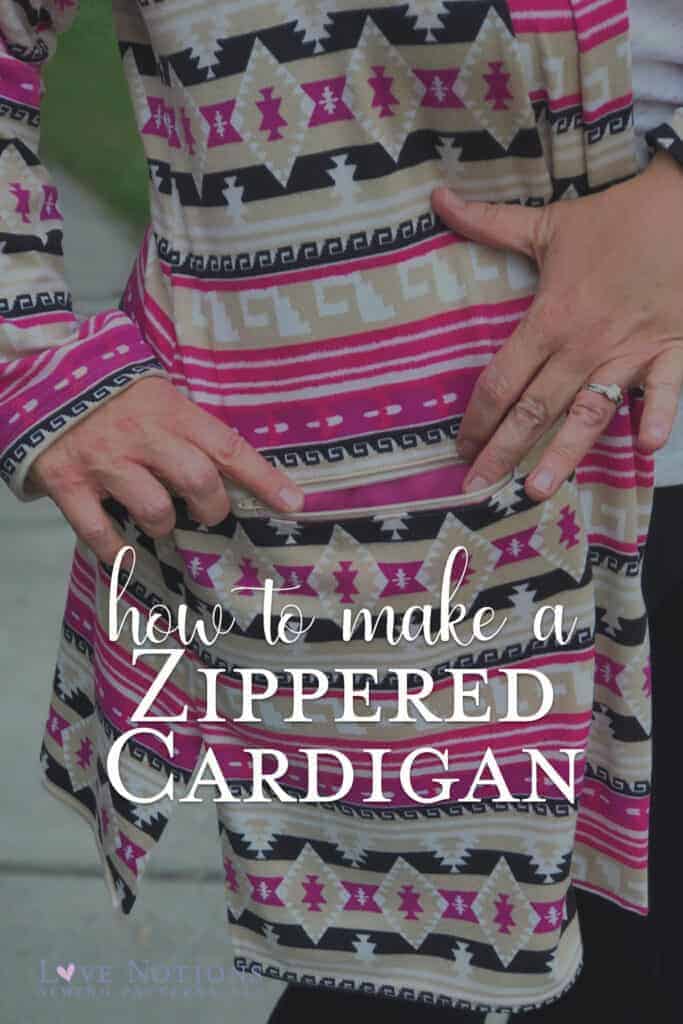
ZIPPERED POCKET CARDIGAN
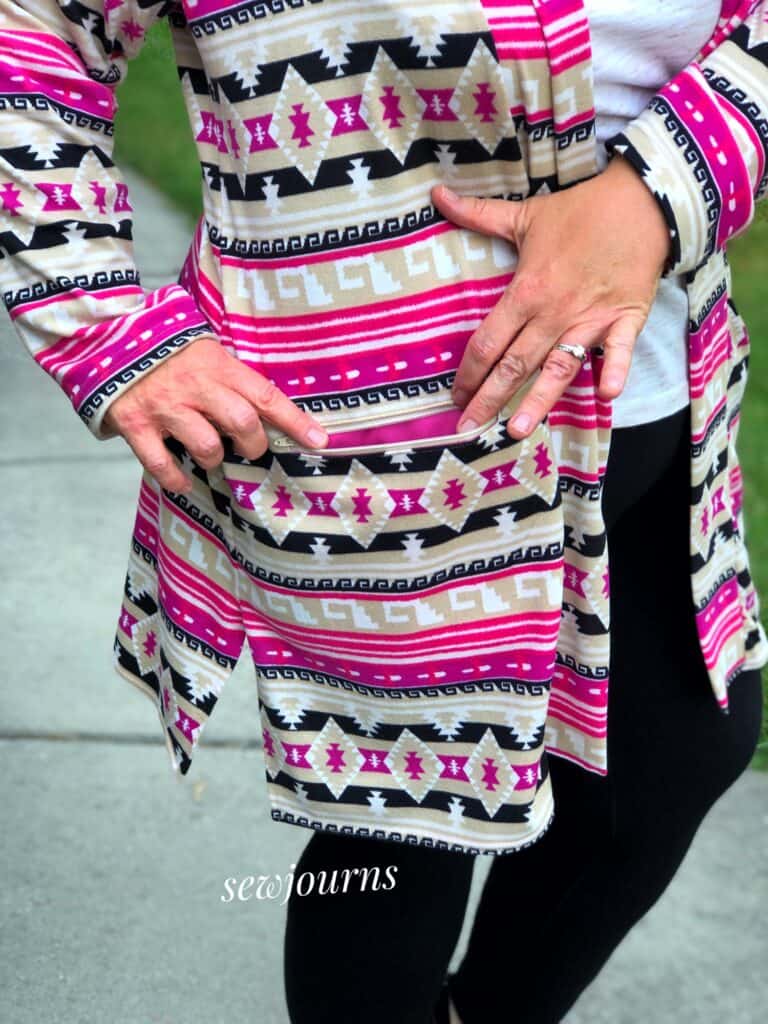
First is the shawl collar version of the Boyfriend Cardigan in a pink, black and tan Aztec design. I sewed up this version as per the tutorial in the pattern but WITHOUT the patch pockets. Instead I will be walking you through how to sew in a hidden zippered pocket.
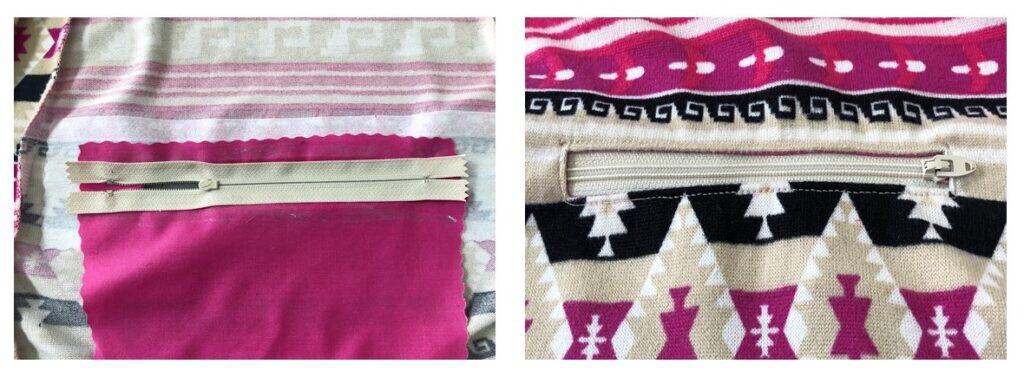
I chose a 7-inch zipper in tan. You can easily use a longer zipper if that is what you have. It can be shortened at the bottom since it will be sewn into the opening of the pocket. I wanted the zipper to blend into the fabric so it would not distract from the fabric design. You can choose to have a bright zipper or a matching or coordinating zipper.
Using the pocket placement lines on the pattern, pin your zipper to the front of the cardigan to check the placement.
HINT: Try on your cardigan to make sure you are happy with the pocket placement. You are the designer; you can choose to move the pocket up or down.
I chose a broadcloth in pink for my pocket fabric. Broadcloth is a great choice since it is a woven, non-stretch fabric.
- Cut out the pocket using the pocket pattern piece included, but instead of cutting two mirror images, cut one on the fold. If using a knit fabric for your pocket, interface the wrong side of the pocket fabric.
- Cut a 3-inch by 7-inch piece of interfacing and iron onto the wrong side of the cardigan, centered on where the zipper will be sewn.
- On the wrong side of the pocket piece (if you have interfaced you will draw directly onto the interfacing), draw a line 1 inch down from the top and 1 inch from either side. Then draw a line ½ inch down parallel to the first line. Draw a line down the center, then draw two lines 3/8 of inch from the sides to form a triangle as seen in the picture below.
- Lay your pocket RST with the cardigan, centering the pocket line you drew in the previous step over where the center of the zipper will be. Use pins to hold your pocket in place.
- Sew all around the outside of the box you drew backstitching at the beginning and the end.
- Cut down the center line, through the pocket fabric and the fashion fabric only to the where the triangle you drew begins. Now cut on the triangle lines up to but not through the stitches on each side.
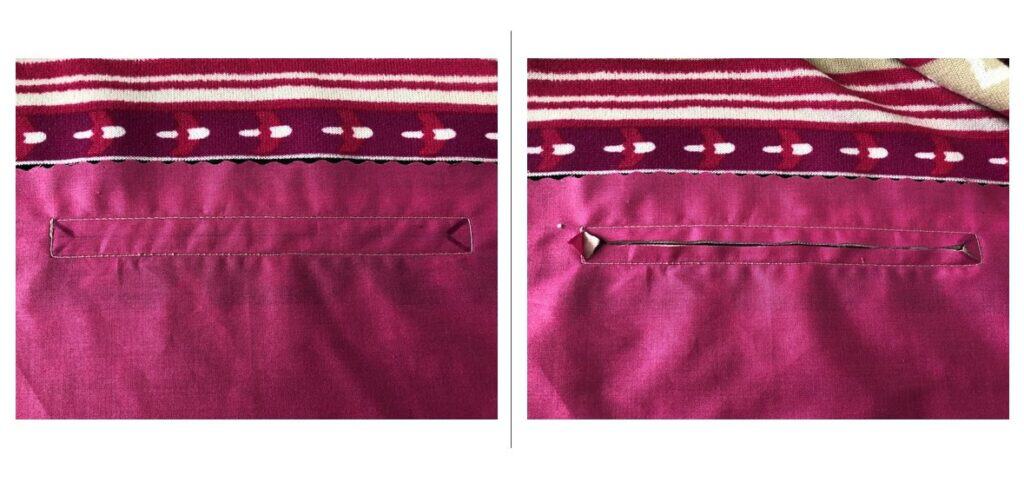
- Flip all the pocket fabric through the opening to the inside of the cardigan and press the seams all around the rectangle opening you have created.
- Working from the wrong side of the cardigan, center the zipper, right side of the zipper face down over the opening you created. Use Wondertape or fabric glue to hold the zipper in place. The zipper stops on either end of the zipper will be past the pocket opening.
- Open the zipper halfway. From the right side sew with a straight stich all around the pocket opening to sew the zipper in place, pivoting at the corners and backstitching at the beginning and the end.
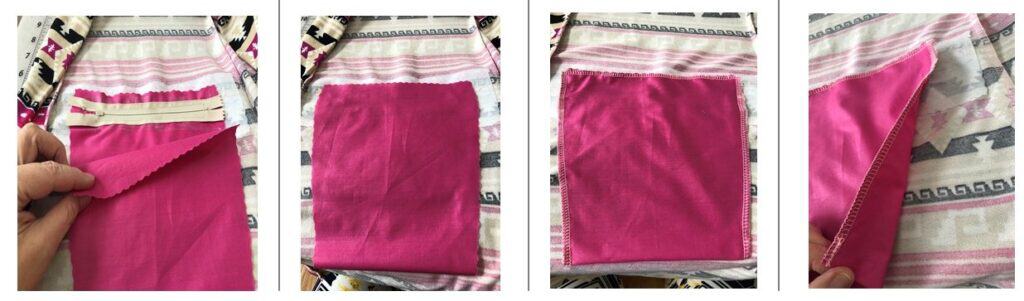
- Turn the cardigan to the wrong side and bring up the bottom of the pocket fabric to cover the zipper and meet the top of the other side of the pocket fabric to form the pocket.
- Sew the pocket fabric to itself and NOT to the cardigan. Sew all around the pocket top and down both sides. You may use a serger to enclose the edges or you can sew with a straight stich and finish the edges however you’d like.
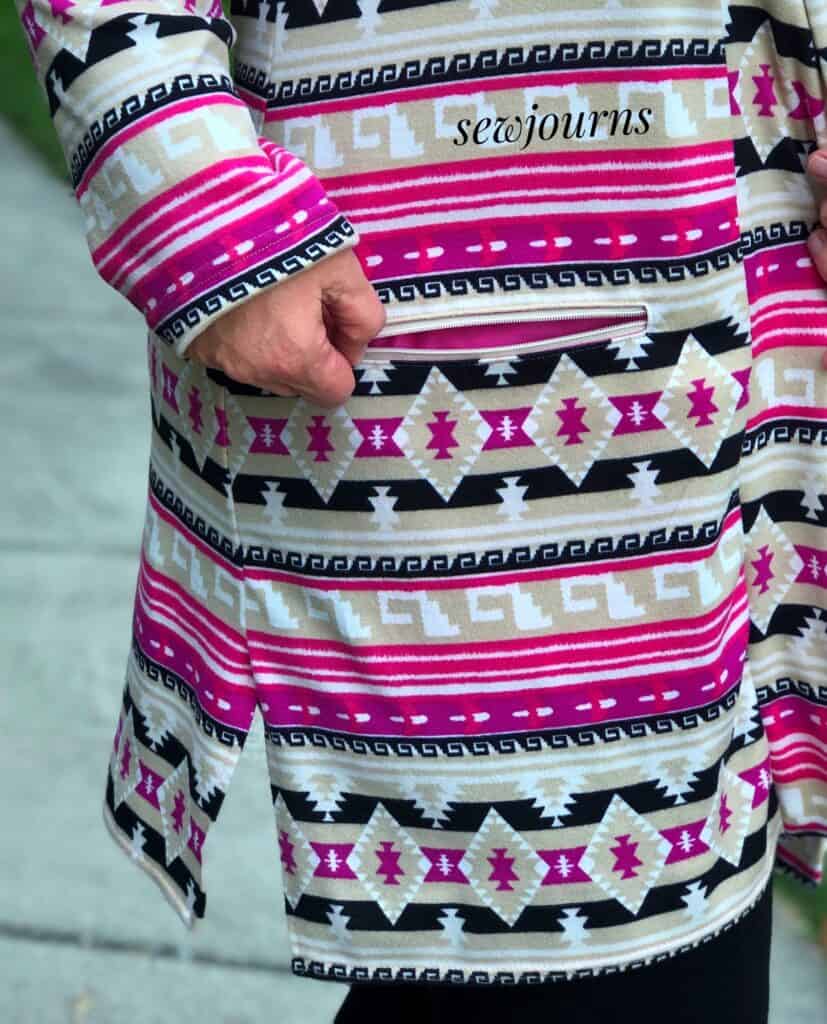
- Voila’! You’ve created a zippered hidden pocket. You can now go out purse free and put whatever you want in your cardigan zippered pockets!

I love the pop of color I get when I open my zippered pocket!
ZIPPER FRONT CARDIGAN
Next up, let’s turn the open front hooded version of the Boyfriend Cardigan into a warm and cuddly zippered cardigan utilizing a separating zipper!

This caramel-colored 4-way stretch fabric from Cali Fabrics is very thick and warm and really was perfect for this version of the Boyfriend Cardigan.
I began by blending out one size on the center front pattern piece only. Since this is an open style cardigan, I needed the center front of the cardigan to be closer together so when it is zippered it will fit comfortably and not too snugly. I constructed the hooded version of the cardigan with patch pockets as per the tutorial. I usually need to shorten the sleeve length, however for this version, I kept the sleeves extra-long so they fall down longer over my hand for that warm and cuddly feel.
One thing you’ll want to do is add some fusible interfacing to one side of the band where the zipper will be on the front of the cardigan before folding WST (the fusible interfacing will be enclosed in the folded band). Then serge or sew on the band as per the tutorial.
To get the look of a jacket, I chose a separating zipper that was a bit shorter than the finished garment. You’ve probably seen jackets where the bottom few inches are open before the zipper begins. I also wanted the hood to not feel tight when zippered all the way so I opted for only a 22-inch brown #5 separating zipper that will finish just under where the hood begins.
- After the cardigan was complete as per the tutorial, I marked with a pin where I wanted the bottom of zipper to be on each side of the front making sure they were even.
- I opened the zipper into two separate pieces and using Wondertape I held the zipper in place on the wrong side of the cardigan with the zipper teeth pointing to the center, making sure the zipper was even on both sides at the top and the bottom.
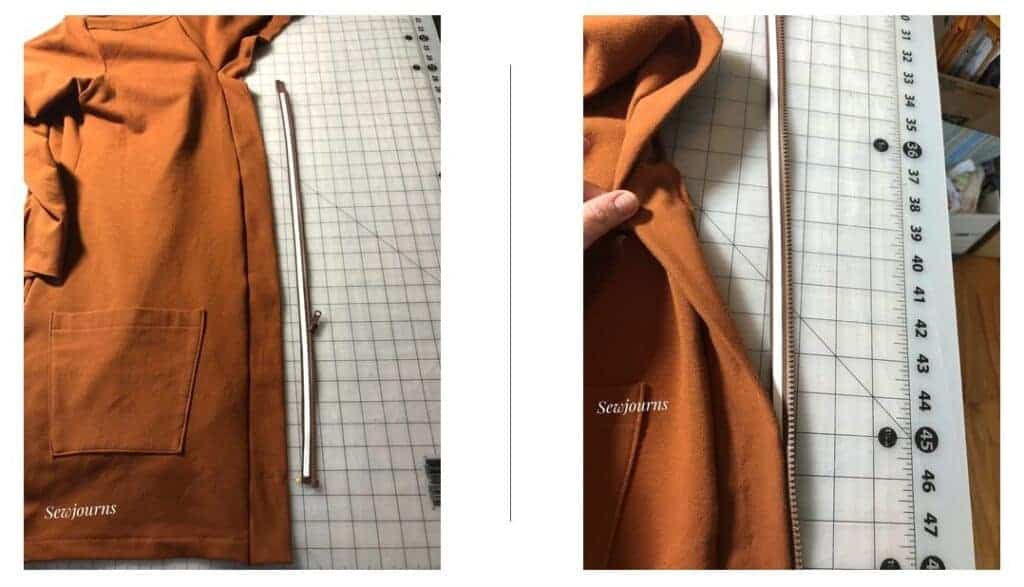
- At the top I turned the ends of the zipper tape to the back of the zipper and stitched them down so the top of the zipper would have a clean and finished look. I then stitched the zipper using my zipper foot to the cardigan on both sides.
There you have it easy as pie! I am so thrilled with this new “jacket” cardigan!


ZIPPER BACK CARDIGAN
Lastly let’s use zippers for fashion!
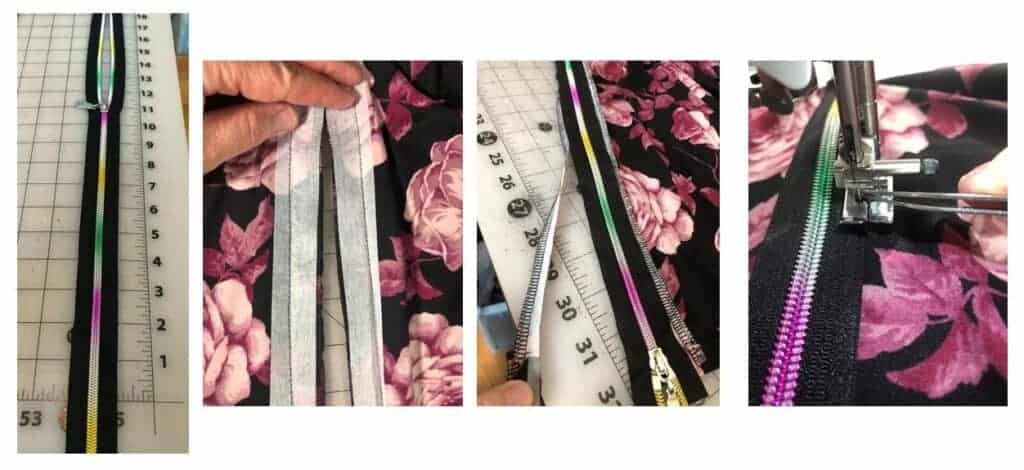
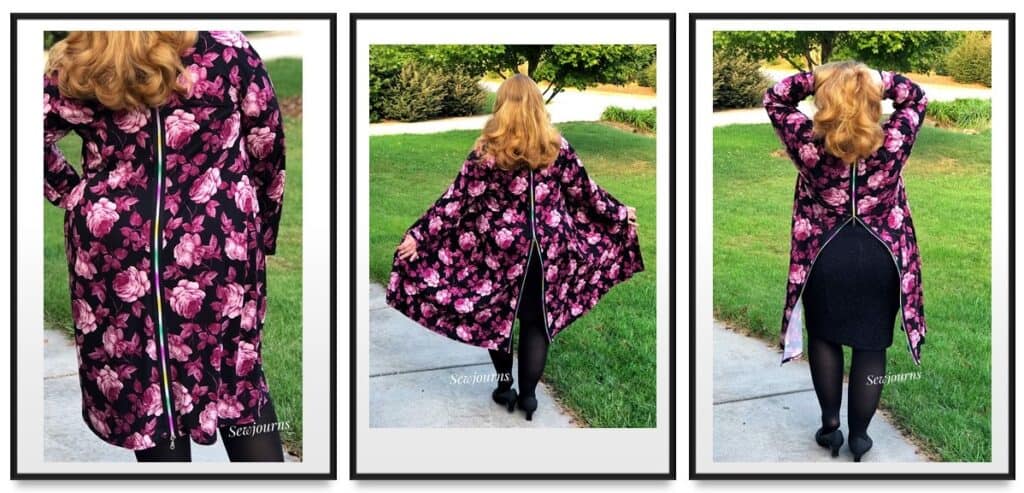
For our final Boyfriend Cardigan will we utilize continuous zipper tape and an exposed zipper up the back of our Boyfriend Cardigan. I chose a Double Brushed Poly Floral Fabric and a gorgeous rainbow continuous zipper that I purchased on Etsy for our fashion look. With this type of zipper you get 20 zipper pulls separately. I then purchased zipper stops since I will be sewing an exposed zipper. You can find many tutorials on YouTube for attaching zipper pulls to continuous zipper tape.

For my third Boyfriend Cardigan I wanted more of a nighttime or date night look (the fabric has a romantic look to me!) so I added 8 inches to the bottom of the cardigan. I also added 8 inches to the shawl collar piece. I did not want the side vents on this cardigan, so I turned the vent extensions on the paper pattern to the back when cutting. I added an additional ¼-inch seam allowance to the back piece to accommodate the zipper. That will give you a 5/8-inch seam allowance on just the back pieces. When I sewed the cardigan, I only sewed down the back seam about two inches from the neckline.
- To sew on an exposed zipper, you will be doing everything from the right side of the garment. It will be counterintuitive to a regular zipper construction, but it is correct ?.
- Turn the 5/8-inch seam allowance to the right side and press.
- Cut two pieces of interfacing 1-inch wide by the length of the back of your cardigan from the opening at the top (after sewing that back seam down about two inches) to the hem, and iron it on all the way down the back on either side of the back pieces.
- Stay stitch down the sides of the interfacing using a 5/8-inch seam allowance.
- Fold and press the stay stitching over itself to the right side of the fabric.
- Use Wondertape to hold the zipper in place from the top all the way to the bottom, so it is even with the seam. Center your zipper so it is equal on either side of the back so when unzipped the zipper will be right in the center. The edges of the folded over seam will extend over the zipper tape. We will trim that after we sew the zipper to the seam allowance.
- Using a straight stitch and zipper foot, sew the zipper close to the zipper teeth, to the seam allowance only, not to the cardigan back on each side, then trim away the excess fabric that extends past the zipper tape.
- Now using your edge foot you will sew the zipper down to the cardigan right along the edge of the zipper tape.
There you have it! An exposed beautiful and fun rainbow-colored zipper that you can unzip as far as you’d like to match your outfit, the occasion or your mood.
I really hope you will try at least one of these techniques on your Boyfriend Cardigan and share your Boyfriend Cardigans with zippers on the Love Notions Support Group page so we can all oooh! and ahhh! over your new skills and your lovely new cardigans.