Welcome to Day Two of our Pullover Sew Along! If you are just now joining us, don’t worry! You haven’t missed the party! Print off your pattern, cut your fabric and jump in! You can find tips for cutting out your fabric over on Day One. Now, let’s get sewing!

Beginning construction of the pullover
Today is pretty straight forward. Follow along with the pattern instructions to sew your shoulder seams, and attach the main portion of your hood/collar to the neckline. You want to pay close attention to keeping your seam allowance an even 3/8″ all along your neckline. If it varies at the ends, it can impact the height of your collar/hood making it difficult to line up the seams when attaching your zipper.
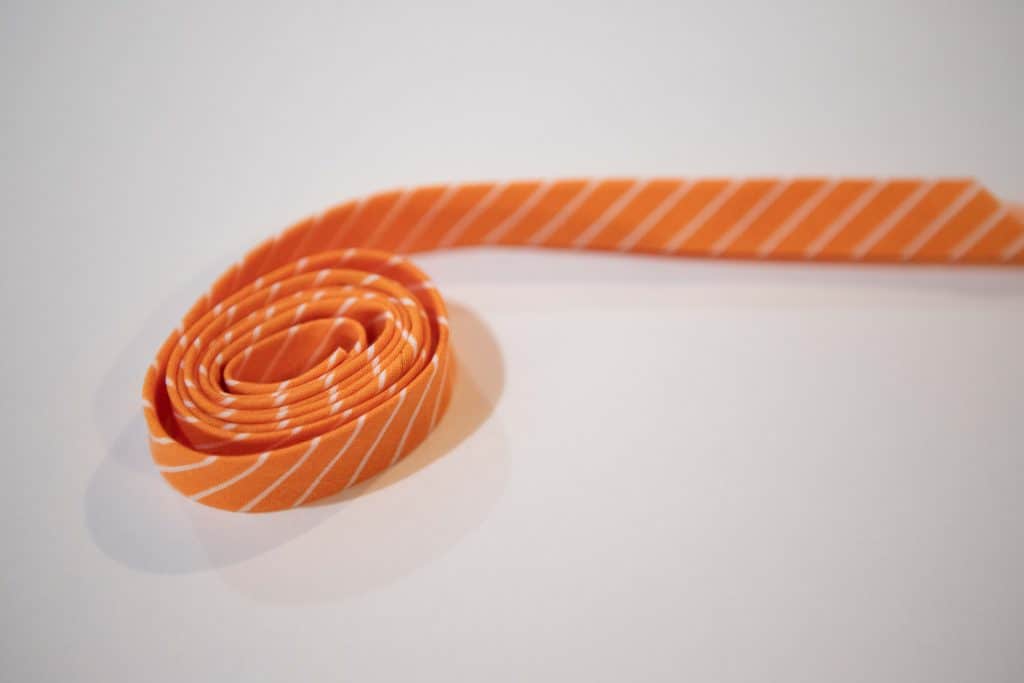
We can also get the hood/collar lining prepped today. That means we will be sewing our bias tape to the bottom edge of the hood/collar. Now, what if you don’t have a package of bias tape on hand? Or, you want to use a very specific color, or a fun print? Well, we just make our own! And it’s so simple!! If you already know how to make bias tape, scroll down to learn how to skip the hood/collar lining on your pullover!
How to make bias tape
You can make your bias tape in a couple of ways. I’m first going to show you have to make it without any special tools. This is actually my preferred way of making it. It ensures that it’s perfectly even and a consistent width. Scroll down a bit to learn how to use a bias tape making tool.
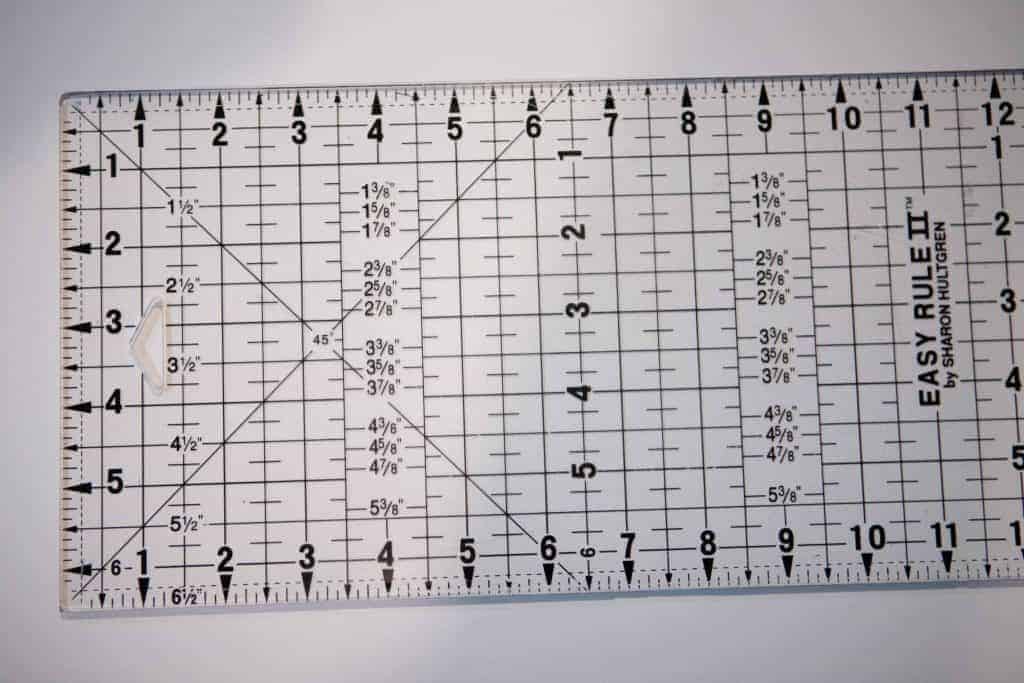
First, cut our fabric. To end up with half inch wide double fold bias tape, we want to cut our fabric into 2″ strips. If using woven fabric, we MUST cut the fabric on the bias. This bias cut is what allows the fabric to stretch around the curve of the neckline and lie flat. Some rulers have a line that marks a 45º angle, that makes this even easier! If you ruler doesn’t have this mark, you can eyeball it.
If you are making knit binding, you don’t want to cut it on the bias. Cut it so that the stretch is going in the direction of the greatest length, so you will usually cut perpendicular to the salvage edge. We don’t cut knit binding on the bias because that actually causing it to lose some of it’s stretch. Also, the knit is already stretchy and will curve around the corners and lie flat, if applied properly.
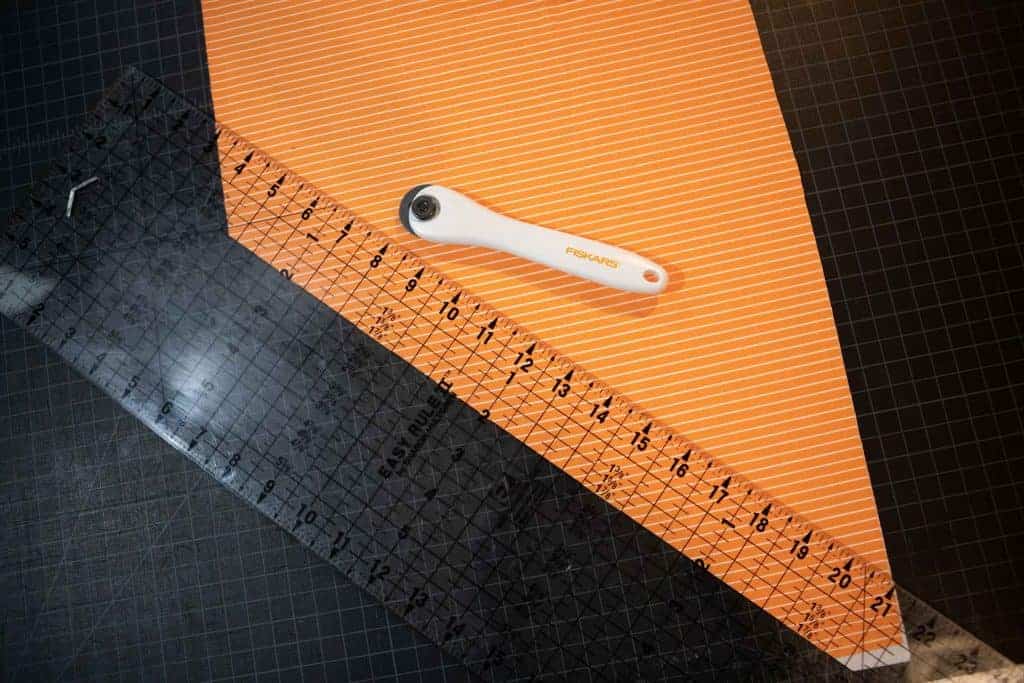
Line the 45º angle marking up with the side of your fabric and cut. I am making the bottom cut first and have the ruler going all the way to the bottom of the right edge of the fabric.

Now, line the 2″ mark up with the cut you just made to cut the top edge of your strip.
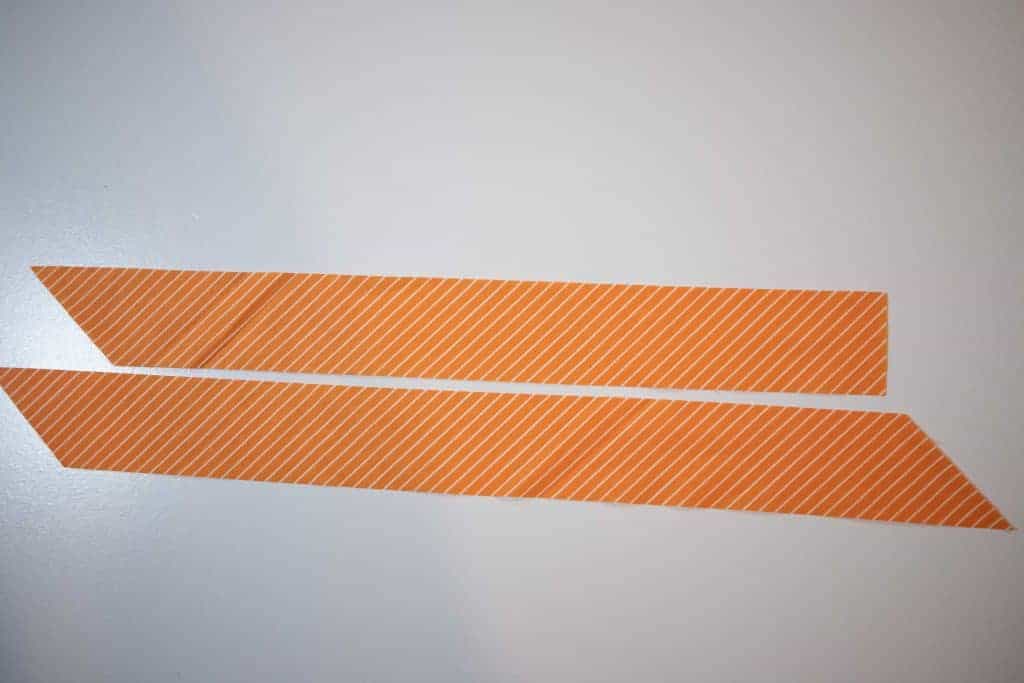
You can do these cuts with the fabric folded in half with the salvages together. If you do and you are using a stripe like I am, you will have to cut two not folded to get the stripes to match.
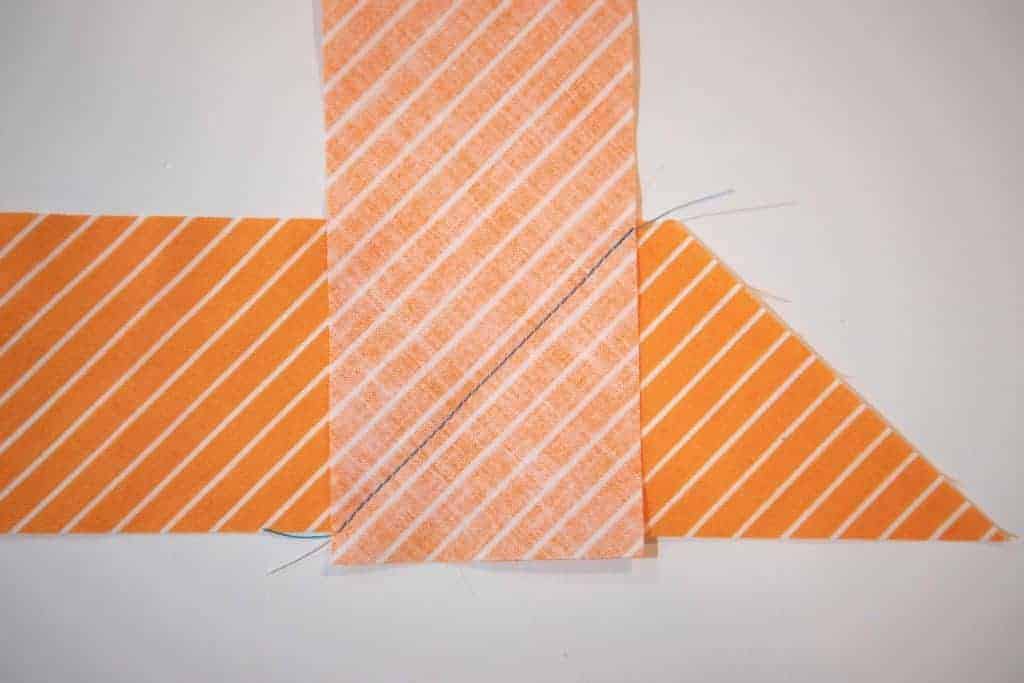
Now, we need to sew these together. To reduce bulk, we will be sewing them together with a 45º seam. Turn your top piece clockwise 90º, then flip it over so that your strips are right sides together. The strips should extend past each other by 1/4″. Don’t line up the raw edges. Sew diagonally across the strips where they overlap.
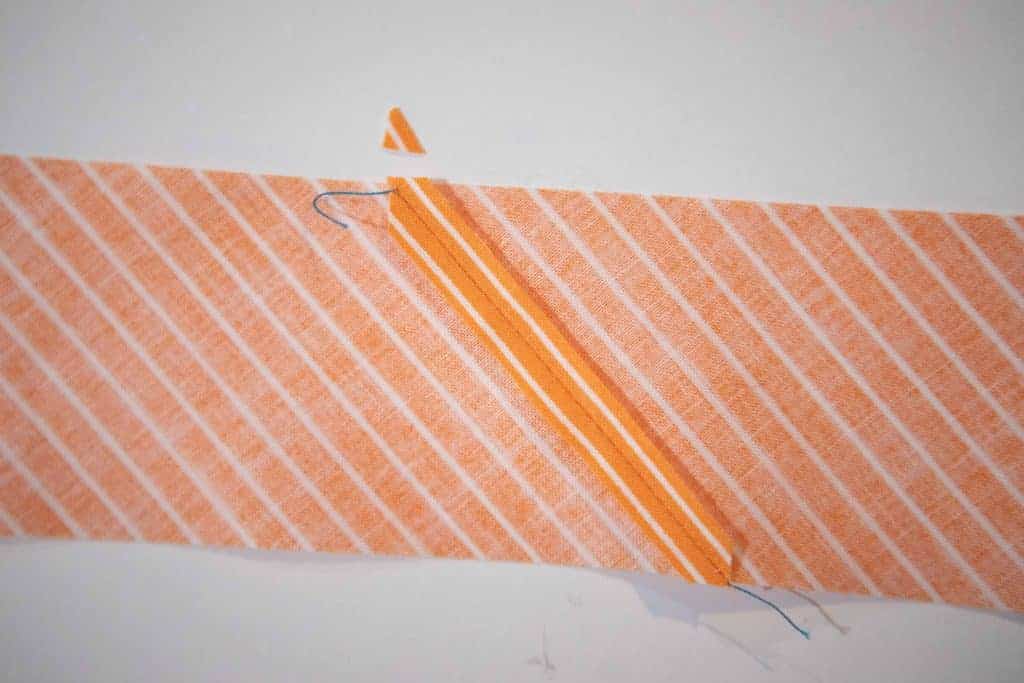
Trim the seam allowance down to 1/4″ and trim off the little corner that extends beyond the strip. Press the seam open to reduce bulk.
Press the fabric in half with the wrong sides together.
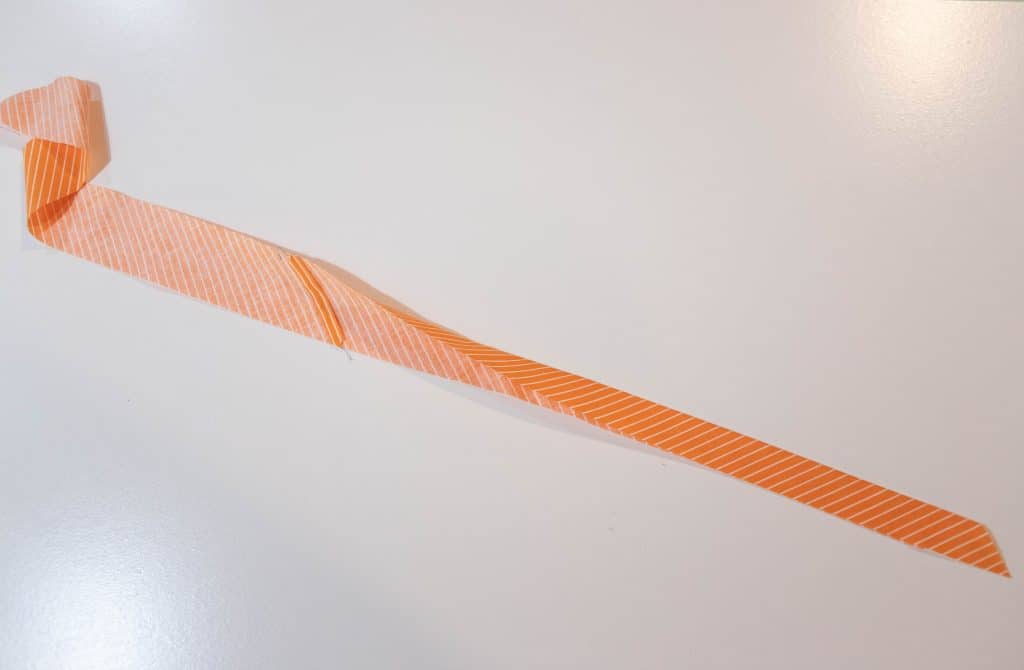
Open your fabric.
Now, fold over one side so that the raw edge meets the crease you pressed. Press.
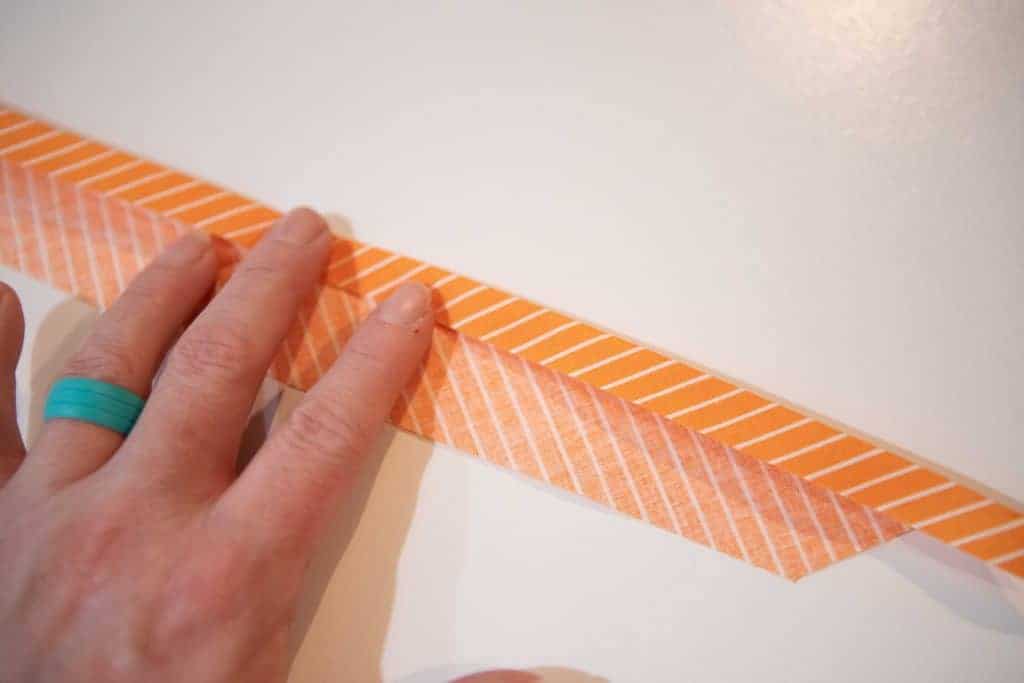
Now fold the other side in to the crease as well. (Stopping here results in single fold bias tape!)
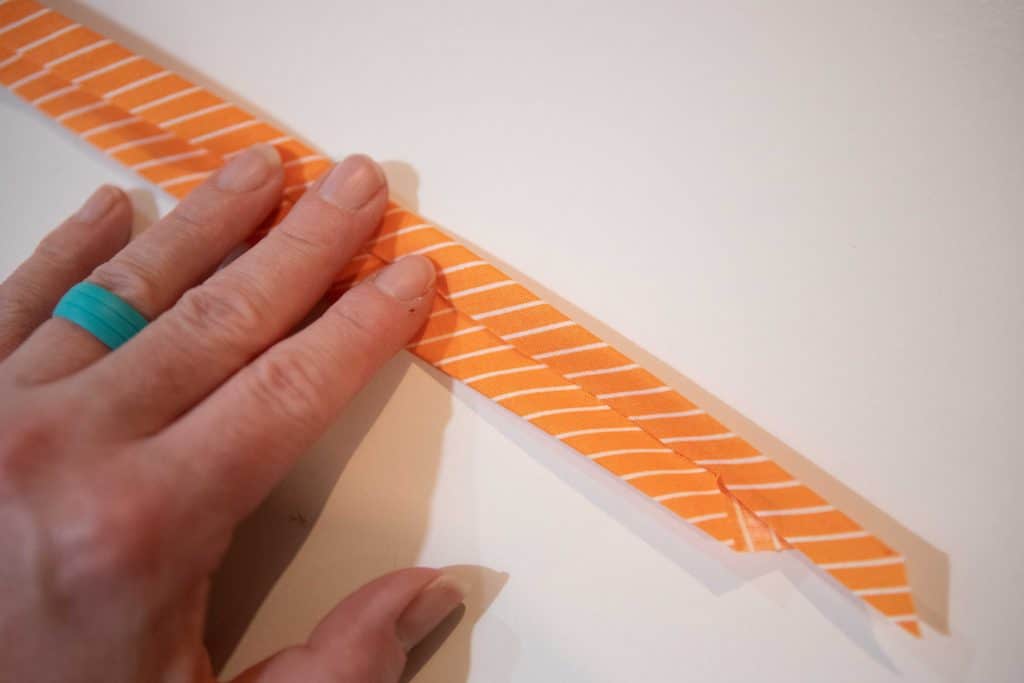
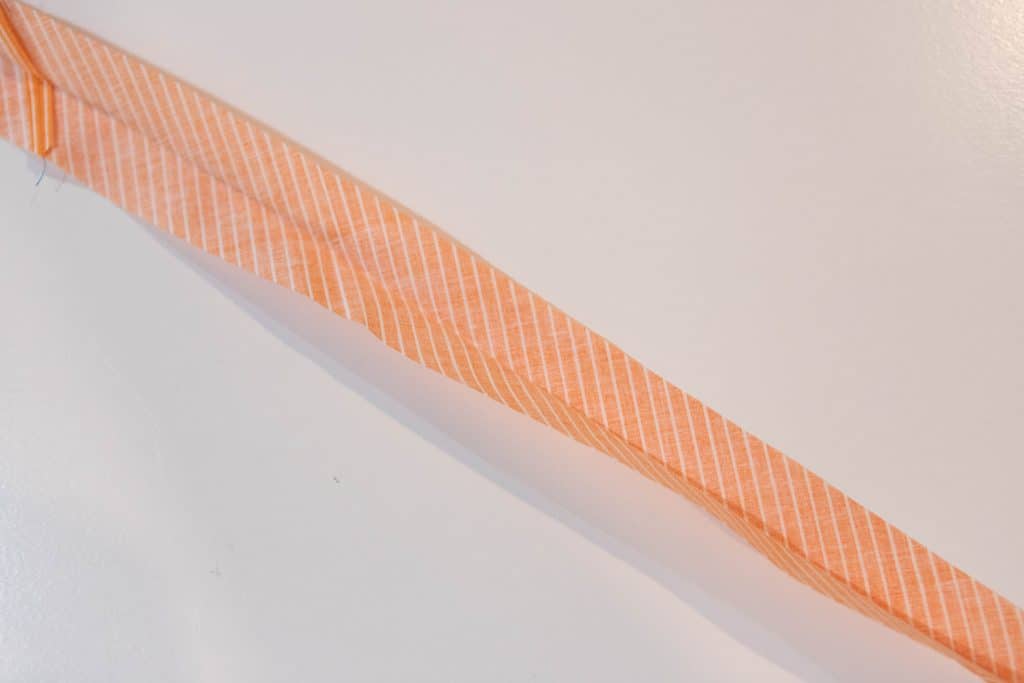
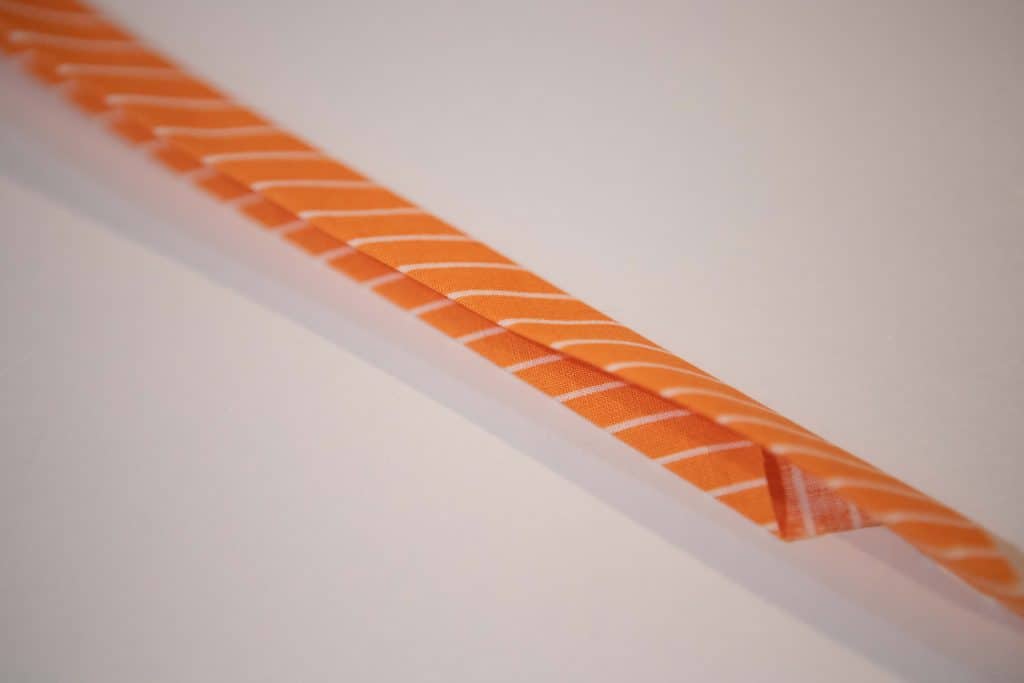
Now refold the strip along the original crease enclosing all the raw edges. Press. That’s all it takes to make bias tape!
How to use a bias tape making tool
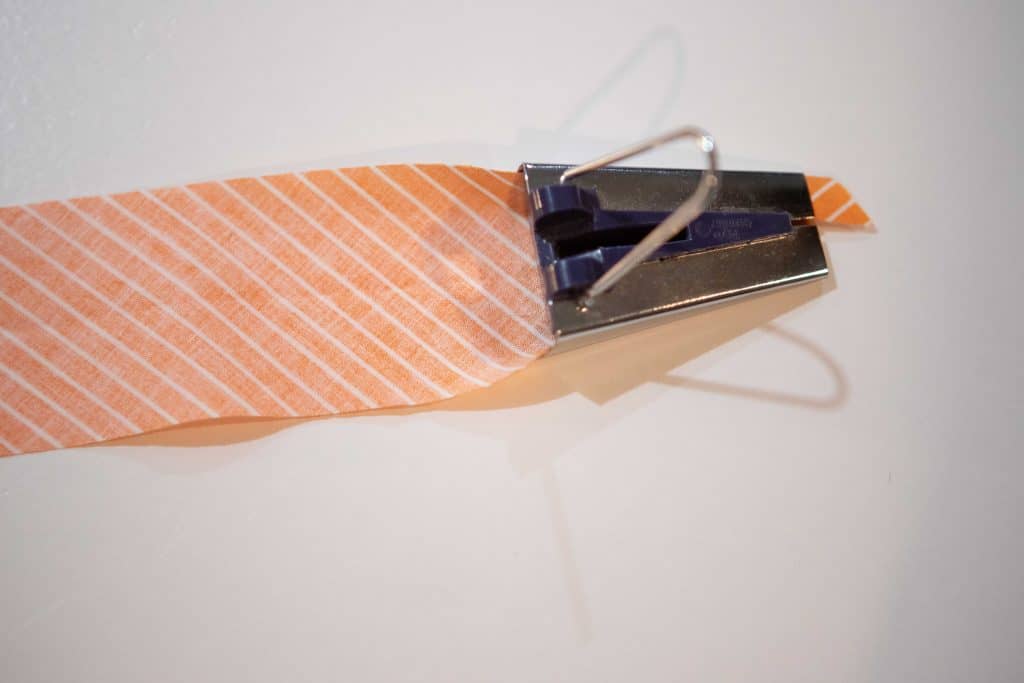
You can buy these fancy little tools for just a few dollars at most fabric shops and online. Bias tape makers come in different sizes, resulting in different sizes of bias tap. If you stop after the first press, you have single fold bias tape. If you complete both steps, you have double fold. Cut your fabric just as before.
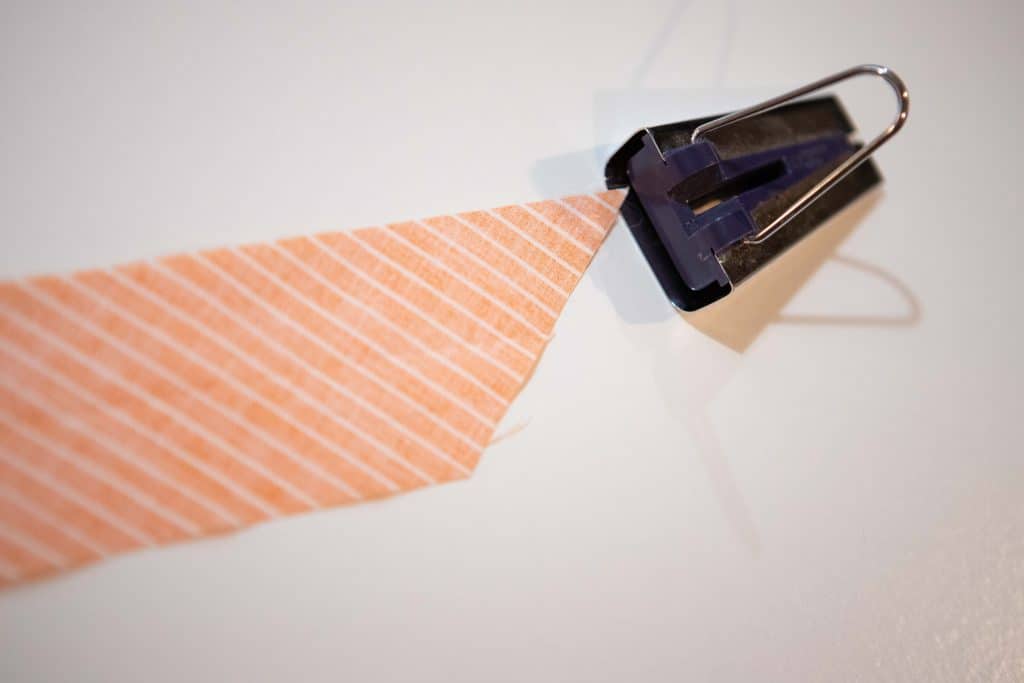
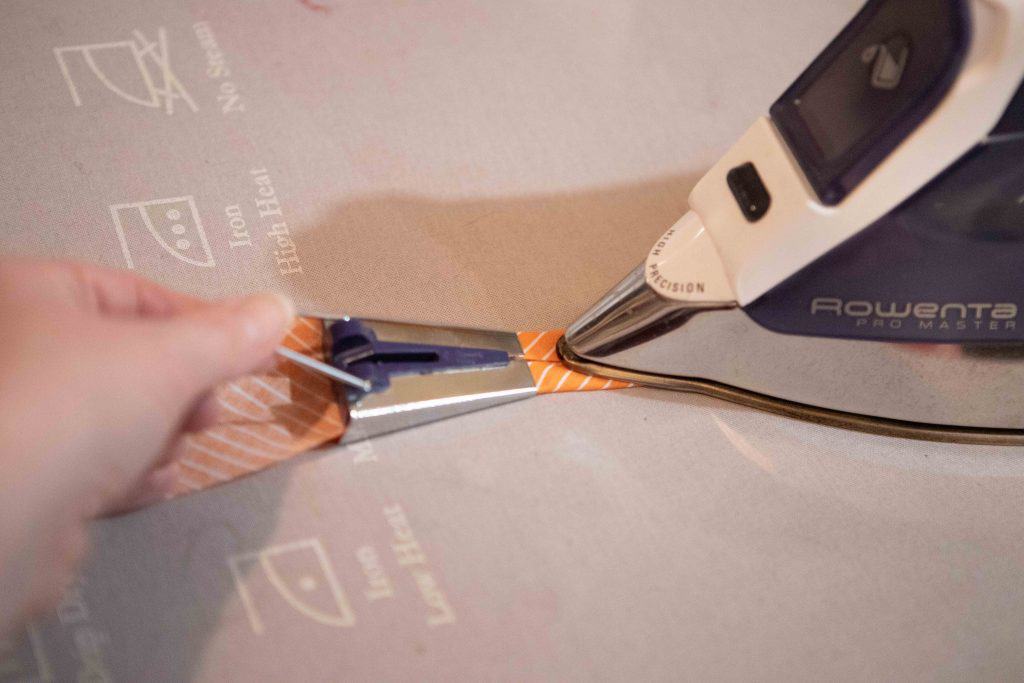
Feed the fabric into the larger end of the bias tape maker. Having the fabric cut with a point makes it easier to slip in there.
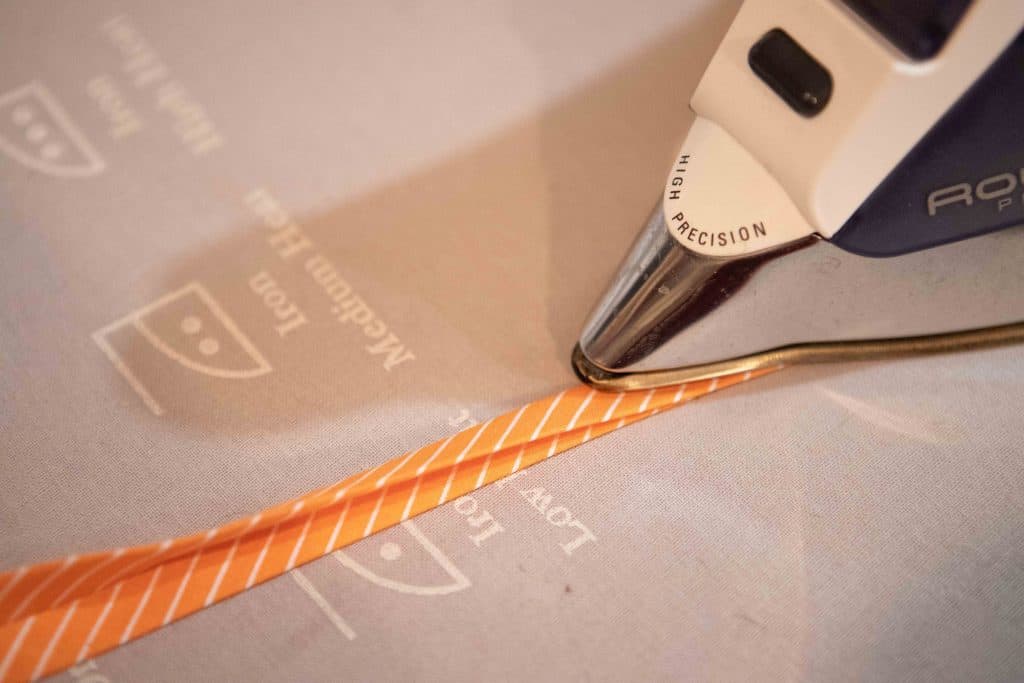
Pull the fabric through, it will fold in as it comes out the narrow end. Press with an iron. While using the iron to hold down the fabric, gently and slowly pull the bias tape maker down the fabric with the handle. Work your way down the entire length of the fabric, pressing as you go.
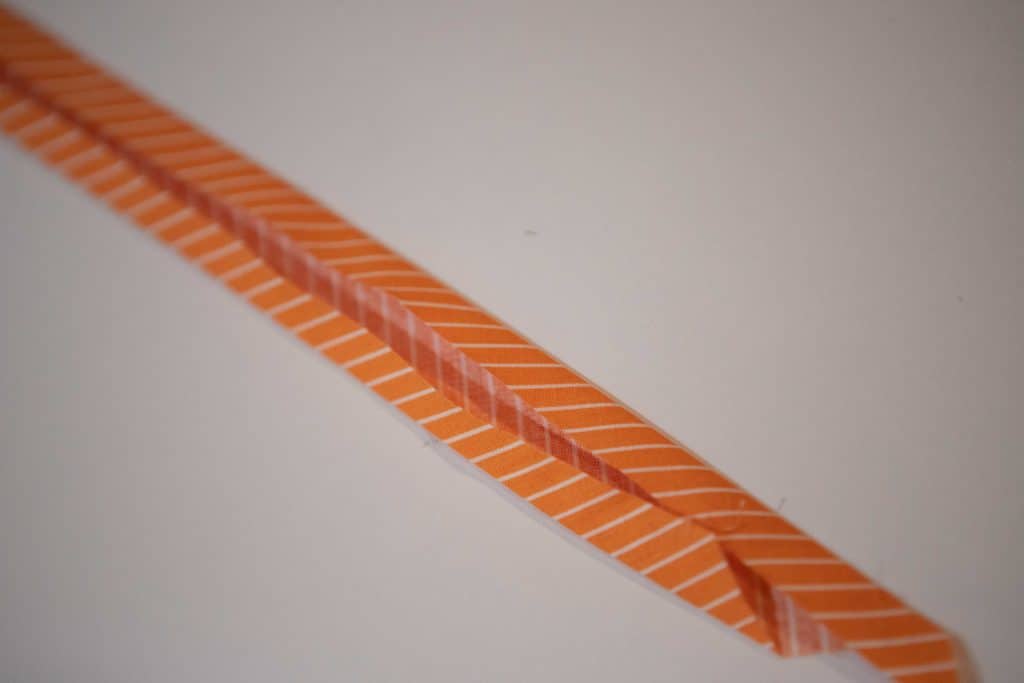
Below is what you will have afterwards. This is single fold bias tape.
Now for double fold bias tape, fold the fabric in half, enclosing the raw edges.
That’s it! Now, we can use this bias tape to finish off the edge of the collar or hood. We can also use it to create a non lined hood/collar version!
Skipping the hood or collar lining
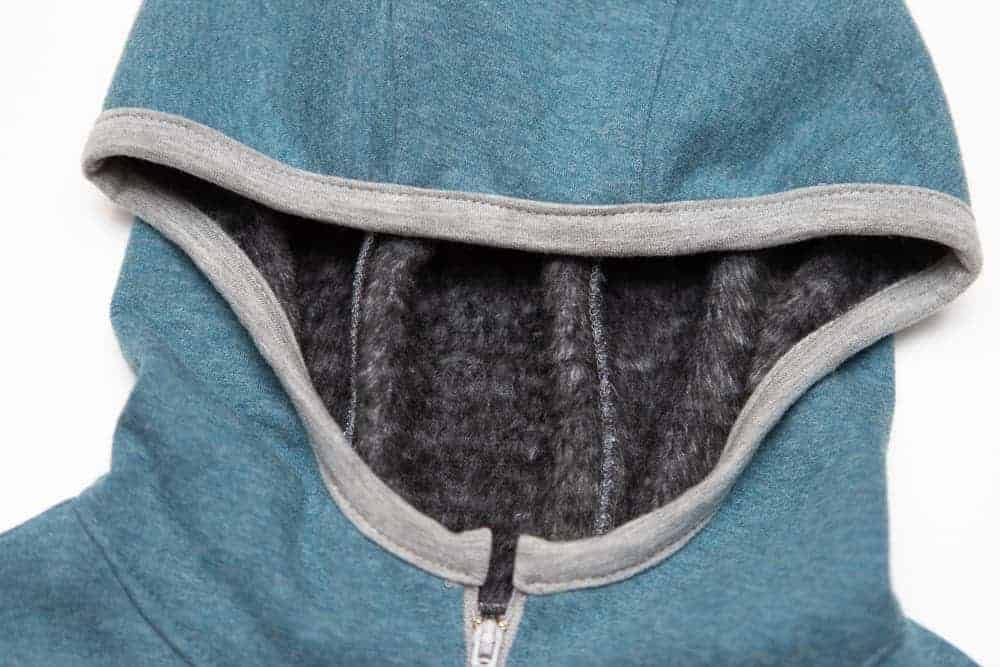
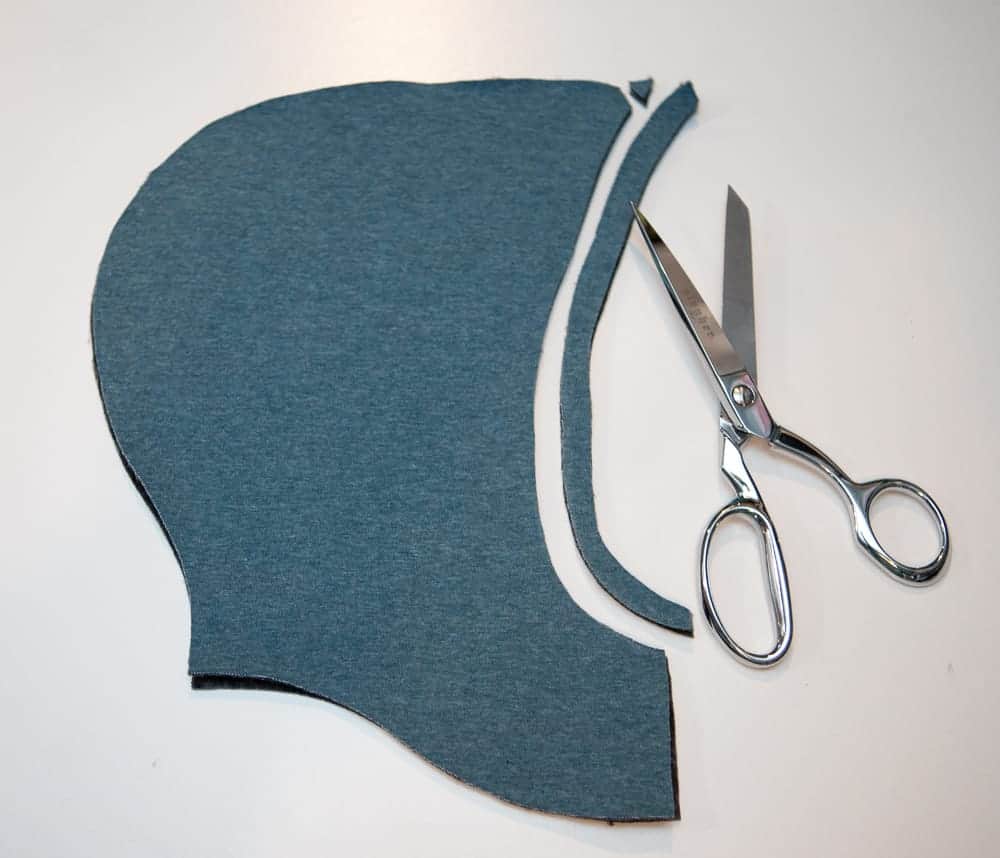
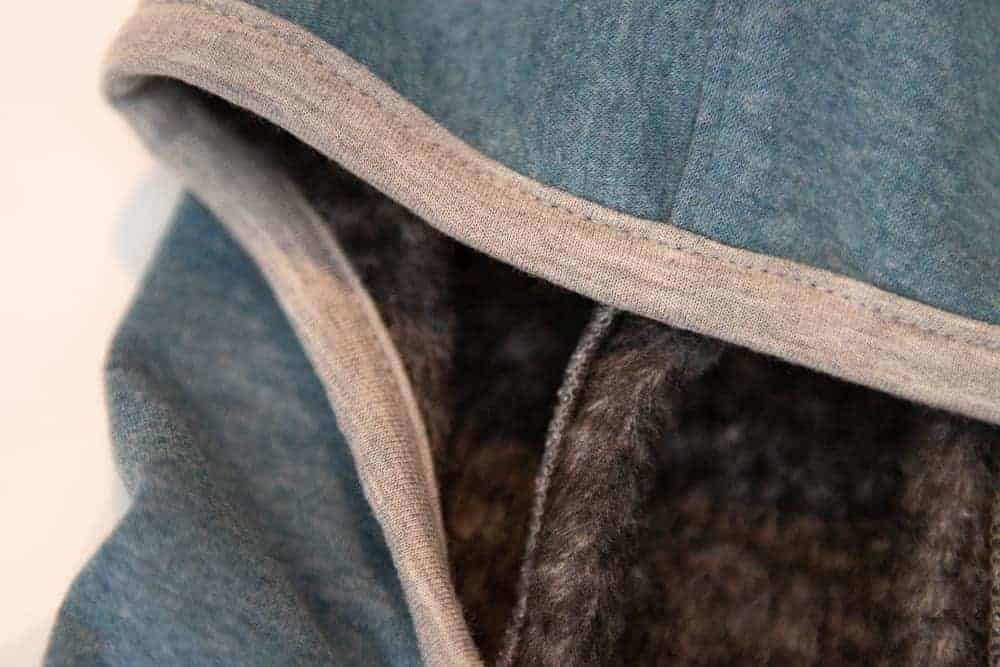
This is the coziest fabric ever and I wanted to keep that fuzzy softness visible on the hood, so I omitted the lining! It’s super easy to do. First, cut away the seam allowance from the front of the hood and the center panel. You will be trimming back 3/8″. (Note that the center panel is not shown below.) Then, assemble your hood and construct the pattern, including installing the zipper. If you like, you can either bind the seam where the hood or collar attaches to the neckline, or you can topstitch it with the seam pressed upward, it’s your choice! I just topstitched.
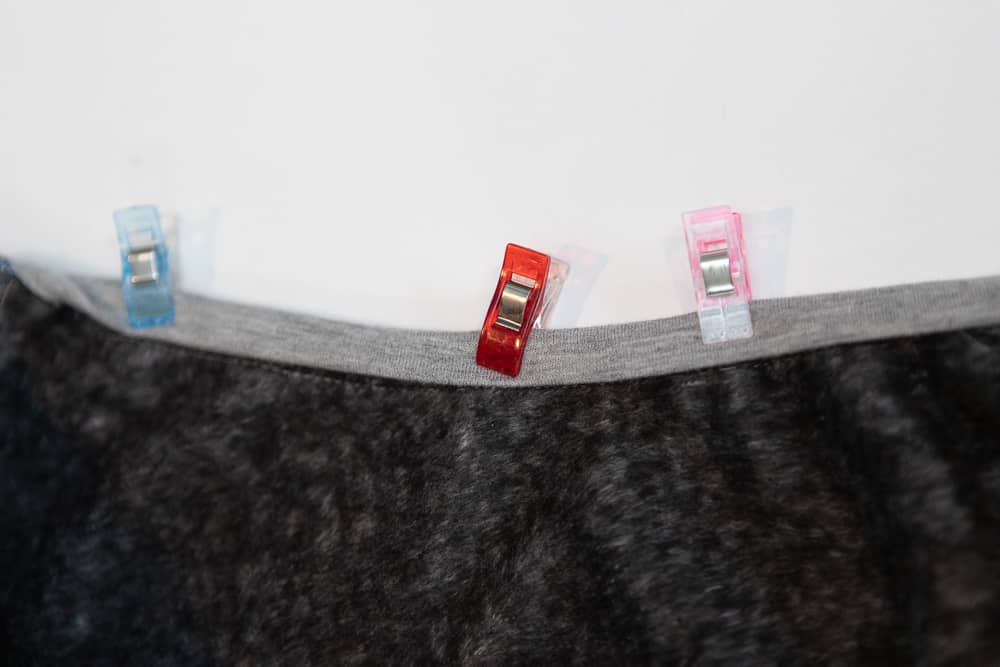
Next, take your bias tape, or binding and place it right sides together with the edge of the hood and straight stitch in place. Leave an inch or two extended beyond both ends of the front. Sew in place with a straight stitch following along the pressed crease closest to the raw edge. I’m using a knit binding that didn’t hold a press well, so it’s hard to see below.
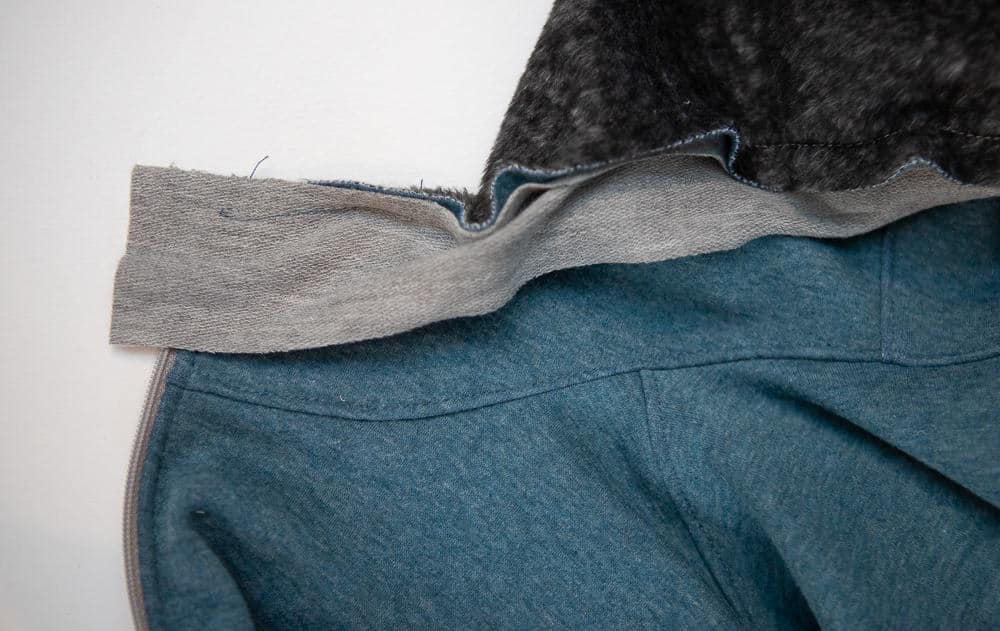
Next, fold the edge of the bias tape in to the wrong side towards the hood, as shown below.
Now we are going to finish off the ends, where the zipper is. Fold the bias tape in half, back towards the right side of the pullover, so it’s right sides together. The folded edges will be lined up. Stitch across the end of the bias tape, as if you are continuing the seam up from the zipper. Trim the excess bias tape back to 1/4″. I find it’s easier to keep it tucked in if there is a little length, but some prefer to trim back to 1/8″.
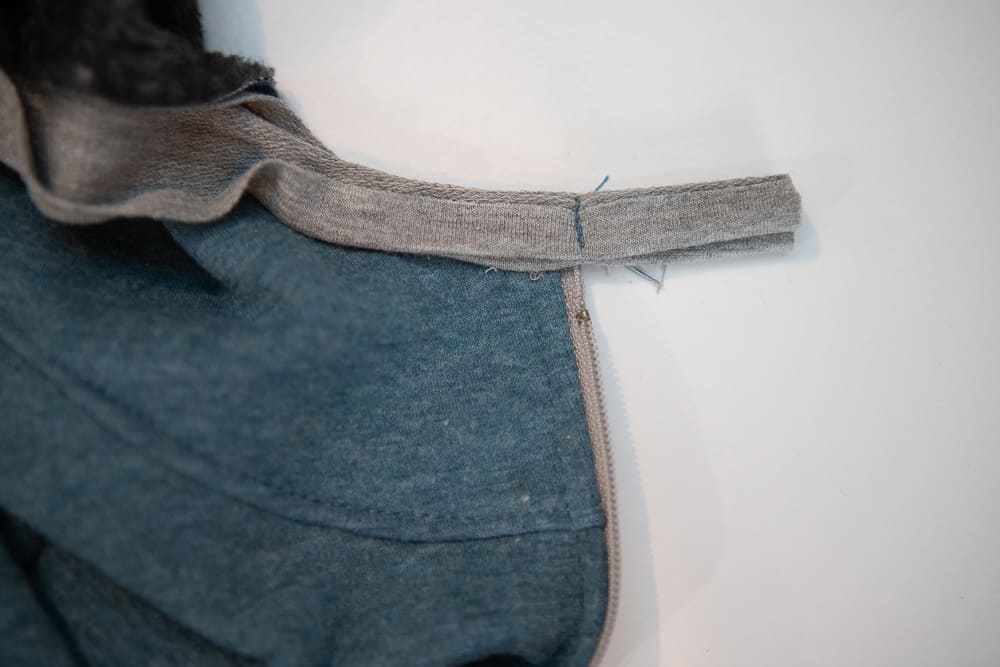
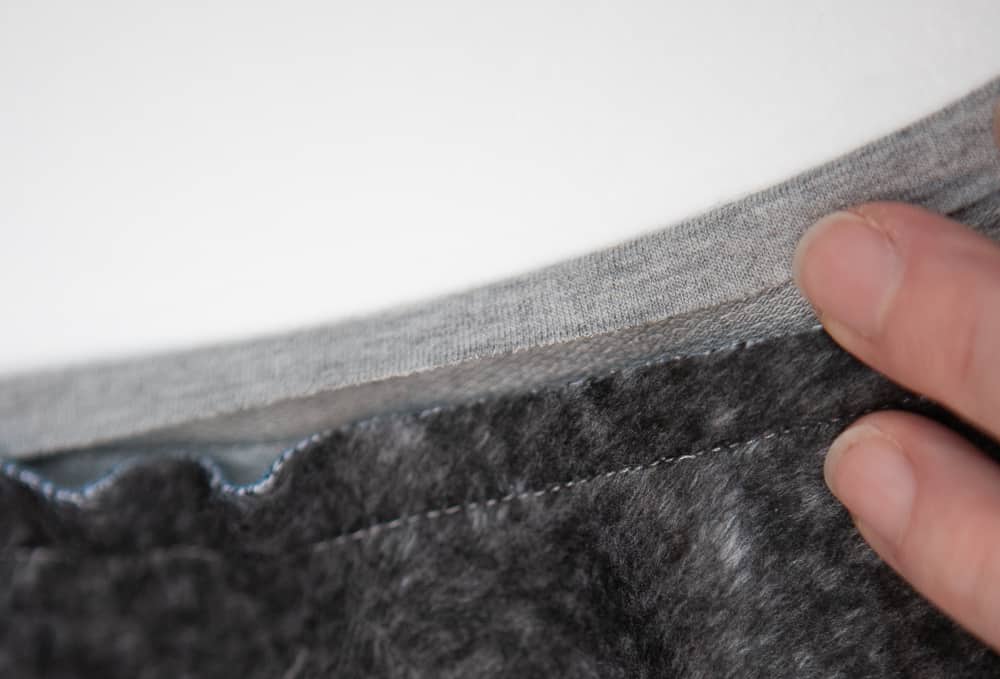
Flip the bias tape over to the wrong side, so that it wraps around the raw edge of the hood and all the raw edges are enclosed. See how the folded edge gives a nice, clean finish! All the cut edges are tucked up inside the bias tape. The folded edge of the bias tape should line up with the stitching line from attaching the binding to the right side.
Edgestitch in place from the right side with a straight stitch and you are done!
Love to sew with friends?
If you love sewing along with a group, be sure to join our Facebook Support Group where I will have live videos and you can see what others are sewing up as we go through the week! We will also have some prize give aways! Simply by Ti is our sponsor and the Sew Along winner will win a $20 gift certificate to the Simply by Ti shop and a gift certificate for the Love Notions shop!!