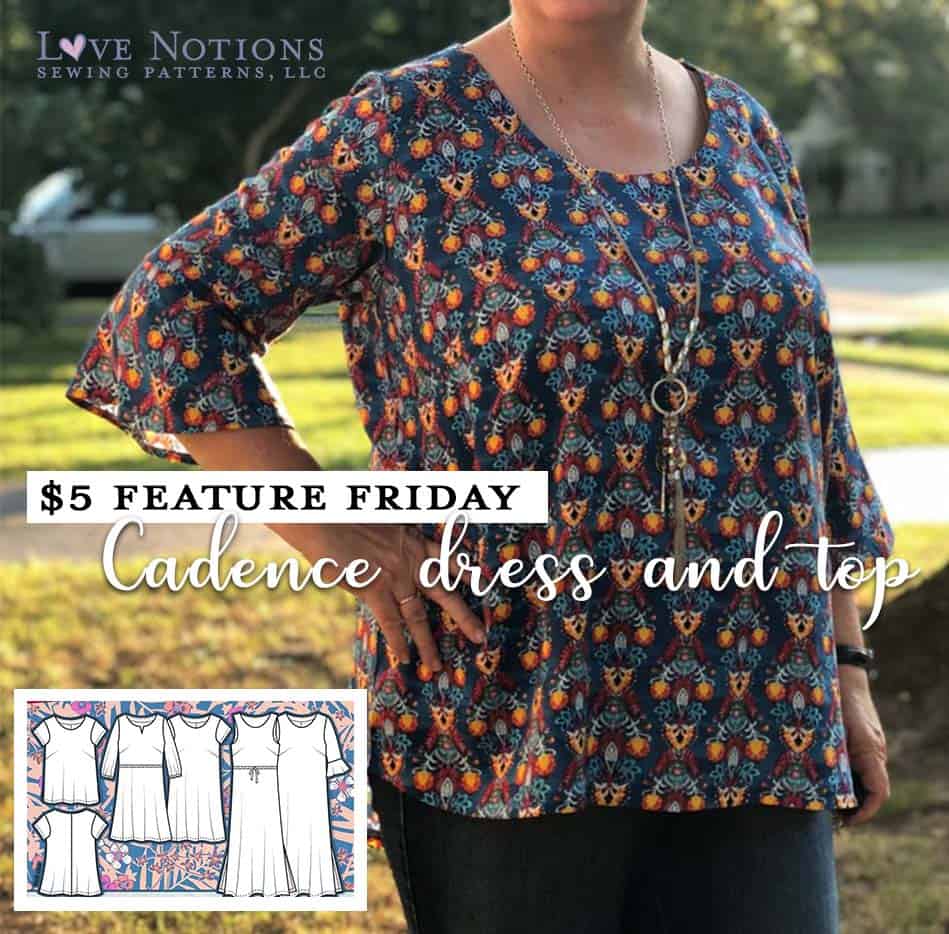
Noreen Mays is making her Love Notions Blog debut with a super helpful round back adjustment as well as some helpful tips and inspo for sewing up the Cadence Dress and Top. Be SURE to snag thia Feature Friday pattern, the Cadence Dress and Top, for just $5 today. As Noreen shows, it is a beautiful shift dress and top that can be used for all different seasons, styles AND bodies!
SAVING CADENCE: Adjustments for a perfect fit
I love a good underdog story! Rocky, Rudy, Iron Will, and Sea Biscuit are a few of my favorites. They are inspiring! They make me cheer (out loud…my kids are like “calm down!” lol) and cry (why yes, I do need a dozen napkins and they are not all for the popcorn!).
Enter The Cadence Dress and Top.
(Spoiler alert! It’s the Feature Friday pattern and it’s just $5.00 for today only.)
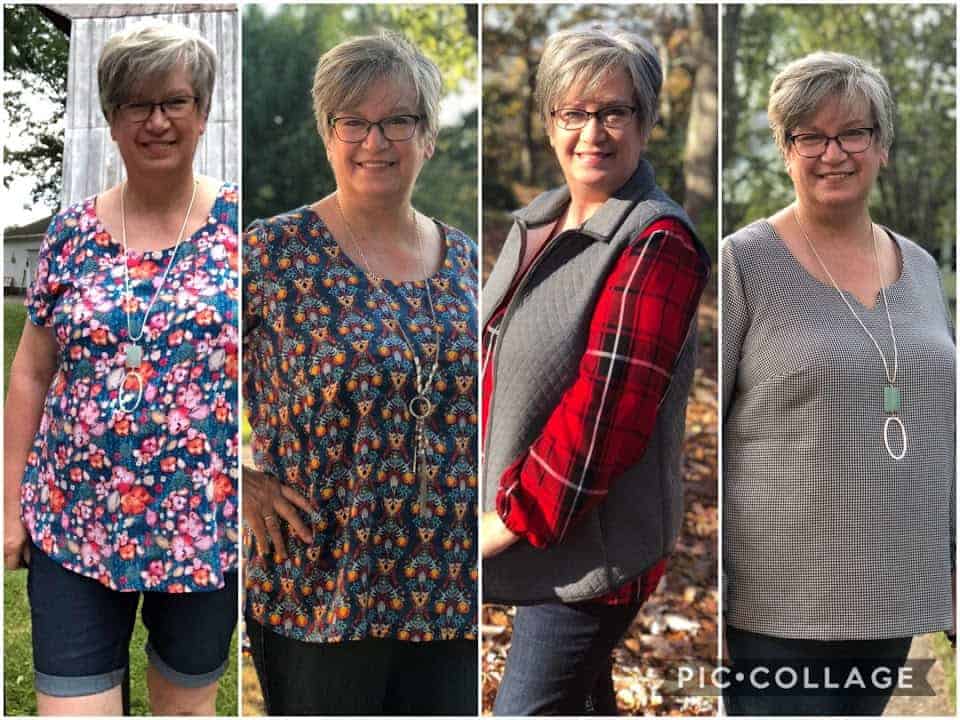
First of all, this pattern IS a winner, simply because of its seasonal versatility and how it works for a huge variety of body types. Look, I’ve got one here for every type of climate, event and mood!
Cadence: My Fit Issues
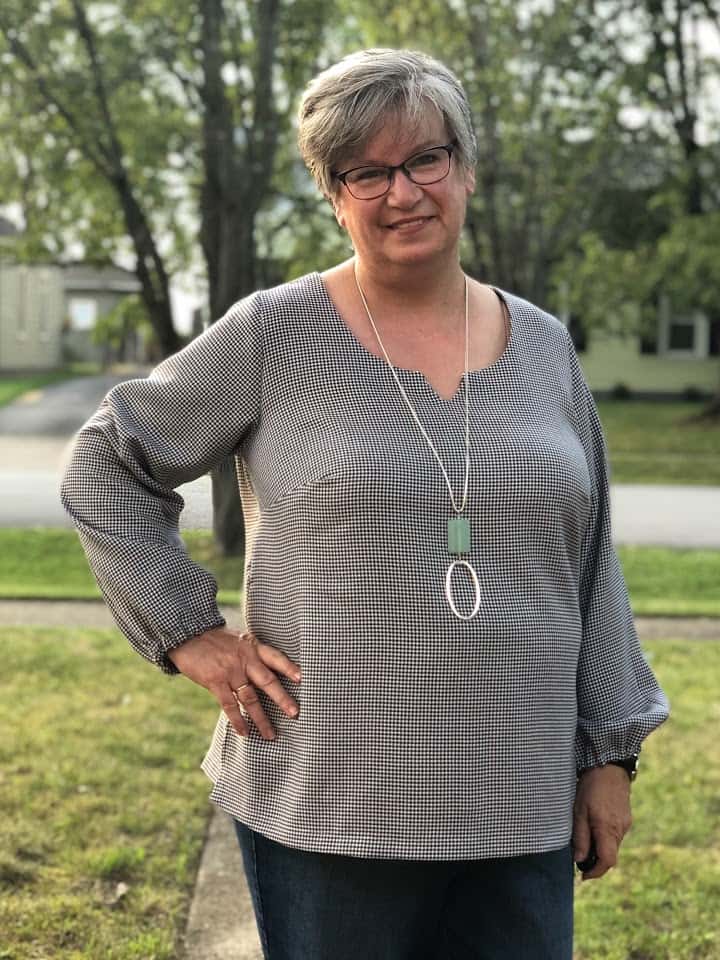
I made my first Cadence almost exactly 2 years ago. I still have my original top in my closet and it has been worn A LOT. As you can see, it is an amazingly versatile top and dress that is perfect for all seasons and is flattering on many body types — so, no, I do not think Cadence is an underdog. I will admit though, I need it to fit me better. The biggest issue I have with it is that the neck shifts on me. Sometimes, it falls off my shoulders and I’m usually trying to set it straight without looking too awkward. (Did I really just spend half the evening with my bra strap showing? Sheesh!)
Anyway, it was my version that was the underdog. I just knew she could be the gem she was meant to be on my body.
In the movie Sea Biscuit, Charles Howard says “The horse is too small, the jockey too big, the trainer too old, and I’m too dumb to know the difference.” With what I have learned about my self in the last two years, and inspired by Charles Howard (“My shoulders are too narrow, my back is too round, my waist is too big and I’m no longer too dumb to know the difference!”), I’m ready to tackle her again!
My adjustments for a perfect fit
First things first. Who else has narrow shoulders? I had been doing a narrow shoulder adjustment on almost all my patterns for awhile and while it may have gotten the shoulder seam in the proper place I was often still having other issues with the neckline. Then it was “do this adjustment,” and “put this dart here” and let’s face it, it was frustrating!
Then I made a groundbreaking discovery. I was making the wrong size! When I choose my pattern based (honestly) on my upper bust, I start with a large. I know, I know, it’s scary! I haven’t worn a large in clothes since the last century! So trust Tami when she says to start with your upper bust measurement. It’s a real game changer. Here you can see the difference between a large and the XL.
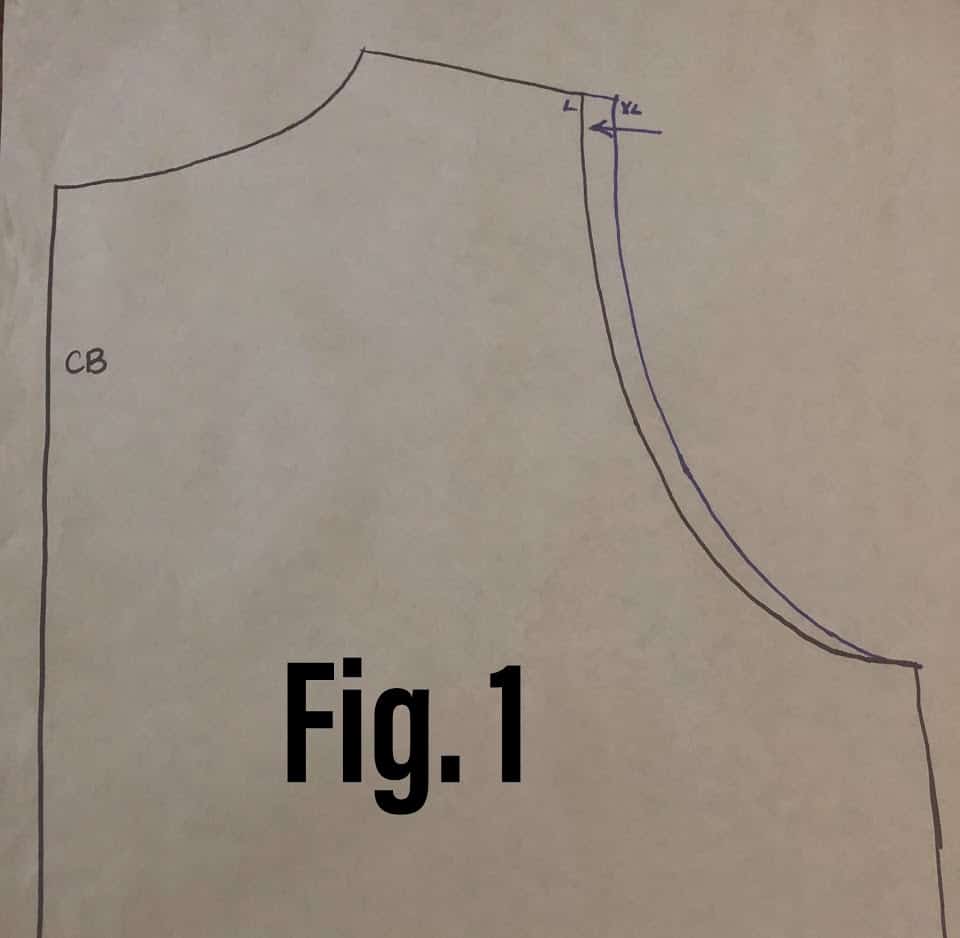
Here you can see the difference between a large and the XL.
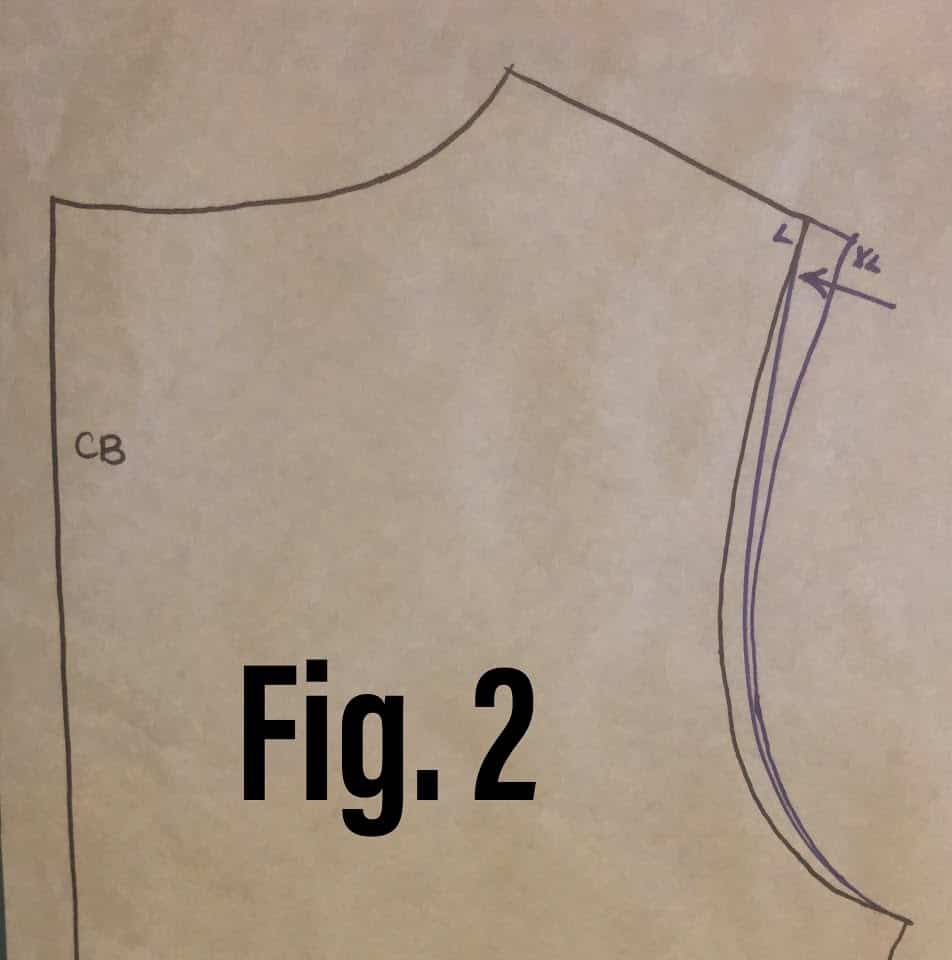
It’s exactly the amount I was taking off. Why is this so different then? Because the whole neckline will be different now, not just the shoulder. The rest of me fits in an XL Full Bust so I just blend.
Round Back Adjustment
So now that my shoulders and neckline are correct, why does my Cadence keep wanting to shift backwards? The first and most common thought would be that I need a forward shoulder adjustment and I sometimes do but in this case, it didn’t solve my problem. Plus, my clothes often feel tight across the back. Having narrow shoulders and a broad back seem counterintuitive to me. Well I don’t have a broad back, I have a rounded one! It seems that this is becoming more of a problem sooner (oh iPad you have betrayed me!) rather than later. Doing this alteration is not only easy, it’s miraculous!
I determined I needed to add an entire inch to my back so I made a line from the center back about mid armhole and cut it to, but not through, the armhole leaving a hinge. Earlier I had drawn a line on a piece of paper and then a line ½” above and below it. I slid the paper under the pattern lining up the CB with the edge of the paper and the middle line with my cut line. Then I just spread out the pattern to the new lines and taped it down. That’s all there is to it! And since you aren’t changing the original neckline, the facings still work perfectly!
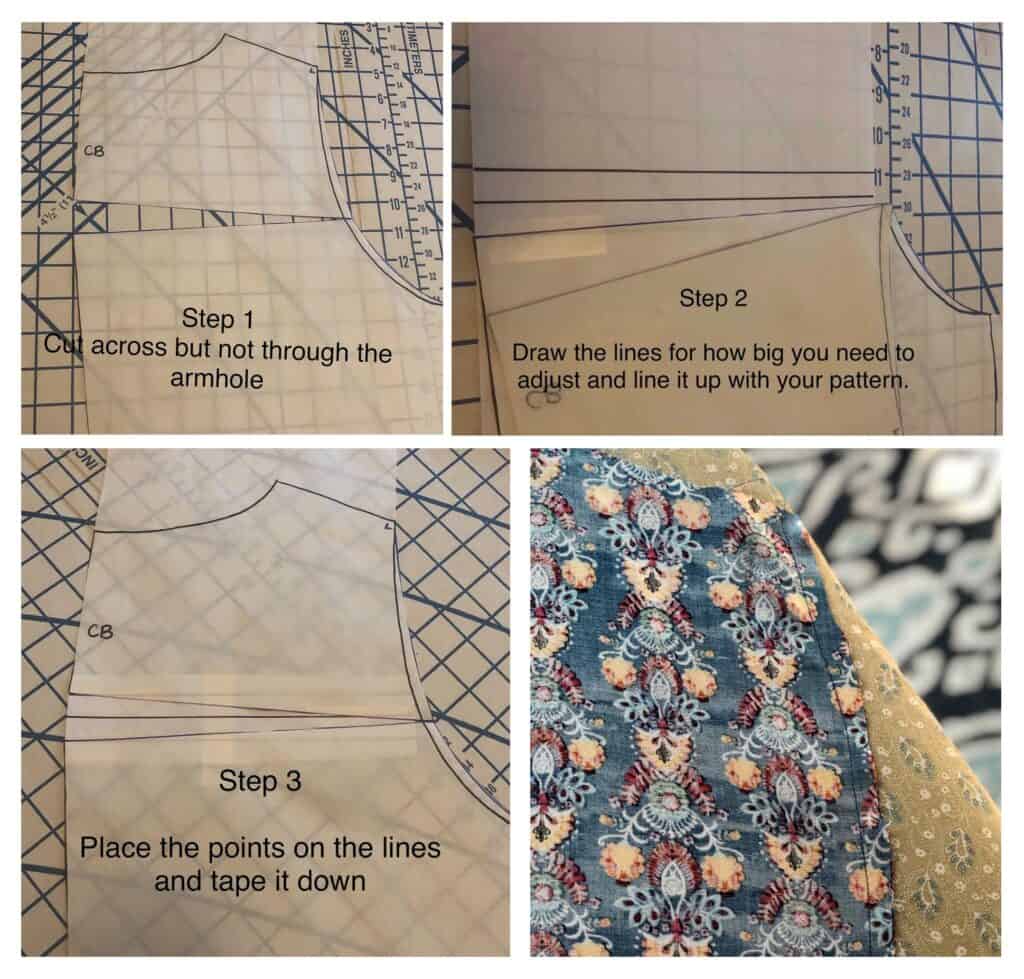
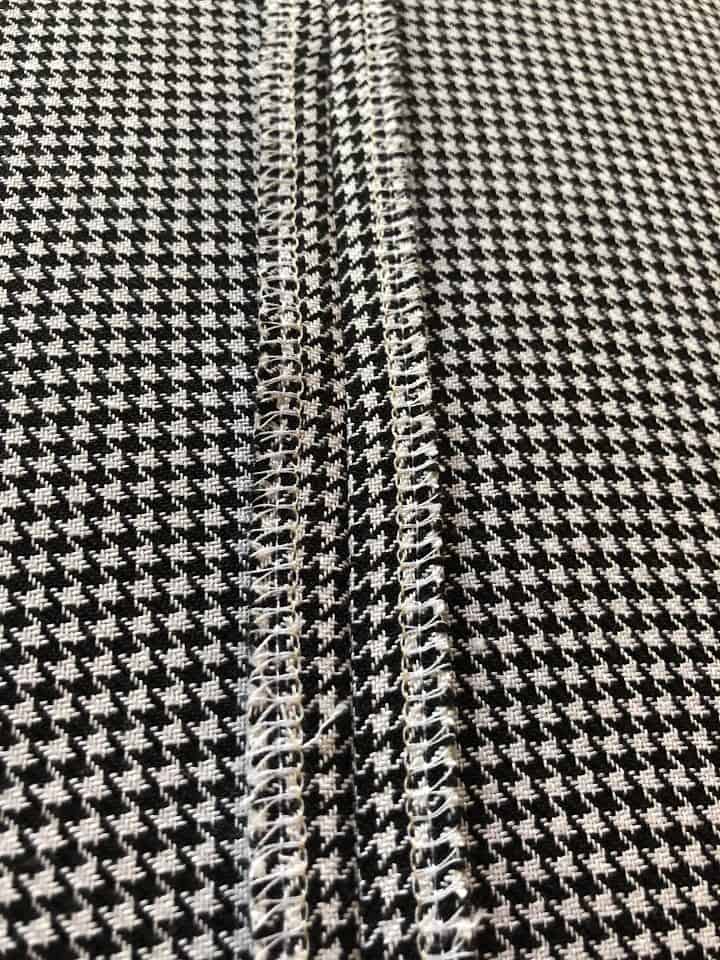
Here are the steps for a round back adjustment and a picture of my finished seam.
A Miraculous Adjustment
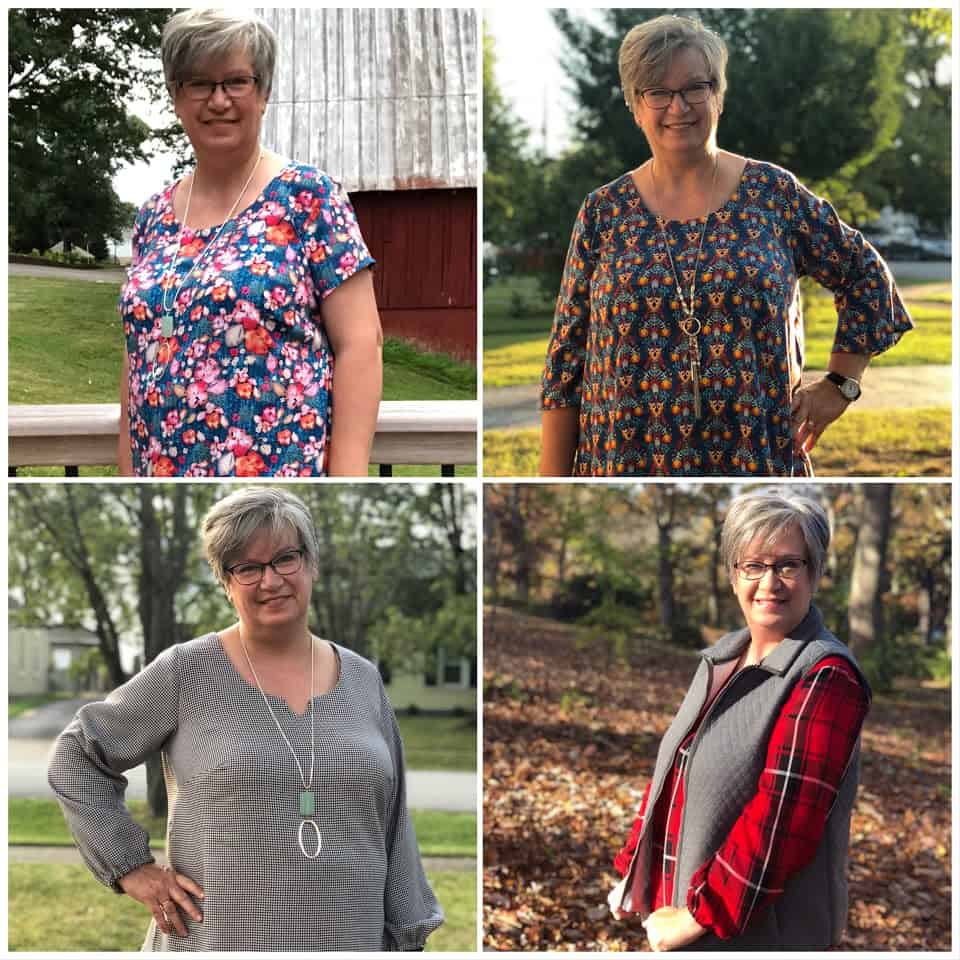
The fact that Cadence has a center back seam makes this the perfect pattern to try this on. (Backs that are cut on the fold require more steps and include darts.) When you sew it you can really see the curve but when it’s on, it’s magic! No more pulling across the back and no more slipping! You can really see the difference between my original top and my new ones both at the center and in the fit across the back.
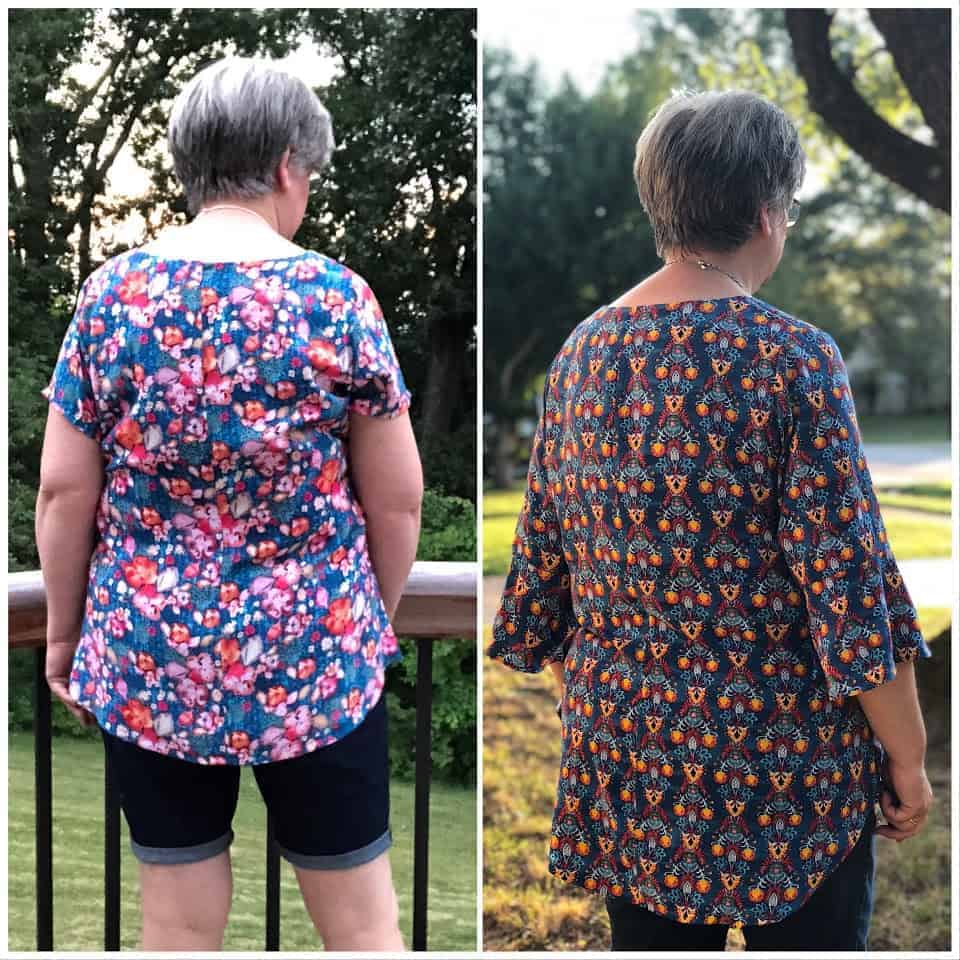
The power of a round back adjustment!
Waist Adjustments
My last fitting dilemma in this tale is my waist. It’s definitely “too big”. Often completely outside the size range. This is when needing an FBA –which I haven’t needed to address because it’s already included in the pattern — is a good thing! It adds a bit of ease in that area and with the easy fit of the Cadence I don’t need to adjust for my waist at all! Make sure to always check out the finished garment measurements so you can save some time. ( I use that extra time to eat ice cream. Don’t judge. )
A perfectly altered pattern
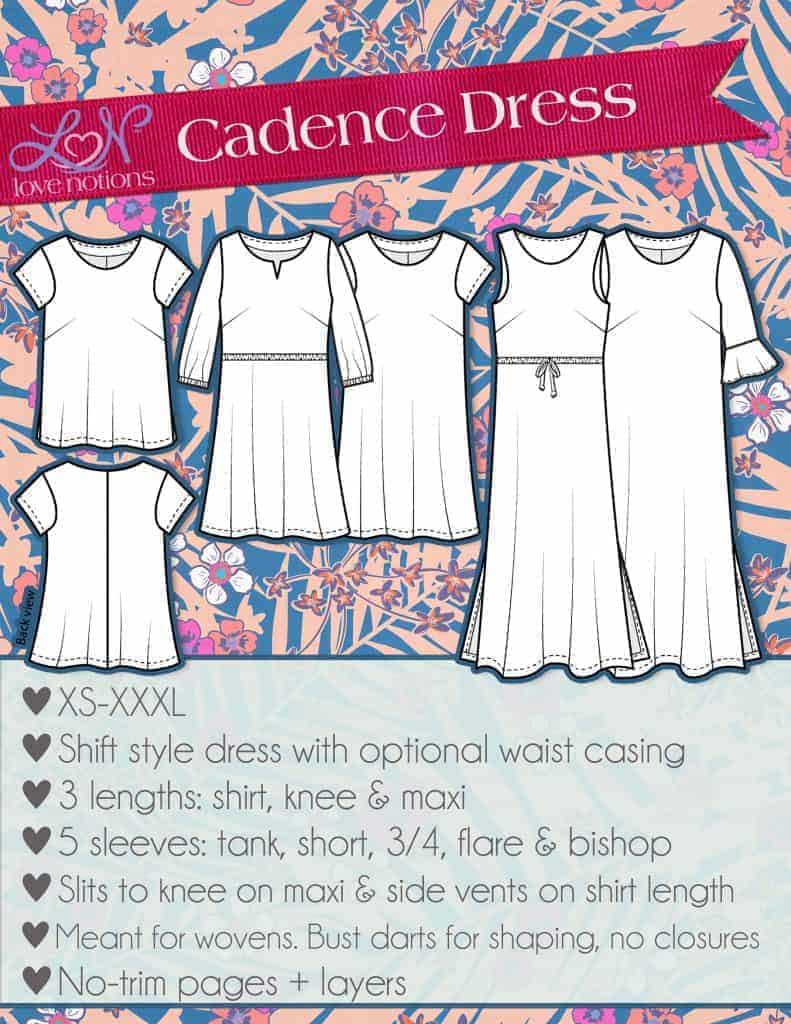
Whew we did it! We have a perfectly altered pattern and now we can have fun! Did you know that Cadence comes in Top, Dress and Maxi length! It has 5… yes, FIVE sleeve options and two neckline finishes! Depending on what type of fabric you use, the looks are endless. My original one is a Rayon Challis so I had to make another one with my new super power pattern!
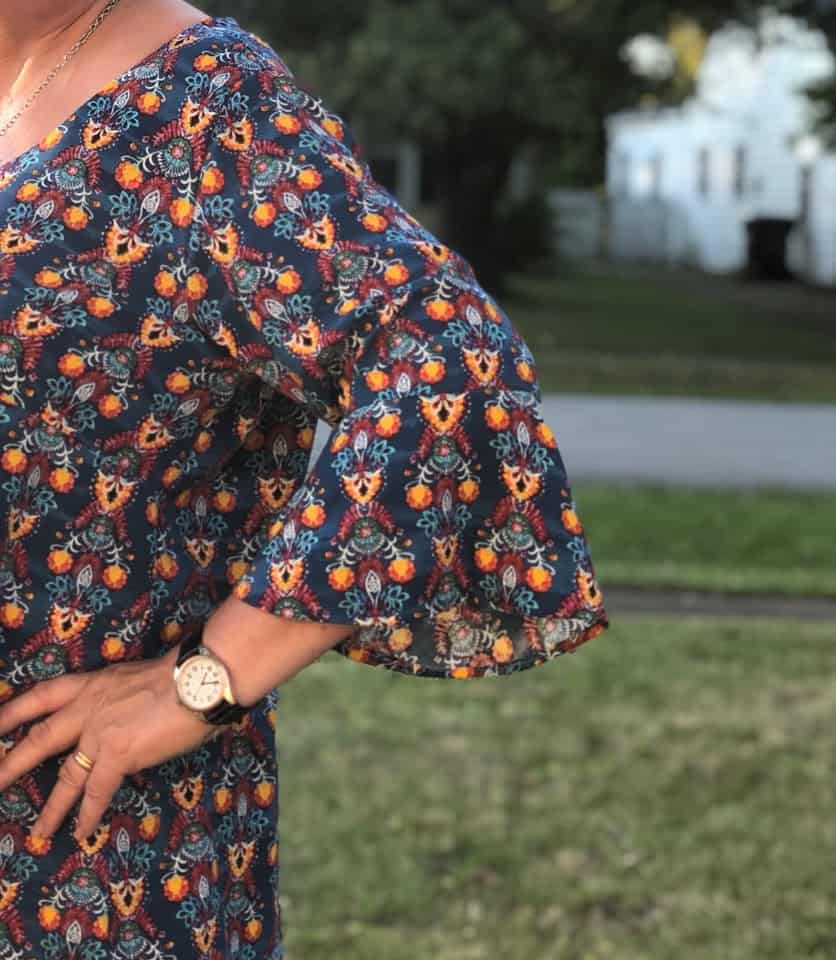
This is the 3/4 sleeve with additional flare.
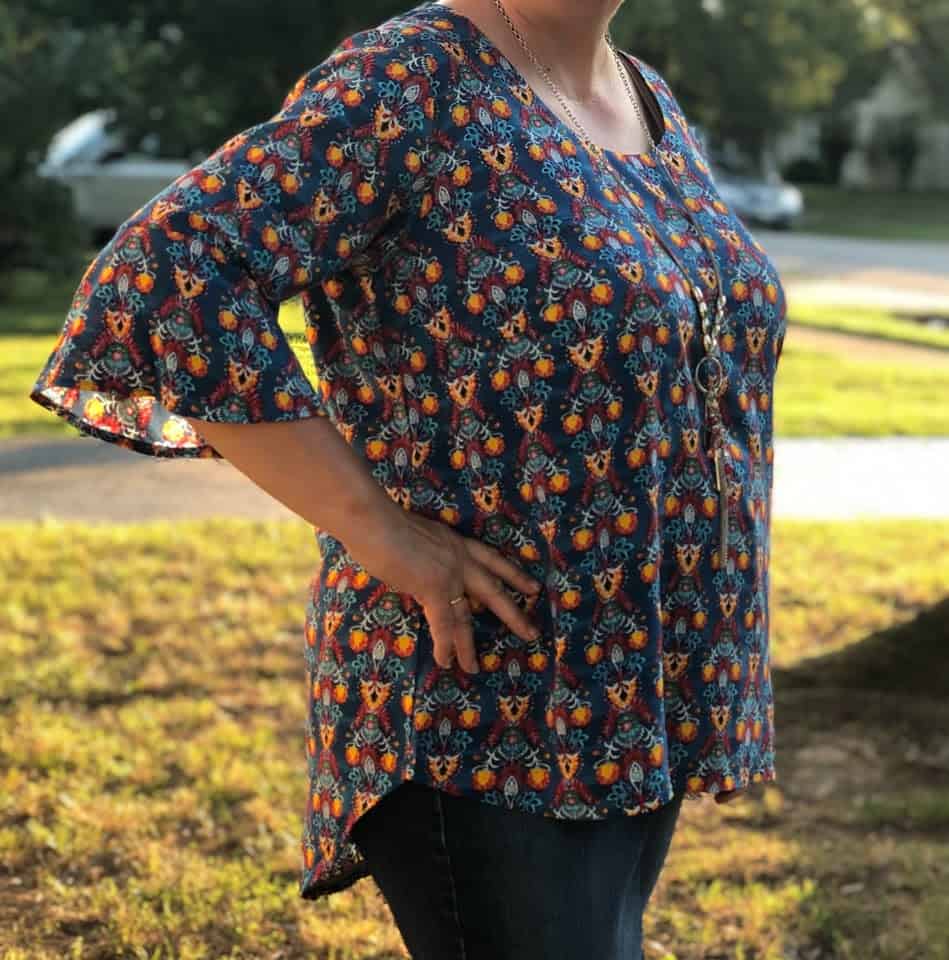
I thought adding a bit of a high/low hem with a shirttail back would add a bit of fun. Just borrow the curve from another pattern like the Rhapsody.
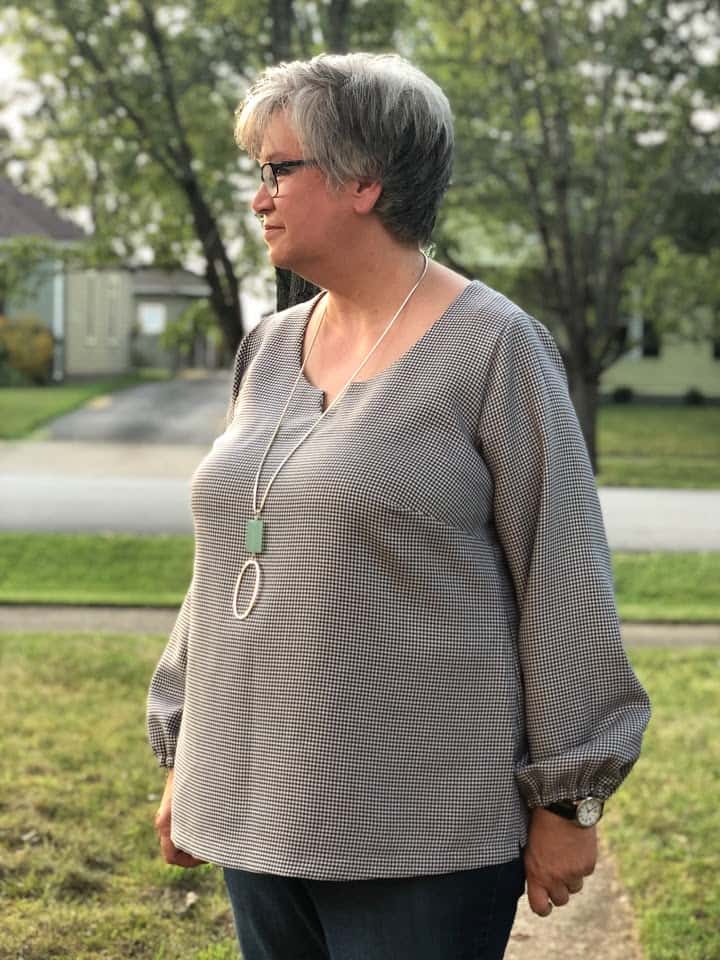
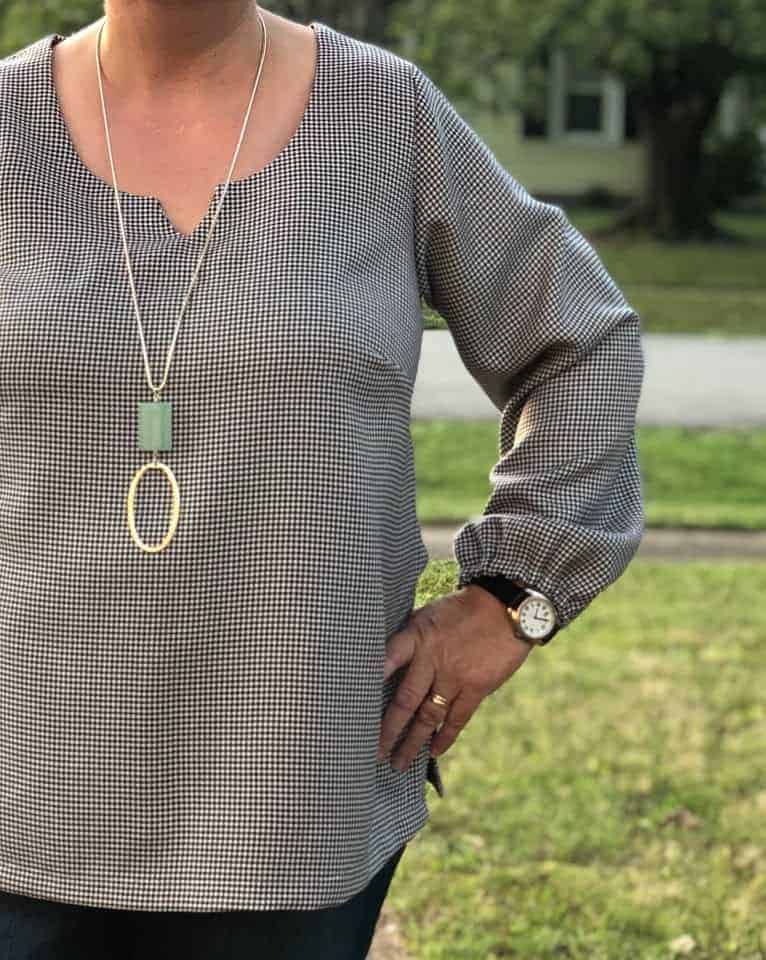
The next one I made looks completely different! There are so many options with this pattern. This time the fabric was a more structured polyester that I inherited in my MIL’s stash a few years ago, so I chose the v neck and Bishop sleeves.
First, I decided to serge all the edges first and then sew it on my regular machine so I could iron all the seam allowances open. Now there’s less bulk, especially at the shoulders, with the facing, and under the arms.
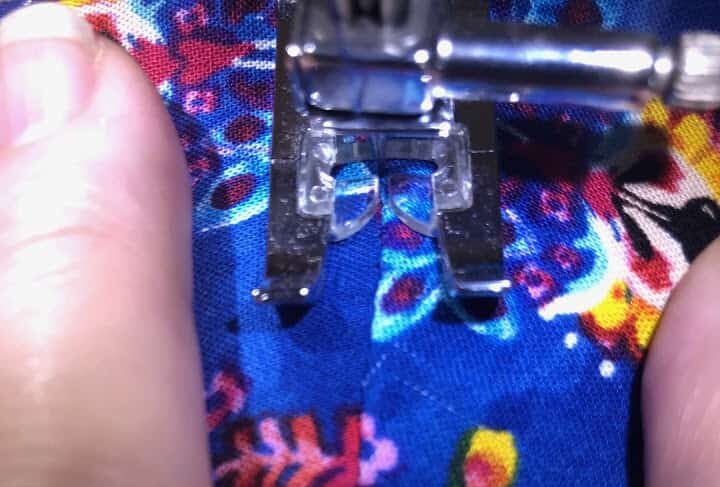
Stitching in the ditch
Here’s another helpful tip! Do you ever have trouble with facings laying nicely? I finished all my necklines stitching the facing down with a technique I learned as “stitching in the ditch”. After I’ve finished my neckline and pressed it, I take it to the machine where I set it at a longer than normal straight stitch. Center the shoulder seam directly under the needle and sew slowly, slightly pulling the seam from both sides so the stitches go right in the seam allowance. I do it at the center back seam as well. It sure beats hand tacking the facing down. (Hey! That’s more time for ice cream! Score!)
Underdog to Champion
So in true underdog story fashion, my Cadence pattern is now a hero, a champion for all those Pinterest inspiration tops I’ve been saving! Which one will I make next? The bigger question is which one will YOU make next? With it being the feature Friday pattern and just $5.00, now is the perfect chance to try and make your own Cadence story. (And can you do it quickly please? I get impatient waiting for opening night!)