Hi everyone! Rachel here today with a fun and easy hack for the Classic Tee.
This pattern comes with multiple sleeve lengths, but I thought a short flutter sleeve would suit the shape of the tee quite well. I used the slash and spread method to turn the short sleeve pattern piece into a flutter sleeve, and then simply attached the new sleeve to the body of the tee. Read on for a quick step-by-step of how to use the slash and spread method.
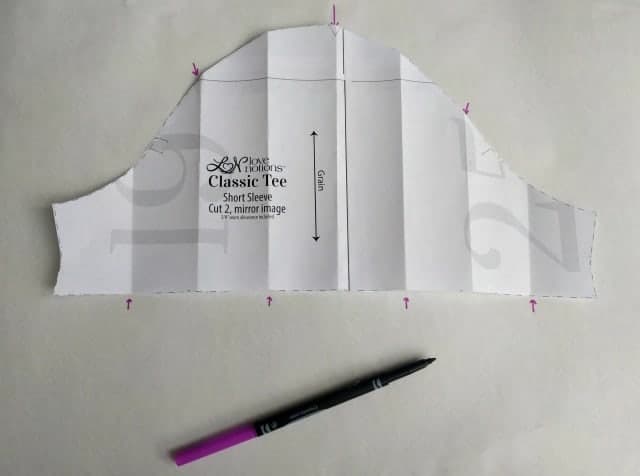
I started by printing and cutting the short sleeve pattern piece in the size I was sewing, which was a large.
Next, I marked and folded along the center point of the sleeve at the top of the sleeve cap. It’s not exactly the center since the sleeve is asymmetrical, but it ensures that the width that we add will be distributed across the entire sleeve. After you’ve made your center fold, make two more folds marking the center of each “half” of your sleeve. Then make two last folds, again dividing each “half” into quarters.
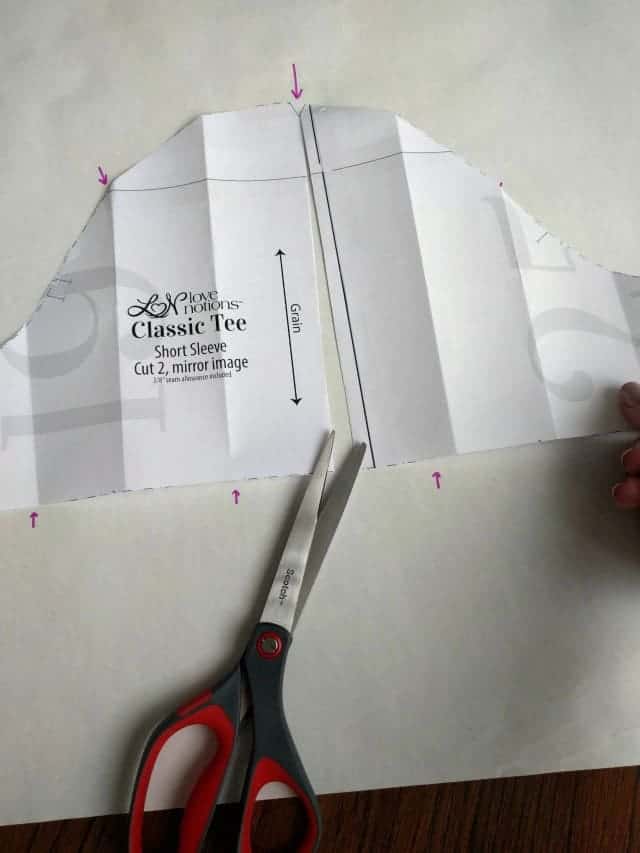
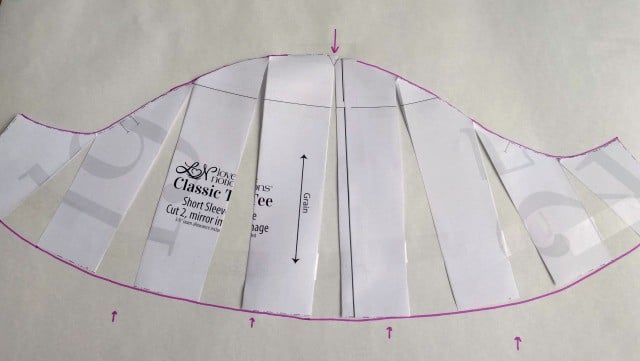
Now, grab a pair of paper scissors (not your fabric scissors!) and carefully cut along your folded lines from the bottom of the sleeve, almost up to the very top.
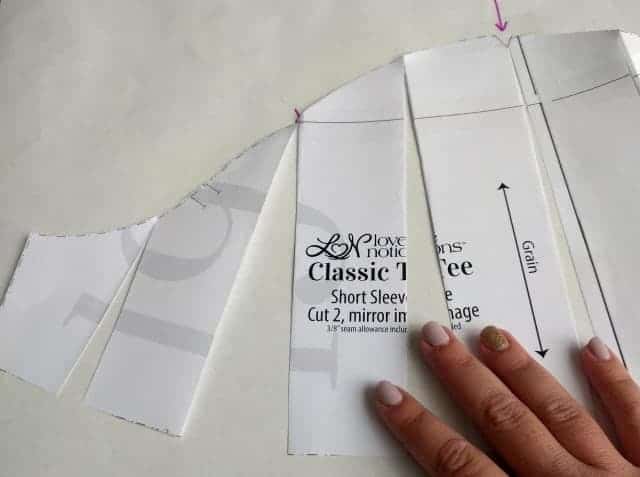
You don’t want to cut all the way through, but leave *just* a tiny hinge at the top. This is the “slash” part of our “slash-and-spread” method. Next, we’ll spread those strips at the bottom of the sleeve – how far apart you spread them will determine how much flutter your sleeve has. Because they’re still attached at the top, your armscye curve will remain the same and your new sleeve pattern piece will still ease nicely into the bodice.
I like to spread about 1 inch between strips for my flutter, and find that it still gives me a good amount of flutter without being too wide or cumbersome. If you spread the strips less, you’ll get less flutter.
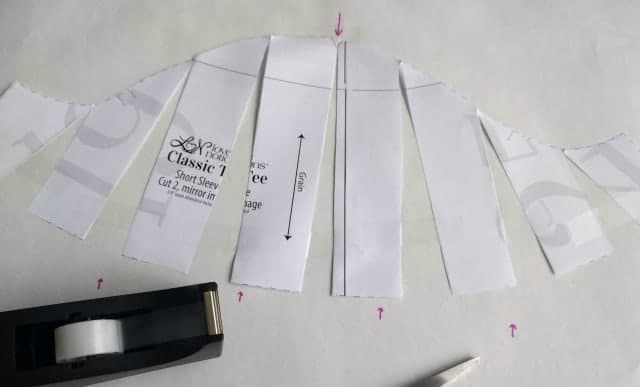
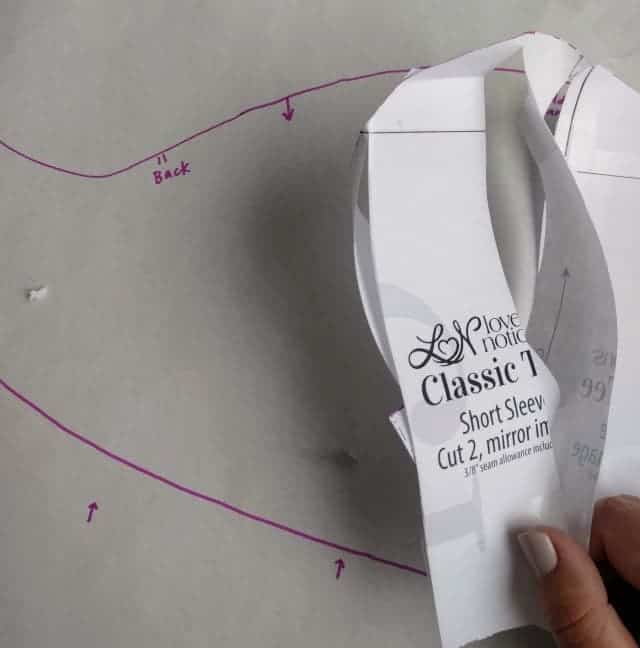
I use tape to hold all of the pieces down in place, and then trace around the modified pattern piece.
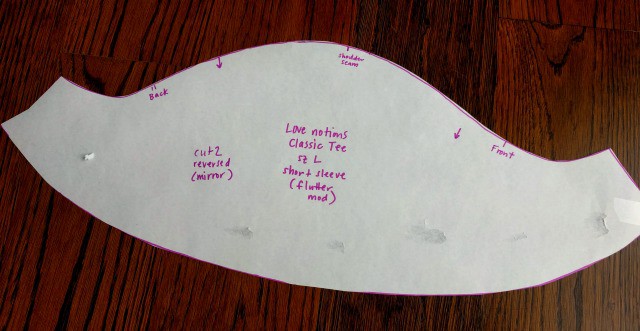
Carefully remove the pieces of the original pattern piece, and your traced flutter sleeve piece will be ready to use.
Simply transfer any pattern markings, cut out the pattern piece, and cut two mirrored sleeves from your chosen fabric.
As I mentioned earlier, your new sleeve should ease nicely into the existing armscye curve as you left the top of the sleeve intact. Easy peasy!
One more note – I left (and used) the existing sleeve hem allowance for my example, which was sewn from a triblend jersey knit. If you are using a fabric that you’d like to leave unhemmed, feel free to remove the sleeve hem allowance from the pattern piece before cutting your fabric.
Thanks for stopping by! Make sure to join us over in the Love Notions Pattern Support Group on Facebook and share your Classic Tees and more!
-
Sale!
Classic Tee Shirt
Original price was: $10.00.$5.00Current price is: $5.00.




Thanks ~such a cute idea~Know my granddaughters will like this -they love the fit of the Classic Tee!
Thank you for this easy tutorial. I did this with the willow wrap dress sleeve.
Beautifully done, I love how your top is not a bag and then not super huggy. Looks so pretty!