Welcome to Feature Friday on the blog where Sneha from SewingCurves.com will help us unravel the mystery of the armscye adjustment. One of the amazing things about sewing your own garments is the ability to slightly alter to fit your unique body *just so* — including the notoriously tricky areas under and around the arm. Before you delve in too deep, be sure to grab the Forte Top and Dress for just $5! Also, thanks to Pretty Posh Prints for partnering with Love Notions for this post and offering a 20% discount when you use LoveNotions20 at checkout. You can also enter to win a $40 Pretty Posh Prints giftcard when you visit us on the Love Notions Pattern Support group on Facebook!
How to Adjust the Armscye for Knits
Hello! I’m Sneha Nirody Monga, of SewingCurves.com, and today I’d like to show you how I adjust a pattern at the armscye to better fit the fabric I choose. After much research, I realized that most resources talk about raising or lowering the armscye on a woven bodice, but they rarely talk about the knit bodice. They also hardly ever mention the adjustments needed to be made on the corresponding sleeve, which is why I am so excited to delve into the topic in depth.
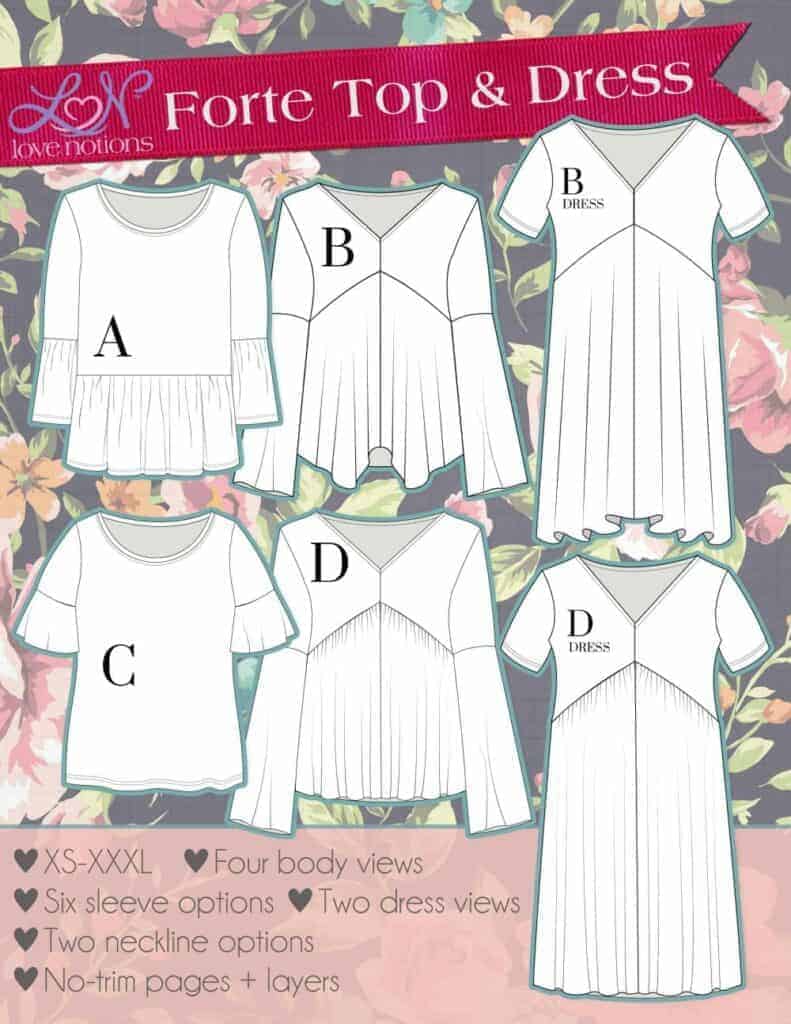
Forte Top and Dress
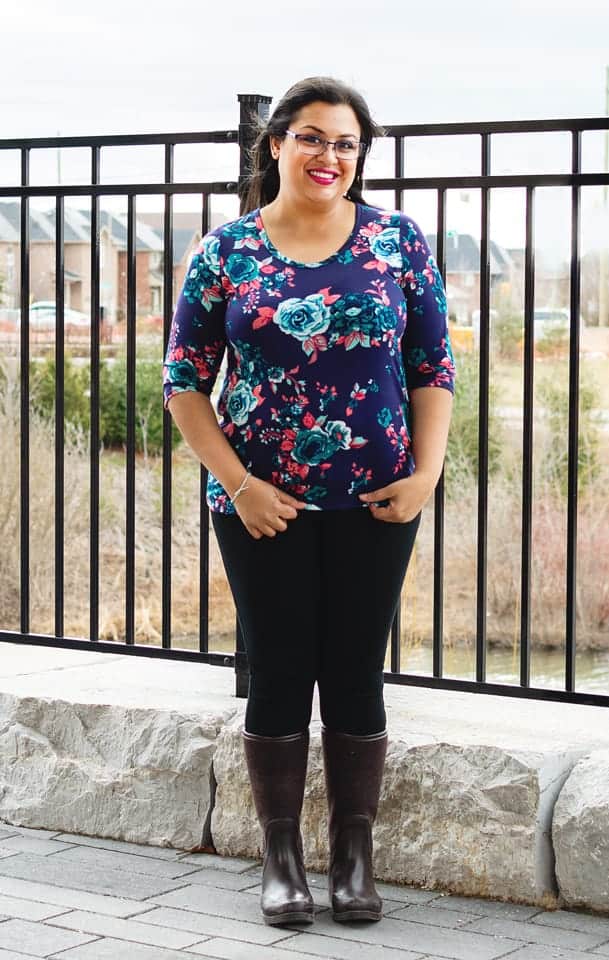
I am using the Love Notions Forte Top and Dress pattern, which is on sale for $5 TODAY only! The Forte includes four body styles, two dresses and several sleeve options to mix and match. While the waterfall front is my favorite, and most dramatic option, I chose to use View A and View C with a simple elbow-length sleeve to show you the true versatility of this pattern. (I receive a small percentage of the sale price at no extra cost to you, as an affiliate.)
Pretty Posh Prints
The fabric I am using for this demonstration is from Pretty Posh Prints. I have long been a fan of this company, and have bought most of my stash from them. With trendy prints, classic solids and a multitude of fabric bases, you’ll be sure to find something for you. Pretty Posh Prints is sponsoring this post and has generously offered Love Notions customers a 20% discount off any order! Use the code LoveNotions20 to get your discount today! 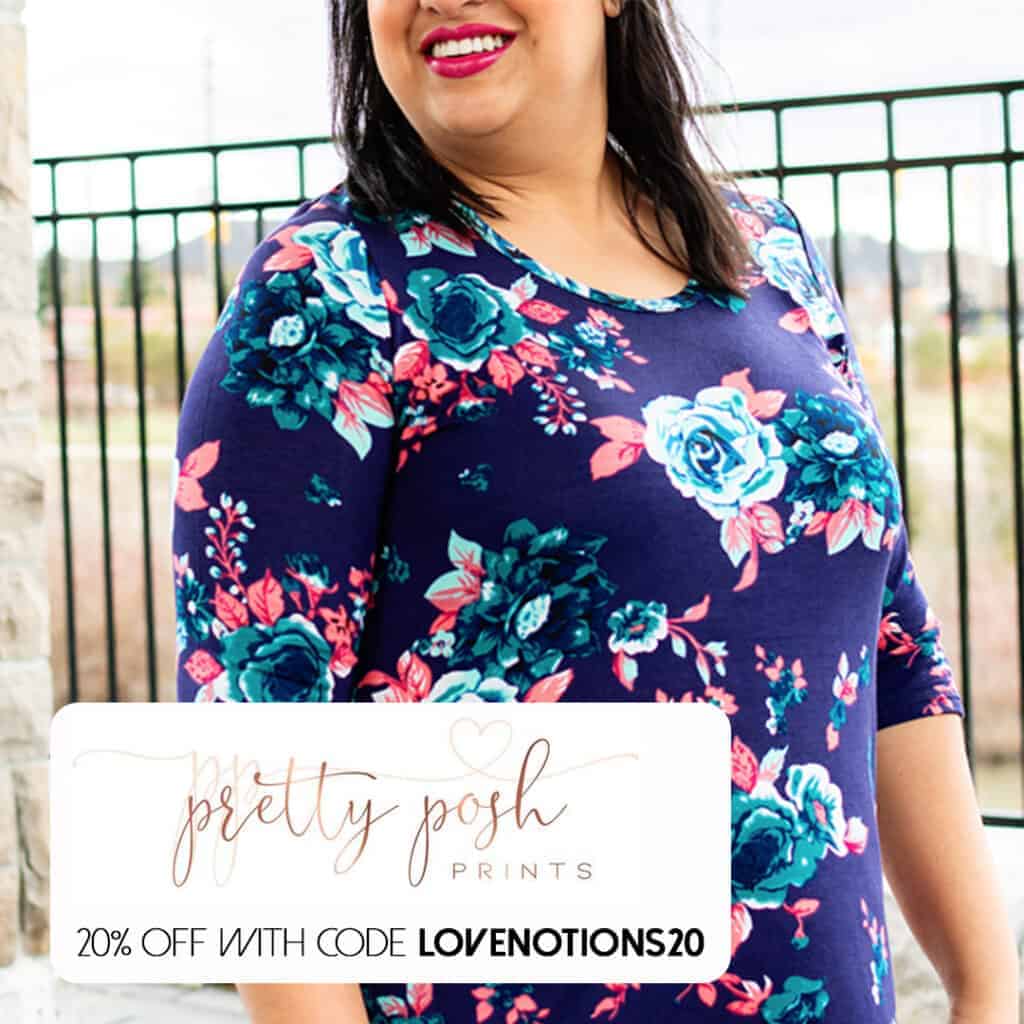
Florals in Rayon Spandex
I chose two similar prints, florals on dark backgrounds on rayon spandex, because I wanted to show you how the adjustment changes the fit. Rayon spandex is wonderfully light, with great stretch and good recovery. It is also a lighter weight fabric, and so will show fit issues to the trained eye. So let’s get started!
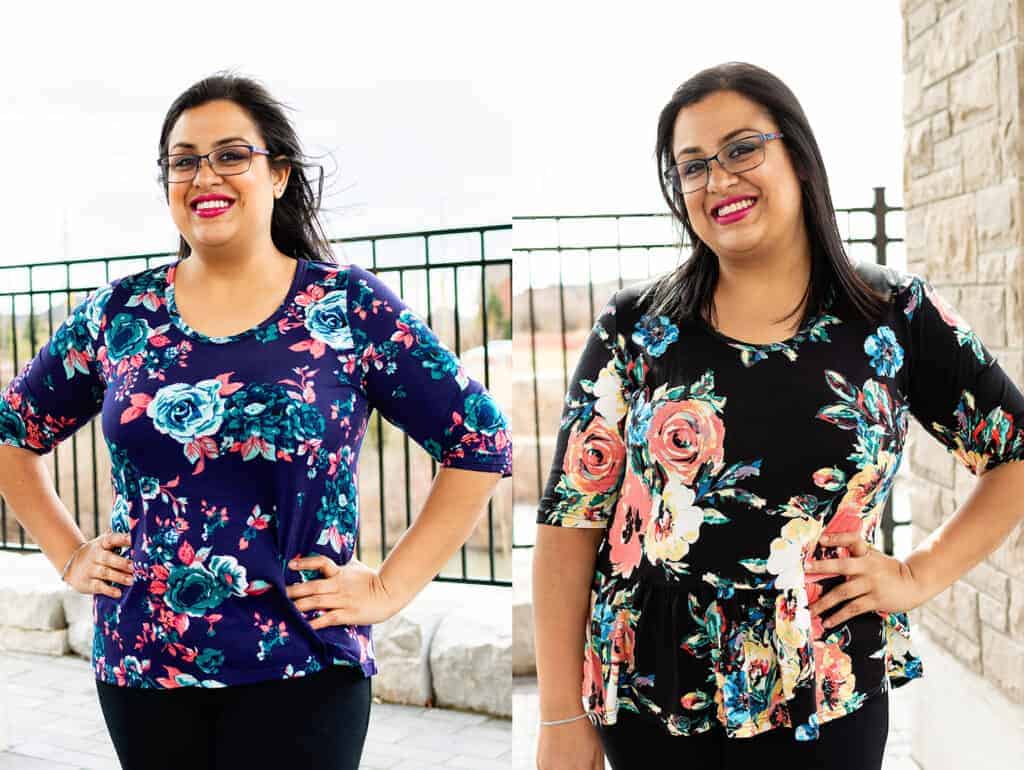
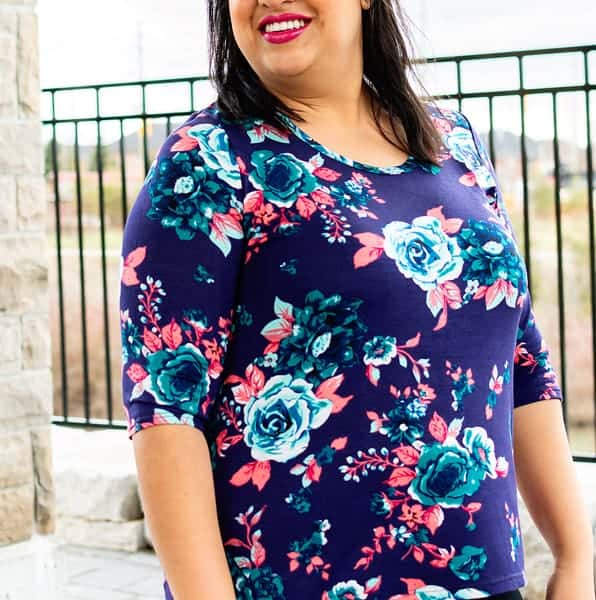
Excess Fabric at Underarm: Needs Armscye Adjustment

The black version shown above is a size large, view A, with no changes made to the pattern at all. If you look closely, there are some folds in the fabric along the sleeve seam, but the fit is good on the shoulders and bust. There are no pulling wrinkles between the bust apexes or radiating from the shoulders, which indicates I picked the right size. The only excess fabric is at the armpit, and the bunching is most pronounced at the underarm, indicating the underarm point is a little high *for my body*.
Armscye Adjustment Procedure
I decided to drop the underarm point by 0.5″, which scoops the armscye, reducing the extra fabric. On a woven bodice, you could pinch out the excess to form a dart, and then rotate the dart to a better location such as the waist seam. In a knit bodice with no darts, simply scoop the armscye, and the corresponding sleeve cap curve, to remove the excess fabric. Always begin with small increments when making such changes, even a quarter inch can make a big difference. Essentially I removed 0.5″ from the body, and 0.5″ from the sleeve to reduce all those wrinkles. Here is my second version, with the changes I made being the only difference to that area. I had to make view C for this one because I only had 1 yard of fabric that was similar in weight and stretch to the first one, but that only affected it waist down.
How effective was that, huh? There’s a slight small wrinkle still left, but I would not want to try and over-fit the garment. I still need a full range of motion, and some ease will help with that. I might, in the future, sew this version in a less stretchy fabric to see if there is a need to make another alteration to the pattern. Fabric choices affect fit to a surprising extent.
Understanding the Armscye Adjustment: Anatomy of a Sleeve
Let’s take a moment to look at why the sleeve looks like a bell curve, and why notches are so important.
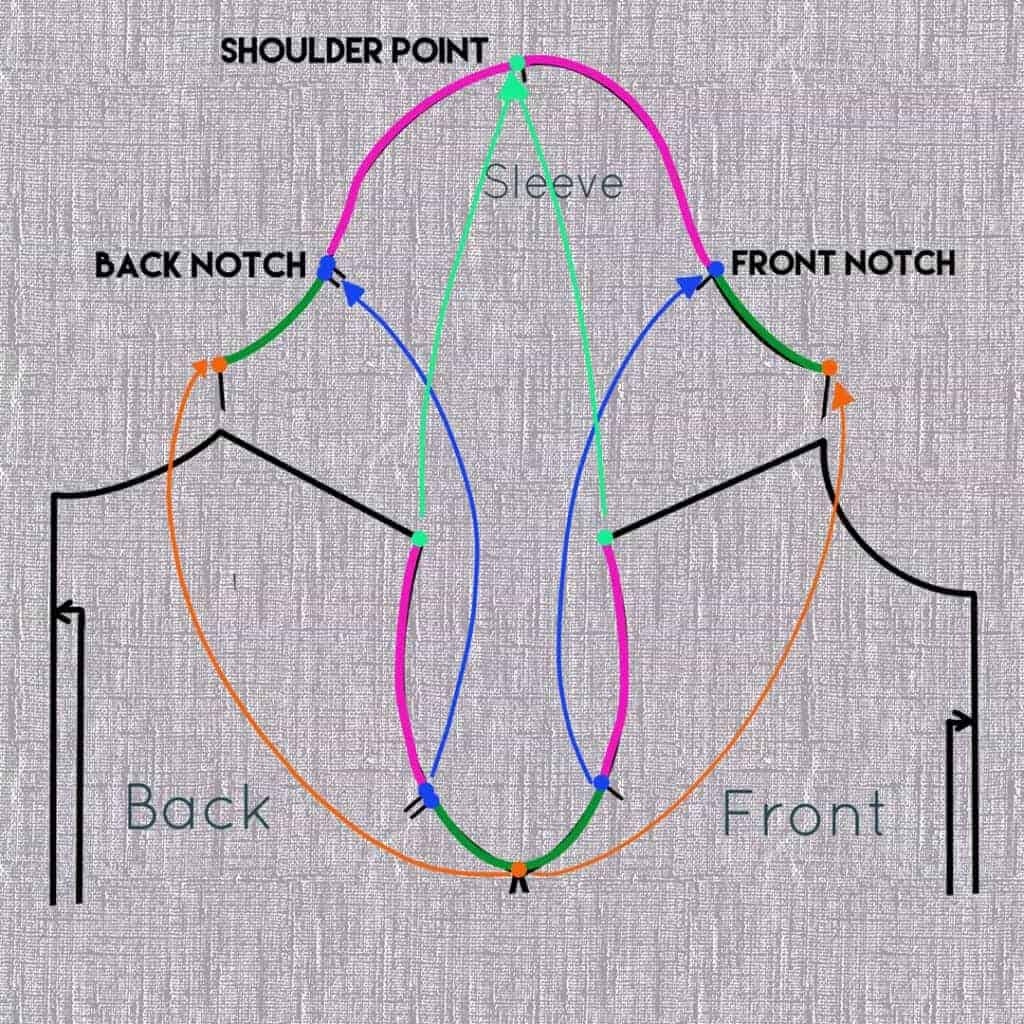
The illustration shows the back and front bodice “joined” at the underarm. The resulting U shape matches the bell curve of the sleeve head. The green section, from the underarm to the notches, denotes where the armhole curves inward under the arm. The pink section, the more vertical section of the U, follows the front/back of the body, and meets at the shoulder point. To remove excess fabric causing wrinkles, it is not enough to simply drop the green section down. There is visibly extra fabric in the pink area as well, and so the scoop extends above the notches to merge into the shoulder point.
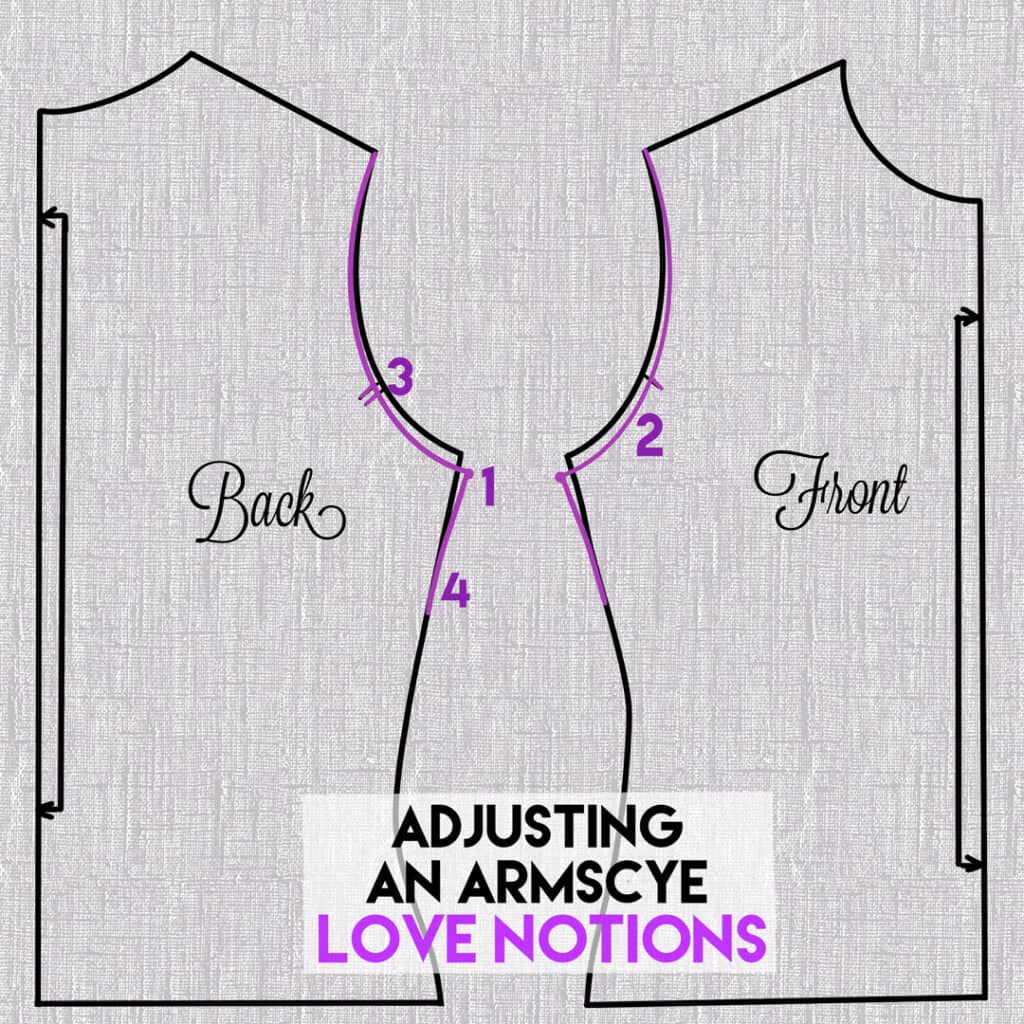
Adjust the Front and Back Bodice
 Assuming an adjustment of 0.5″ is needed, the adjustments are made as follows, and are done on both the Front and Back bodice in the same way:
- Measure 0.5″ below the armhole.
- Using a french curve or Dressmaker’s Curve, draw a new line from this point to the shoulder point (in purple in the illustration). I prefer to mimic the original curve from the underarm to the notch, and choose multiple sections of the french curve that best follow the original smoothly. This is a process of trial and error, just keep it as smooth as you can. The “scoop” disappears gradually above the notches, and the lines merge before or at the shoulder point.
- Echo the notches on the new curve – the notches are extremely important, as is their location.
- If necessary, true the new underarm point with the bodice side seams (1-4) – this may not be necessary for a tiny drop.
Adjust the Sleeve
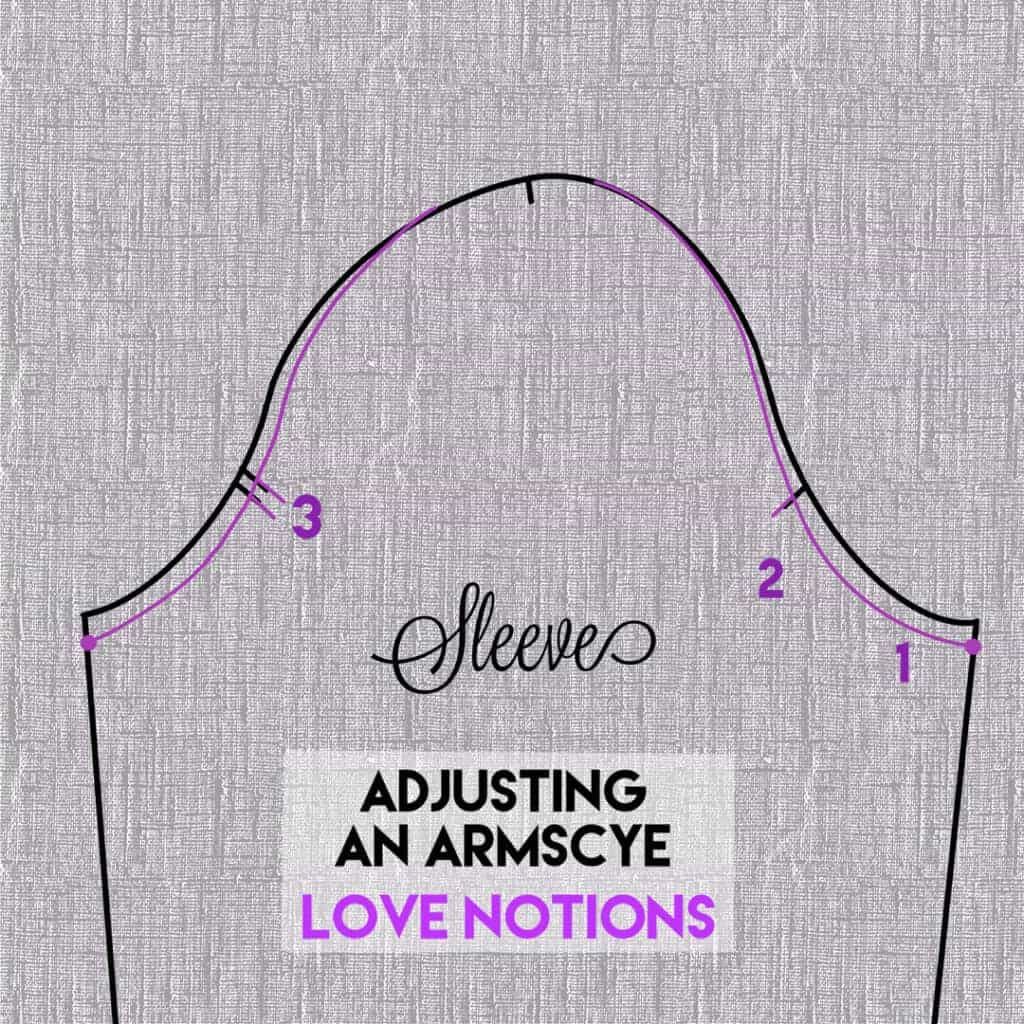 Repeat the same four steps on the sleeve piece. Drop the underarm point by the same amount as before, and mimic the curves of the pattern piece up to the notches. Don’t forget to mark your notches!
All that’s left is to cut along the new lines, and proceed with cutting and sewing the fabric. Make a note of the changes you made right on the pattern piece so you don’t forget what you did!
In the event you need to do the reverse, you can raise the underarm point of any pattern. The procedure remains the same, only the new underarm point will be above the old one instead of below.
Fit Differences with Armscye Adjustments
Here are some side-by-side photos of the muslin (black floral) and final (blue floral). I hope this article clarified the mystery of sleeve notches for you! Fitting a pattern to your body and its uniqueness is really easy when the foundation is strong, which is why I picked the Forte for this demonstration. Please don’t forget to buy the pattern if you don’t have it, and participate in the Pretty Posh Prints discount using code LoveNotions20. And what could be better than the discount than winning a $40 fabric store credit? Be sure to visit the Love Notions Pattern Support group on Facebook to win!