Hello and happy Friday!!
When it comes to sewing, one thing is for sure. I love learning new sewing techniques. Luckily, the Love Notion Blog is such a great resource for fun ideas to snazz up your makes with those new techniques.
So, today I am going to share how I made the perfect dress for me using today’s Feature Friday pattern, the Tessa Sheath dress.
For me the perfect dress has a little swing to it, pockets, a great fit, and most importantly a built in shelf bra. Yep I love them. So comfy and a great travel dress as it eliminates packing one more thing.

Special Addition Cut List
Here is the cut chart and other special materials I used for my dress with a built in bra, swing skirt, and ruffle.
- Tessa sheath front top bodice cut on fold at the waistline of your main fabric.
- Tessa sheath front top bodice cut on fold of your lining fabric.
- (optional but recommended for support) Front top bodice cut on fold of power net.
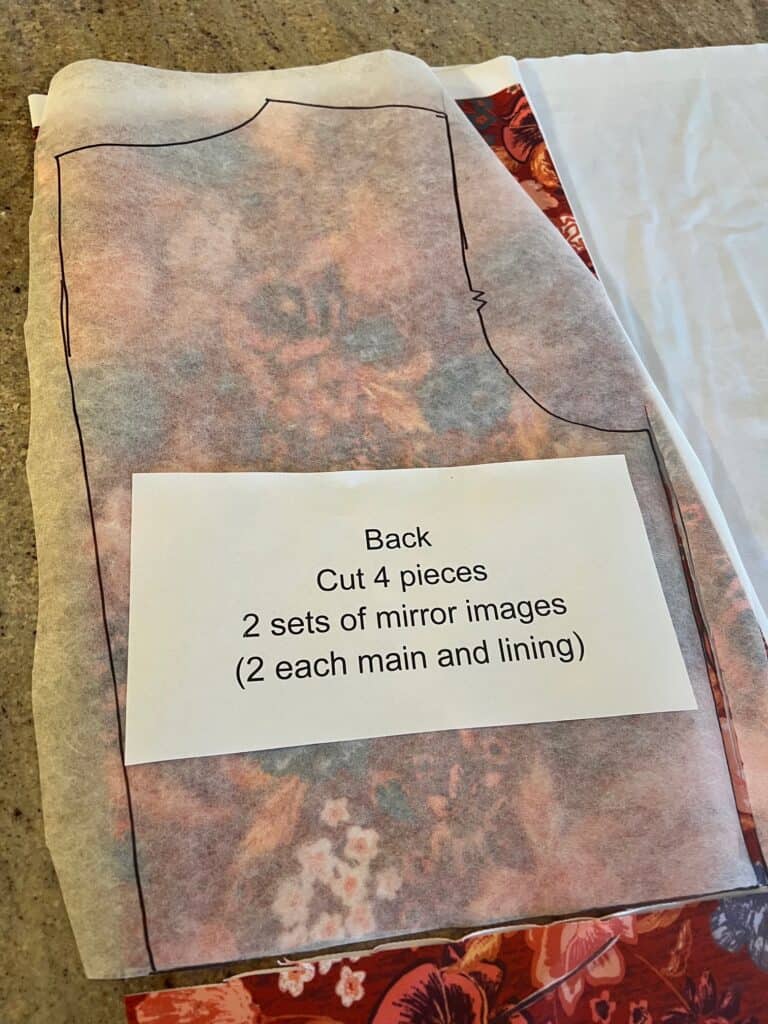
- Tessa sheath back bodice cut 2 mirror images main fabric.
- Tessa sheath back bodice cut 2 mirror images lining fabric.
- Tessa bottom or any of the sybil skirts you desire. Note if using a Sybil skirt, per the instructions to add lenth I added 2” to mine and should have added 4” as you will read more on later.
- 1.5” Elastic cut to comfort level for underbust elastic.
- Pockets as desired.
- Optional bra cups


Addition #1: A swing skirt
For my dress I used this tutorial Marta wrote on mashing the Sybil skirt pattern and Tessa dress.
Addition #2: Built in Bra
The very first step is to construct the bodice. If you are using the optional bra cups and power net- you will need to trim the shoulders off the power net, cut a pocket for the bra cups, and baste this piece onto the wrong side of the lining front piece as shown here.
Bodice Sewing
- Sew both the lining and the main back bodices together along the center seam as instructed on the Tessa pattern.
- Sew the shoulders of the front main to the shoulders of the back main. Repeat for the lining.
- Next we are going to use the burrito method for a clean finish. I love using this method when making a lined dress! Here is the video link to help with this method. You will be sewing the neck and the arm hole pieces on this step. I like to give the bodice a really good steam press after this step.
- Lay the bodice out flat and match the side front to the back and lining front to back. Sew the front bodice main side seam to the back side seam. Repeat and sew the lining side seam.
- Take the 1.5” elastic and if you have not cut it do so now using your underbust as a guide. Sew the short ends using a zig zag stitch to make a circle.
Elastic Sewing
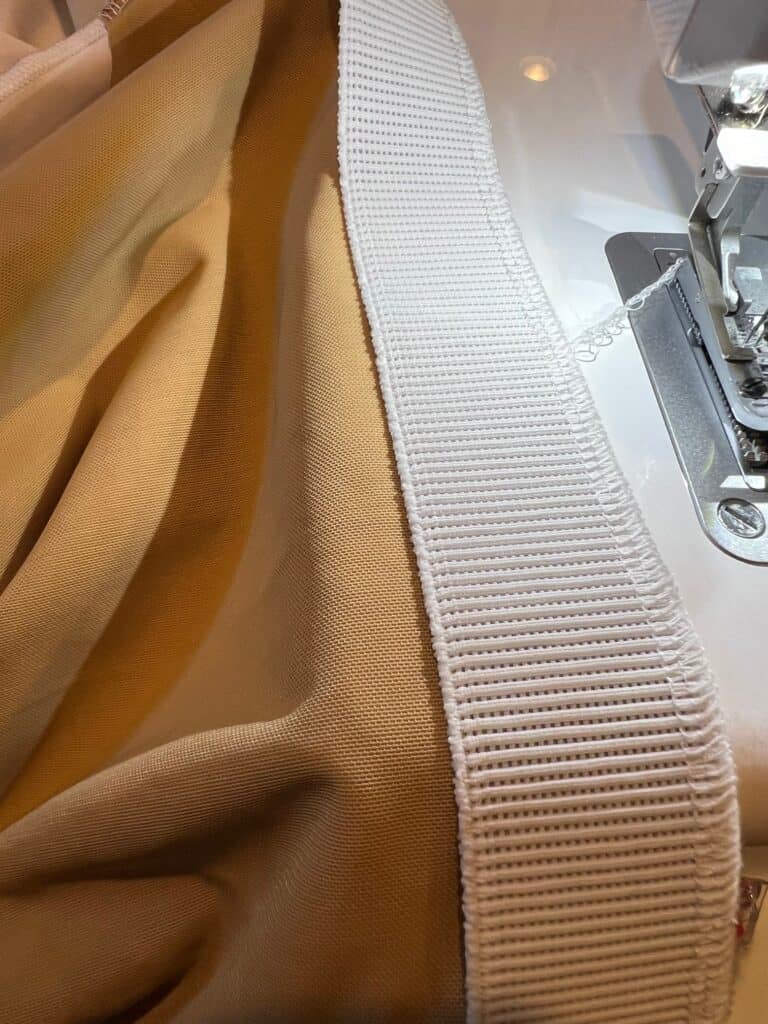
The next step is to divide the elastic in half and the bottom of your lining piece in half. I didn’t need to stretch mine much at all. There was only a 1” difference between my elastic band bottom. Sew the elastic to the bottom of the lining piece along the wrong side as shown. Be sure to keep the main bodice out of the way. The elastic only gets sewn to the bodice lining.
Now, flip the elastic over and topstitch. See pics for details. You will be topstitching this with a stretch stitch along the top inside edge of the elastic. A zig zag, triple stitch or coverstitch works well.


Addition #3: Pockets
Finish construction of your skirt of choice. Add pockets if desired. I used this tutorial for the pockets.
Addition #4: Ruffle
I also used this ruffle tutorial from Ilse for the bottom ruffles. I had not originally planned to use ruffles- but my dress was a little short for my comfort and her instructions helped add a fun detail.


Let’s Finish Up Sewing the Tessa Sheath Dress
- Almost there! Next attach the skirt to the main bodice right sides together- making sure to keep the bodice lining out of the way.
- Last but not least (in my opinion) add your bra cups. I like to do this last to be sure they go on the right spot and not too high or too low. After I like the placement I carefully pin and sew them in place.
Admire your comfy and pretty new dress!!!
A few other notes– I went down in bodice size after making a practice dress in my measured size pictured here and realizing I preferred a bit smaller fit on the bust. I made a medium size bust for this one, but I measure a large. I used a high quality athletic fabric with great recovery. Other fabrics will work but in my opinion this is the best fabric to use for comfort and support. A great second choice would be a cotton jersey or double brushed poly with higher spandex content (8% spandex would be best). I lengthened the skirt pieces 2” for my 5’8 frame and after trying the dress on, realized I should have added an extra inch or two. So adding the ruffle worked well for a last minute addition!
I hope you find these tips helpful and I am even thinking this would make a great swim top!! I share all of my makes on Instagram here. I have made several other Tessa dresses over the years if you want to take a peek. If you have not already purchased the Tessa pattern, here is my affiliate link to grab it for $5 today. Happy sewing!