Turn the Classic Tee into a Knot Front Tee!
Hello! I’m Sneha Monga, of Sewingcurves.com. I’m a sewist, artist, mom and late night snacker. Love Notions patterns are my favorites, drafted well and simple to sew. I like to find new ways to change up my trusted patterns to flow with trends. Today I have such a fun, free hack to share with you – a knot front tee! You’re going love it!
The Classic Tee is a newly released pattern, a semi-relaxed tee-shirt style that is the perfect blank canvas to make it your own. It’s free – check out the Facebook group to find out how to claim your copy! A few simple tweaks can make it look completely different. Here’s how to take the Classic Tee to the next level – the trendy knot front tee.
So, let’s get to making a knot front tee! Print and assemble your pattern in your size. Make your usual changes including lengthen/shorten for height, grading between sizes and any shoulder or sleeve adjustments that you usually need to make.
Once you’ve got your Classic Tee pattern ready, I’d recommend tracing the front and back out on tracing paper or wax paper because we will be making some modifications to the pattern.

THE MODIFICATIONS:
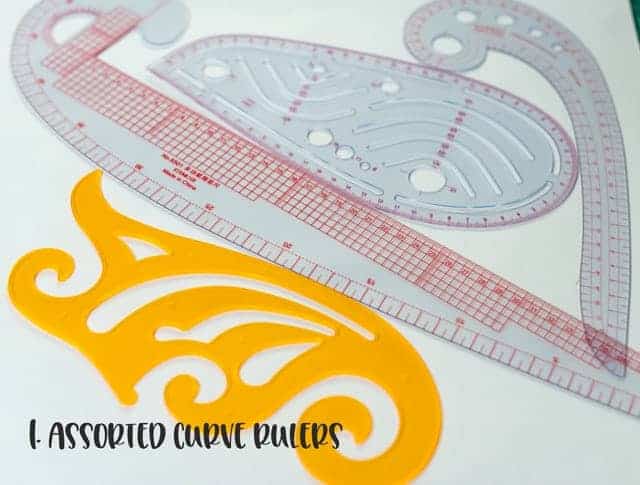
Gather your supplies – pencil, paper, tape, French curves if you have them, ruler. You need any sort of J curve that looks like the photo. You could just trace it out freehand, or copy the curve of a ready to wear knot front tee, but these are a set of French curves I have. I bought these as a huge set on eBay for about $26.
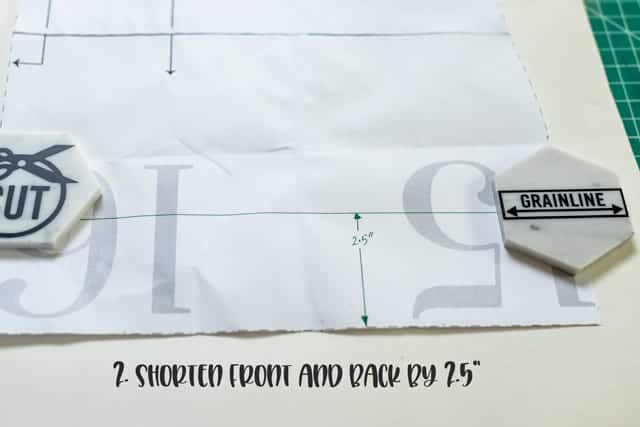
Shorten the hem of the Front and Back pattern pieces by 2.5″. I picked 2.5″ because I want the knot to hit right at the high hip, covering my “mummy tummy” to disguise it, but you can pick any number depending on your preference. Please keep in mind that there’s a 1″ hem allowance, but we will be making a facing with a 3/8″ seam allowance, so the tee will be 5/8″ or so longer than if you just shorten it and hem.
FRONT EXTENSION
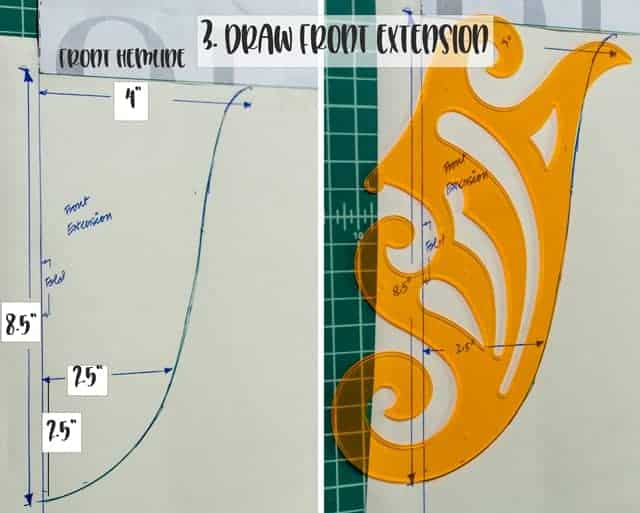
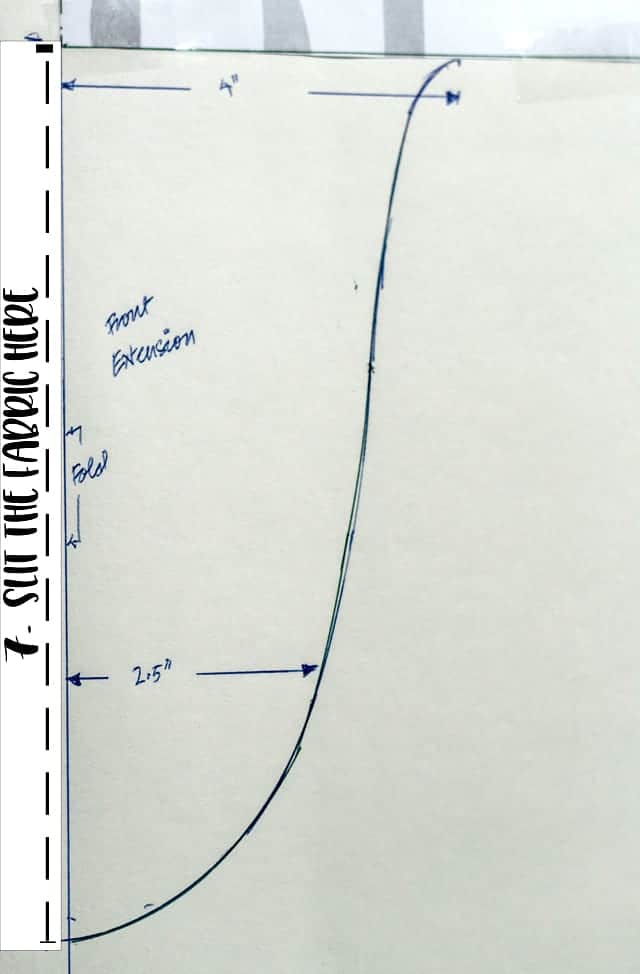
Tape down a large sheet of paper – tracing paper or even kids’ art rolls work great, which is what I did. Then, draw a right angle at the top left, about 10″ down and 10-15″ across. This will be the beginning of the Front Extension. Tape down the hem of the Front piece aligning the fold line with the corner of the extension, and the bottom cut edge with the horizontal line you just drew. Mark off 8.5″ along the vertical line. Starting 4″ in from the center front, draw a curve as shown, making a gradual S shape.
I used my curve for this, and it was amazingly helpful. Keep in mind it should be about 2.5″ wide near the bottom because we will be losing 3/8″ on both sides as we sew the facing. Gently taper to the vertical line. Cut out the front extension we just made, making sure to tape the piece to the main front piece well. Mark a notch at the original Center Front Hem.
FRONT FACING
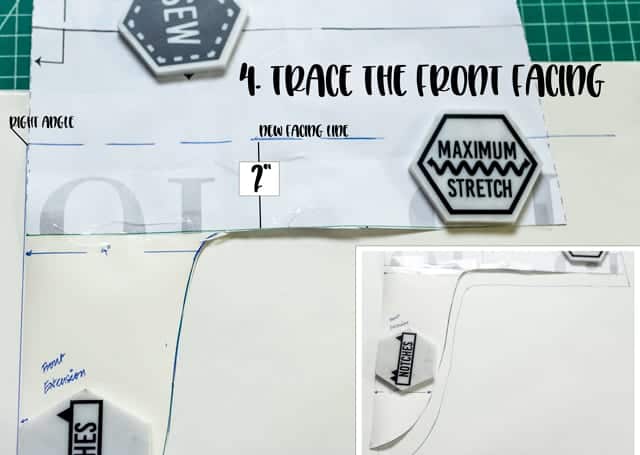
Trace the new front hemline on another piece of paper, following the Front Extension and hemline, and 2″ tall as measured along the side seam. Be sure to trace the side seam as well. Cut it out.
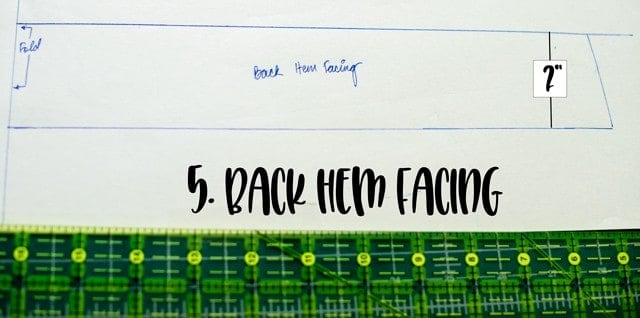
BACK FACING
Just like the front facing, trace the Back Hemline on another piece of paper. Also trace the center front and side seam, 2″ tall. Join to form the back facing. Cut this out as well. Voila, you’re done with Drafting!
Here are your drafted pieces!
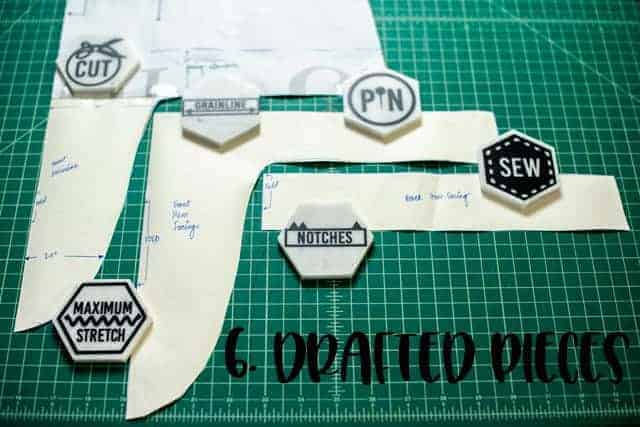
Cut your pattern pieces out as usual. If you think you may forget, mark the grain line the same as that of the original pattern pieces. Then, with the front still folded, carefully slit the front extension along the fold to have two long halves, ending at the original Center Front Hem notch.
SEWING:
Assemble the pattern as per the instructions, steps 1 through 6. At Step 7, only hem the sleeves.
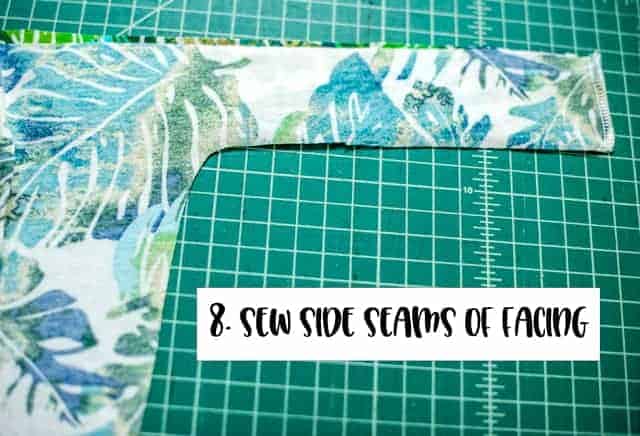
Next, place the front and back facing right sides together, matching up side seams. Sew or serge as per your preference.
With the main body right side out, and the facing wrong side out, place the facing over the main body and match hemline, pinning as you go. Be sure to align the curves of the front extension and side seams, with the fabrics right sides together. Now, sew with sewing machine and then serge (if you prefer), since I found the tight curve of the center front was really hard to neatly serge. Be sure to sew all around the front and back hem.
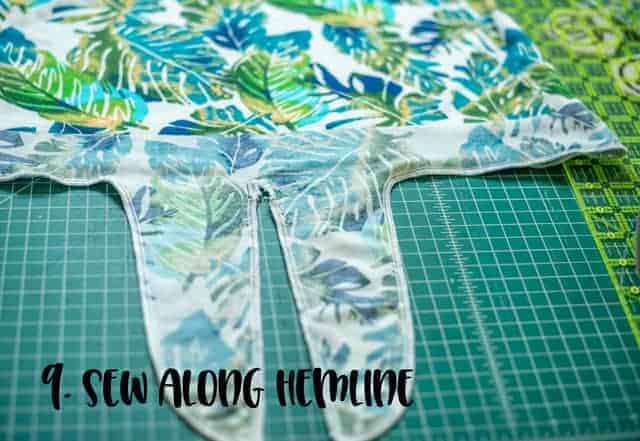
Now, turn the facing right side out, and fold under the main fabric. Press well and use a screwdriver or awl to push out the corner of the knot extensions. If they’re not as crisp as you’d like, you can definitely trim the seam allowance down to 1/8″ to reduce bulk. Depending on the fabric, you may also choose to topstitch along the edge.
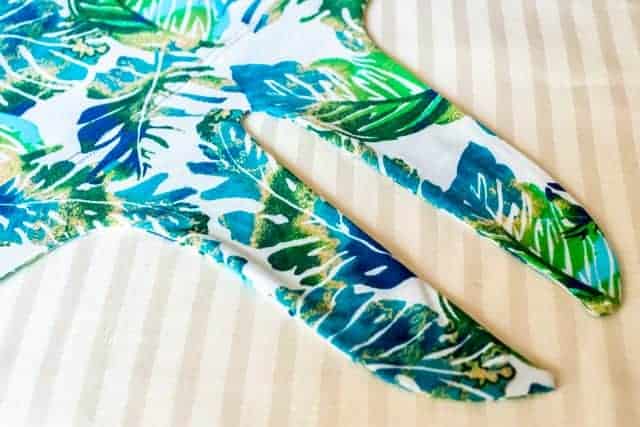
Next, pin the free edge of the facing to the main fabric (wrong sides together). Cover stitch or topstitch with twin needle along the raw edge of the facing to finish. Press all the seams well.

You’re all done!
Wasn’t creating a knot front tee easy? I hope you’ve enjoyed this little hack, and post your finished projects in the Love Notions Facebook group for all of us to see. Here are more shots of this amazing top!