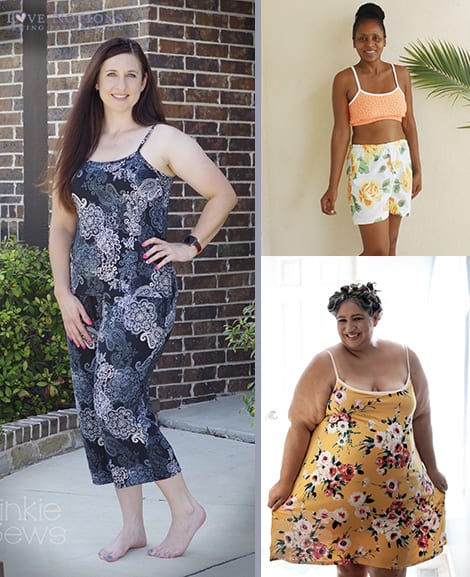
How to Add Lace to the Luna Cami
The Luna Cami is definitely one of the hidden gems in the Love Notions collection. Who doesn’t love the ability to make a custom fitting cami that coordinates with anything your heart desires?! Today, we are going to add a feminine touch to Luna with some pretty stretch lace. Are you ready to learn how to create a Lace Luna Cami? Let’s do this!
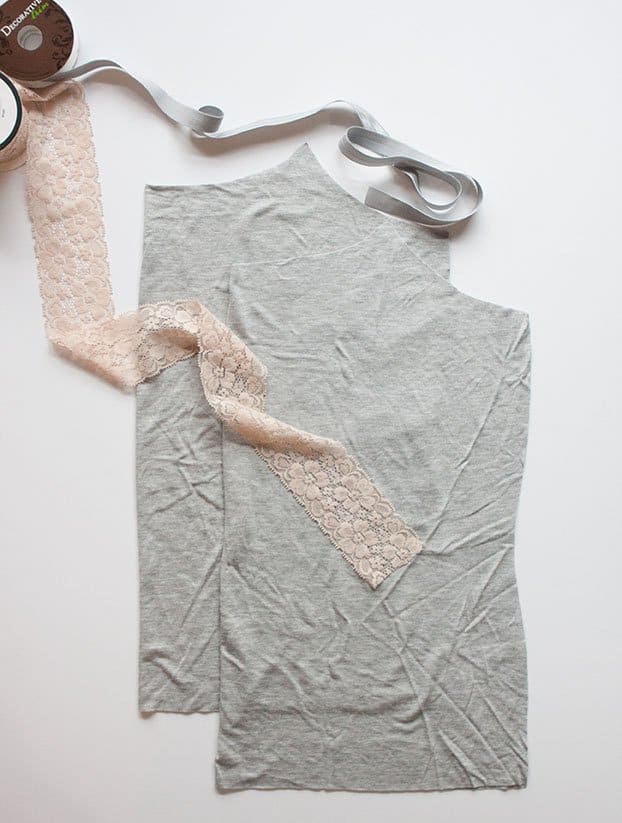
Adding a touch of lace to the Luna cami is such a quick addition!
There is no need to finish the raw edge of the cami front. The knit won’t fray!
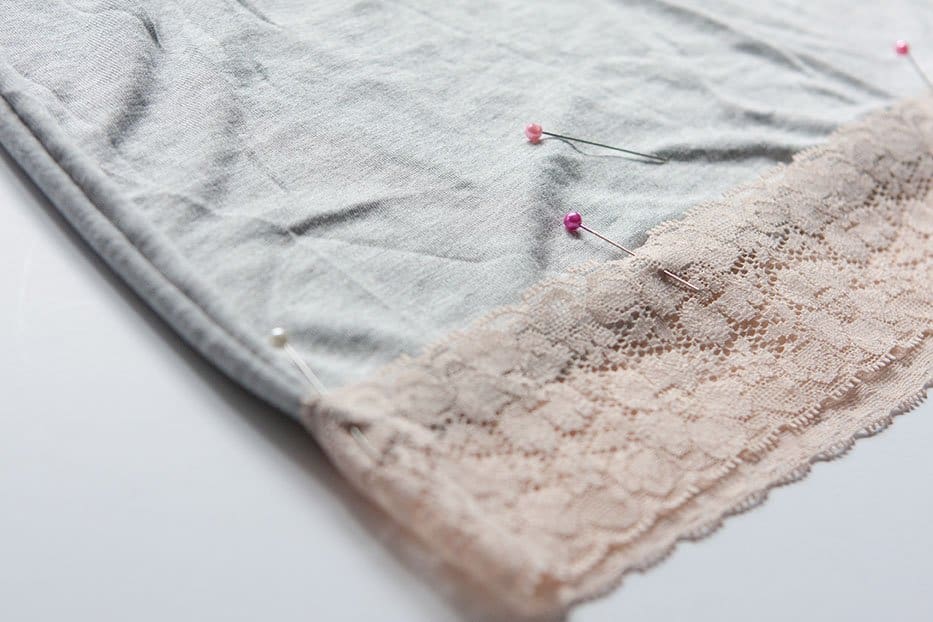
Using the bodice binding piece to determine the length of lace you need, cut your stretch lace. Pin it in place, right side up, on the right side of the bodice, matching up the center and ends. Position the lace so that it overlaps the cami front by about 1/2″. Because of the curve to the neckline, I would not recommend using lace wider than 2″ for this project.
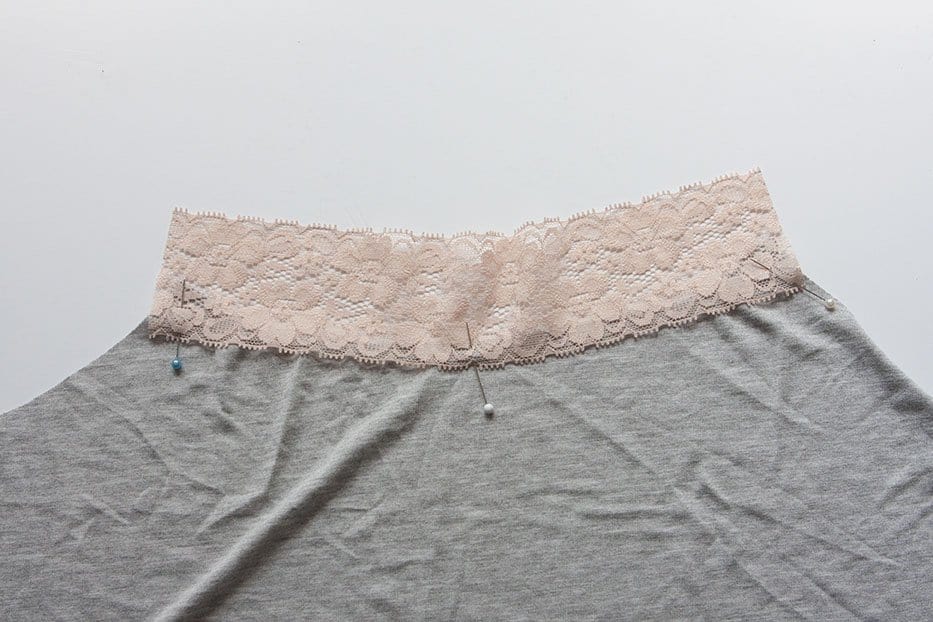
Using a stretch stich, double needle, or coverstitch machine, sew the lace to the cami 1/4″ from the edge of the lace. Stretch the lace slightly to fit as you go. Be careful to not stretch the neckline of the cami.
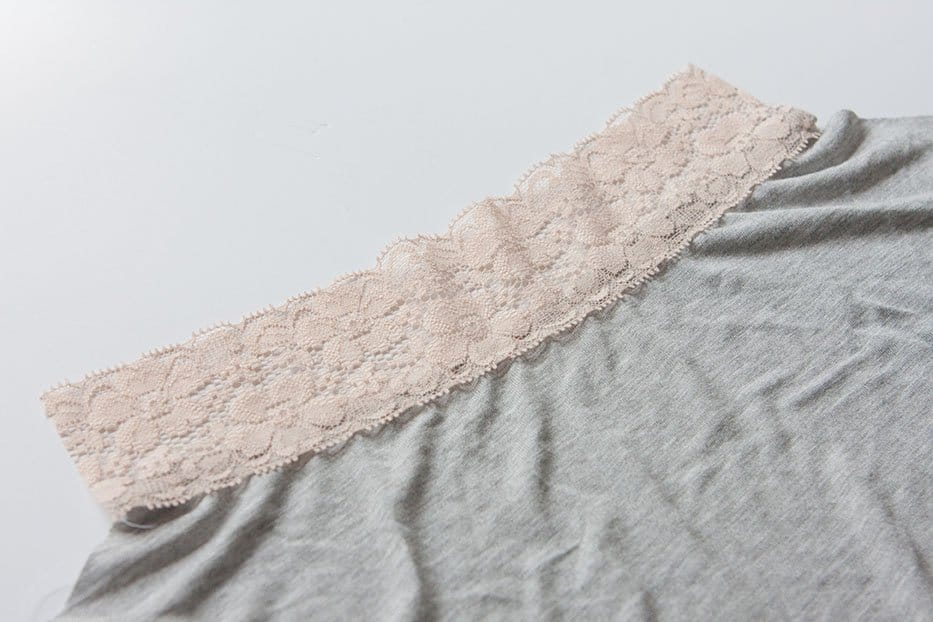
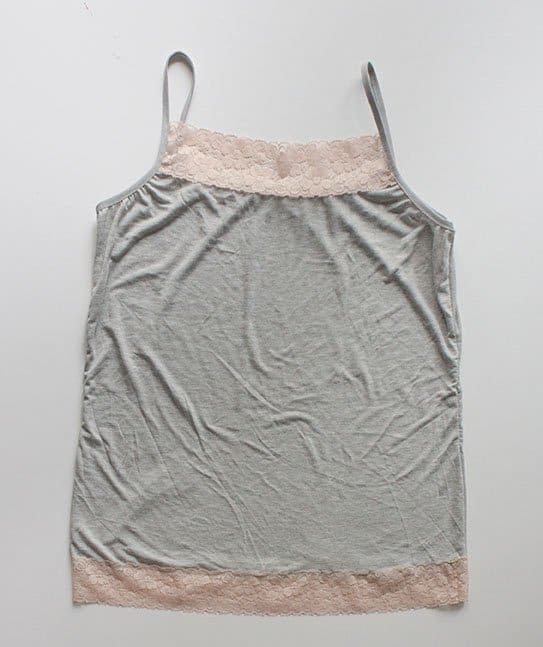
That’s all there is too it. Now assemble the cami as the pattern instructs. Don’t forget to either use binding or lace on the back as well.
Do you want to take things a little farther and add lace to the hem?
Sooo easy! Cut a piece of lace the same length as your hem, plus seam allowance. (I added 1/2″ for 1/4″ seam allowance.)
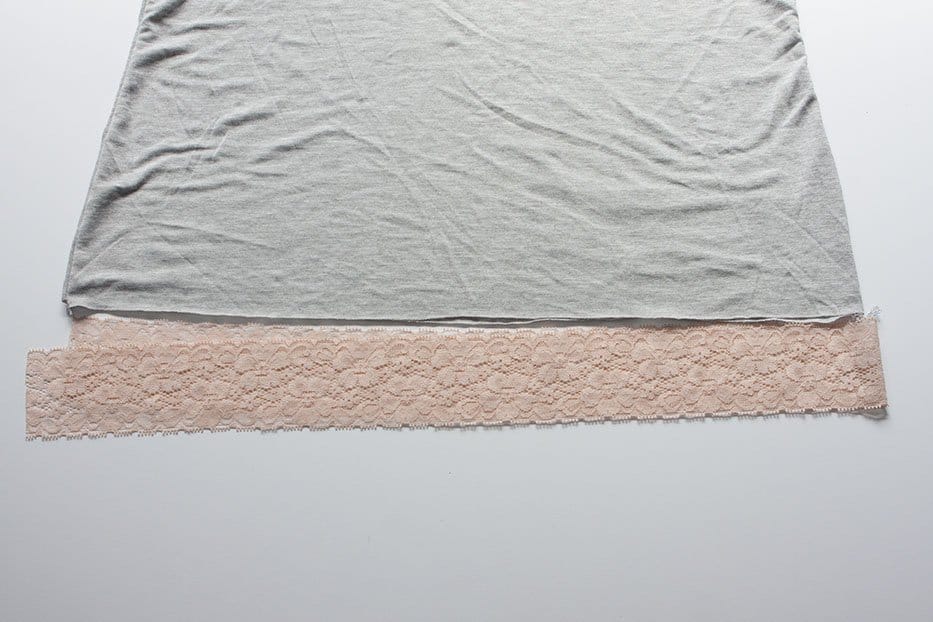
With right sides of the lace together, sew the ends of the lace together to form a loop. Find the center and quarter points of the lace and the center of the front and back of the cami. Lining up one side seam of the shirt with the seam in the lace, match up the points and pin in place the same way you pinned the lace to the neckline.
Stitch in place with a stretch stitch, double needle or coverstitch machine. That’s all there is to it! I have to say, this may even be easier than hemming!
So now that we have this ultra cute lace cami, let’s say we put it to work?
It’s beautiful under the new Forte pattern. The deep V in views B and D really give you the opportunity to play with some layering. How sweet is that touch of lace?

Wondering where you can pick up some stretch lace?
I asked around our Facebook Support Group and here are some places our wonderful members recommended. Please note, I did not purchase my lace from any of these shops, I found mine locally at Hobby Lobby.
- Surge Fabric
- Fabric Depot
- M&J Trimming
- Lace Haven
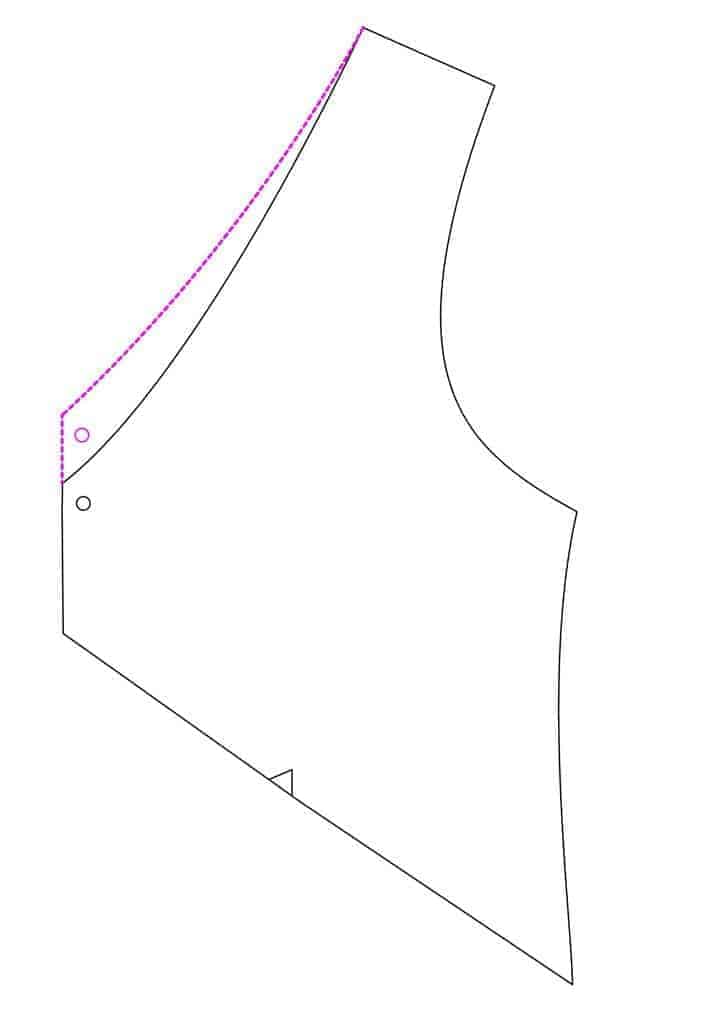
Hello! Tami here with my pattern-designer hat on. 🙂 I thought now would be a great chance to share with you a super simple pattern alternation to raise the neckline of the v-neck Forte… or any other neckline!
First, the Forte v-neck: The neckline on views B & D of the Forte use a v-neck that is not bound or banded. It’s just simply turned to the wrong side, pressed well and topstitched in place. If you prefer more coverage and don’t want to layer with a cami you can easily raise that V in just a few seconds.
Once you have your bodice piece printed and assembled but not cut out, draw in a straight line up from the center front however much you’d like it raised. To get an idea of how much you’d like, hold the bodice piece up to yourself, taking into account the shoulder and neckline seam allowances (all 3/8″) and go from there.
Now, connect that new line with the shoulder seam. You want the shoulder seam to stay the same (or if you want a wider shoulder just be sure to do the same to the back piece at the shoulder seam). I have drafted the neckline with a slight curve to it. Get your pencil out and just free-hand that connection. If you happen to have a french curve ruler, now would be a great time to use it.
Don’t forget to move your circle pattern marking as well. This marking is where you stop your stitching and should be 3/8″ in from the edge and 3/8″ down from the neckline.
While we’re on the subject of raising neckline’s I thought I’d also show you how to raise a scoop neck.
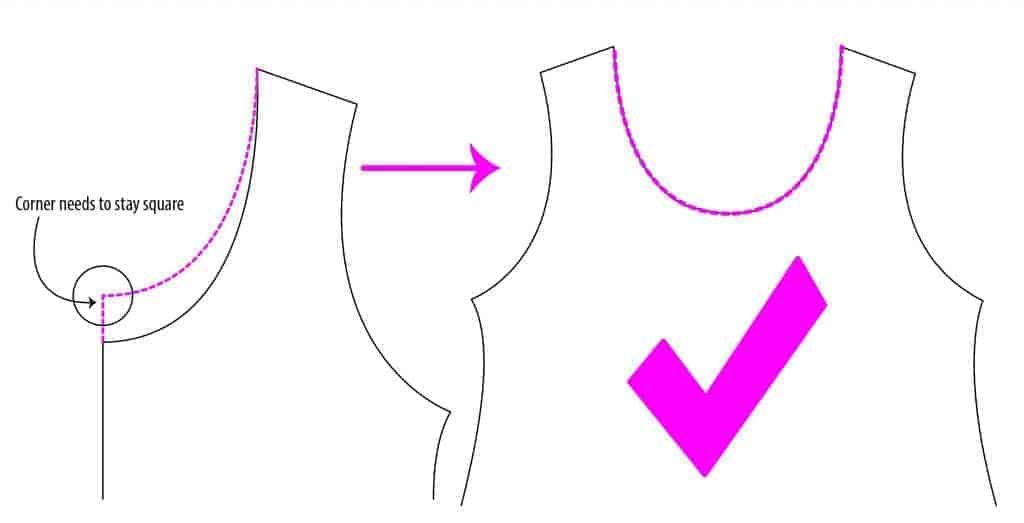
It’s basically the same concept as the v-neck above with one exception. When you draw in your new scoop neckline, be sure your center front corner is square. Let me show you what a well drafted scoop looks like:
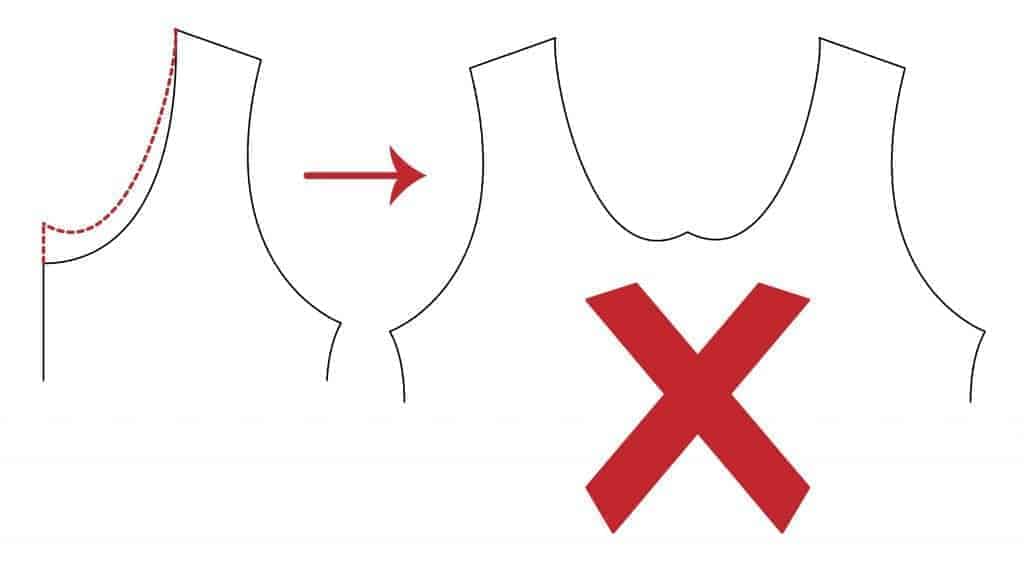
And below is what happens when your corner isn’t square. You don’t want that little peak at the center front!
Now that you have drawn a new neckline, be sure to remeasure the neckline front and back to adjust your neckband as well. Don’t forget to subtract your seam allowances in that measurement. As a general rule, a neckband should be anywhere from 80-90% of the neckline measurement. This will vary depending on fabric. If you’re working with a stretchy rib knit you’ll probably want the 80% number, if you’re working with less stretchy you’ll want to go a little larger with 85-90%.
You have now added a great alteration technique to your arsenal. Raise those necklines with confidence!