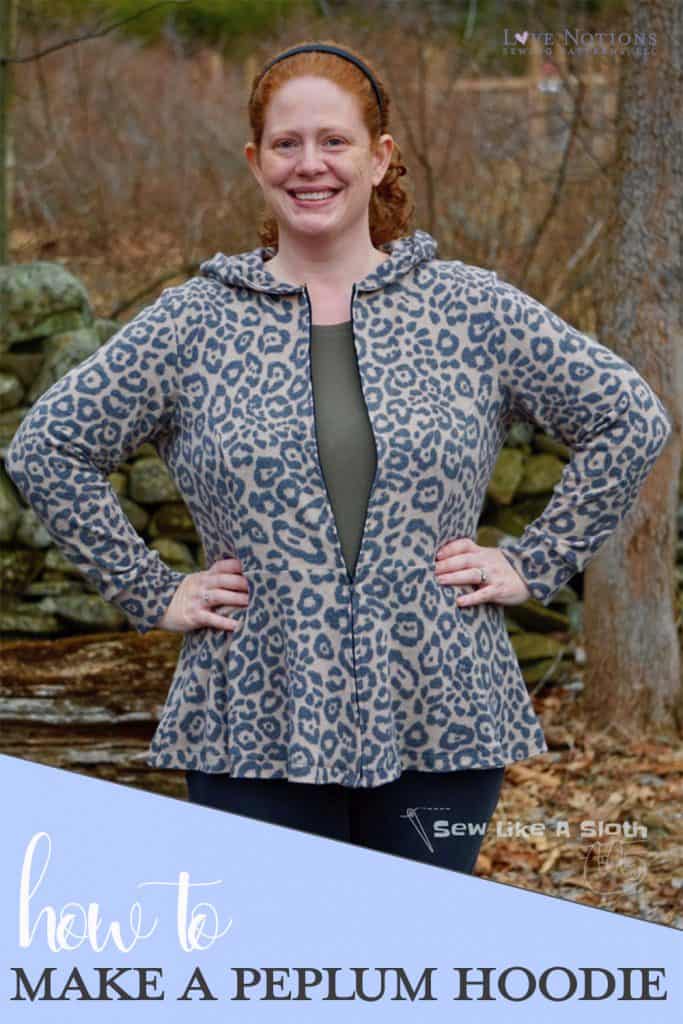
We are so excited to welcome Caroline Gaddy to the blog today! She is showing off her adorable Margot Peplum Hoodie Hack. We know you’ll love it and will be making tons of these for yourself or your little one (using the coordinating Maggie Peplum, of course). And as Caroline encourages, we hope that you’ll be inspired to say ‘YES’ to yourself and your style with your sewing.
MARGOT PEPLUM HOODIE HACK
Hello fellow sewists! I am so excited to share today’s $5 Feature Friday pattern, the Margot peplum top, with you. (The Maggie Peplum is also on sale today.) I have a fun hack for you AND a fabric discount from our amazing fabric sponsor this week, Amelia Lane Designs! Who doesn’t want more pretty fabric? Not me! My husband says we’re doomed to perish in a fabrilanche. Ha! Oh well, there are worse ways to go. 😉 Read on to the end of this post to find the discount code for our spectacular fabric sponsor!

Why sew a peplum hoodie?
Before I walk you through this little hack, I want to talk a little bit about what inspired me to do it. I’ve spent a lot of time saying, “no” to myself.
“No, you’re too old for that.”
“No, you’re too fat for that.”
“No, you could never pull that off.”
But this year, I decided no more! 2020 is my year to take the plunge, to live authentically, and to say “yes” to me. When I see a style that inspires me, I’m going for it! So, when I saw Mal’s peplum style zip up faux leather jacket in Descendents 3, I did not say to myself, “Caroline, this is a Disney show for tweens, not a pinspiration board.” I said, “I like that idea! How can I make it work for me?” Not out loud, of course, because that would have been weird. 😉 To create the look I wanted – a fun peplum style hoodie – I turned to the Margot, with some fabric inspiration from Amelia Lane Designs.

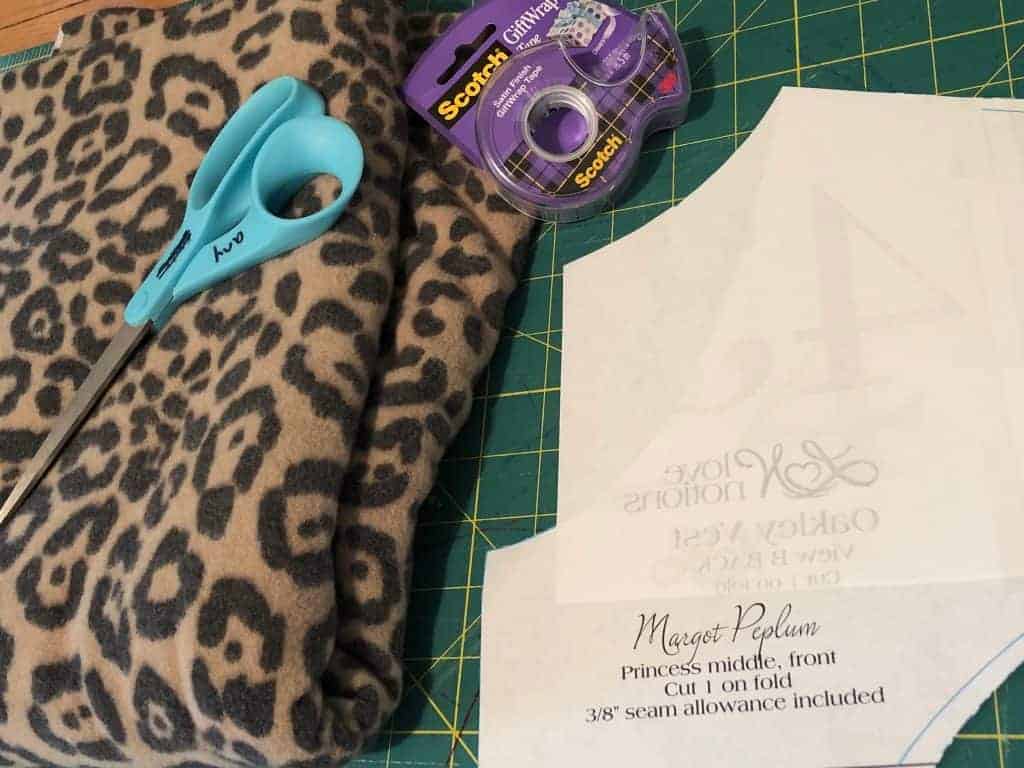
Supply list for a peplum hoodie:
To create your very own Margot hoodie, you will need the following:
- The Margot pattern in your size and selected style (obviously hahaha!)
- A ruler
- A pen/pencil
- Paper
- A hoodie pattern you like – I’m using the Love Notions Oakley
- A french curve is handy but you can wing it
- Separating zipper in the length needed for your size
- Interfacing
You can do this hack with any of the Margot style options. I chose to do the half circle skirt and princess seam bodice because that was the look I was going for. I encourage you to explore whatever style options you enjoy most! 🙂 You could, for example, choose to be eerily excited about your super cozy hood on your new awesome peplum hoodie, like me in the picture below. 😉

Directions for Peplum Hoodie Hack
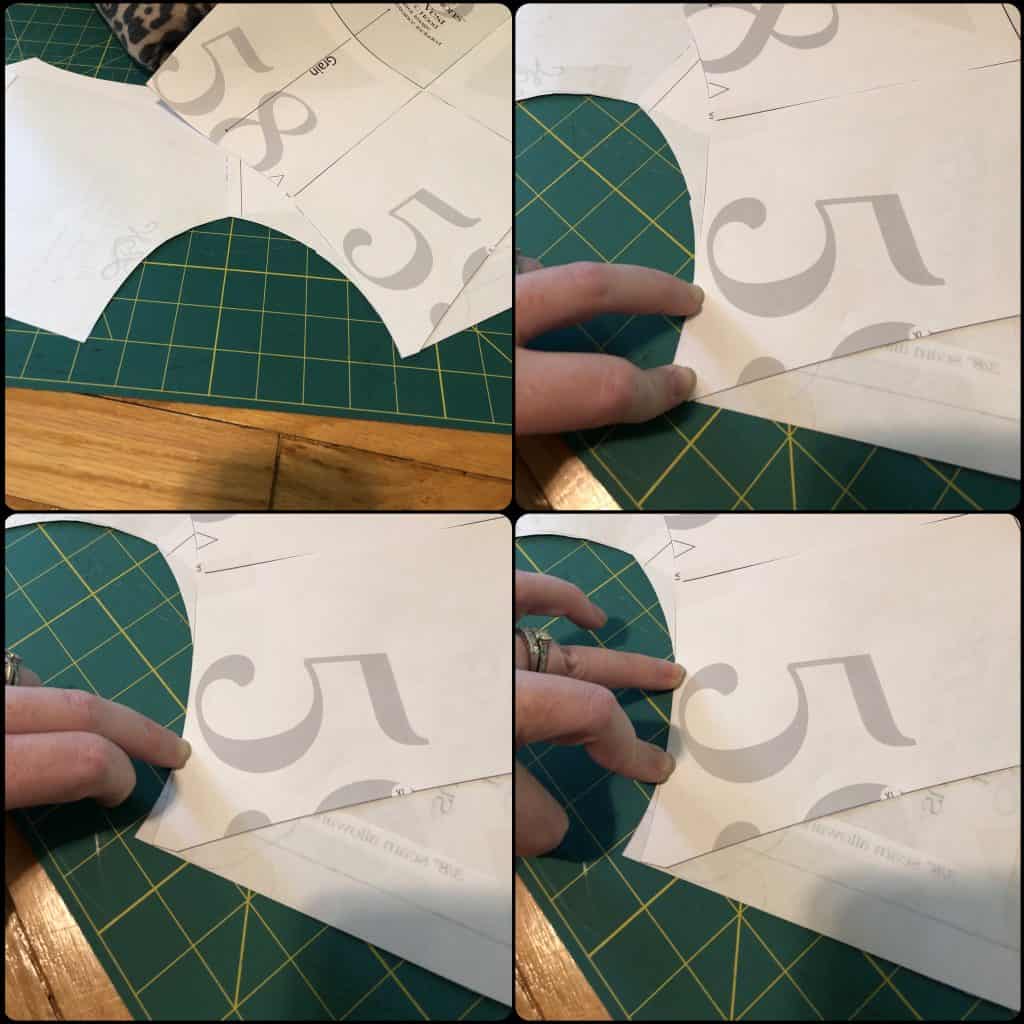
STEP 1:
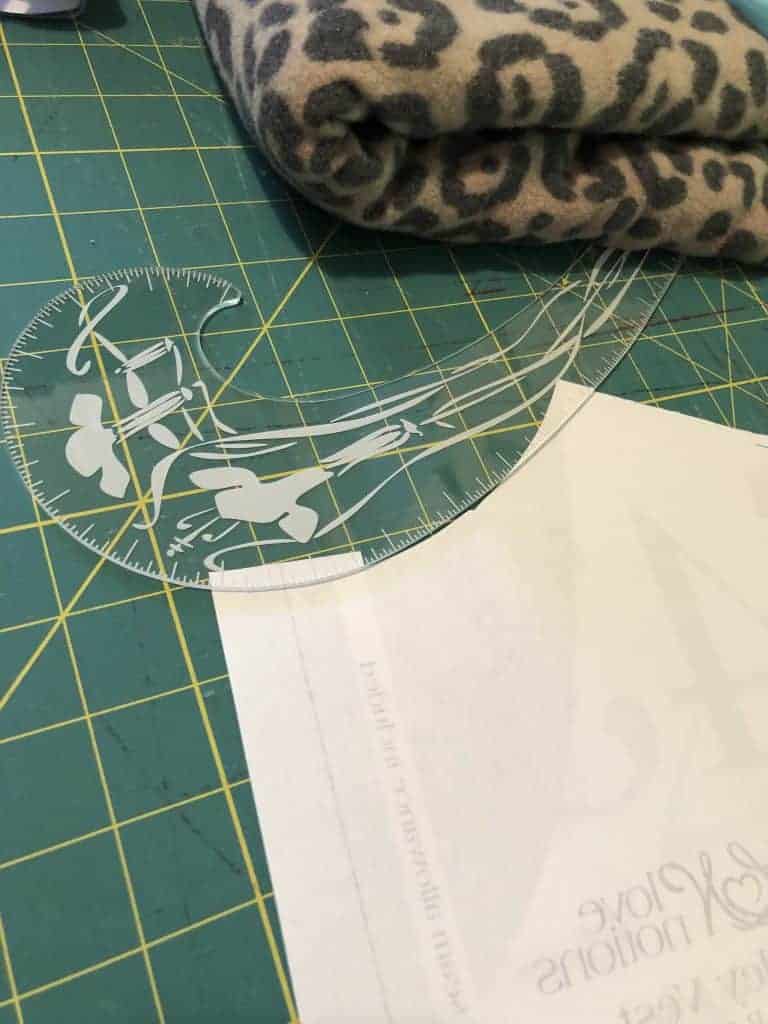
After you’ve taped and cut your Margot pattern pieces, attach the neckline from your hoodie pattern to the Margot at the shoulder.
If the new neckline piece is a little short or long, just add or remove paper to match it up to the Margot. You can see the Oakley is a little short. I simply added another strip of paper and used a french curve to finish out the curve of the neckline.
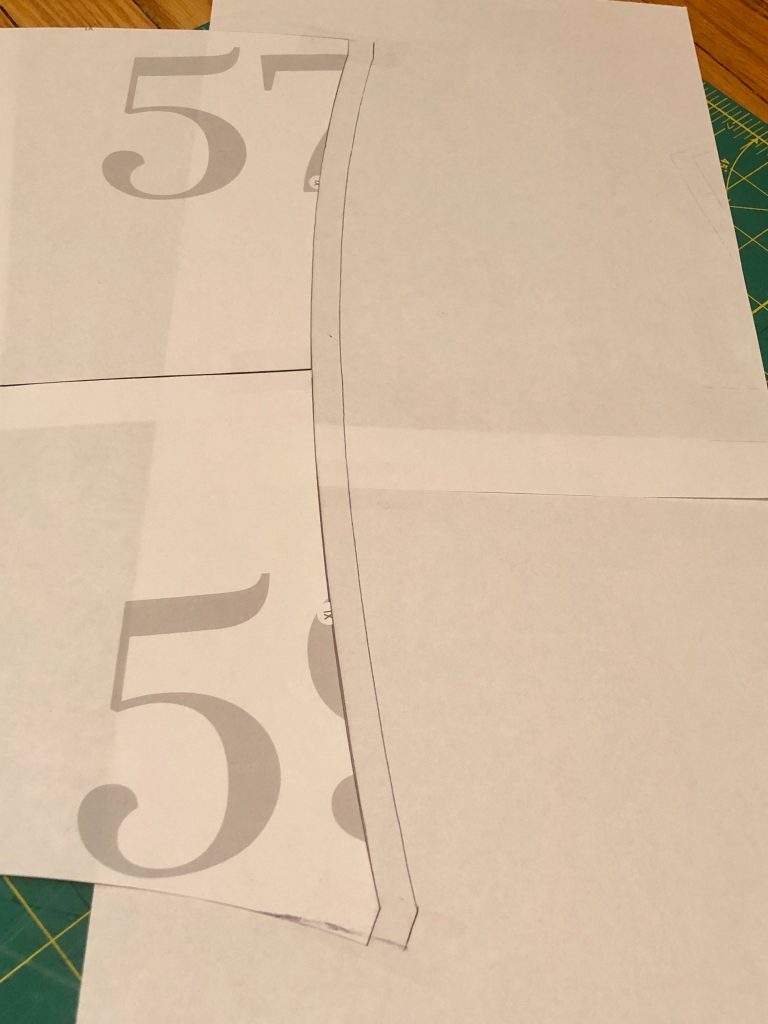
STEP 2:
Take your hood piece and walk the pattern to double check the fit. To do this, you’ll need to mark the ⅜” seam allowance and overlap your pieces to account for SA. You may need to make some adjustments to the neckline if the hood is not fitting. If the hood is a little shorter than the neckline (which is the case with my pattern pieces), that’s okay because you’re using knit and you can stretch it to fit. You just don’t want to stretch so much that you have to use Hulk strength. 😉
STEP 3 (optional, depending on pattern used):
Since I’m using the Oakley hood, I needed to add either seam allowance or hem allowance because the Oakley is made to have a binding finish. I opted to add a ⅜” seam allowance because I wanted to line my hood. To do that, I traced the edge of the hood on to paper, and then pulled the pattern back ⅜” and taped it in place. Voila!
***If adding a hood lining, make sure you cut both hood outer and hood lining pieces. If I had wanted to add a hem allowance, I would have followed the same steps, I just would have added ½” – 1” for a hem instead.
STEP 4:
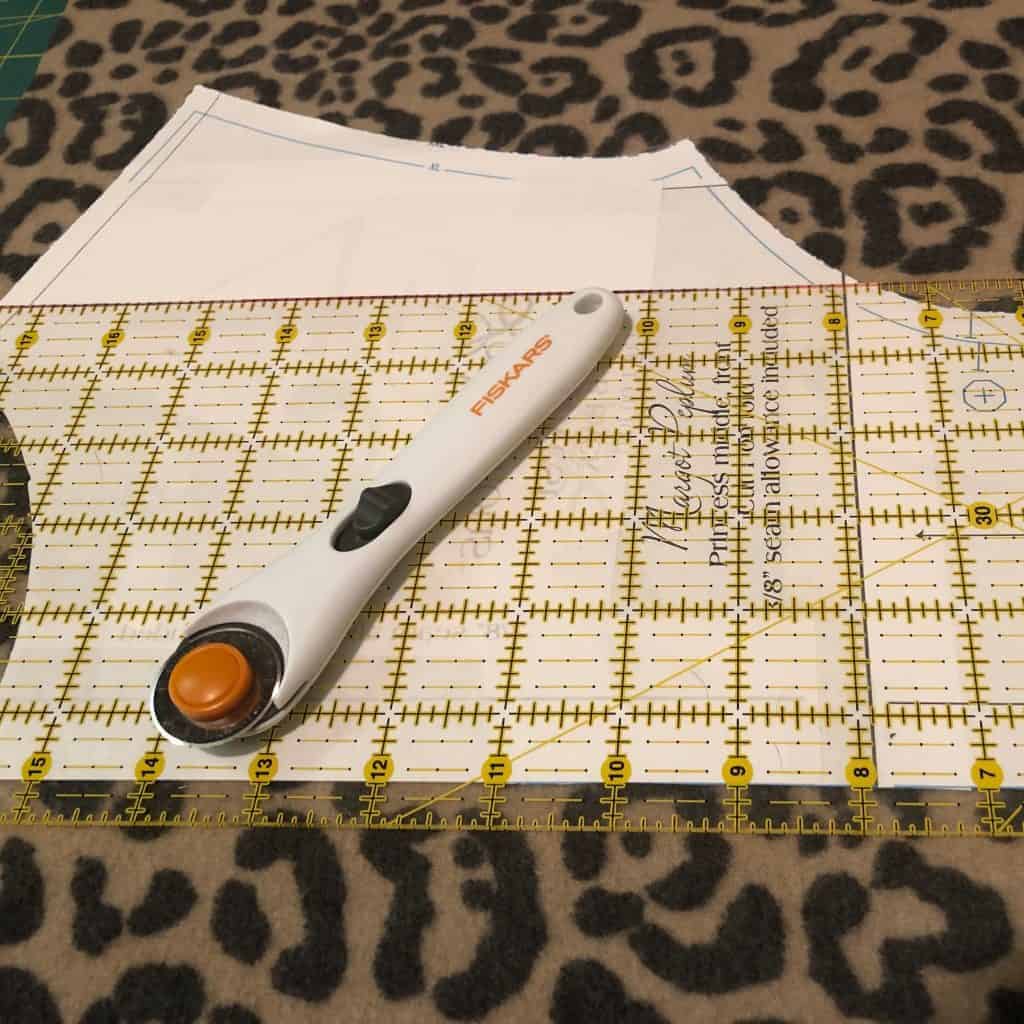
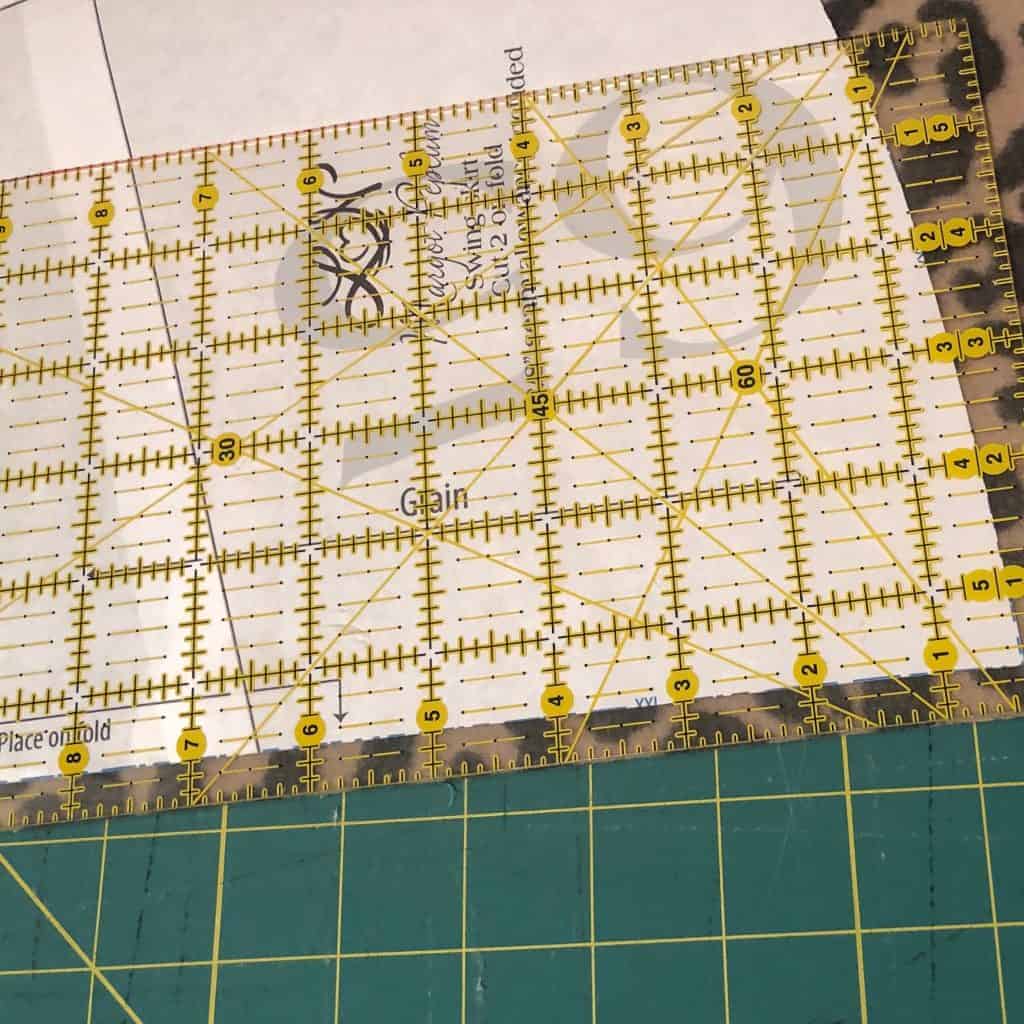
Cut your pattern pieces as usual EXCEPT add ⅜” to the front bodice piece and cut two mirror images instead of cutting on the fold, and add ⅜” to one skirt piece and cut two mirror images instead of cutting both on the fold.
**OPTIONAL STEP: You can opt to add cuffs to the sleeves (which I did). To do that, simply fold back the sleeve pattern piece at the hem line by about 4” – this really depends on your preference. Then cut a rectangle cuff piece to your length and width preference. Mine is almost a 1:1 ratio with the hemline of the sleeve because I like a loose cuff.
STEP 5:
Assemble your modified Margot as usual, following the instructions in the pattern. The only difference will be that your front section will be in two pieces. Do not add the hood yet.
STEP 6:
Iron a ¾” – 1” strip of interfacing (I used SF101) to the wrong side of each of your two front pieces where the zipper will go. This helps stabilize the zipper and makes your life a little easier for zipper installation. You can skip this step, but I don’t recommend it, especially if you’re using a sweater knit or lighter weight knit.

STEP 7:
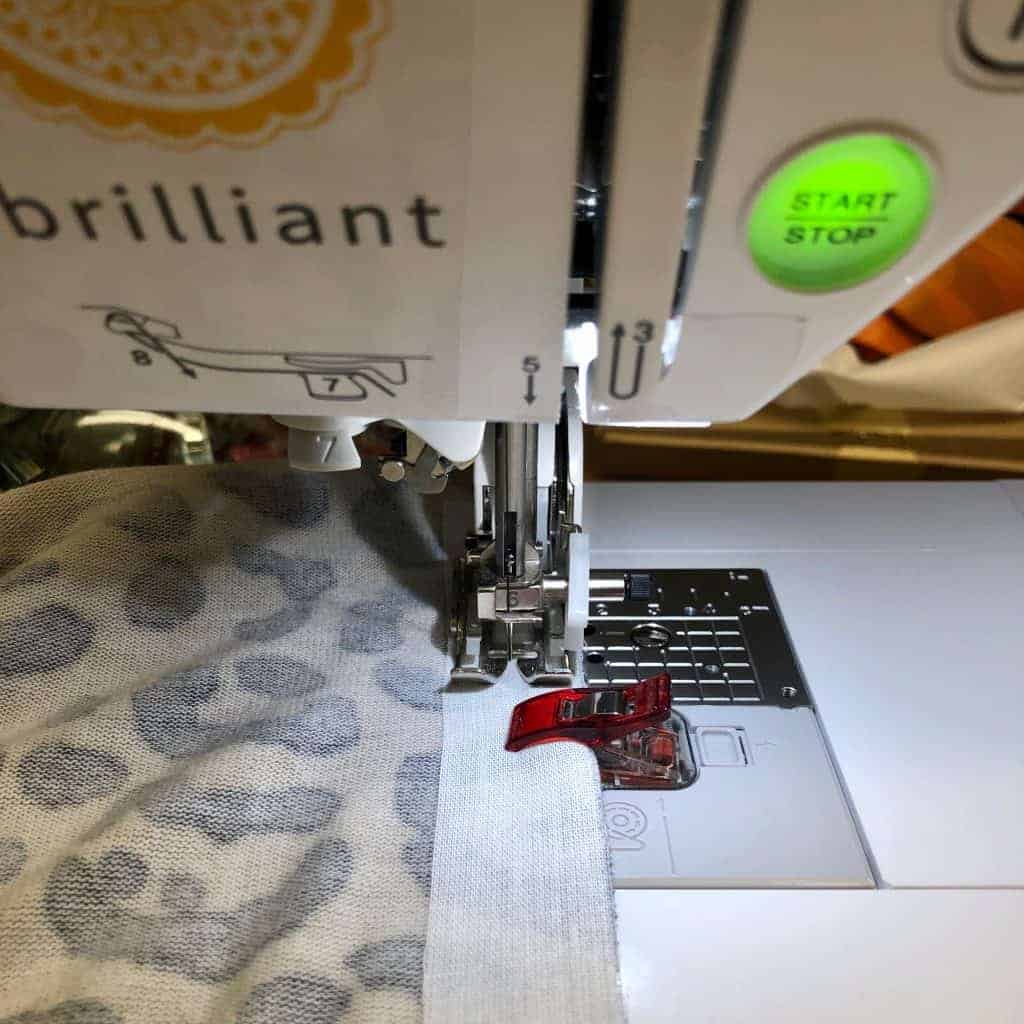
Sew together the front pieces with a basting stitch, using a ⅜” seam allowance. Make sure to line up your bottom and top edges and the waist seam.
(Isn’t my Babylock Brilliant beautiful?! I got her at the last Love Notions Retreat! I wuv her.)
STEP 8:
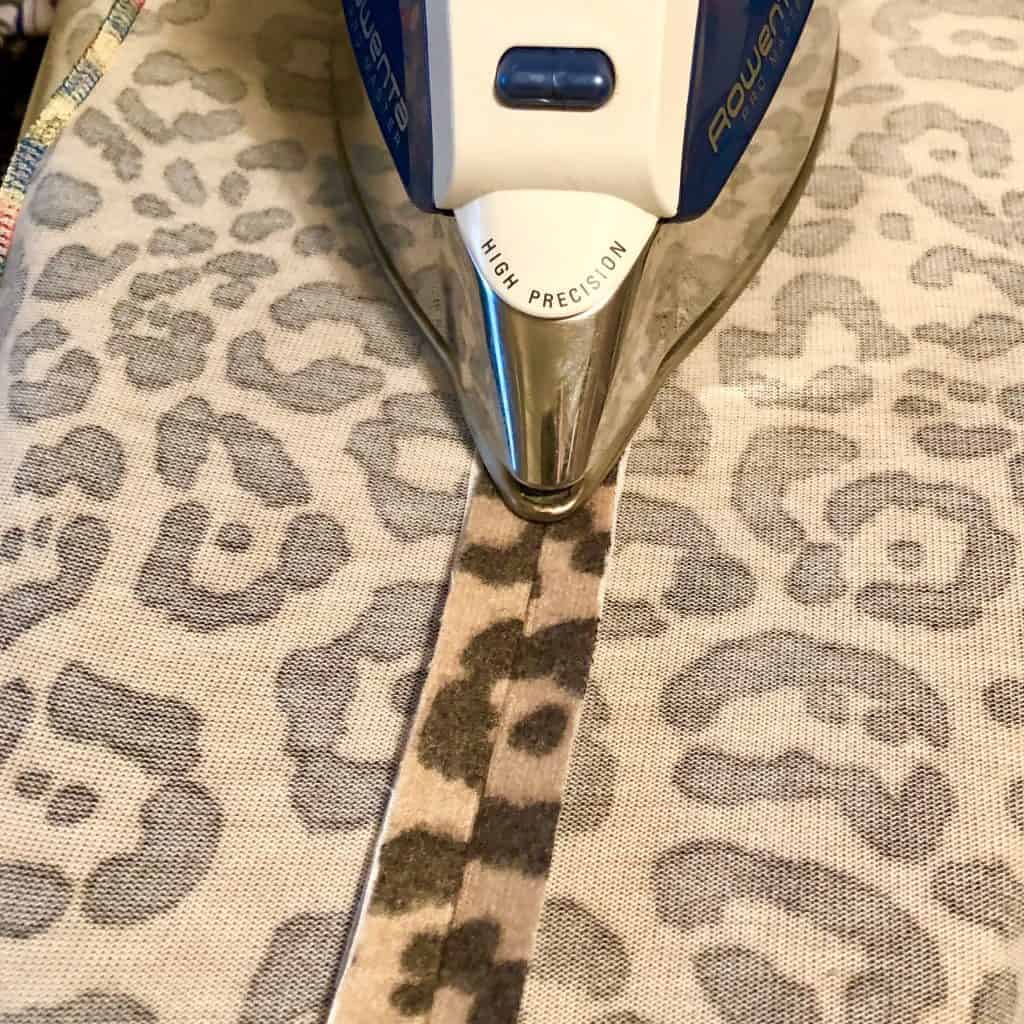
Press open the “seam” you have just created. This is where your zipper will go.
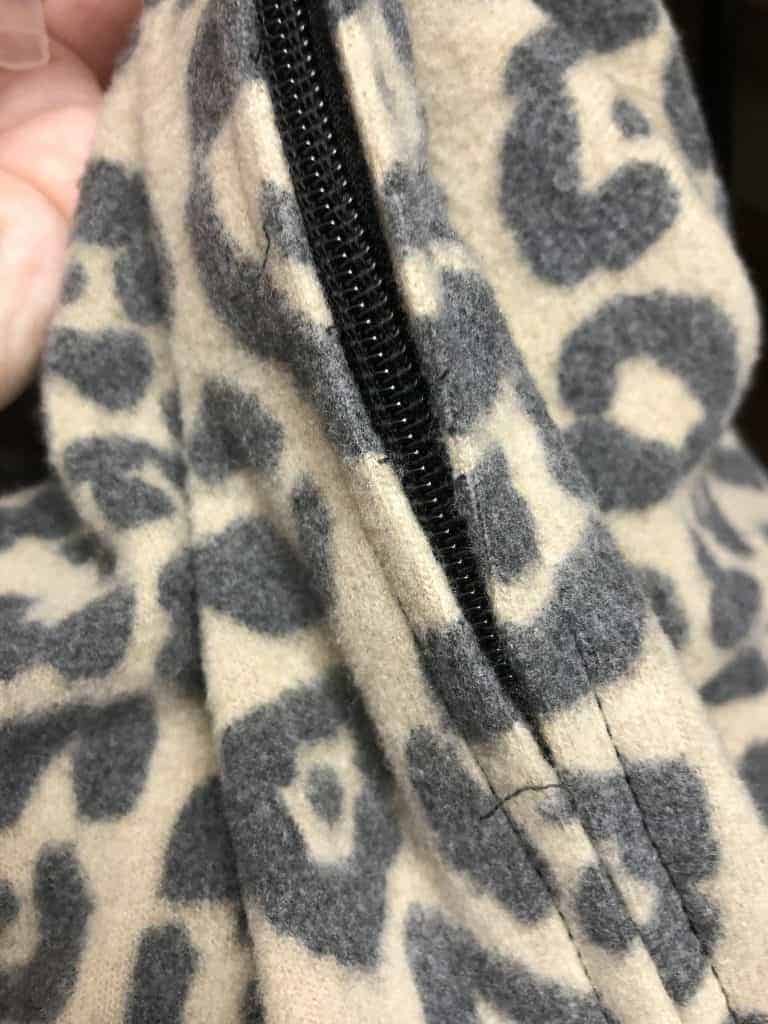
STEP 9:
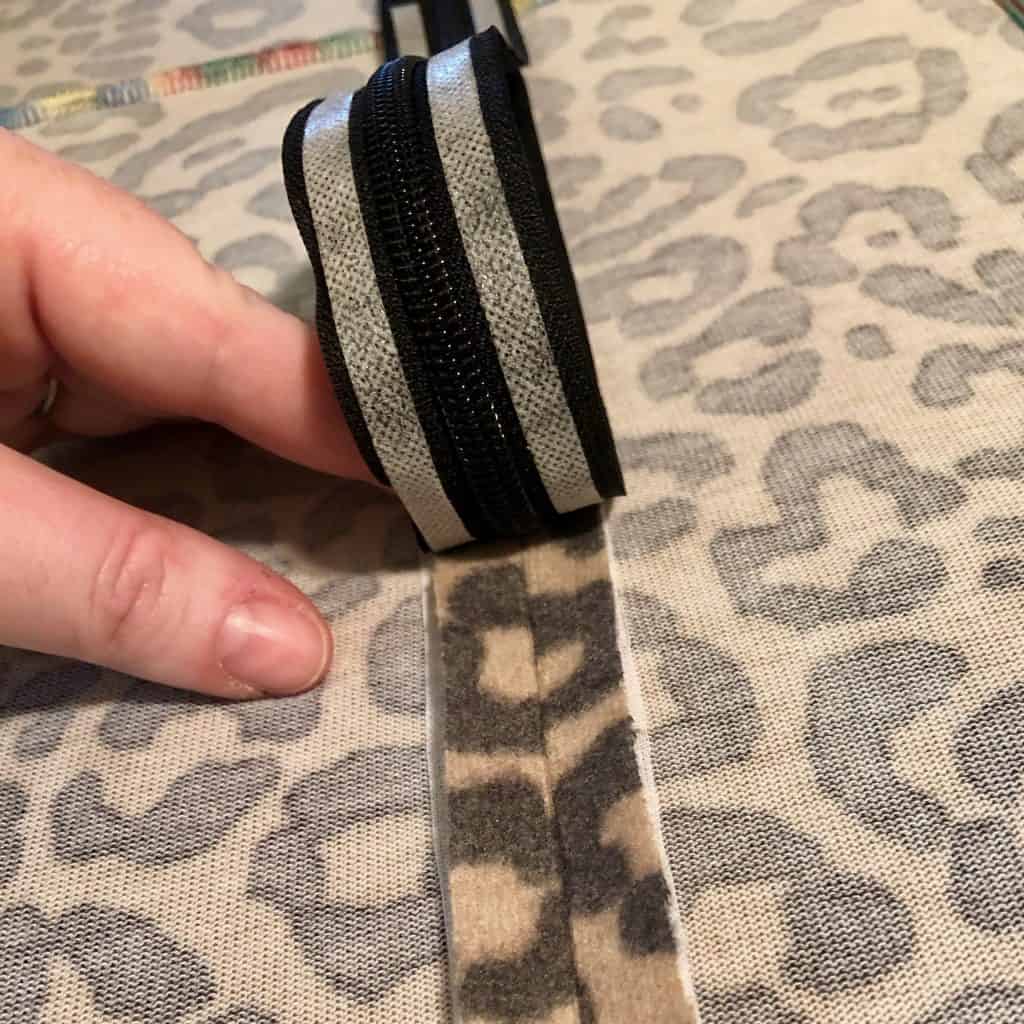
Pin, clip, or glue your zipper in pace, being careful to line the center of the zipper teeth up with the basted stitch line. **I recommend using wonder tape or a glue stick to secure the zipper. Wonder tape is pictured here. It makes life so much easier. I have a tendency to leave problems for “future me.” Don’t be like me. Future Caroline has had some very sad zipper moments that could have been avoided if Past Caroline had only done the work! haha!
STEP 10:
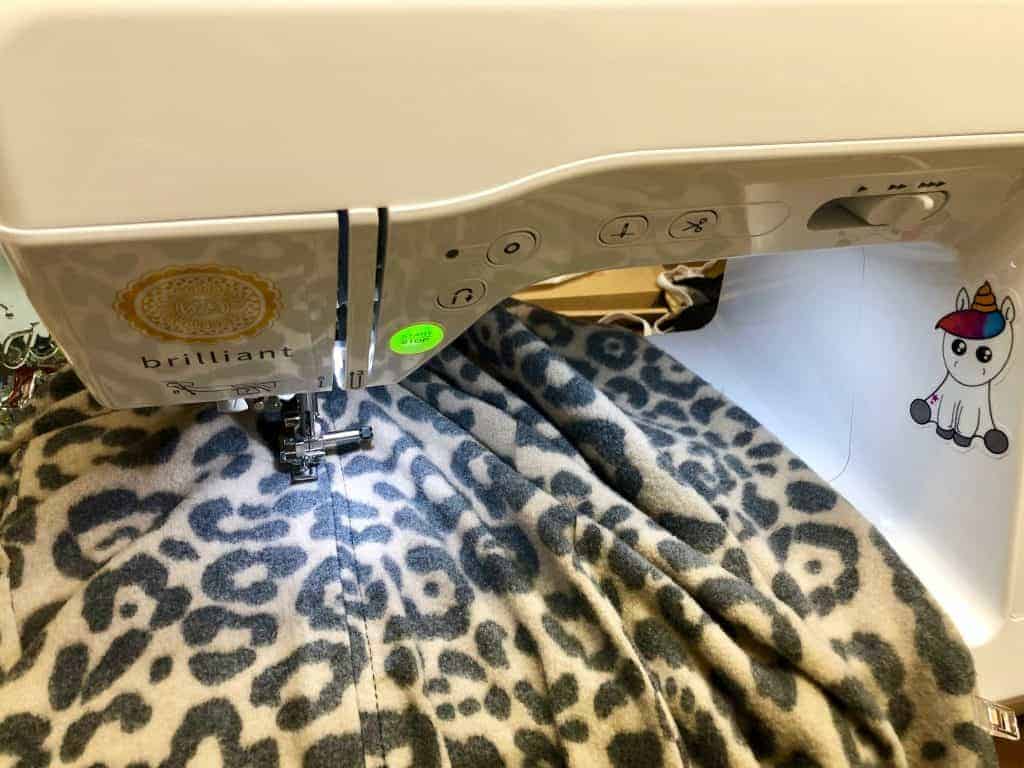
Using a zipper foot, sew on your zipper. For more detailed instructions on zipper attachment, see the excellent LN tutorial!
(That’s my unicorn friend, Sassy. She keeps an eye on my seam allowances for me. Somebody needs to! Haha! I got her from my amazing friend and artist, Jess, at 28th Ave. Collective.)
STEP 11:
Using a seam ripper, open up the basting stitch you put in. Assuming nothing exploded, you’ve done it! Yay! You have a zipper!
STEP 12:
Partially unzip the zipper, so that you can freely work the neckline. Attach the hood to the neckline by lining up the raw edges of the hood to the neckline, RST. You may want to baste these together to make sure the hood doesn’t try to slip away from you. If you attach your hood this way with your serger, you will be trimming off any excess zipper with your serger. I have found nylon zippers to be most successful for this.
***Optional step: Before attaching the hood you can topstitch along the edge. I did not opt to topstitch, but I did do a little stitch-in-the-ditch at the center seam to keep the layers from shifting around too much.
STEP 13 (optional):
Stitch twill ribbon, bias tape, FOE, etc. over the serged/sewn edge between your hood and the body for a more finished look. (I’m intending to go back and do this with mine!).
You are done! You have an awesome Margot hoodie!

Margot Peplum Hoodie Styling Ideas
Perfect paired with jeans or Resolution bottoms and a Summer Basics tank/dress, Laundry Day Tee (free with code in the Love Notions Facebook group!) or Classic tee. Or dress it up a bit with your favorite Sabrinas or Sybil skirt. Mine is pictured with Sabrina-like RTW pants and an LDT. 🙂

Say yes to your style!
Know that this is just one way to go about this hack. There are other ways – maybe better ways – and you may prefer to do something else. Do whatever works best for you and your vision. Say yes to your own style! Say yes to yourself.
Peplum Hoodie Fabric
My Margot peplum hoodie is in Selleck, a faux “alpaca” super plush hacci knit. The website says that the fabric content is Poly/Rayon/Spandex blend, but I am convinced that it is actually made of clouds and unicorn dreams. I need approximately 11 million more yards of “alpaca.”
Want some fabric for your peplum hoodie?

Grab a discount for it! Enjoy some of ALD’s “alpaca” or other amazing sweater knit with the code MakeAMargot. You will receive 15% off all sweater knits at Amelia Lane Designs. Thank you so much for this awesome discount, ALD!

Pin this for later!