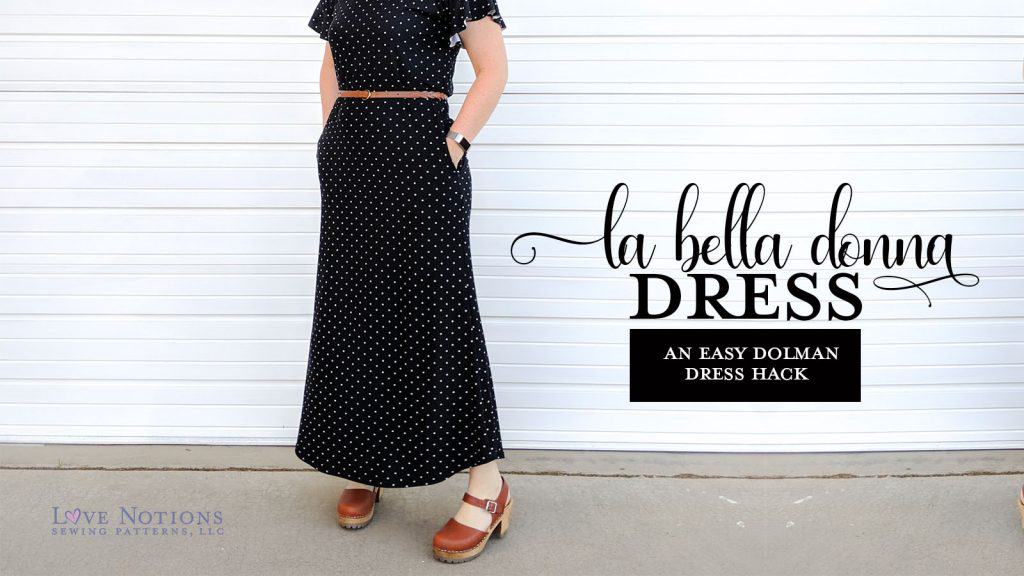
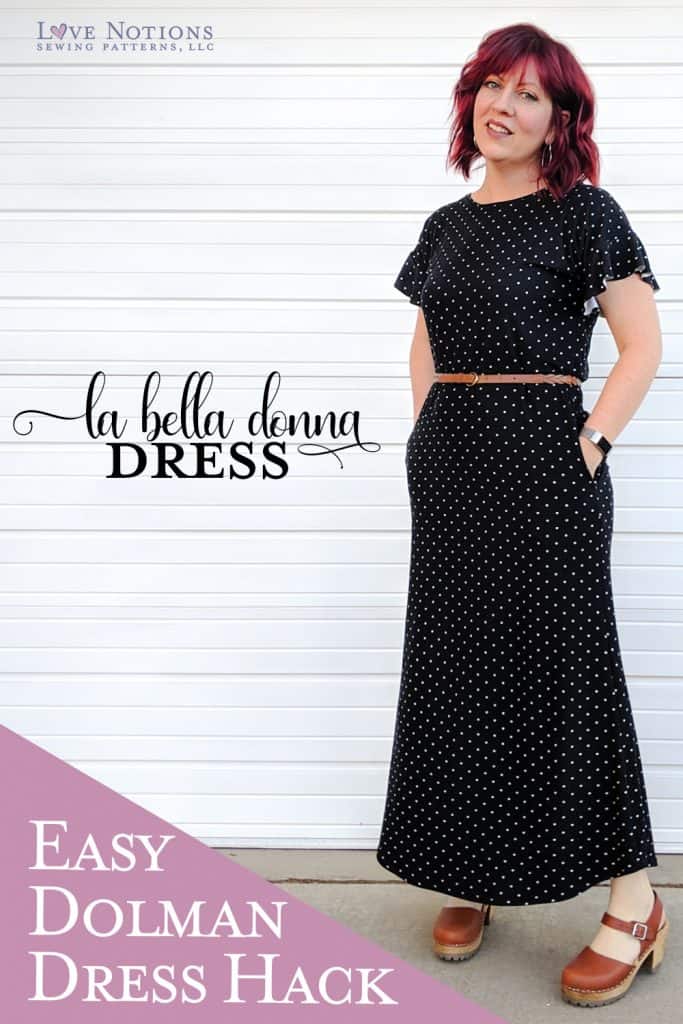
LA BELLA DONNA: DOLMAN DRESS HACK
Looking for a dolman dress hack? Everyone needs a LBD! No, I don’t mean a “little black dress” Today we’re talking about a “La Bella Dress!” Follow along as our guest blogger Koe easily transforms The La Bella Donna Top and Tunic into a darling dress. Plus, her sleeve details are EVERYTHING! Enjoy all the inspiration here and be sure to grab your copy of the La Bella Donna (both for girls and ladies) today and use this post to make the LBD into the dress of your dreams.
LA BELLA DONNA: DOLMAN DRESS HACK
SIMPLE AND SUBLIME
Hi! It’s Koe (said like Koy) from Koetiquemade on instagram. I’m new this year here at Love Notions so this is my very first post on the blog. I’m excited to share this super fun and simple hack of one of my favorite patterns, the La Bella Donna. I love taking a simple pattern and hacking it slightly to give it a completely different look. The La Bella Donna is perfect for this kind of customizing.
Ways we will hack this dolman pattern:
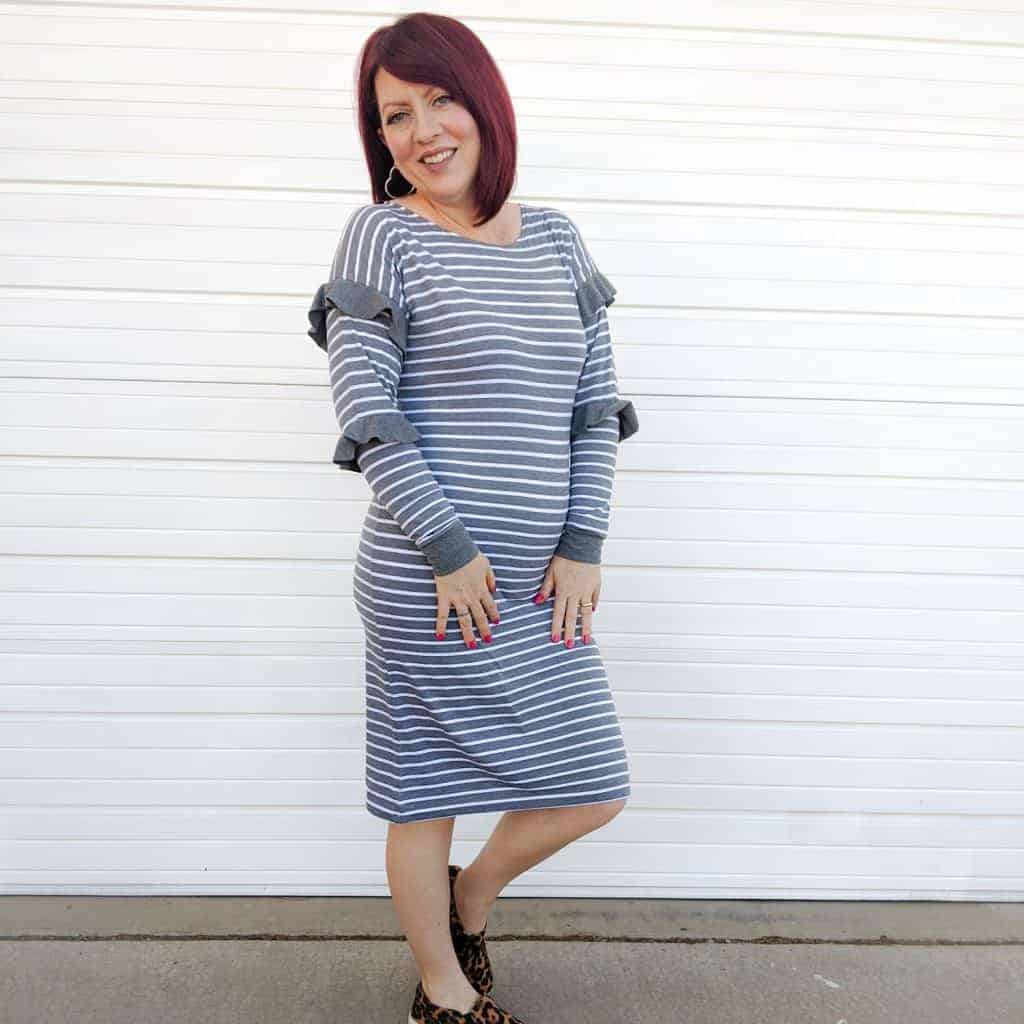
- Lengthen the shirt view to a knee length dress
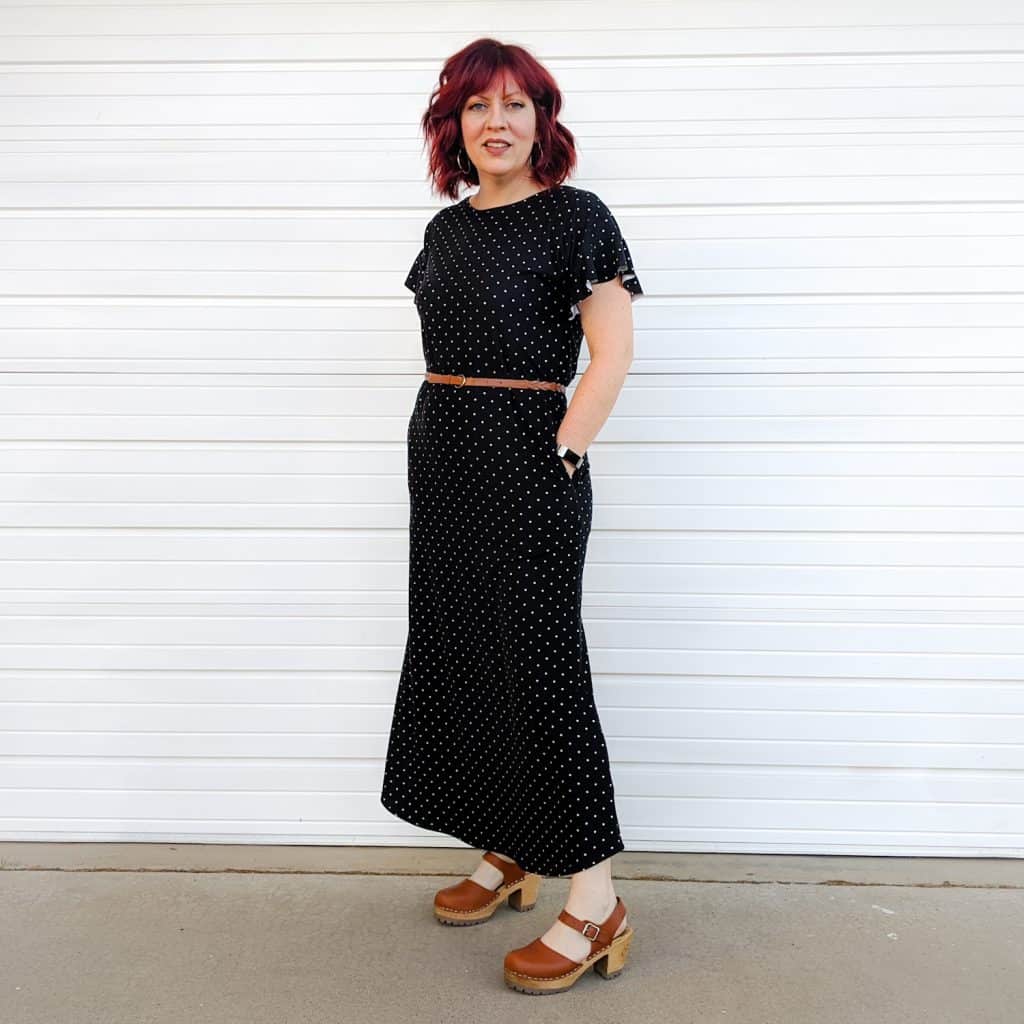
- Lengthen the tunic to a maxi length dress
- Add a flounce ruffle to fit the sleeve at the shoulder and elbow
- Create a cuff band for a long sleeve
The pattern comes with two different fit options: the shirt view which is straighter and has an optional banded or curved hem and the tunic view which is a more loose bell shape with a curved hem. I used the shirt view for the knee length and the tunic for the maxi.
Supplies you will need to create the dolman dress and sleeve hacks:
- La Bella Donna pattern printed and cut out
- medium weight knit fabric with 4 way stretch in the yardage needed for your size plus ½-1 yard for adding length
- (optional) contrasting knit fabric for circle ruffle
- matching thread
- an iron
- a clear ruler
- paper for drafting the flounce ruffle and adding length to shirt/tunic pattern
- iron and ironing board
Pattern Prep for the Dolman Dress and Sleeve Hacks
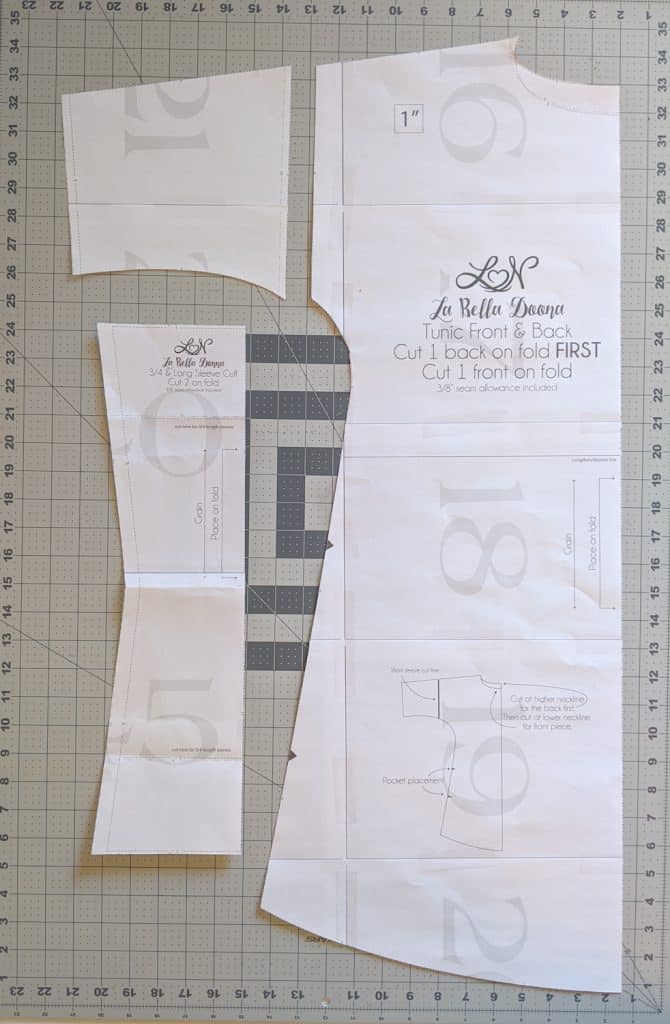
These are the pattern pieces you will need for both looks. I cut the pattern at the line for the short sleeve. We’re going to use this upper sleeve portion that was cut off. I didn’t add a seam allowance where it was cut because I knew I was going to add a contrasting band at the bottom of the sleeve. I actually wanted the sleeve to be a bit shorter for this. Feel free to add in 3/8 inch seam allowance to both pieces where it was cut if you would like. For the ¾ /long sleeve piece we are only using half of it so either cut it in half or fold it. It will still be cut out on the fabric fold.
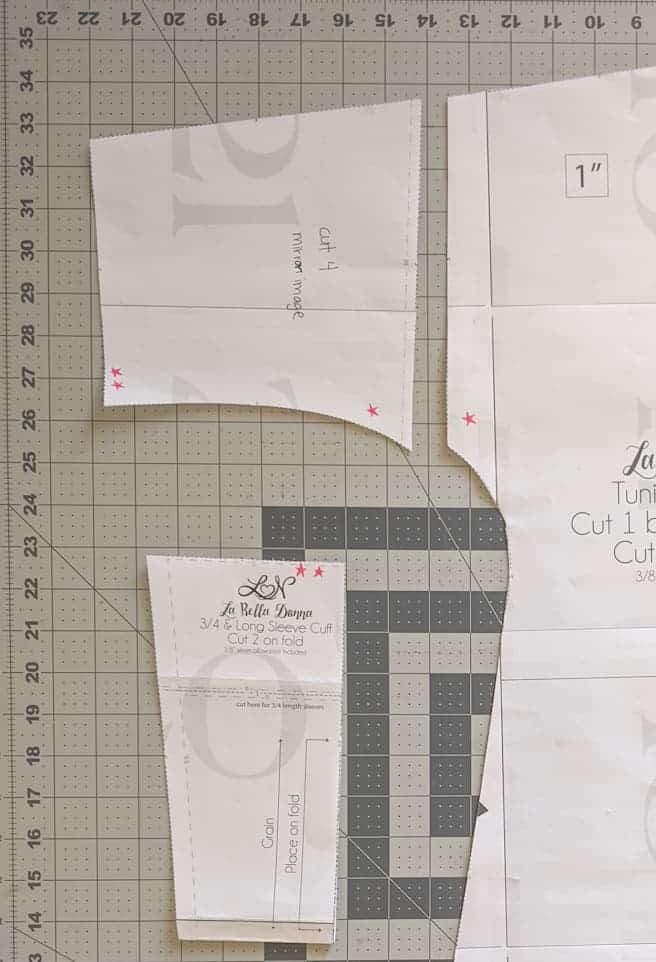
Since there will be so many sleeve pieces, it’s super helpful if each piece is marked. It makes assembling much easier. If you look closely you can see the pink star markings on the pattern pieces. I mark a single star on the armpit of the shirt and a single star on the armpit of the sleeve portion I cut off. Then I mark two stars on the bottom of that piece and two stars on the top of the long sleeve cuff like so. Then I mark the fabric once I cut it out.
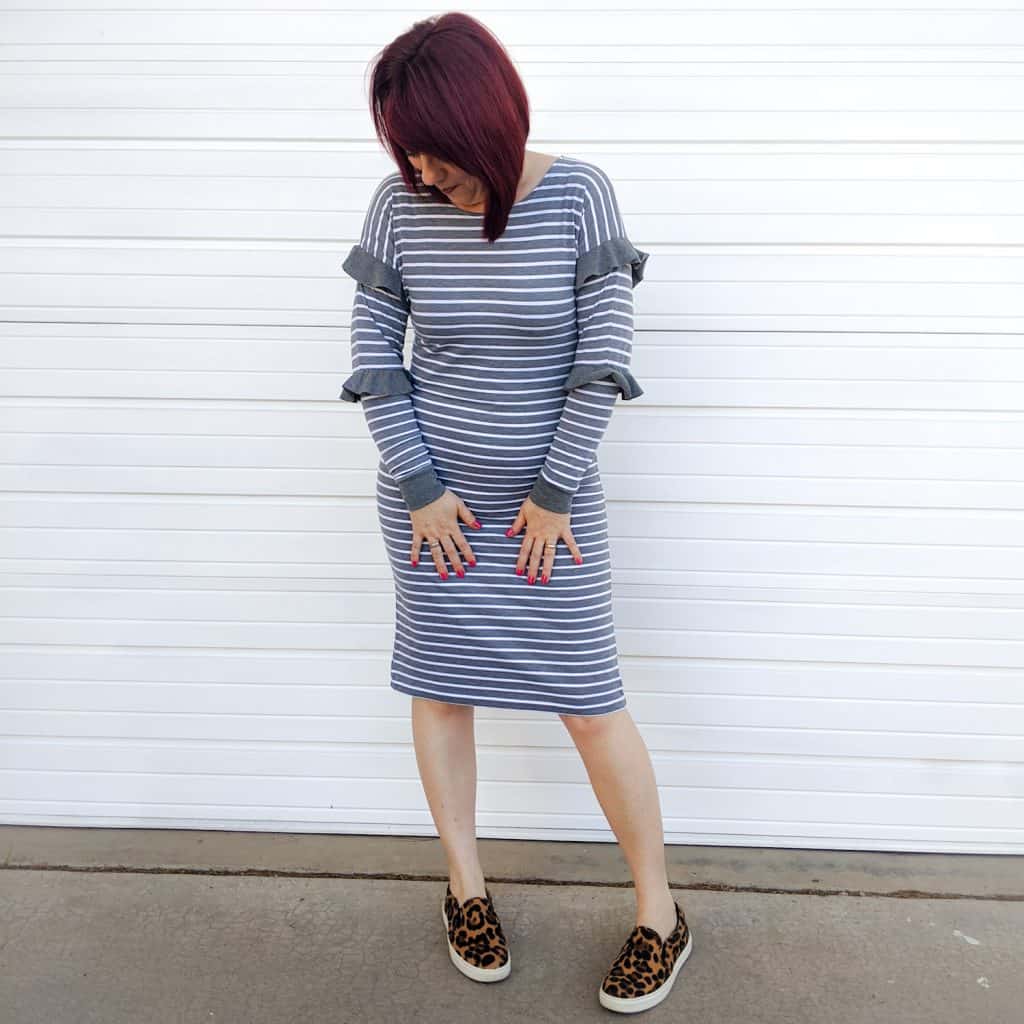
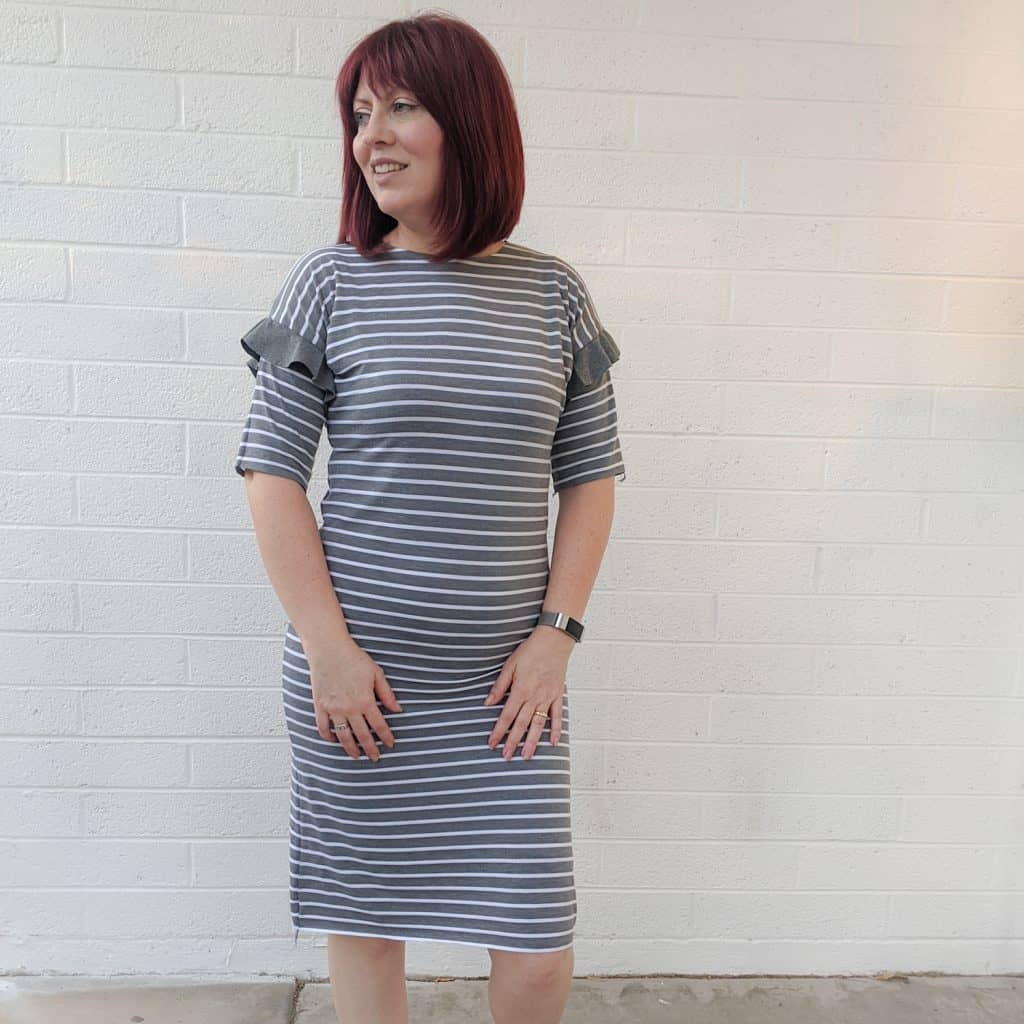
How to Lengthen the La Bella Donna to Create a Knee Length Dolman Dress
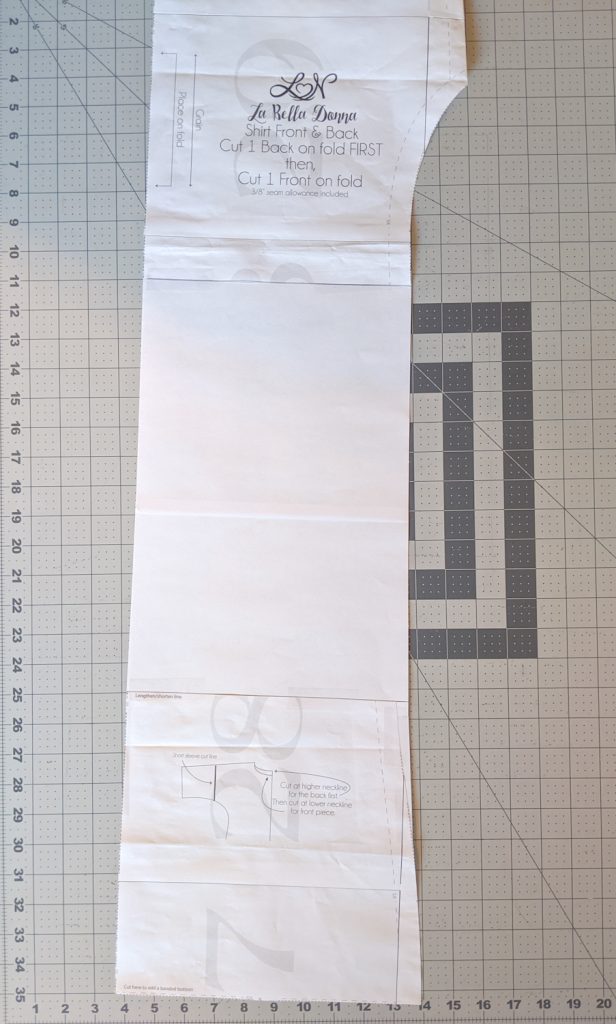
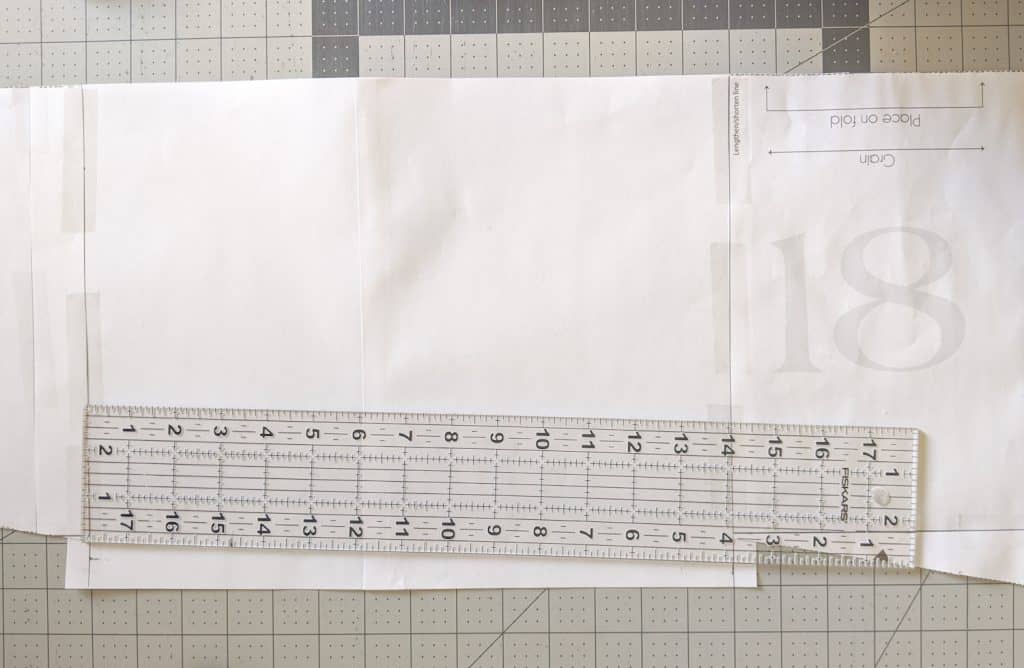
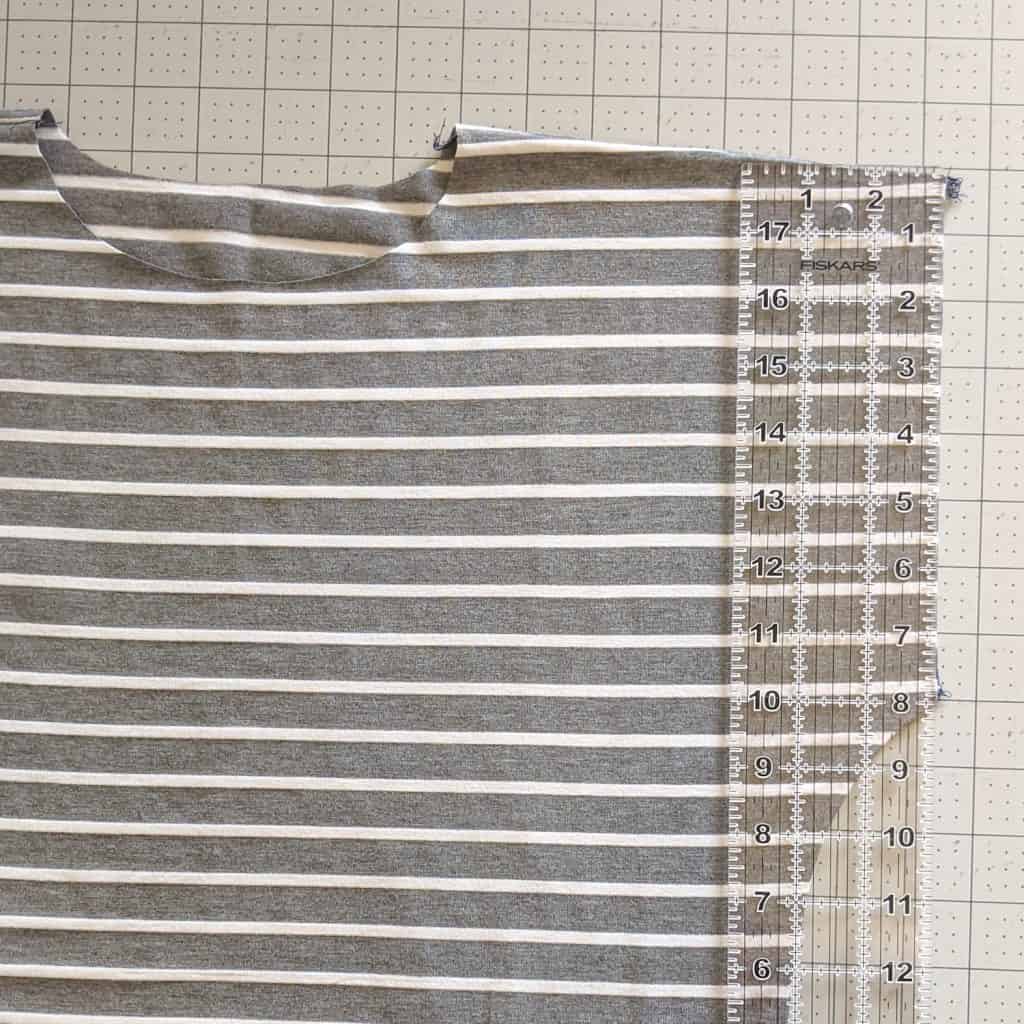
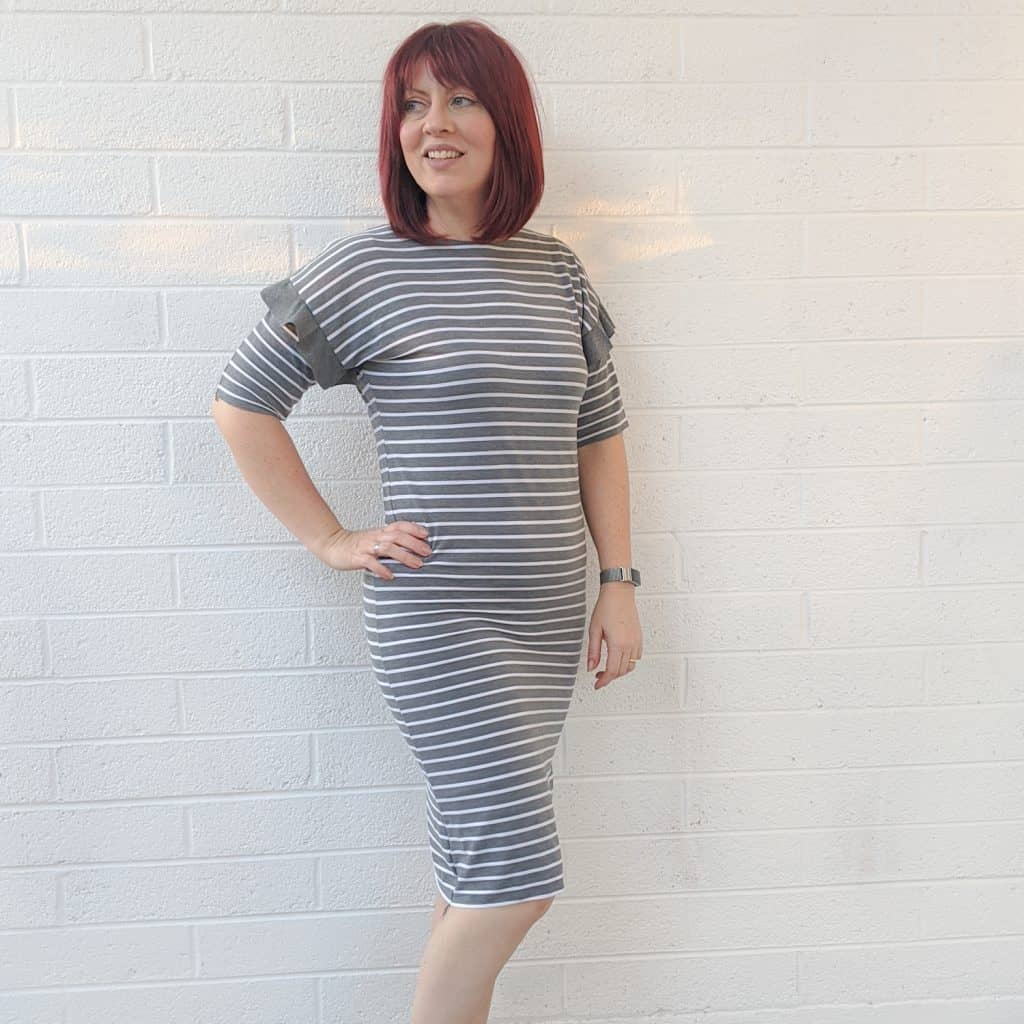
I am 5ft 5 inches and I wanted my dress to fall at the middle of my knee. I cut the shirt view of the pattern at the banded bottom line of the pattern because I wanted a straight hem. Next I measured it. I knew I would need to add 14 inches to it to achieve my desired length after hemmed. After that I cut the pattern at the Lengthen/Shorten line and added in 14 inches.
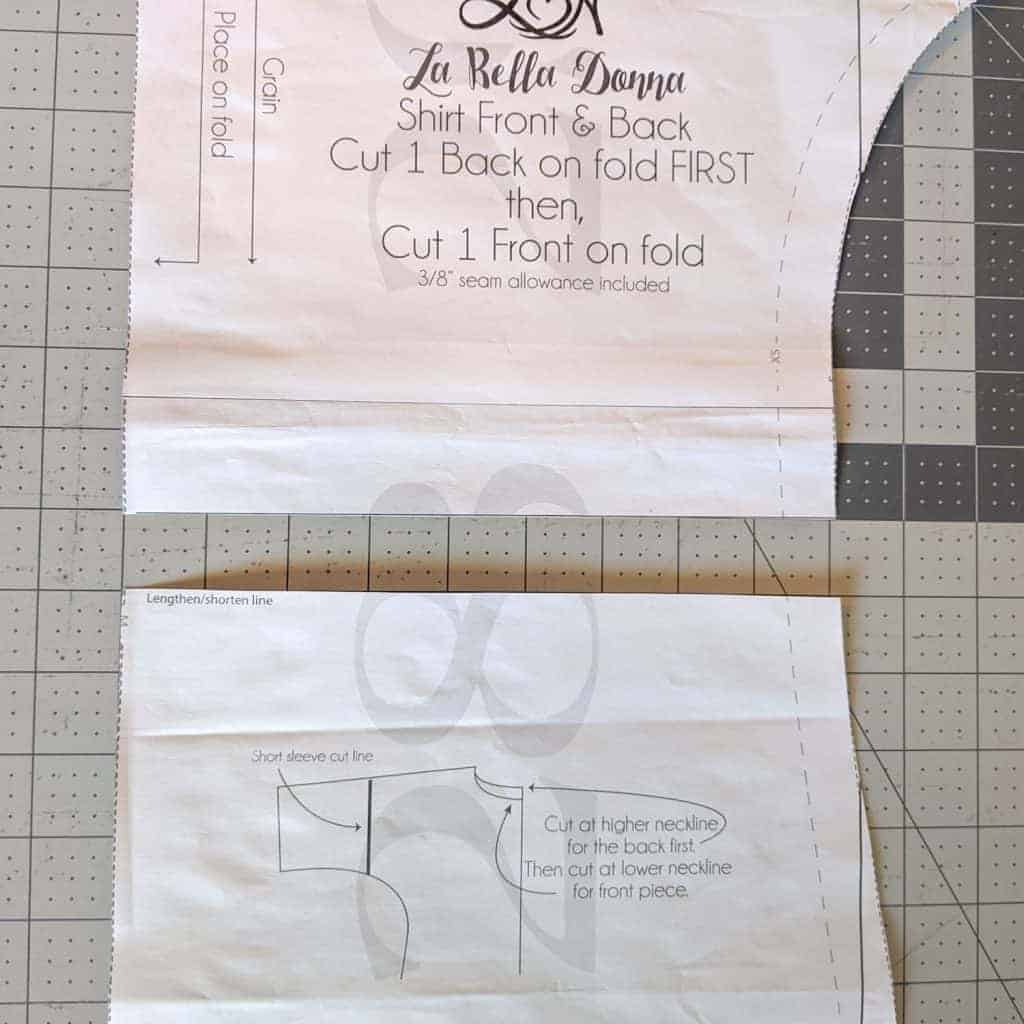
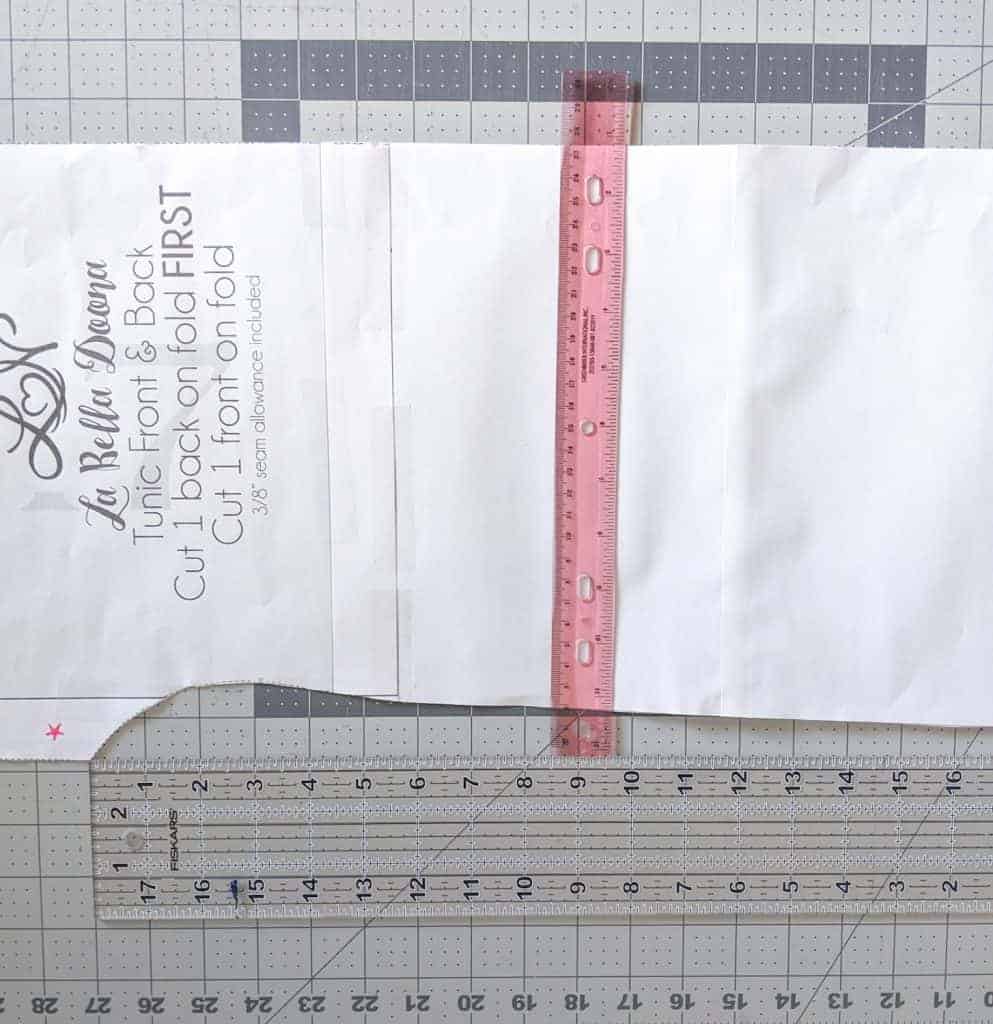
Once it’s lengthened, you can cut out your fabric. Remember the front and back dress pieces are cut with the same pattern piece on the fold using the different necklines for each as shown on the pattern. Cut the back out first. Also remember to cut the ¾ /long sleeve portion on the fold of the fabric as well. Once cut, you should have front and back with the added length, the upper sleeve portion (4 total-2 pairs mirror image) and 2 of the ¾/long sleeve portion.
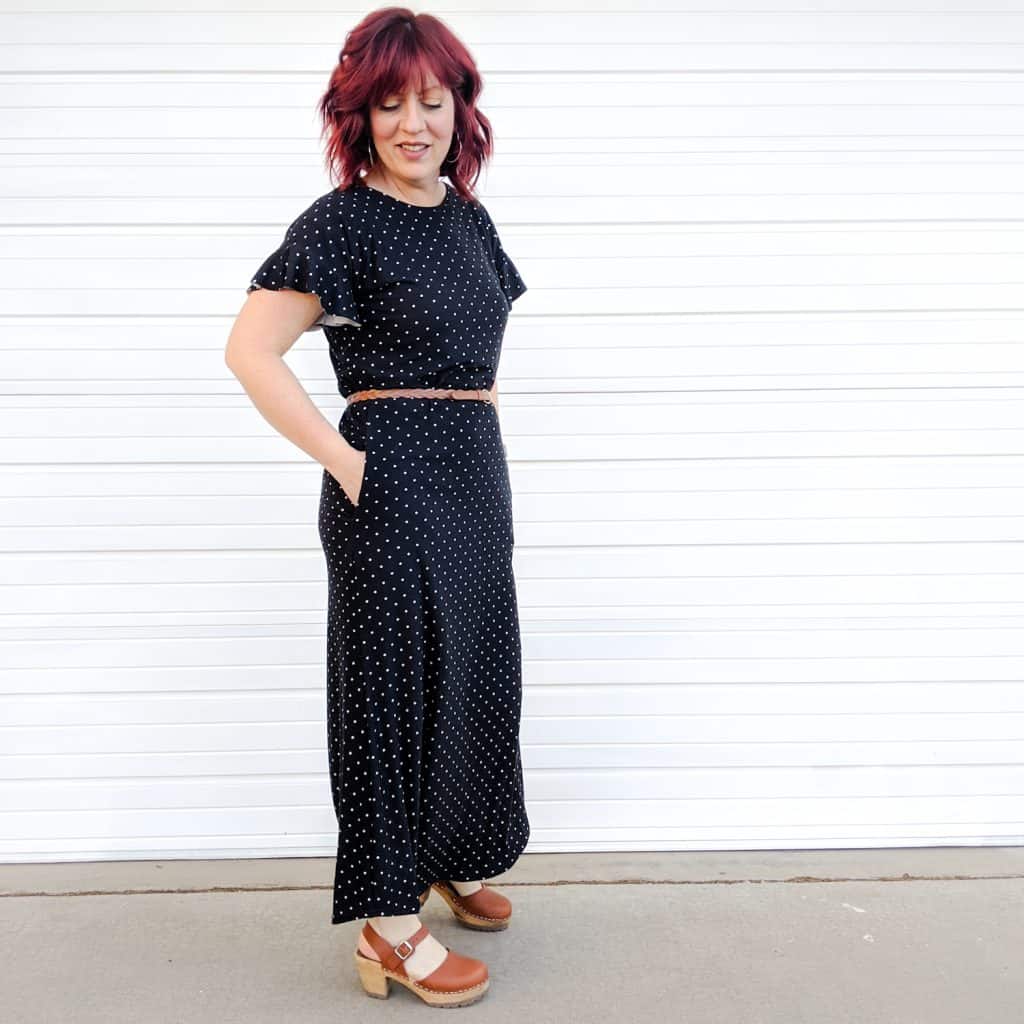
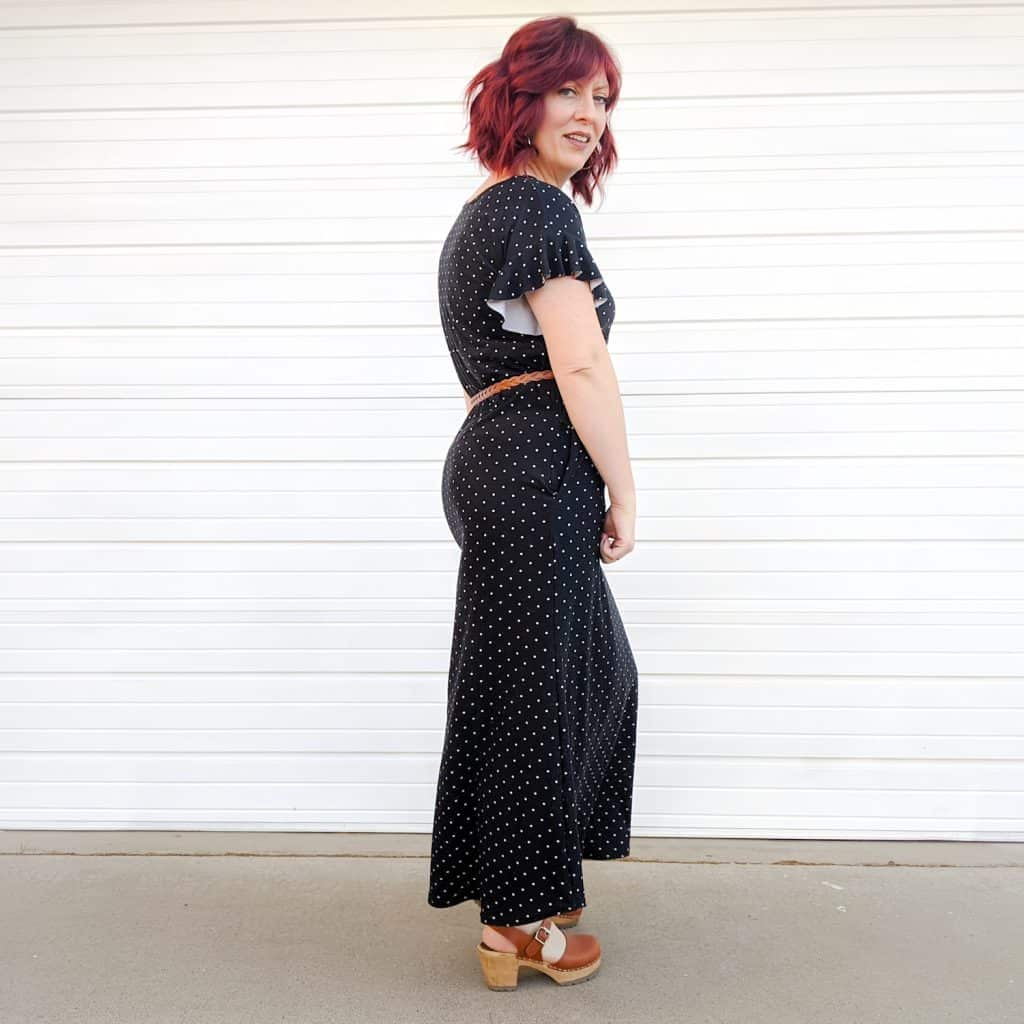
How to Lengthen the La Bella Donna Tunic to a Maxi Dolman Dress
For this look I wanted to lengthen the tunic. I also wanted pockets. Since I was lengthening it the pocket markings were going to get moved so I needed to measure where they were. I measured from the armpit to the pocket marking which was 9.5 inches.
Next, I cut the tunic pattern at the lengthen/shorten line and added in 14 inches. I had to straighten out the line and fill in the gaps.
Then I measured from the armpit down 9.5 inches. I measured it on myself and it seemed low. I decided that I would put my pockets in at 8.5 inches down from the armpit.
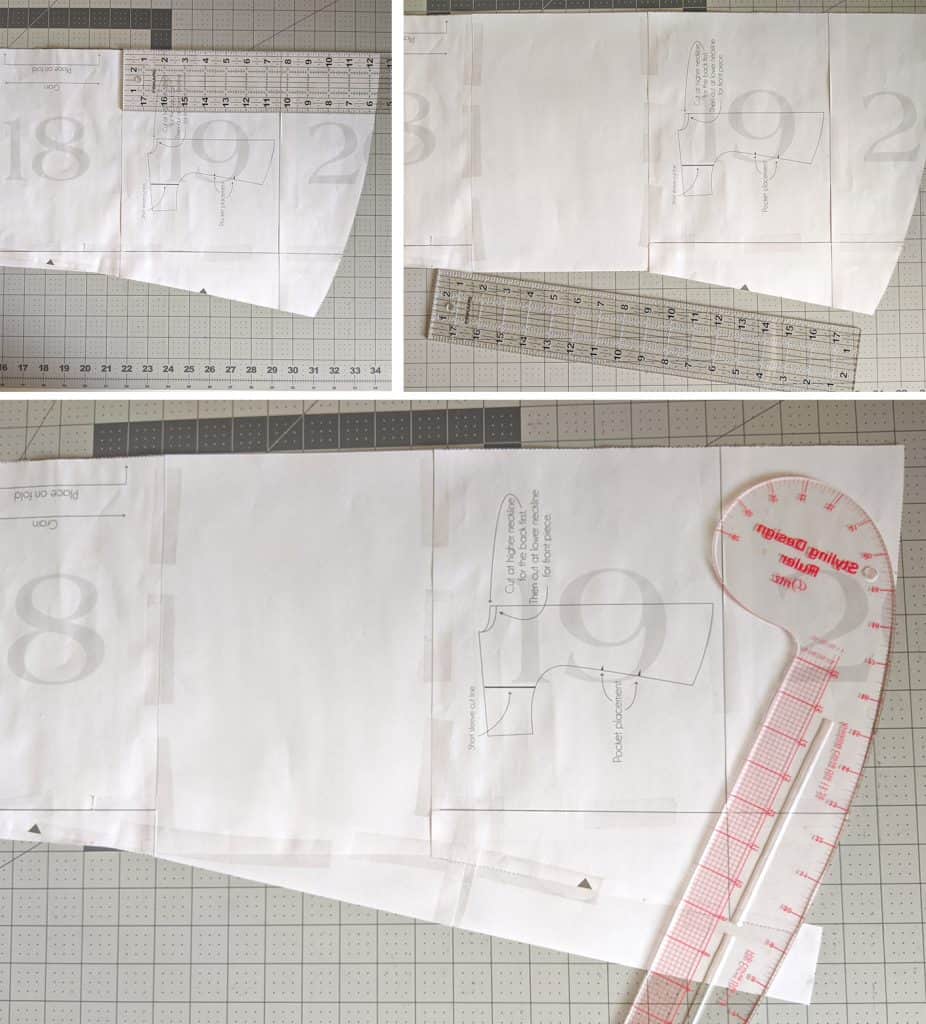
I liked the loose bell shape of the tunic and the curved hem. I wanted to preserve that in the maxi so I measured up to where it belled out, which was 12.5 inches, and made another horizontal cut. Then I added in 7.5 more inched to make it maxi length. I had to straighten out the lines and fill in the gaps again. This added about an inch to the bottom width.
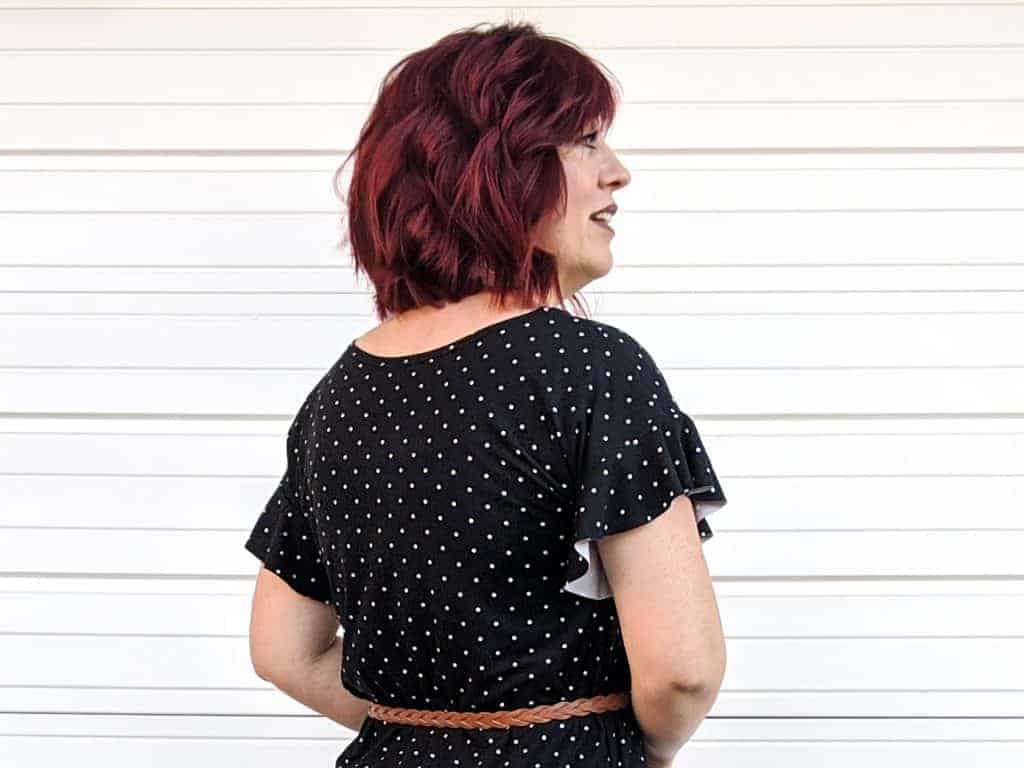
I cut out my pieces, attached the pockets at the new markings and sewed together the side and shoulder seams. Then, using the formula about to be discussed below, I made a 3 inch flounce ruffle to attach to the short sleeve. Because I was using stretchy knit that didn’t fray I chose not to hem my flounce. All that is left is the neckline and hem. This was super fast make!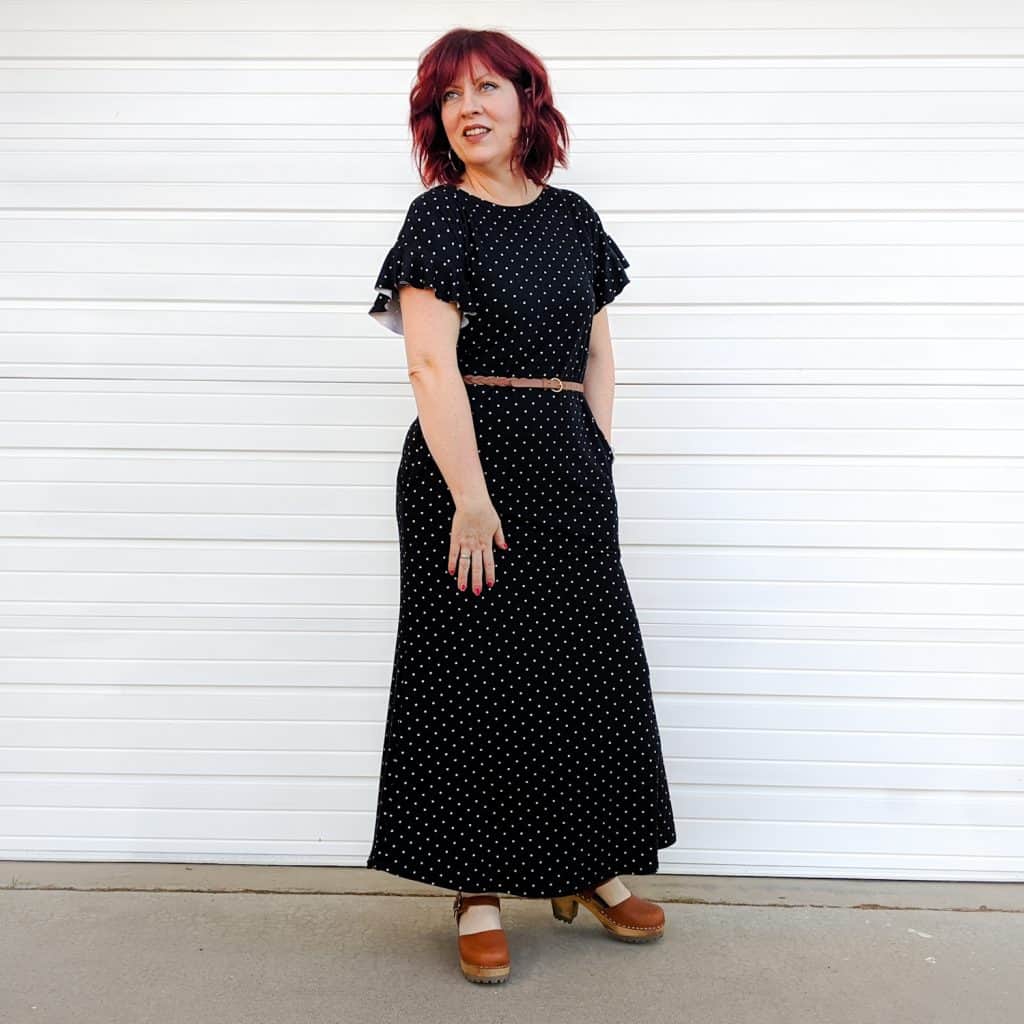
How to Create a Flounce Ruffle for the Dolman Sleeves
Since every person is different we will have to sew the dress together a portion at a time and make the flounce after each step. Once you have made the flounce pattern pieces you will have them for any future flounce additions you want to add. So hang on to them.
Adding flounce ruffles to any pattern isn’t as hard as you might think. This is where the math comes in, but don’t be freaked out. First you find the circumference then you divide it by 6.28. Why 6.28 you ask? Because 6.28 = Pi x 2. What does Pi have to do with this? Pi is a constant and we need to know half of the diameter of the sleeve to make our flounce ruffle so we multiply Pi ( 3.14) by 2 which gives us 6.28. Did I lose you? It’s ok. Just follow this formula and it will all work out: Circumference (divided by) 6.28= ½ diameter. Ok, let’s make a flounce Ruffle.
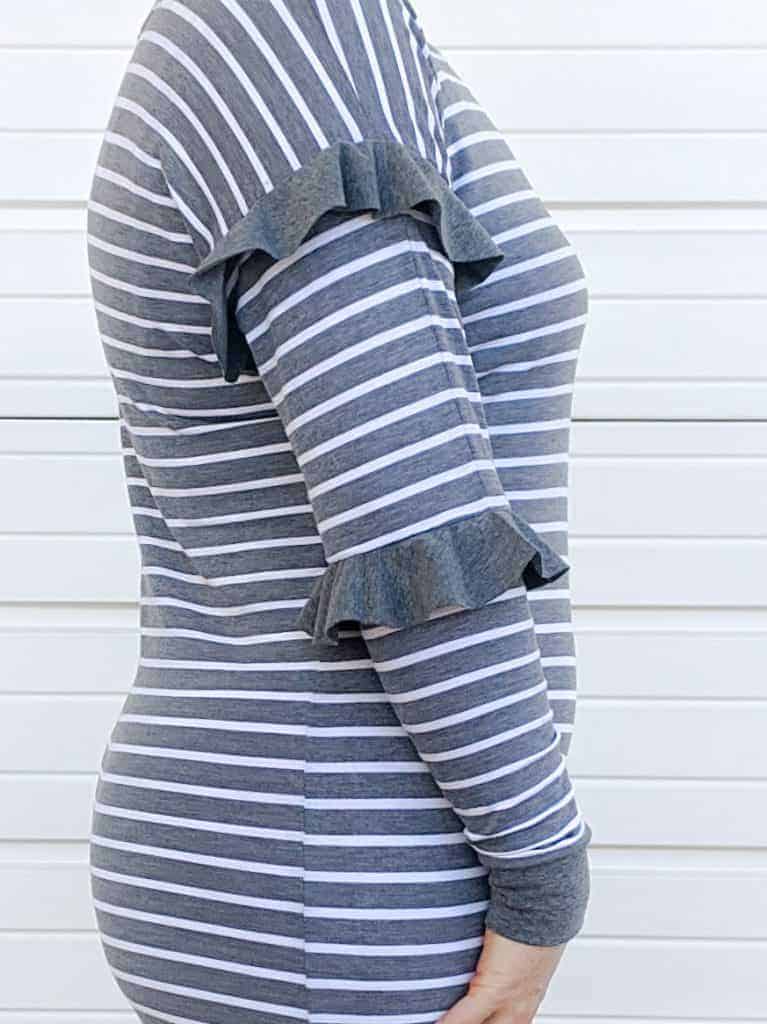
Shoulder and Elbow Flounce Ruffles
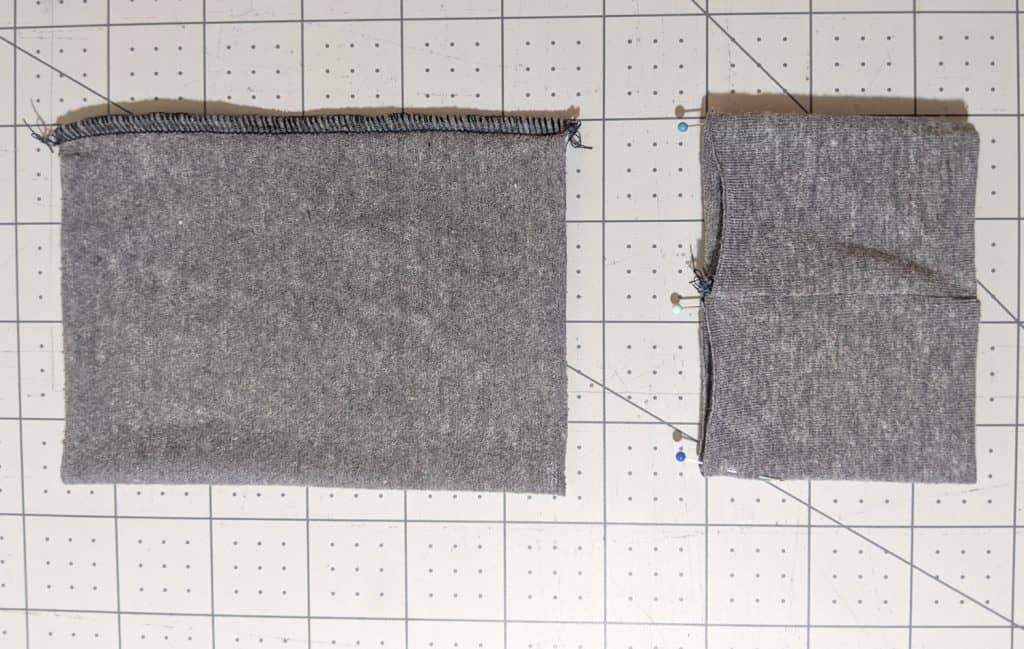
Sew together the main body of the dress at the shoulders and side seams. Also sew the side seams of the upper sleeve and ¾ /long sleeve pieces. You should now have two pieces per sleeve. Turn the dress and sleeve pieces right sides out and lay flat, making sure they aren’t being pulled or stretched in any way.
Measure the arm opening from shoulder to armpit. Mine was 8 inches. Multiply your measurement by two to get the circumference. Mine was 16 inches. Now divide that by 6.28 inches. 16 divided by 6.28= 2.55 inches which is half diameter. Now, because we are dealing with stretchy knit fabric we can round our answers down to make things easier. So I rounded down to just 2.5 inches. You will use this number to make the inner circle of your flounce ruffle.
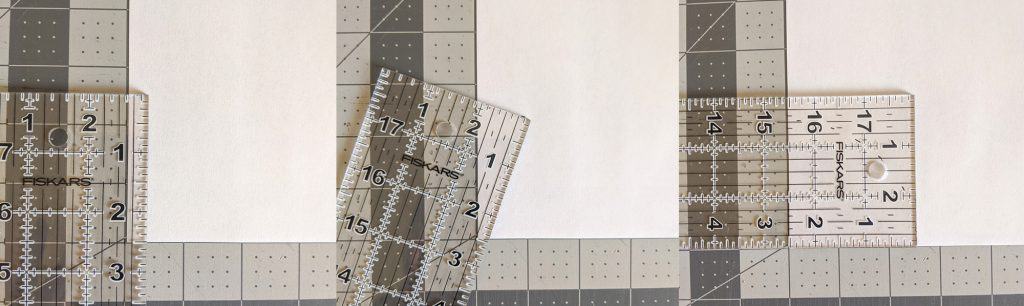
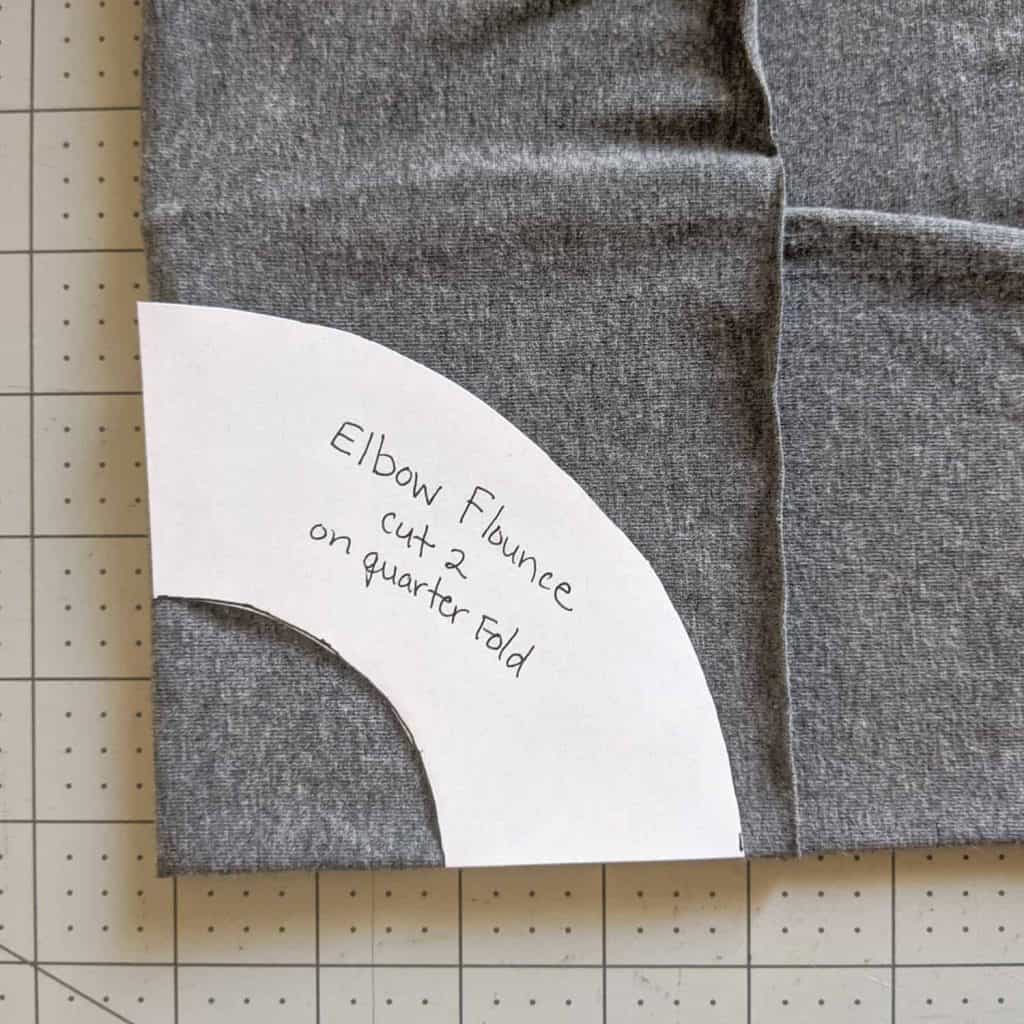
Take your piece of paper (I just use regular printer paper) and measure from the corner out to the number you got from above, mine being 2.5 inches. Keep your ruler at the corner, rotate, measure and mark again. Keep rotating and marking until you get to the perpendicular side.
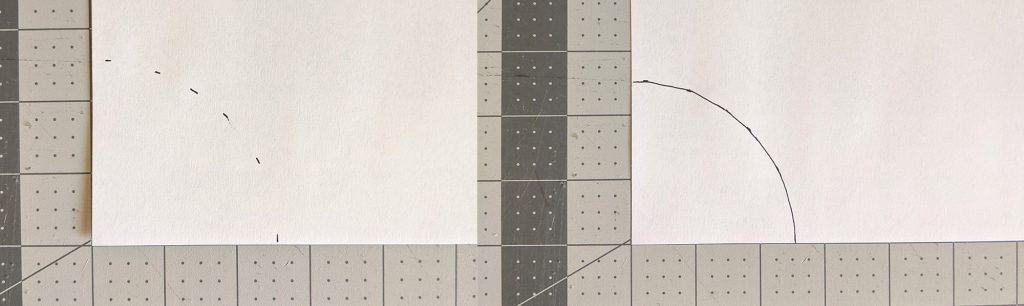
You should have a dotted arch. Connect those dots to make the arch and you will have the inside of your shoulder flounce pattern. Because we are using knit fabric that doesn’t fray you don’t need to hem your flounce. You can, but I always find it to be huge pain and I am never quite happy with the way it looks. These instructions only account for the seam allowance not a hem. If you’re hemming your flounce you’ll want to account for that in the ruffle length.
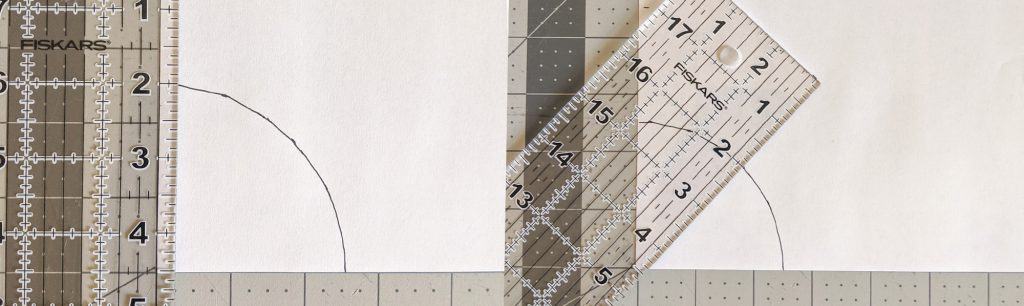
Decide your Flounce ruffle length. I wanted mine to be a little less than 2 inches. I measured out from the first arch 2 inches and made a mark. Keep the ruler at the corner, rotate and measure out 2 inches from the first arch line again. Keep rotating and measuring from the first arch line until it reaches the perpendicular side. Connect the marks of the dotted arch.
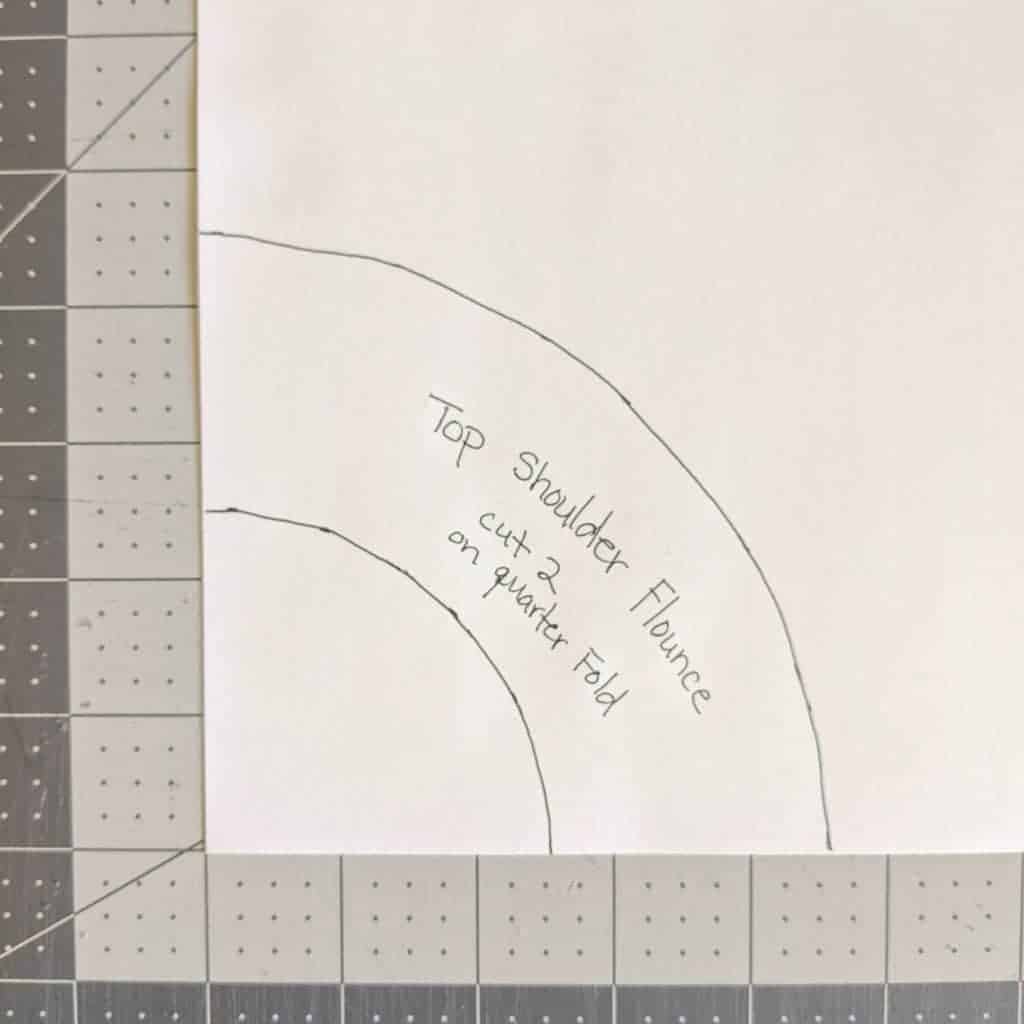
It should look like this. This is ¼ of your flounce pattern. I labeled my pattern piece “top shoulder flounce.”
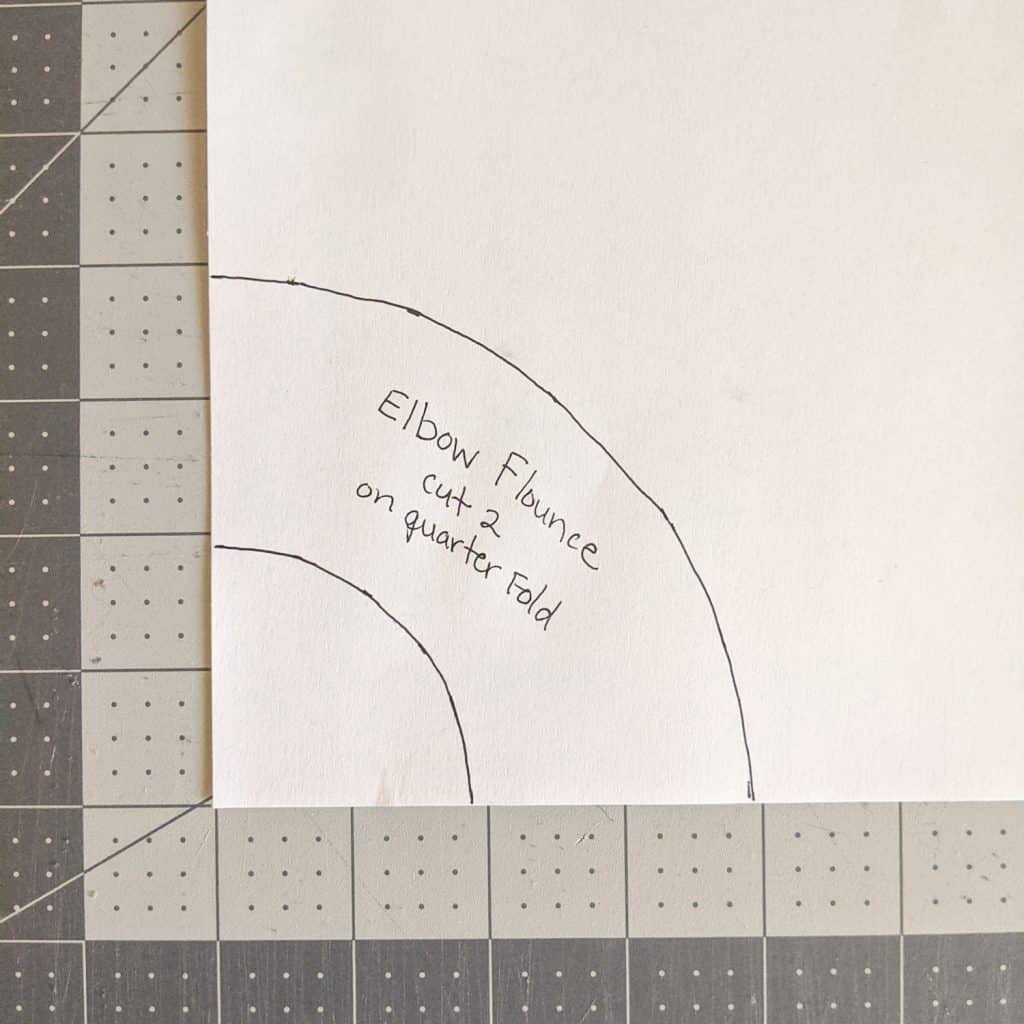
Now measure the smaller opening of the upper sleeve piece. This is where the second flounce will be attached. Use the same method from above to make the elbow flounce ruffle. I labeled this piece “elbow flounce.”
Cutting the Flounce Ruffle
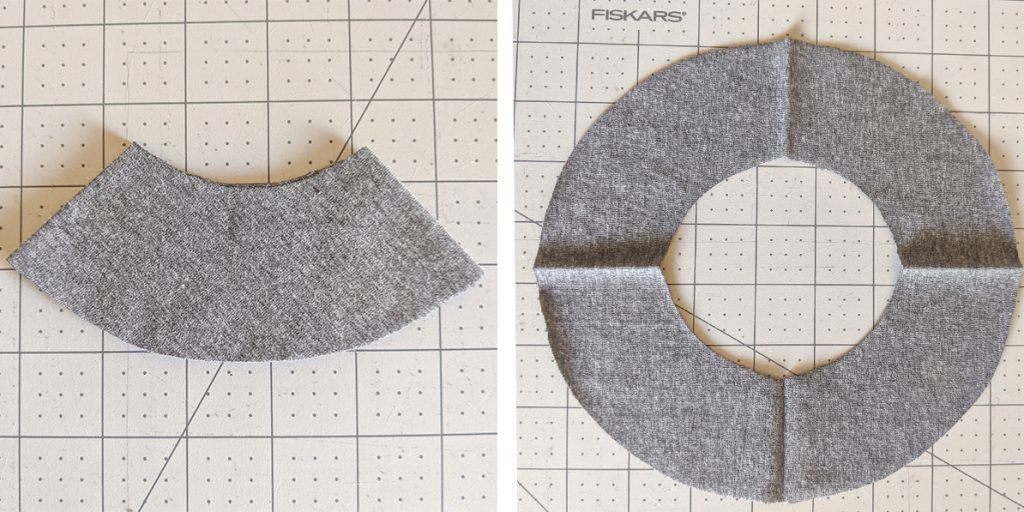
Since the pattern we made isn’t a full flounce ruffle the fabric needs to be folded a certain way to make the full circle. Here’s how you do it.
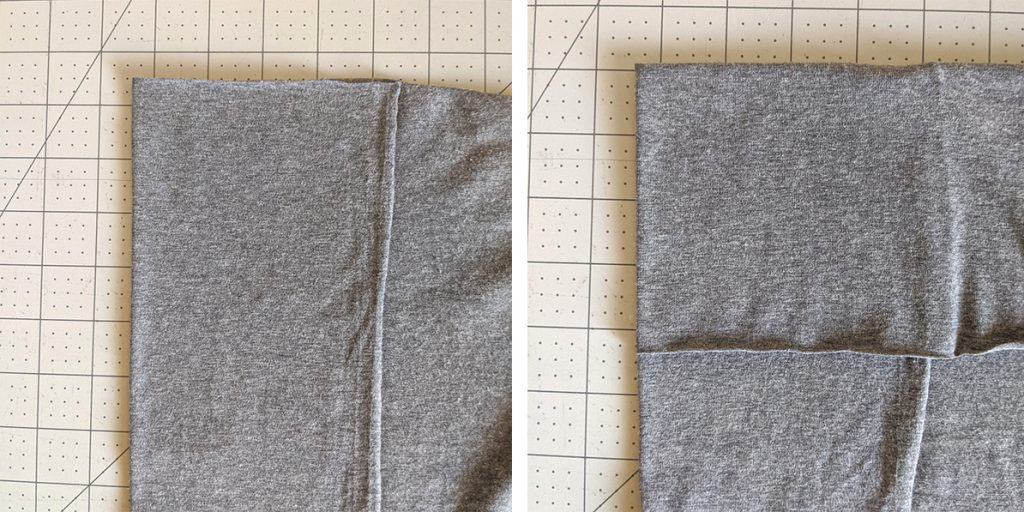
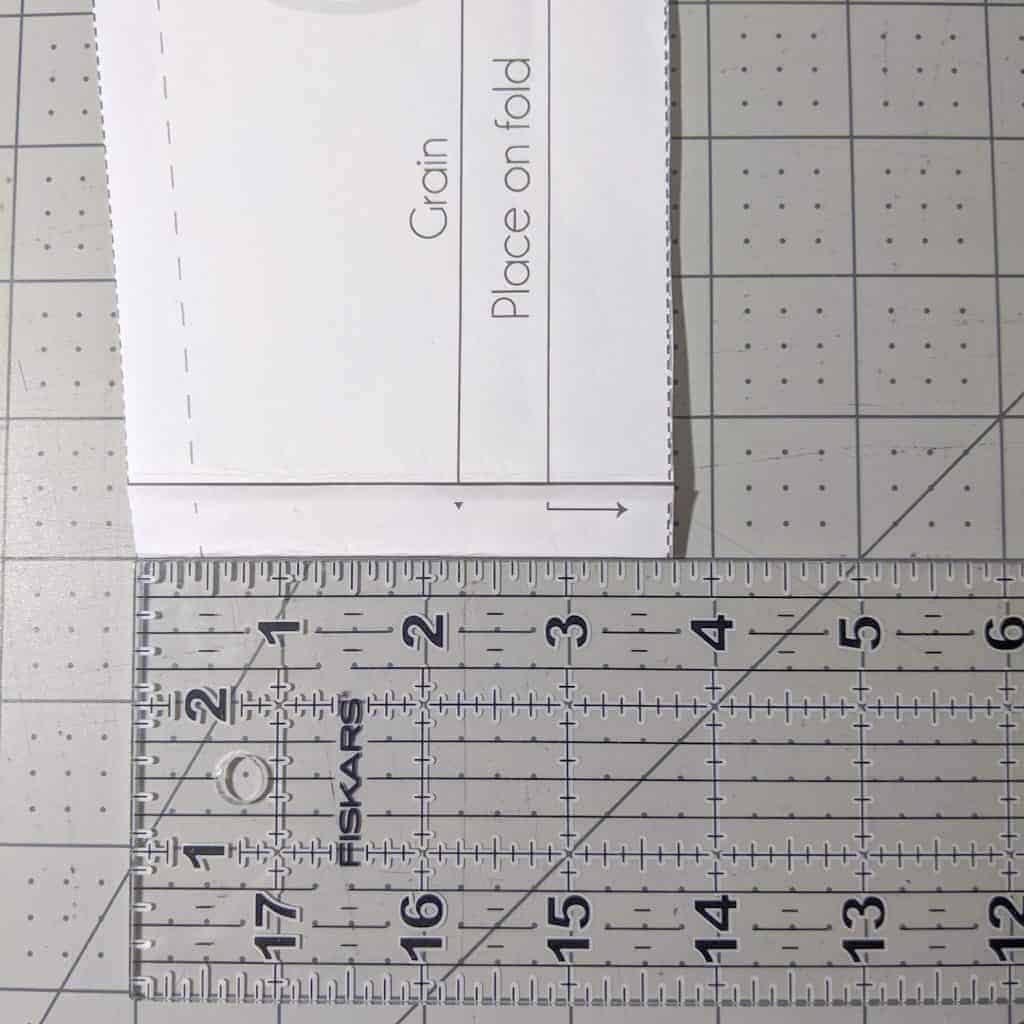
I used a contrasting fabric for my flounce ruffle. To cut the flounce you will first fold your fabric vertically with the grain making sure your pattern piece fits. Then fold it horizontally.
Place your flounce pattern on the fabric and cut it out. Before I unfold the flounce piece I take it to the ironing board and iron the folds in. Then I use those lines to attach it to the sleeve.
Attaching the Flounces
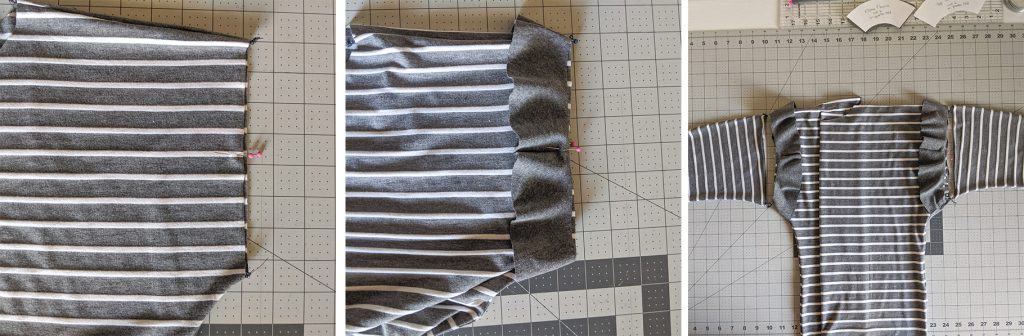
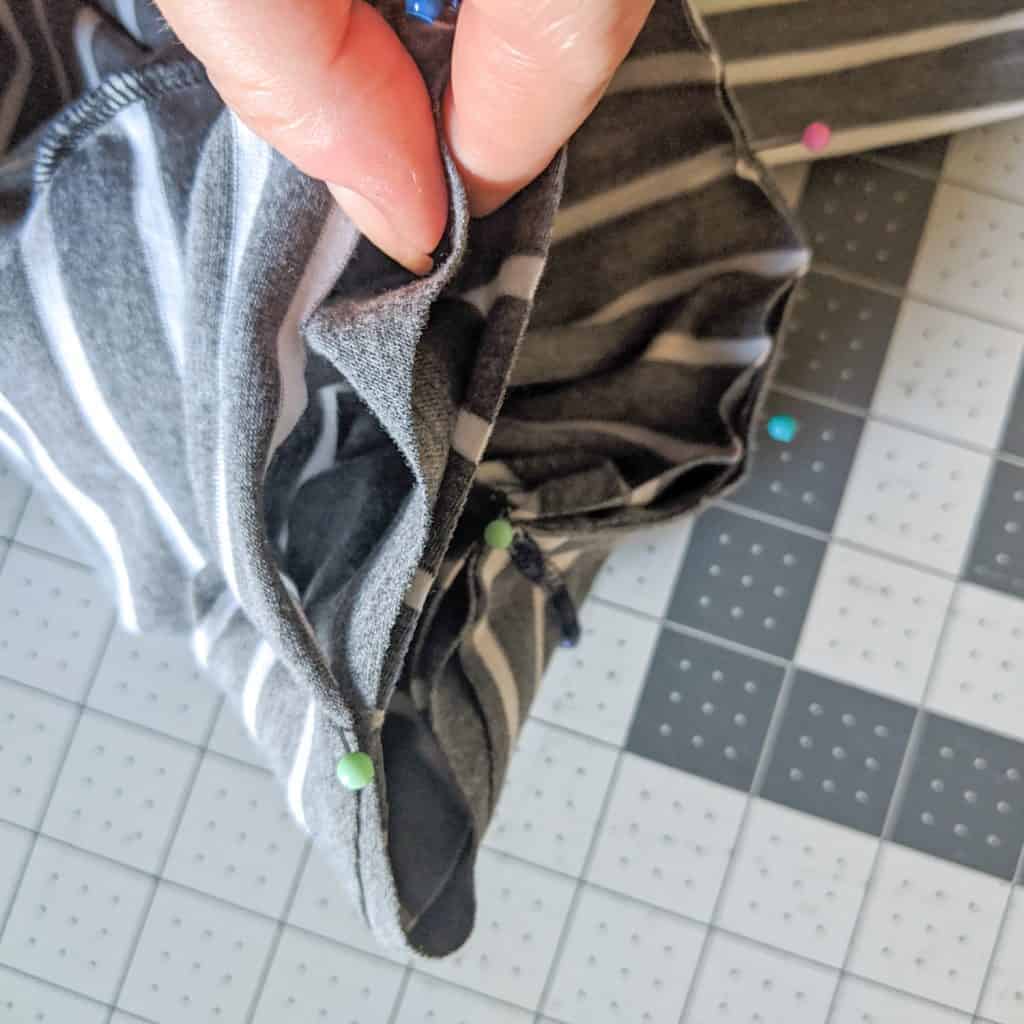
Mark the arm hole in quarter markings. Match those 4 markings with the ones on the flounces and pin in place right sides together.
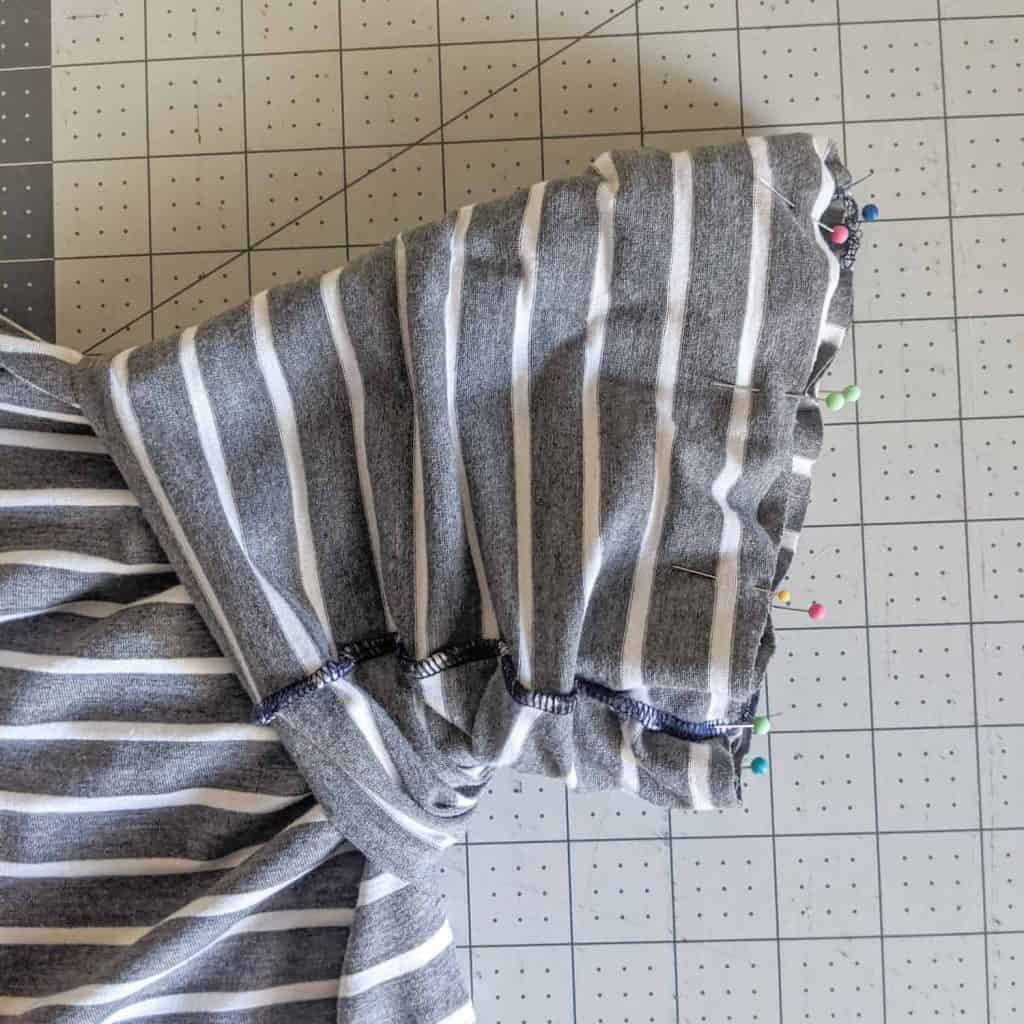
Mark the upper sleeve piece in quarters at the widest part. Make note of which side is the curved armpit side of the upper arm piece so you can match it with to the armpit of the arm hole. Pin it to the sleeve opening right sides together sandwiching the flounce in-between the two pieces. Sew them together with a 3/8 inch seam allowance with either a serger or narrow zigzag stitch.
Do the same for the elbow flounce and ¾ /long sleeve pieces. This part can be confusing so this is why the star markings from the very beginning are useful. Once you have the pieces pinned, sew them together with a 3/8 seam allowance using either a serger or narrow zig zag stitch.
How to Make a Cuff Band for the Dolman Sleeves
The easiest pattern piece to make is the cuff. I really wanted my long sleeve to have a cuff rather than a hem. The sleeve is already rather fitted so I decided not to make the cuff any tighter than the sleeve.
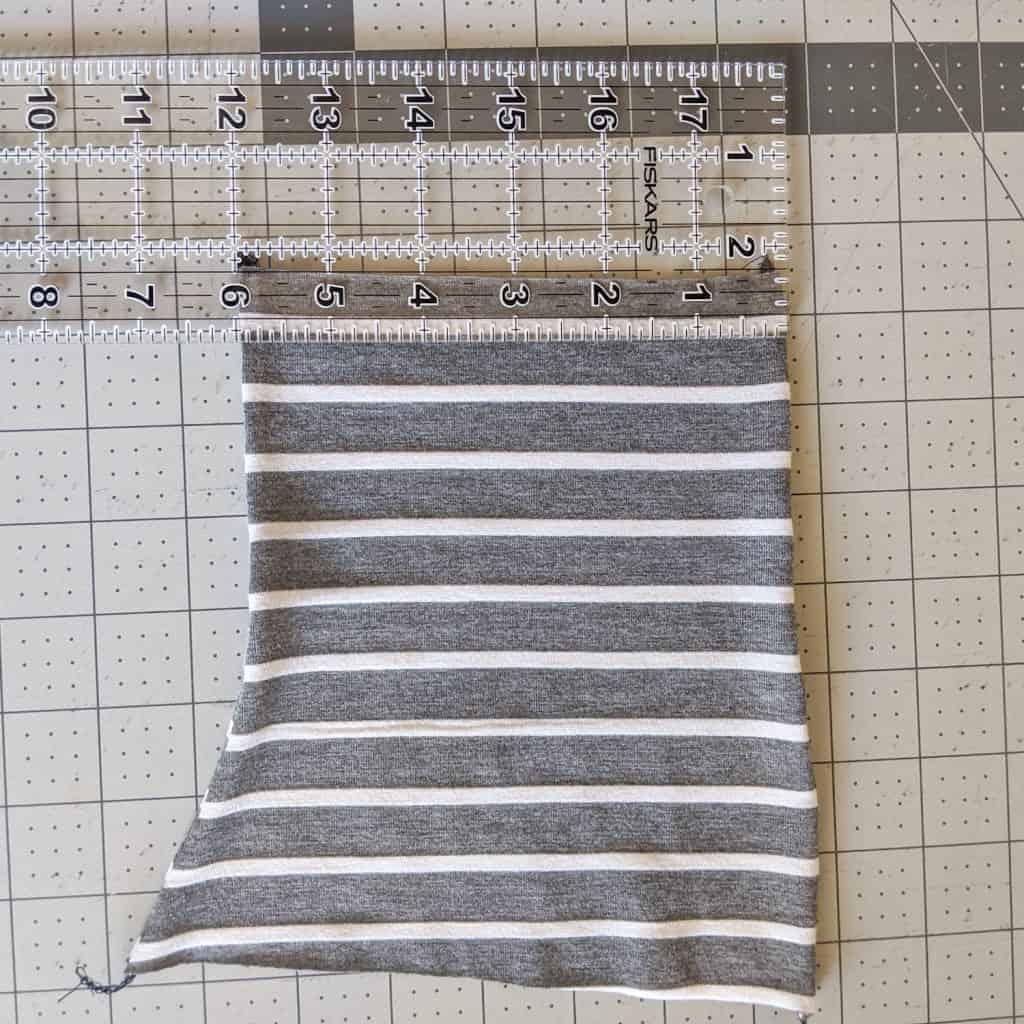
Measure the narrowest part of the ¾ /long sleeve pattern piece, mine was 3.75 inches.
Then I multiplied it by 2 to get the circumference of 7.5 inches. I only wanted the cuff to be between 2-3 inches wide when folded over so I made my pattern piece 7.5 in x 5 in.
Once it was cut out. I sewed the short ends right sides together. Then I folded it in half, marked the quarter markings on both the sleeve and cuff and pinned them together. Using either a serger or narrow zigzag stitch attach them with 3/8 seam allowance. Now all you need to do it finish the neck line and hem the dress.
Optional Single Sleeve Flounce
When I was making the knee length version I thought it was super cute with just the one flounce and the first part of the sleeve attached.
This would be so fast to do since you have already made the flounce ruffle pattern and the other adjustments. I might just make another one for spring.
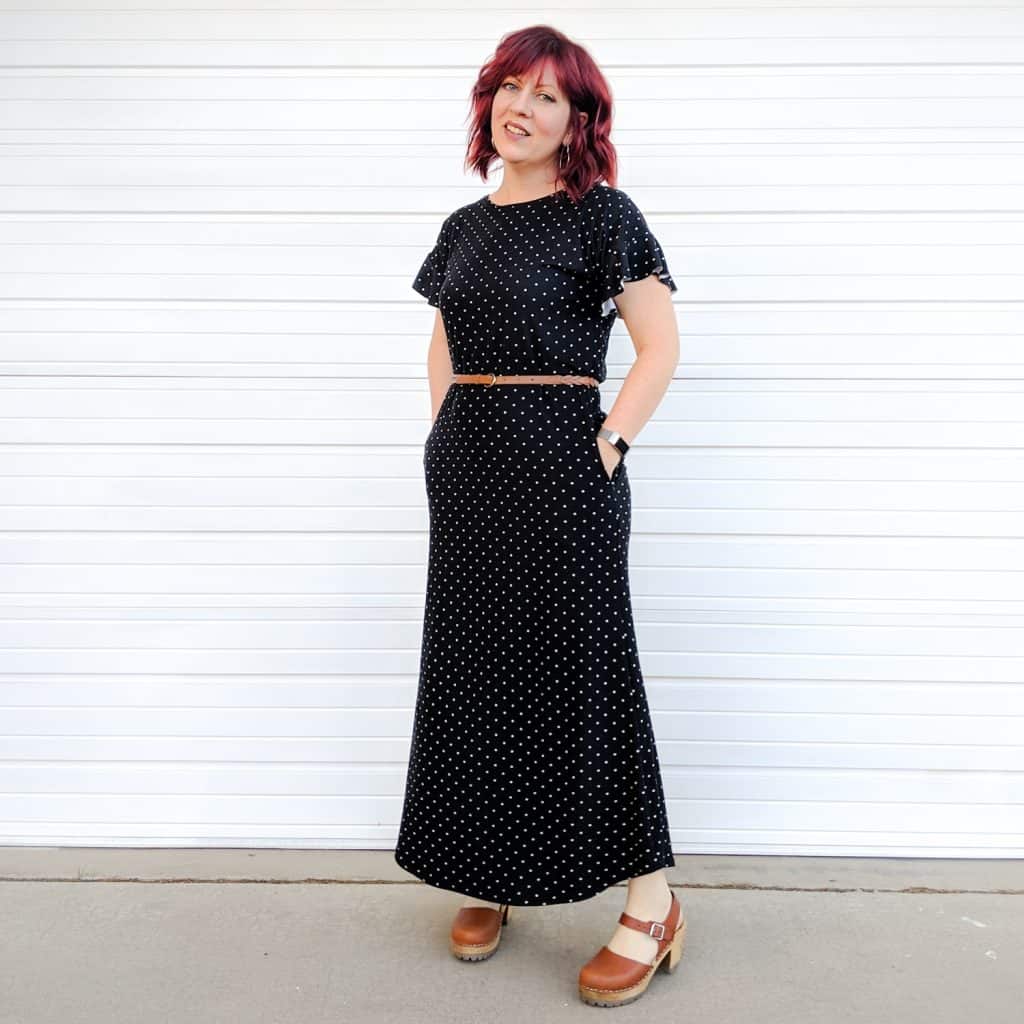
So,there you have it: A Dolman Dress with Flounces!
Thank you for reading! I can’t wait to see what you do with the La Bella Donna Pattern! Please tag me on instagram @koetiquemade and @lovenotions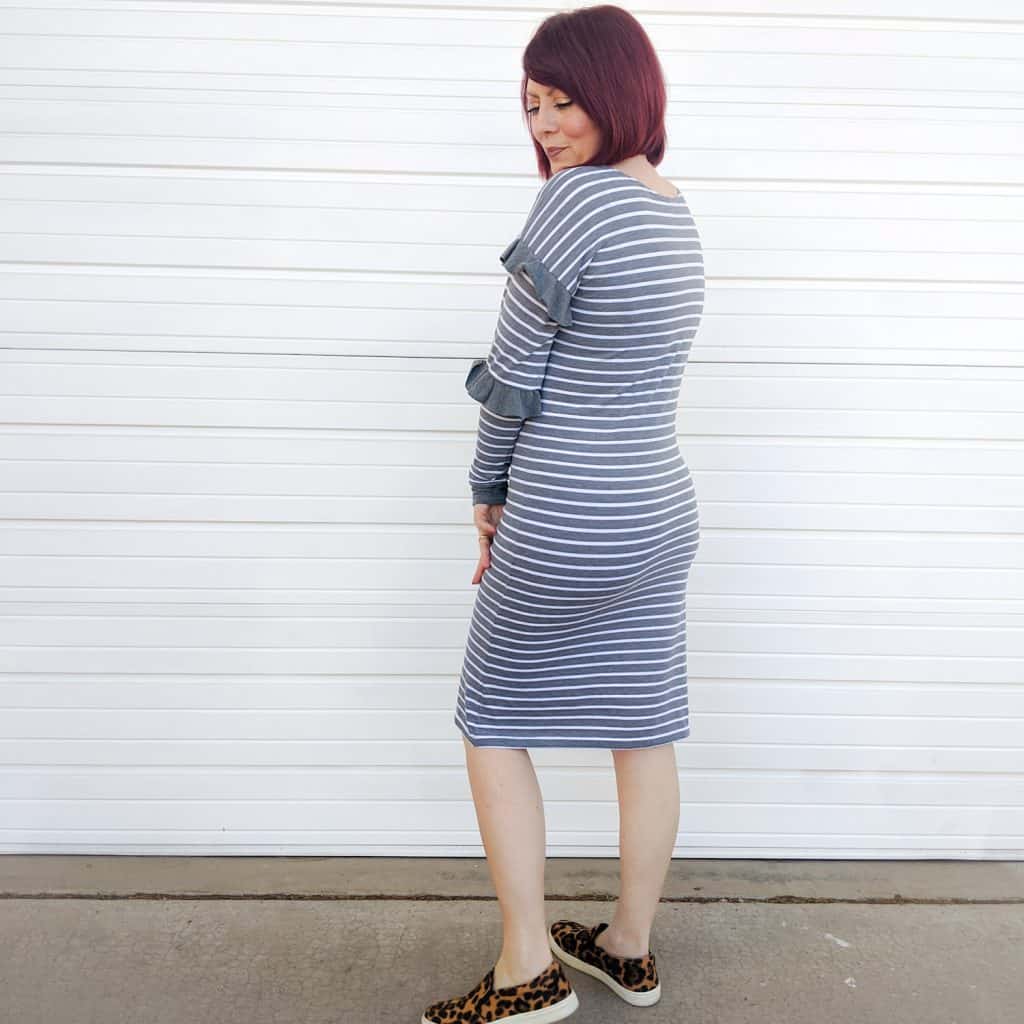
Make sure you pin this for later!
Looking for more hacks for the La Bella Donna pattern? Try these!
- La Bella Donna Spring Style
- La Bella Donna Hack: The Woven Dolman Cardigan
- La Bella Donna – Colorblock Hack
- La Bella Donna V-Neck Tutorial
Start Shopping
[carousel_slide id=’361728′]