Pressing Matters
Hello, hello! Happy Friday to all in the sewing world. Welcome to our Sewing School discussion all about irons and what to do with ’em. My name is Katie (you can find me here on Instagram) and I’m behind my machine most days, and beside my ironing board nearly as often.
The Pattern I’m Pressing
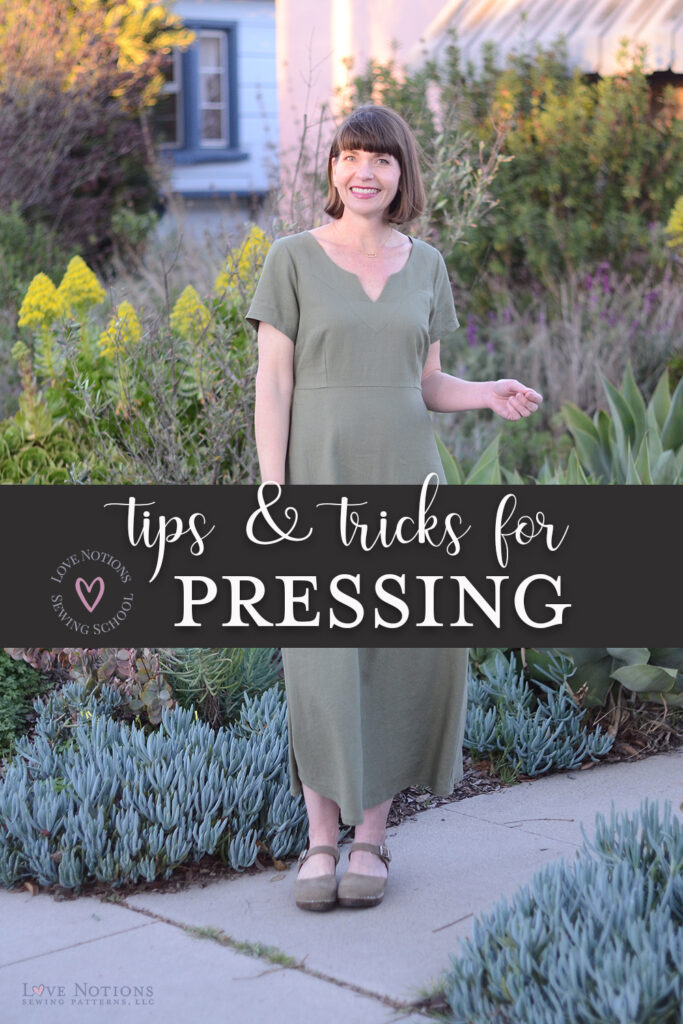
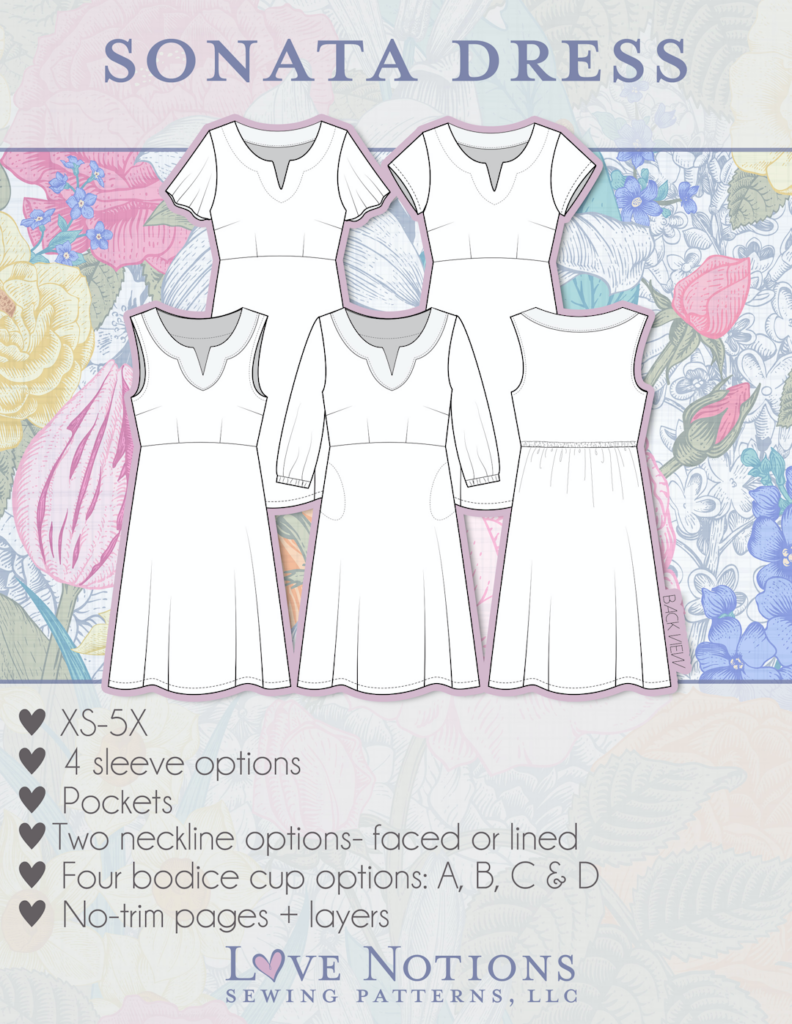
Included in our Tour de Pressing is how to best prep and sew the gorgeous Sonata Dress (aff) for really professional results! Woven fabrics press so beautifully, and the Sonata is just the garment to showcase good iron usage for flawless seams and a regal finish.
So, what’s the big deal about Pressing?
Years ago, I remember not being able to really understand what was so important about pressing during a sewing project, and now I can’t unsee the difference! If you’re still learning the ropes or an old hand at pressing like a pro, I hope this overview serves as a helpful tour or refresher. Proper pressing is one of the main ingredients of ensuring your garment looks more “handmade” and professional than “homemade”. One of the goals of sewing my own wardrobe is to ensure my clothing is better than ready-to-wear, and that includes taking the time and proper steps to ensure each garment turns out beautifully and to the best of my abilities.


Seems like the general consensus to ironing is reluctance, but more recently I’ve learned to appreciate the general quiet versus sewing on the machine, and now I don’t miss details of the true crime podcasts I’m inevitably listening to. See? Silver lining.
I keep my iron on while I’m sewing so that I don’t have to pause and wait for heat when I’m on a roll. My CHI brand features an auto shut-off and beeps a warning after 30 minutes, and that attribute is super helpful so that I don’t leave it on without supervision.
First, a big concept to note, although people use both terms interchangeably, pressing and ironing refer to two different applications of the hot iron. Shocking, I know!
Pressing
This is strictly an up-and-down movement, lifting between each application of heat. You are helping the freshly-sewn threads to tighten up, manipulating curves at darts or anywhere else, and setting the fabric seam itself. If you instead rub the iron all over the surface, you can easily stretch out the shape of your garment. I don’t use the full weight of the iron on this occasion unless it’s a long straight seam, like a pant leg side seam, in which case I just set down the iron momentarily every few inches.
Ironing
Using light pressure and longer sweeping movements to smooth wrinkles. Better suited to making sure your yardage is wrinkle-free before cutting out your pattern pieces, and also generally suitable for smoothing your whole garment after it’s finished.
Tools & Accessories
A few excellent tools to consider adding to your arsenal.
Iron: The apex magical tool itself! These vary from very simple to all the bells and whistles, but should include a temperature dial and a steam dial at the very least. I favor one with an on-demand steam button that also works for upright steaming so I can freshen up clothes while they’re on a hanger or a final once-over before taking pictures. There are non-stick iron plates, ceramic plates, different sizes (even minis!) and cord lengths, retractable cords, and various auto-off and even auto-lifts to prevent scorching. The sky’s the limit, so consider your needs and head right down that rabbit hole.
Ironing Board or Press Mat: A flat workspace that is heatproof, ironing boards come in all sizes and can be foldable or store into a wall unit. They need a washable cover that can withstand high heat, like heavy cotton. The press mat is a heavy, usually wool, mat in various sizes that you can set down on any surface to make it heat proof.
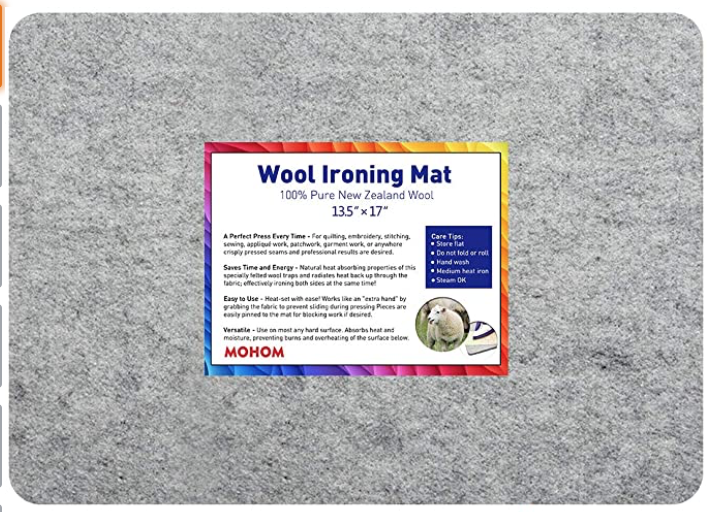
Pressing Mat 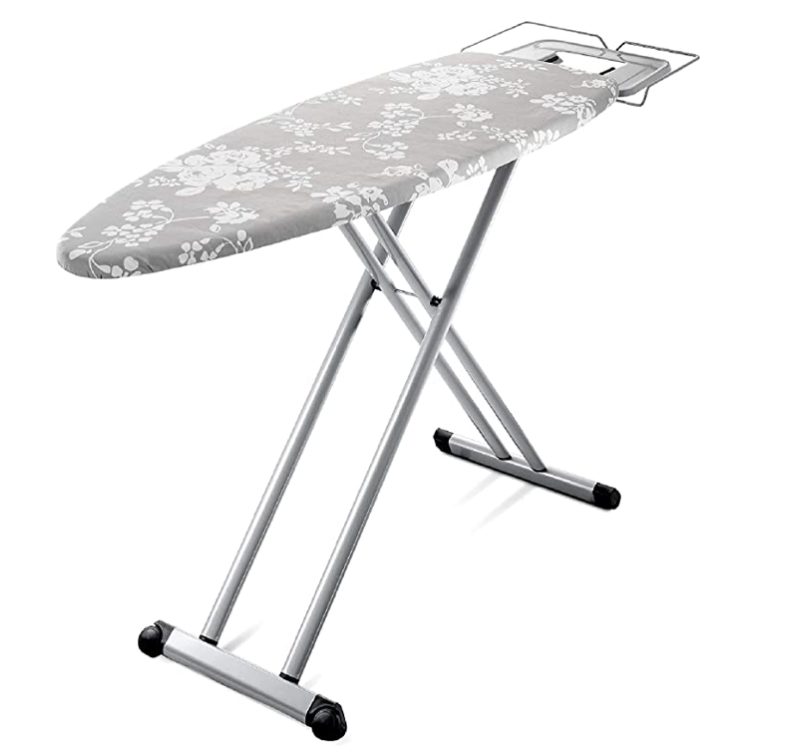
Ironing Board
Best Press: I must confess to never having tried this. From everything I gather, it’s a starch alternative and certainly comes in a lot of scents (many of which remind me of Teen Spirit deodorant, but I digress). Spraying while pressing will help add crispness and stability to your garment. And obviously your chosen scent will add to your ambience.
Spray Starch: Numerous brand options are available and also the choice between aerosol or a trigger spray. These can help the iron glide over the fabric and add body without too much stiffness. I’m not a huge fan since this tends to make a mess on my surrounding floor from the spray, and I have found it does gum up my iron plate and my ironing board cover if I overdo it. If I’m using starch, it’s because I’m sewing a woven cotton fabric on the bias, or I’m quilting.
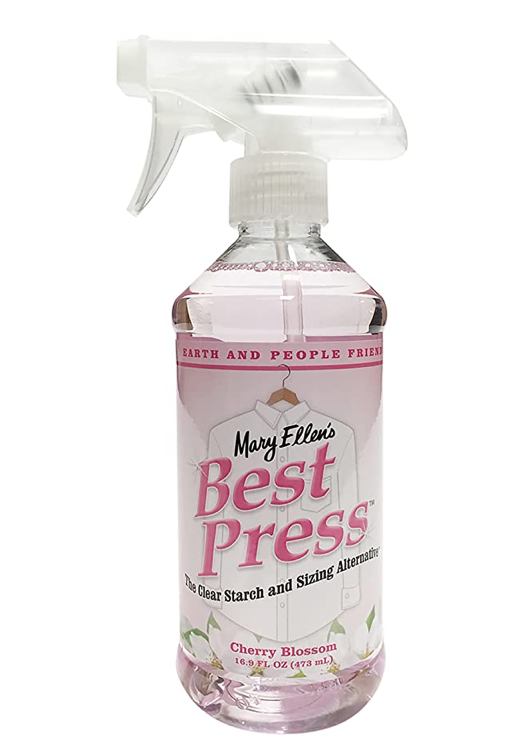
Best Press 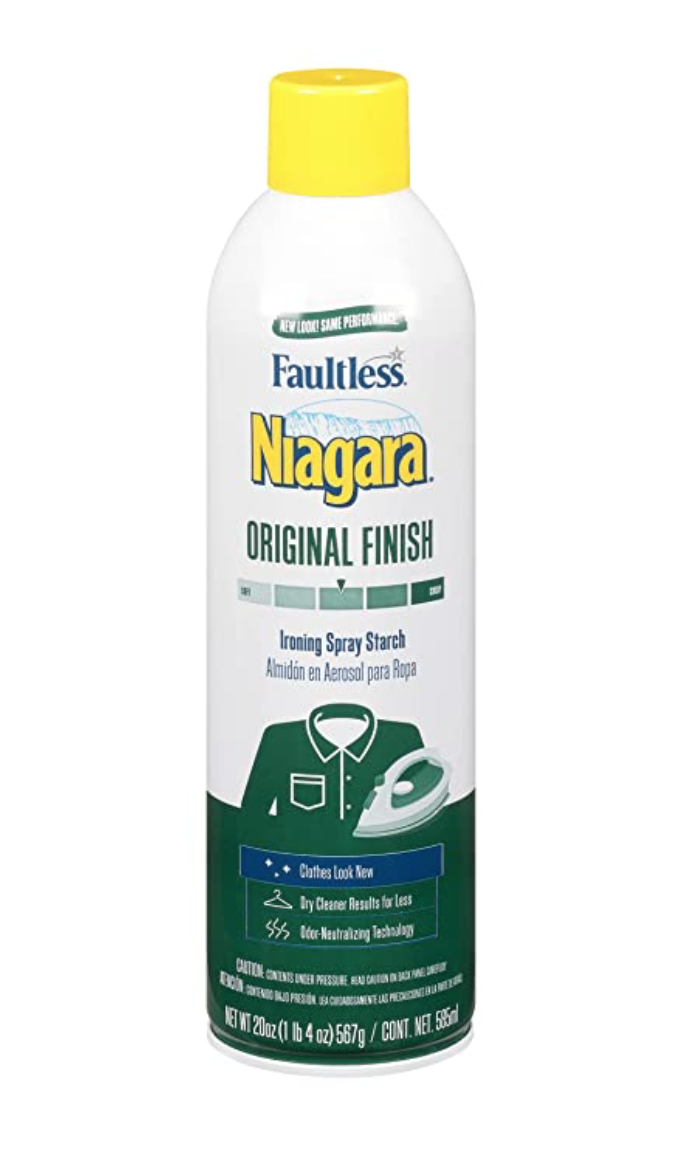
Spray Starch
Press Cloth: Very necessary for fabrics that can overheat and get shiny (especially anything with rayon content!), or for plusher fabrics that have a nap or raised texture. This provides an extra layer of protection against scorching or water marks, too. I also like to use one when I’ve stabilized light woven fabric with gelatin or used starch so that I don’t collect yucky residue on my iron plate, which can then transfer to fabric later. Also very useful when adding iron-on-interfacing to fabric. You can pick up a professional cloth or be like me and grab a cotton dish towel when the need arises. Easy peasy.
Pressing Ham (or Tailor’s Ham): A round pillowish tool for pressing and molding curved seams. This one is great for bust darts, armscyes, the ol’ crotch, and curves of that nature. There are generally two sides; a plain cotton side for use with high heat on linen and cottons, and a plaid cotton/poly blend side for lower or medium heat while pressing synthetics, blends, or wool.
Seam Roll: Not unlike the pressing ham with double sides, this longer stuffed tube can easily fit into long sleeves or smaller circumferences like kid’s pants so that you can easily press the seam without creasing the opposite side.
Sleeve Board: A tiny ironing board that fits inside most sleeves! This tool is perhaps a little extra cumbersome, but incredibly helpful for sleeves, smaller clothing, cuffs, etc. I have a folding version that I jam right into the same space where my regular ironing board fits into the wall.
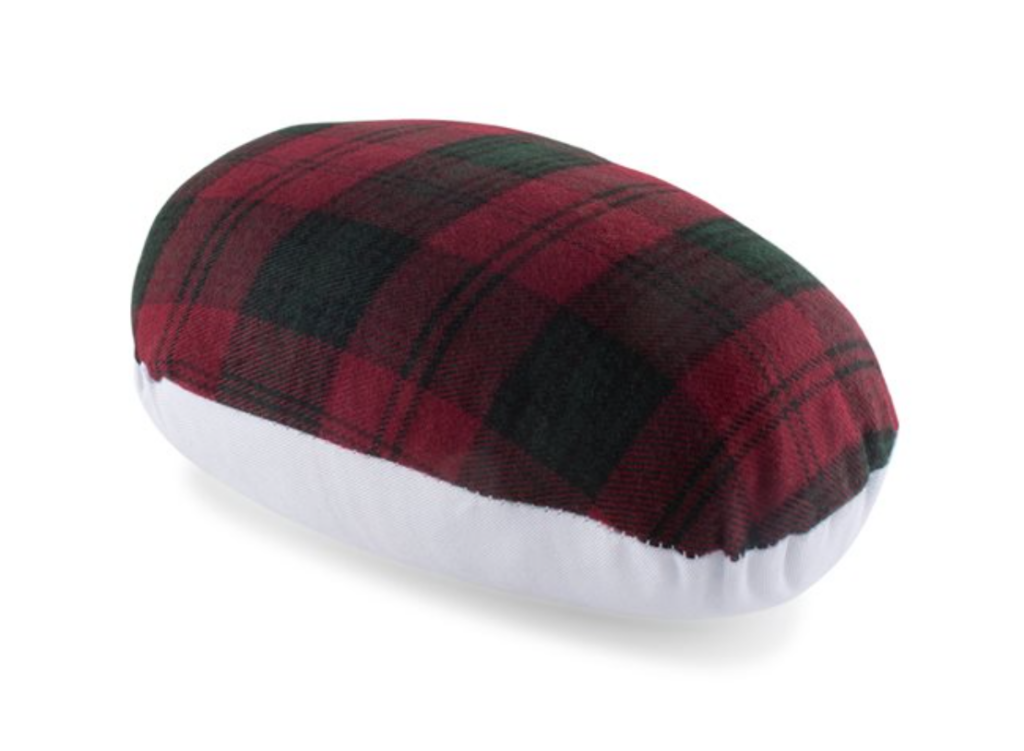
Pressing Ham 
Seam Roll 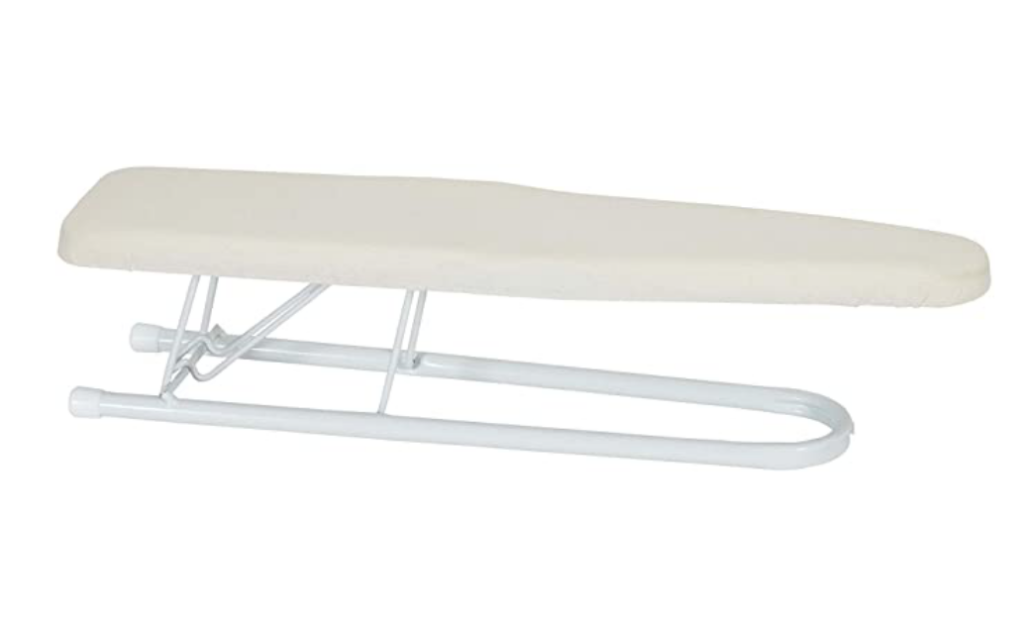
Sleeve Board
Wooden Clapper: Literally a baguette-shaped block of absorbent wood that you set over a steamed seam to wick out the moisture and make the seamline extra crisp. Magnificent on woven fabrics like cotton and linen, but I’ve also used it with a lot of success to help correct wavy knits and rib knits when my machine’s tension was a little off.
Magic Eraser Sponge: I’ve yet to find anything better to clean off my iron plate. Wait until the iron has cooled and then scrub away. I’m always shocked how gross the plate gets, and this solves my problem and restores my iron’s surface every single time. Always check a test spot before you go over the whole thing.
Glass Head Pins: the safest type of pin to use because you won’t accidentally melt one onto your garment. I love to use loads of pins when I’m pressing a hem, and the glass offers a great level of security versus plastic when my iron inevitably touches the pinhead.
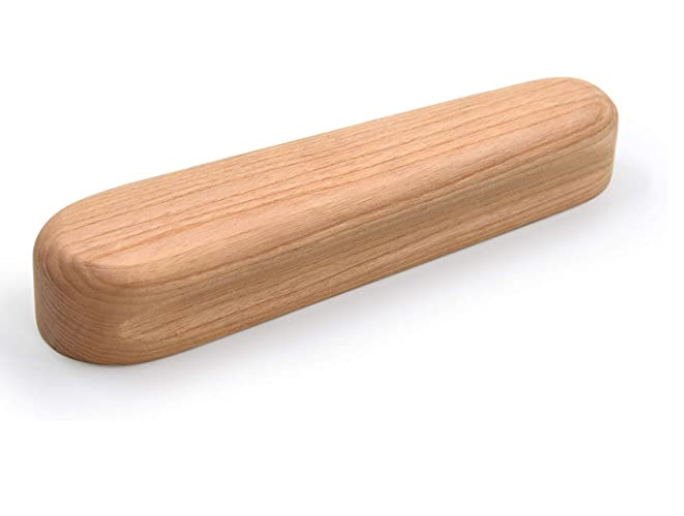
Wooden Clapper 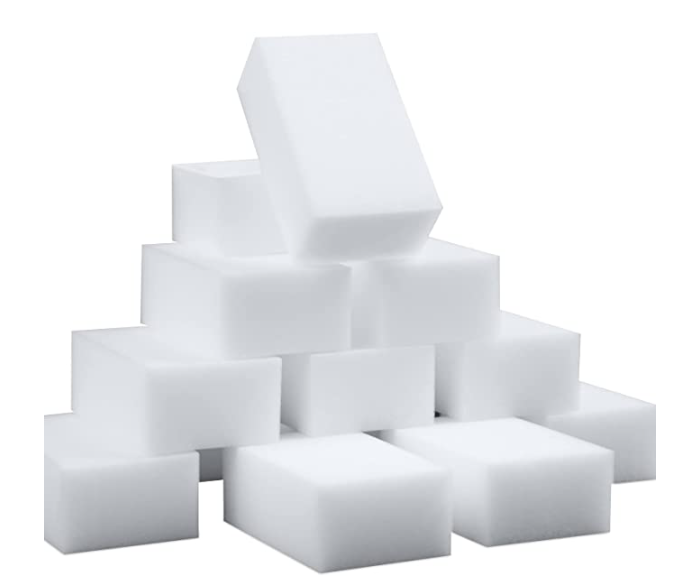
Magic Eraser 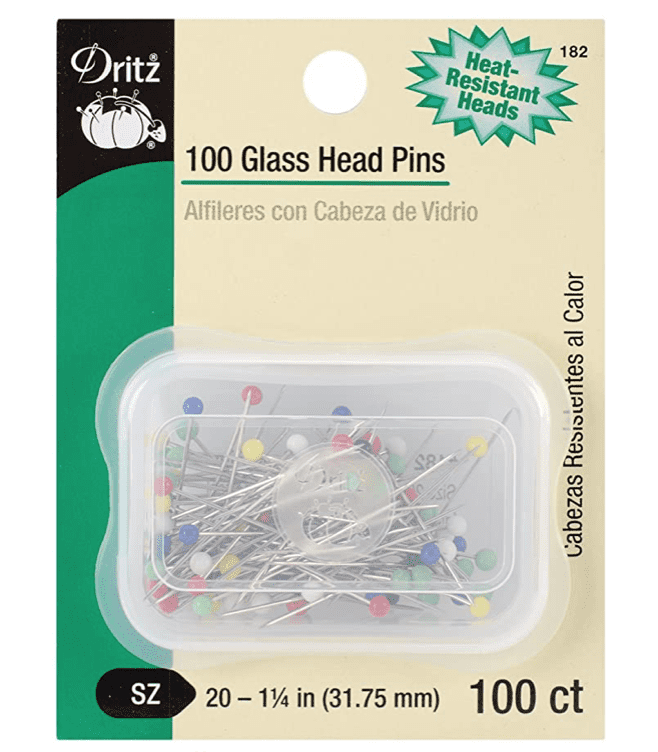
Glass Head Pins
And with all those tools explained, onto our project! Ready, Freddy?
Let’s get pressing
First, set the appropriate temperature for your fabric. Unless I know I’m sewing 100% linen or cotton, I’m fairly cautious and tend to skew to a lower temperature for fabrics. If you’ve ever scorched something, that’s a hard, sad lesson to learn.
In general (and PLEASE test a scrap before you commit to the real deal) synthetics and silk are at low temps, wool and poly blends are more in the medium range, then cotton and linen are at hot. Your tester scrap is the ideal time to try steam, too. Silk and many wools or blends don’t like steam and they may get discolored or spots from the water. Rayon and related blends like to get shiny, so take heed on those fabrics too.
This is also the point to pause and make a judgment call about whether you need to use a press cloth in this instance or not. Grab one if you’re not sure.
My fabric to press
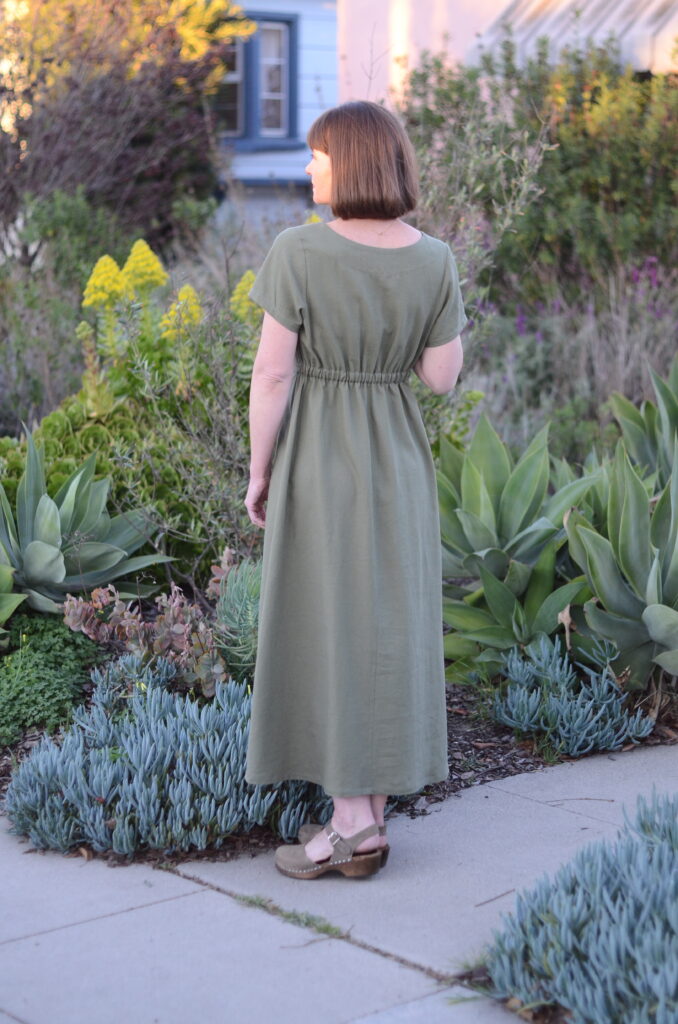
I chose some lighter weight woven, a Kaufman Brussels Washer Linen, to sew my Sonata dress. This is readily available fabric and it comes in tons of solid colors. It’s a 55% linen and 45% rayon blend so it’s both soft and sturdy. Not only does this fiber blend press beautifully but also I find linen a joy to work with while sewing as well as to wear, wrinkled or not. (But you know me, I’ll definitely be pressing mine.) My only change to the pattern was to add twelve inches to the skirt length because the only thing better than wearing a linen dress is wearing a midi-length linen dress. To cajole this length from my two yard cut, I added a center seam to the back skirt piece and just extended the side seams in the same A-line angle to the new hem. The extra width at the bottom of the hem ensures I have enough room to take regular size steps when walking. Don’t ask me how I know that’s important.
Iron the fabric before cutting
I iron my woven fabric yardage before cutting to remove the major folds from storage and to straighten out the scrunched wrinkled ends. I tend to keep the whole thing folded in half, selvedge to selvedge, and iron with the two layers together up to a few inches away from the center fold, then unfold and iron that center section on its own. If I’m in the mood and ironing a few cuts in one sitting, I hang them over a door to keep them smooth until I’m ready to cut them up. I may like using the iron, but not enough to go over the same fabric twice!
Now that your fabric is smoothed, sally forth and cut out all your pattern pieces. Use a press cloth when you add your interfacing.
One quick hint here that applies to adding a facing (or any seam junction). If you prefer to press your seams to one side rather than press then open, be sure to press the facing seam in an opposite direction to the shoulders seams. I always press my facing seams forward and my shoulder seams to the back so that they line up and fit together and create less bulk.
To create smooth, perfect seams
In my experience and in reading that of others, I’ve found that the best technique to create smooth, perfect seams is to press each seam allowance in both directions, one at a time. Start with the wrong side of the fabric up, meaning the inside of the garment is facing you and the iron, and the right side of the fabric is against the ironing board or surface.
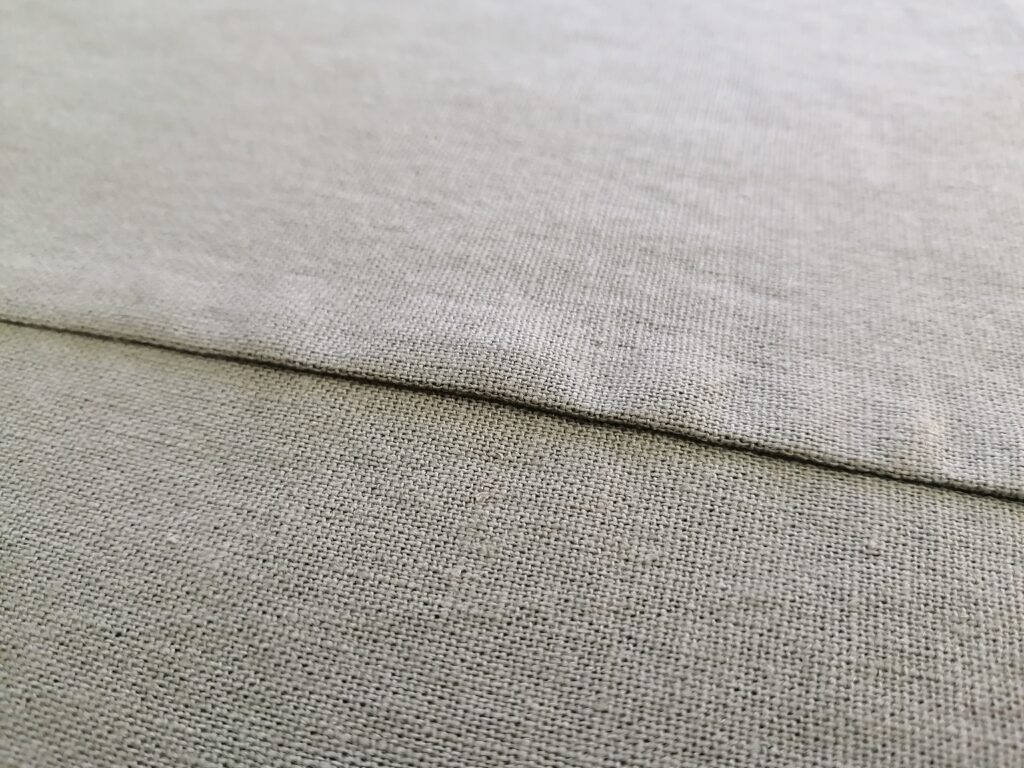
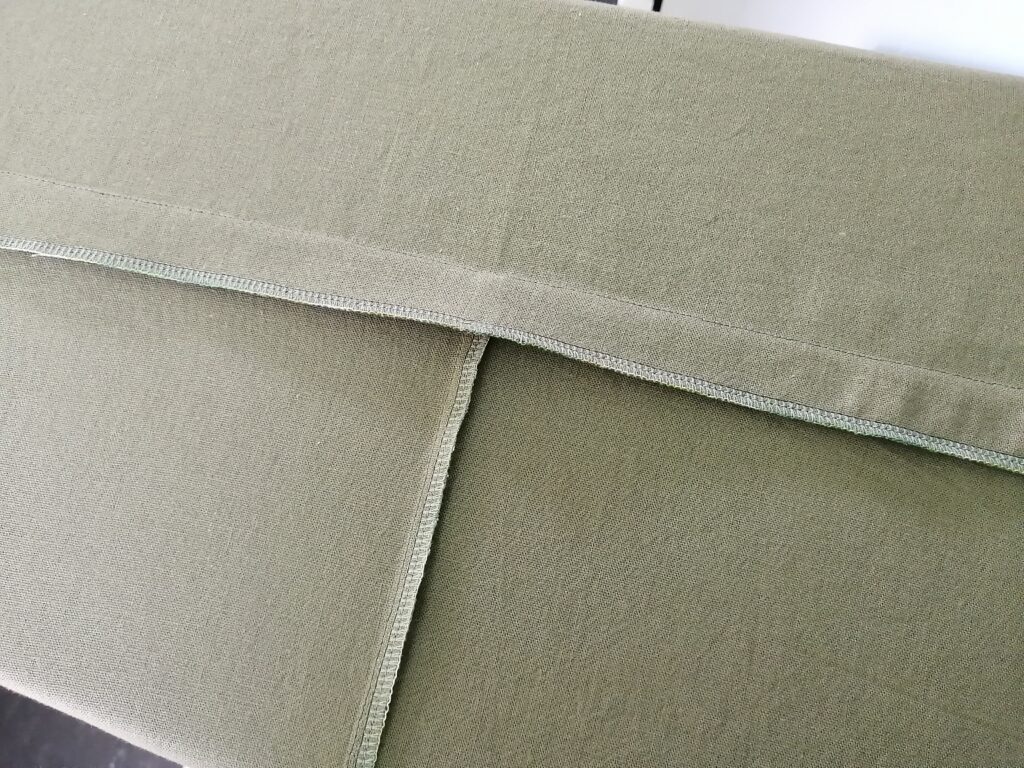
Here is the untouched seam, sewn and serged to finish the seam allowance.
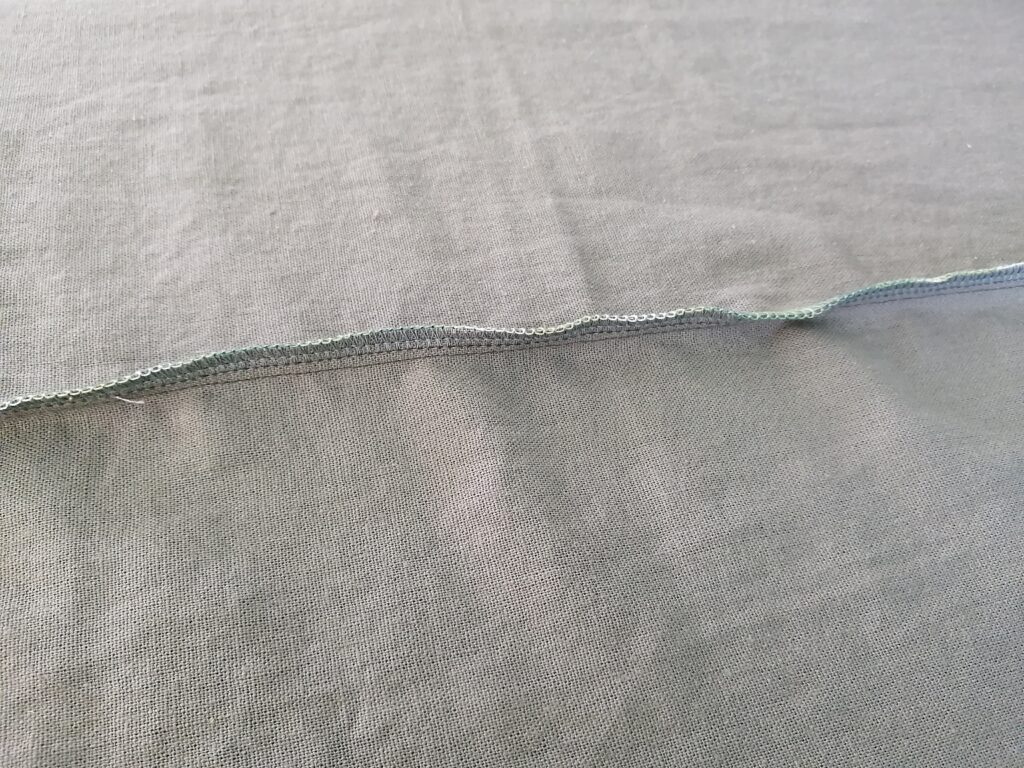
Untouched Seam 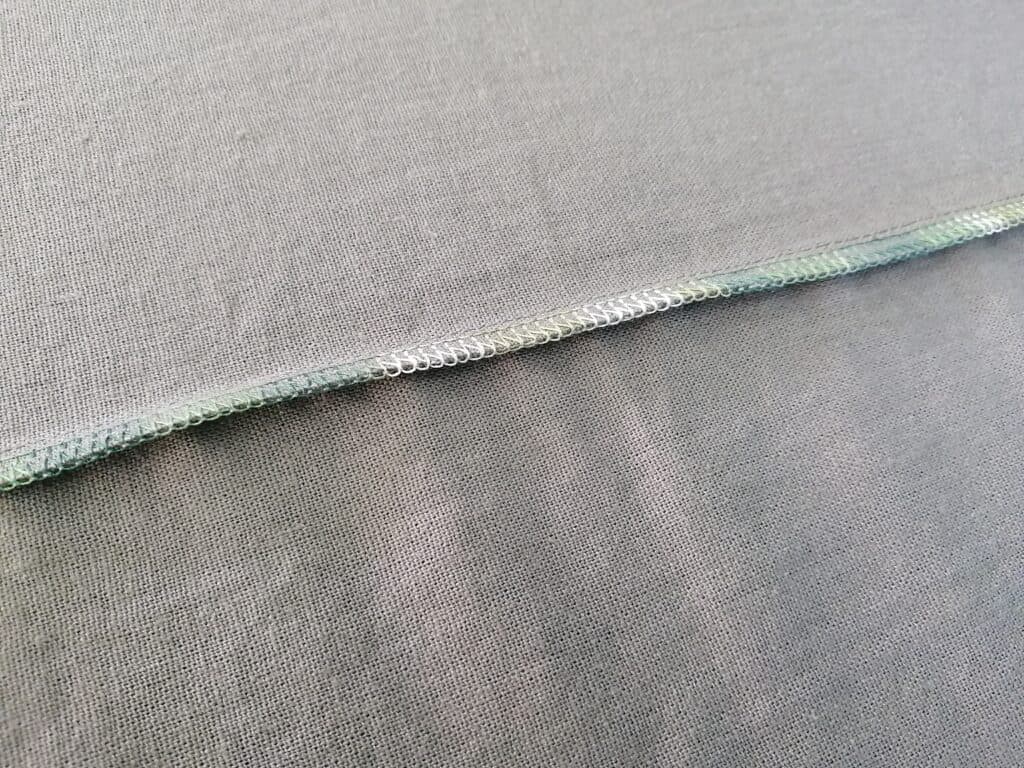
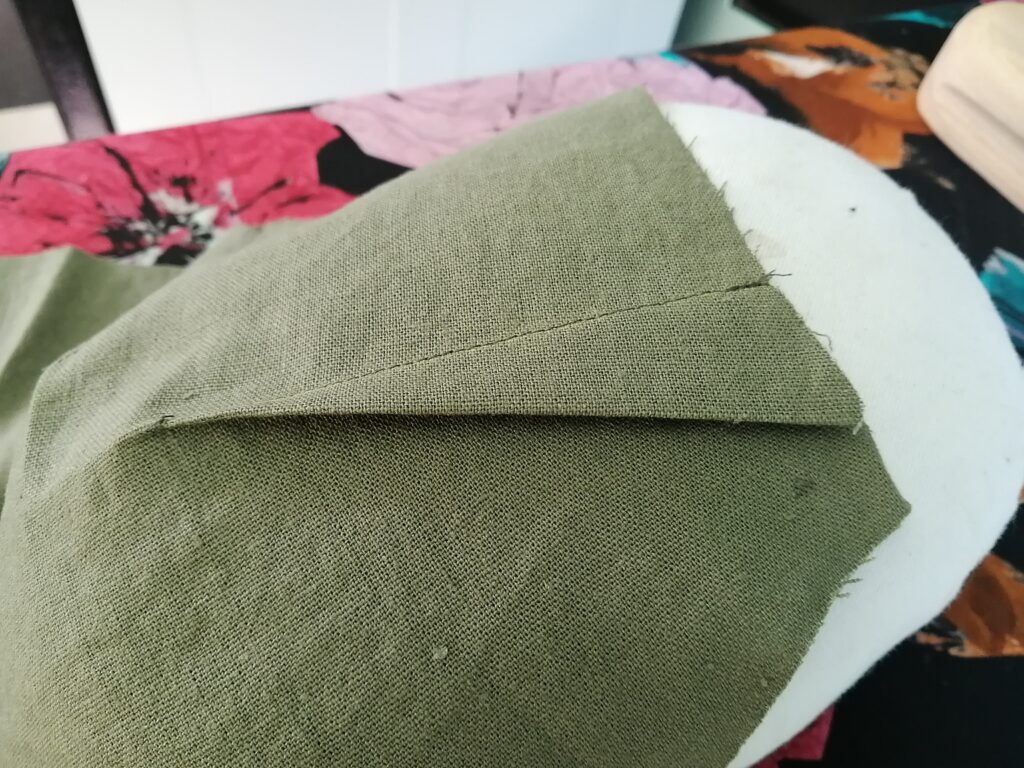
Press it the opposite way first 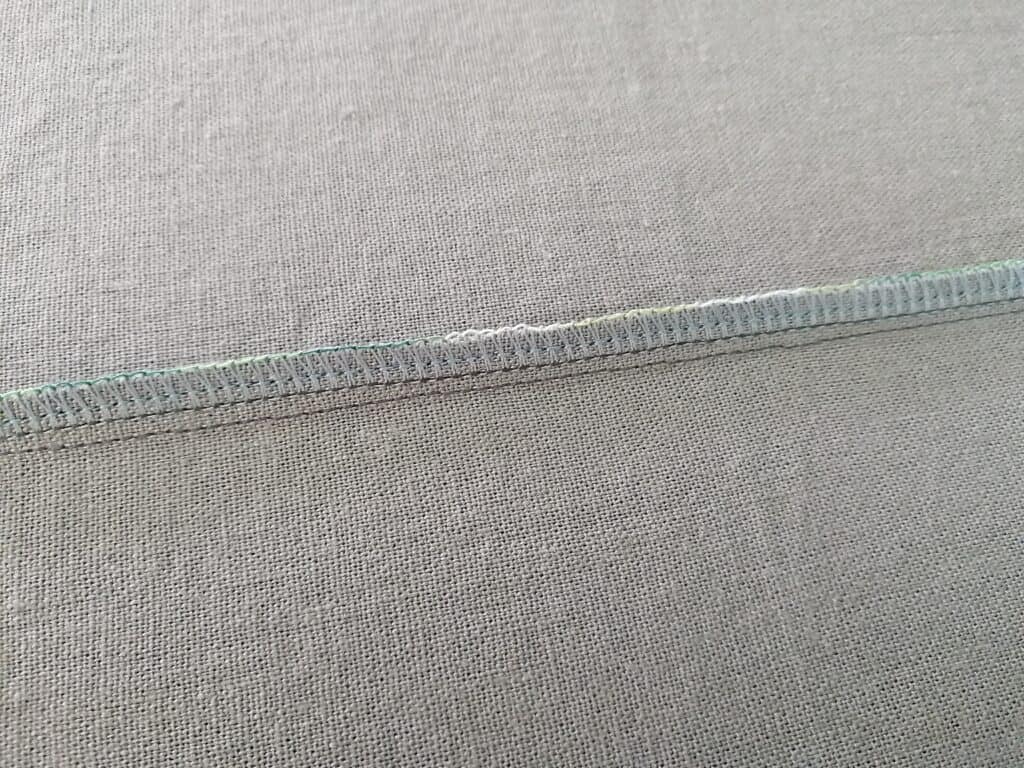
Press to correct side
- First, push your seamline all the way to the opposite side of where you want it to end up when worn and gently press. (You could instead opt to press the seam open for this first step.)
2. Next, gently press to the correct side, which is the side where you want the seam allowance to end up when wearing your article of clothing.
So for, say, pants, you would first press the side seams to the front, and then go back and press the seams toward the back of the pants. The goal is to not end up with any puffy or excess fabric at the seamline. You want everything to be perfectly smooth and flat.
Use the clapper
On the second press is when you can set down the wooden clapper to really set that seam. Place it on the seamline immediately after a steamy press and leave it to absorb the excess moisture for several moments and then work your way across the whole seam.
Just pressed 
Use the clapper 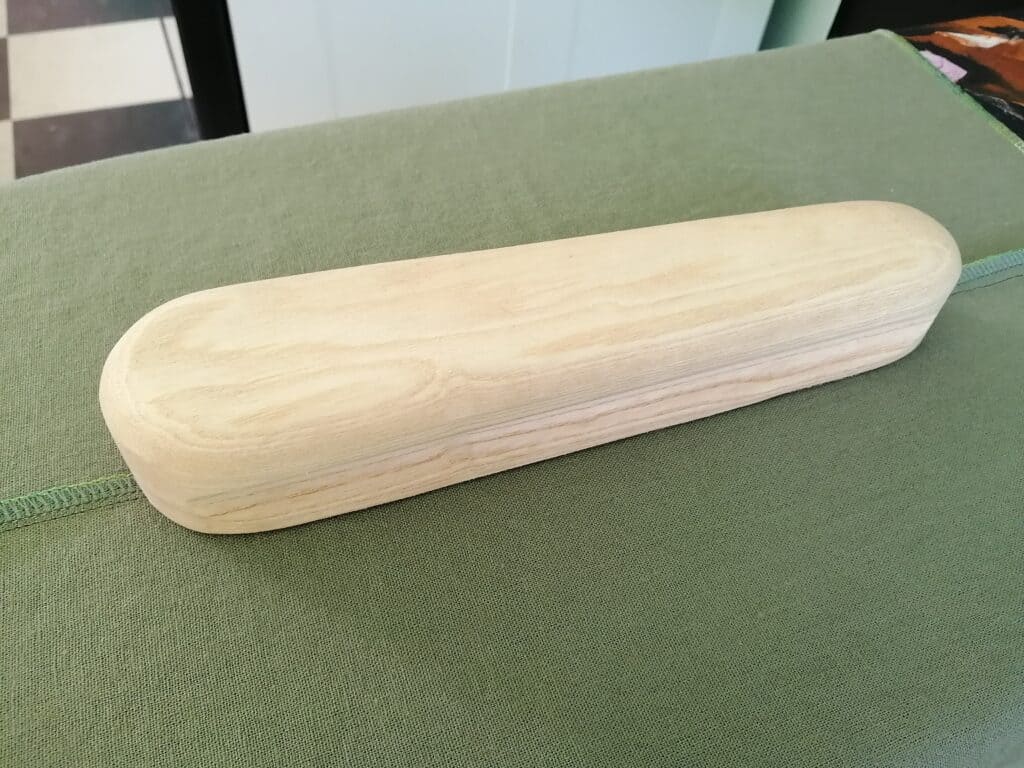
Clapper
Here’s a seam with iron pressing alone. See how it’s not perfectly smooth? Not bad, but room for improvement.
And the same seam after the wooden clapper was employed. Ah, heavenly! It’s kind of ridiculous how much of an improvement a slab of wood makes.
Important for under stitching or edge stitching
This step is particularly important when under stitching and/or edge stitching facings, waistbands and that ilk. You want that seam pressed very carefully and to lay perfectly flat without any extra fabric bubbling or sort of leaning over the seamline. Turn your garment over to the right side to check and make sure your seam is very smooth and flat. Touch up on the right side if you find any pressed creases or bubbles, and don’t forget that press cloth.
Pressing darts
After sewing the bust and waist darts, you can press them over the rounded shape of the tailor’s ham to help shape them to your bust depending on your preferences. There is much debate about whether or not to press the tips of the darts with an iron, but I have honestly not found much difference in the final appearance of each method. I think a smooth dart has more to do with the final few stitches’ angle and that they are tied off instead of backstitched. As with the seam pressing method, first press the bust darts up and away from their final direction before pressing them down to the correct final position. You can play with where you set the dart on the ham to find the best curve for you.
First, press darts up and way from final direction 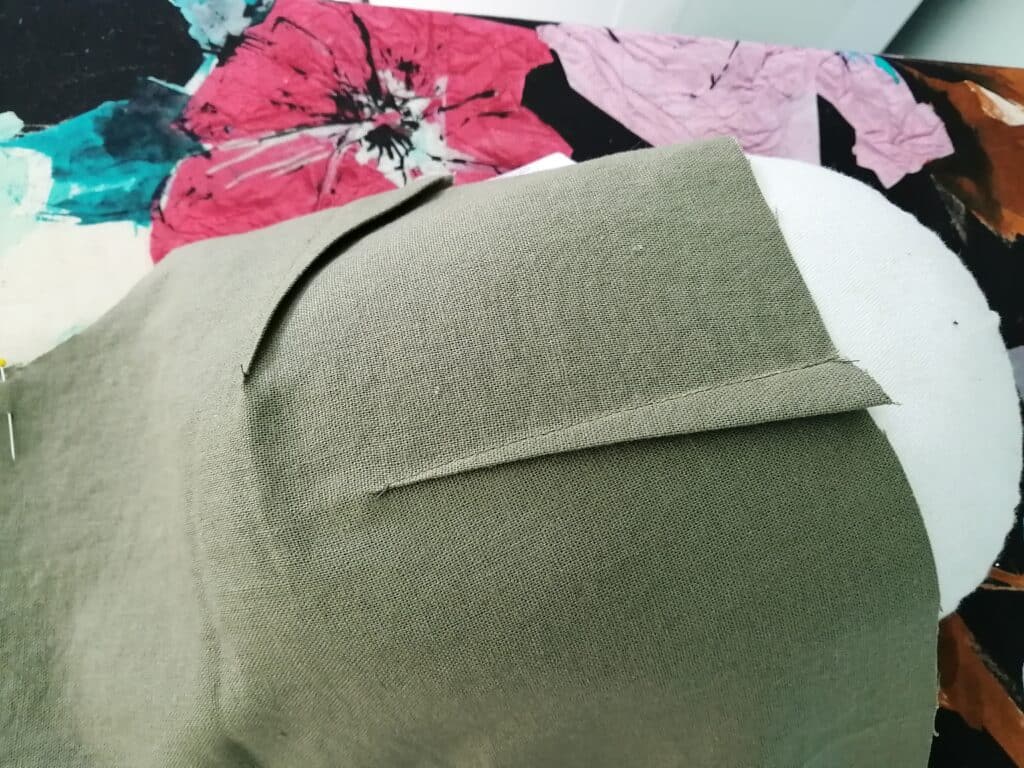
Press down on the ham in the final position
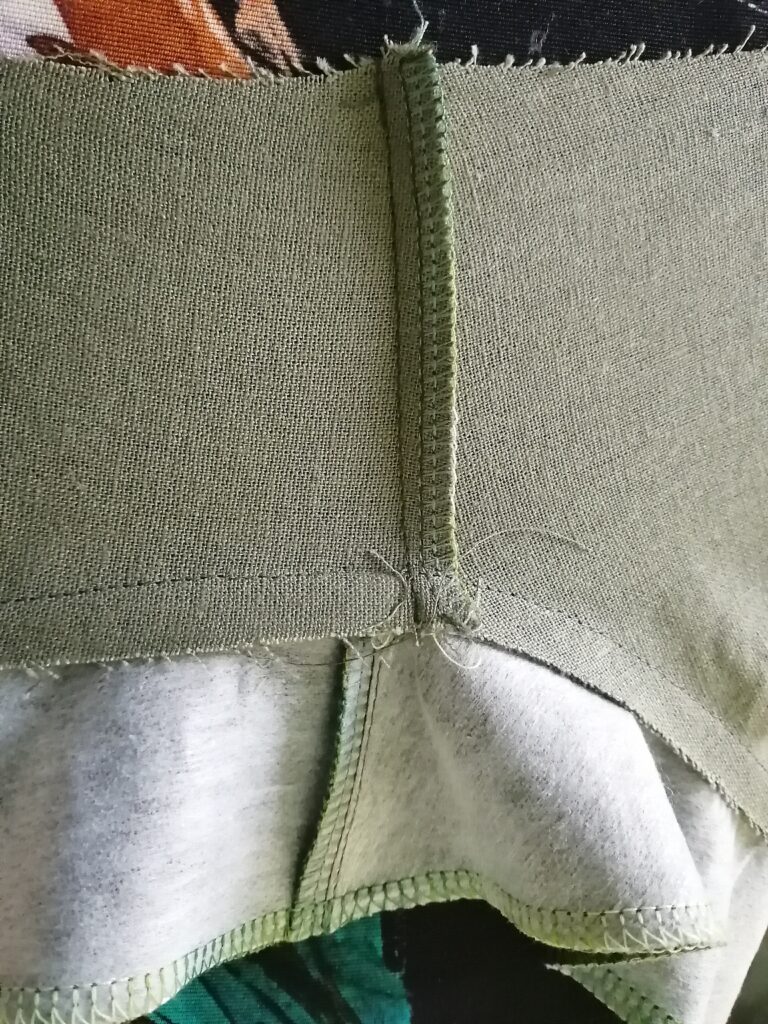
Here’s another view of some gorgeously flat seams. This shows my elastic channel on the back bodice and my back skirt piece that was sewn from two pieces.
Press channel down first 
Press up 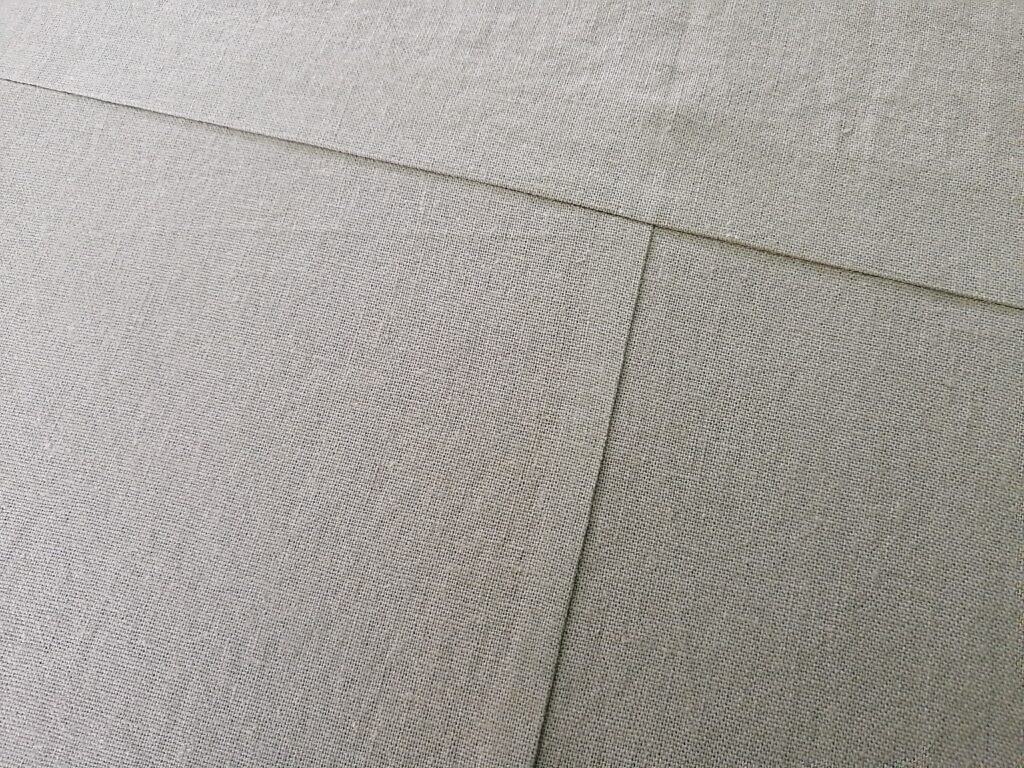
Flip over to check. Spot on.
- Press that channel down first.
- Then press it up so it’s sitting in its final spot (and admire the swirly thread!)
- Finally, flip it over to check the right side of the fabric. So sharp!
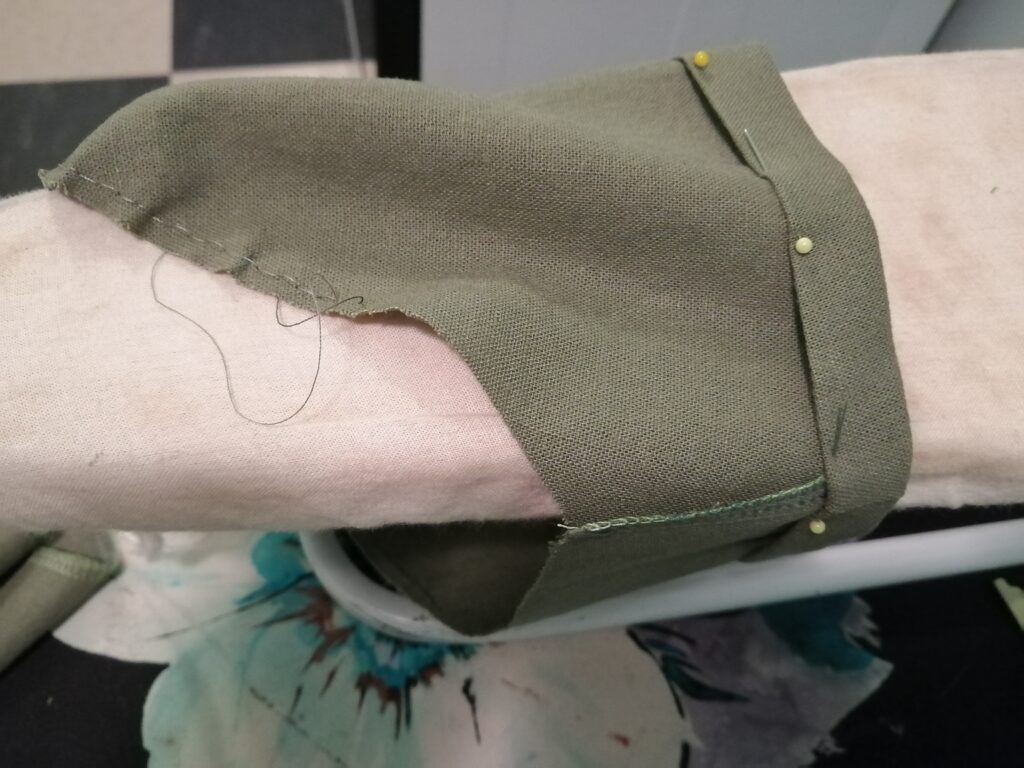
Hemming details
I usually save hemming for my last sewing step, but I wanted to show how useful that little sleeve board can be, so I opted to hem my sleeves before attaching them to the bodice. Rotating that small circumference around this wee board is a piece of cake, and without the weight of the rest of the dress to deal with, pinning that hem evenly is easier.
You’ve got it!
You are now fully prepared to sashay off on your own and create a perfectly finished garment. Once you’re finished sewing, give your dress a final once over with the iron and enjoy your fresh new Sonata!
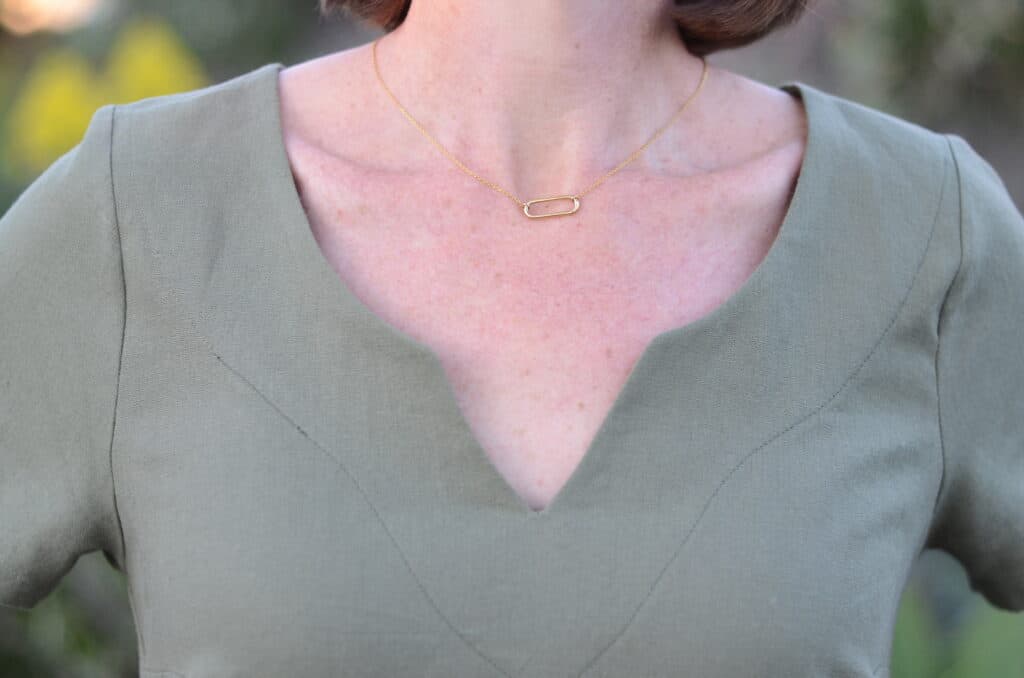
Front Neckline 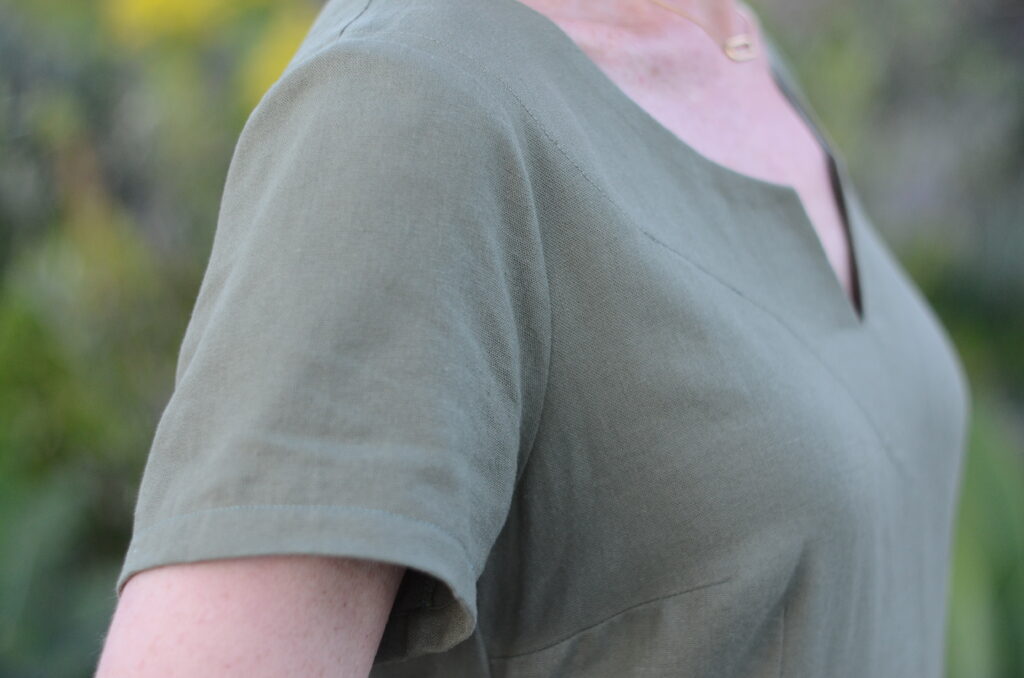
Darts and Side Bodice 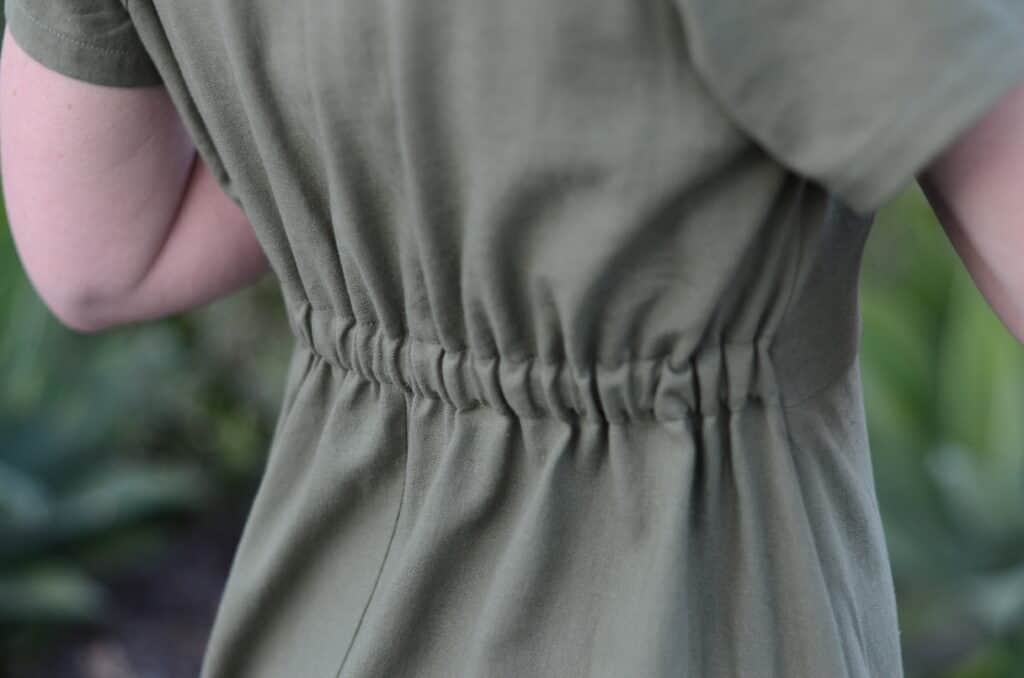
Elastic Casing
Love a fully pressed Sonata Dress
Save this article to your Sewing Pinterest Board