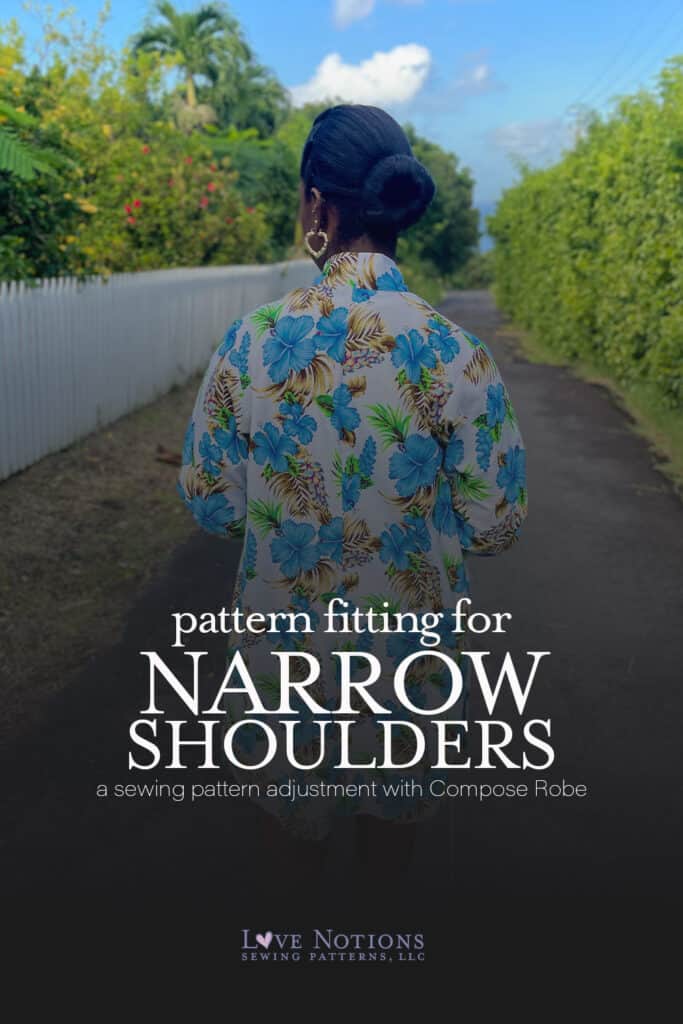
It’s Kris here from Unsewcial. I’m happy to be back and spreading word through the sewing ‘ton’ about today’s Feature Friday pattern – the Compose Robe. If you have been sleeping on this pattern, it’s sure time for you to WAKE UP!!! If you’ve been here for a while, you can probably tell I LOVE this robe as I wrote an earlier guest post featuring this pattern too! That one demonstrated a Sloping Shoulder Adjustment and today, I’ll be using Compose to demonstrate another shoulder adjustment: the Narrow Shoulder Adjustment.

Diagnosis: When to know if you need a narrow shoulder adjustment
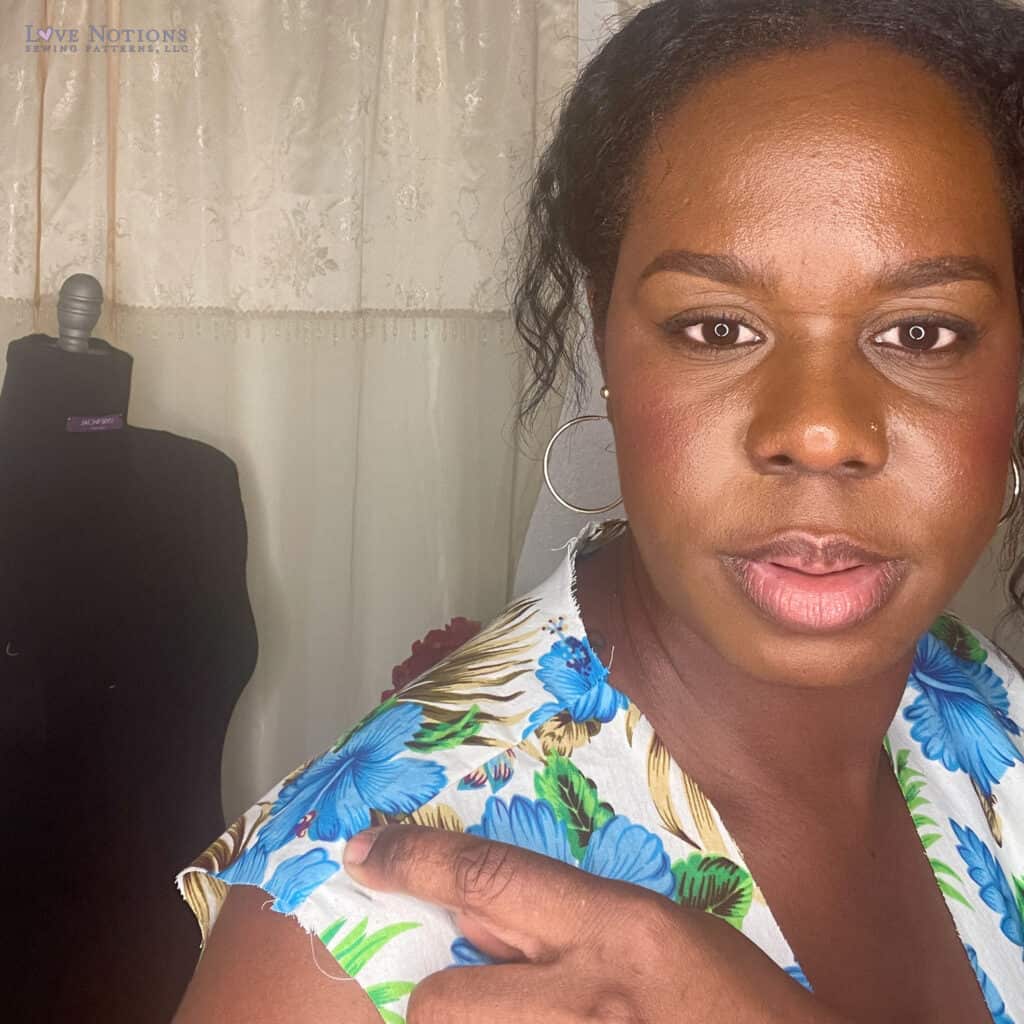
Have you ever made (or bought) a garment that fits great everywhere else, but the shoulder is way too long? Now, I’m not talking about a pattern that is designed to fit this way, as with a dolman, grown-on or kimono type sleeve like the Love Notions Melody Dolman. I’m referring to a pattern that is meant to end at your shoulder point, like the Compose Robe, but sorta hangs off your shoulder instead.
If the answer is yes, you’re the perfect candidate for a narrow shoulder adjustment!
As a consequence of a too-long shoulder, the upper back can pull, and the sleeve (if there is one) can feel very tight and uncomfortable. I can bet that there have been times when you’ve blamed a tight sleeve for this discomfort and thought you needed a full bicep adjustment when the truth is, you probably need to fix your shoulder point first.

The Solution: The Narrow Shoulder Pattern Adjustment
I’m a true believer that if you nail the fit at the shoulder, you’re 9/10ths of the way on your fitting journey. When you perform a narrow shoulder adjustment, you are in effect, moving the shoulder line inwards, thereby reducing its length whilst keeping the armscye untouched. To perform the adjustment, we will be using both the front and back ‘bodice’ pieces of the Compose robe. Since the armscye is untouched, there is NO need to adjust the sleeve piece.

How to Make the Narrow Shoulder Adjustment
1. Determine your adjustment amount
The first thing you need to do, is determine how much of an adjustment you need to make. The easiest way to do this, is to sew up a toile. I know, I know. Many people despise toiling, but it makes fitting so much easier. Trust me! Soooooooooo go on. Grab that muslin and cut out the front and back robe pieces, and baste them together. Once you put your toile on, raise your hand to the ceiling. Using the opposite hand, have a feel at your shoulder point. You should be able to feel where the ball meets the socket at the intersection of the arm and shoulder. This is where your shoulder line should end, and the point from which your sleeve should hang. Place a mark on your toile at this point. Remove your toile and pencil in your seam allowance, which for the Compose Robe is ⅜”. The difference between your seam allowance, and the mark you made, is the amount of the adjustment you need to perform.
Another way to find your adjustment amount
As an alternative, you can measure your shoulder line with a tape measure from the neck to the shoulder point. Next, measure your pattern to determine its shoulder length and make a note of the length. If the pattern length is longer than your shoulder length, then the difference between the two is the amount of your narrow shoulder adjustment. Although this is a faster method, I DON’T recommend this alternative in most cases as the width of your neckline impacts the length of the shoulder line. If you cannot accurate guess where the neckline should fall, then your calculation for the narrow shoulder adjustment might be incorrect.
Once you’ve determined how much of an adjustment you need, then it’s time to get cracking! Grab the front robe piece and follow along with me.
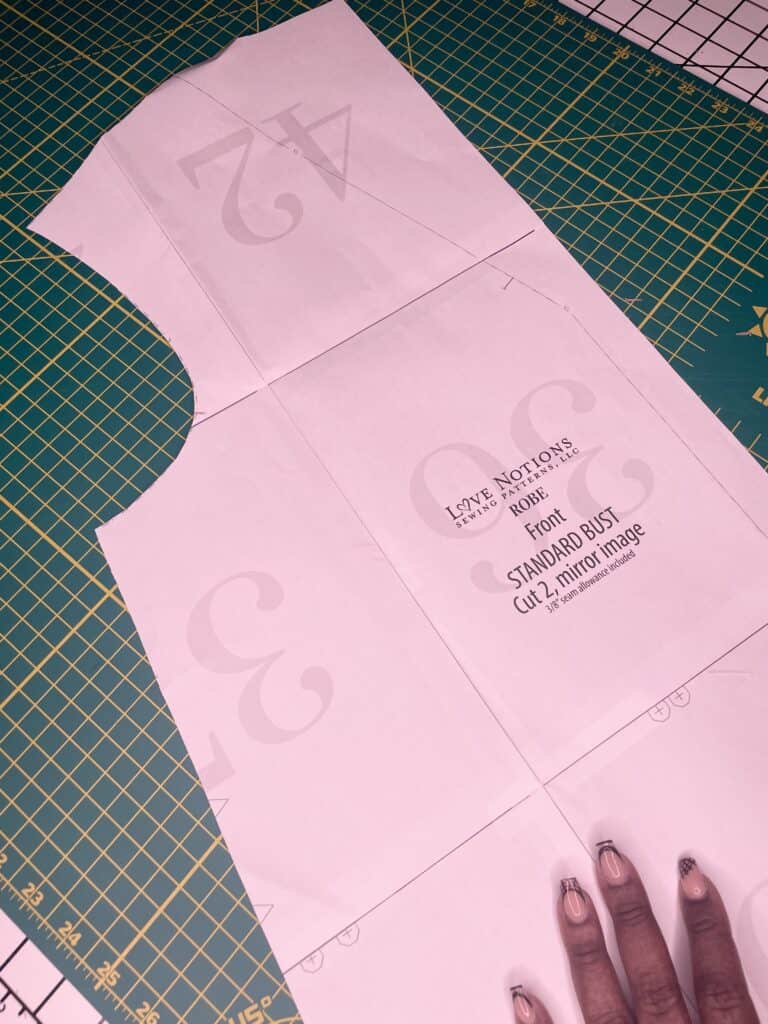
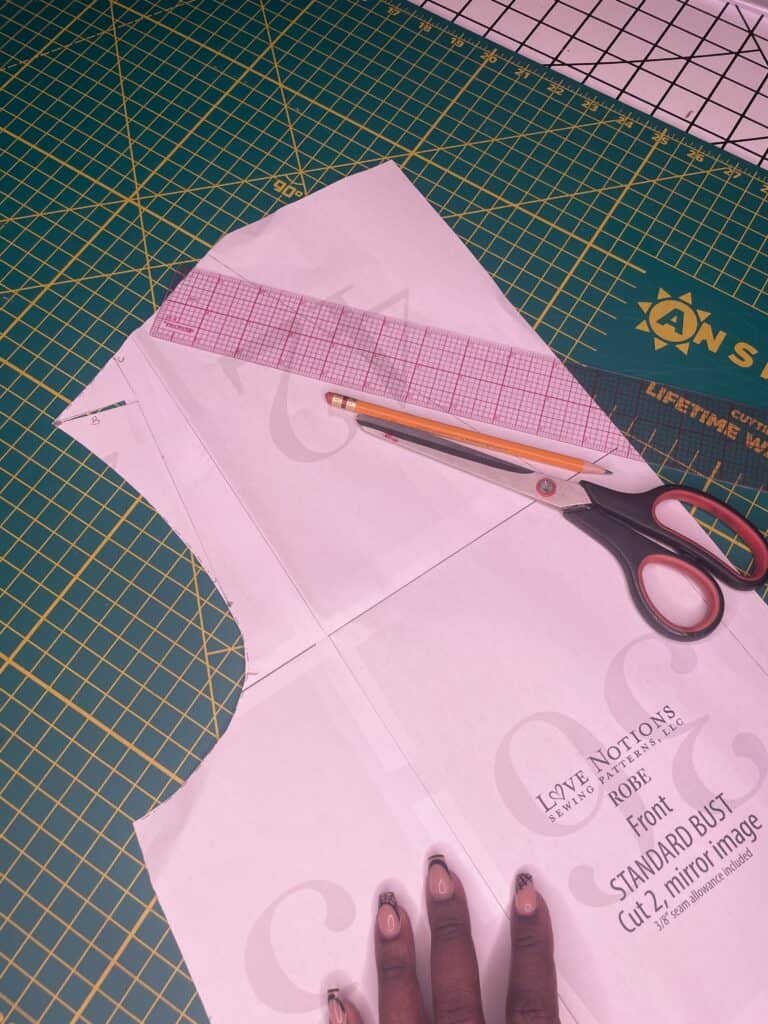
2. Mark your pattern pieces
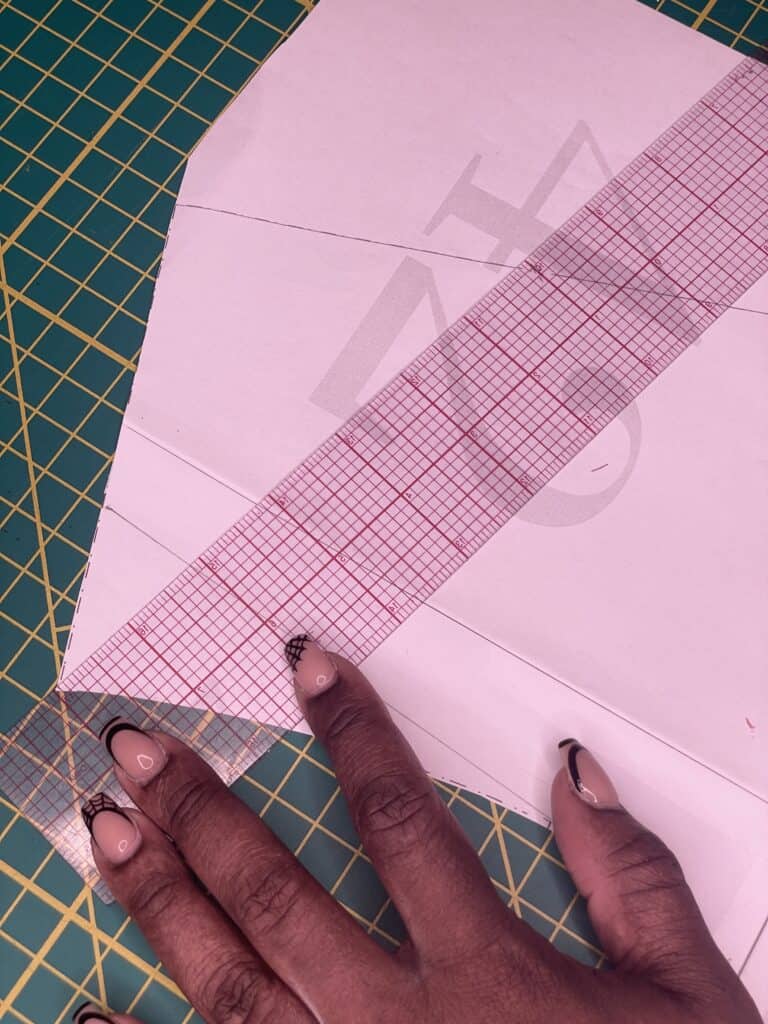
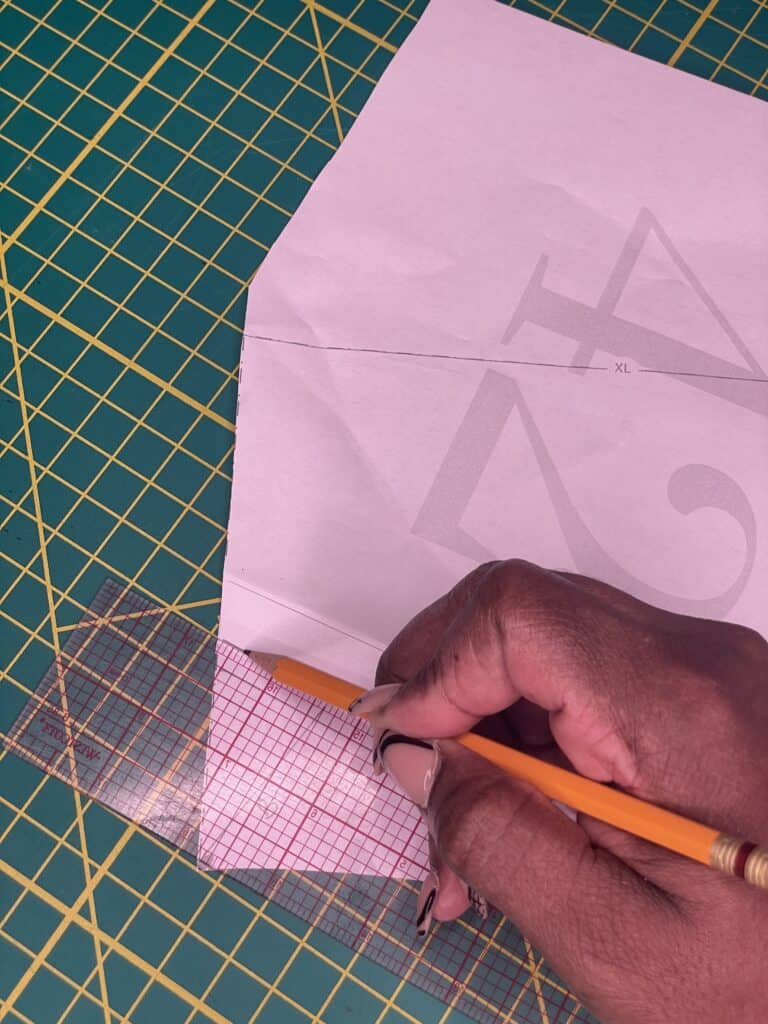
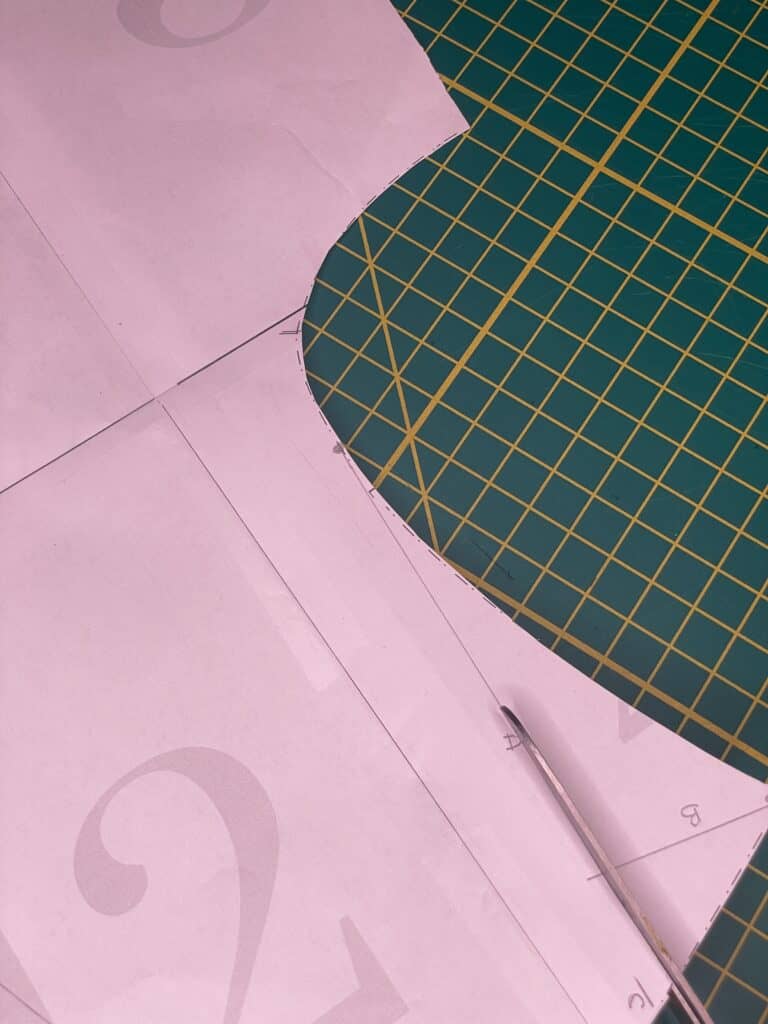
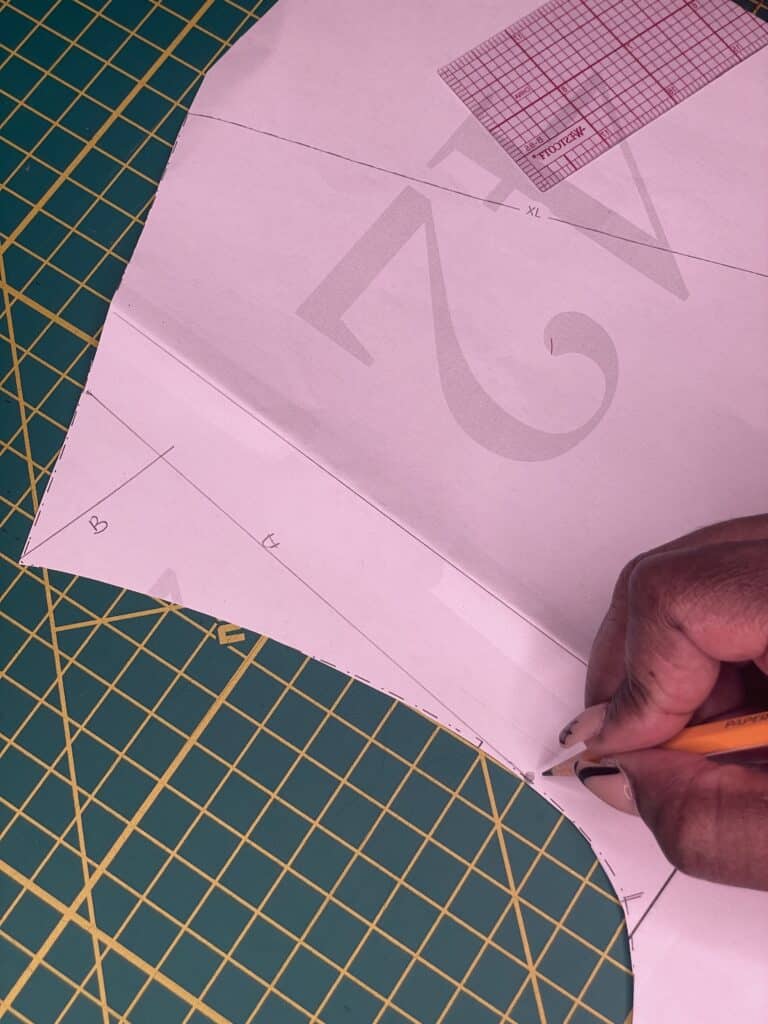
- Place a mark along the shoulder line about 2” in from the shoulder point. Connect that mark down to just above the curve at the armscye. We’ll label this line, line A.
- Place a second mark along line A about 1.5” down from the shoulder point. Connect this second mark to the tip of the shoulder. We’ll mark this line line B.
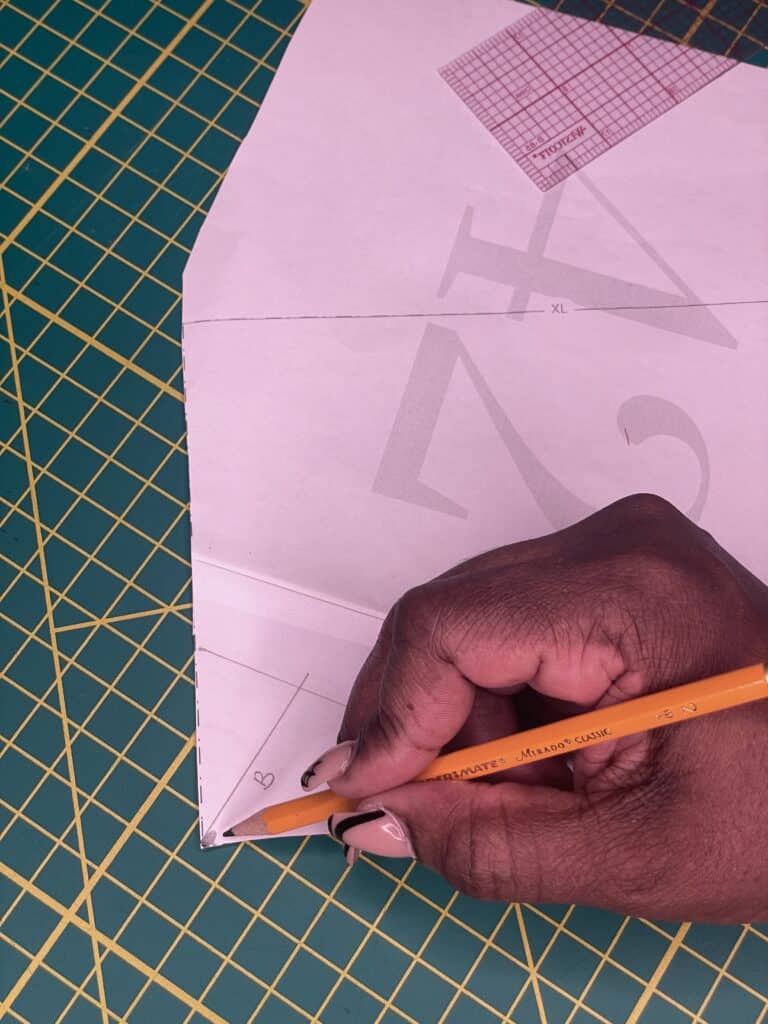
- From point A, make a third mark (towards the neckline), the amount of your intended adjustment. In my case, ¼”. We’ll label this mark C.
3. Cut and Adjust
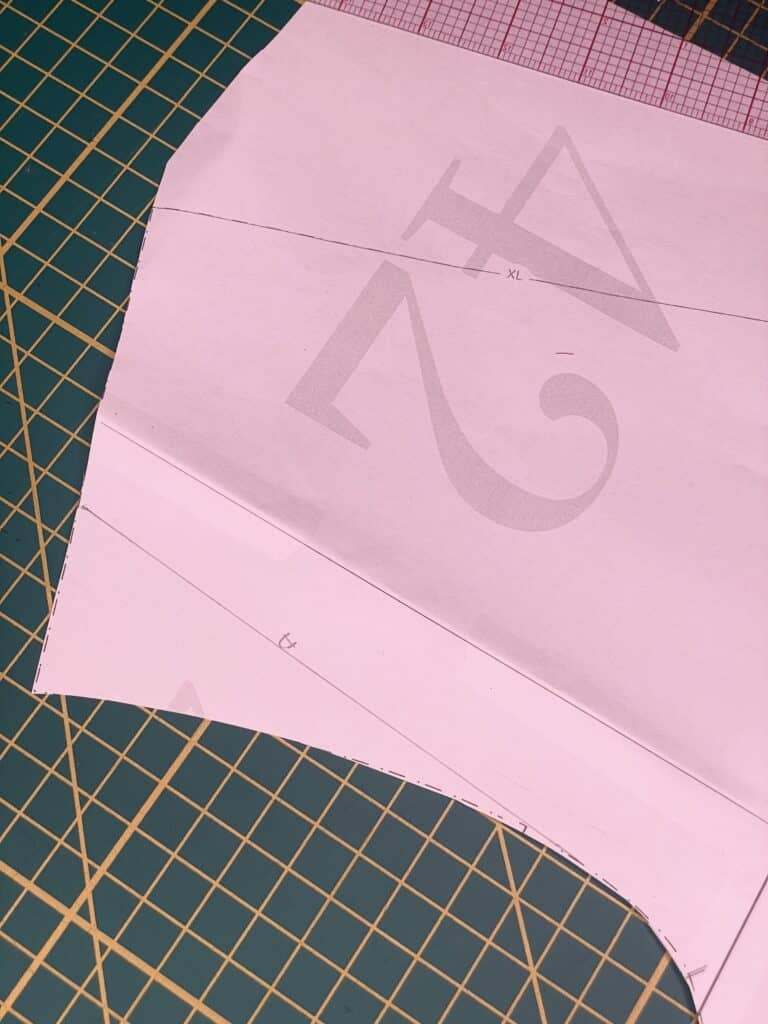
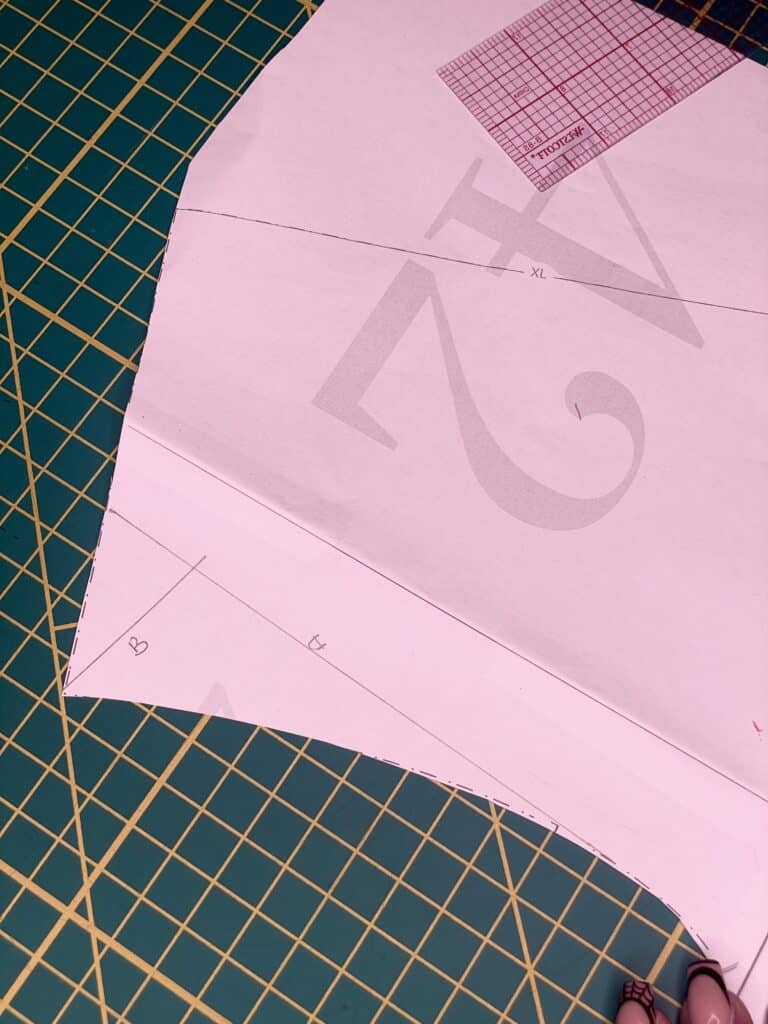
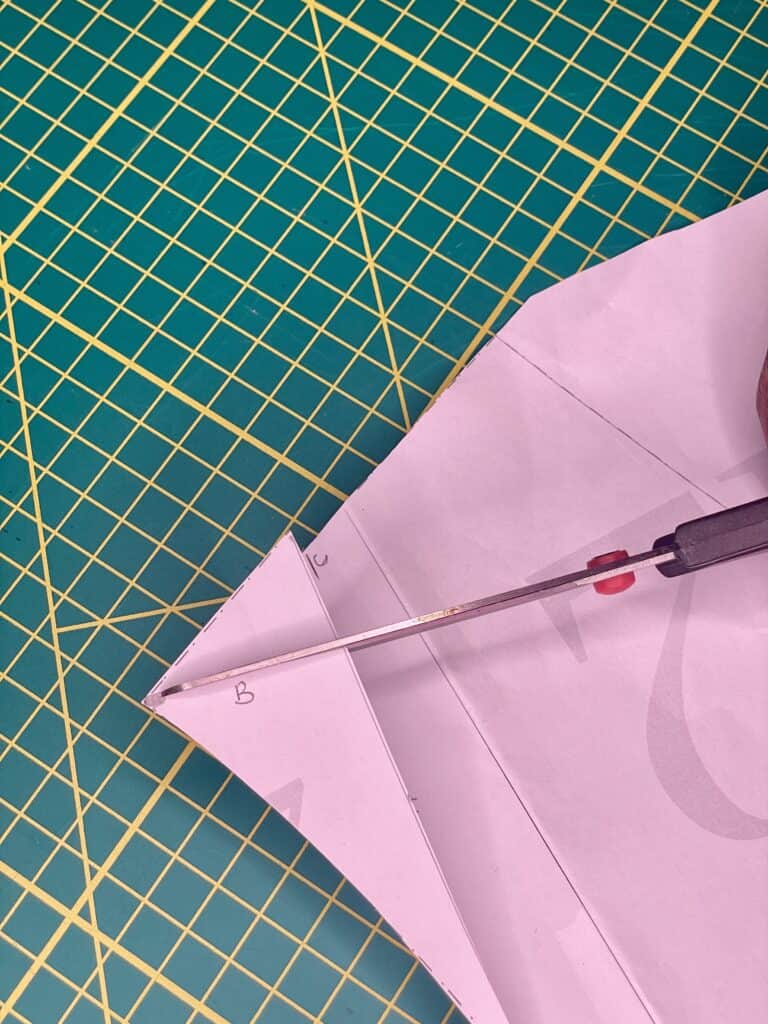
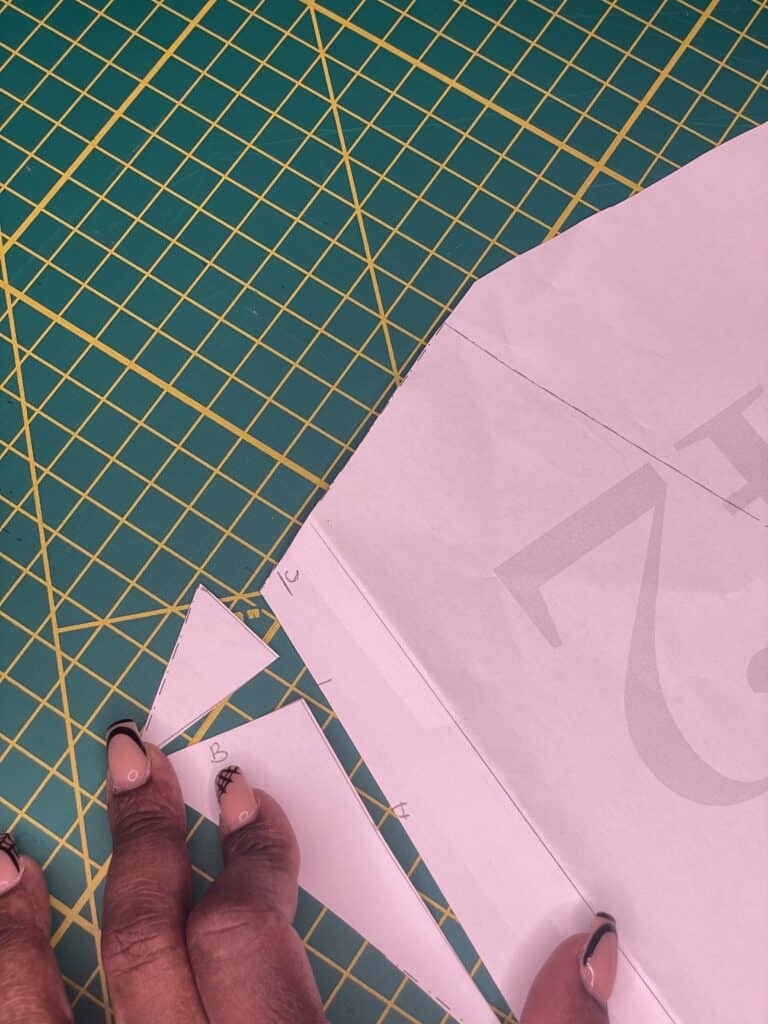
- Once we have all our markings in place, grab a pair of scissors. First, cut along line A to the armscye, leaving a hinge point at the armscye. Be sure NOT to cut through the armscye.
- Next, cut along line B from mark B up towards the shoulder point. Leave a small hinge at the shoulder point. Again, take care not to sever the shoulder point.
4. Tape and Finish
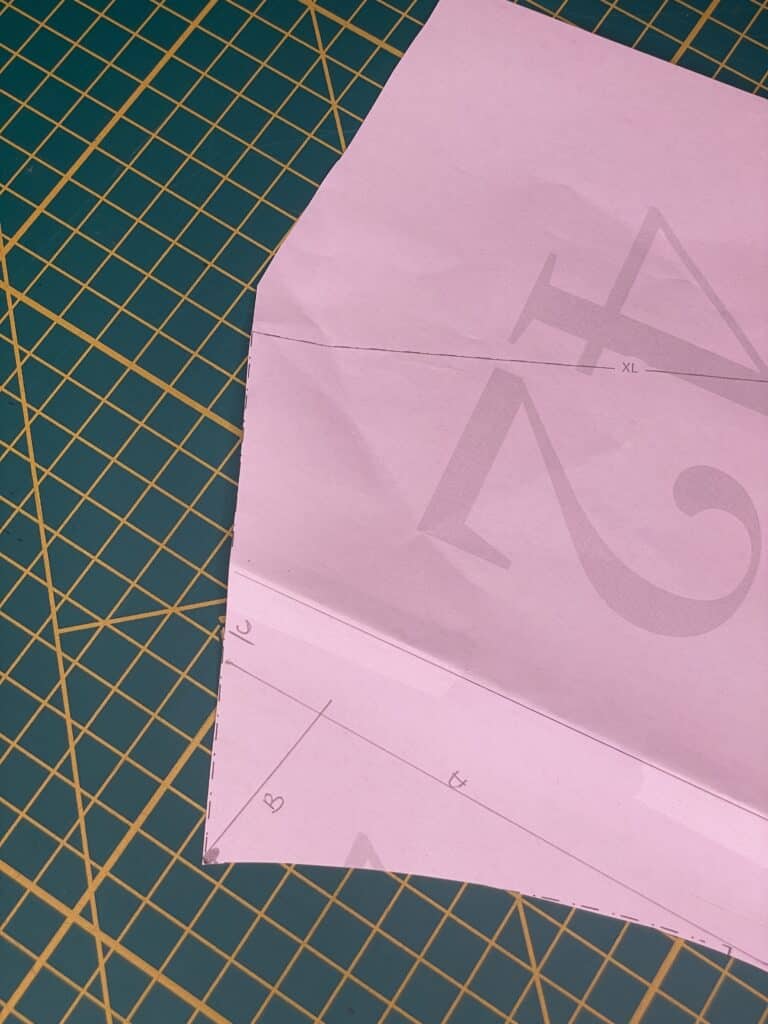
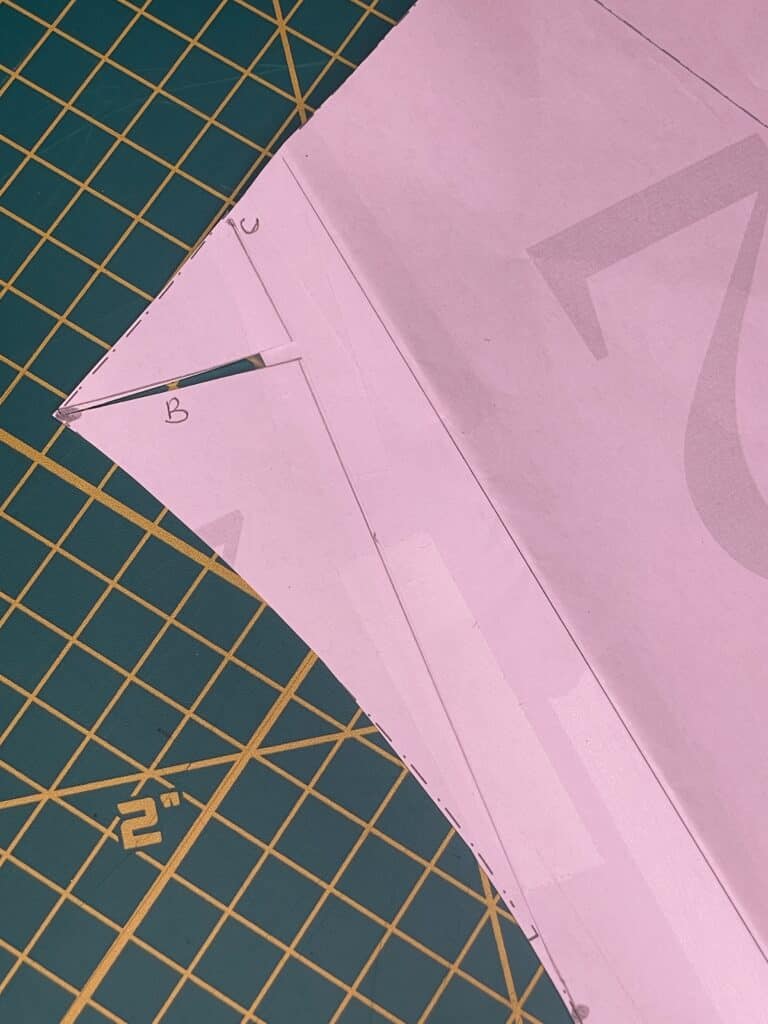
- Move line A over to point C and secure with tape. [Picture L]
- To finish the adjustment, move the triangle created by cutting mark B so the end of the triangle lines up with point C. [Picture M]
- By doing this, we keep the same shoulder angle as the pattern intends. Tape the triangle into place and voila, you have successfully completed your narrow shoulder adjustment! Not bad, huh?!
- [Picture N] Make sure to repeat the process on the back bodice.

By doing this, we keep the same shoulder angle as the pattern intends. Tape the triangle into place and voila, you have successfully completed your narrow shoulder adjustment!

My Iteration of Compose Robe – A Light Weight Robe or Jacket
The Compose Robe is designed for both knit and woven fabrics. It comes with two length variations: knee and calf, and an optional hood. For this version, I opted for the knee length robe with the patch pockets and finished with the band. I also hacked the pattern to have side slits. I just couldn’t help myself. I’m a hacker at heart, and this one was so simple to do. Instead of closing up the side seam all the way to the hem, I placed a mark 9” up from the hem and stopped sewing my seam there. I then hemmed the rest of the side seam by turning in the seam allowance and stitching it. This was my only aesthetic change, though for my photos, I pushed my sleeves upward!

The Compose Robe is designed for both knit and woven fabrics. It comes with two length variations: knee and calf, and an optional hood. For this version, I opted for the knee length robe with the patch pockets and finished with the band. I also hacked the pattern to have side slits. I just couldn’t help myself. I’m a hacker at heart, and this one was so simple to do. Instead of closing up the side seam all the way to the hem, I placed a mark 9” up from the hem and stopped sewing my seam there. I then hemmed the rest of the side seam by turning in the seam allowance and stitching it. This was my only aesthetic change, though for my photos, I pushed my sleeves upward!

That’s it from me for today and I’ll see you again sometime soon! In the meantime be sure to follow me on Instagram, and subscribe to my blog for more fitting tips ’n’ tricks and tons more hacking!
Sending you good vibes (and some sunshine if you need it),
Kristen
*Links in this blog post to Love Notions patterns are affiliate links and earn me a small commission at no extra cost to you. Thank you for your purchase! *
Save this article to your sewing Pinterest board.