I am excited to share with you a technique that I think you will find very useful. A very special thank you to my friends at Raspberry Creek Fabrics who sponsored my blog and provided all these wonderful fabrics. I would love for you to follow me on Instagram to see these and more makes with Love Notions patterns.
~Nicole of @sewhardofhearing
A common sewing question
In the Love Notions Facebook group, there is often discussion about whether or not you can interchange pattern pieces. While that’s usually not possible, you can interchange them with a few small adjustments that every one of us is capable of making.
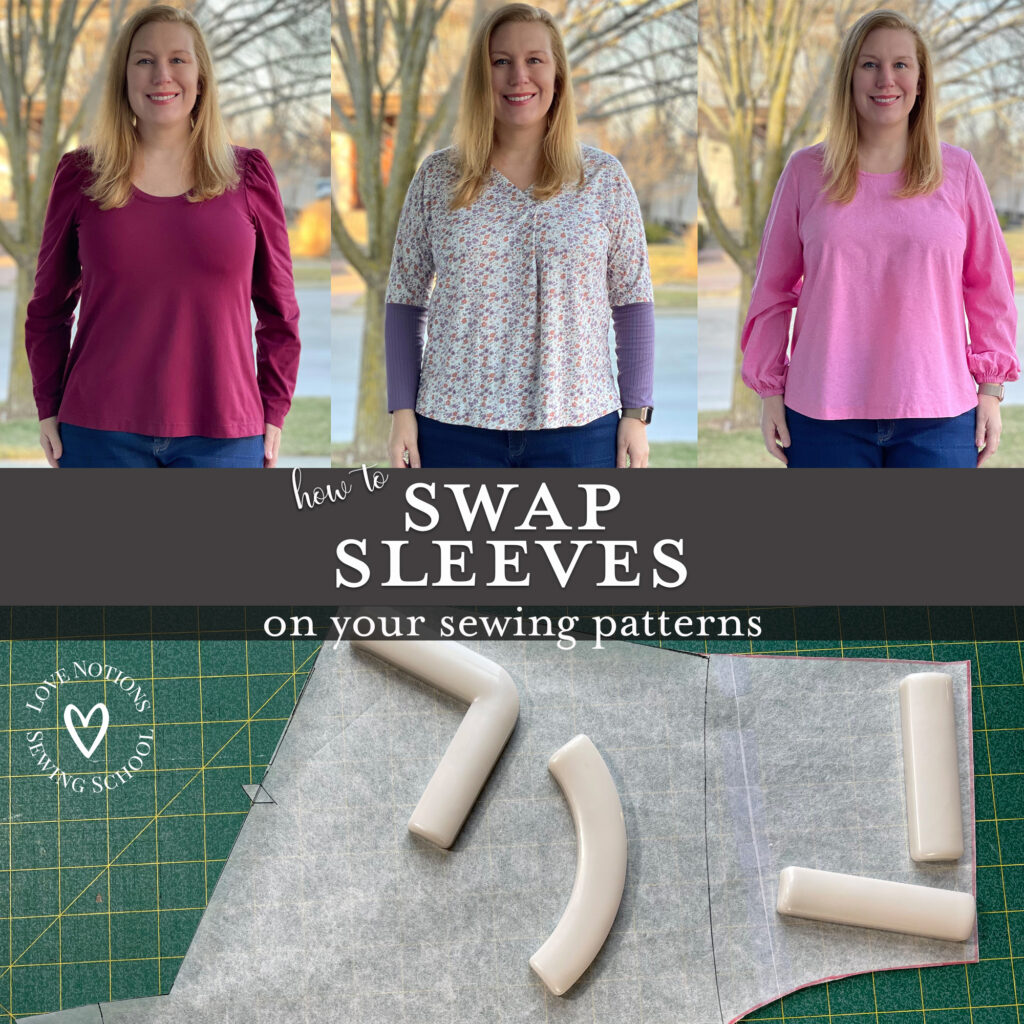
Classic Tee Bodice with Arlington Puff Sleeves Harmony Bodice with Lyric Bishop Sleeves Vivace Dolman with La Bella Donna Sleeves
You can also swap necklines and other pattern elements, but today I am going to provide instructions on swapping sleeves. But first, why would you even want to swap sleeves, when there are so many pattern options out there?
Here are some reasons for swapping:
- You may want to use patterns from a particular company that you know are well drafted.
- You already have the pattern pieces printed out.
- It provides you more options with the patterns you own.
- It’s fun, easy, and addictive!
Research, Experiment, and Test what works for you
I love to learn and have worked in adult learning for most of my career. So, I do invest time in researching a new technique. I have found the most success when I just go for it. If things get complicated, you can always post questions in the Love Notions group. If you are already using another method that works for you to swap sleeves, then by all means keep doing that. As with most things in life, there are lots of correct ways to accomplish the same result. This is what consistently works for me. The beauty of the wealth of online resources available is that you can take a bit from everything you read and devise an approach that works best for you.
USE THE SAME FABRIC BASE
One note before we start: The sleeve swap will work best using the same types of fabric. So, knits to knits and wovens to wovens are most successful. It is also more straightforward if you have a similar type top like dolman to dolman or raglan to raglan. Though I have seen successful versions from different types. It just depends on the level of effort you want to expend.
So, knits to knits and wovens to wovens are most successful. It is also more straightforward if you have a similar type top like dolman to dolman or raglan to raglan.
I don’t own a projector, so I’m not going to get too deep into the process here. But you could also swap sleeves by projecting the image of one pattern and tracing the projection on your fabric. Then, you switch to the pattern pieces of the second pattern and draw that pattern on top before you cut.
Supplies you’ll need for a sleeve swap
- curve ruler (not necessary but helpful)
- front and back pattern pieces for both the main pattern you are using and the pattern with the armscye you are transferring with any needed fitted adjustments made
- sleeve piece from the pattern you wish to use
- tracing paper for a new pattern piece
I’m going to take you through the process with three different sets of patterns. The basic principles apply, so the first set has the bulk of the details that you can apply to all.
Sleeve Swap #1: Vivace Dolman with La Bella Donna Long Sleeve
For the first sleeve swap, I’ll be adding the La Bella Donna long sleeve to the Vivace Dolman. The Vivace Dolman doesn’t have a long sleeve option, so this enables you to wear this pattern year round depending on your climate. For this particular pattern, the Vivace Dolman has an option for a knit version and a woven version. There are different front/back pieces for the knit and woven versions. So, please ensure you have the knit version.
FRONT
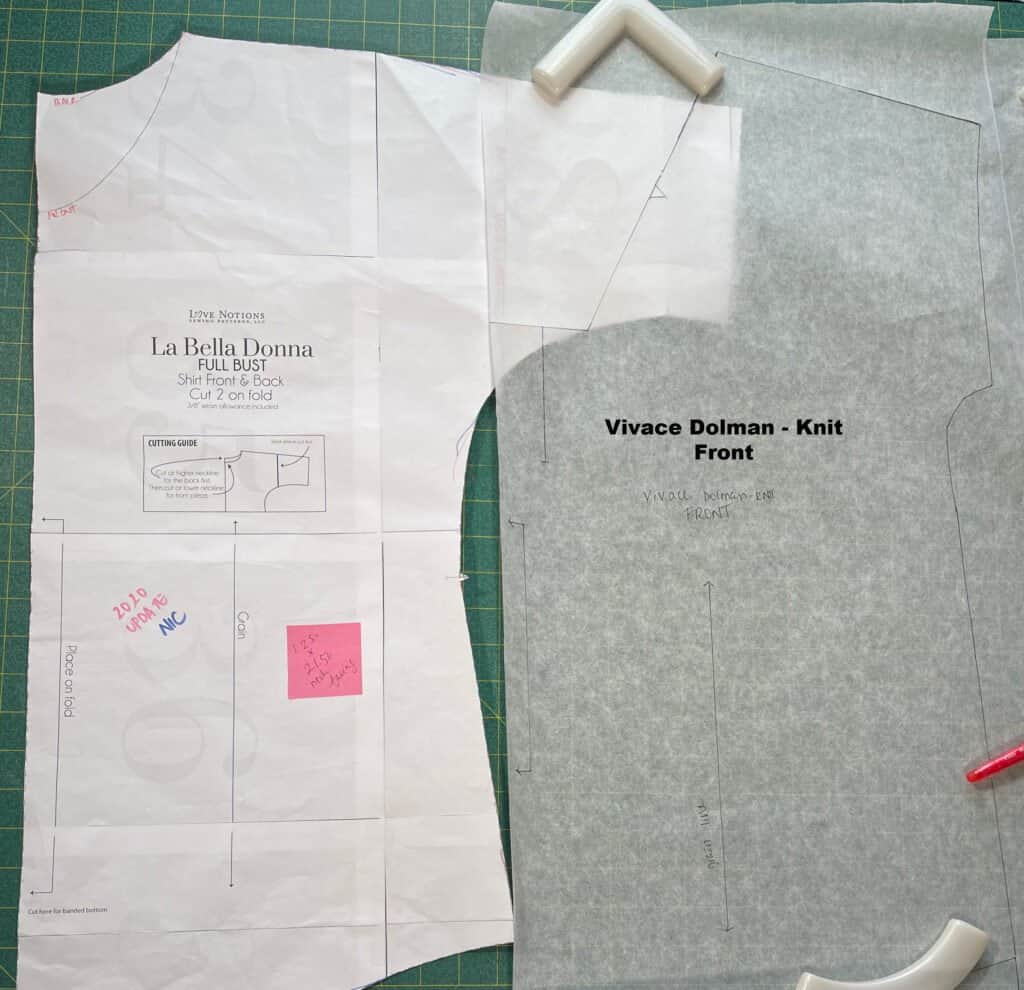
Step 1.) The easiest method I’ve found to mash patterns is to trace the pattern piece on transparent tracing paper. Then, you can overlay it on the armscye you are copying and see through it. If you prefer, you can print and piece together a new copy of the front/back of the pattern. Then it does double duty for both sleeves.
I wouldn’t cut the front/back out completely from the tracing paper or the piece you printed just yet. Based on the mash, you might need to trace outside the lines of the pattern that you are altering.
Trace original pattern piece to use for new pattern piece. You also need the pattern piece with the armscye you want to use.
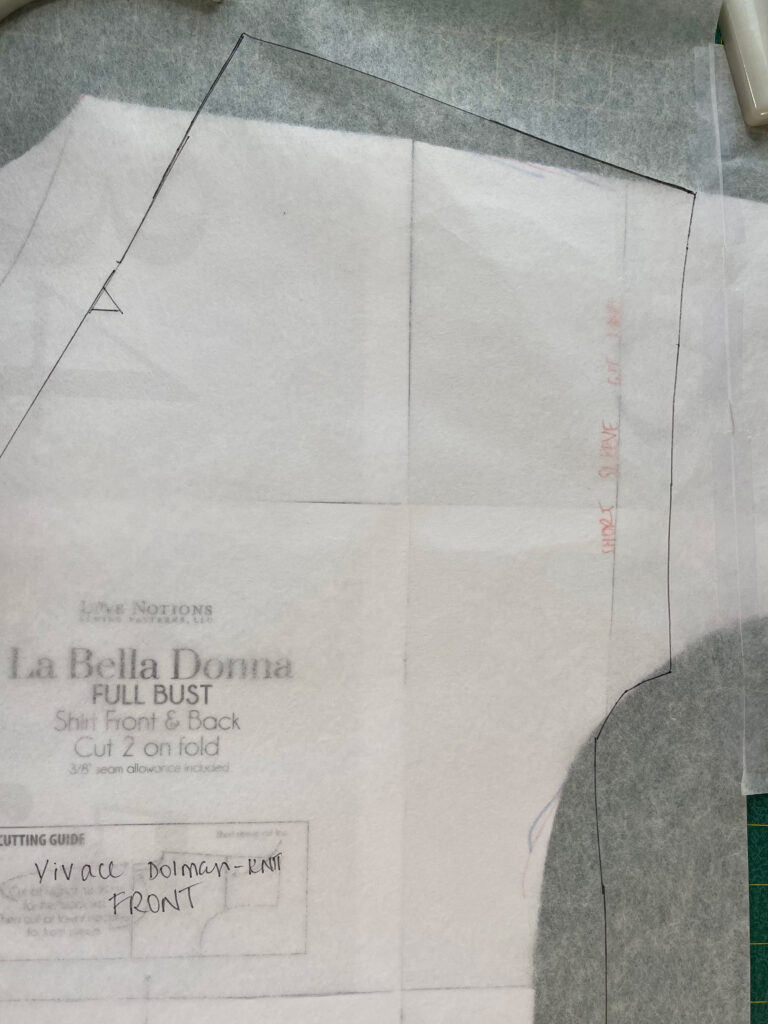
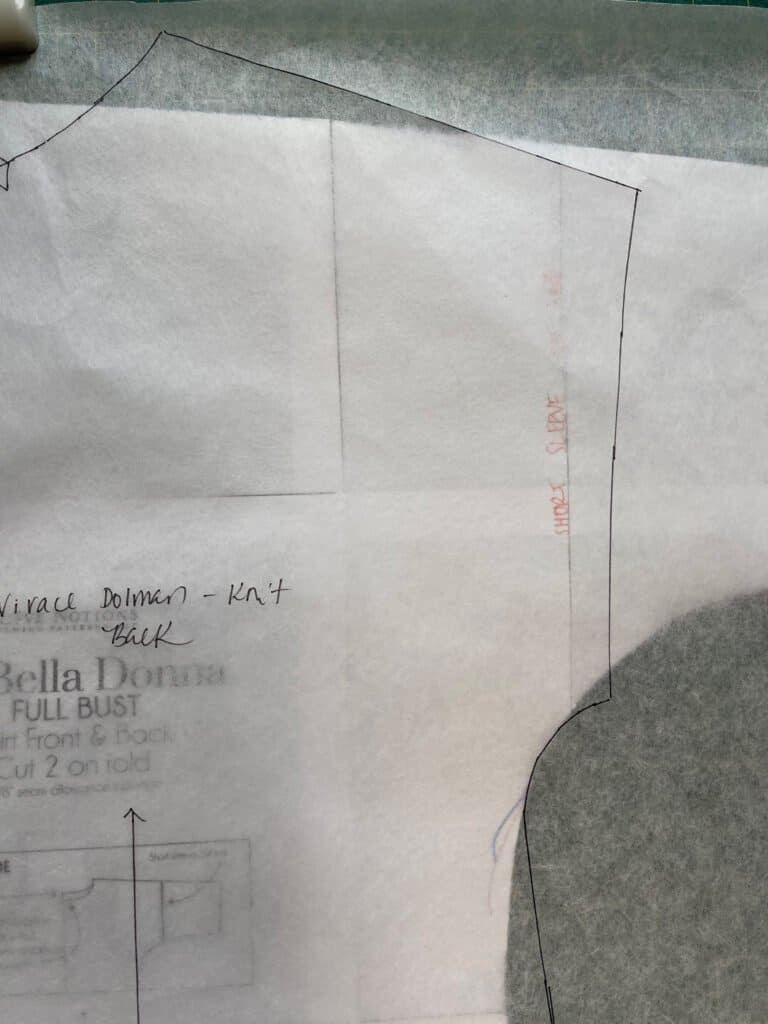
Step 2.) Line up the two pieces at the outer shoulder corner of the armscye and bottom of the armscye up to the edge of the lower pattern. You also may find another point to line up like the waist point. The neckline is not a good place for a match. You want to identify how to match them up best. All points may not match. Just ensure you are matching the pieces in a way that minimizes the adjustment that you need to make to the shape of the pattern. Also, ensure the grainlines for both patterns are even and going the same direction.
Match up the two pattern pieces and trace the new armscye on your pattern piece.
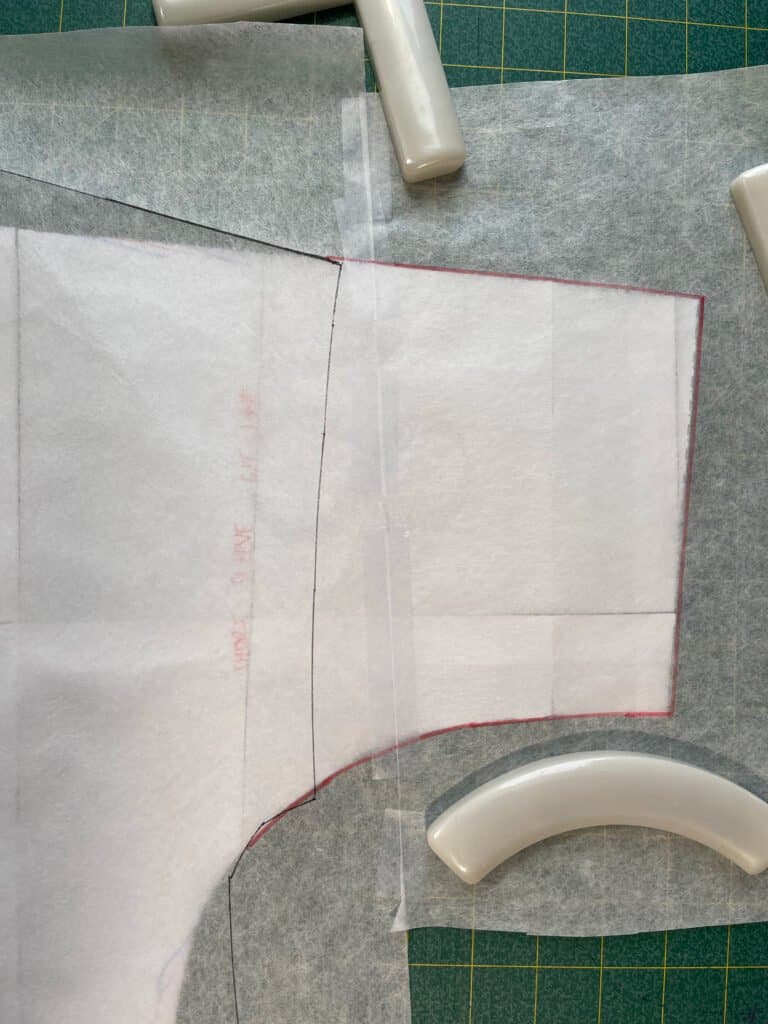
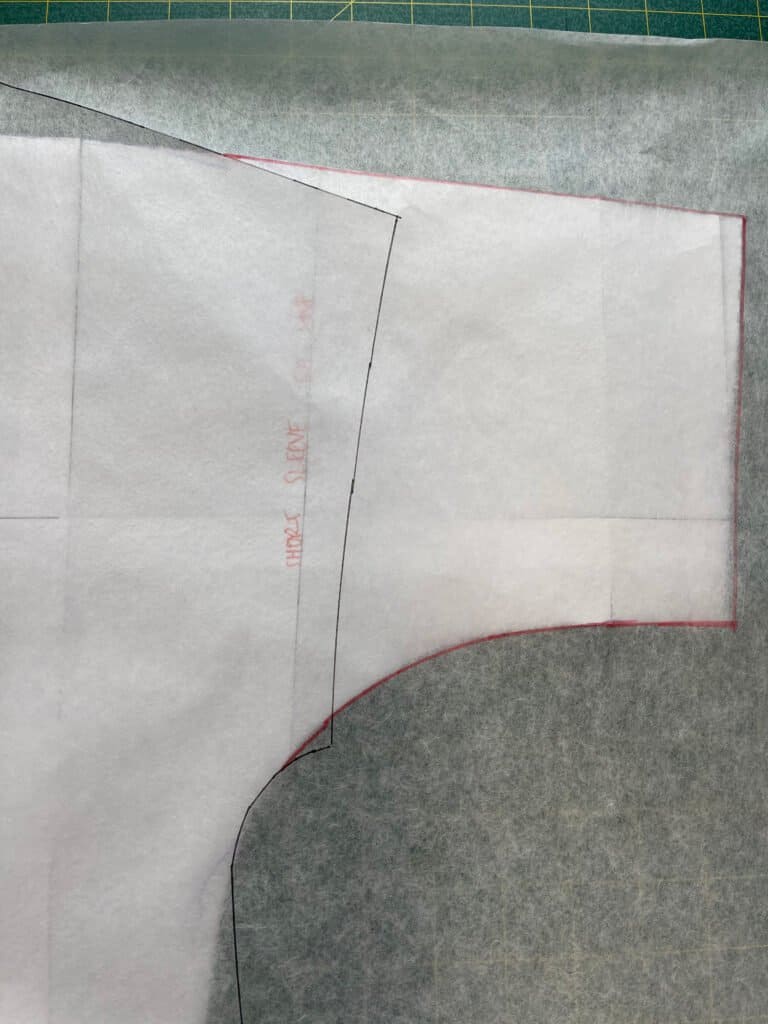
Step 3.) After matching the pieces together, trace the armscye from the pattern that has the sleeve you’d like to use to your new pattern piece you are creating.
Trace the new armscye on your pattern piece.
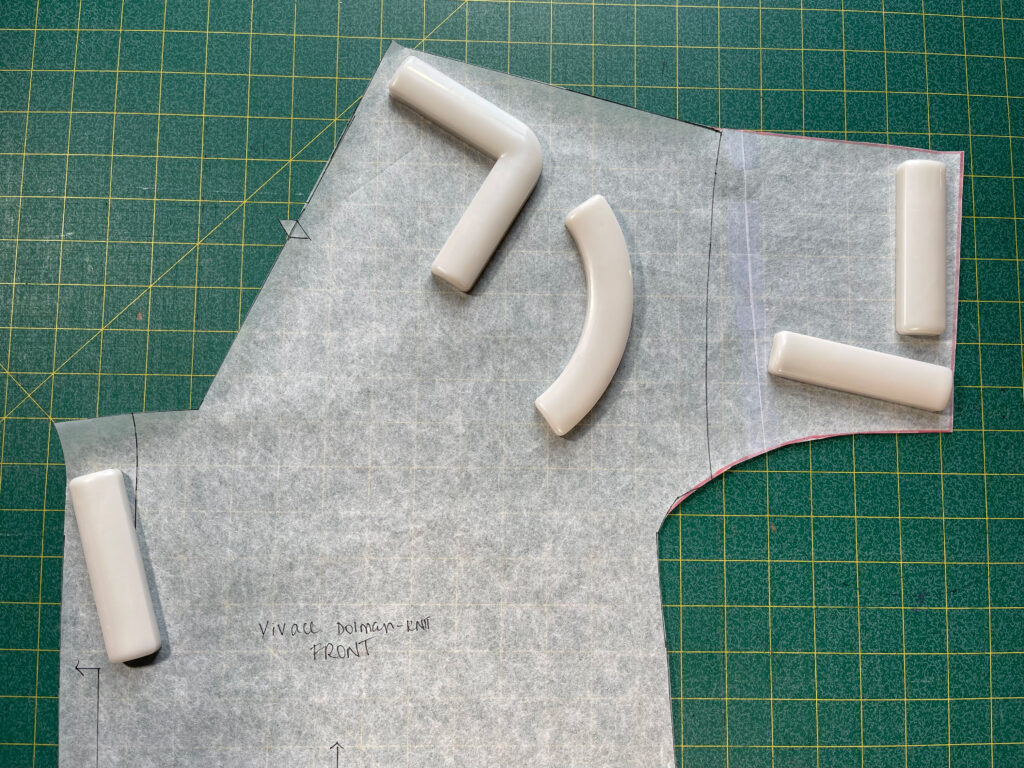
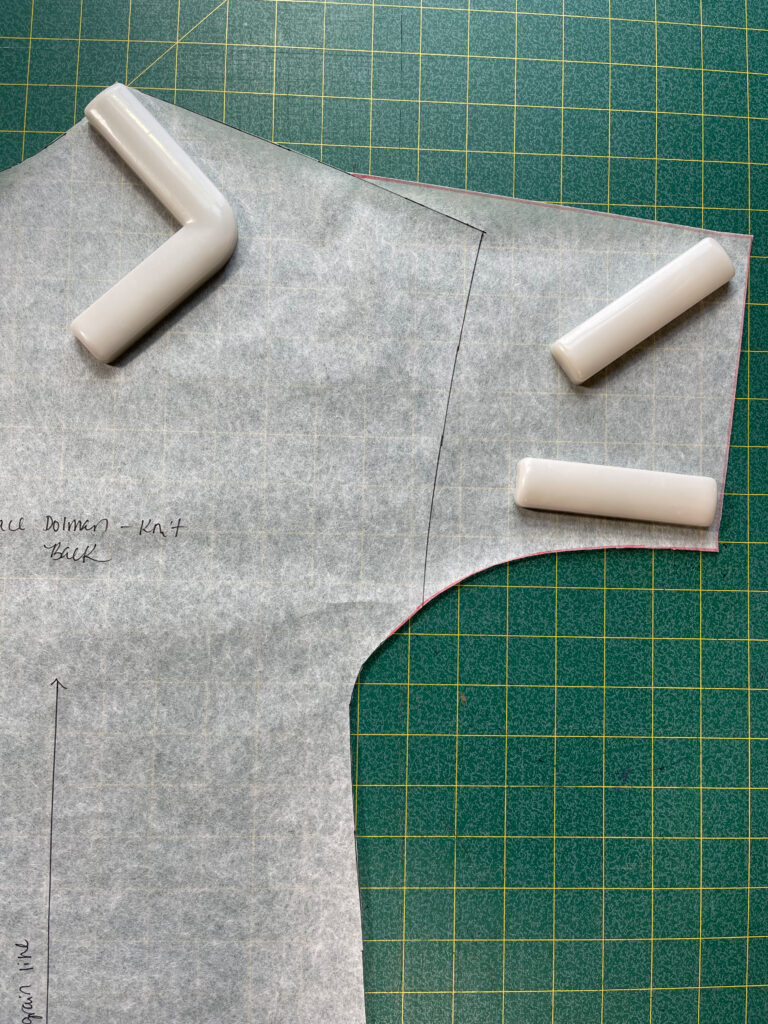
Step 4.) Cut out the new pattern piece based on the original Vivace pattern piece and the La Bella Donna armscye you traced.
Cut out your new pattern piece.
BACK
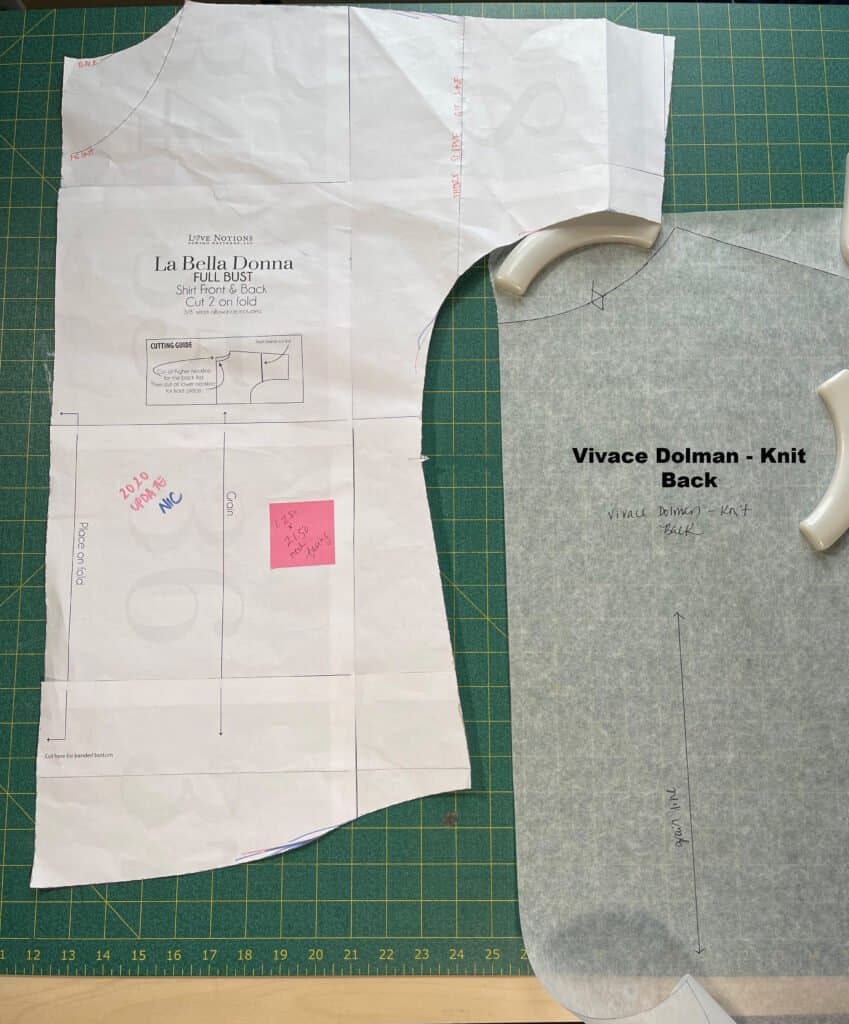
You need to make changes to both the front and back pieces. The front/back piece is the same for the La Bella Donna pattern. So, you’ll use that same piece to trace the sleeve to the front and back of the Vivace Dolman.
Trace original pattern piece to use for new pattern piece. You also need the pattern piece with the armscye you want to use. Match up the two pattern pieces and trace the new armscye on your pattern piece. Trace the new armscye on your pattern piece. Cut out your new pattern piece.
Sew the patterns but follow the directions from each appropriate pattern. For instance, I’ll follow the Vivace pattern for most portions. But for sewing the cuff, I’ll switch to my La Bella Donna pattern instructions.
My Vivace Dolman with La Bella Donna sleeves. Sewn with Ditzy Floral Print Rib Knit and Solid Dusty Purple Rib Knit.
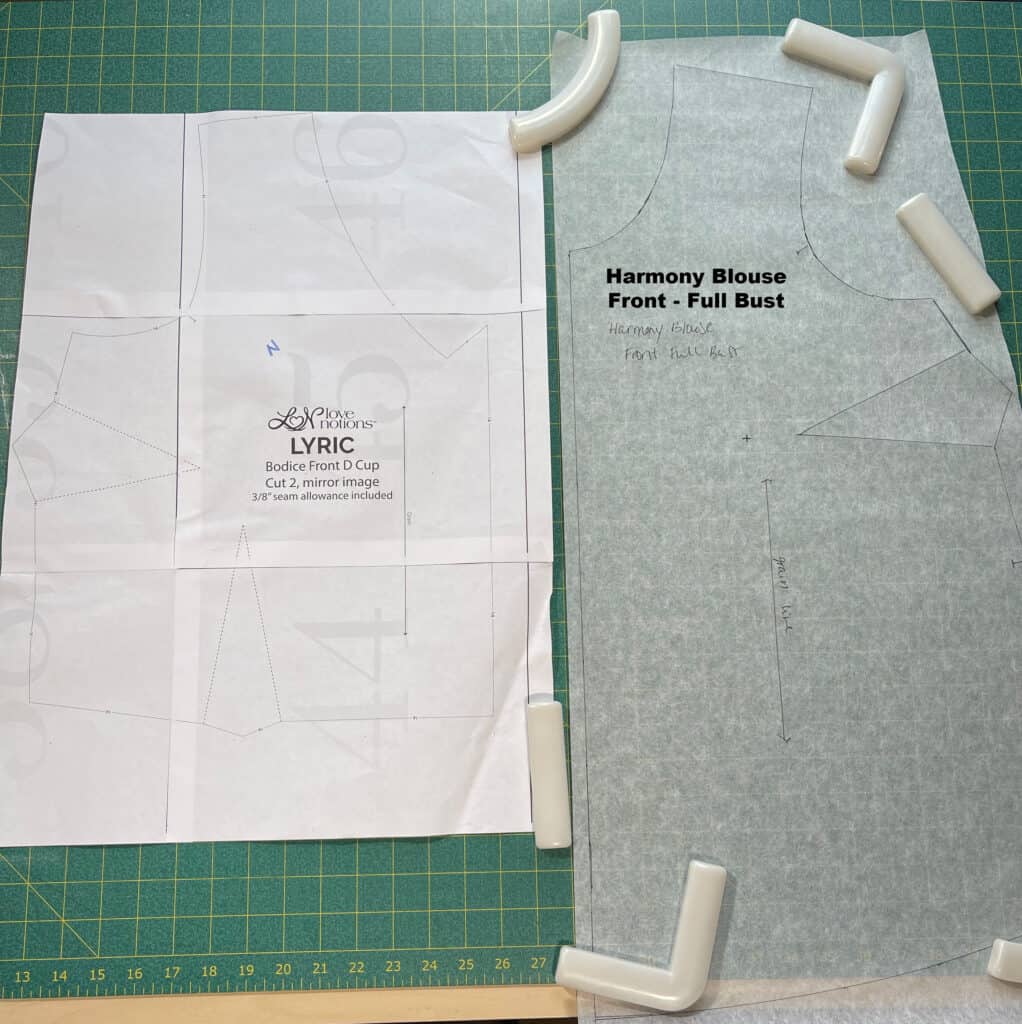
Sleeve Swap #2: Harmony Blouse with the Lyric Bishop Sleeve
Now you may be wondering if you could do this with woven patterns. You sure can! I’m going to show you how to add a sleeve from the Lyric pattern to the Harmony Blouse pattern. Harmony only comes with a short sleeve, so this will provide you a long sleeve option.
FRONT
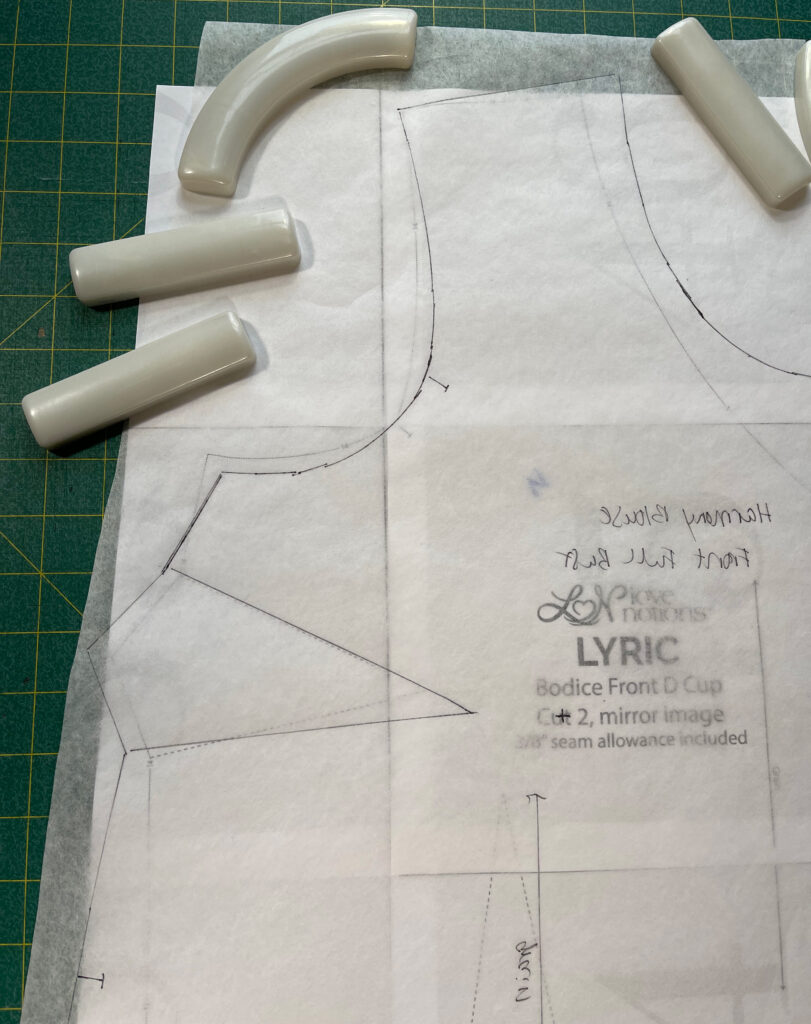
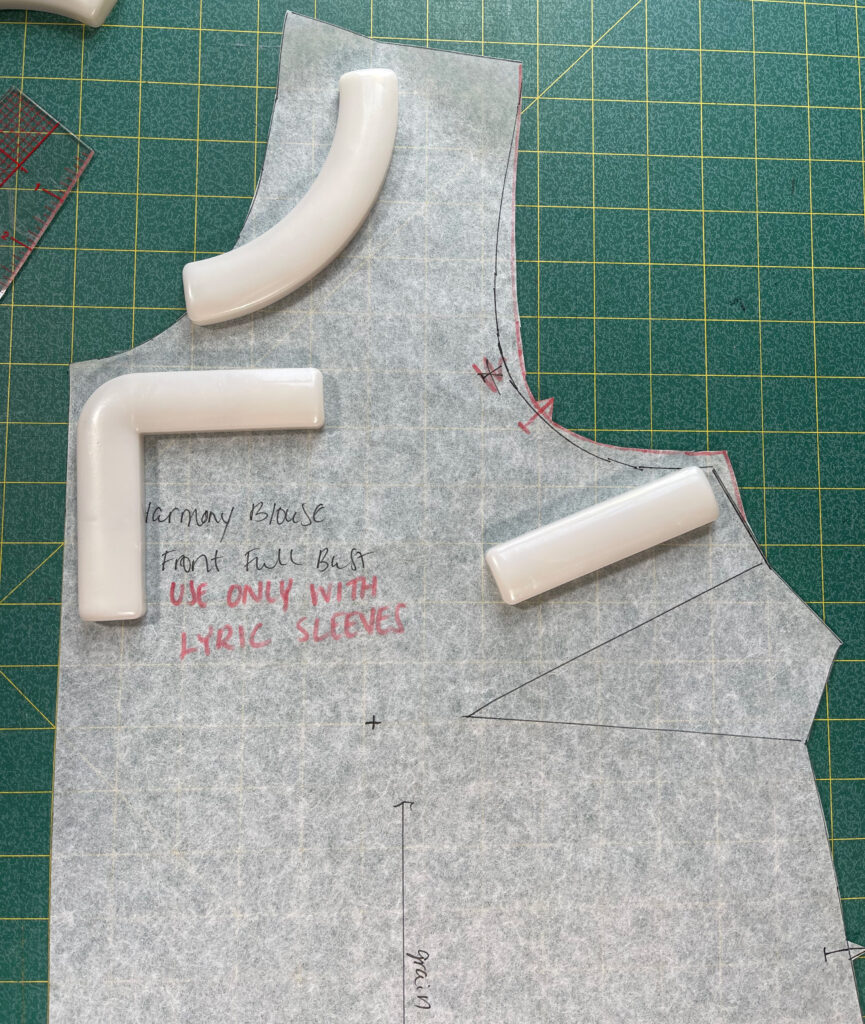
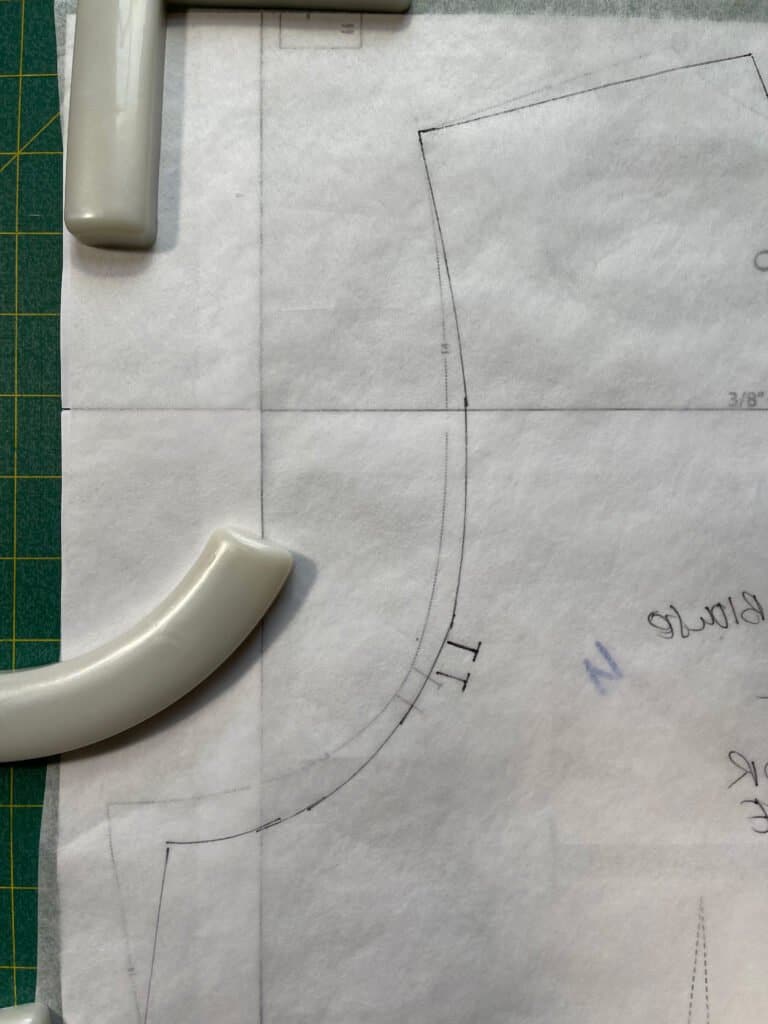
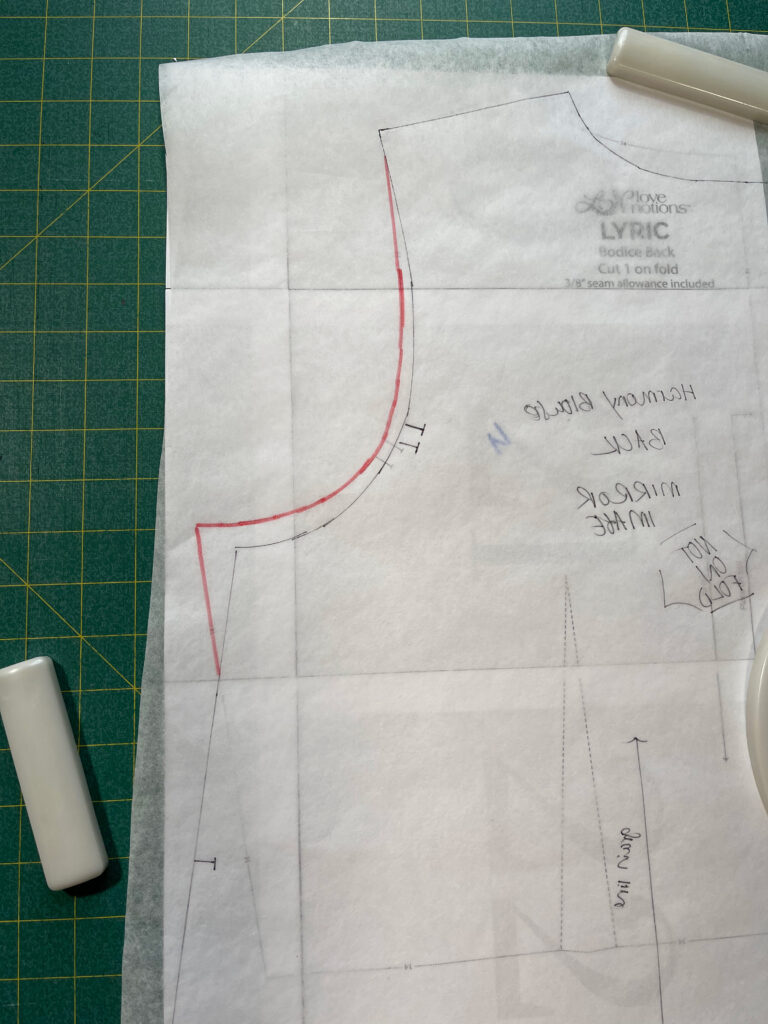
Trace original pattern piece to use for new pattern piece. You also need the pattern piece with the armscye you want to use. Match up the two pattern pieces and trace the new armscye on your pattern piece. Trace the new armscye on your pattern piece and cut out your new pattern piece.
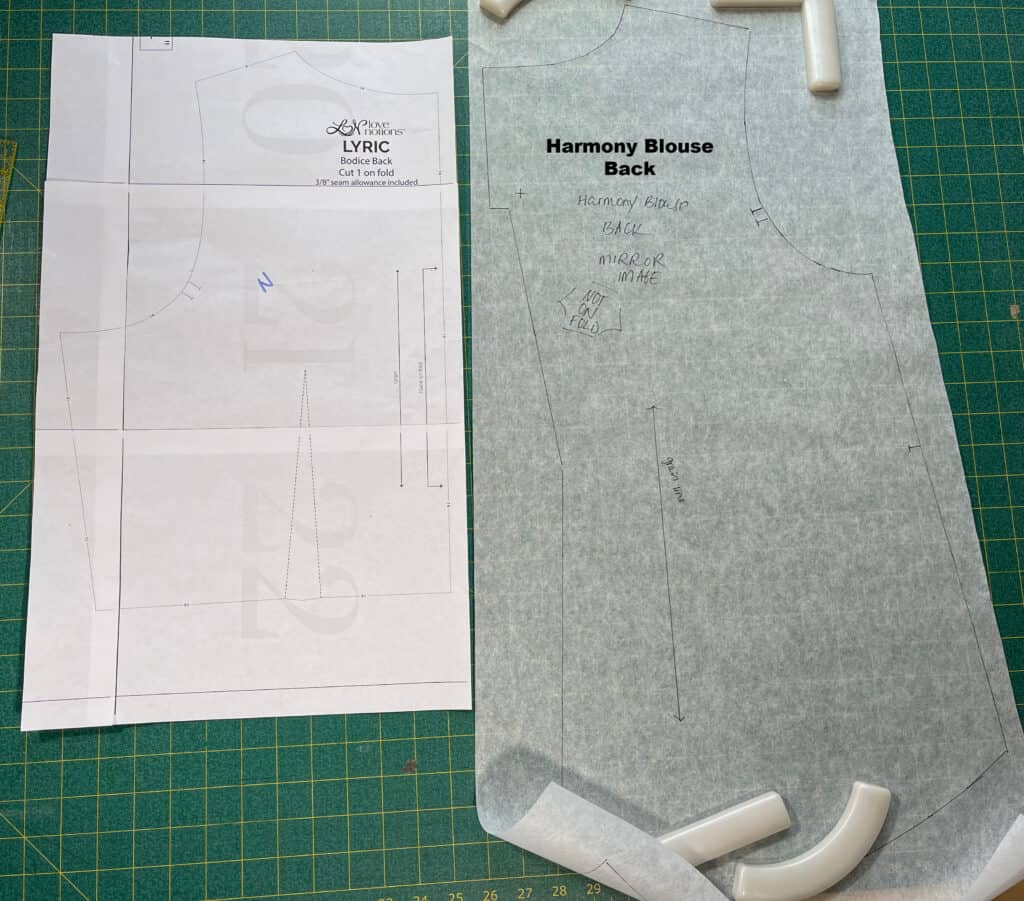
BACK
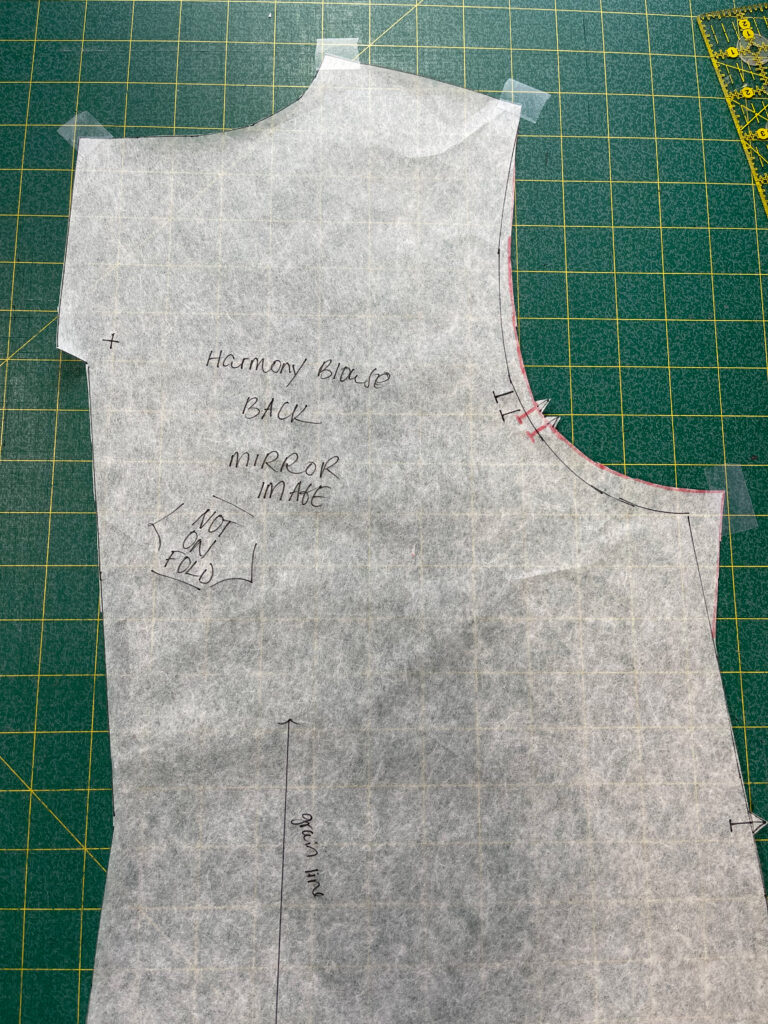
Trace original pattern piece to use for new pattern piece. You also need the pattern piece with the armscye you want to use. Match up the two pattern pieces. Trace the new armscye on your pattern piece. Cut out your new pattern piece.
Compare Shoulders
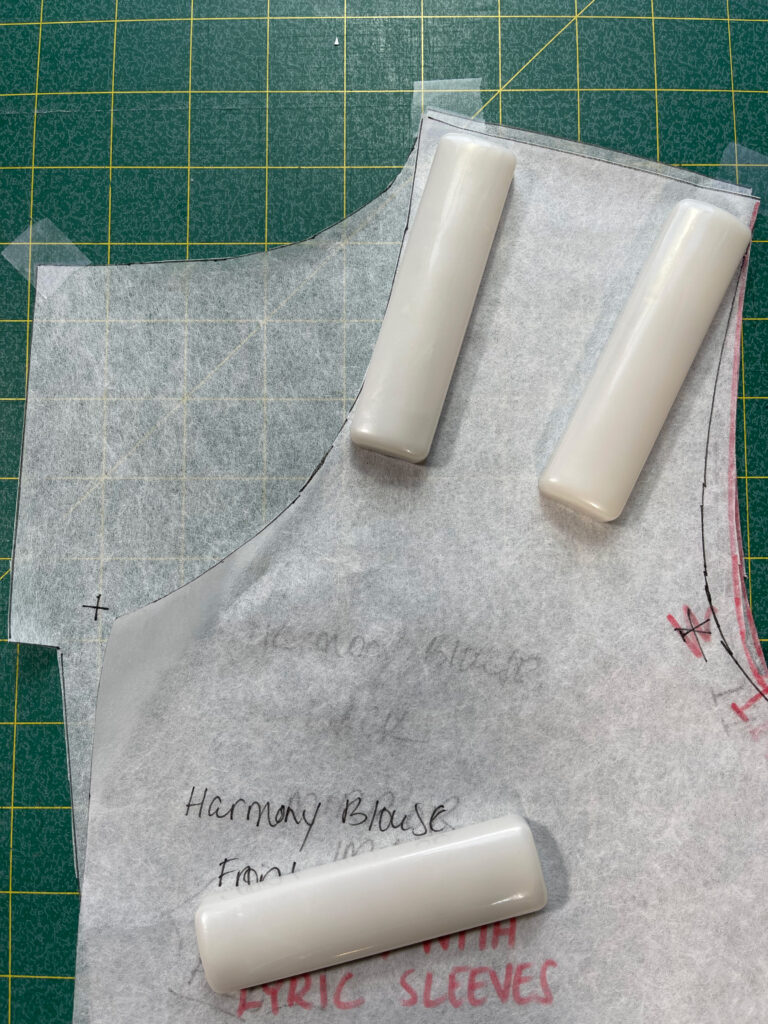
It wasn’t such an issue with the two Dolman patterns, because they were so similar. But you need to check all the parts that fit together to make sure that your change didn’t impact how the back/front join. The shoulder seams are the big concern here.
Compare pieces that fit together.
The shoulders match closely, so now you can get your other pieces and you are ready to sew.
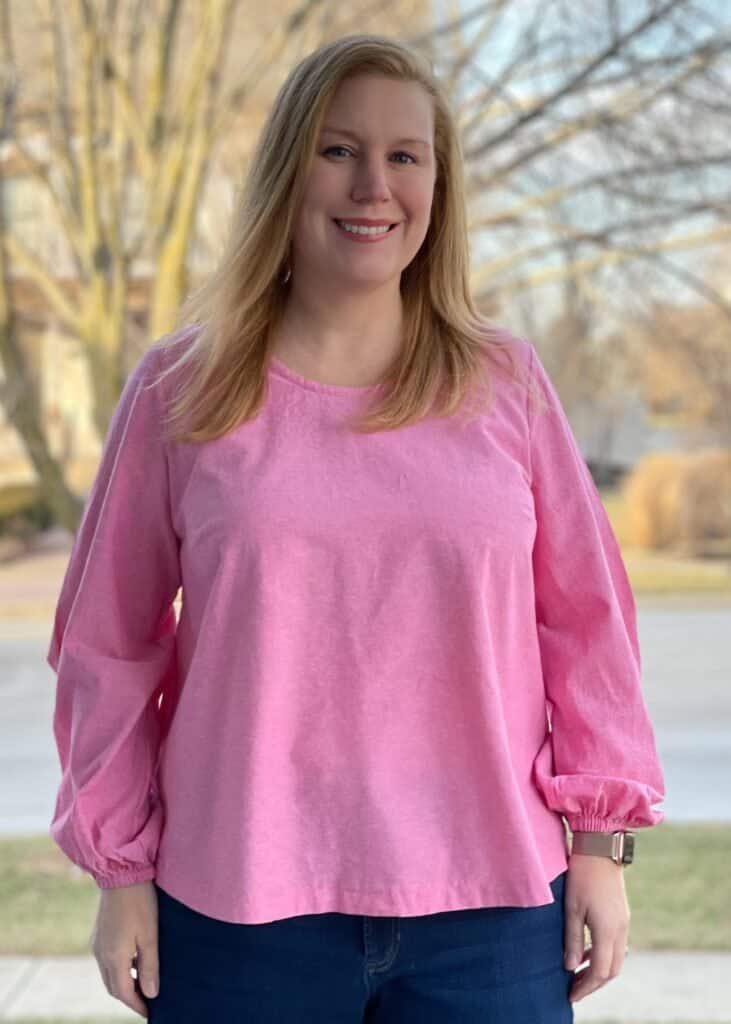
My Harmony Blouse with Lyric sleeves. Sewn with Salmon Pink Chambray.
Sleeve Swap #3: Classic Tee Scoop Neck with the Arlington Sweater Puff Sleeve
The first two sets of patterns were really very straightforward. I felt I’d be remiss, if I didn’t share with you a challenging set of patterns. The puff sleeves on the Arlington Sweater are a popular sleeve to swap. So, I am going to share with you my process in swapping those sleeves onto the Classic Tee.
FRONT
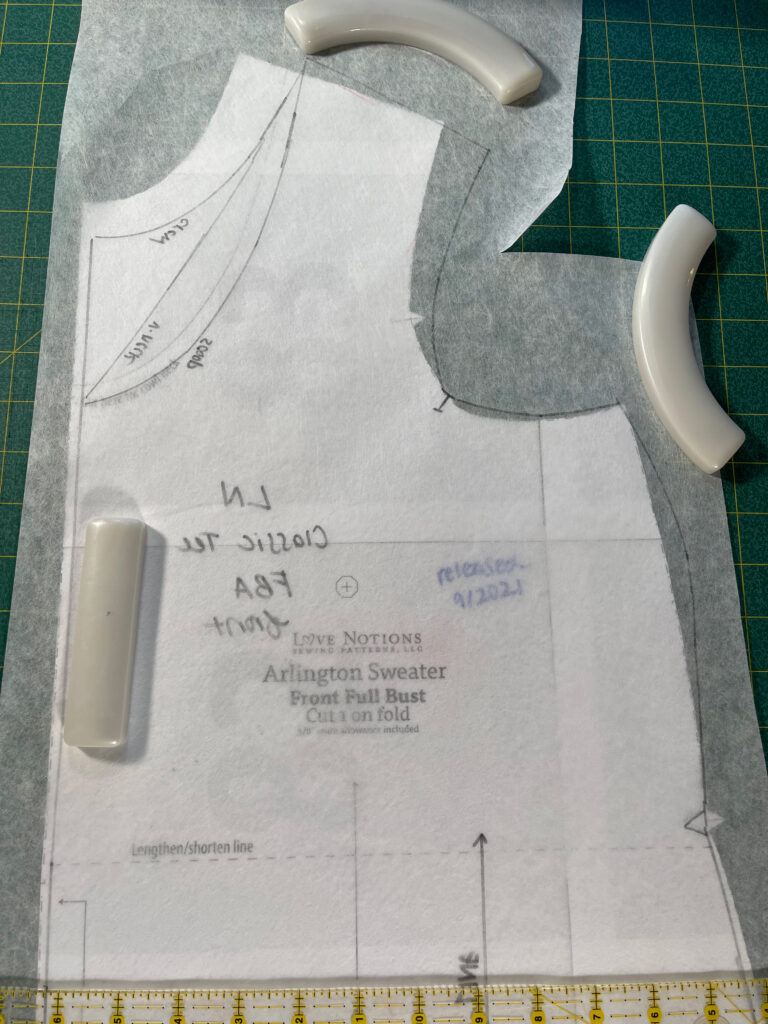
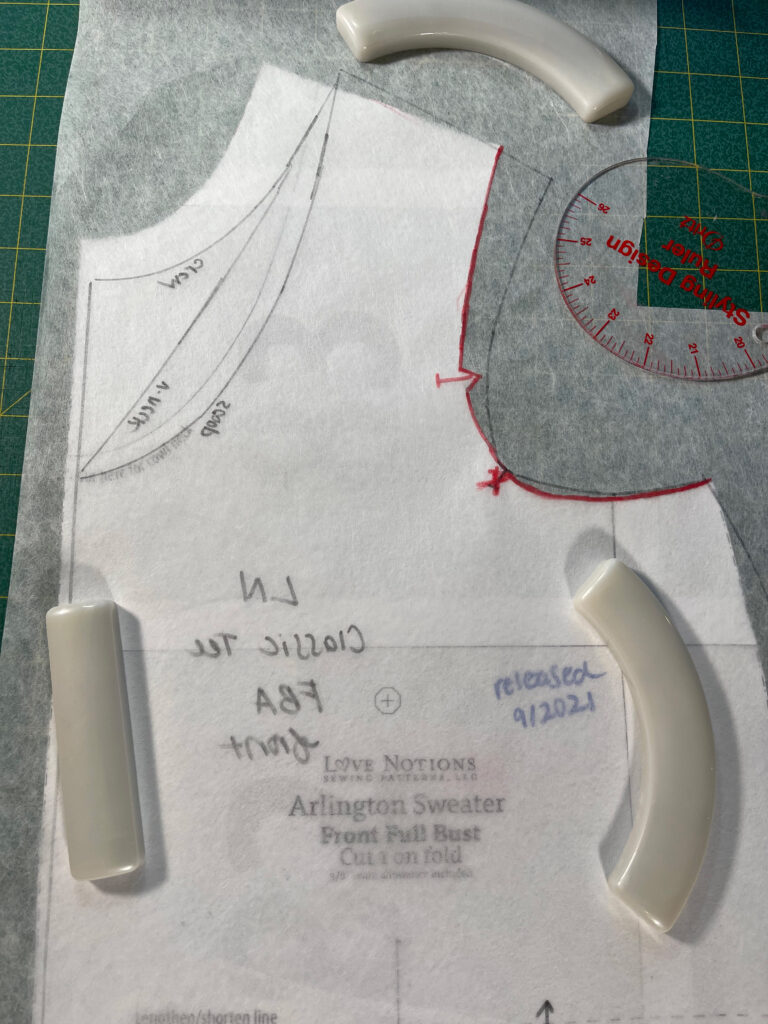
This match was tough. I’m just going to follow the principle of getting these to line up in the way that causes the least amount of my changes to the pattern pieces.
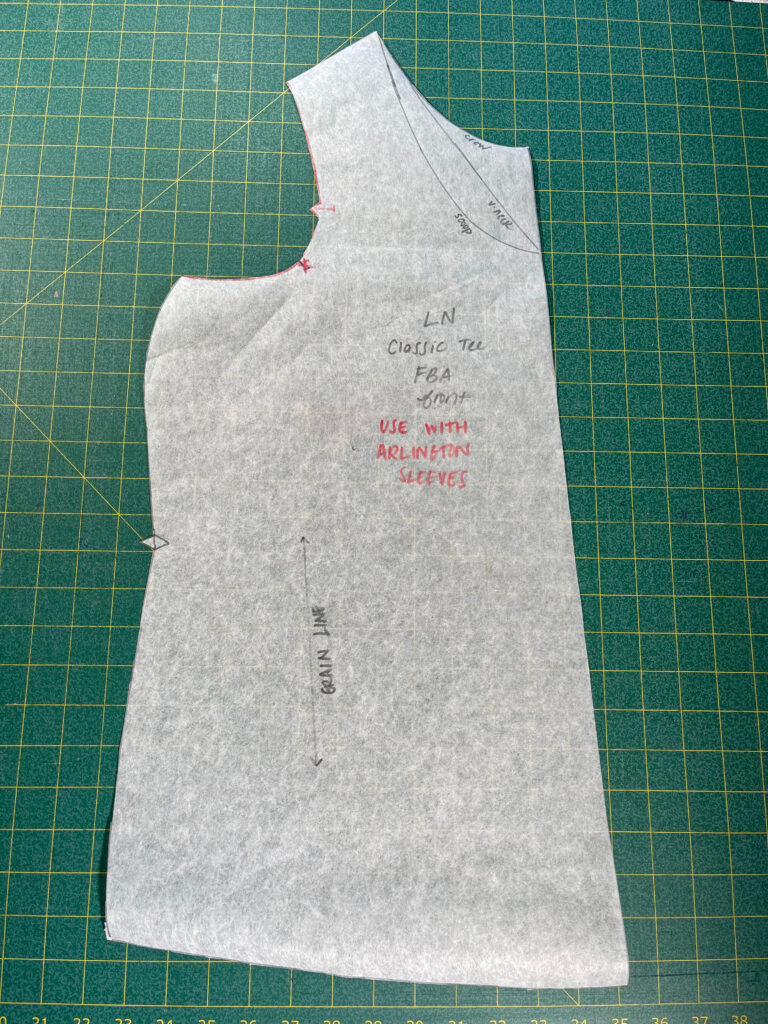
Match up the two pattern pieces and trace the new armscye on your pattern piece. Trace the new armscye on your pattern piece. Cut out your new pattern piece
BACK
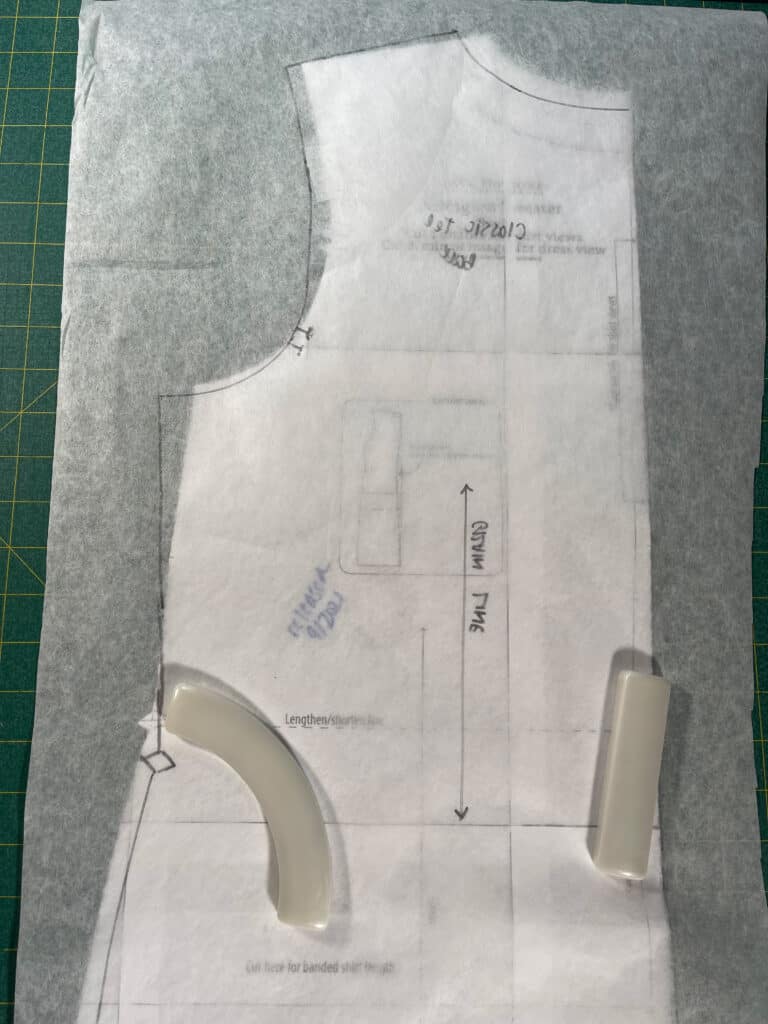
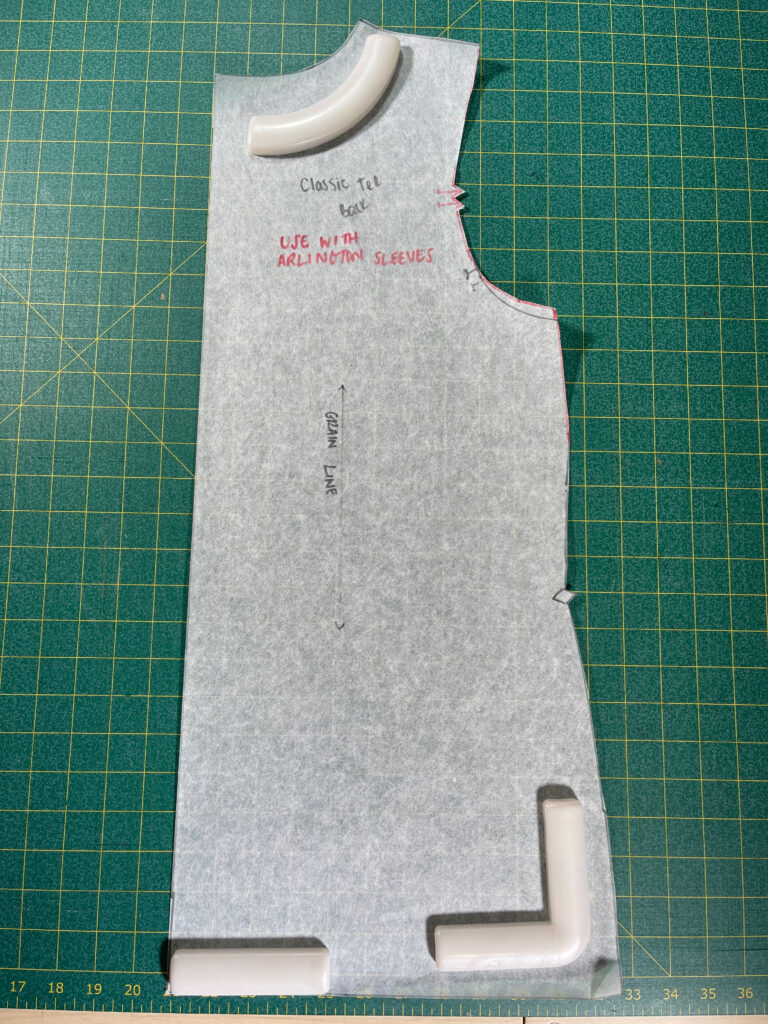
The back seems to match better than the front. But I had an overhang on the bottom of the armscye.
Match up the two pattern pieces and trace the new armscye on your pattern piece. Trace lower armscye to match as best you are able. Cut out your new pattern piece.
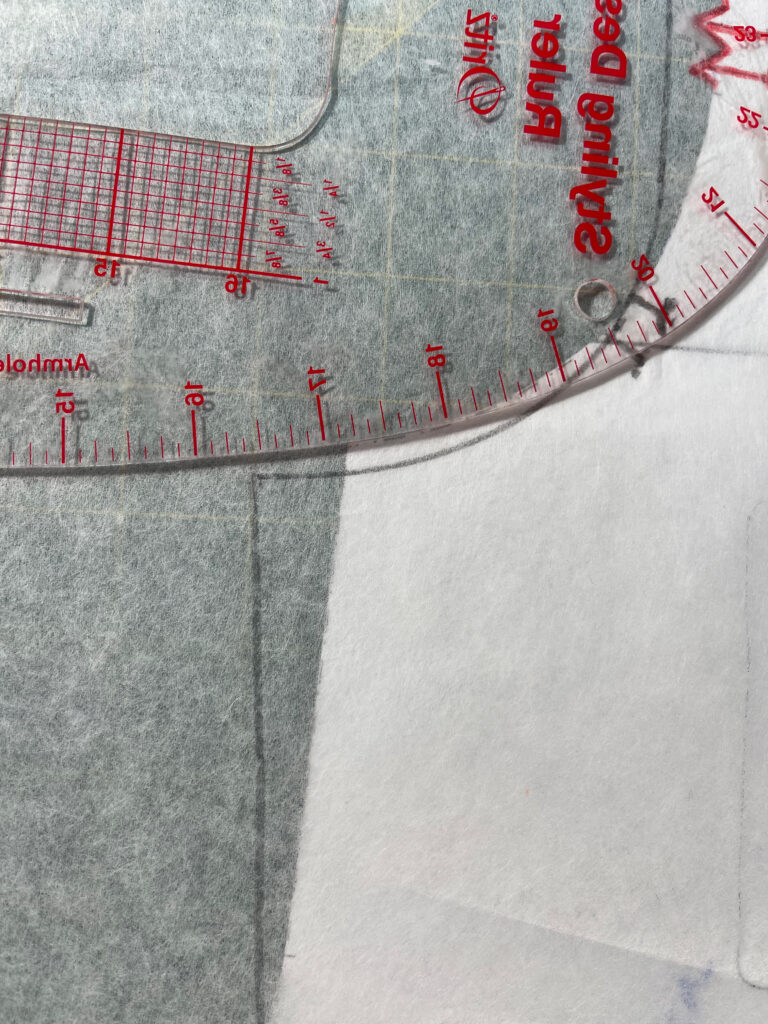
You would have to alter the sleeve head (the top of the sleeve that connects the armscye) to account for that. So, I kept the bottom of the armscye for the Arlington back and tried my best to use my curve ruler to quickly return to the path of the Classic Tee back. I was a little worried that it would impact the Full Bust Adjustment. But I could tell the pattern pieces were the same width because the width from the fold line to the outer edge were pretty close. Both patterns use the Full Bust Adjustment pieces so I think I’m going to be okay. If not, I’ll just adjust the next time I make it.
Compare Shoulders
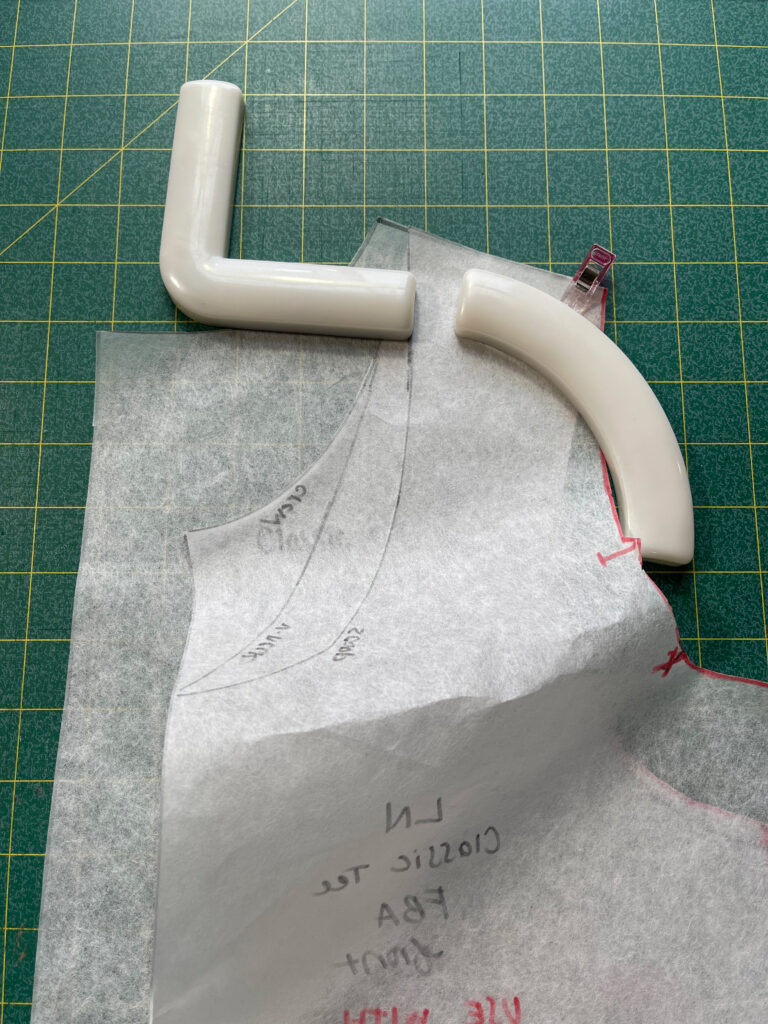
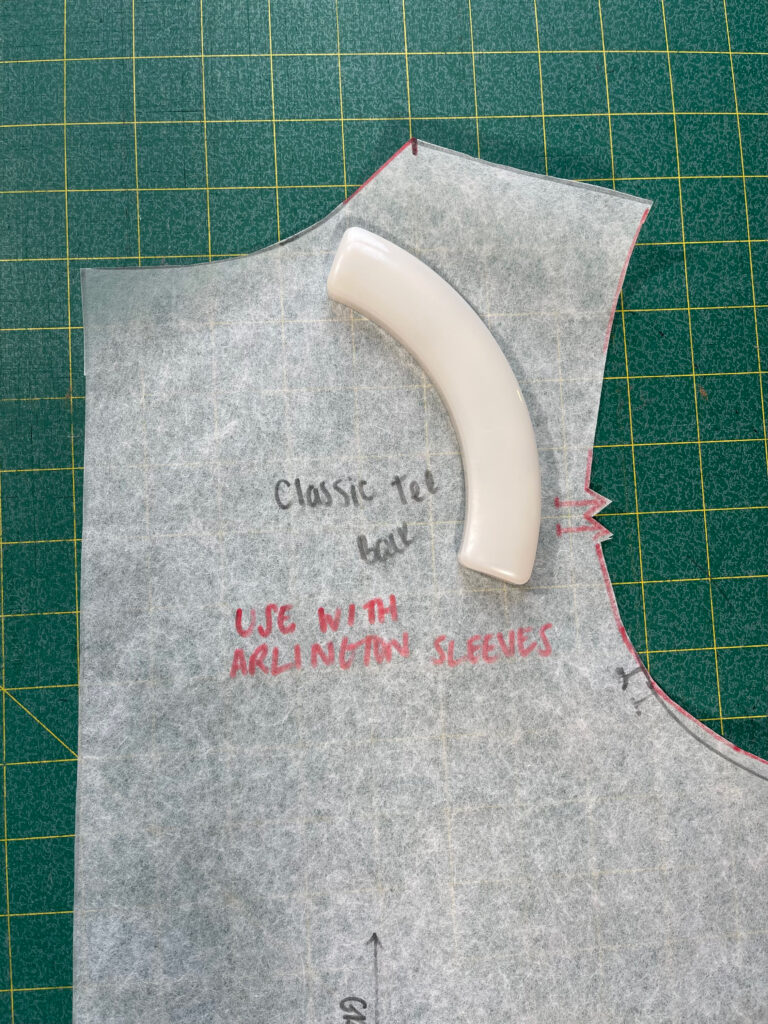
Now I need to ensure all the parts of the front/back that fit together still fit. Unfortunately, when I do the comparison one shoulder is narrower than the other. I went back and checked what I did to ensure that I didn’t make a grievous error.
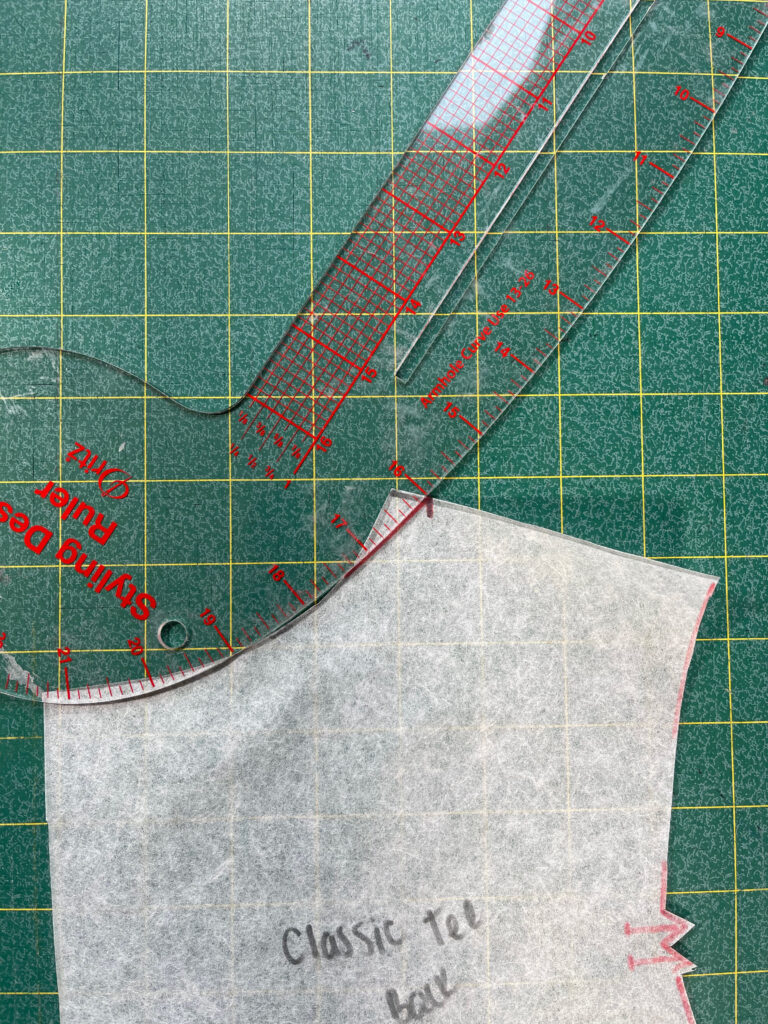
Compare the shoulders of the front/back pieces A curved ruler can help you to redraft the back neckline curve You have your back piece with an adjusted back neckline to reduce the shoulder width
Now, I have to decide what to do to make the front/back shoulders fit properly. If you alter the armscye then you have to alter the sleeve head to match. So, I’m going to slope down a little in the back with my curve ruler.
If I do this too much, then I need to make a new neckband. But that is a relatively easy fix. You could have just as easily widened the shoulder of the pattern that was narrower. As with most things in life, there are other solutions to this issue. So, use your instincts and adjust as it seems best in the situation. You will rarely end up with something unwearable if you follow the basic principles.
My Classic Tee with Arlington Sweater puff sleeves. Sewn with Solid Burgundy 4 Way Stretch Cotton Lycra Jersey Knit Fabric.
Now you can swap sleeves!
So now you have learned all I know about swapping sleeves from one pattern to another. If you have something you’d like to share on this topic, I would love to hear what you have to share in the Love Notions Facebook group. I’d know we have so many knowledgeable members of this community and I would like to hear what works best for everyone.
If you found this interesting, I highly recommend Ilse’s Sloane Sweater Gathered Sleeve Hack post:
Save this article to your Pinterest Board:





Well demonstrated and fabric in solid colours (easier to follow and see). Just starting to sew for mom and sis, so thank you for the tutorial. Appreciate your efforts.
Nicely done. I’m always hesitant about dealing with the armscye, but you make it straightforward. I agree about the solid colors, though busy print can minimize awkward alterations.
Thanks for stopping by the blog Cathy! So happy you found this post easy to understand. Touching the armscye seems intimidating but Nicole did an excellent job at explaining the steps. You definitely have a point about the prints too! Happy Sewing! ~K
So happy you enjoyed this post and found it useful Deb! And what wonderful news for mom and sis.. they must be elated! Happy Sewing! ~K
Nicole, Thanks so much for this post. It gave me the confidence to try something I have wanted for a long time. a blouse with lacey sleeves! It came out beautiful! Your instructions were easy to follow and made perfect sense. Thank you.
Oh thank you so much for coming back to let us know! Your blouse sounds lovely! ~K