It’s ALL about the details! This is so true when you are aiming for a professional result in your sewing. We’re happy to welcome Karina from Lifting Pins and Needles to the blog today to walk us through a few ways to upgrade your woven Melody dolman button-up shirt by adding in those professional details: button sleeve tabs, pocket flaps, dress length and more!
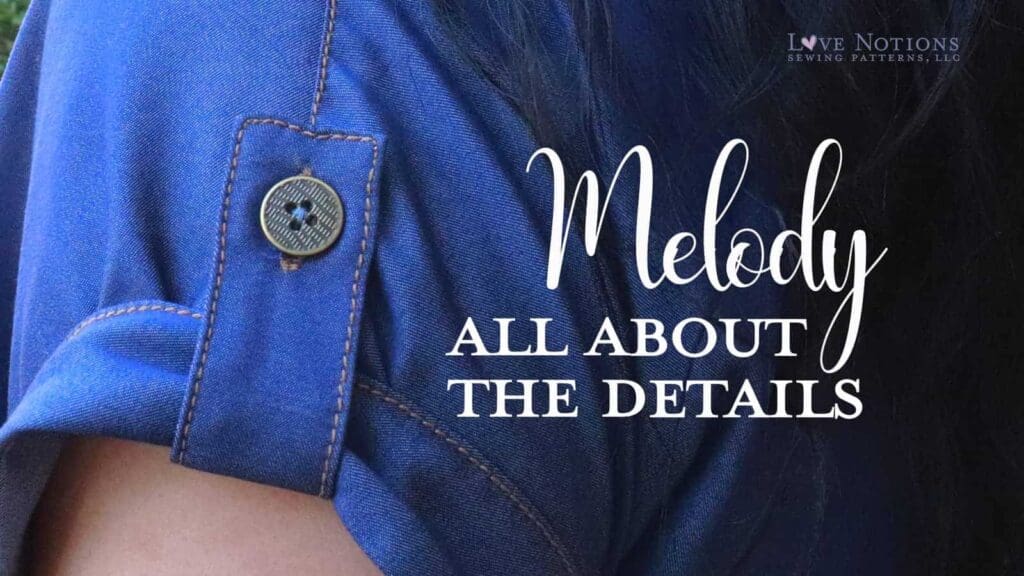
MELODY DOLMAN: ALL ABOUT THE DETAILS
Pocket Flaps, Button Sleeve Tabs, Patch Pockets, Shirt Dress
Hi sewing friends! I’m Karina and you might have met me on my sewing YouTube channel Lifting Pins and Needles and more recently on my blog too. I have been an ambassador for Love Notions since last year and have been enjoying sharing my Love Notions garments with you a great deal. Today I’m sharing with you a new version of one of my all-time favorite patterns!
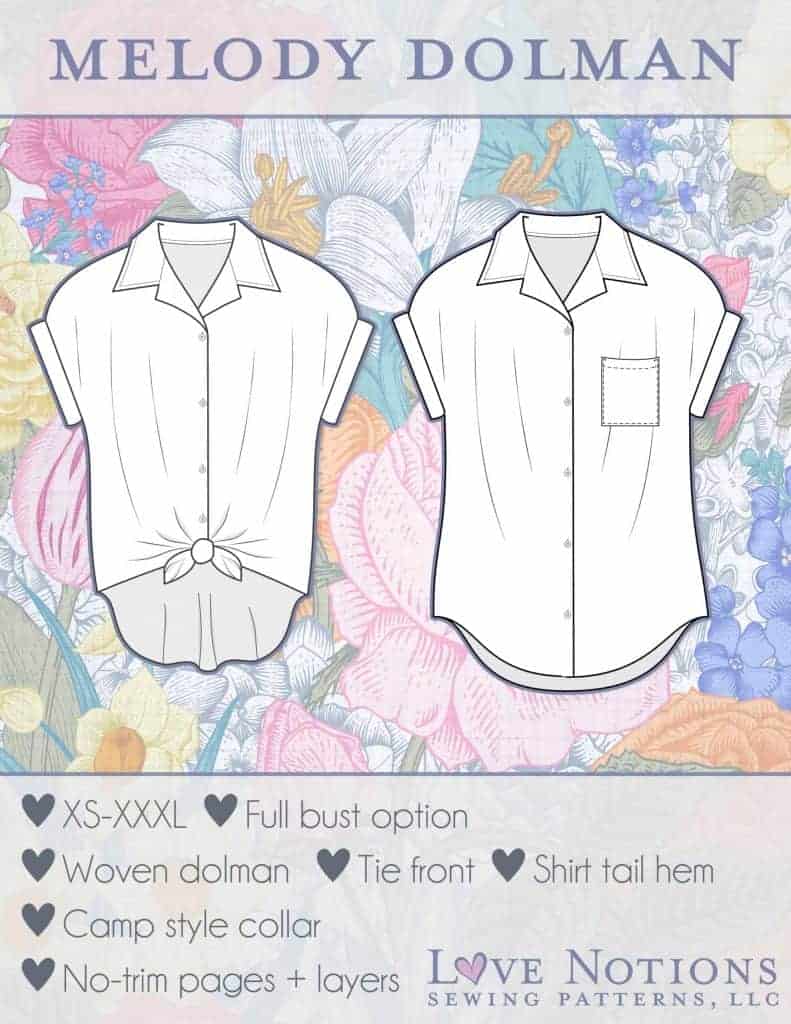
Melody Dolman Pattern Details
The Melody Dolman is a woven button up shirt with a camp style collar, cute cuffs on the dolman sleeve hems. The shirt tail hem can also be tied on the front for even more versatility. It’s just a classic that is not so complex to sew and with the full bust option, you´ll be ready to sew without doing a FBA (if you typically need it). The pattern also comes with links to some of the sewing techniques. Super helpful right? YOU CAN SEW THIS COLLAR.
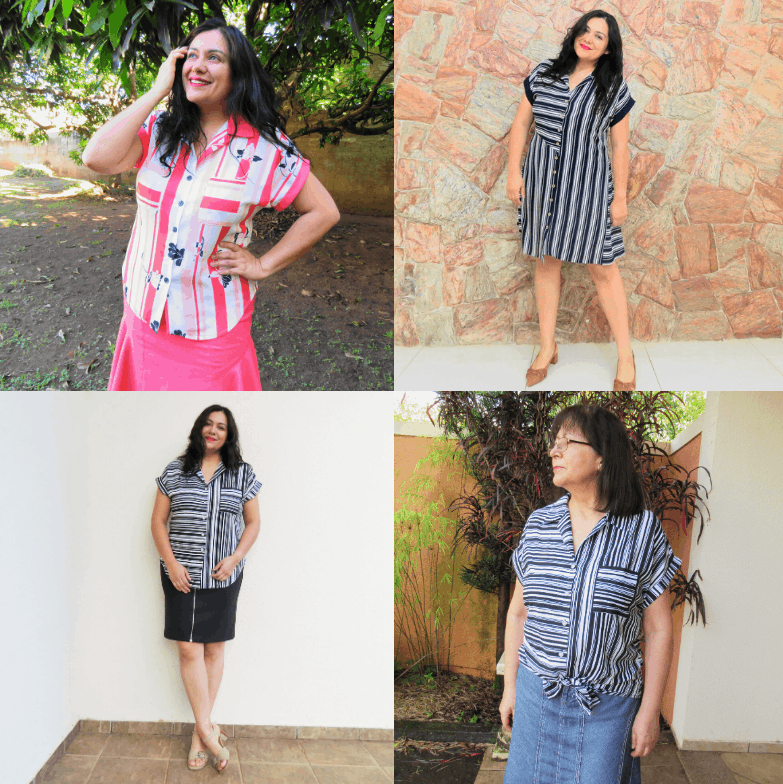
My Melody Dolmans
Last year during pattern testing, I made two versions. I loved them both and the stripy one was also loved by my mother, who ended up keeping it. It’s a great style for any age. I also got carried away and used the Melody Dolman as a base to create a crazy stripe play asymmetrical dress. The sky is the limit with this pattern, and I notice I have really been enjoying the stipe craze lately.
The Melody Dolman is the Feature Friday pattern today (3/13/20) and that means that you can purchase it 50% OFF, at only $5. A real steal. For this occasion, I bring you some more inspiration and some little details that you can add to this style.
My Fabric for Melody Dolman
I have chosen a solid fabric. Solids tend to be left tucked away in our fabric collections, but they truly are versatile and useful in our wardrobes. I had dreamed of a shirt dress that looked like denim but wasn’t denim. In comes a beautiful blue Tencel twill! A light to medium weight woven fabric that will look like denim but will have a lovely drape and be softer on the skin. Another aesthetic goal was to do tan color top stitching were appropriate to highlight the little details I was planning to add.
A Melody Dolman with All the Details:
I have experimented and drafted extra little pattern pieces that will give the Melody Dolman a few extra details:
- Flaps with a buttonhole for the bust pockets.
- Sleeve tabs with a buttonhole for the cuffs
- Patch pockets on the front of the dress…. And yes….
- It will be a shirt dress!
If shirt dresses are not your interest, you can add the bust pocket flaps and sleeve tabs to the original shirt version too.
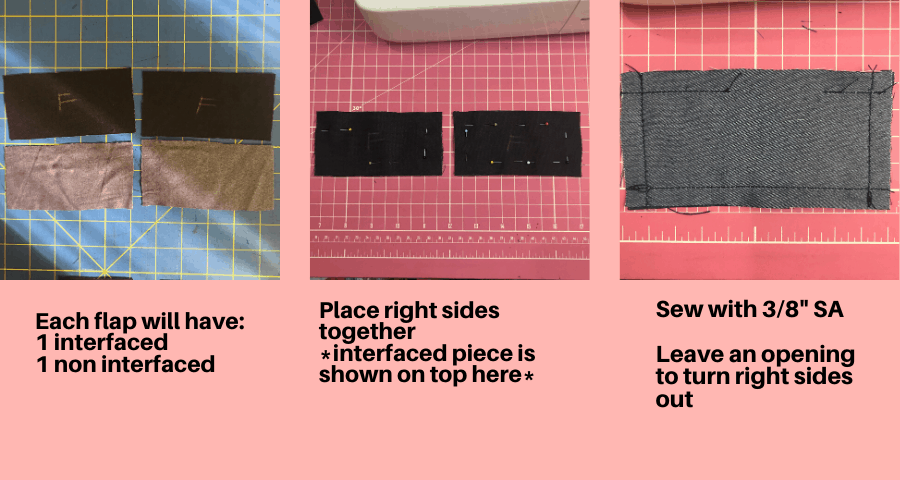
Professional Detail 1: Pocket Flaps with a Buttonhole
The Melody Dolman has a bust pocket available on one side. I am utilizing this same pattern piece and will have patch pockets on both sides. I drafted a pocket flap appropriate for the size of the bust pocket and you can see the dimensions next. Seam allowance is included in all these extra pattern pieces.
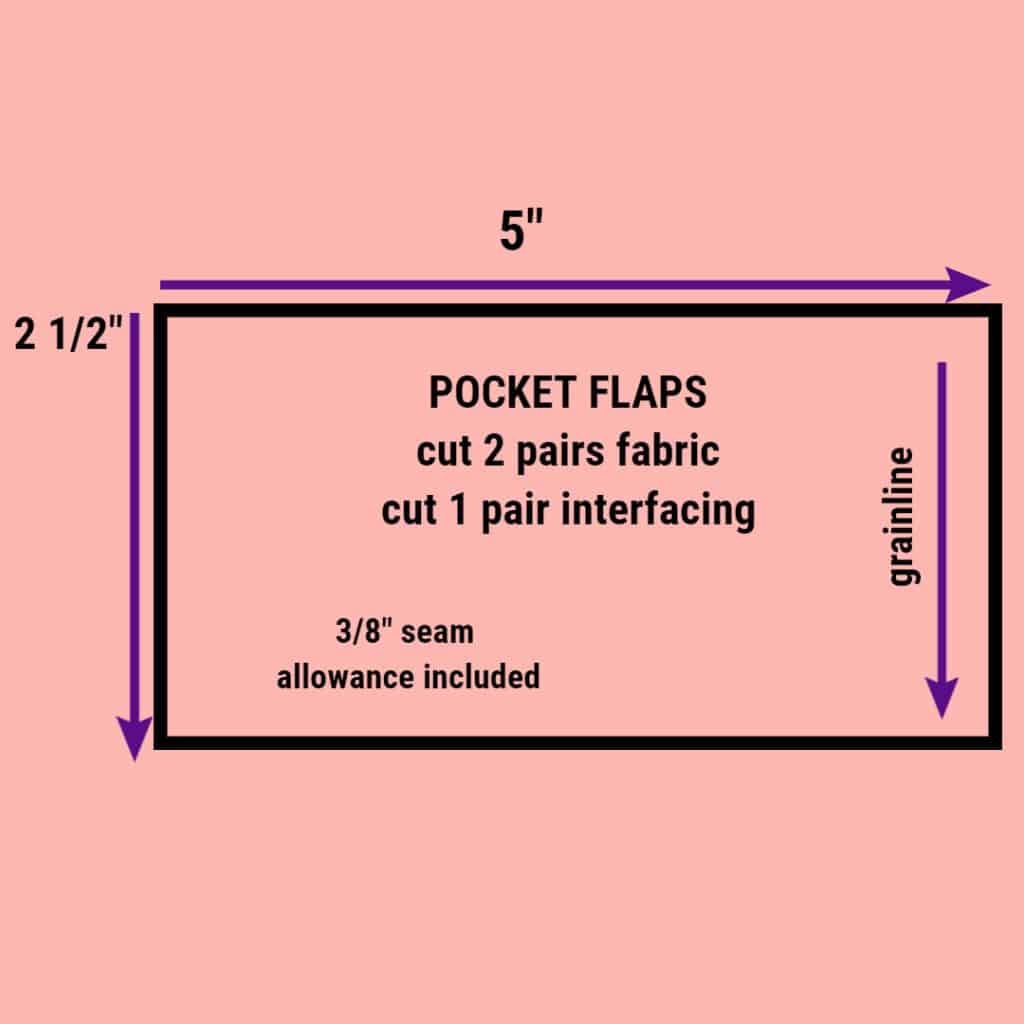
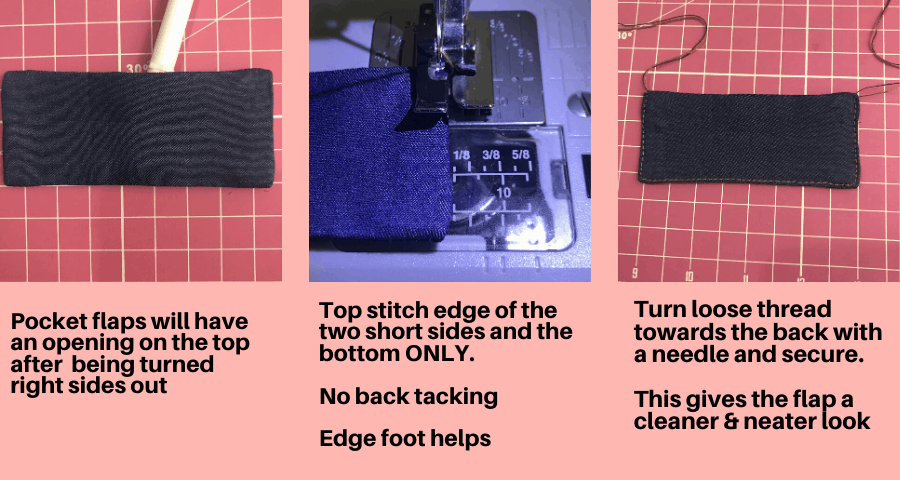
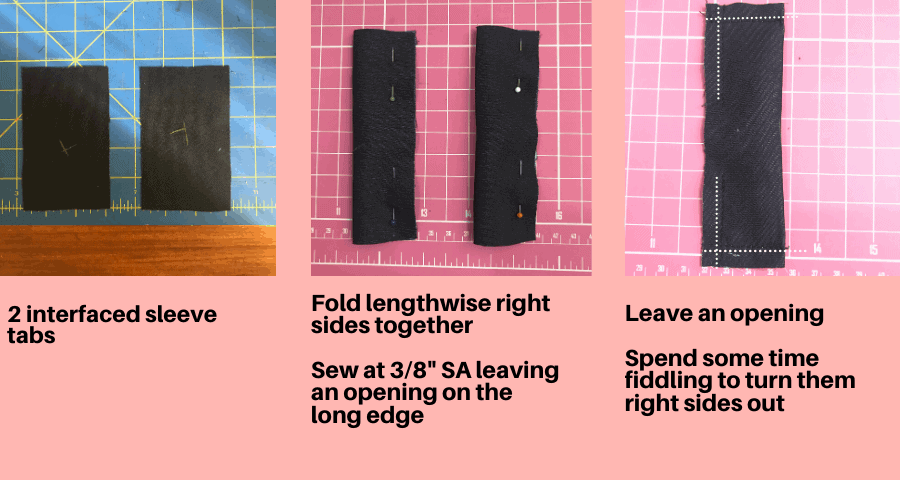
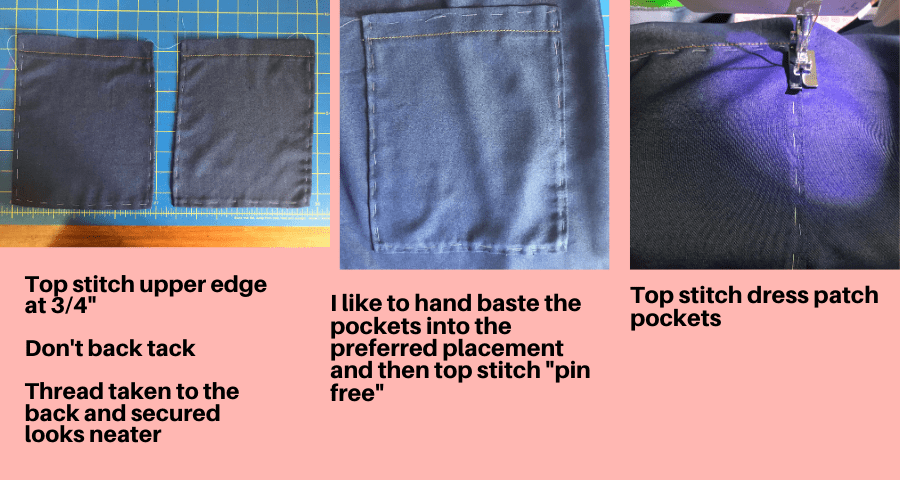
In the following photos below, you can see the simple steps it takes to create the pocket flaps. A few straight seams and a little fiddle time to turn them right sides out. The opening will be left unsewn for now.
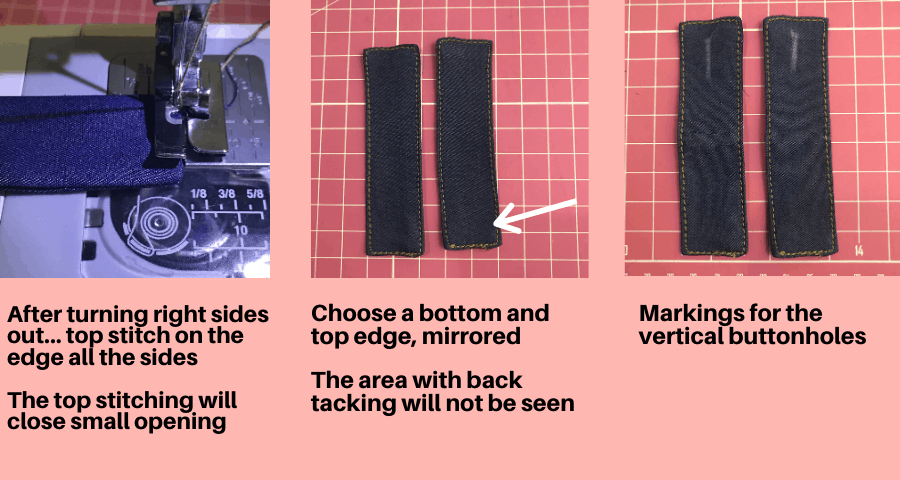
Below you can see my seam ripper showing the open area that can stay put. I am using top stitching tan color thread only on the top. The bobbin has regular navy thread. After top stitching the short and bottom edges, leave the threads loose. To avoid bulky visible top stitching on the dress, I am not back tacking anywhere. I use a larger needle to thread the top stitching thread to the back and knot there where it won’t be seen.
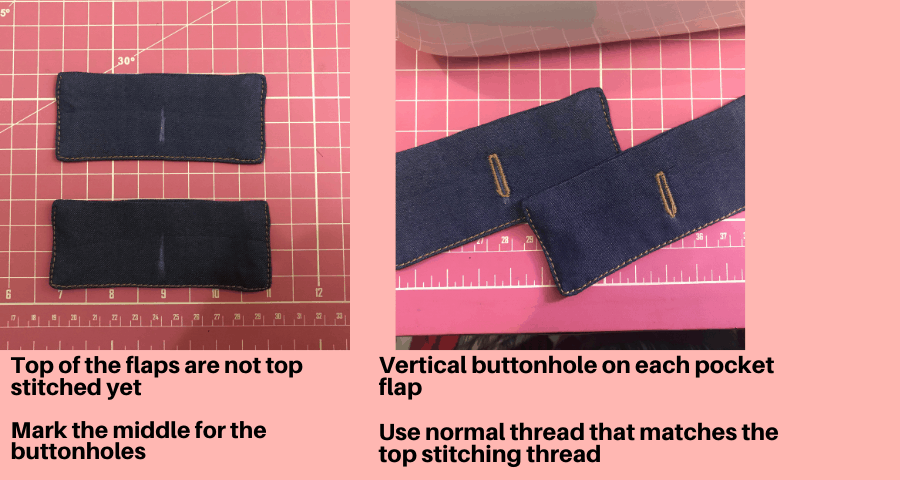
Shown below, make a mark in the center of the flap. This is where the buttonholes will be made on each flap. I practiced on scraps to have the correct size to match my chosen buttons.
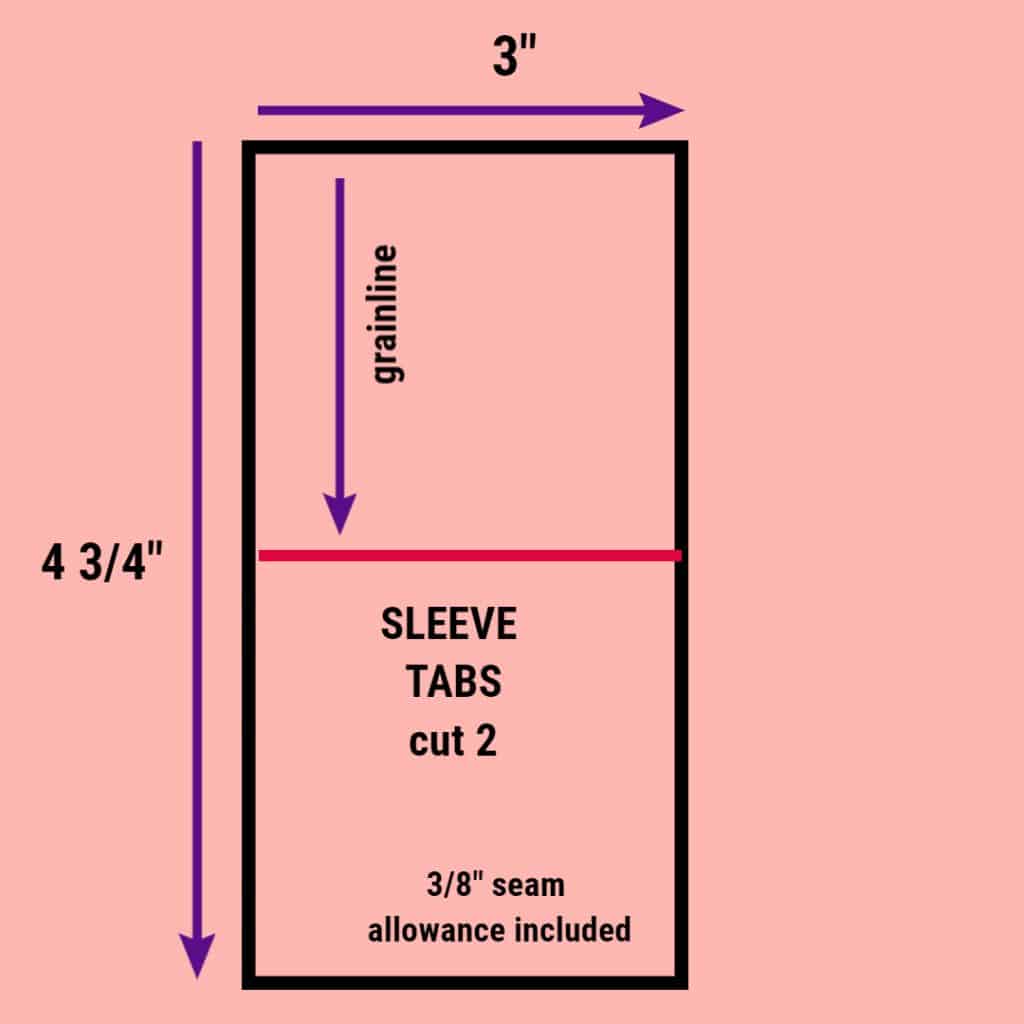
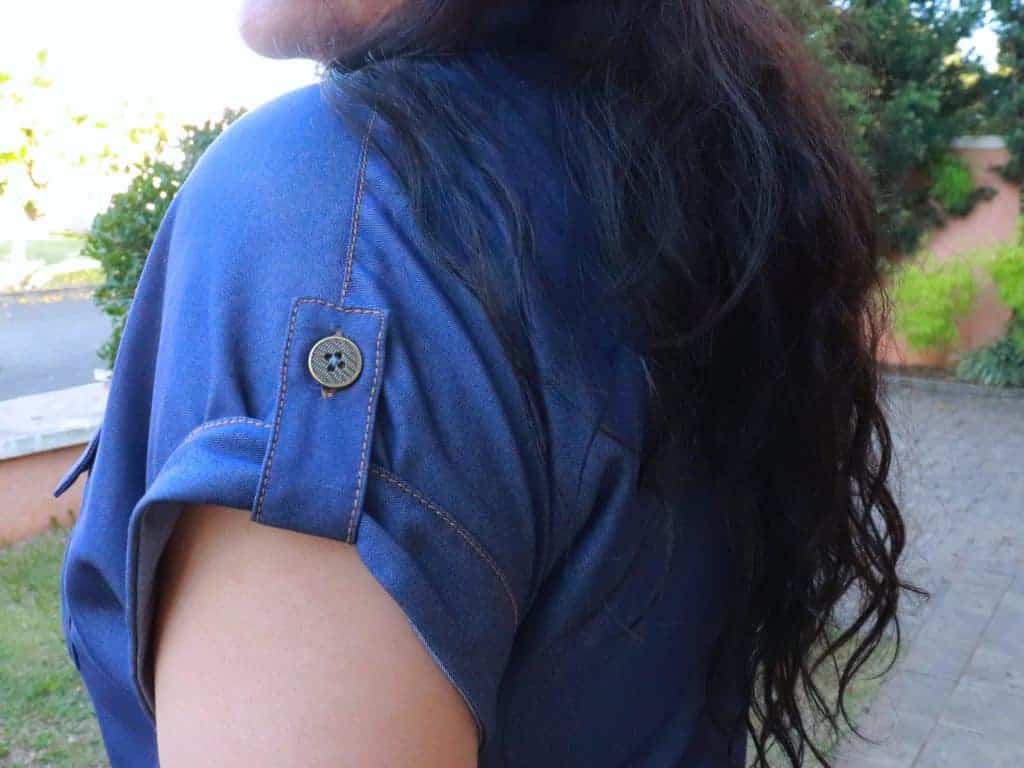
Professional Detail 2: Sleeve Tabs for the Cuffs
I think sleeve tabs are an interesting visual feature PLUS they are functional because they hold the folded sleeve cuff in place. I set out to experiment to come up with an appropriate pattern piece you can easily draw. It is only a rectangle. Cut two and interface them.
In the photos below, you can see the interfaced sleeve tabs and the process to give them shape. They are small pieces. Patience is required to turn them right side out. Luckily, only two of these are needed (whew).
I did back tack here on the bottom edge while I was top stitching. The area marked with an arrow will not be seen. Trust me, there can be a little back tacking there.
Mark the buttonholes in the center of the top and sew them. See the images below.
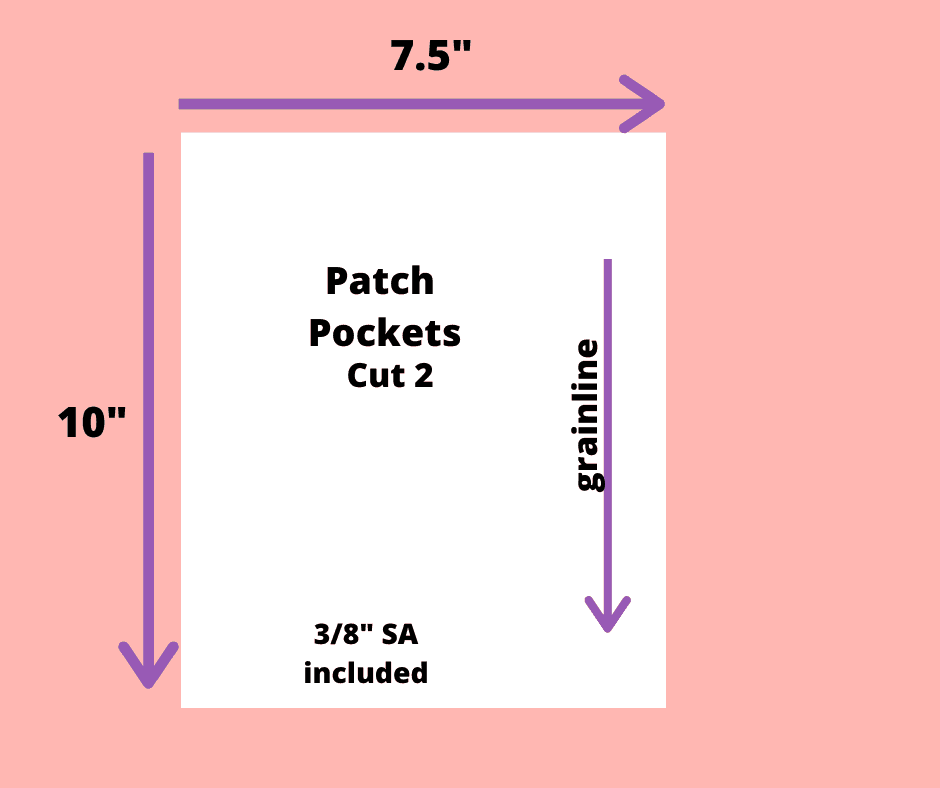
Professional Detail 3: Patch Pockets on the Skirt
I enjoy a good patch pocket because it adds visual interest without adding bulk and to be honest, they are decorative only. I never ever put things in them. But they are pretty, so let’s add some on to the dress. I also experimented with the size of these and think this is an appropriate size and in proportion to the style of the garment. See the dimensions below.
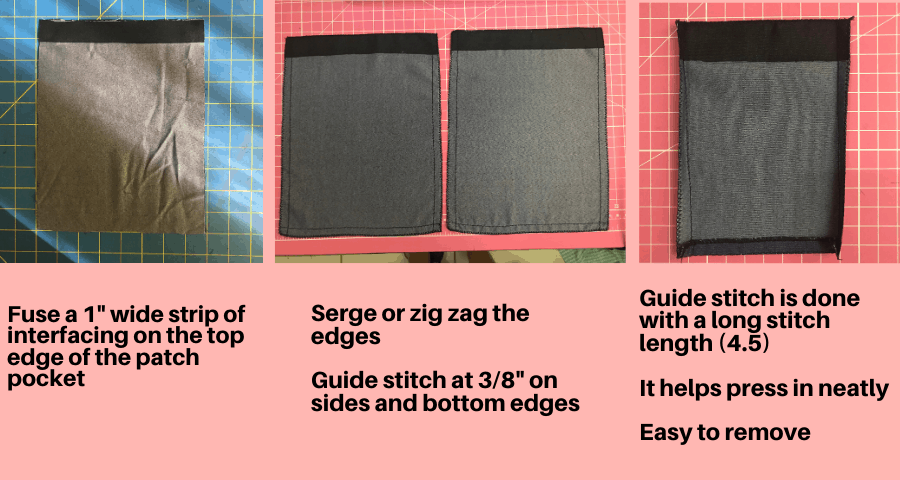
I’d love to stabilize the top of the pockets, hence the strip of fusible interfacing as seen below. I am also a fan of doing a long length straight “guide stich” to facilitate pressing in the seam allowances. These stitches can be easily removed after pressing.
Professional Detail 4: Dress Length Melody Dolman
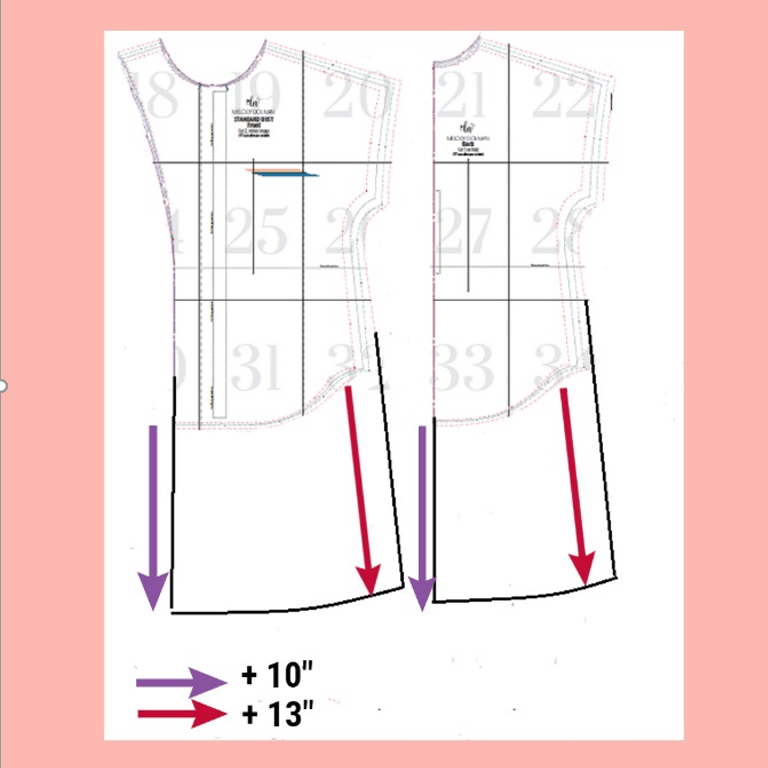
The easiest way to determine how much to lengthen the shirt is by trying on one you have already made and measuring from the hem down to the desired length. In my case, I needed to add 10” at the center front and back. To compensate for the original shirt tail hem shape, I added 13” from the sides down. See the image below. I suggest blending to the next size up at the hips to allow more ease. I used an XL at the hips for this dress version. I continued the lines on the side seams.
More Professional Sewing Details: My Tips and Tricks
BOTH TYPES OF POCKETS
Show next are a few steps taken with both the bust and the skirt patch pockets. I like finishing the top of the pockets like shown below. There will be no raw edges there and it’s a neat finish.
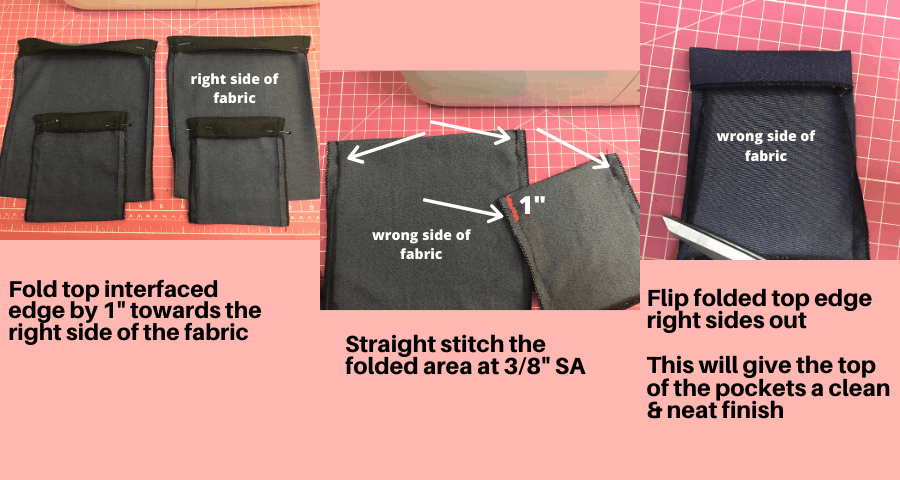
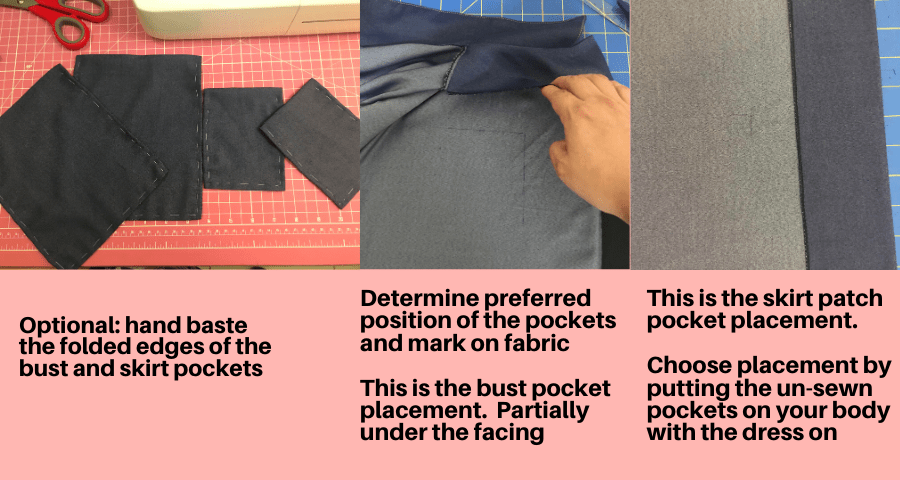
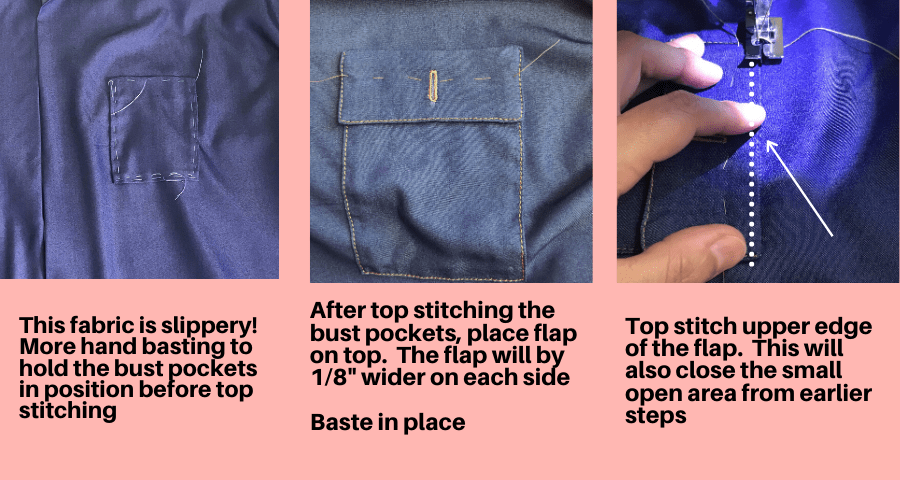
It’s no secret that I am a fan of the long-lost art of hand basting. This fabric is drapey and does not want to stay where you want it to. I did huge stitches to hold the folded edges in place for all the pockets. See below.
I determined the placement of all the pockets with the dress on my body and pinning and repining until I was happy. I marked my preference on the fabric for both bust and skirt pockets.
BUST POCKETS
Below you can see that I hand basted the bust pockets into position before top stitching them on to the dress. The flap is placed above the pocket and top stitched. The opening left on the top edge of the flap previously is dealt with, finally.
No back tacking here either. As mentioned, I am trying to avoid bulky top stitching thread being visible.
DRESS PATCH POCKETS
The top folded edge is top stitched and again I’ve hand basted it onto the dress. Nothing beats the precision and comfort of sewing without pins everywhere.
SLEEVE TABS
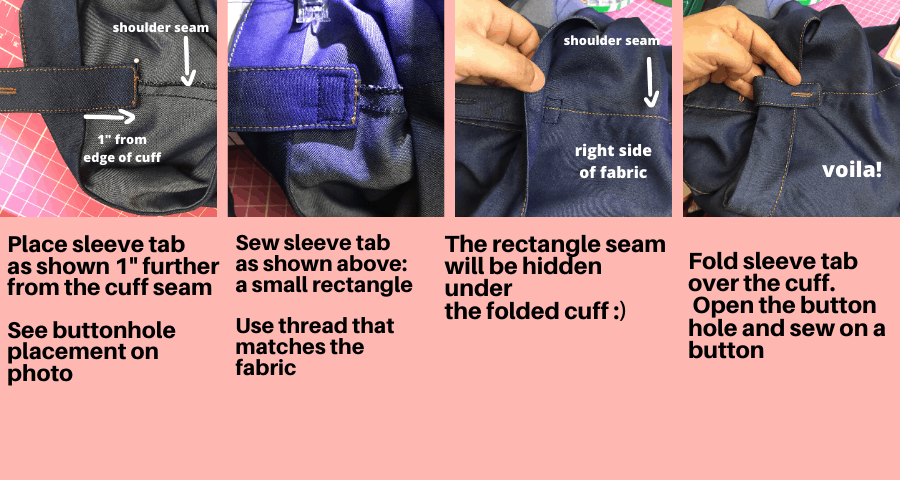
Sleeve tab time! This is my favorite feature for this dress. As seen below, the tab is placed inside 1” further than the seam that unites the sleeve and the cuff. See below. The little rectangle seam that will hold the tab in place will be invisible to others because the folded cuff will hide it.
Once in place, the tab comes over the cuff and when the button is in place, the cuff won’t be able to unfold. Practical AND pretty.
TOP STITCHING CONSIDERATIONS
I opted to use tan top stitching thread to highlight the extra features I was adding. All this effort won’t be too visible if a printed fabric is used. I would recommend a solid fabric for this reason.
Experience has taught me that my machine does not appreciate top stitching thread when I attempt buttonholes. Previous failures have me now using normal thread in a matching color.
I decided to top stitch the shoulder seams, collar, and cuffs with one row at the edge.
All the top stitching was aided by my trusty edge foot that makes sewing super straight and neat.
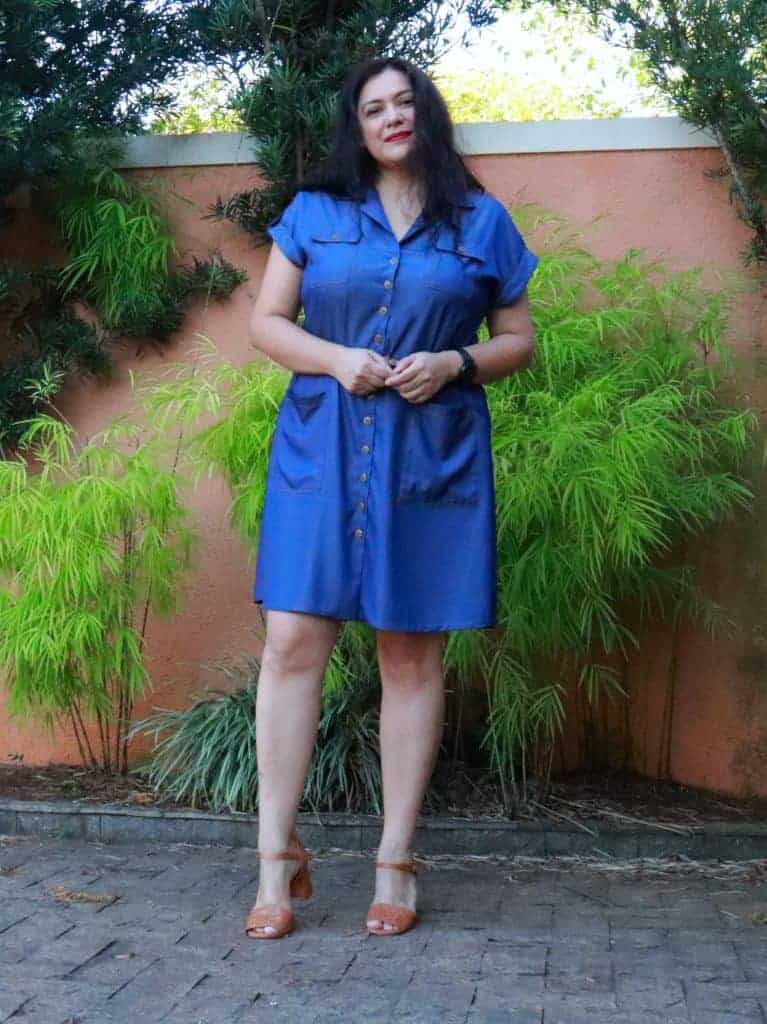
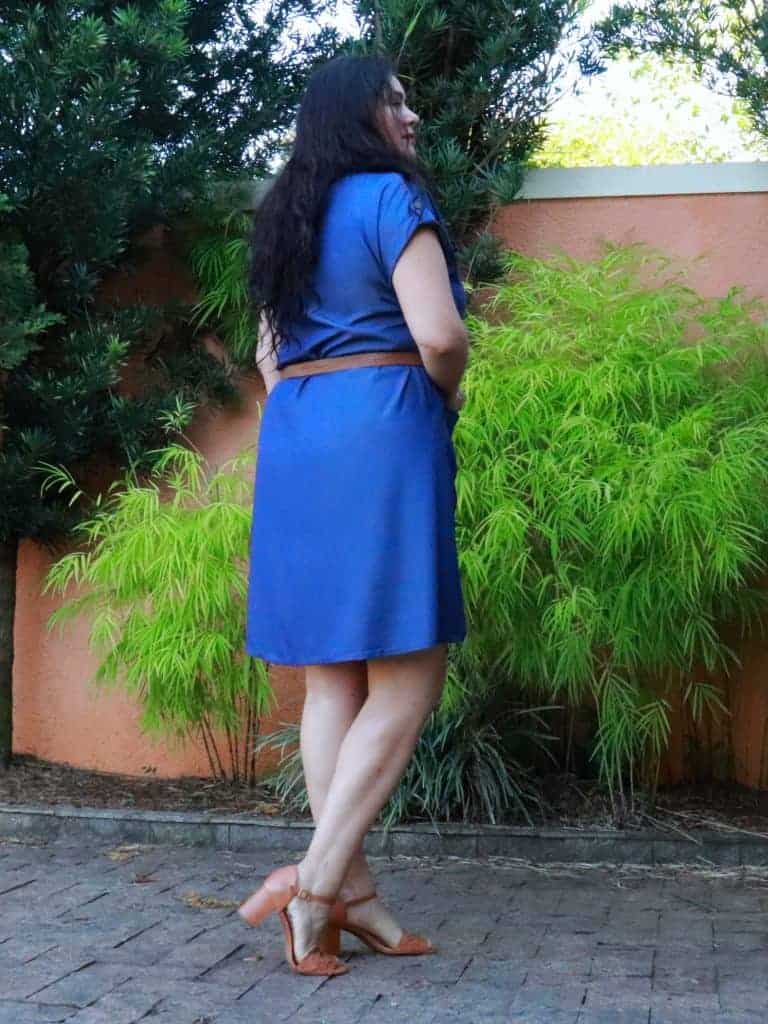
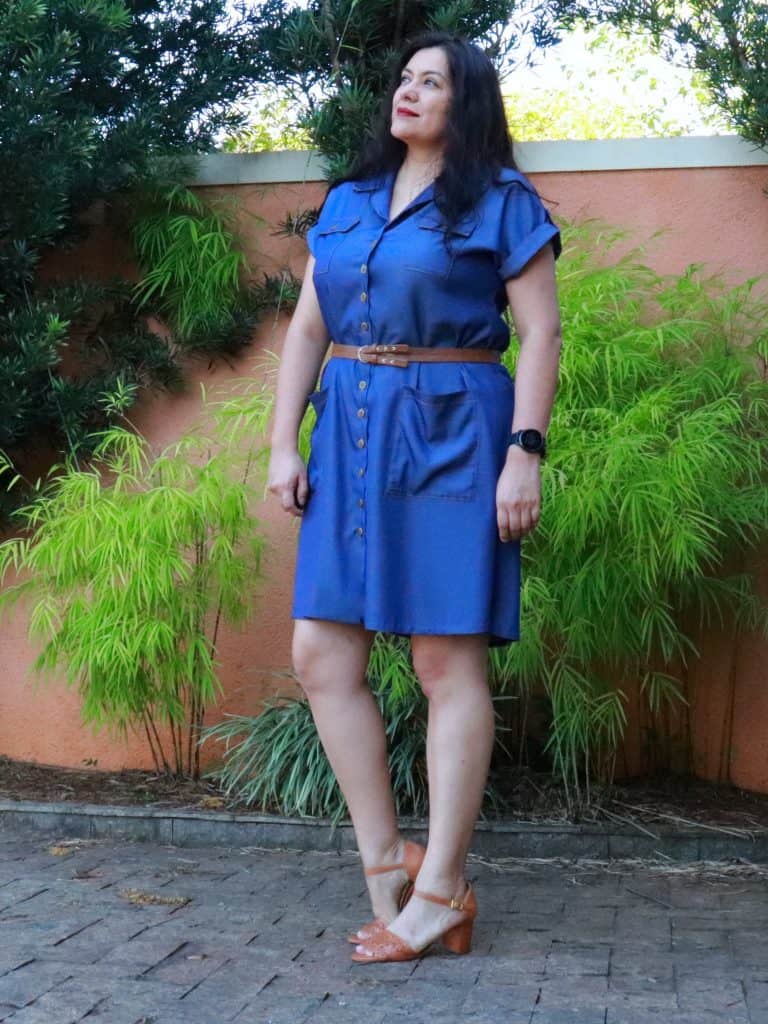
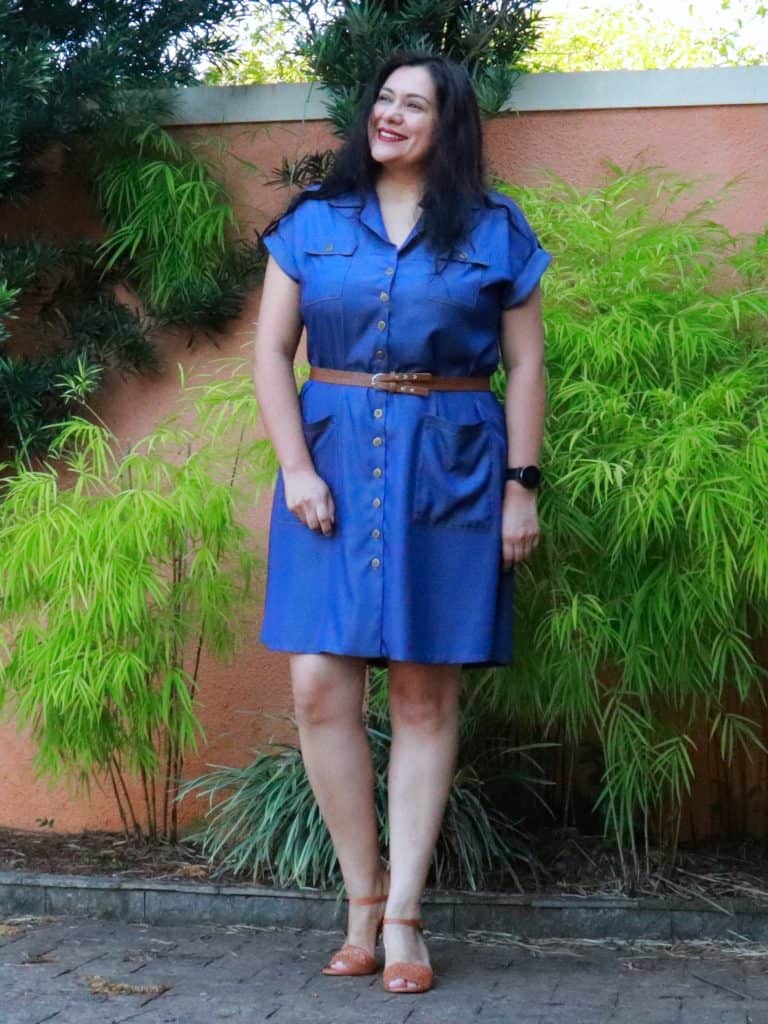
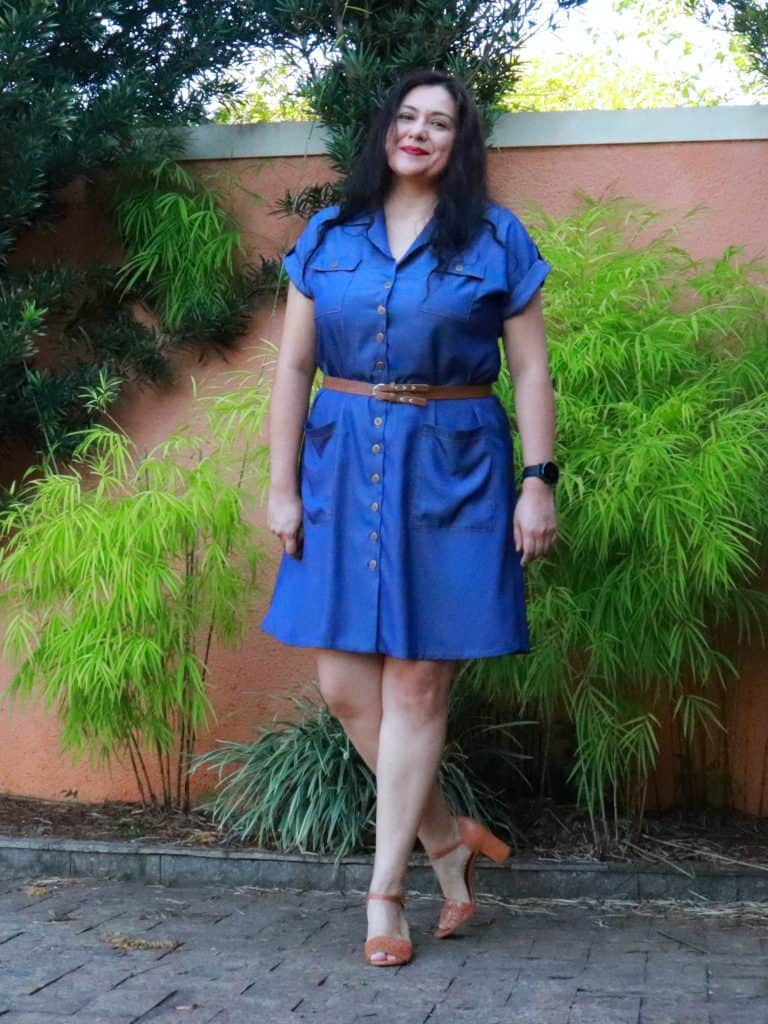
The Final Melody Dolman with all the Professional Details
Have a look at my dreamed shirt dress!
The collar with one row of top stitching on the edge.
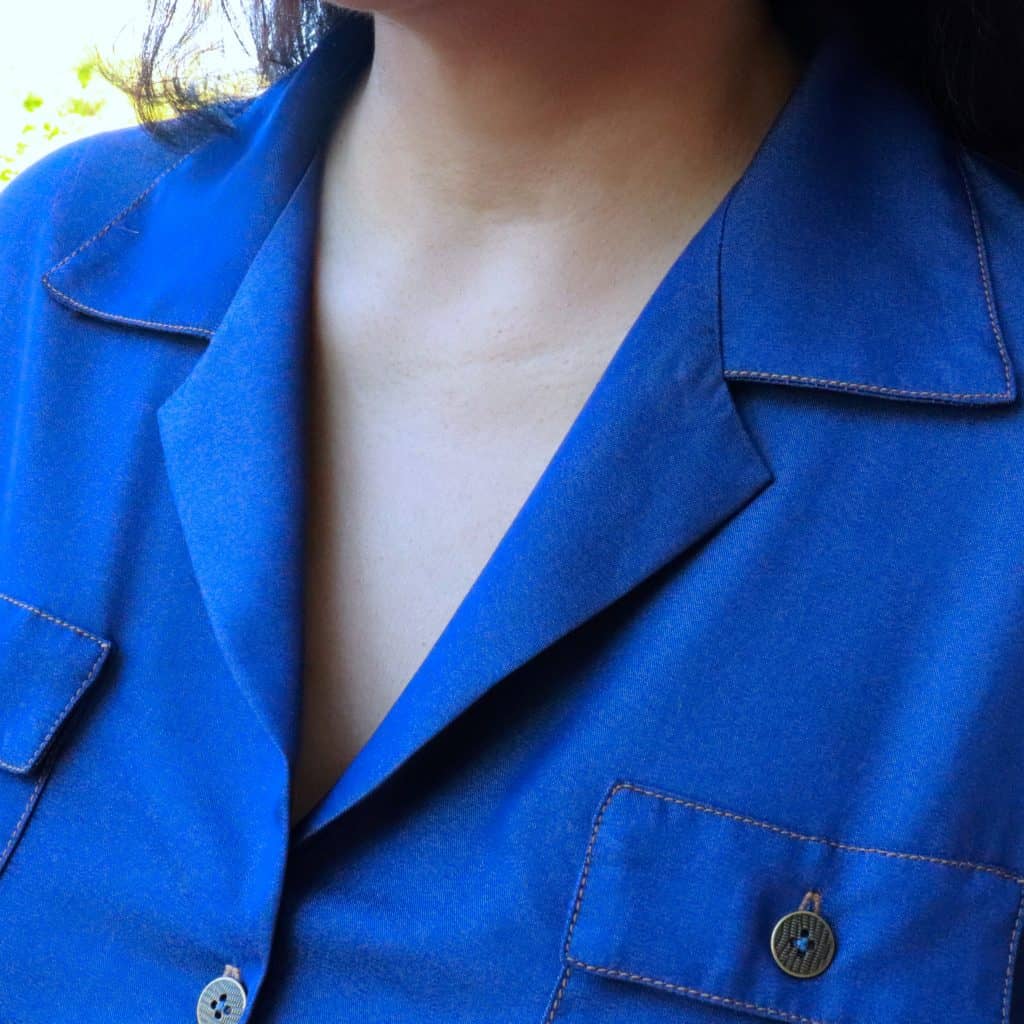
Closer look at the collar and pockets with the functioning flaps.
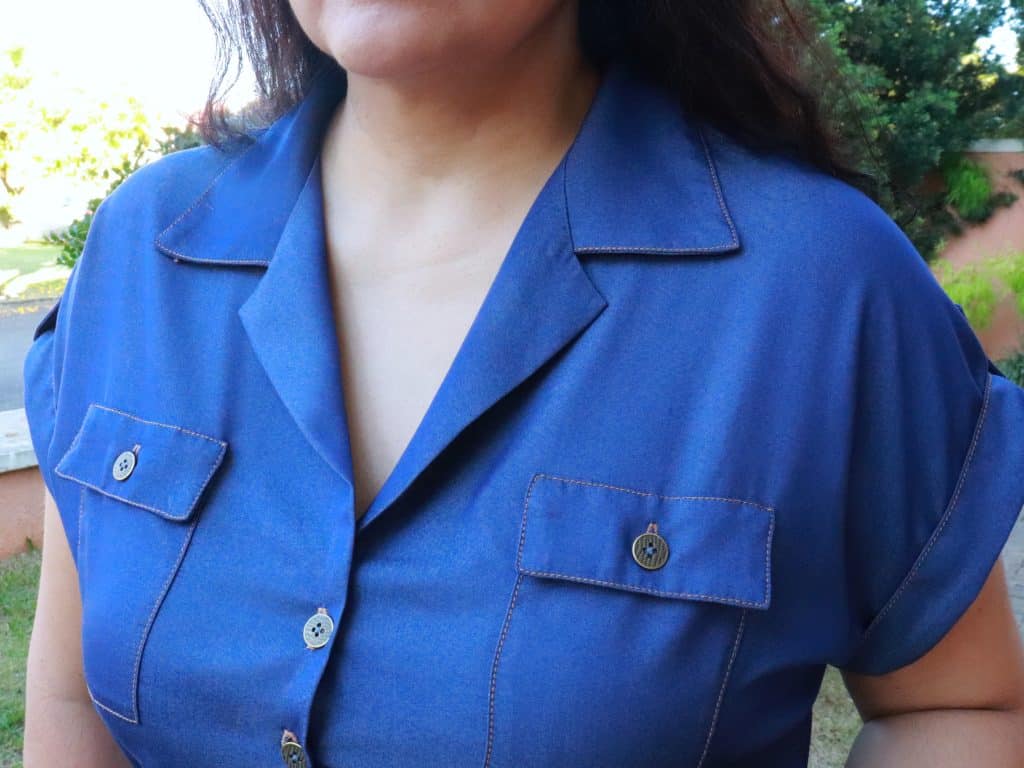
Cute and functional sleeve tabs keeping the cuff in place.
The large patch pockets on the skirt of the dress.
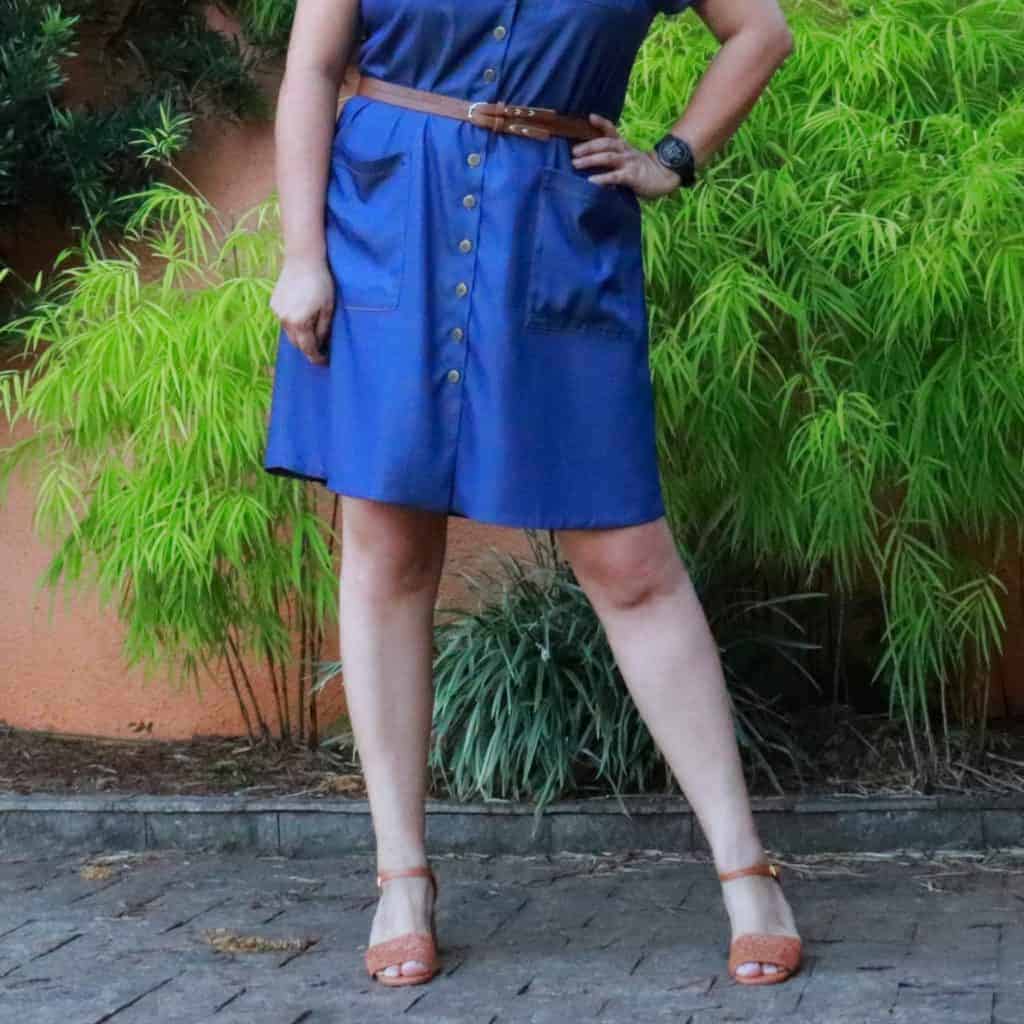
And a general look of the entire dress. I used 15 buttons. 11 on the front, 2 for the flaps and 2 for the sleeve tabs. They are all functional. I paired the dress with a tan belt and shoes and love this classic color combination. The belt does make the dress a little shorter and it’s important to take that into account if a belt will come into the mix. I personally love a nice thin belt for waist definition.
This is a project to plan and dedicate some time to, but the efforts will be compensated because this is a classic style you can enjoy for years to come. I highly recommend this pattern and these little “extras” can add a little more fun into the mix!

Don’t miss out on this amazing pattern that has so many possibilities. I am sure to make more in the future. I’ve used the Melody Dolman Pattern four times already! Who is to say I won’t use it 4 more times? Thank you for reading and I’ll see you again very soon.
*This link is an affiliate link and I earn a percentage of the sale, as commission, at no extra cost to you. Thank you for your purchase.
Pin this for later!
More Spring Shopping
[carousel_slide id=’361728′]
[et_bloom_inline optin_id=optin_3]