Puff Sleeve Hack + Metra Blazer
Hi everyone,
This is Livia from Livia.JY on Instagram and from the blog Liviality. Hacking patterns is one of my all-time favorite things to do, and when you have an amazingly drafted pattern it makes the process way easier and a lot more fun and rewarding.
This is 100% the case with the Metra Blazer.
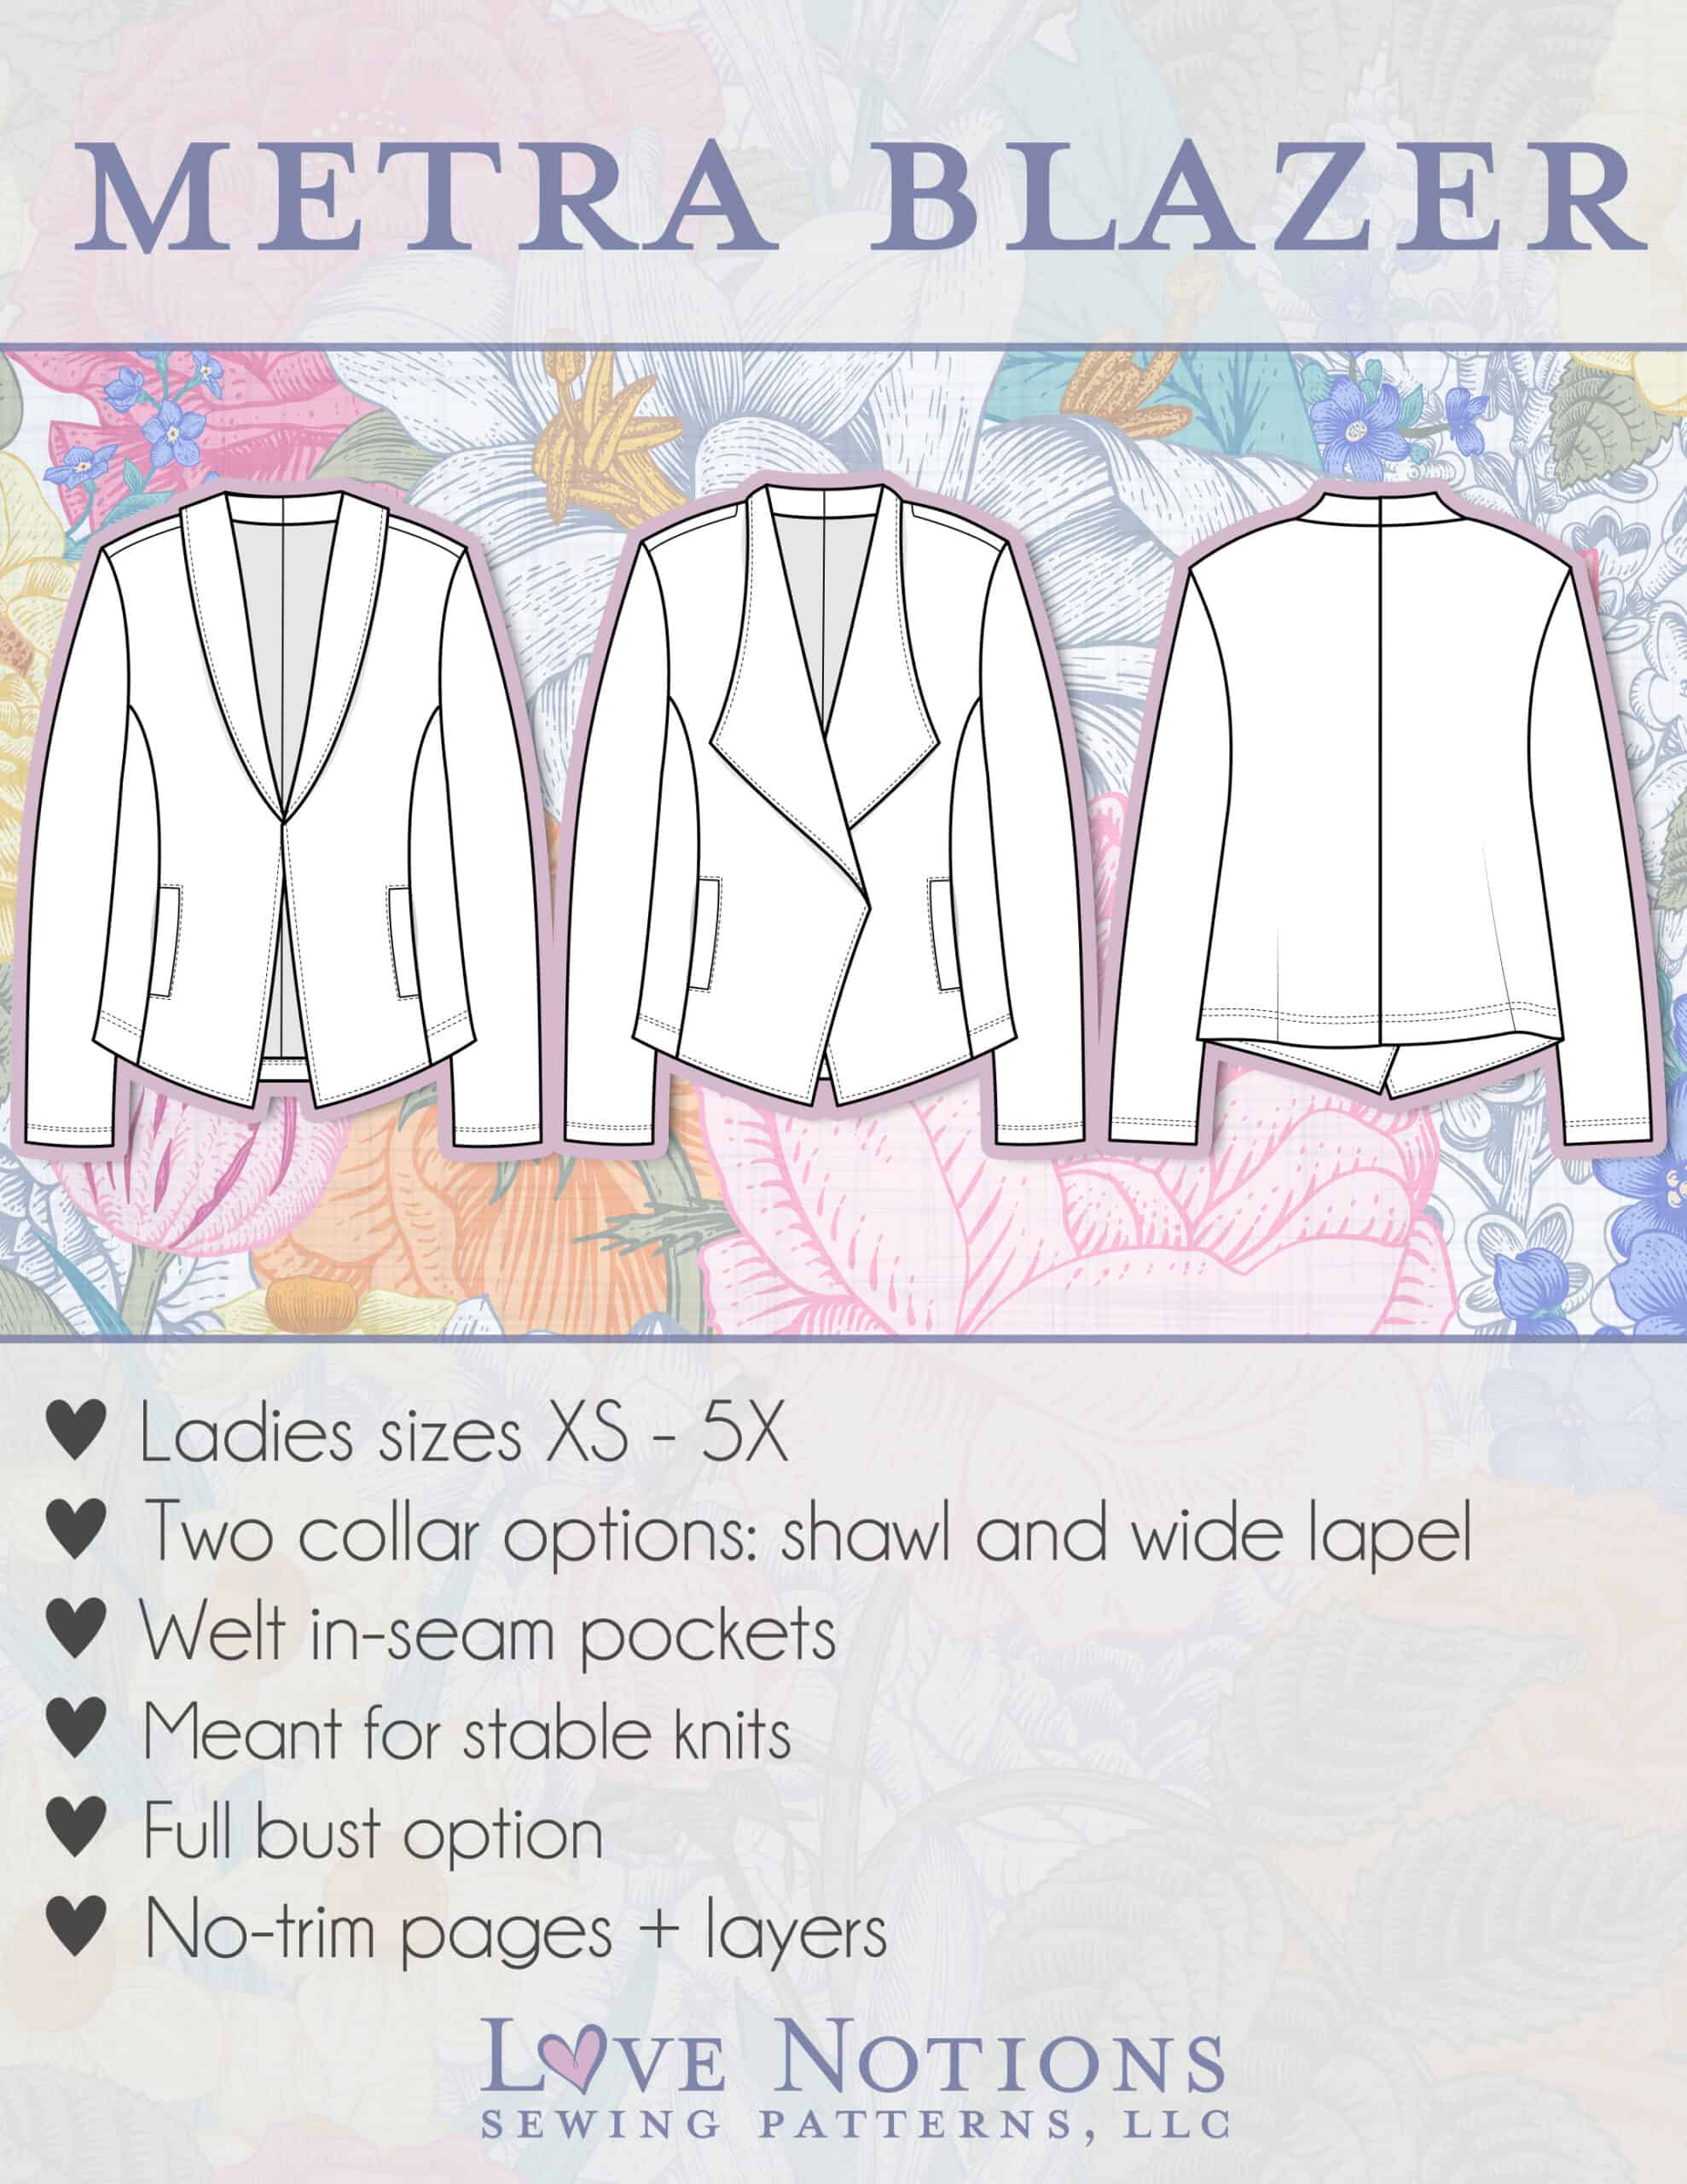
The blazer pattern for all
This pattern is truly a chameleon, it dresses any age and style, it can be business or casual and be worn all year round. It’s just a matter of fabric choice.
Plus, a blazer has the superpower to elevate any outfit and can be paired with pretty much anything. What’s not to love? ????
Metra Blazer: On-Demand Sewing Course
And here’s some awesome news:
If making a blazer sounds a bit daunting to you, Metra now has a full-length on-demand course!
And to make it even better, if you purchase the $25 course today, you’ll receive the pattern for free, and if you already own the pattern the course can be snagged for $20. Gotta love Feature Fridays! <3


Now, let’s add Dramatic Sleeves
Even though Metra is as versatile as I just mentioned, the dramatic sleeves lover in me couldn’t resist the idea of adding cute puff sleeves to it. And today I’m going to show you 2 different ways to do it:
- With the fullness only on the top
- With fullness on the top and bottom with an added cuff.

While it might look different, this is a really simple hack, it just takes a bit of time to adjust the pattern pieces.
Here’s what you’ll need:
- Sleeve pattern piece;
- Paper;
- Tape;
- Scissors;
- Pen/Pencil/Marker;
- Ruler(s).
A few considerations before we start:
- The amount you’ll add to the sleeves is up to you, the more you add the puffier the sleeve will be.
- I added 1.5” to mine and that’s what I’ll use as a reference throughout the tutorial, but you can absolutely adjust that to your preference.
- Fabric choice will also play a big role in how well the sleeve holds its shape.
- I highly suggest you make a muslin of it first to test it out.
- The photos were taken with a scaled-down pattern piece.
PUFF SLEEVE WITH FULLNESS ON THE TOP
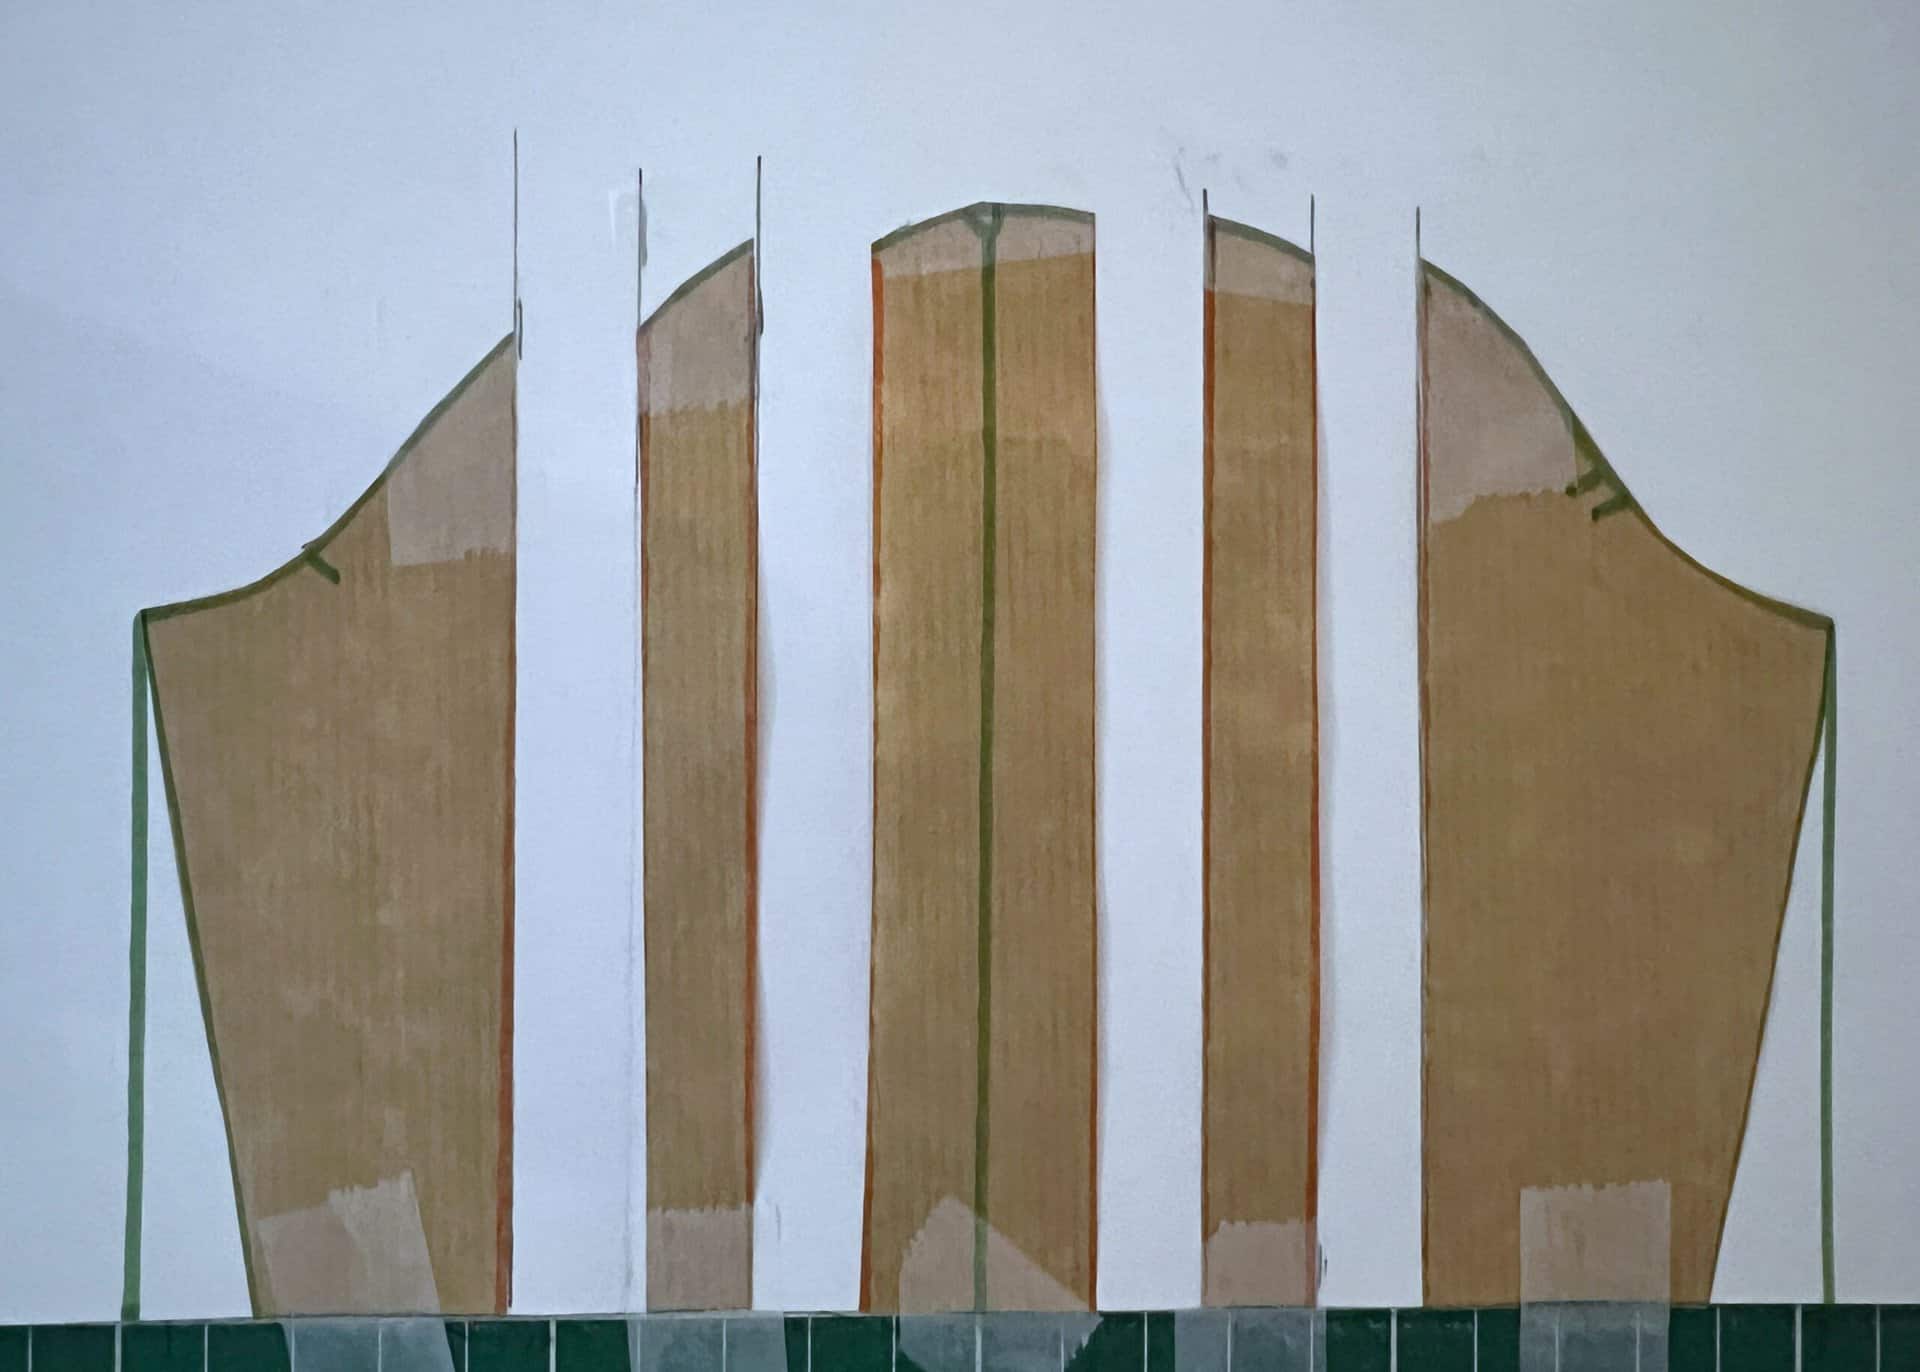
Steps 1-3
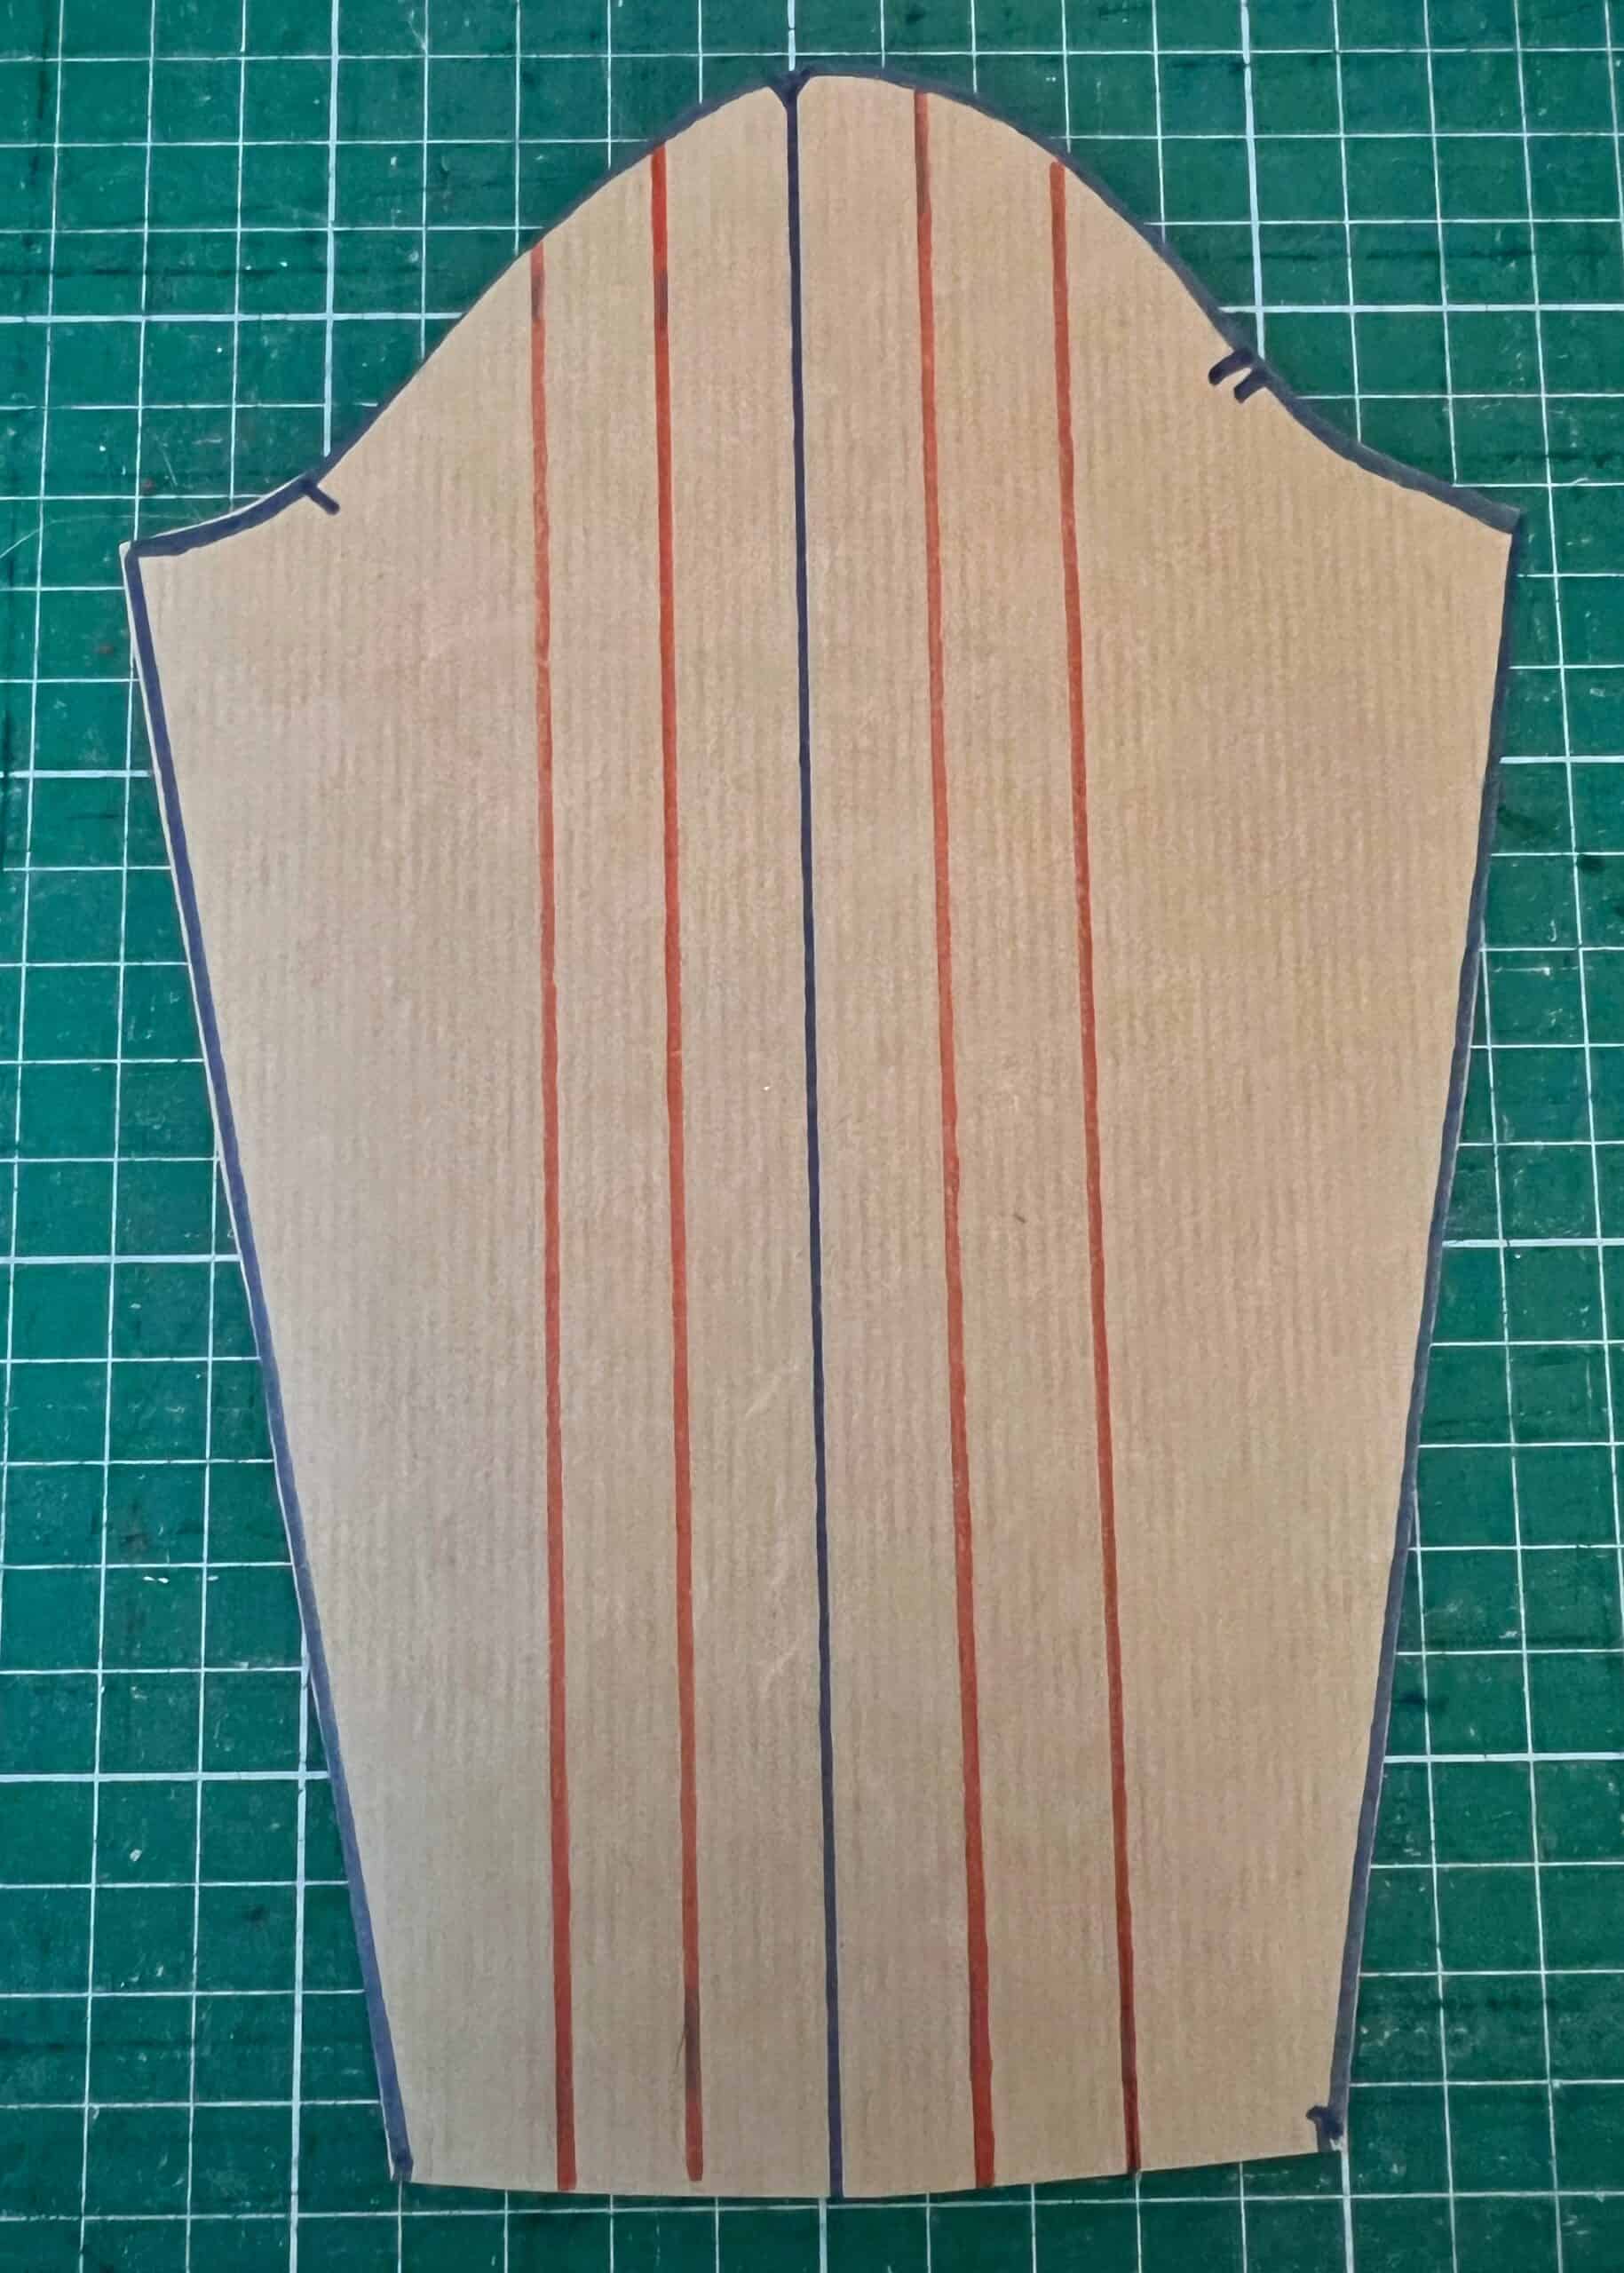
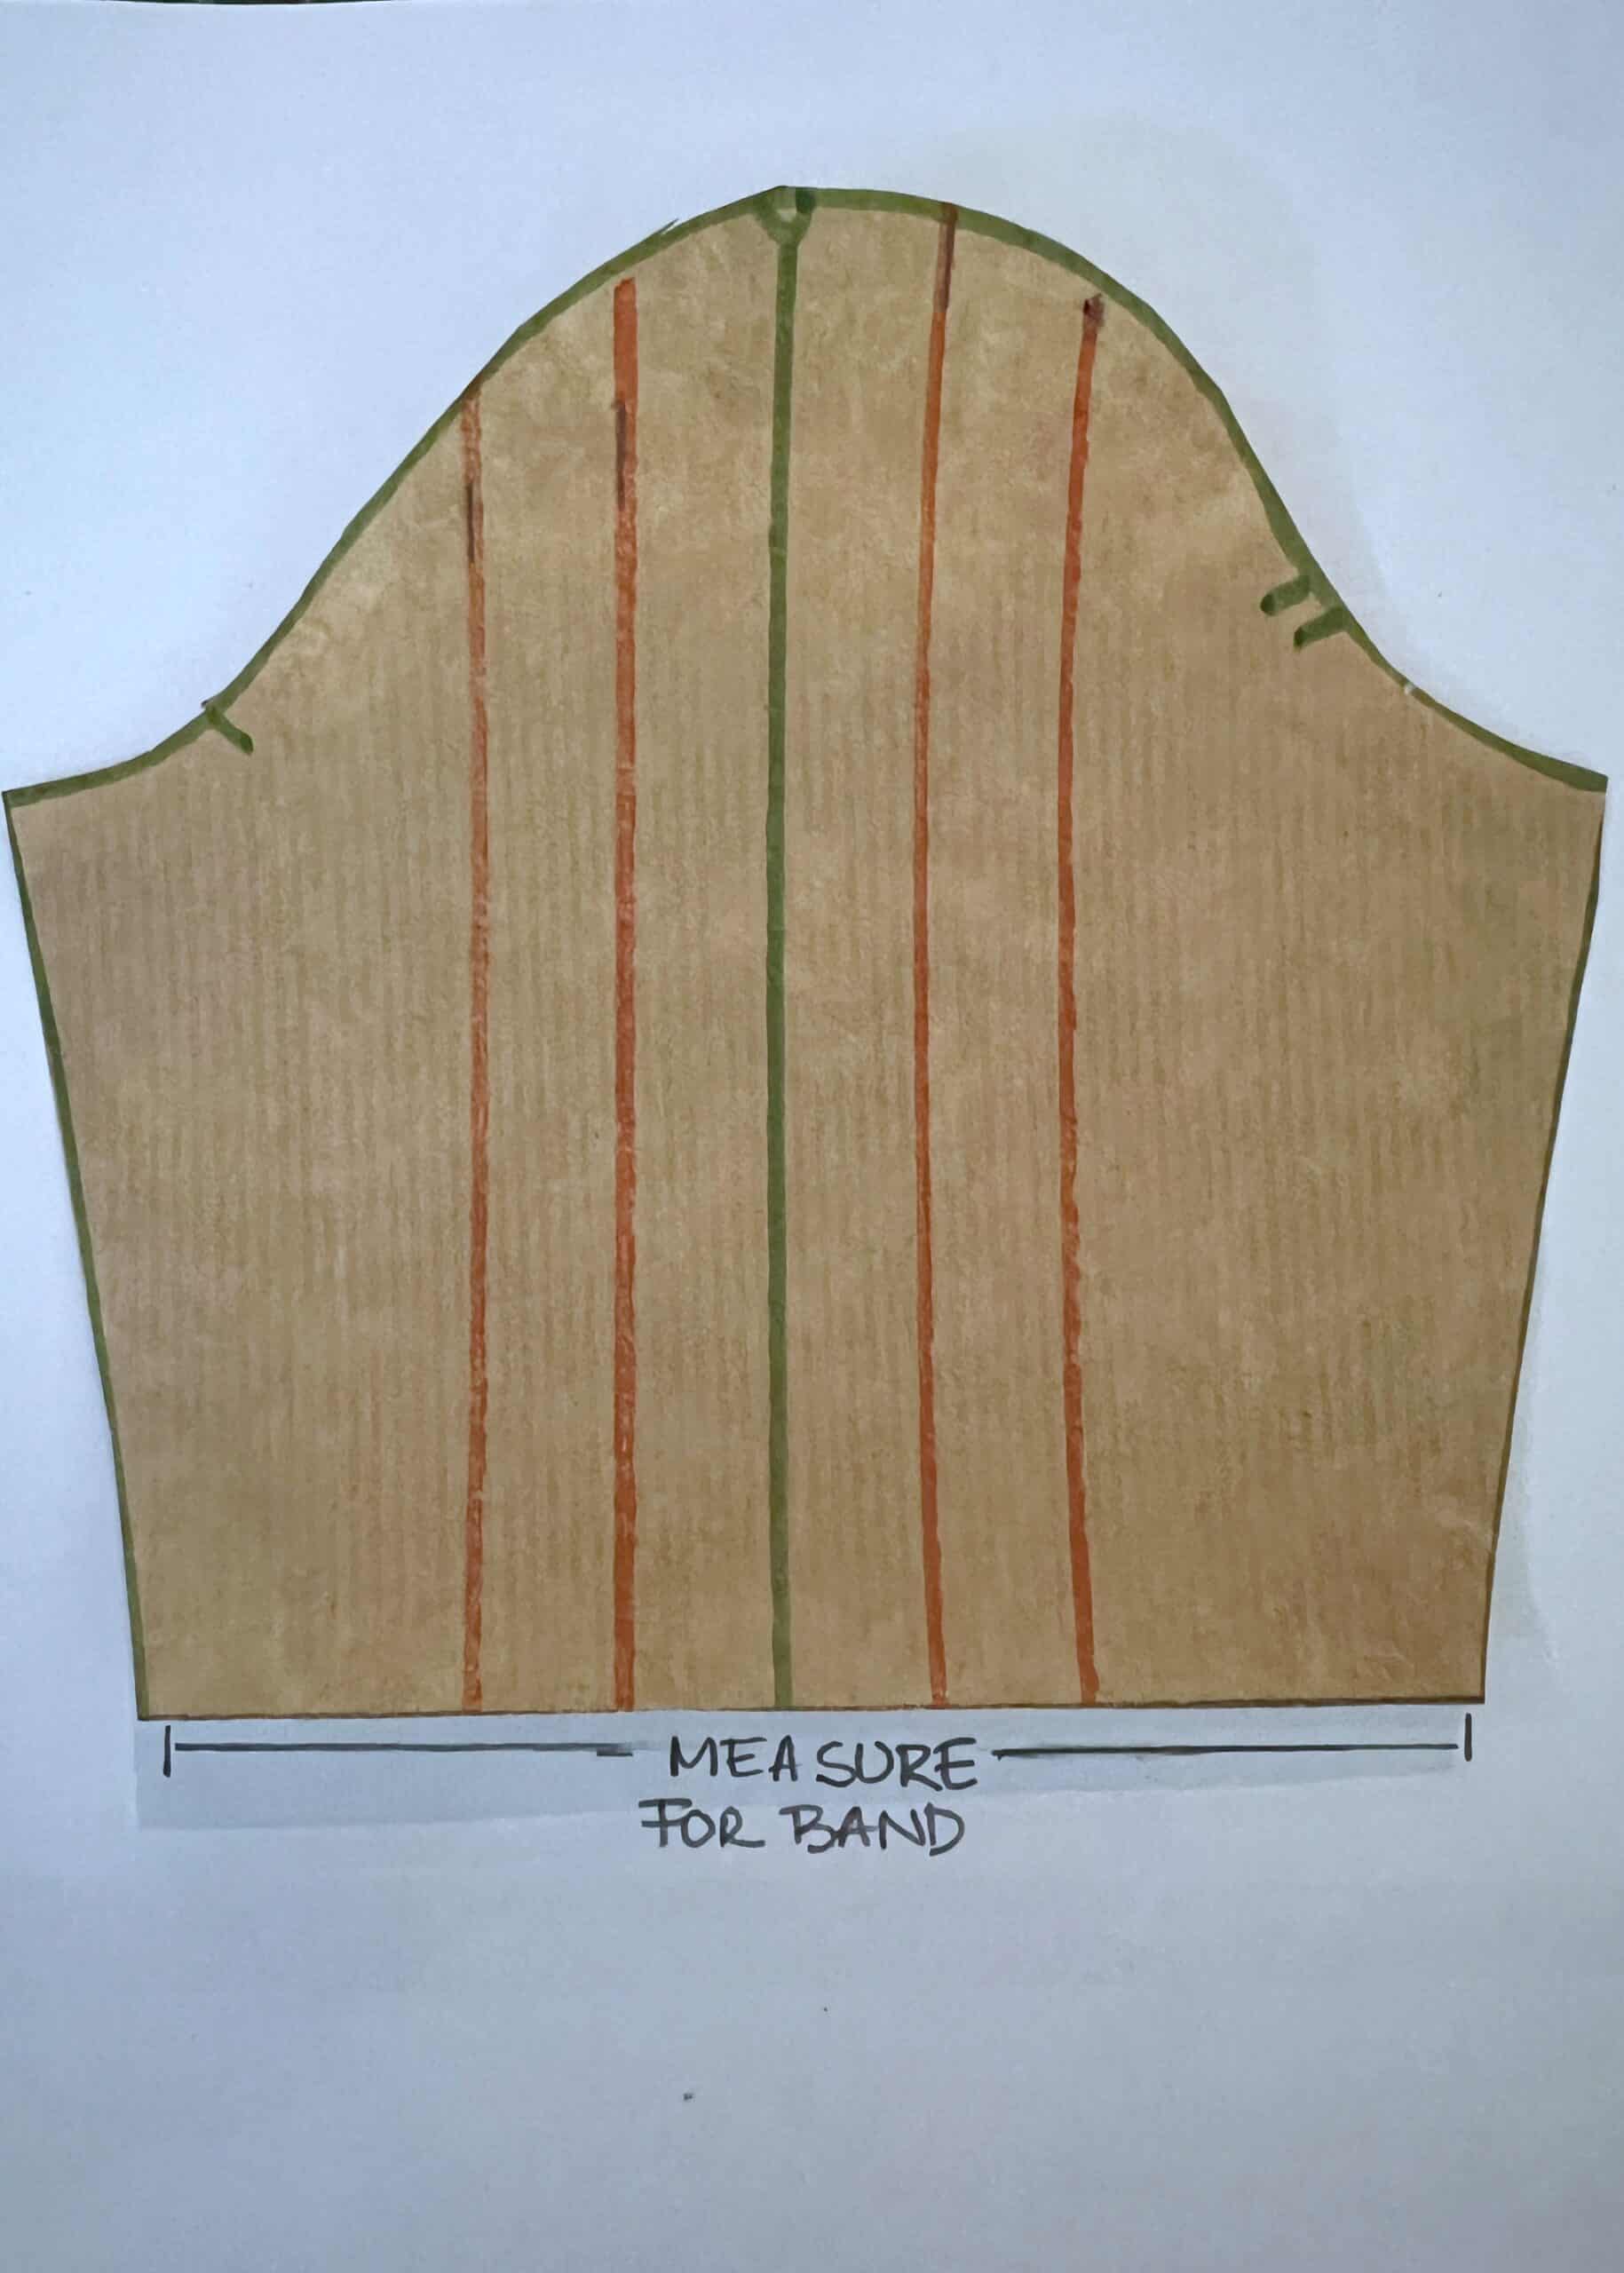
- Get your pattern piece and draw a line from top to bottom straight down the middle. This will be your center line (blue).
- Now draw 2 more lines to each side of the center 1.5” apart (red), these will be your cut lines.
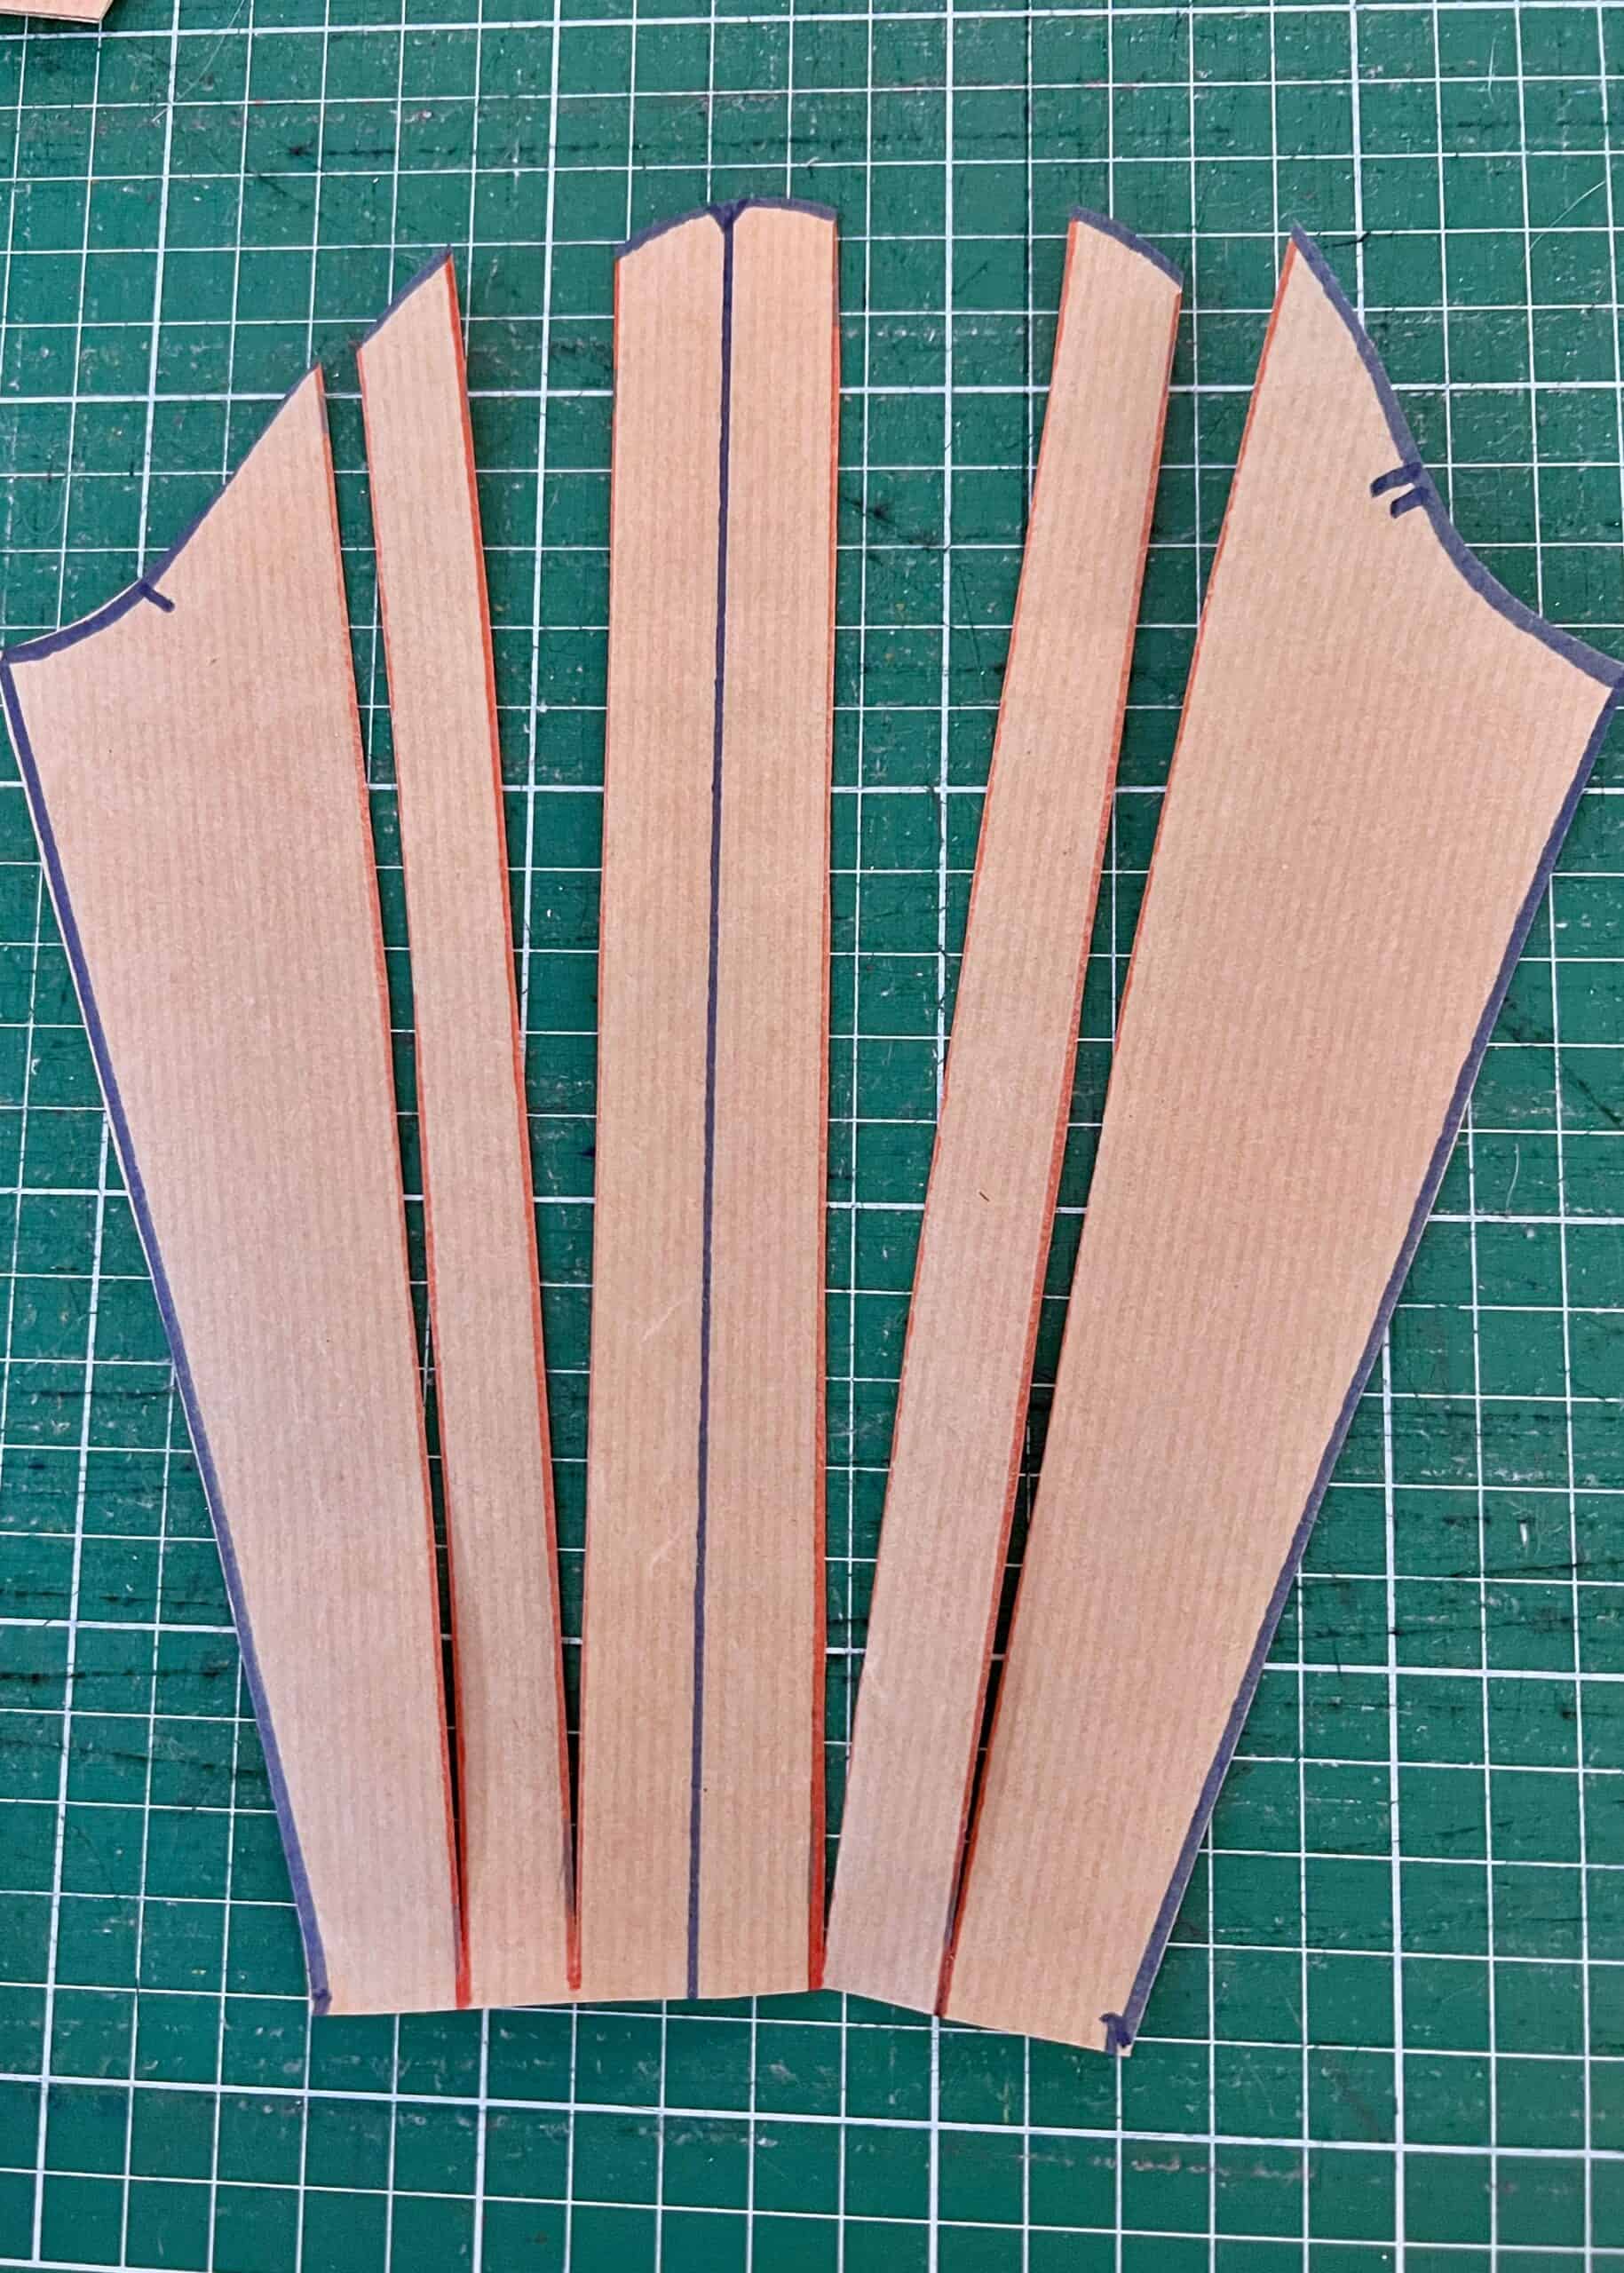
- Cut the lines in red from the top to the bottom but not all the way through. Leave about ⅛ of an inch still attached, creating a hinge. Do not cut the center line.
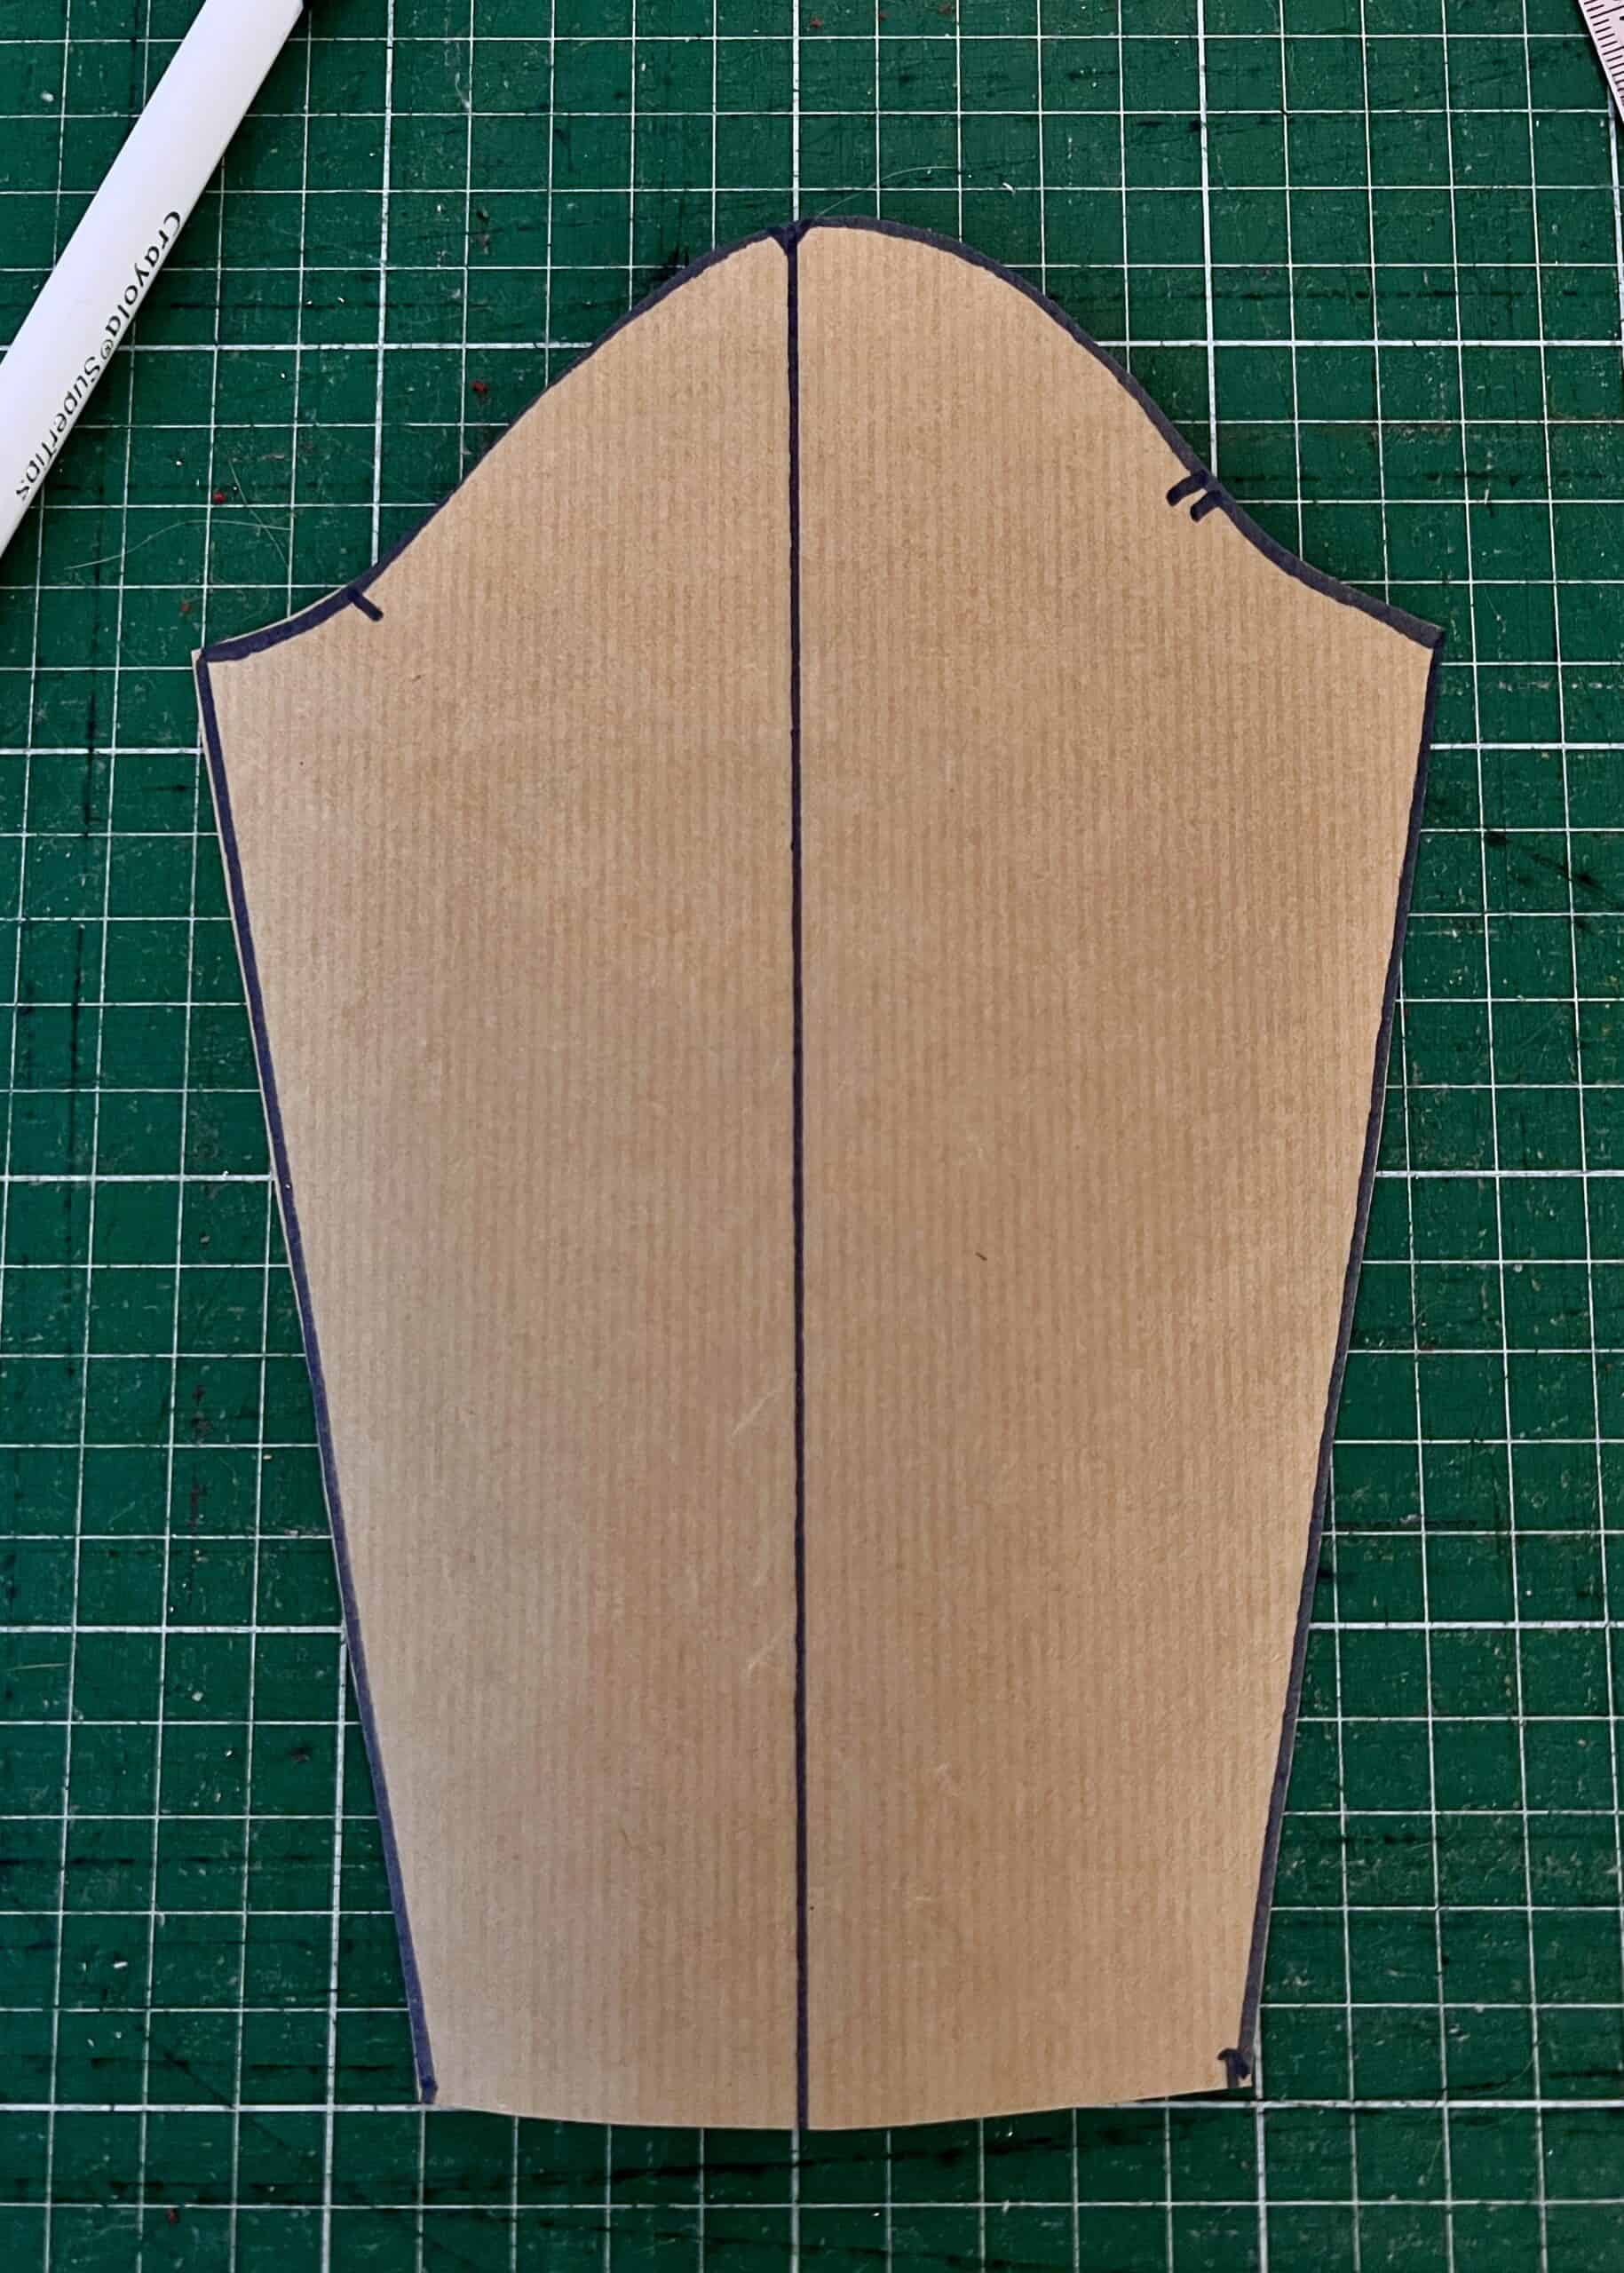
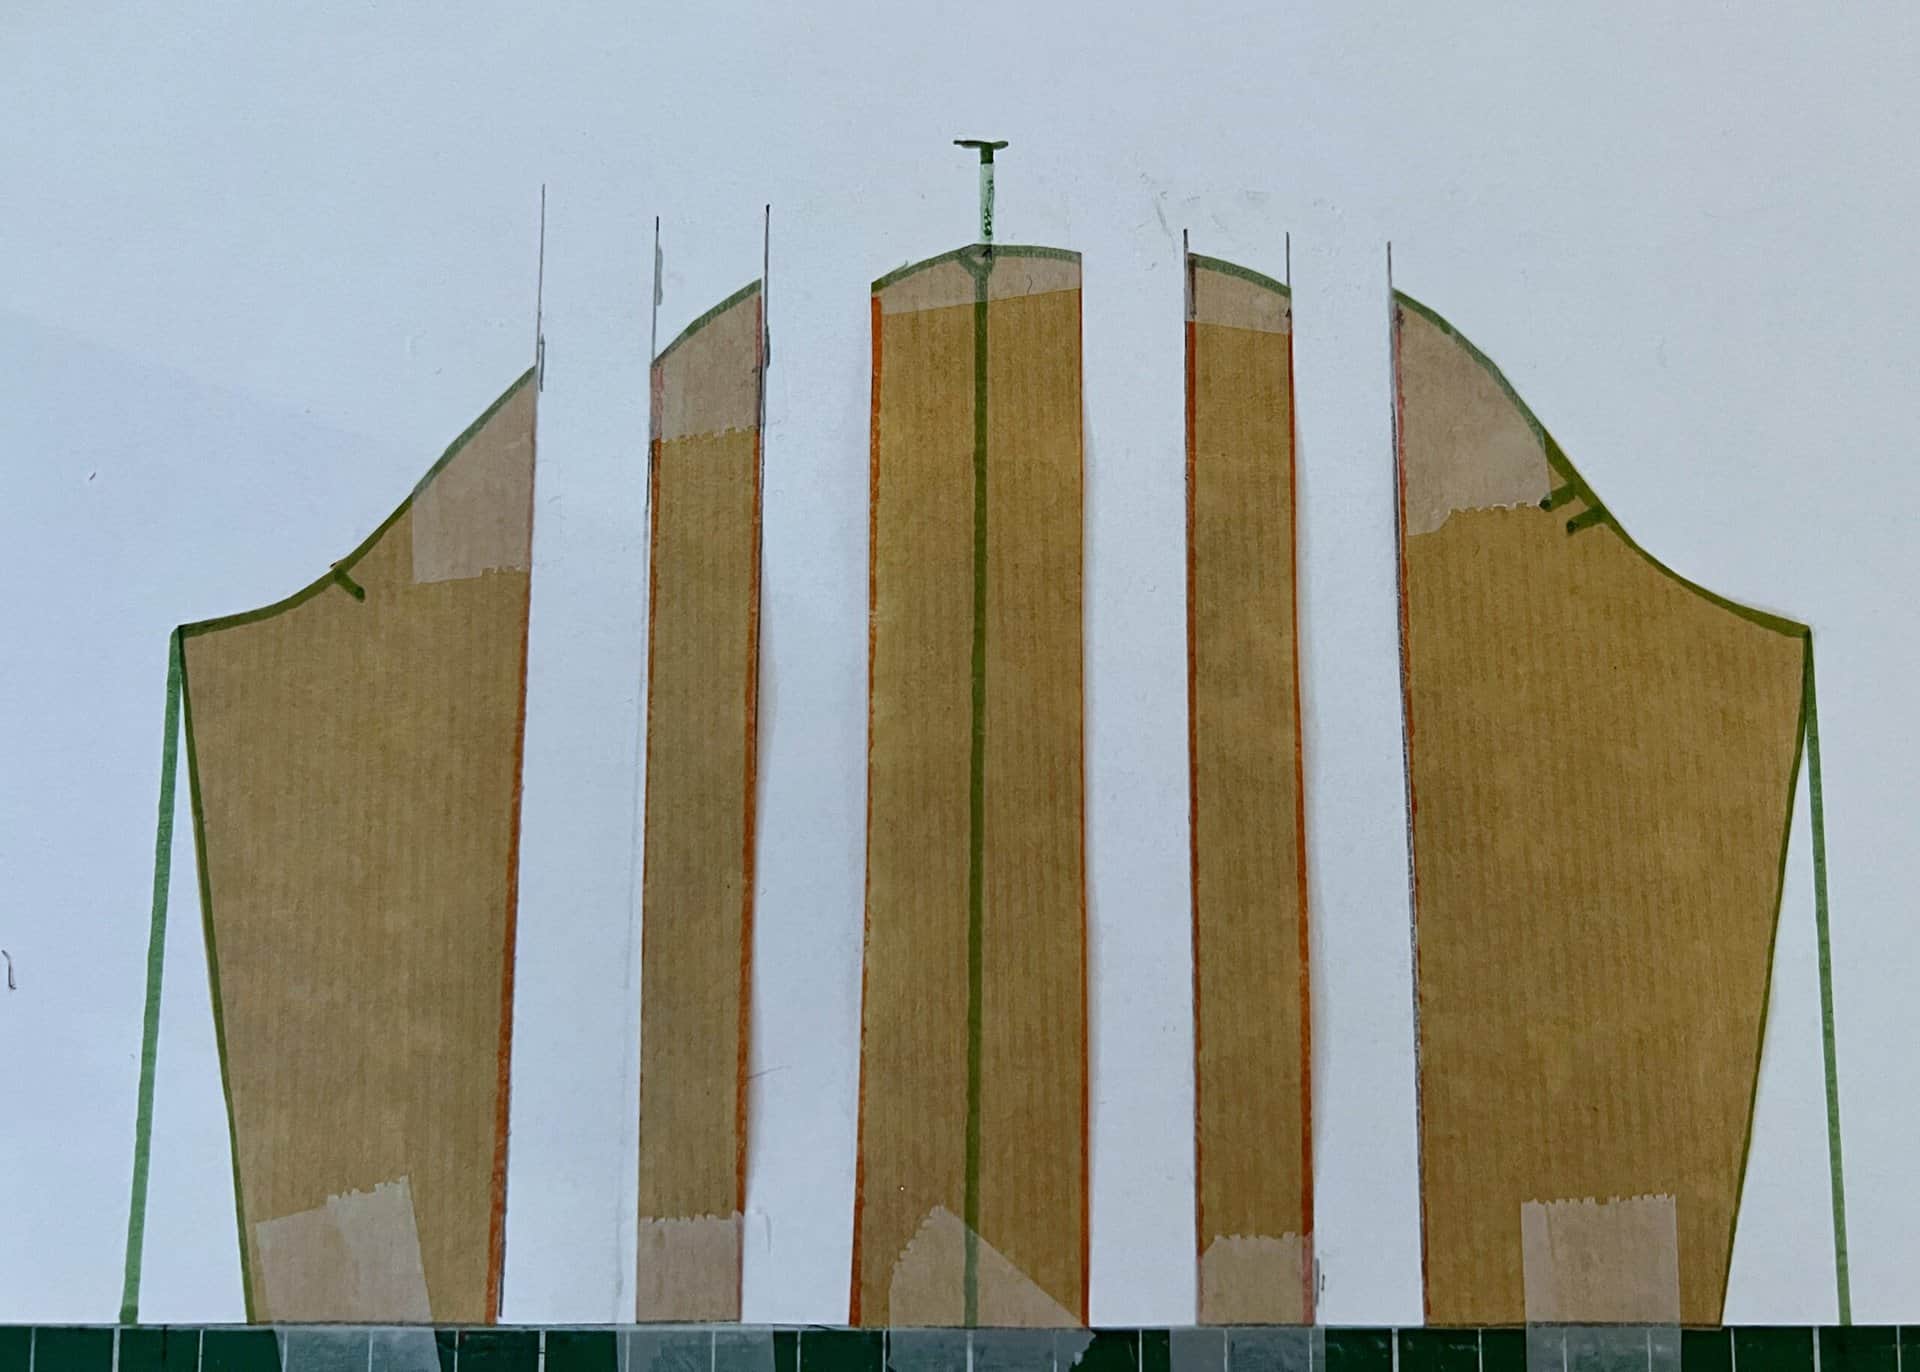
Steps 4-6
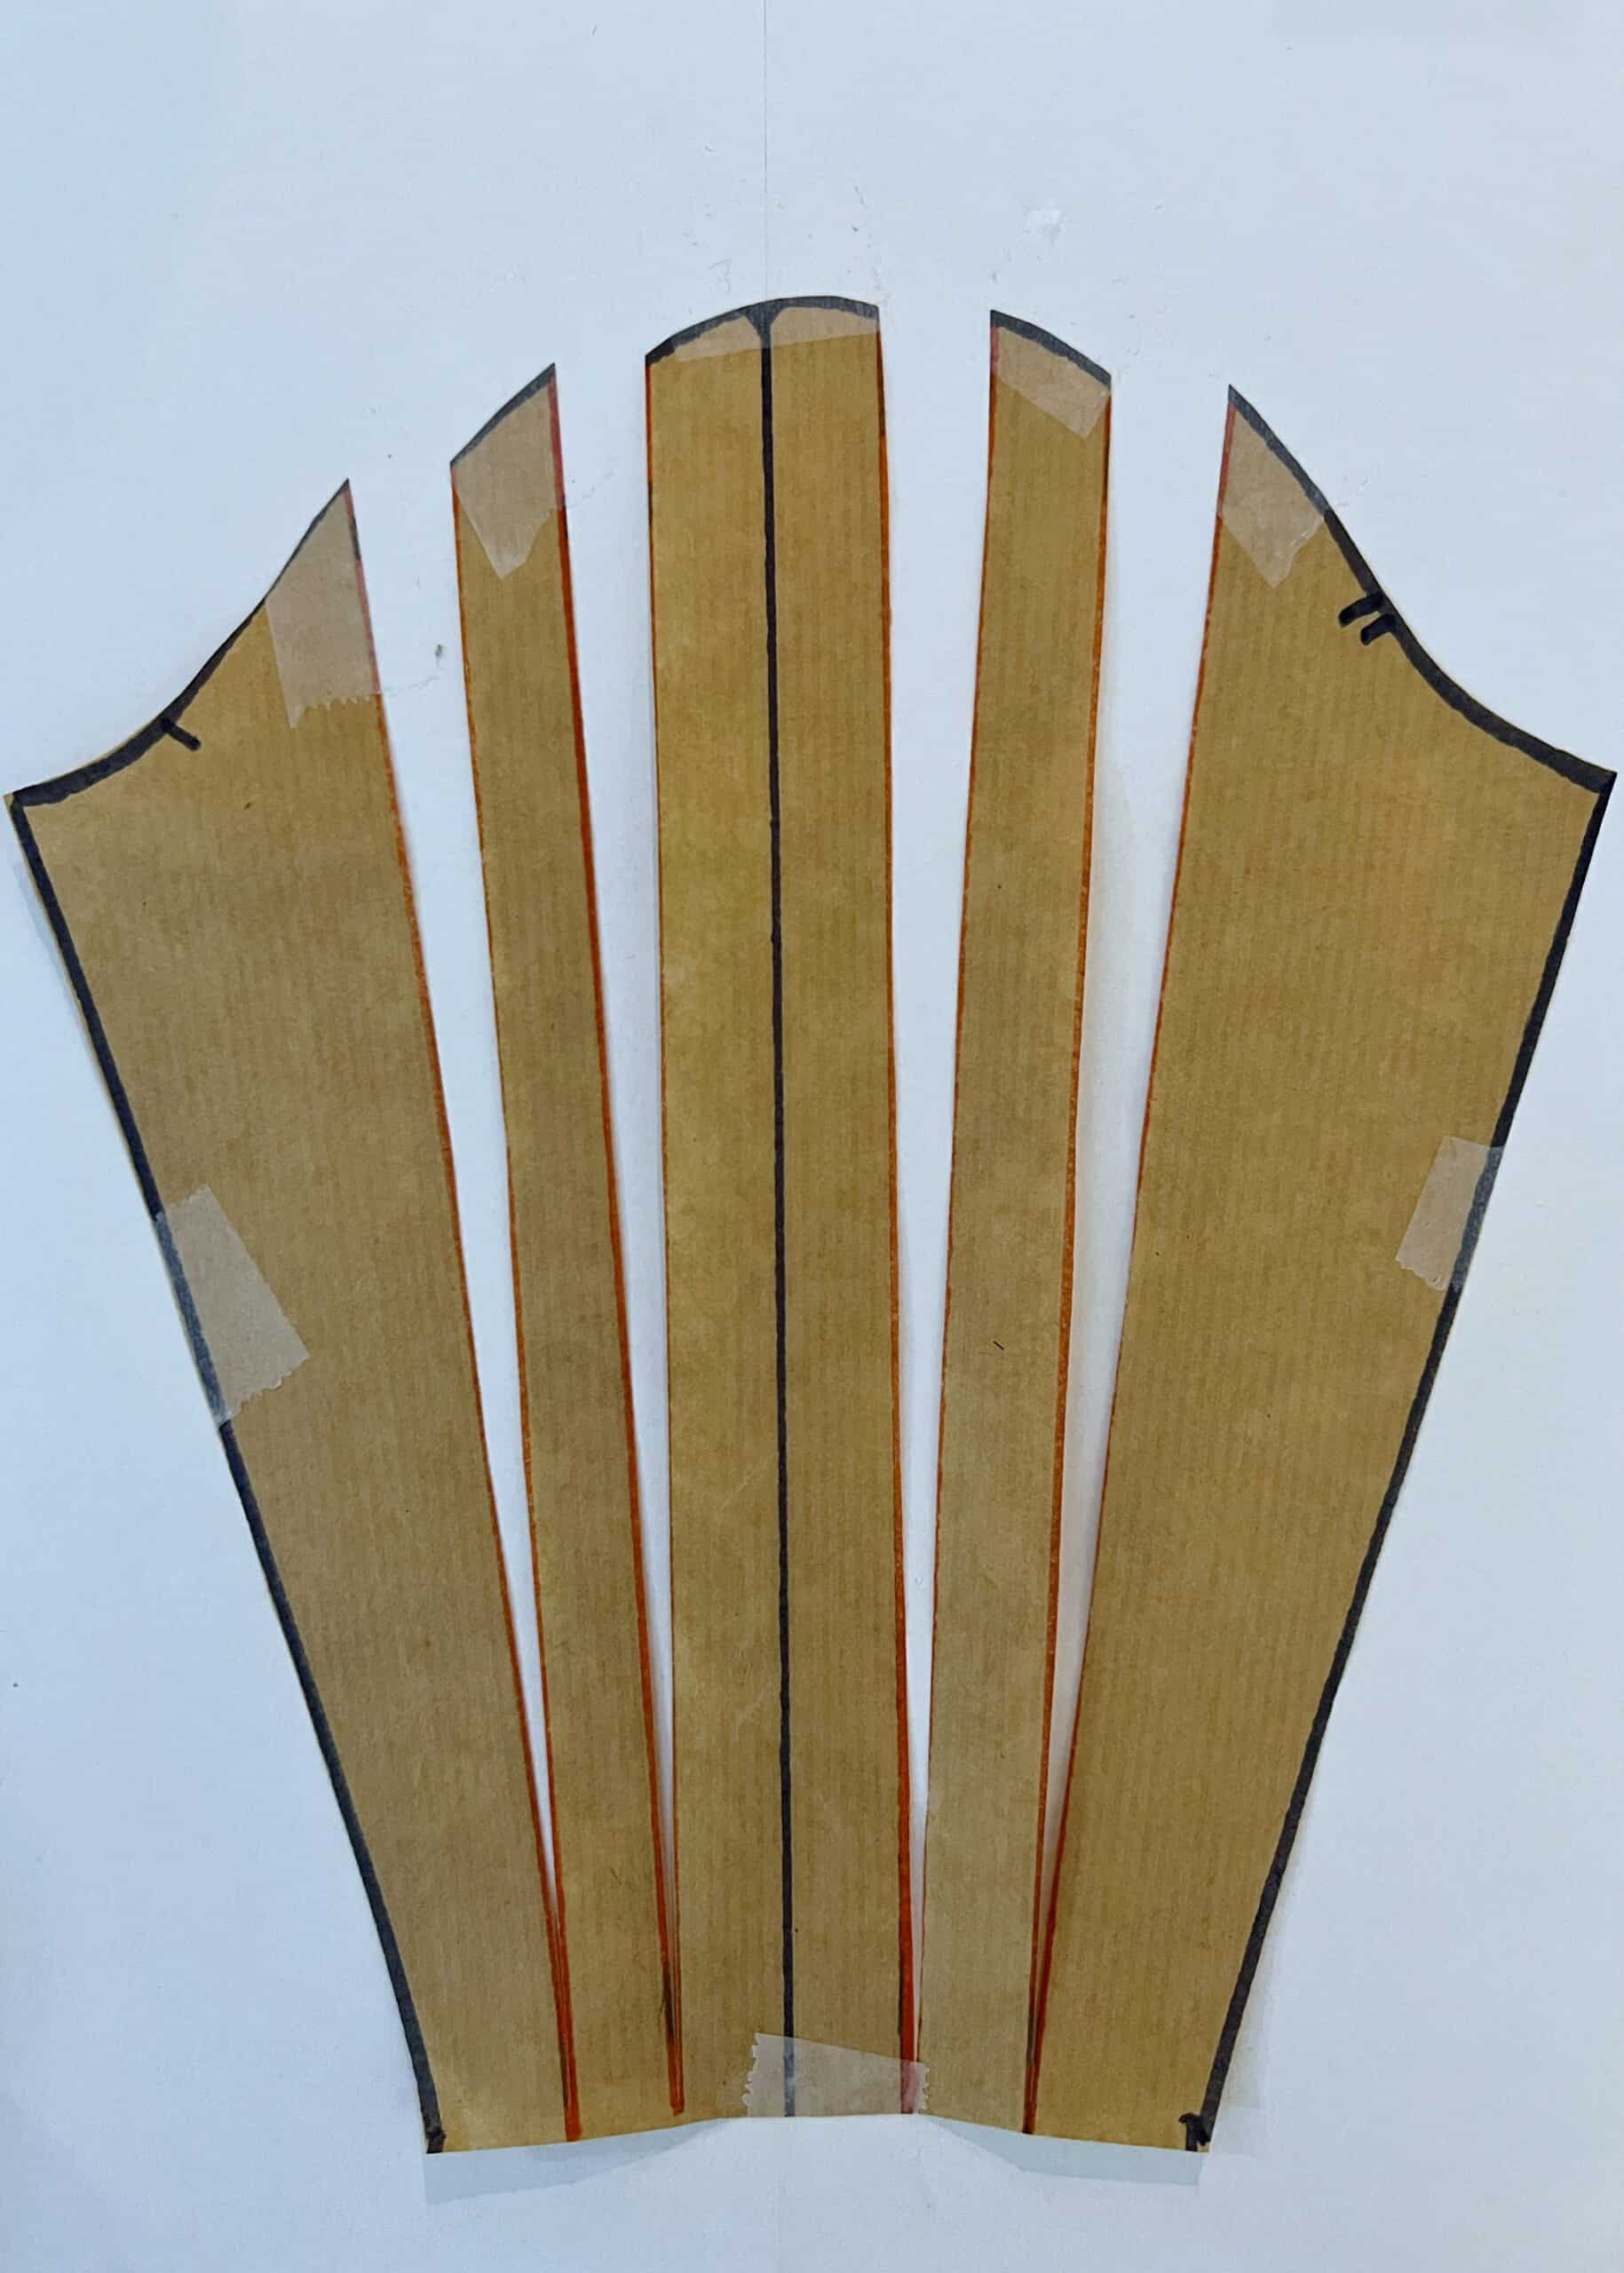
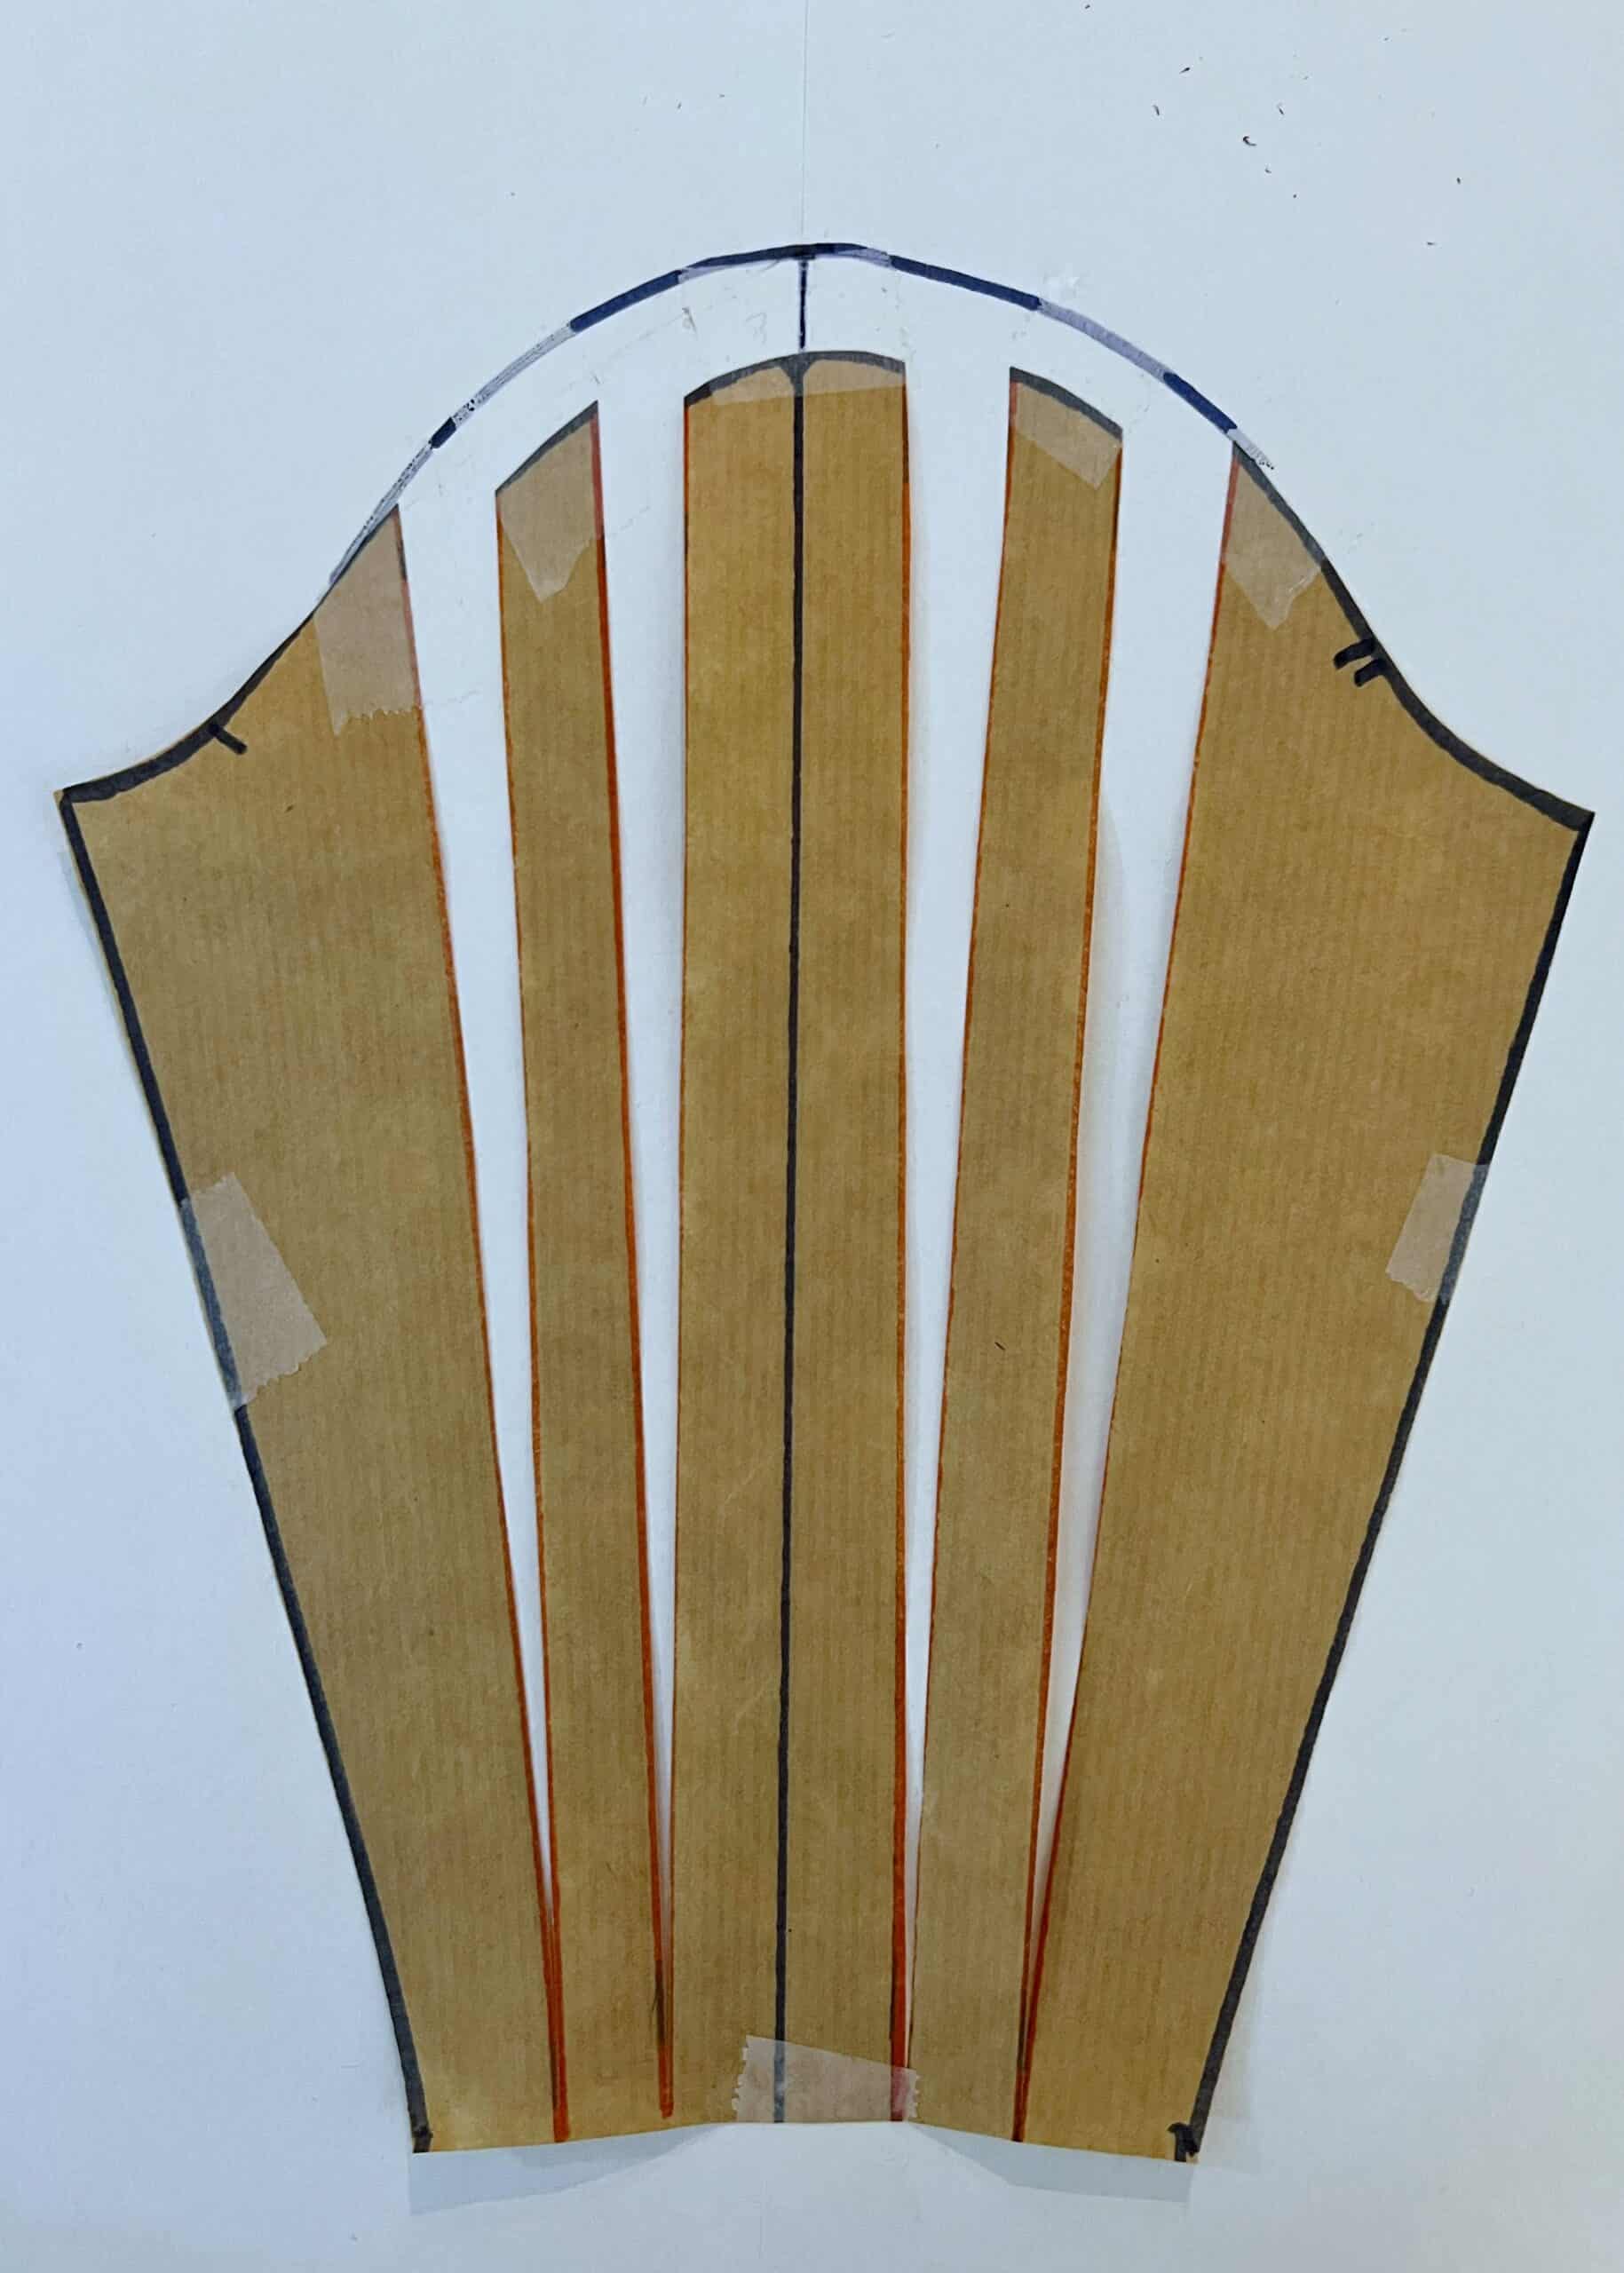
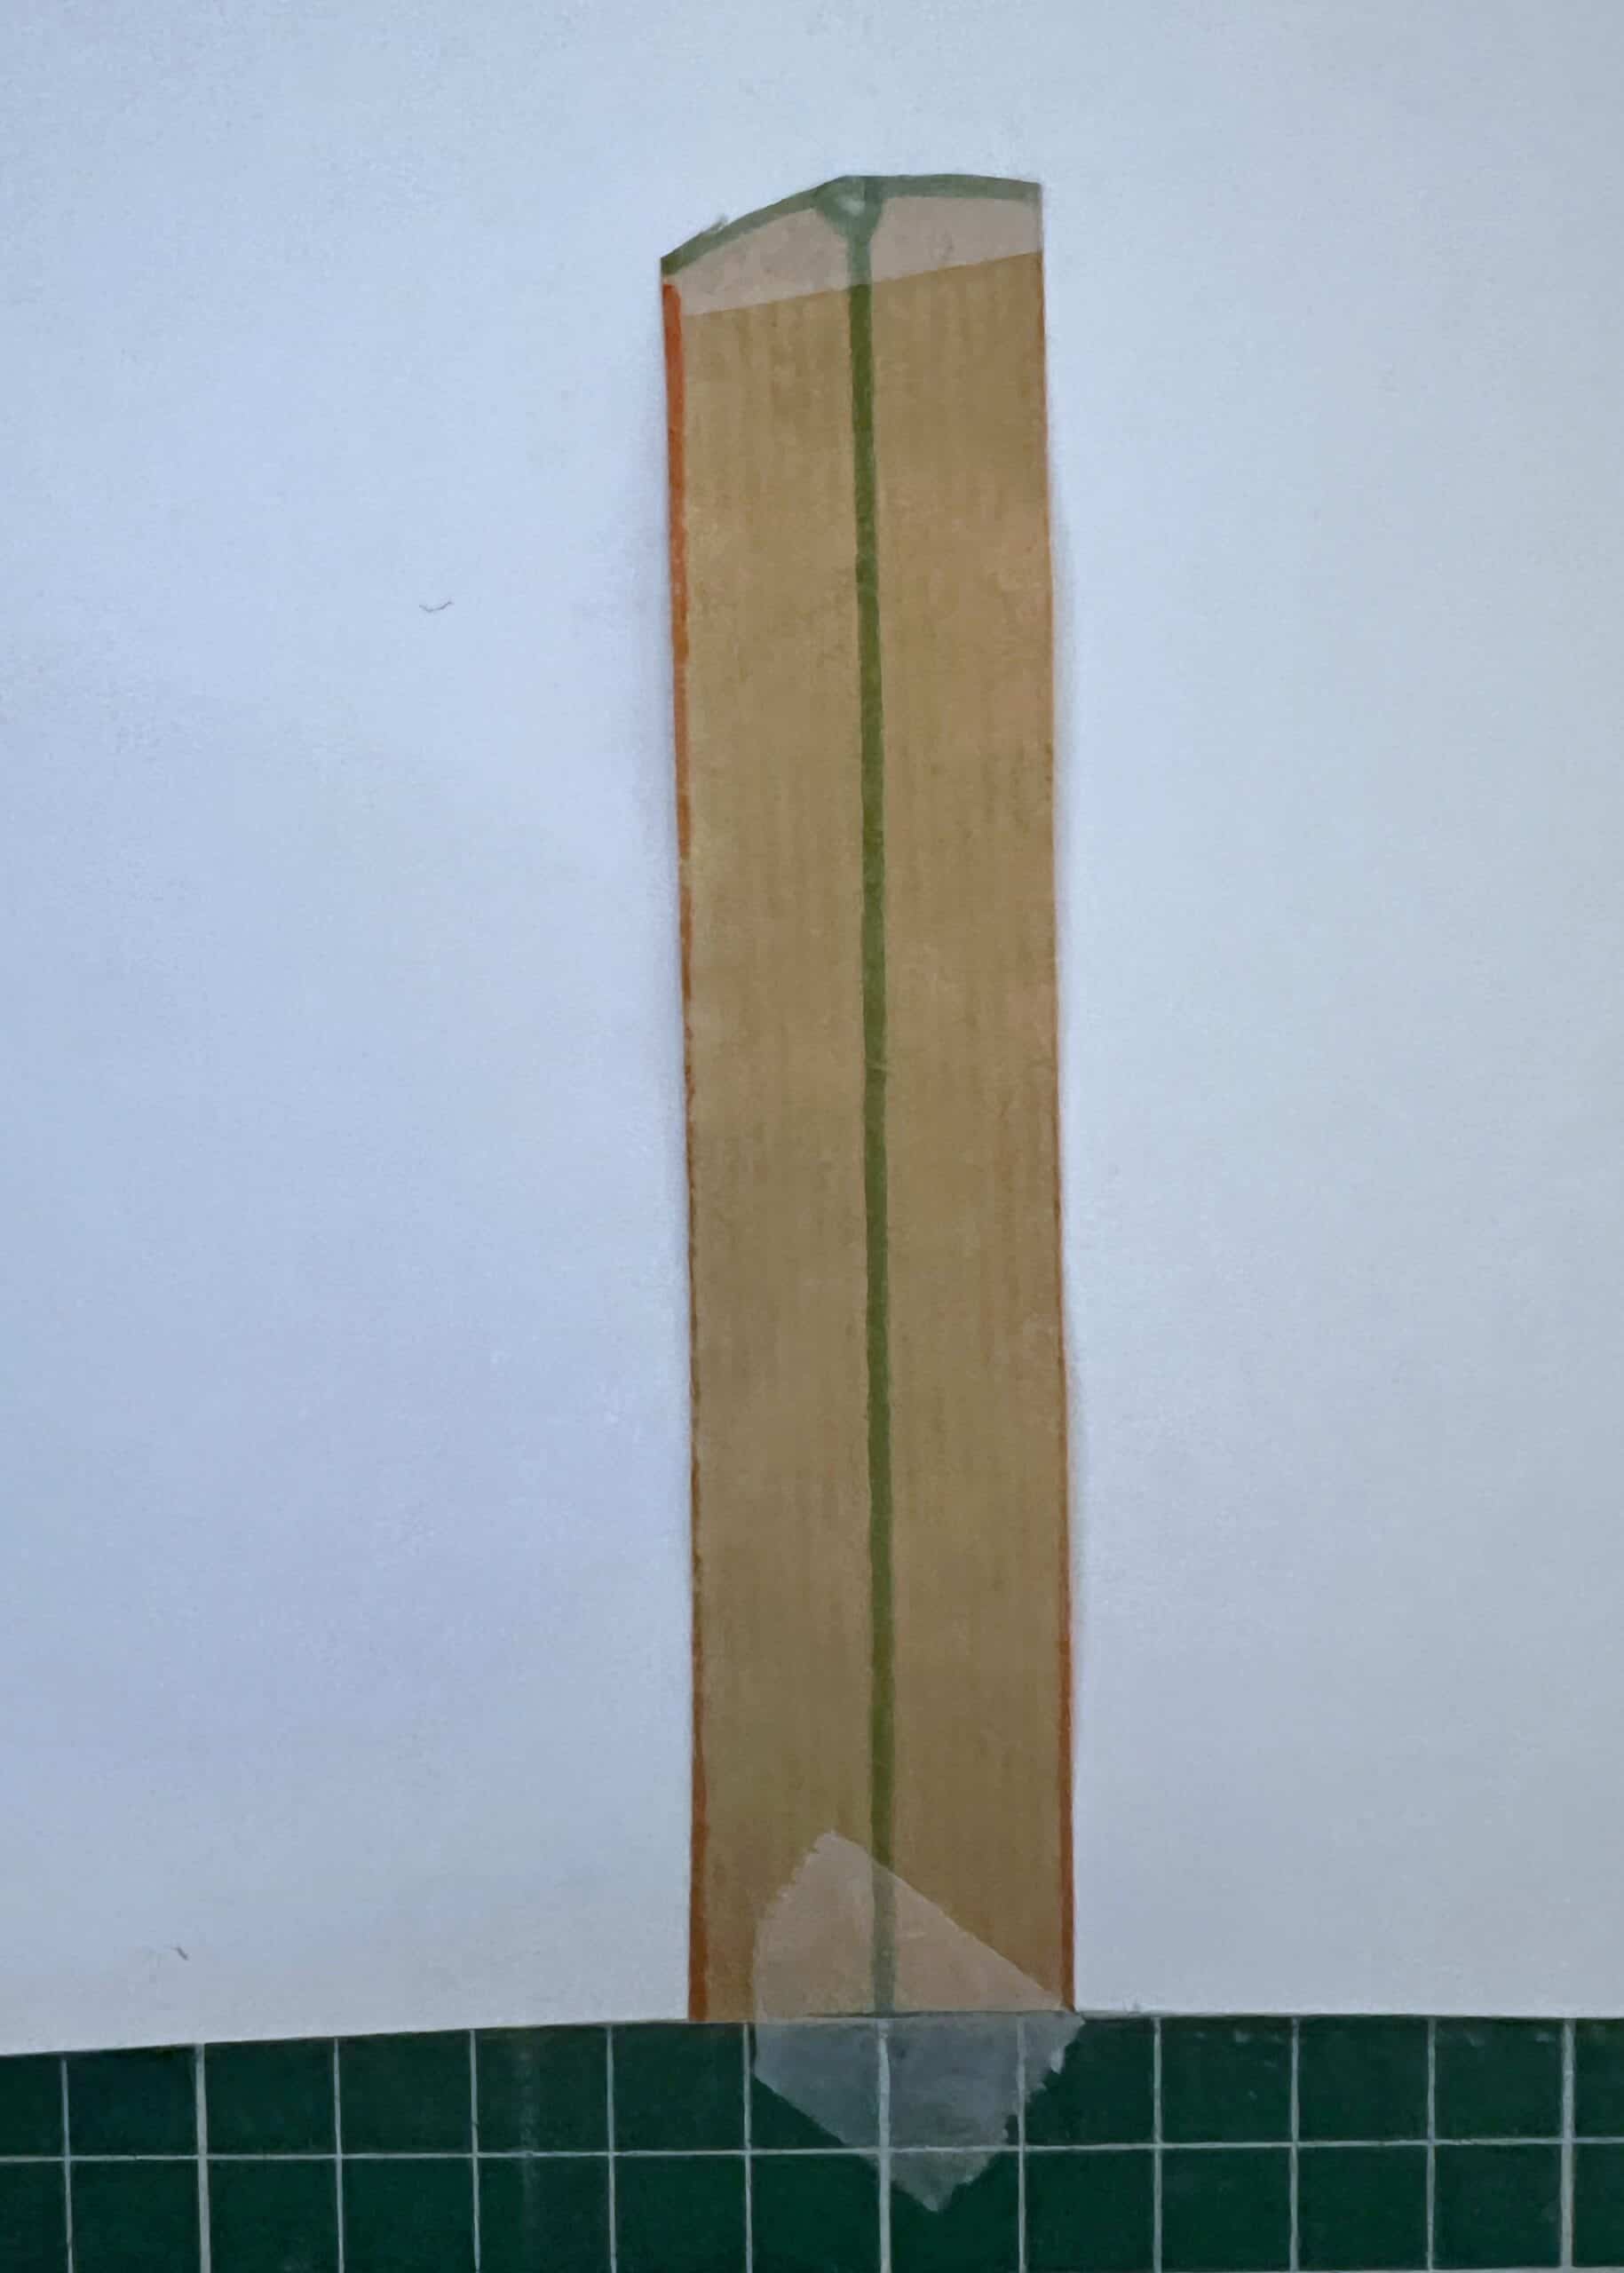
- Place your slashed sleeve pattern on top of another sheet of paper and fix that center piece (with the blue line) on it with some tape.
- From that center piece spread the other pieces 1.5” apart and tape each in place.
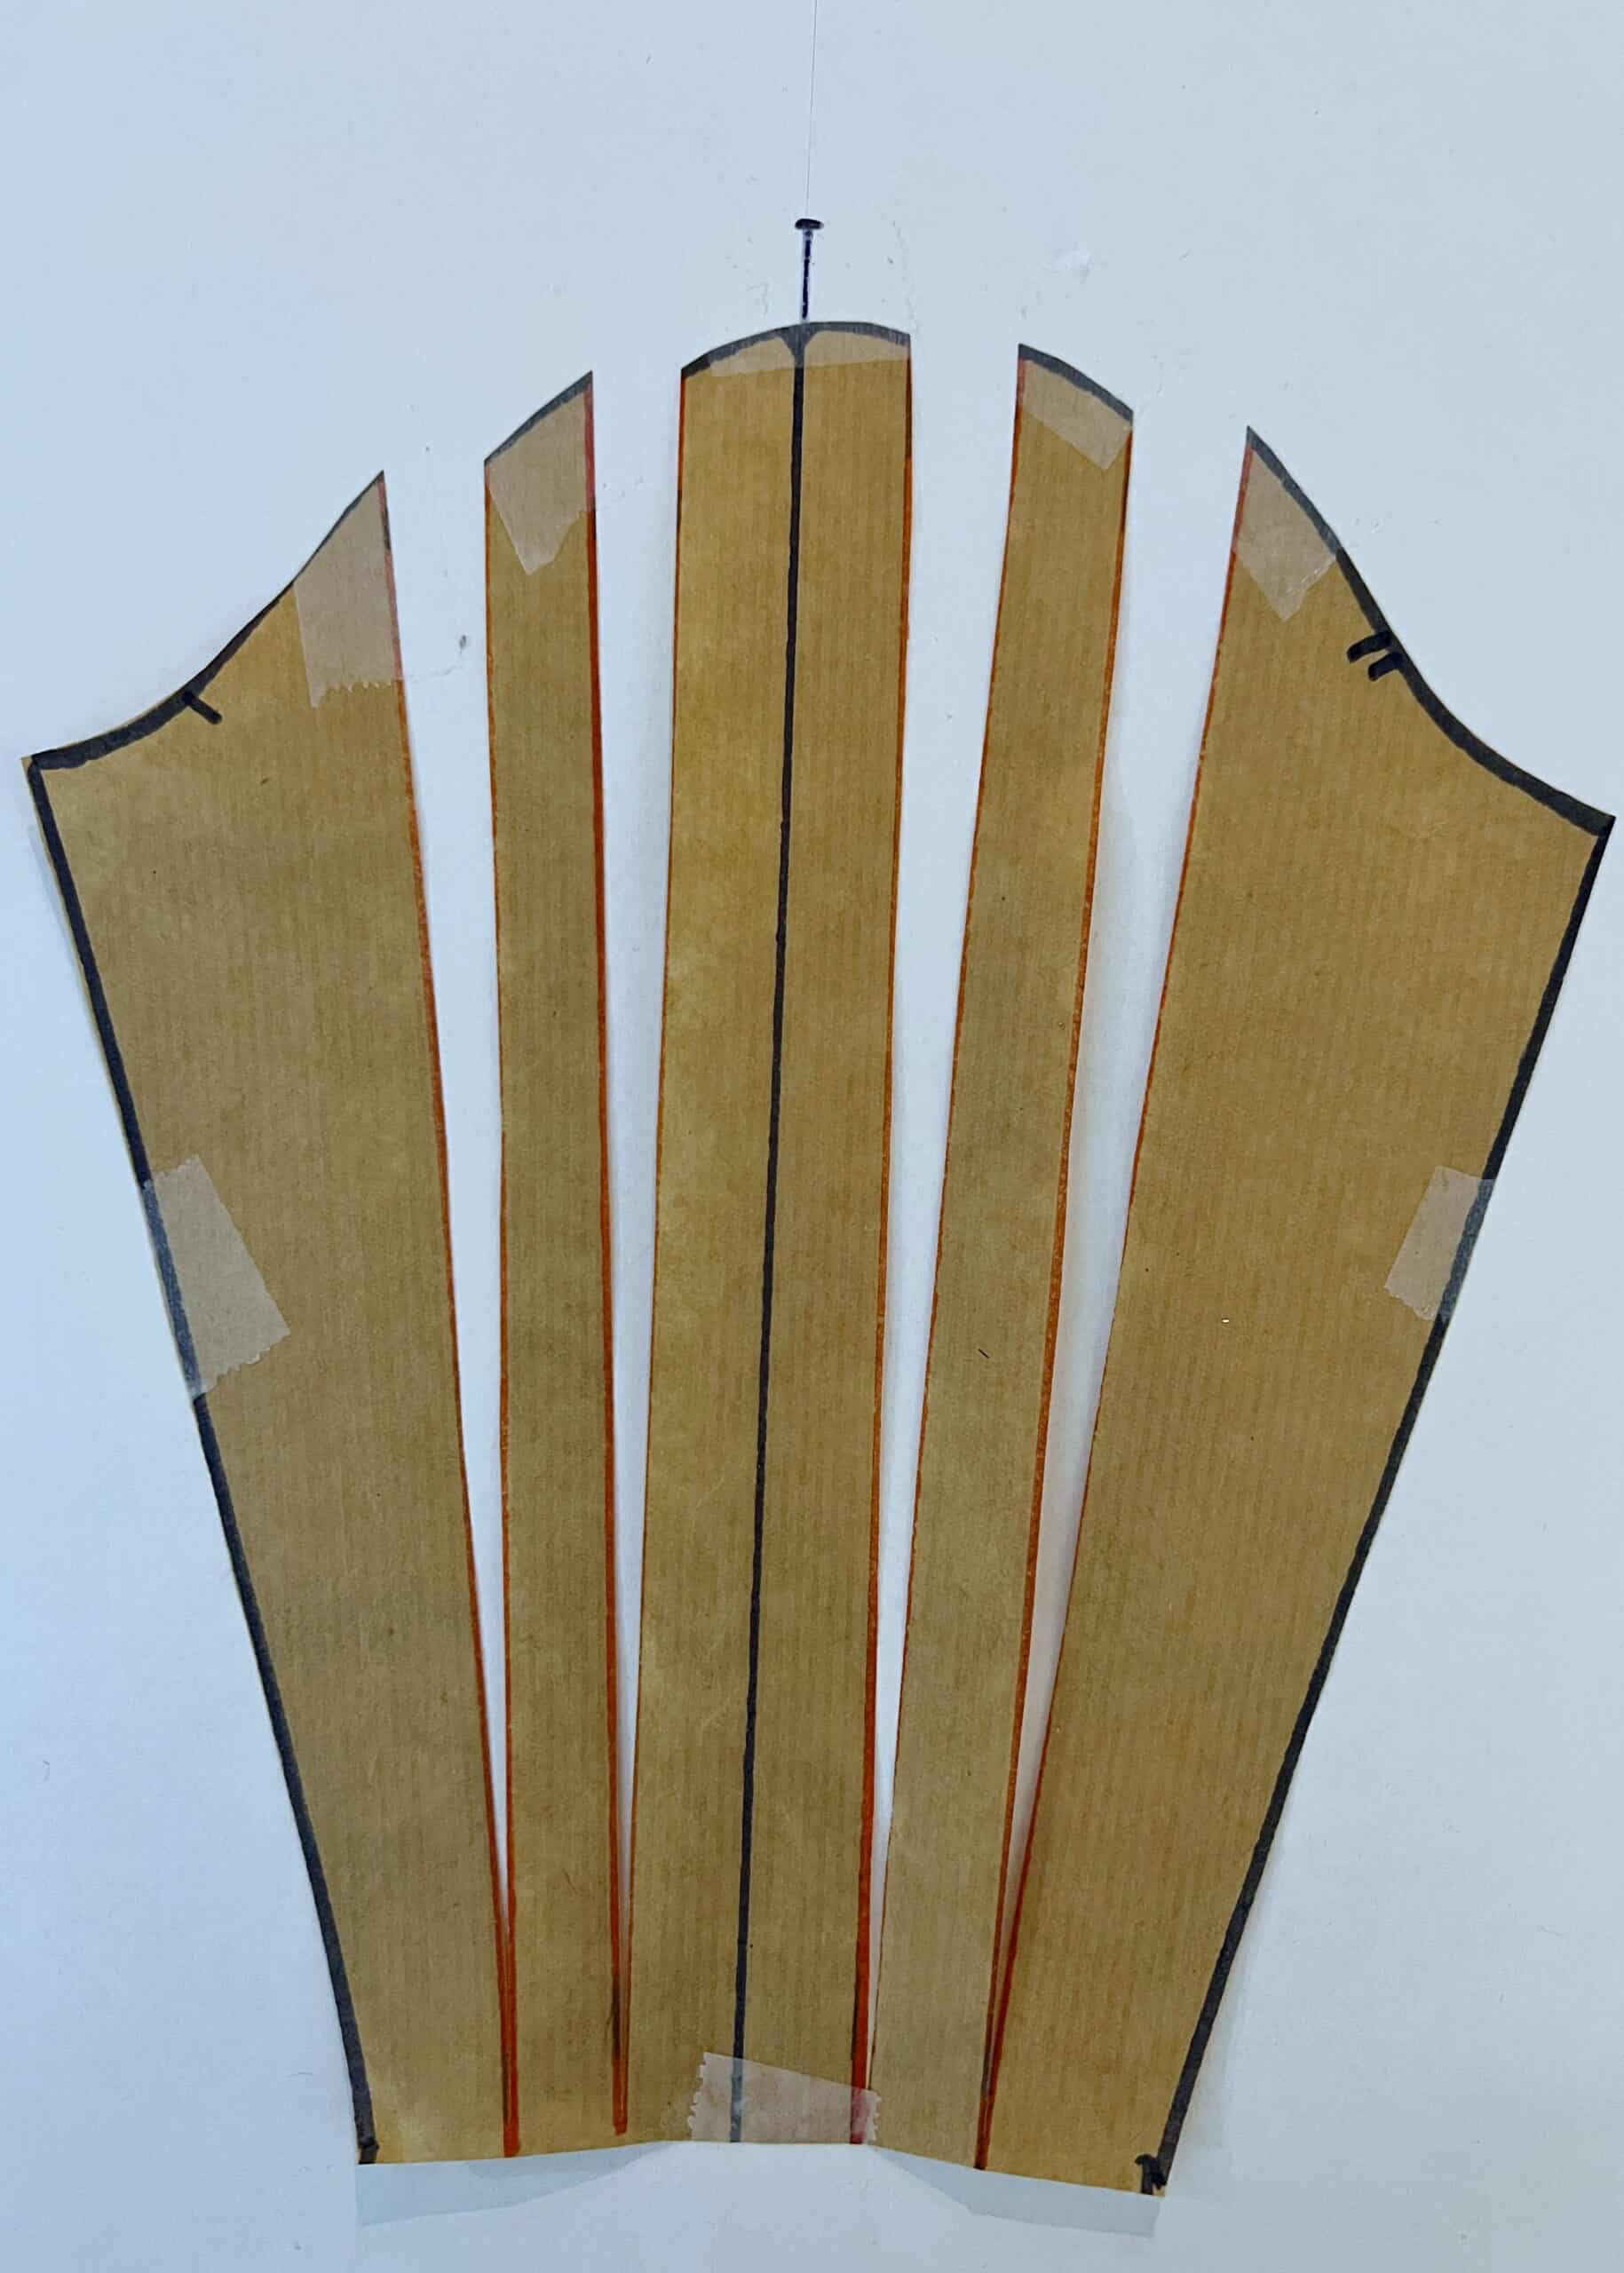
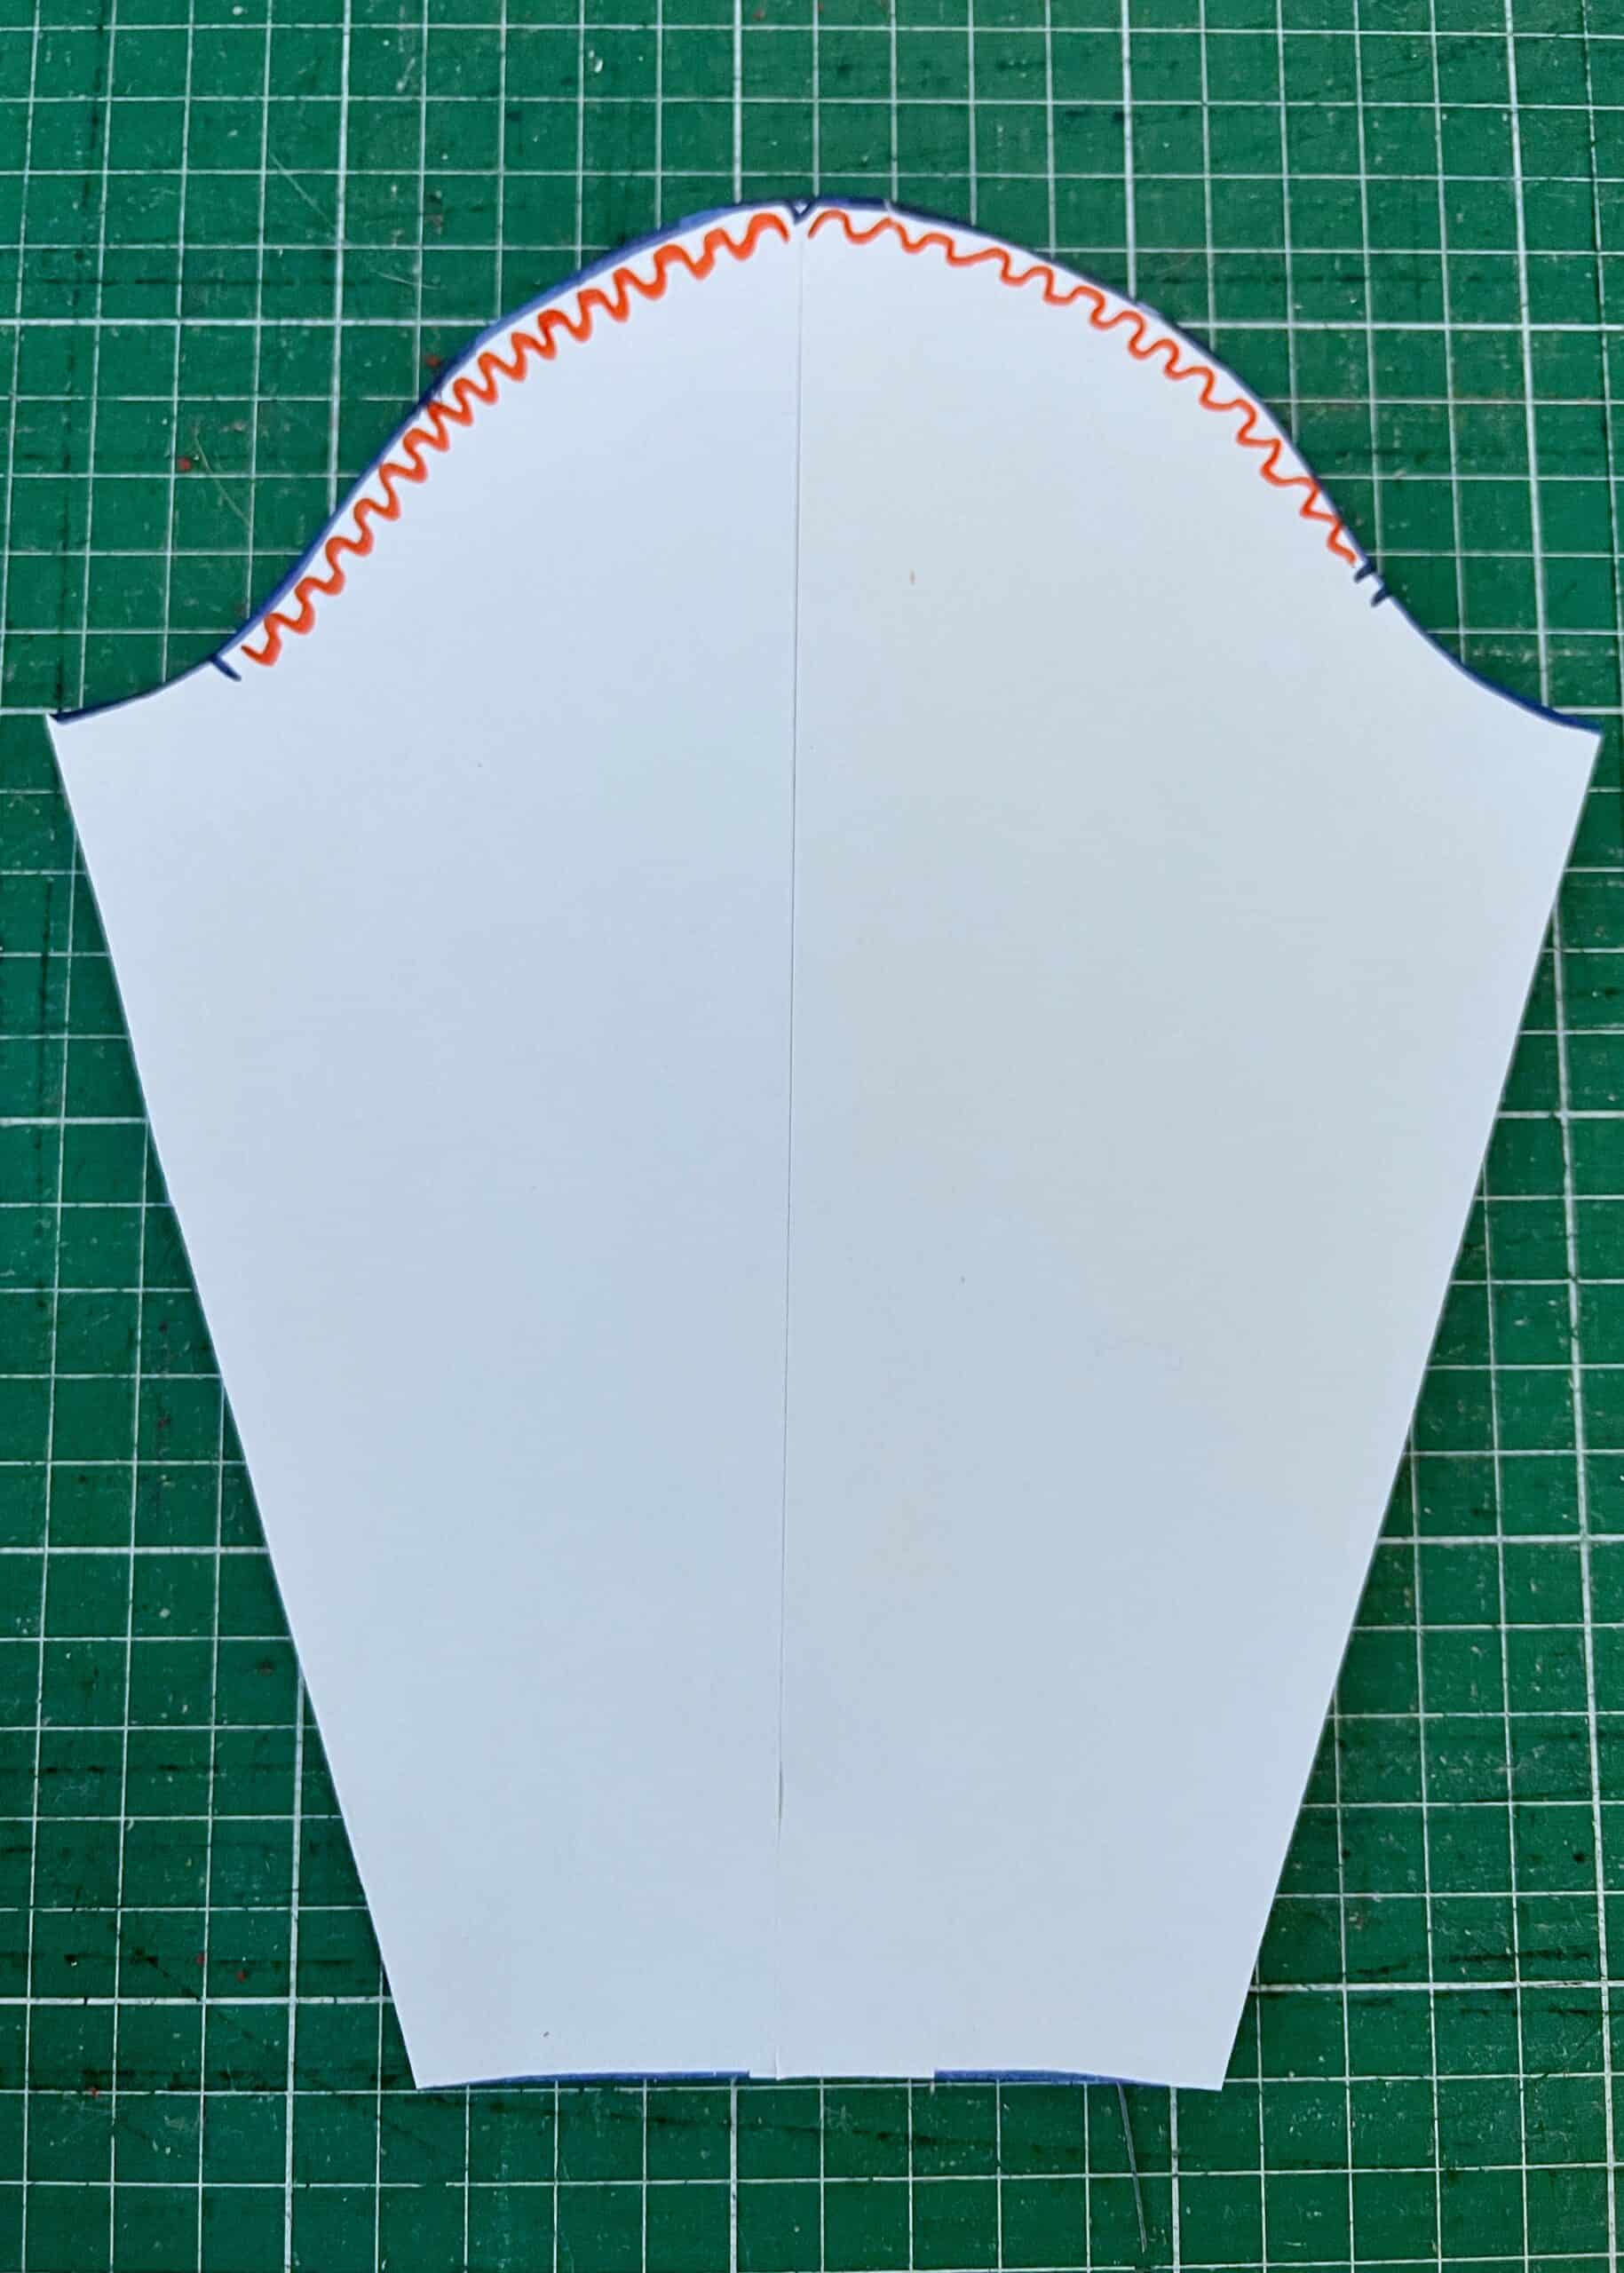
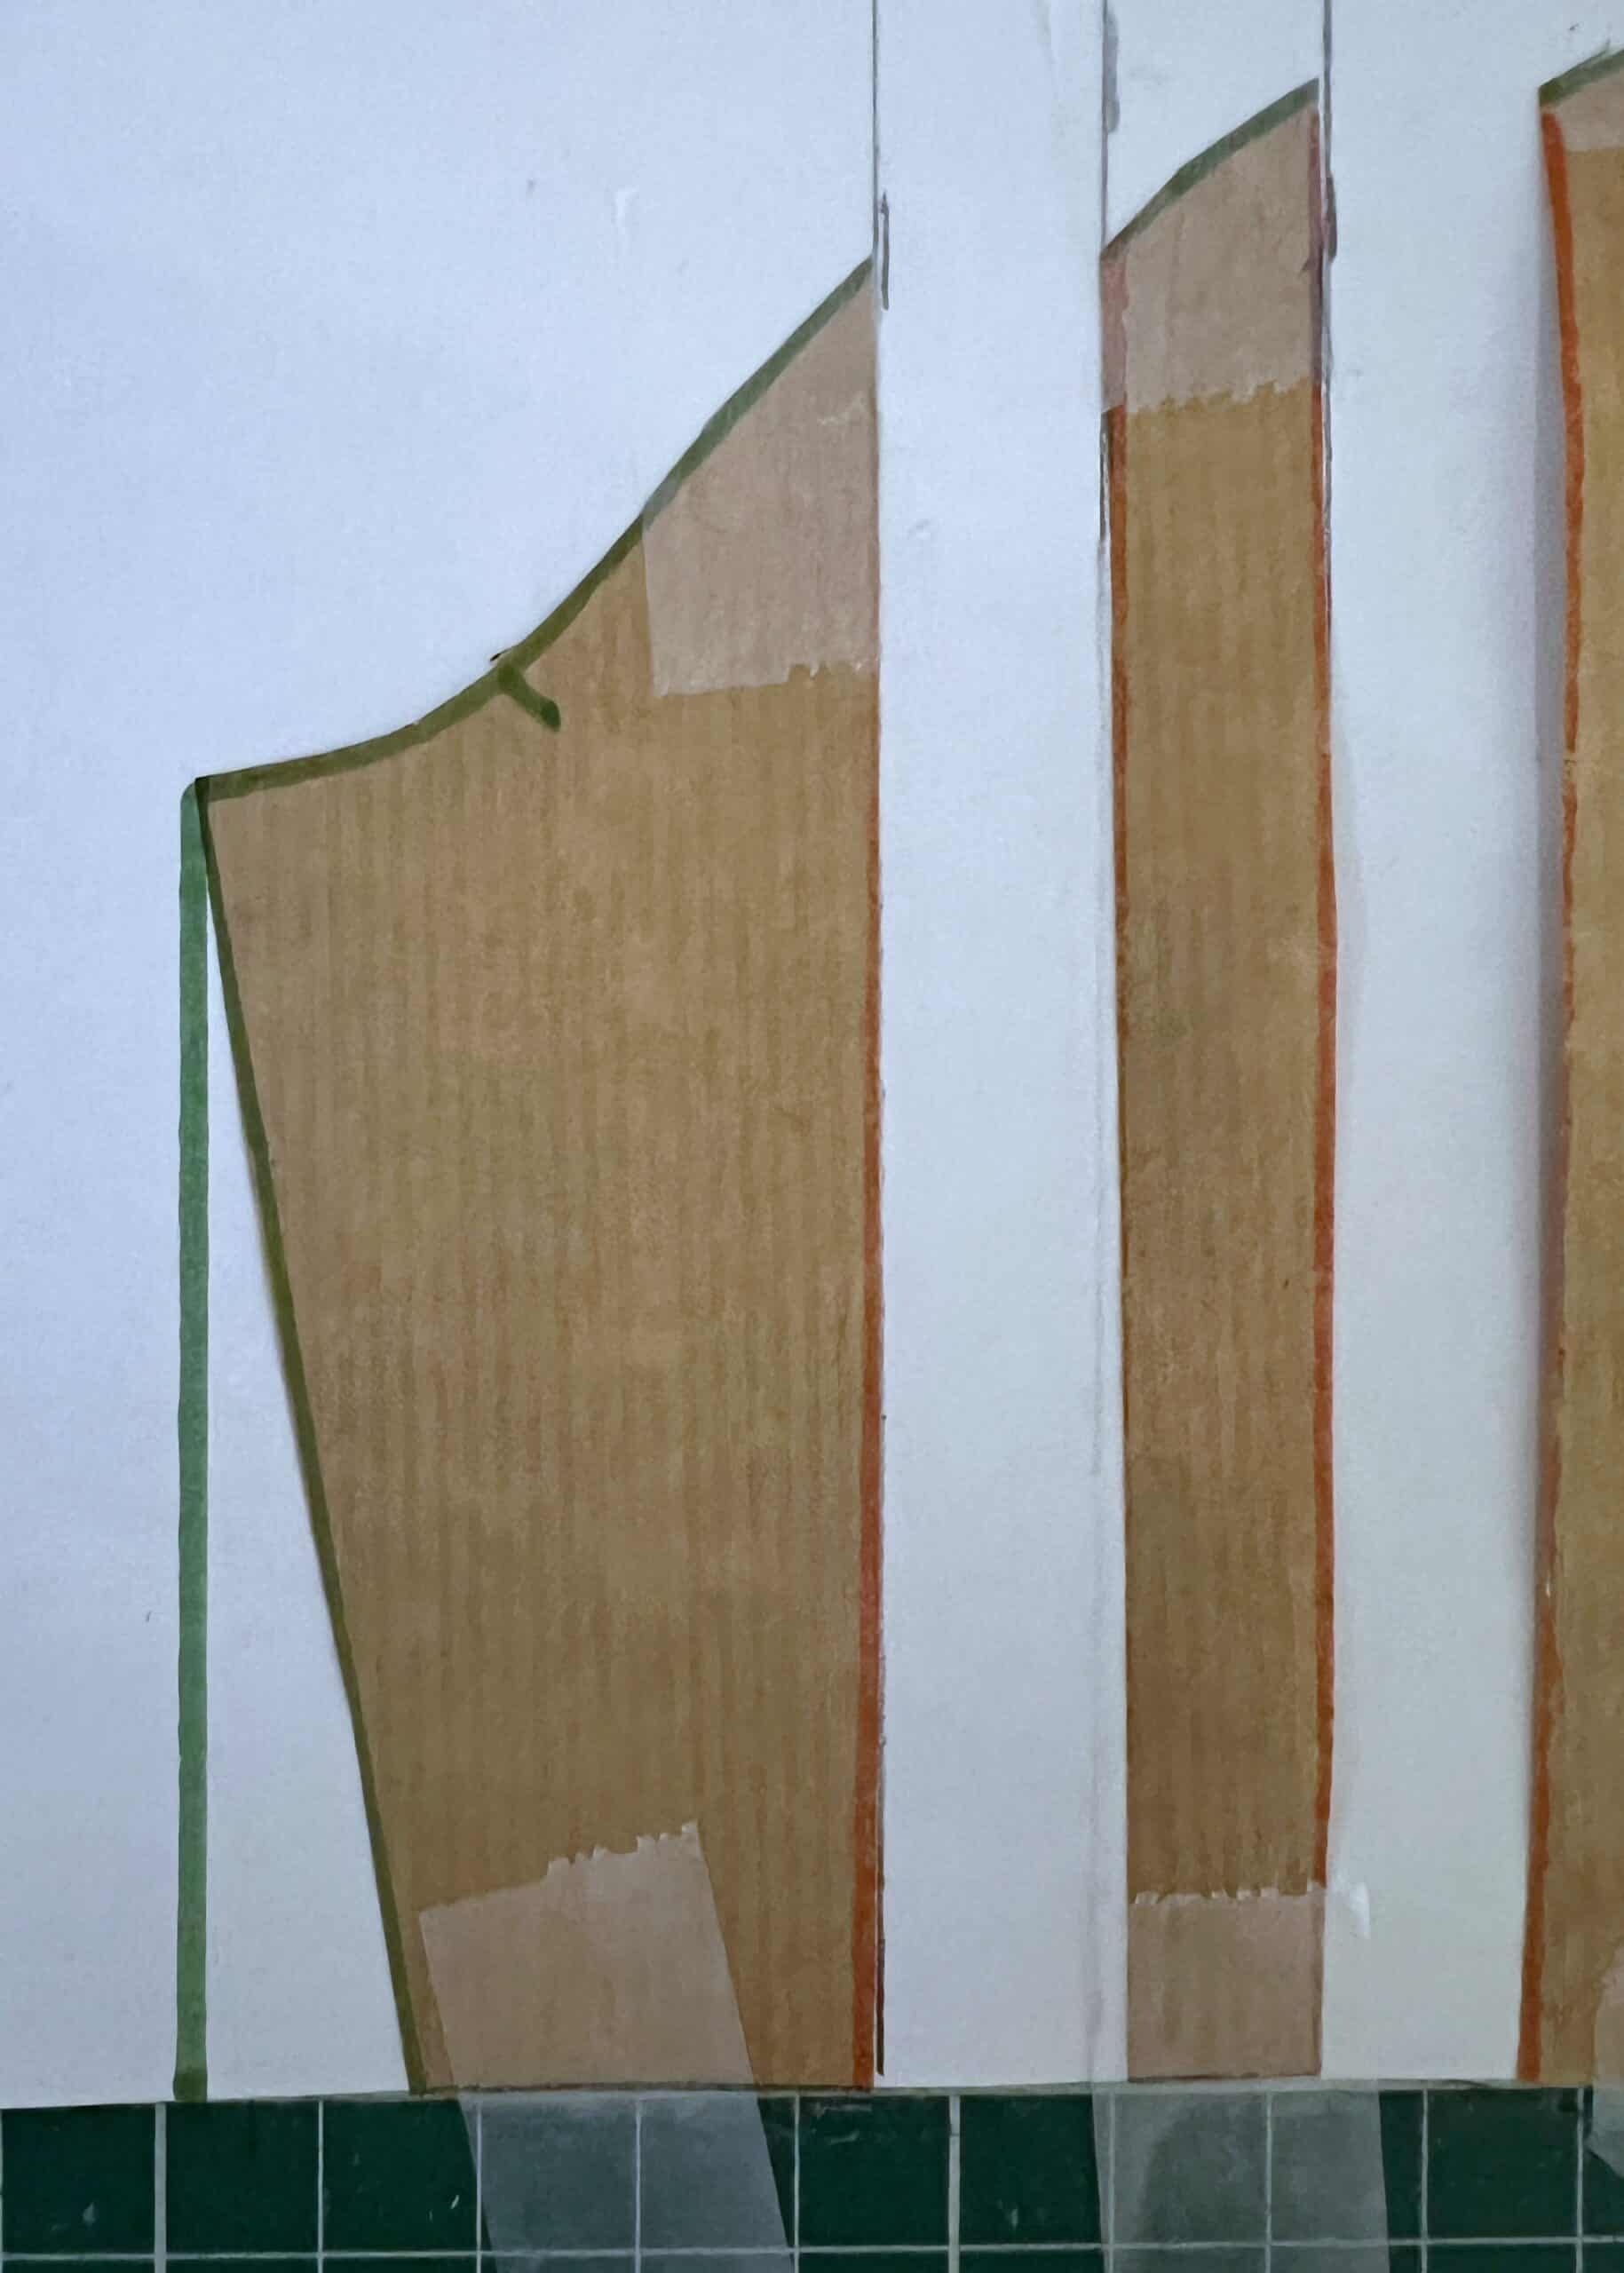
- Next, measure 1.5” from the center line up and re-draw the sleeve cap following the lines from the side edges. You can use a french or hip curve ruler to help you, or just wing it as I did. 😉
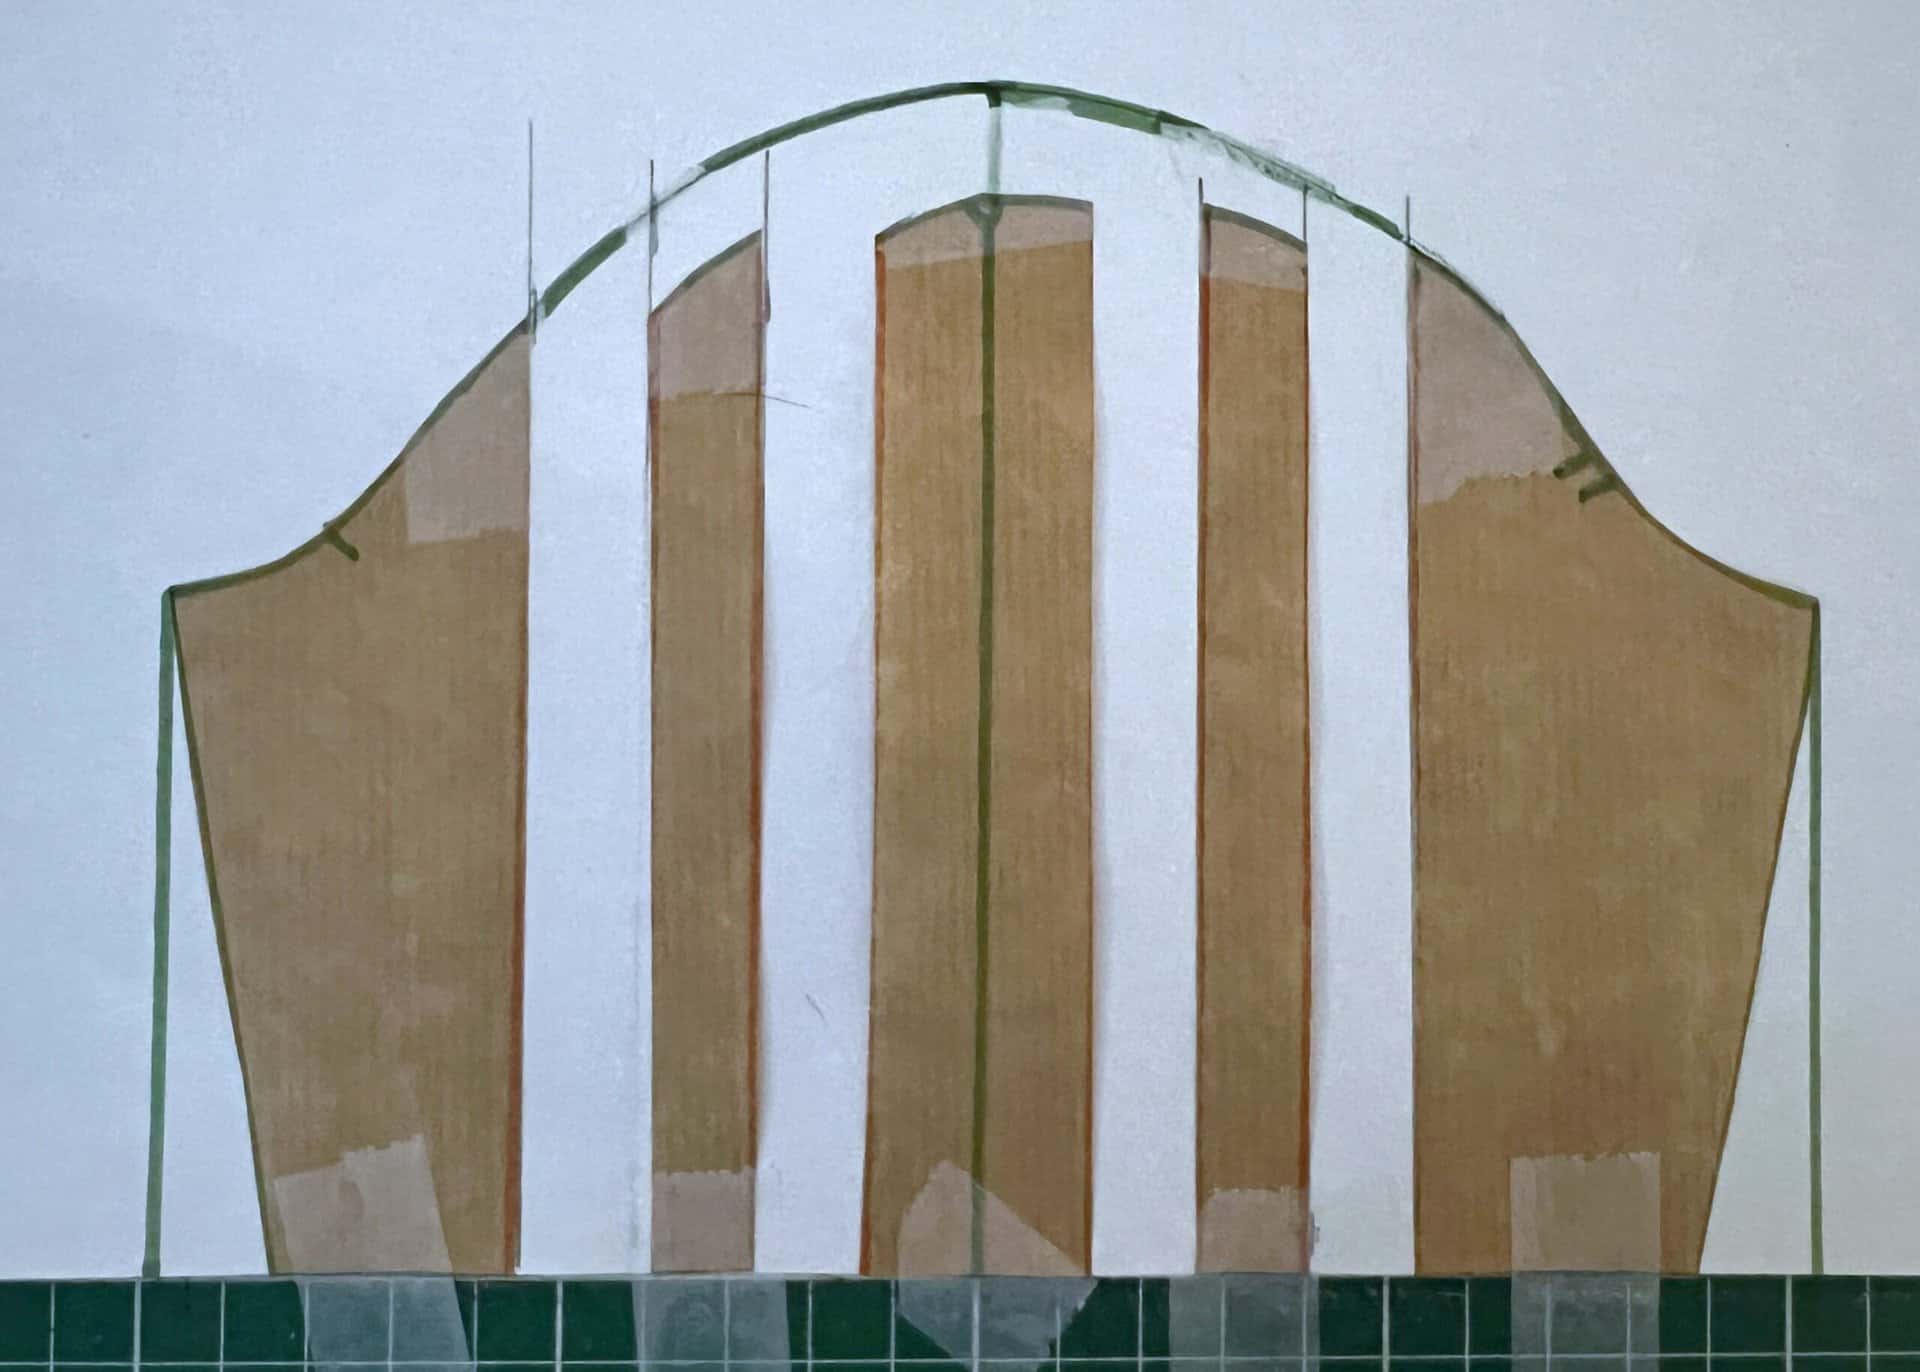
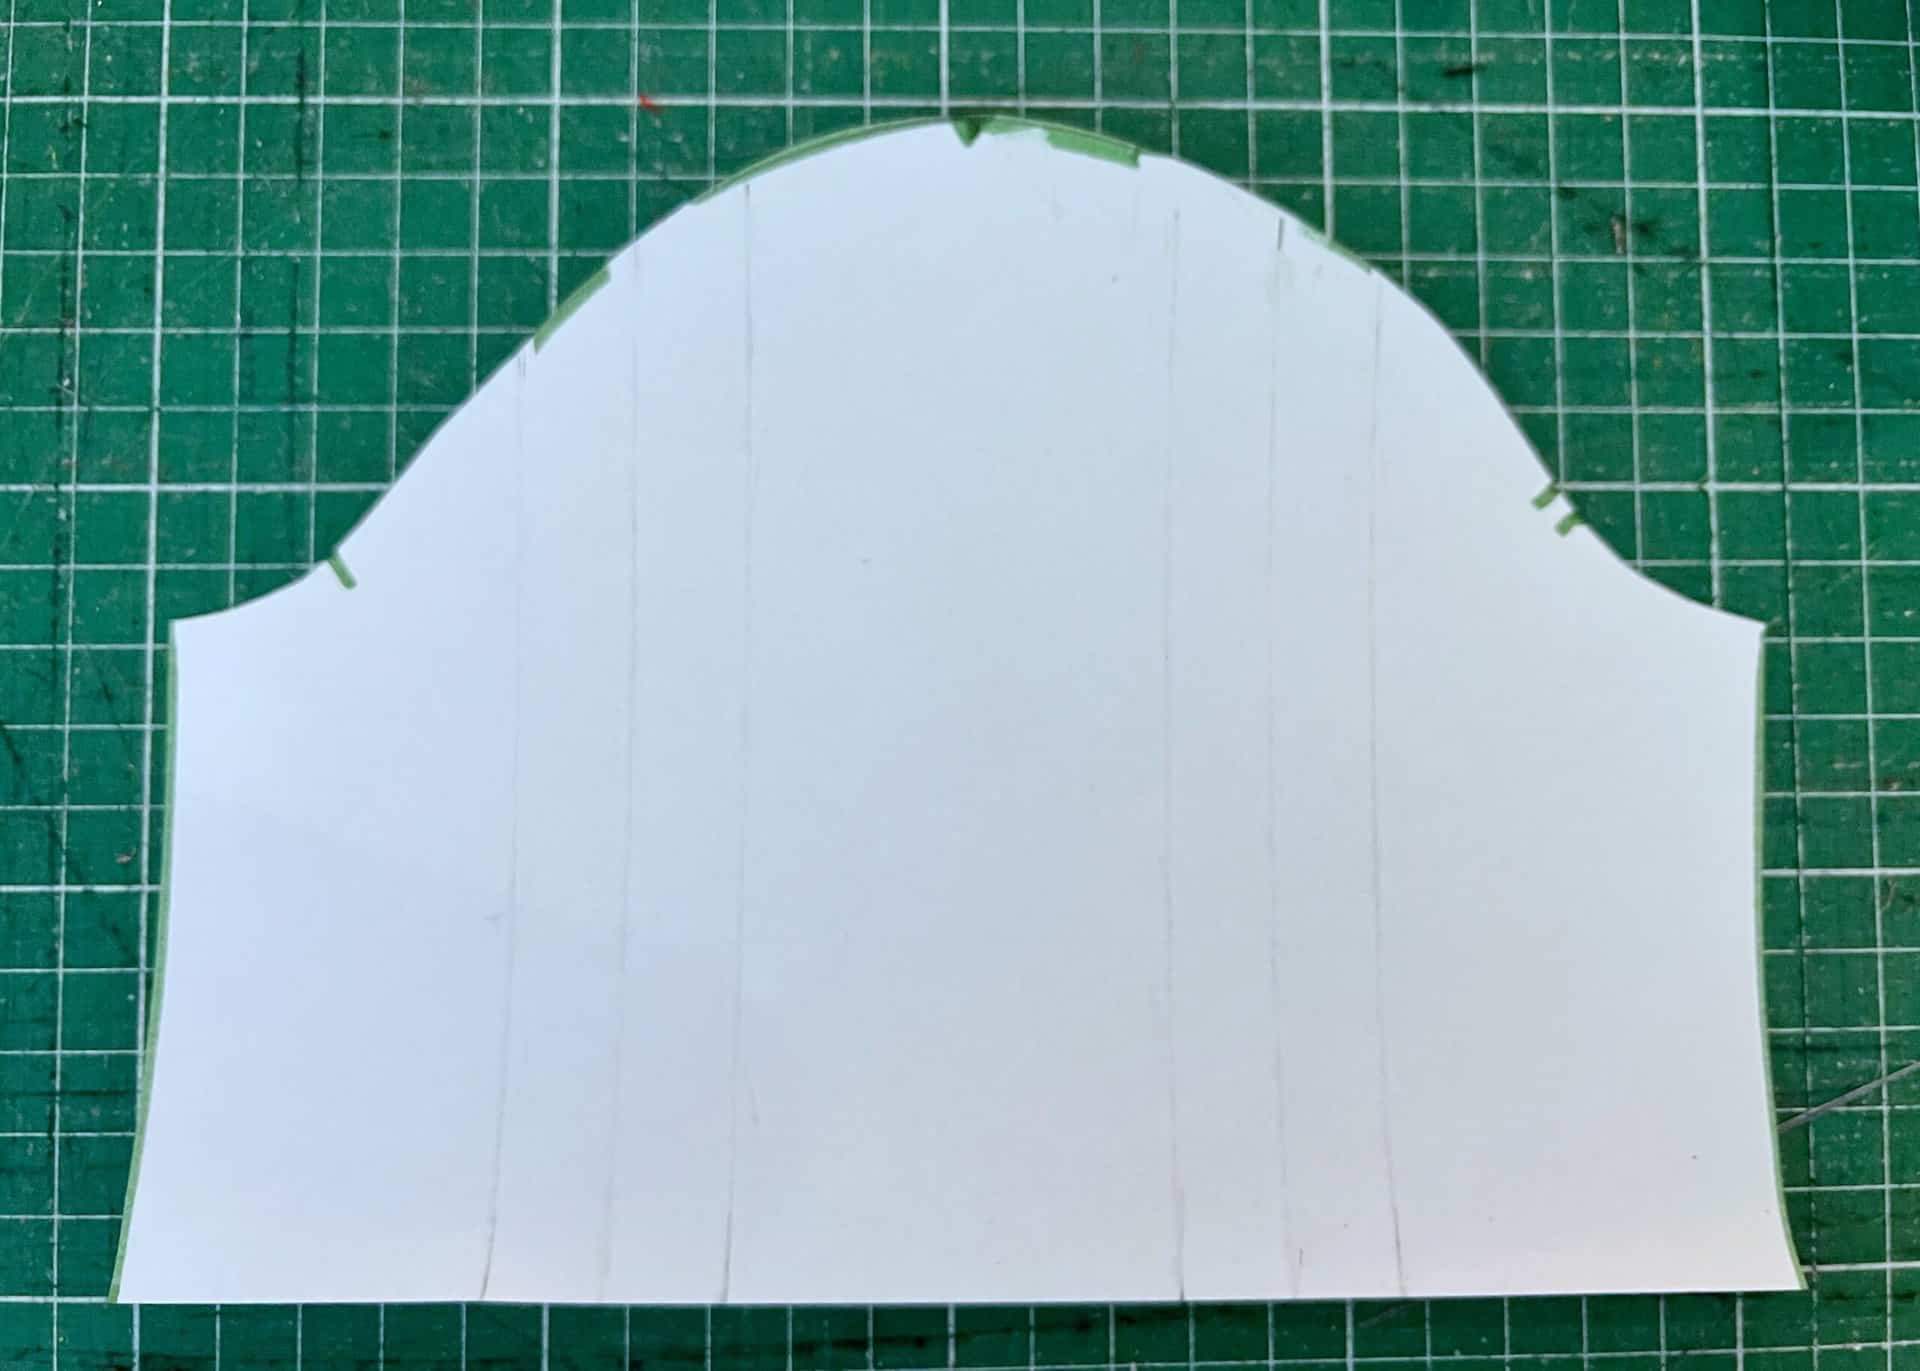
Steps 8-9
- That’s it, we’re pretty much done!
Cut your new sleeve shape and transfer all the pattern markings to the new piece.
- Gather the space between the notches and attach the sleeve to the blazer as per pattern.

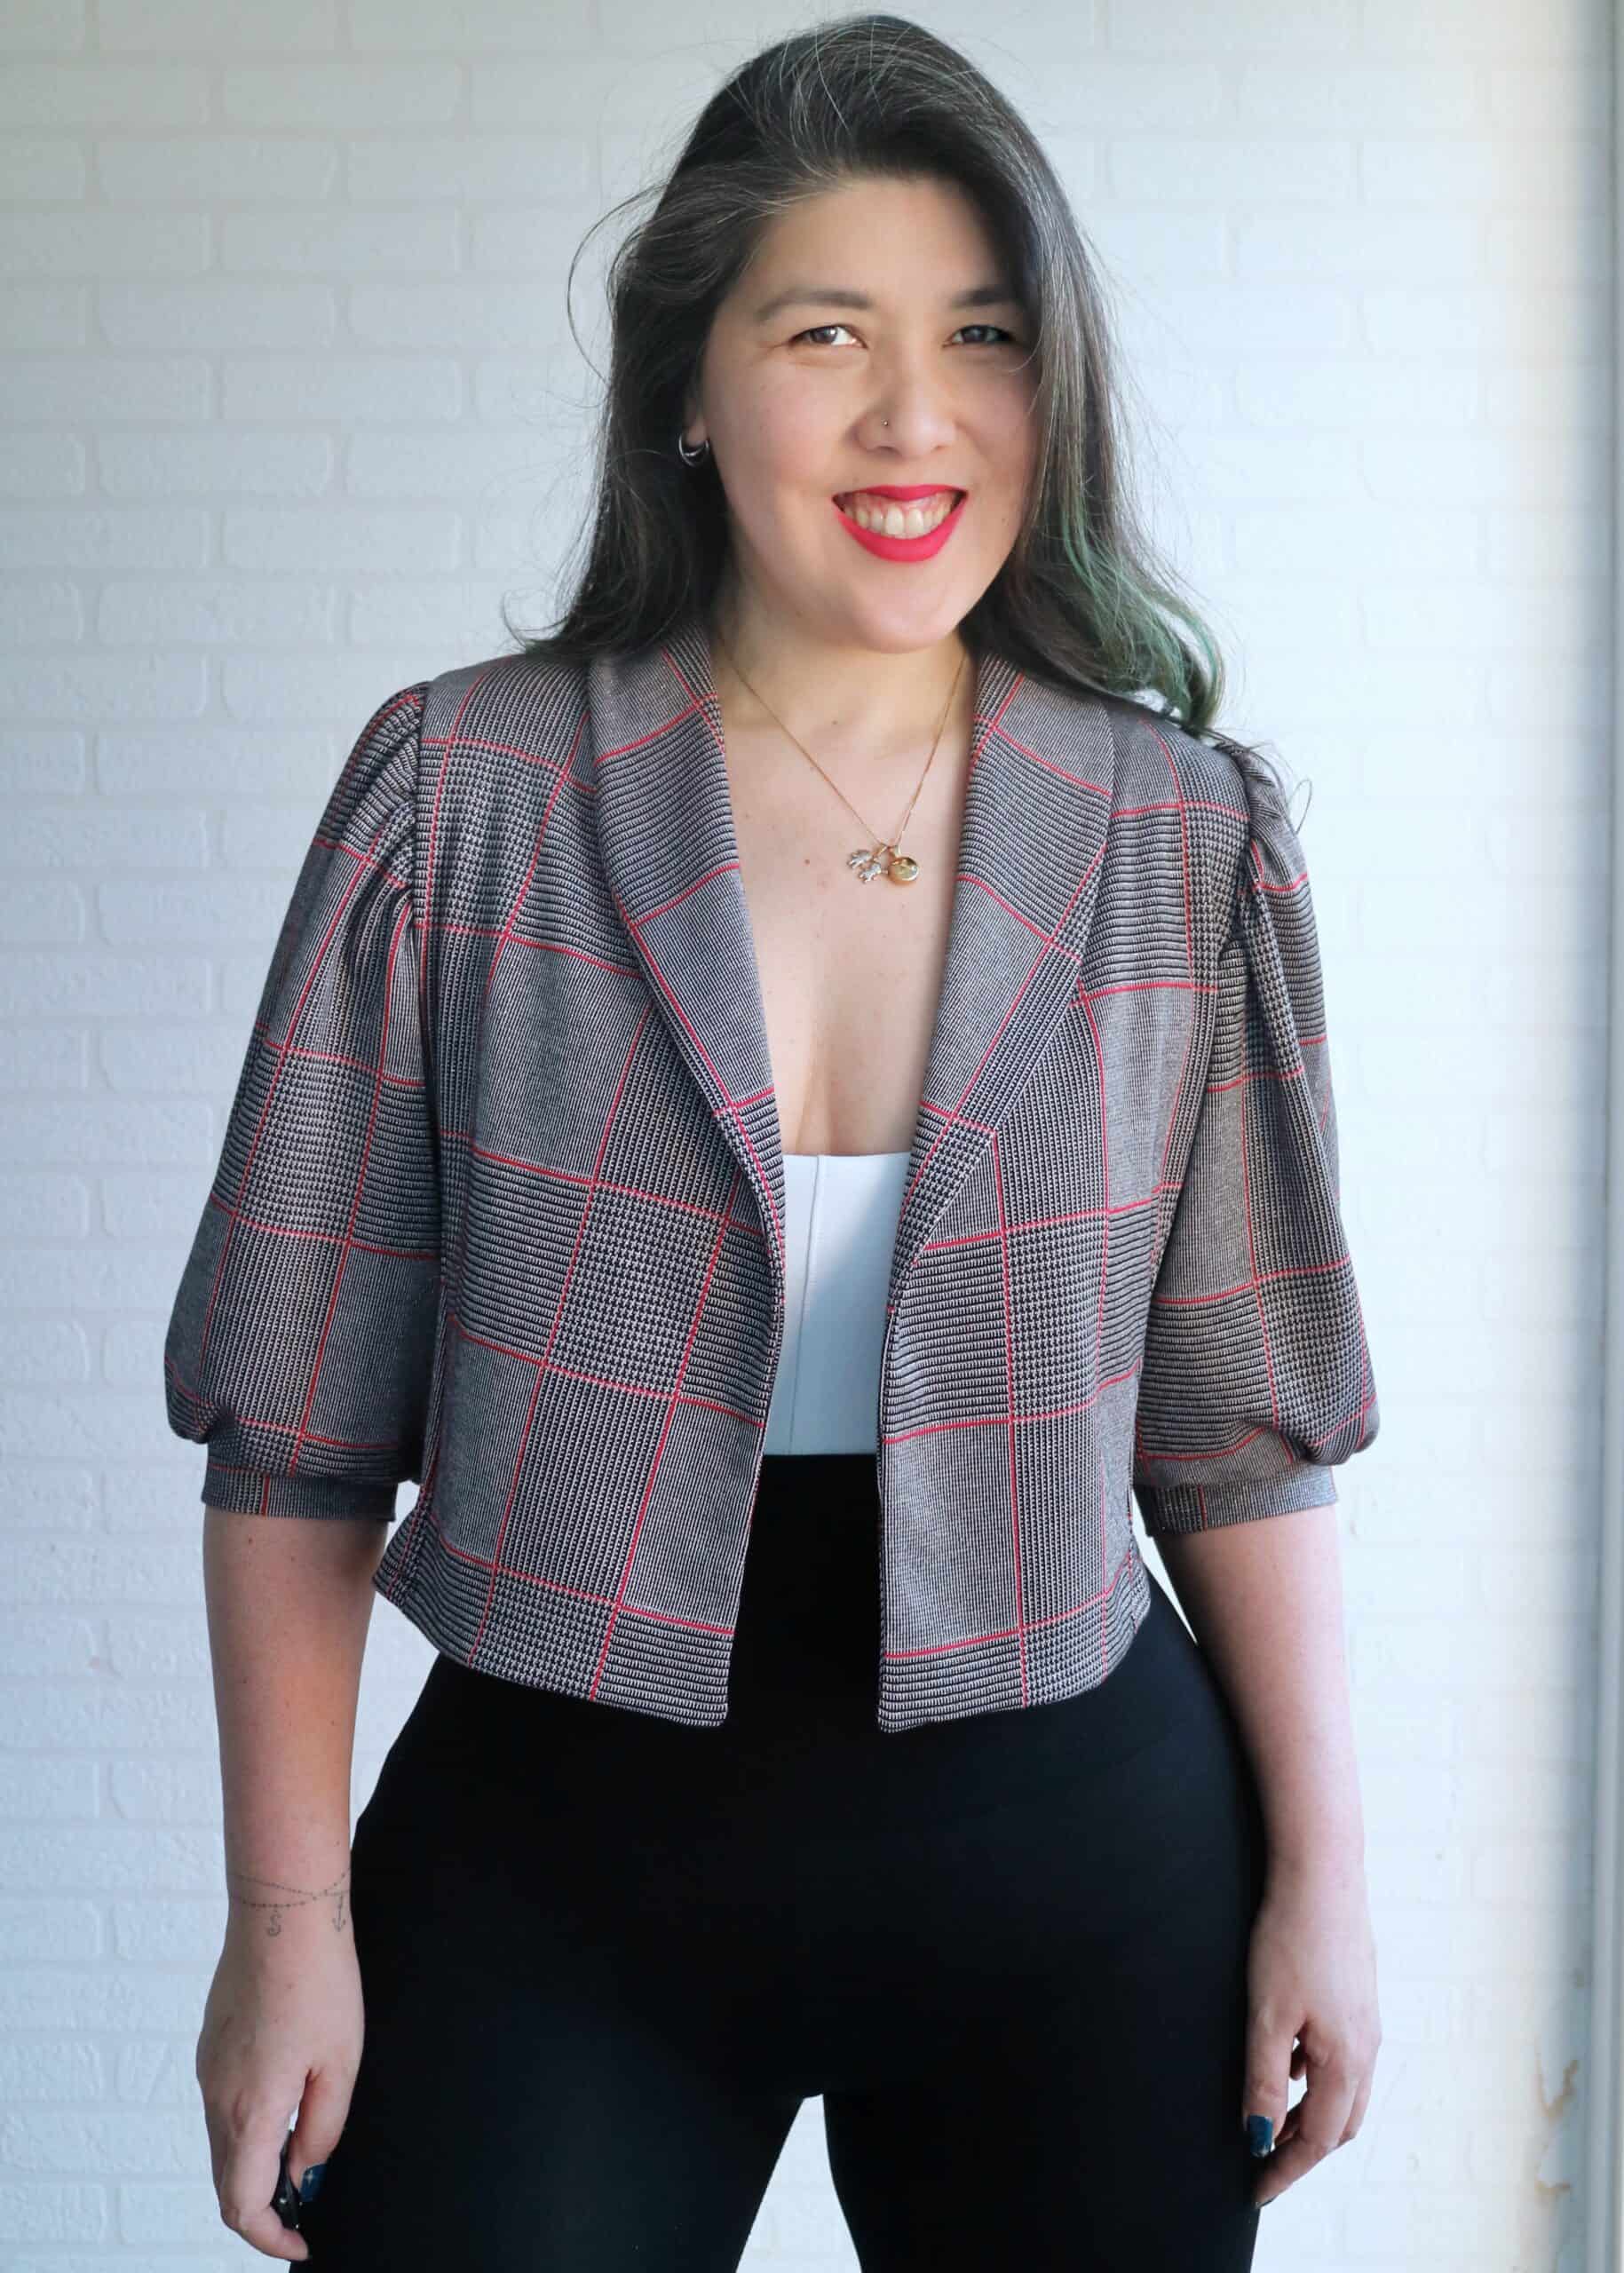
More make details
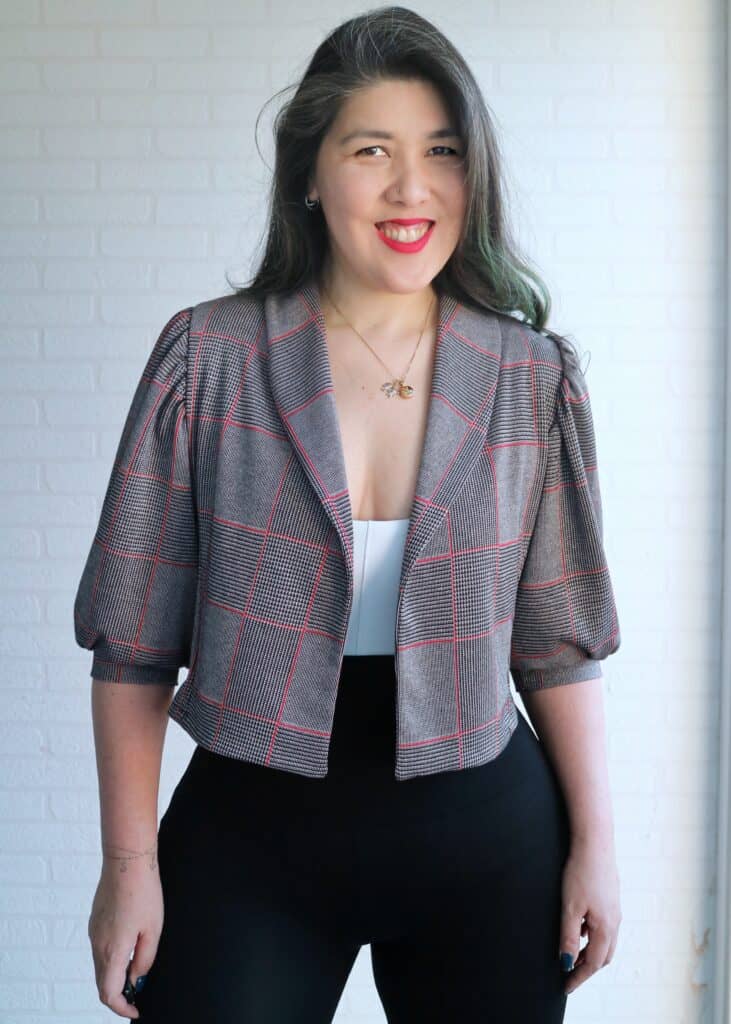
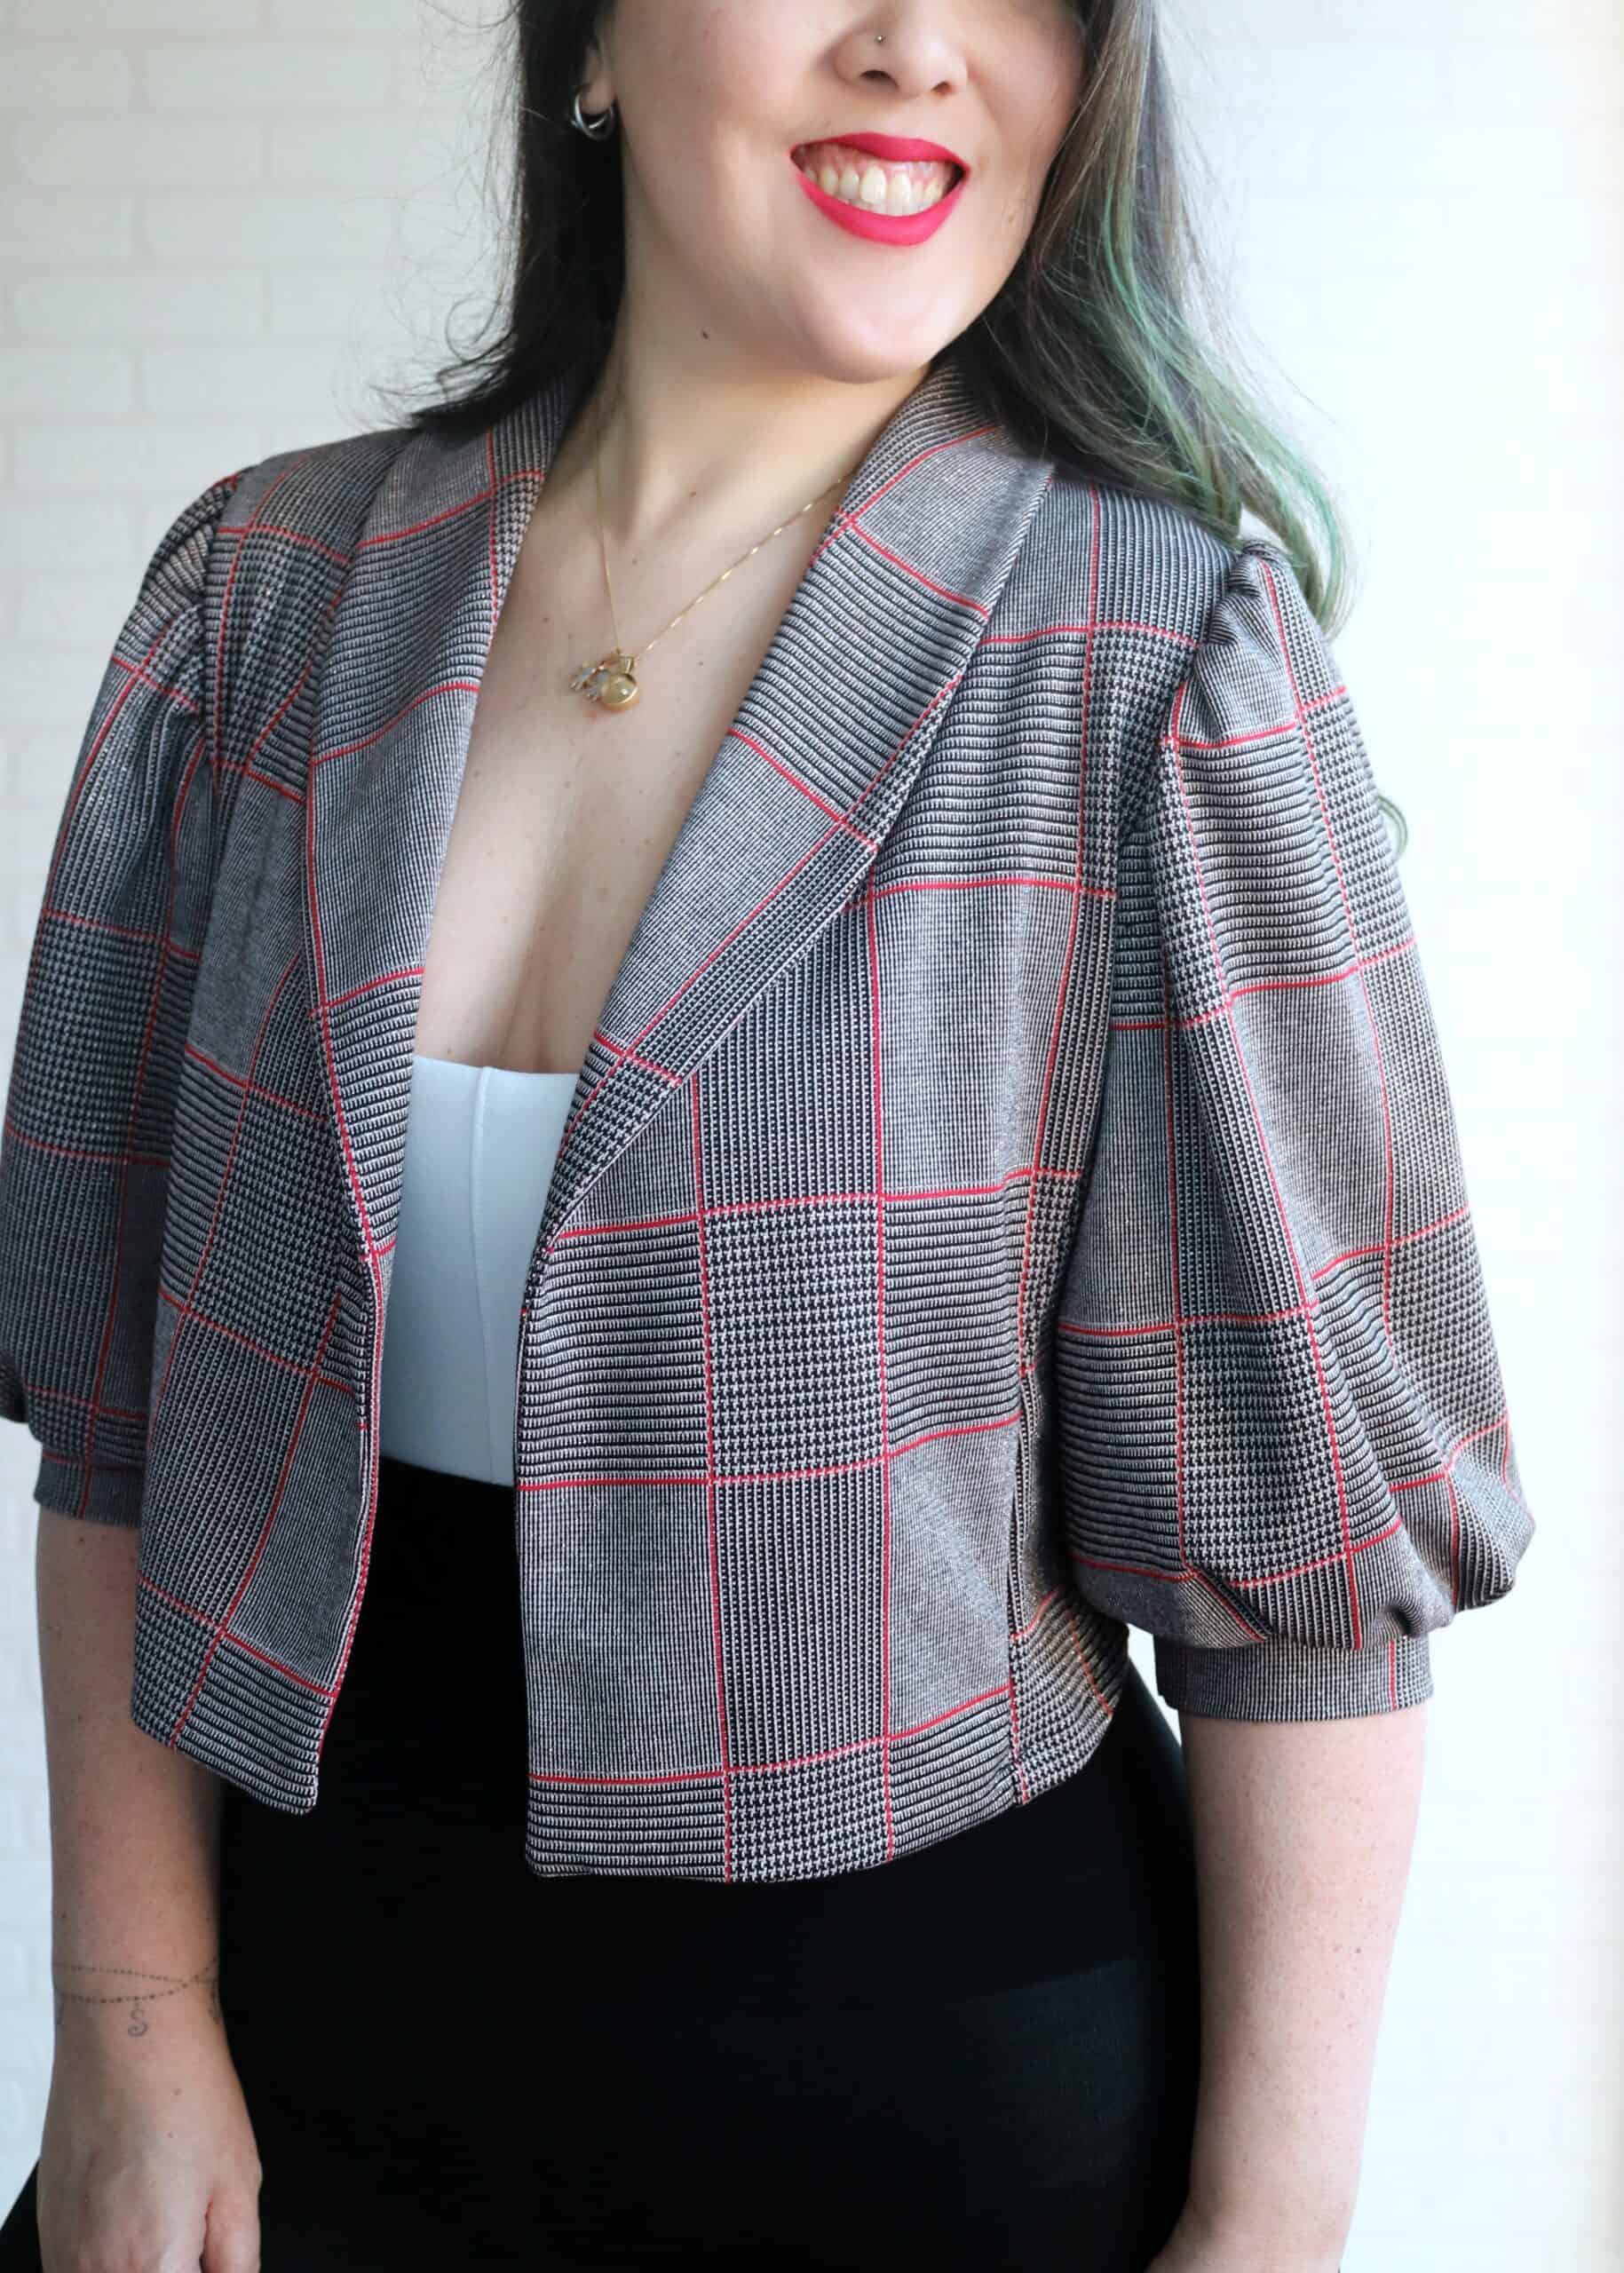
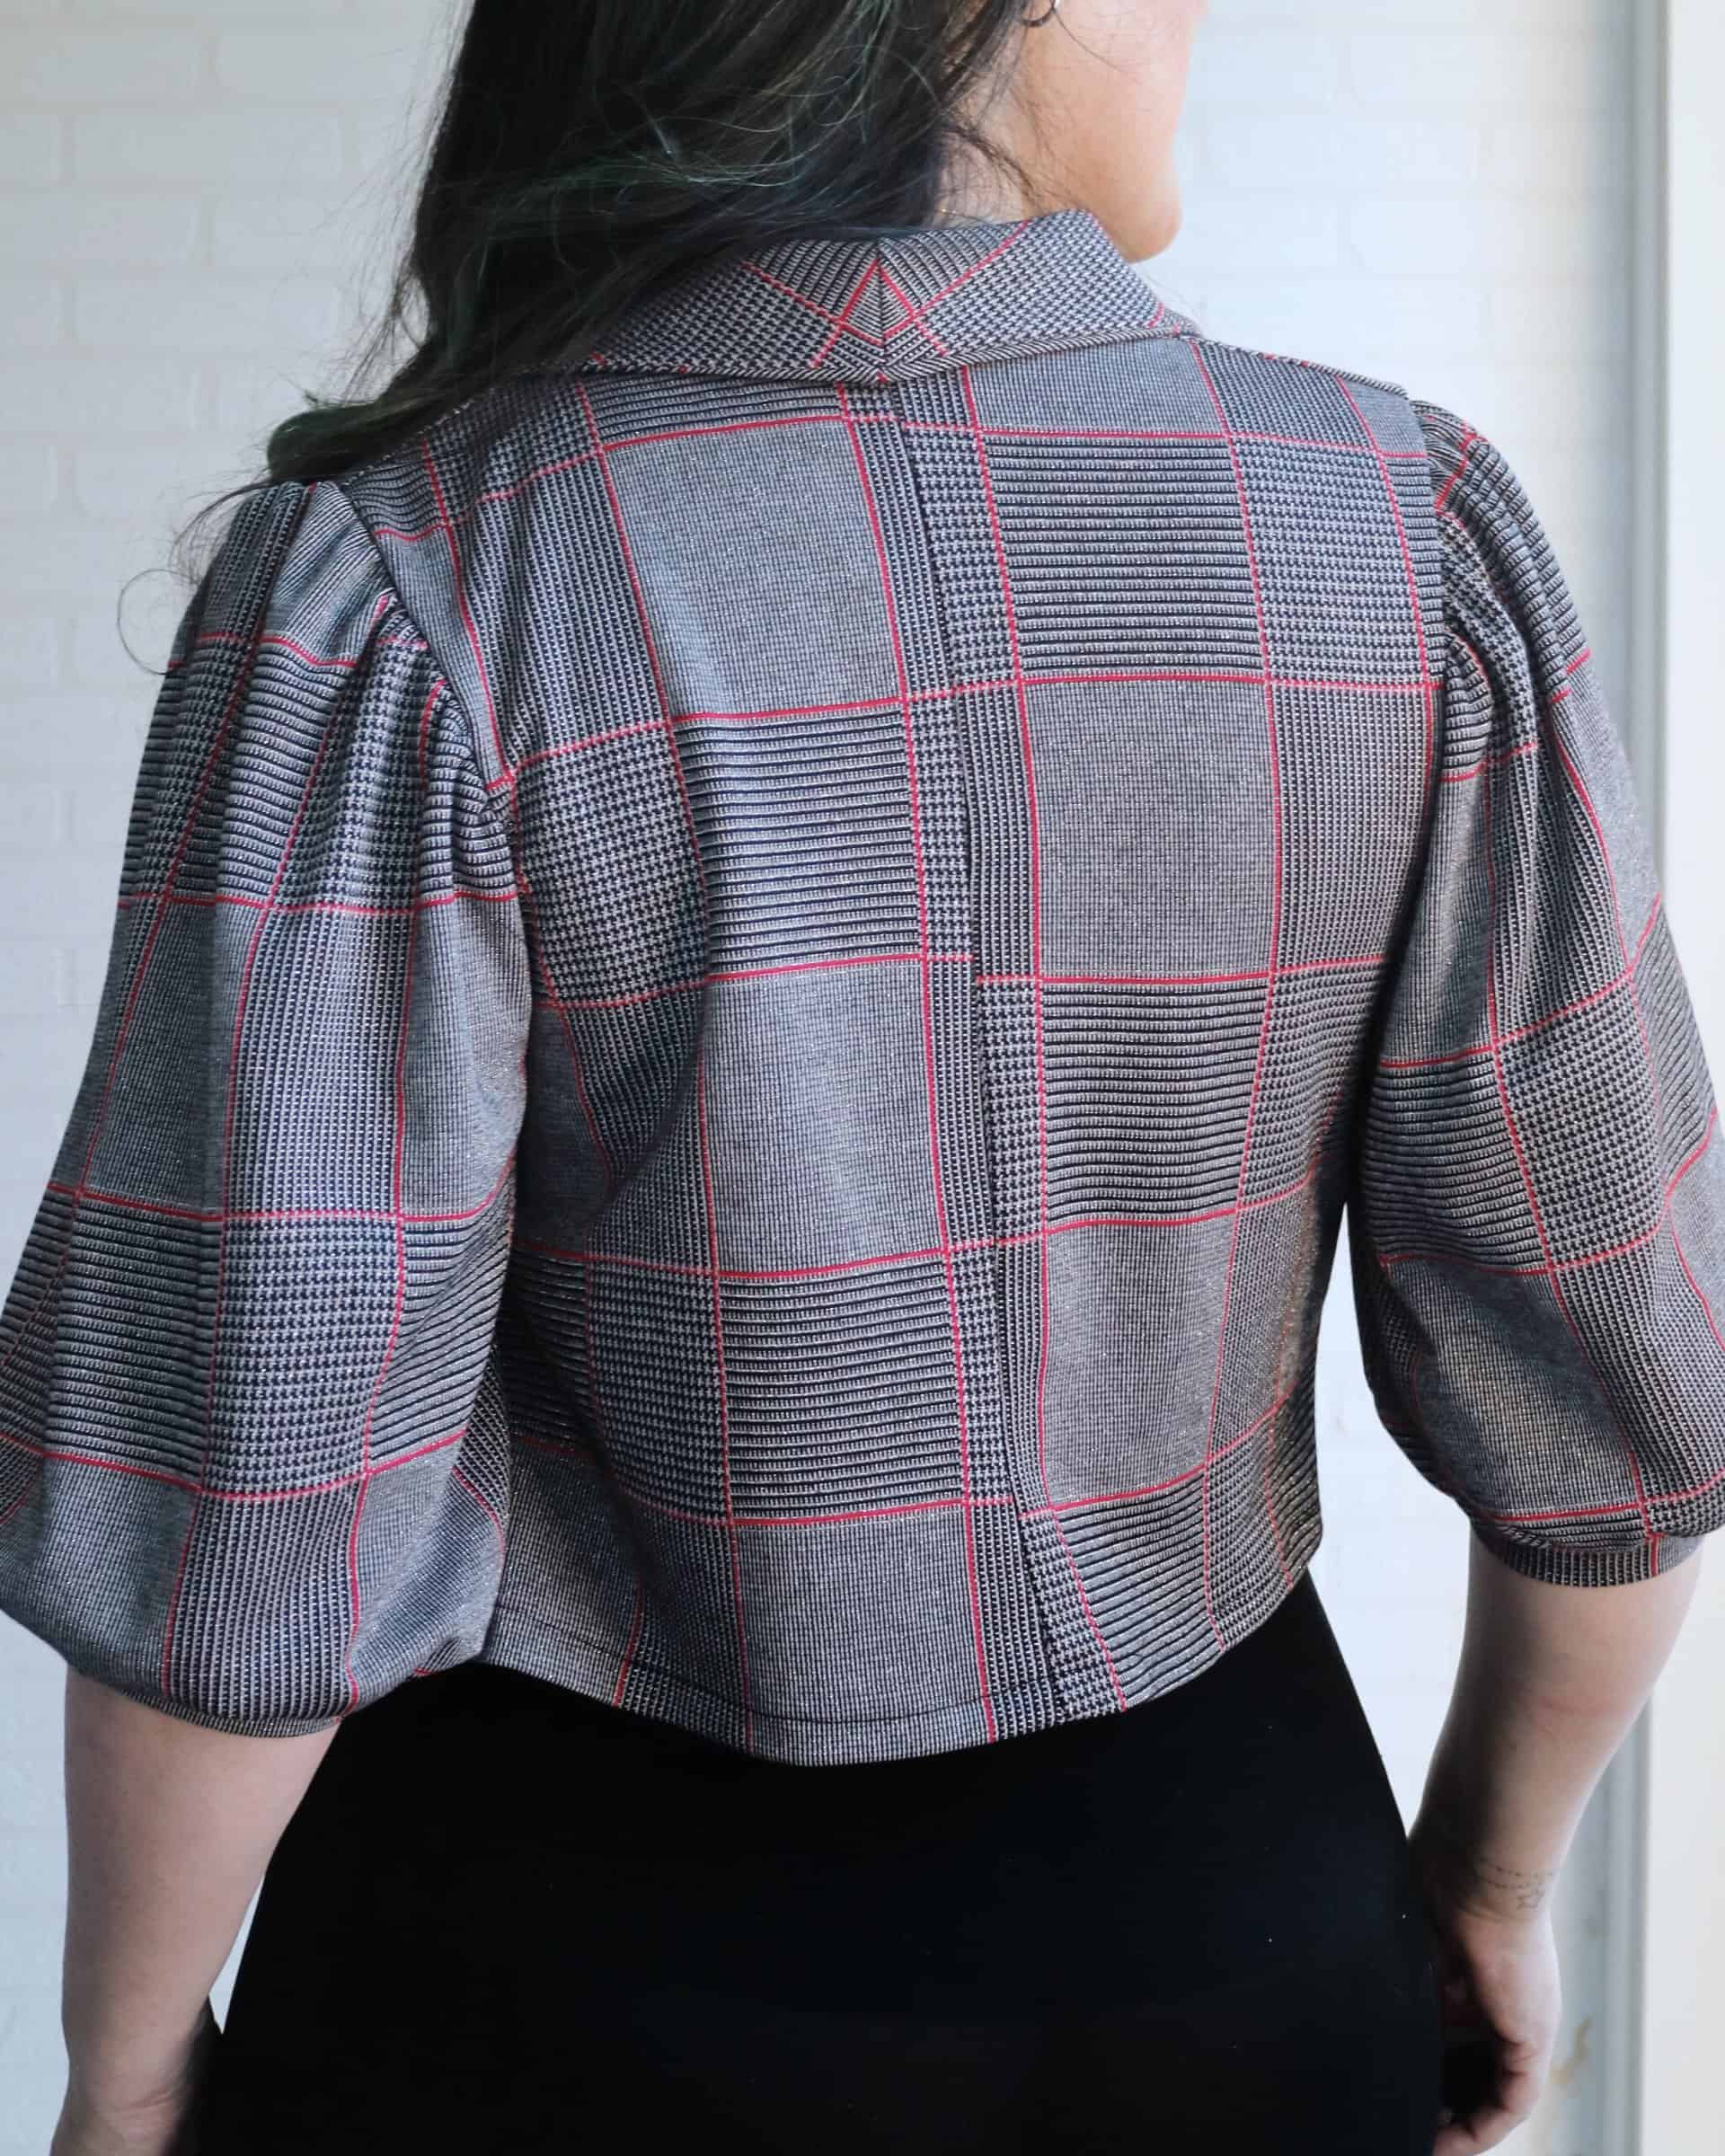
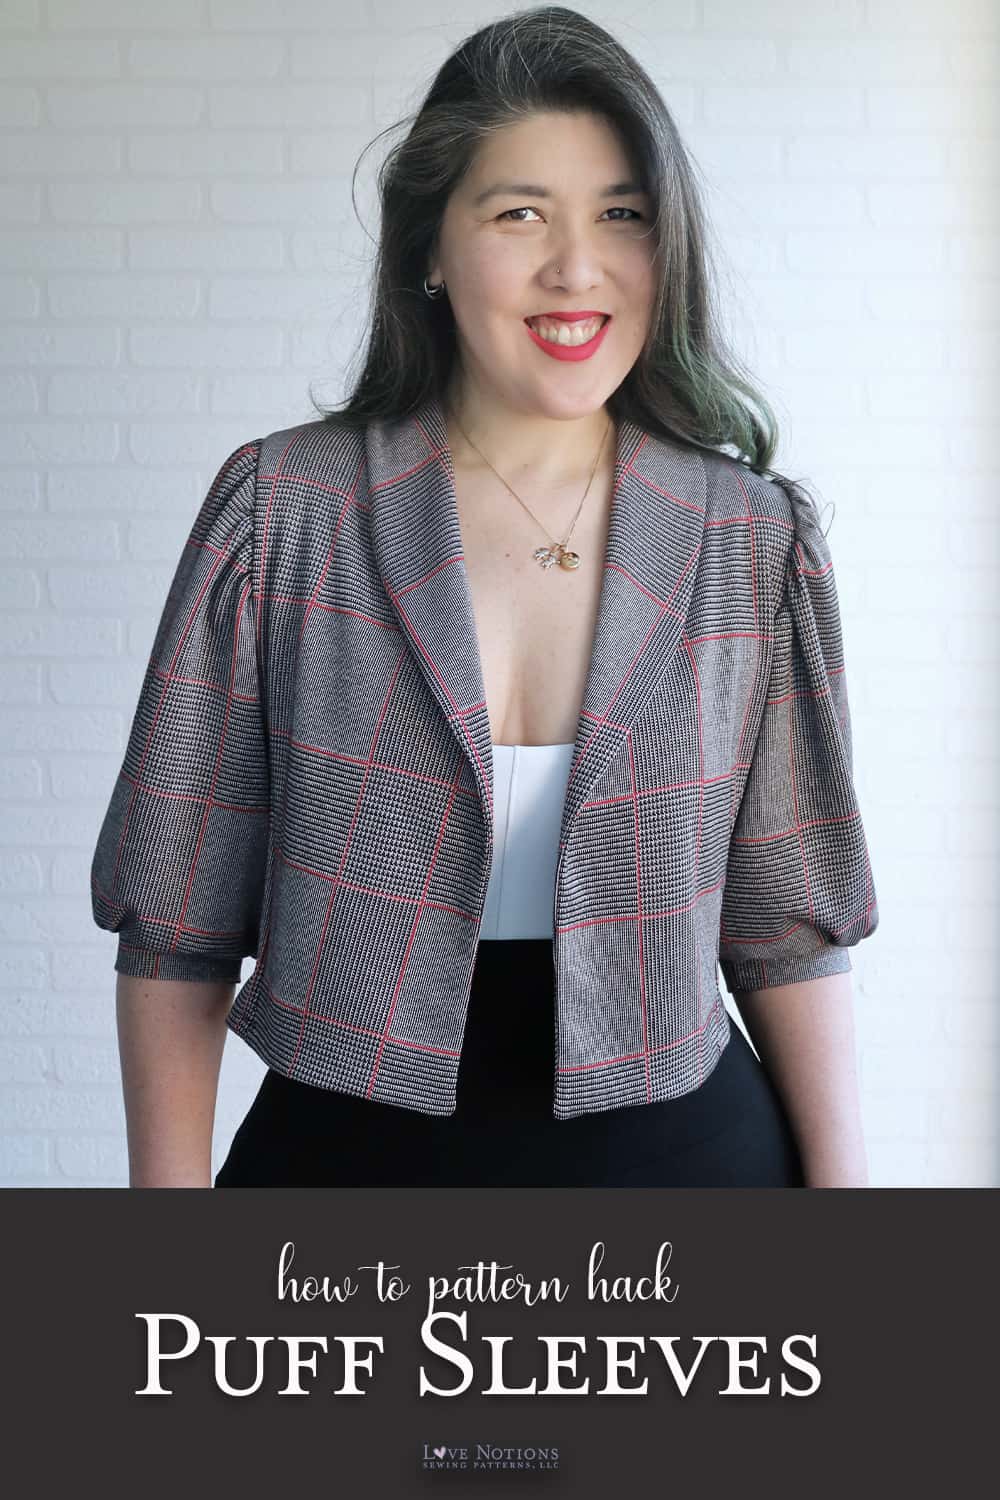
I used a stretch cord for this one and it’s a bit on the lighter side. It’s super comfy and it drapes a little bit making the sleeve a bit of a subtle puff. Aside from the sleeves, this Metra is made as per pattern, with the lapel collar and welt-syle pockets.


PUFF SLEEVE WITH FULLNESS ON TOP AND BOTTOM (+ CUFF)
I opted to make this one elbow length (-5 inches) but the same instructions will work for the full length as well.
Steps 1-3
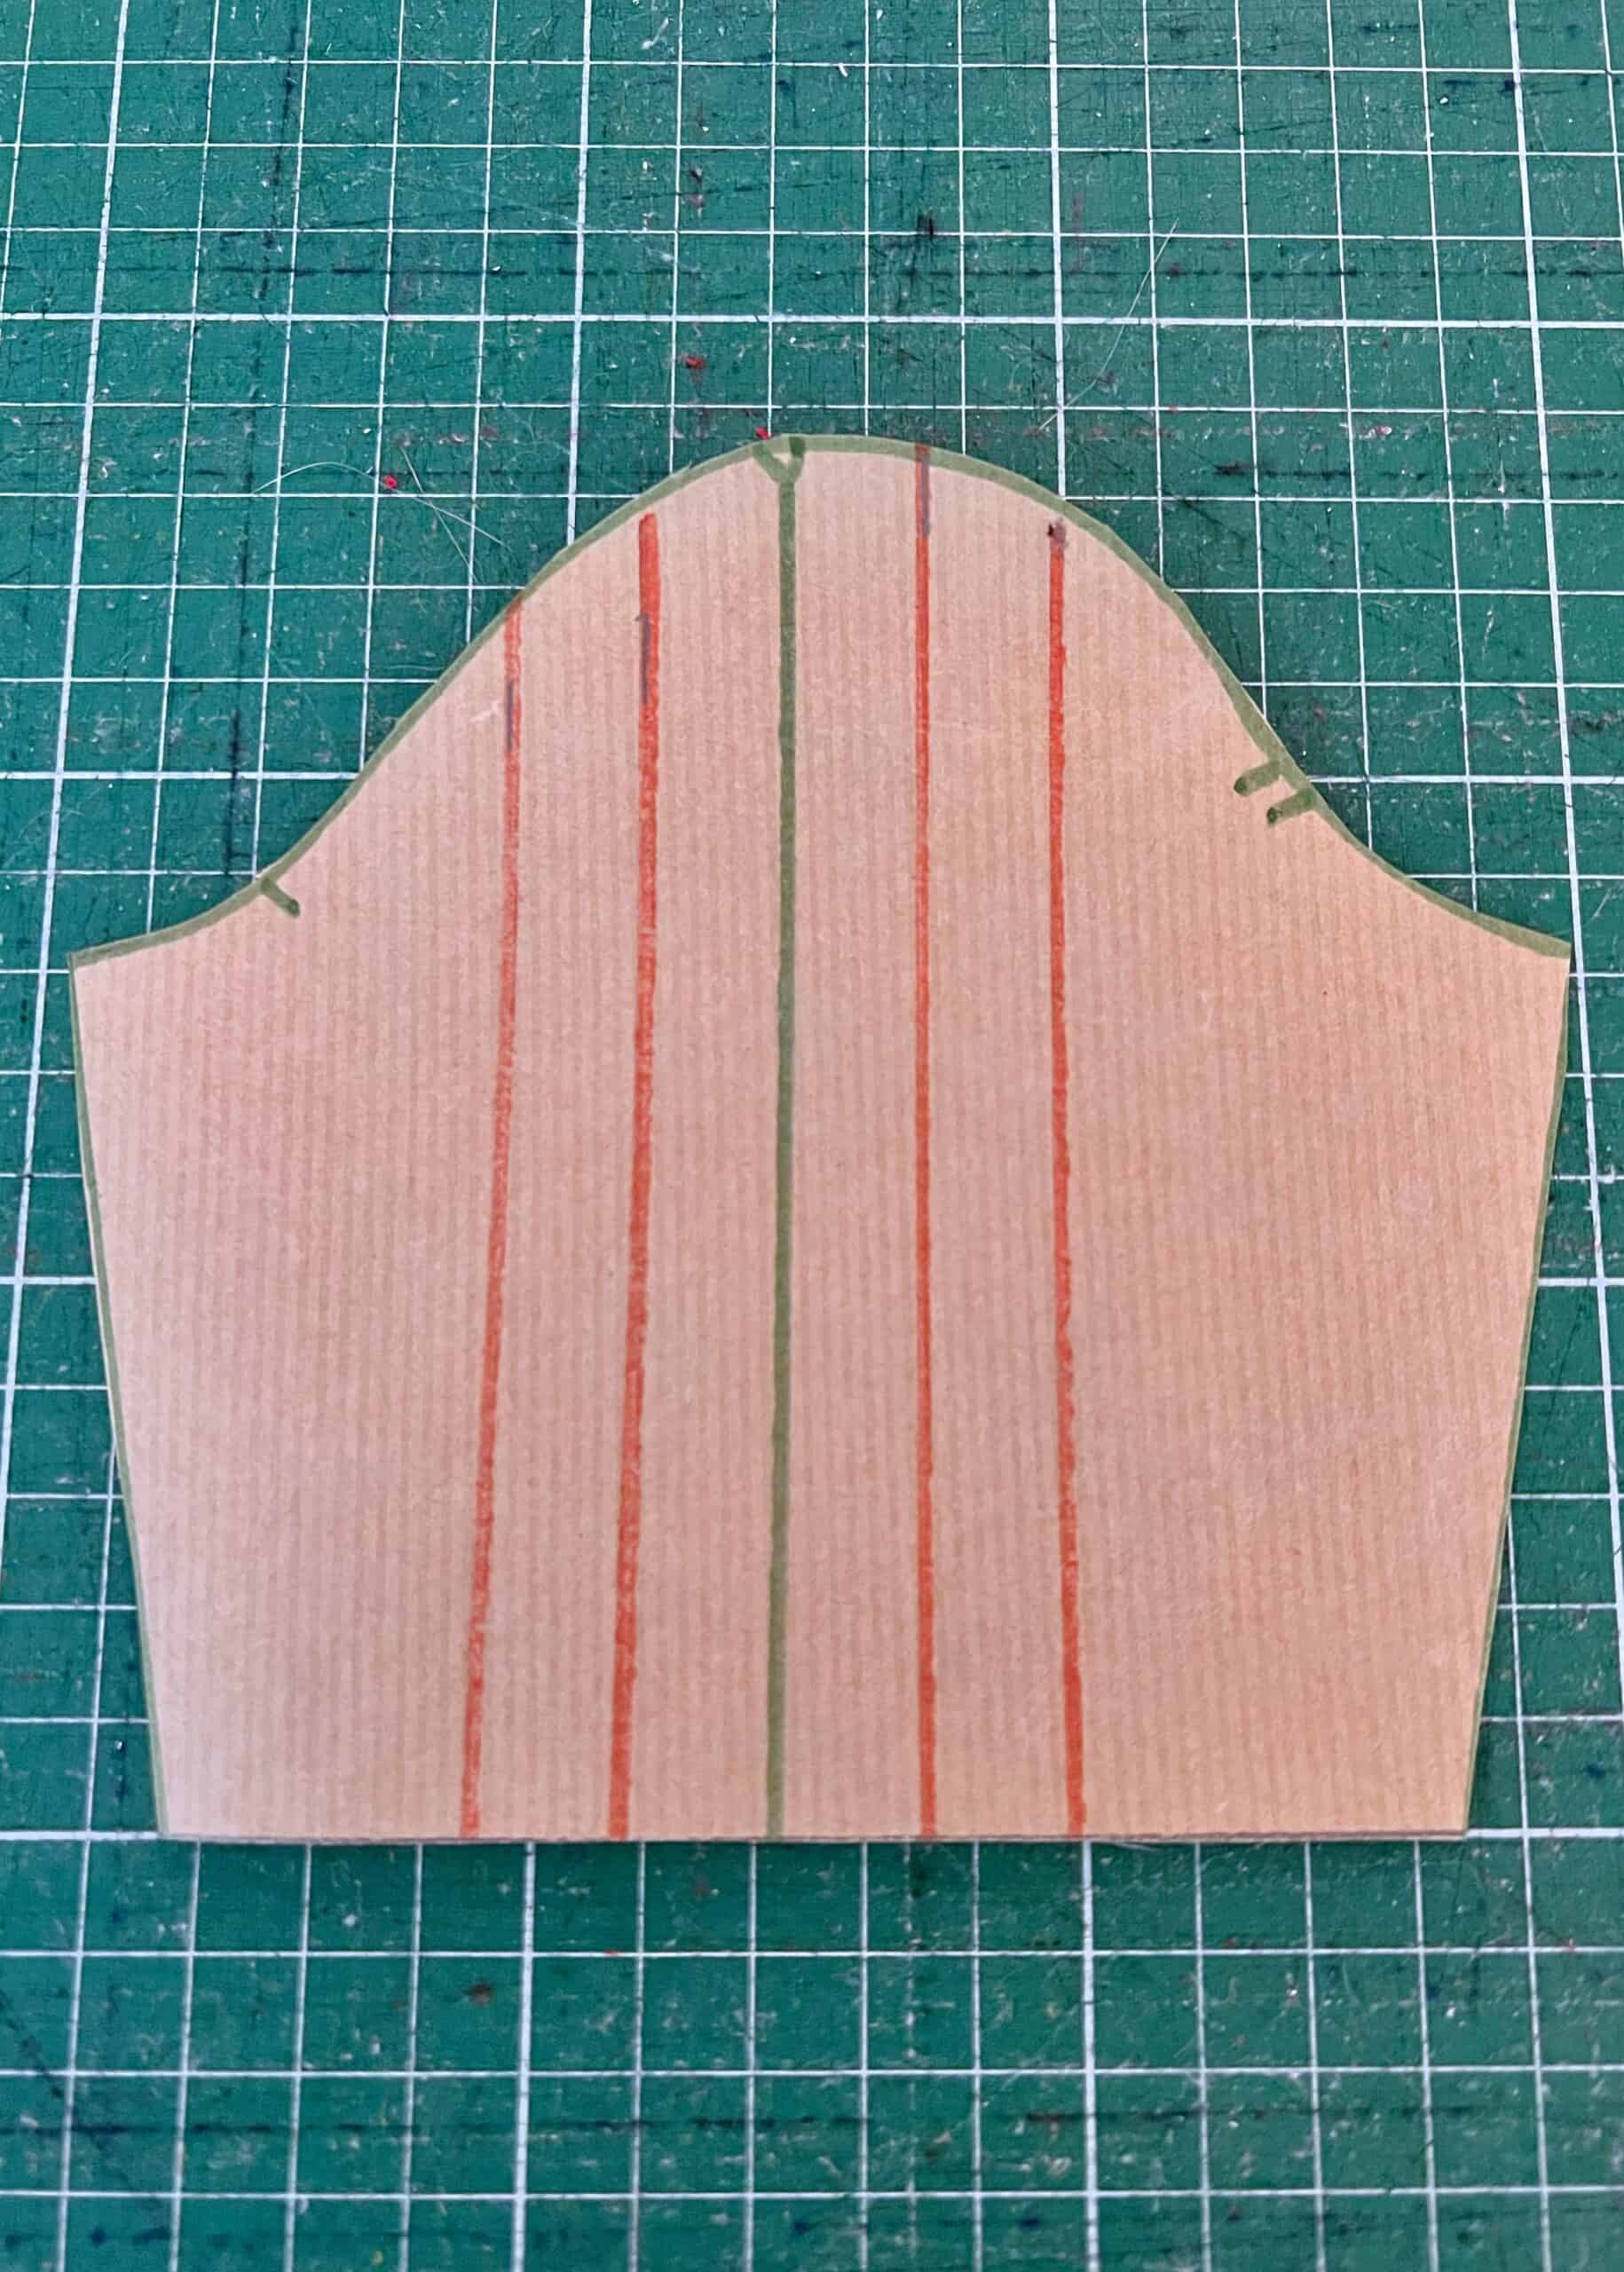
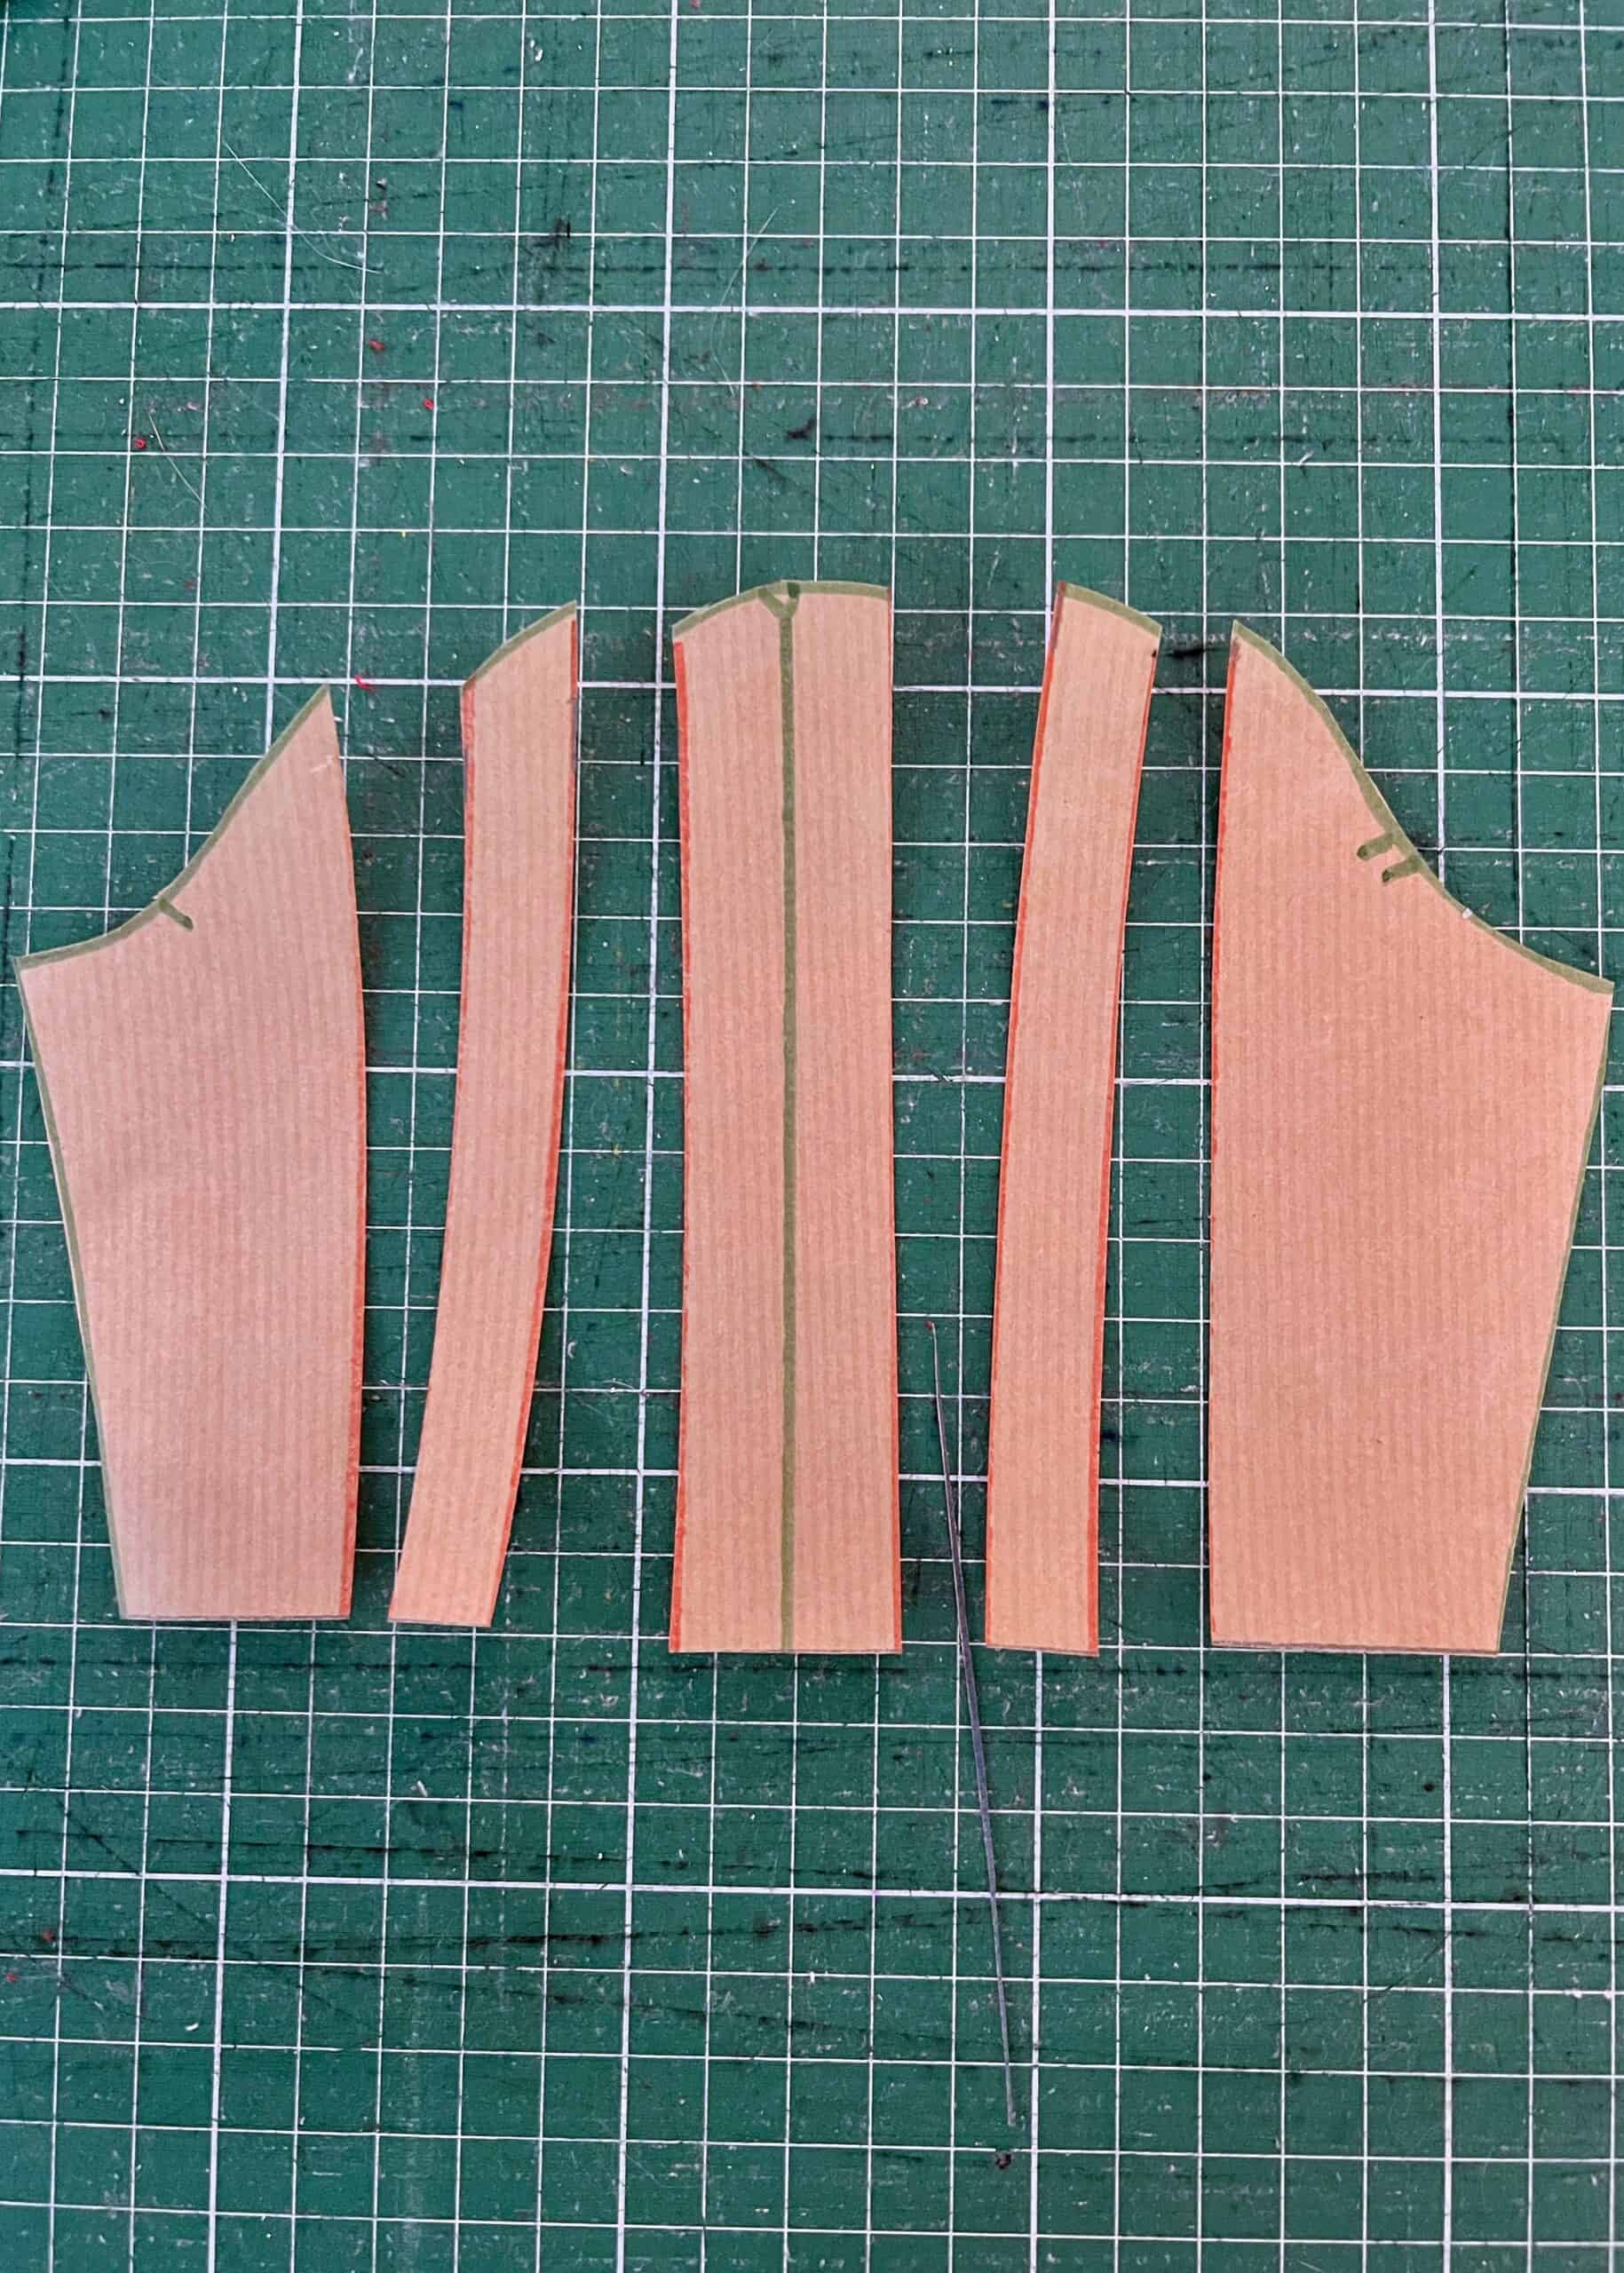
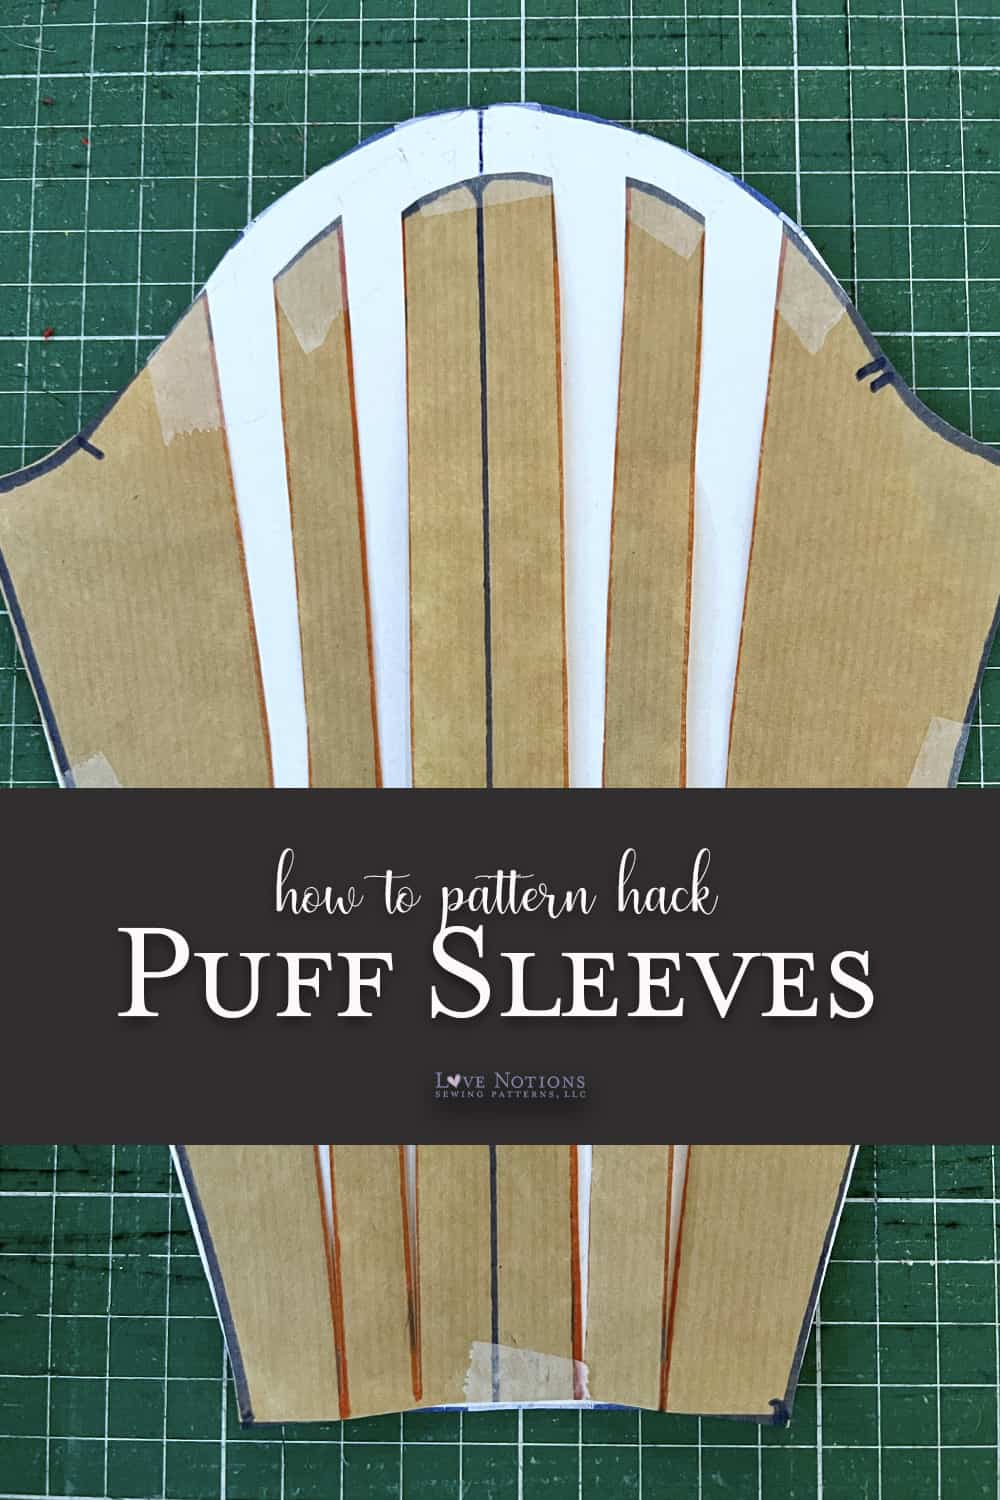
- As with the previous one, we’ll draw a center line (green) and 2 cut lines (red) on each side of it, 1.5” apart.
- For this one, we’ll need to measure the bottom of the sleeve for creating a cuff piece. Save that measurement for later.
- Next cut the red lines, this time all the way through. You’ll have 5 separate pieces.
Steps 4-6
- Tape the center piece to another sheet of paper. I aligned the bottom edge of the sleeve to the edge of the paper as an easy guide.
- From there, tape the other pieces to each side of the center 1.5” apart.
- Once they’re all in place, square off both sides of the sleeve by drawing a straight line from the top down as pictured.
Steps 7-9
- Mark 1.5” above the center line and re-draw the sleeve cap from the sides to that point. You can use a french or hip curve ruler to help you, or simply freehand it.
- Now we’re ready to cut our new sleeve shape, transfer pattern markings, and get to the fun part: sewing!
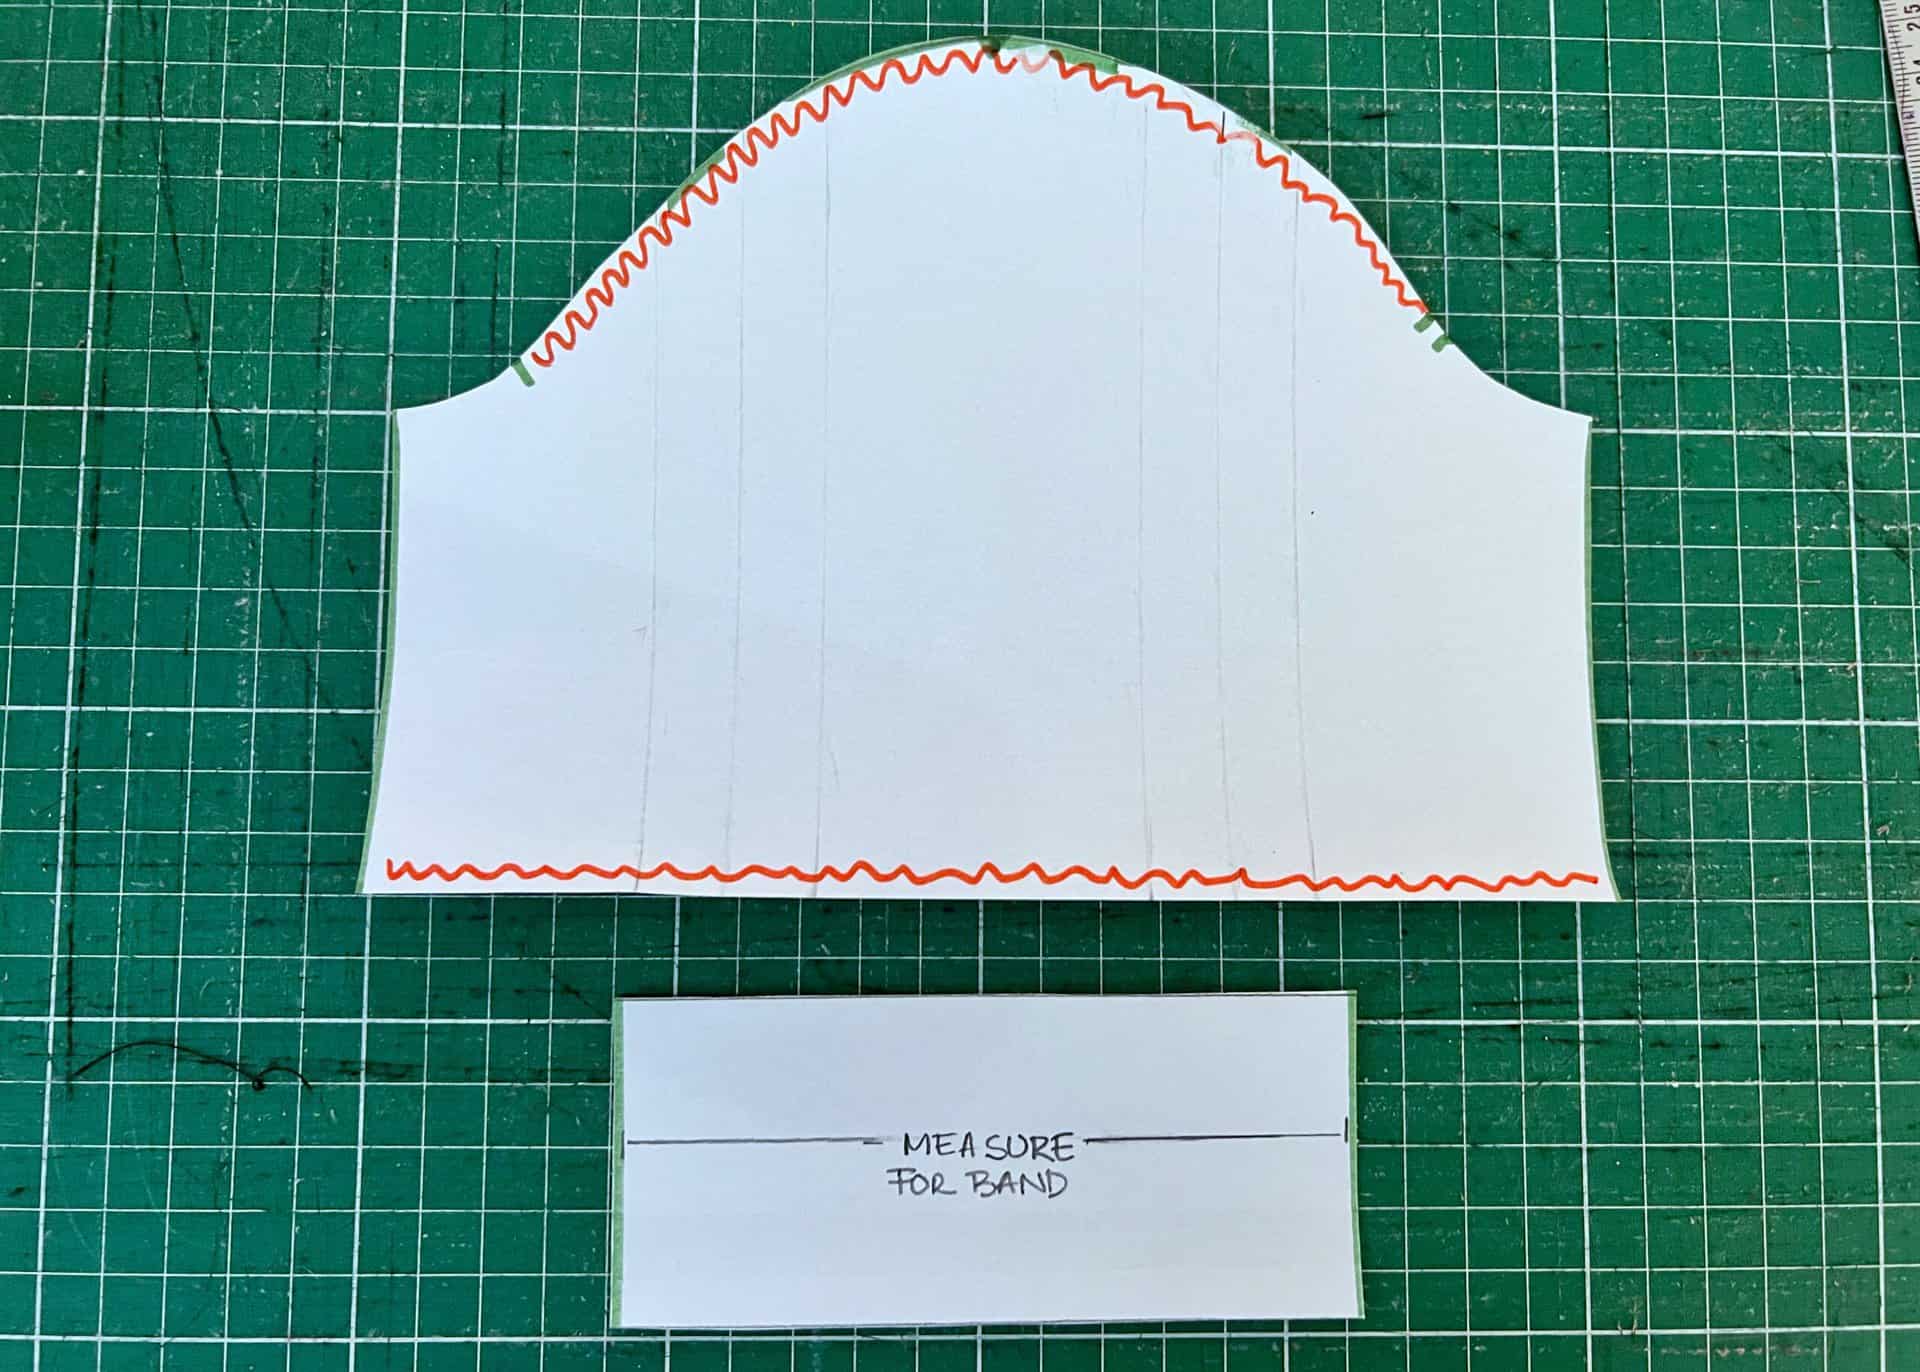
Create Cuff and Finish!
Actually… one more thing before that! Remember that measurement we put aside? Now it’s time to use it to create a cuff piece.
Here personal preference is key. If you want your cuff to have negative ease, you’ll make it a bit smaller than the sleeve width, if you want it to have the same ease as the original sleeve use this exact measurement. The height of the cuff is also up to you (my pattern piece was about 3” in height).
Gather the top of the sleeve between the notches and the bottom from seam allowance to seam allowance. Add the cuff as you normally would and you’re ready to sew the sleeve to your blazer as per pattern instructions.
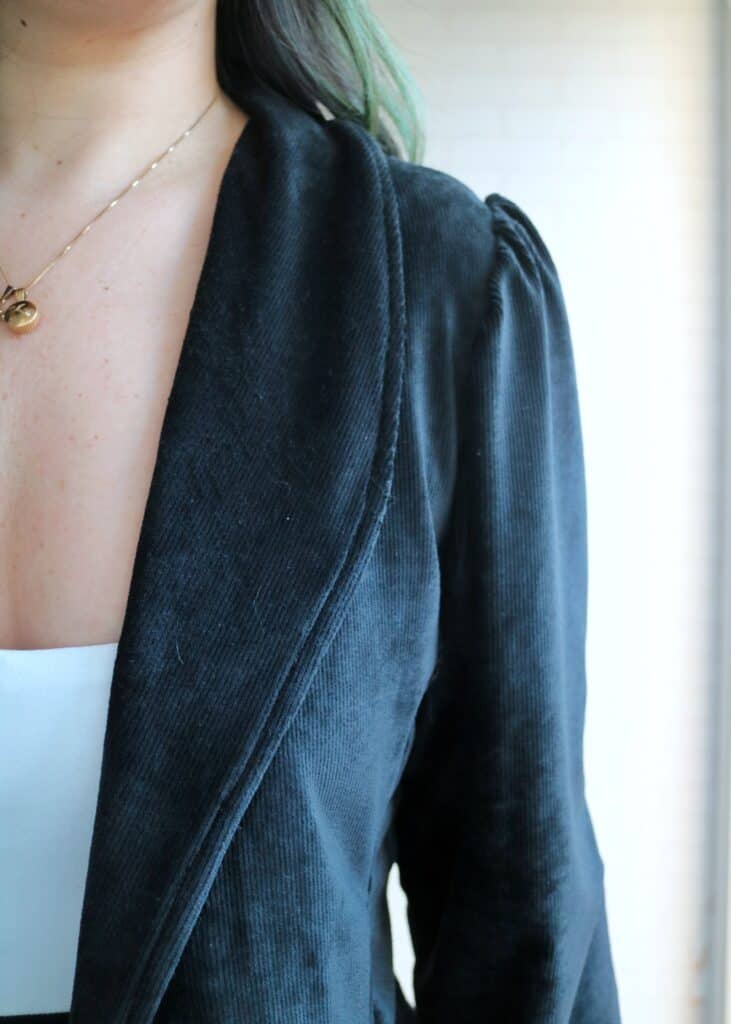
More details about my extra Metra Blazer
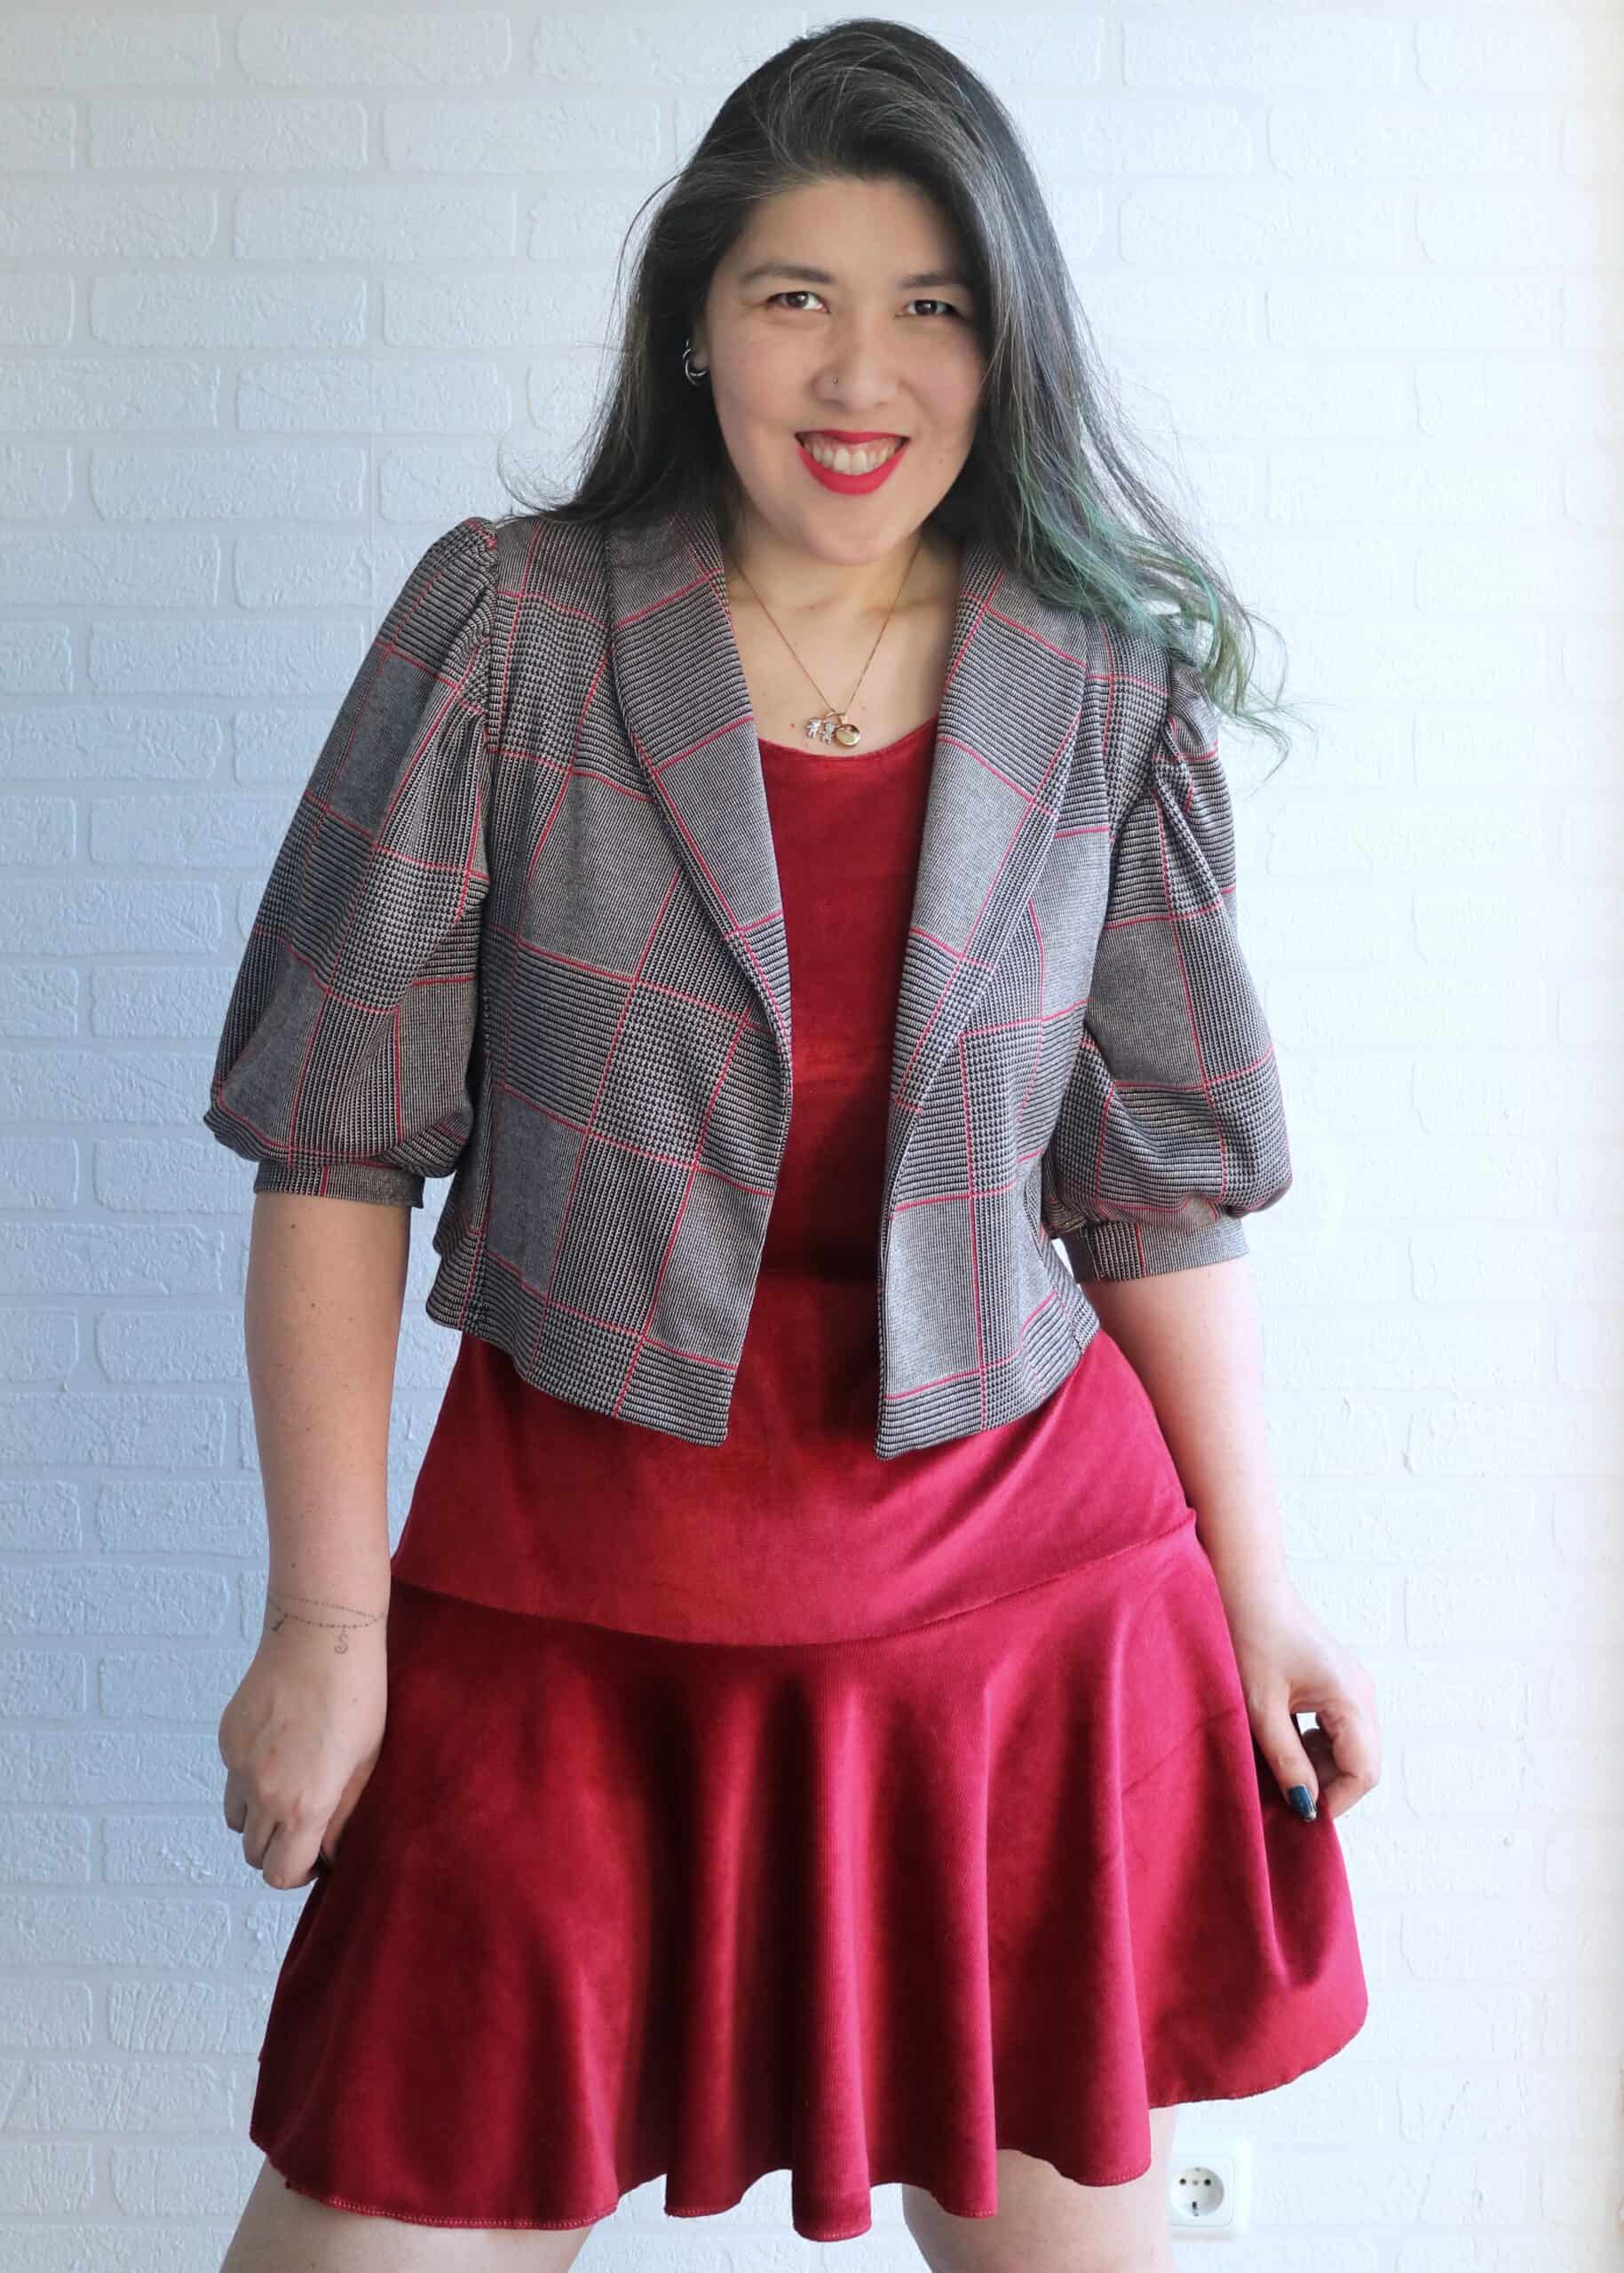
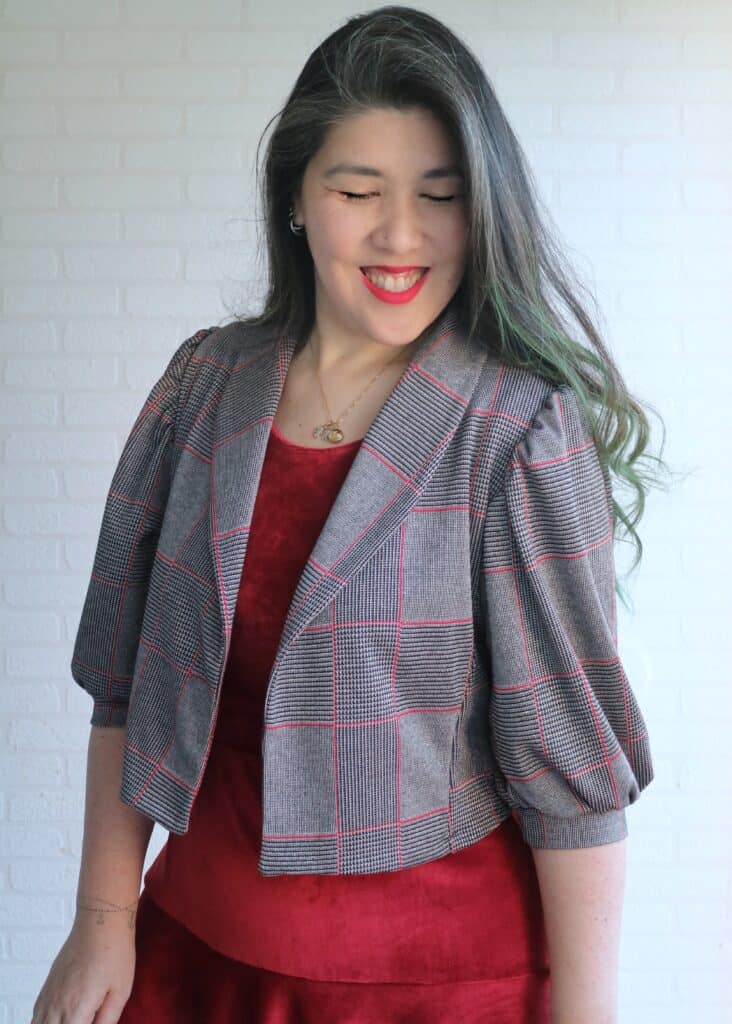
This Metra version is a bit extra hacked, I cropped the length and omitted the pockets.
It’s like Metra’s sassy little sister haha. The fabric used is a very stable ponte, so it looks a bit crispier and holds the sleeves shape better than the cord.

And bonus points for it looking extra cute when paired with my velvet Tessa Sheath Dress!
(you can read about this particular dress HERE on my blog)

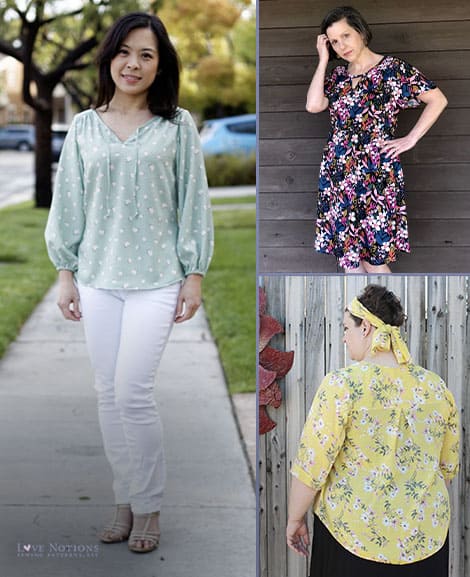
Puff Sleeves on all the Things
This hack will work perfectly with other patterns as well, knit or woven. Can you imagine how adorable Aria will look with a puff sleeve? Ok, so now this may have just jumped into the top of my to-sew list… Haha
That’s it from me today.
I hope I inspired you a little into having a bit of sleeve fun! ????
xxx, Livia.
Instagram: @livia.jy
Blog: Liviality
Facebook: Liviality
TikTok: @livia-patterns
Pin this for later!
Add this hack to more patterns
-
Product on sale
 Laundry Day TeeOriginal price was: $12.50.$5.00Current price is: $5.00.
 -
Product on sale
 Classic Tee ShirtOriginal price was: $10.00.$5.00Current price is: $5.00.
 -
 Rhapsody Blouse & DressPrice range: $12.50 through $23.00
 -
 Cadence Dress & Top$12.50
 -
 Vivace DolmanPrice range: $12.50 through $23.00
 -
 Harmony Blouse$12.50