

How to add Flutter Sleeves to the Willow Wrap Dress
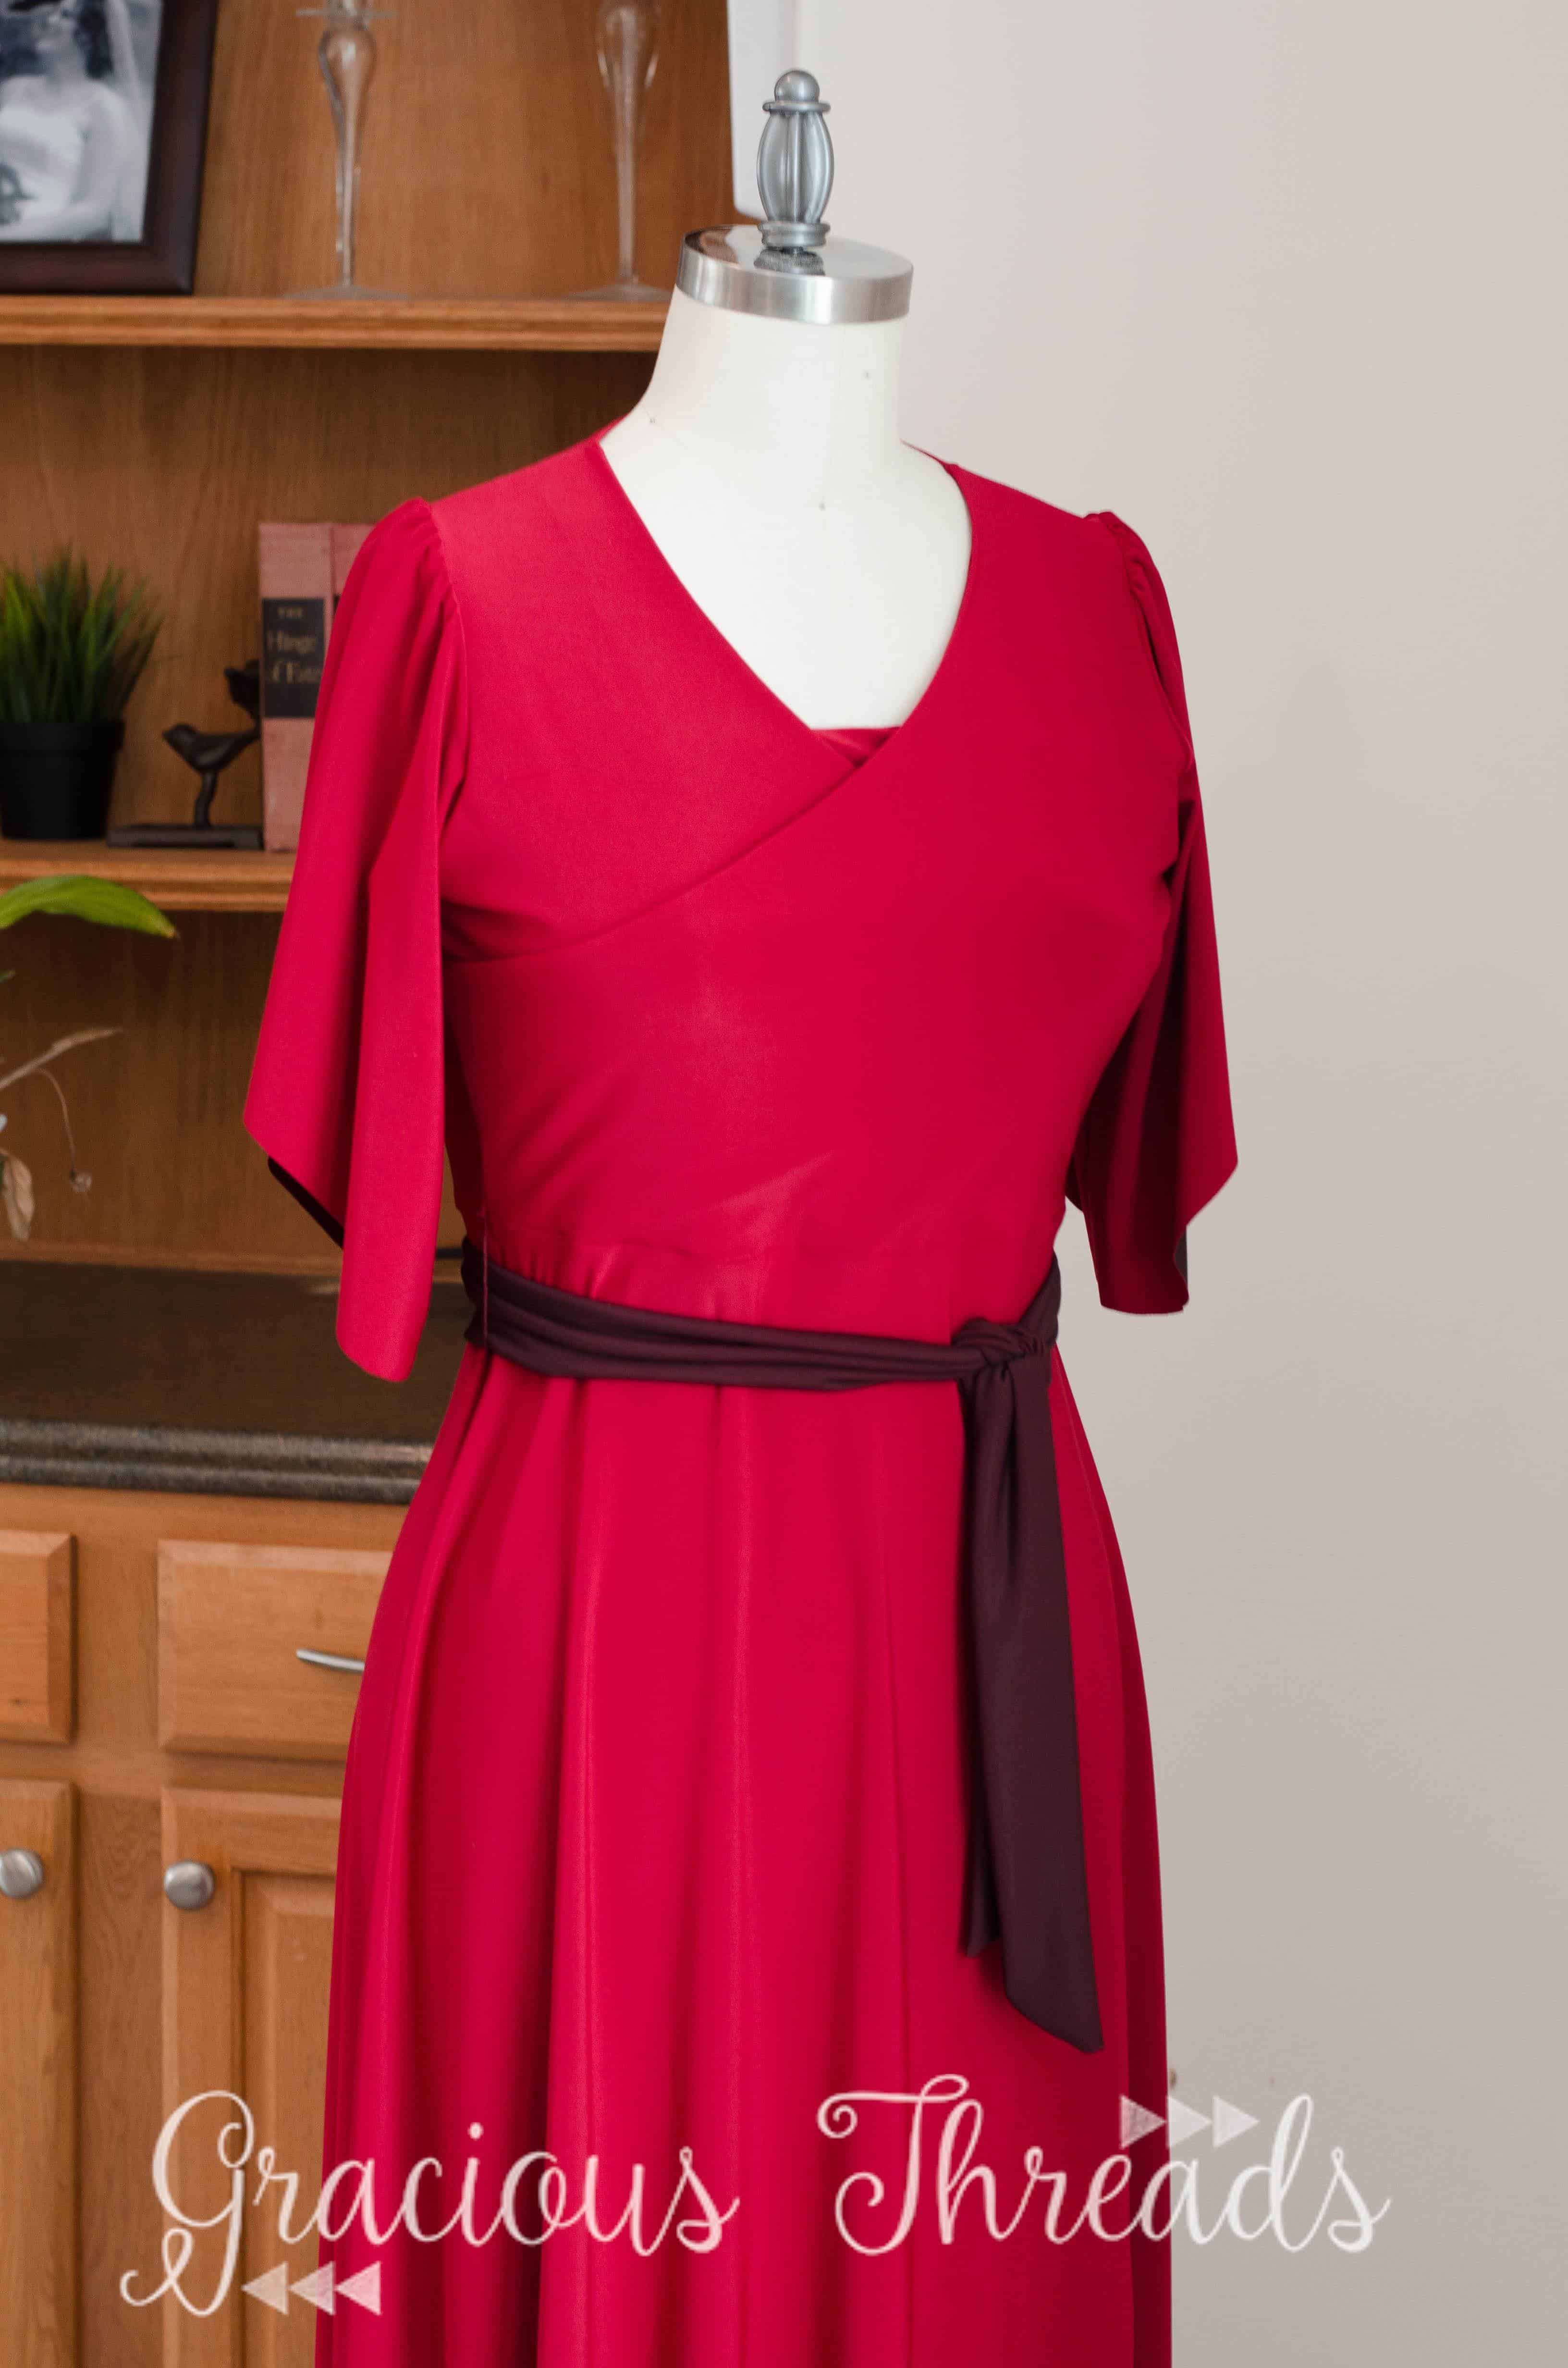
Last week, Jess from Gracious Threads shared a gorgeous bridesmaid dress using the Willow Wrap Dress with added flutter sleeves she created in the Love Notions Patterns Support Group. Today, she is here to share with us how she created the flutter sleeves. Thank you so much, Jess for joining us!
Hello all! I’m happy to be here guest posting. I’m Jess, and you can usually find me blogging and designing at Gracious Threads.
Recently I was asked to sew bridesmaid dresses for one of my acquaintances. She had some specific needs for the dress: had to be breastfeeding friendly, flattering is sizes small and extra-large, and modest with the upper arms and knees covered. She was unable to find anything meeting these requirements in the bridal store, but fortunately I was able to help out!
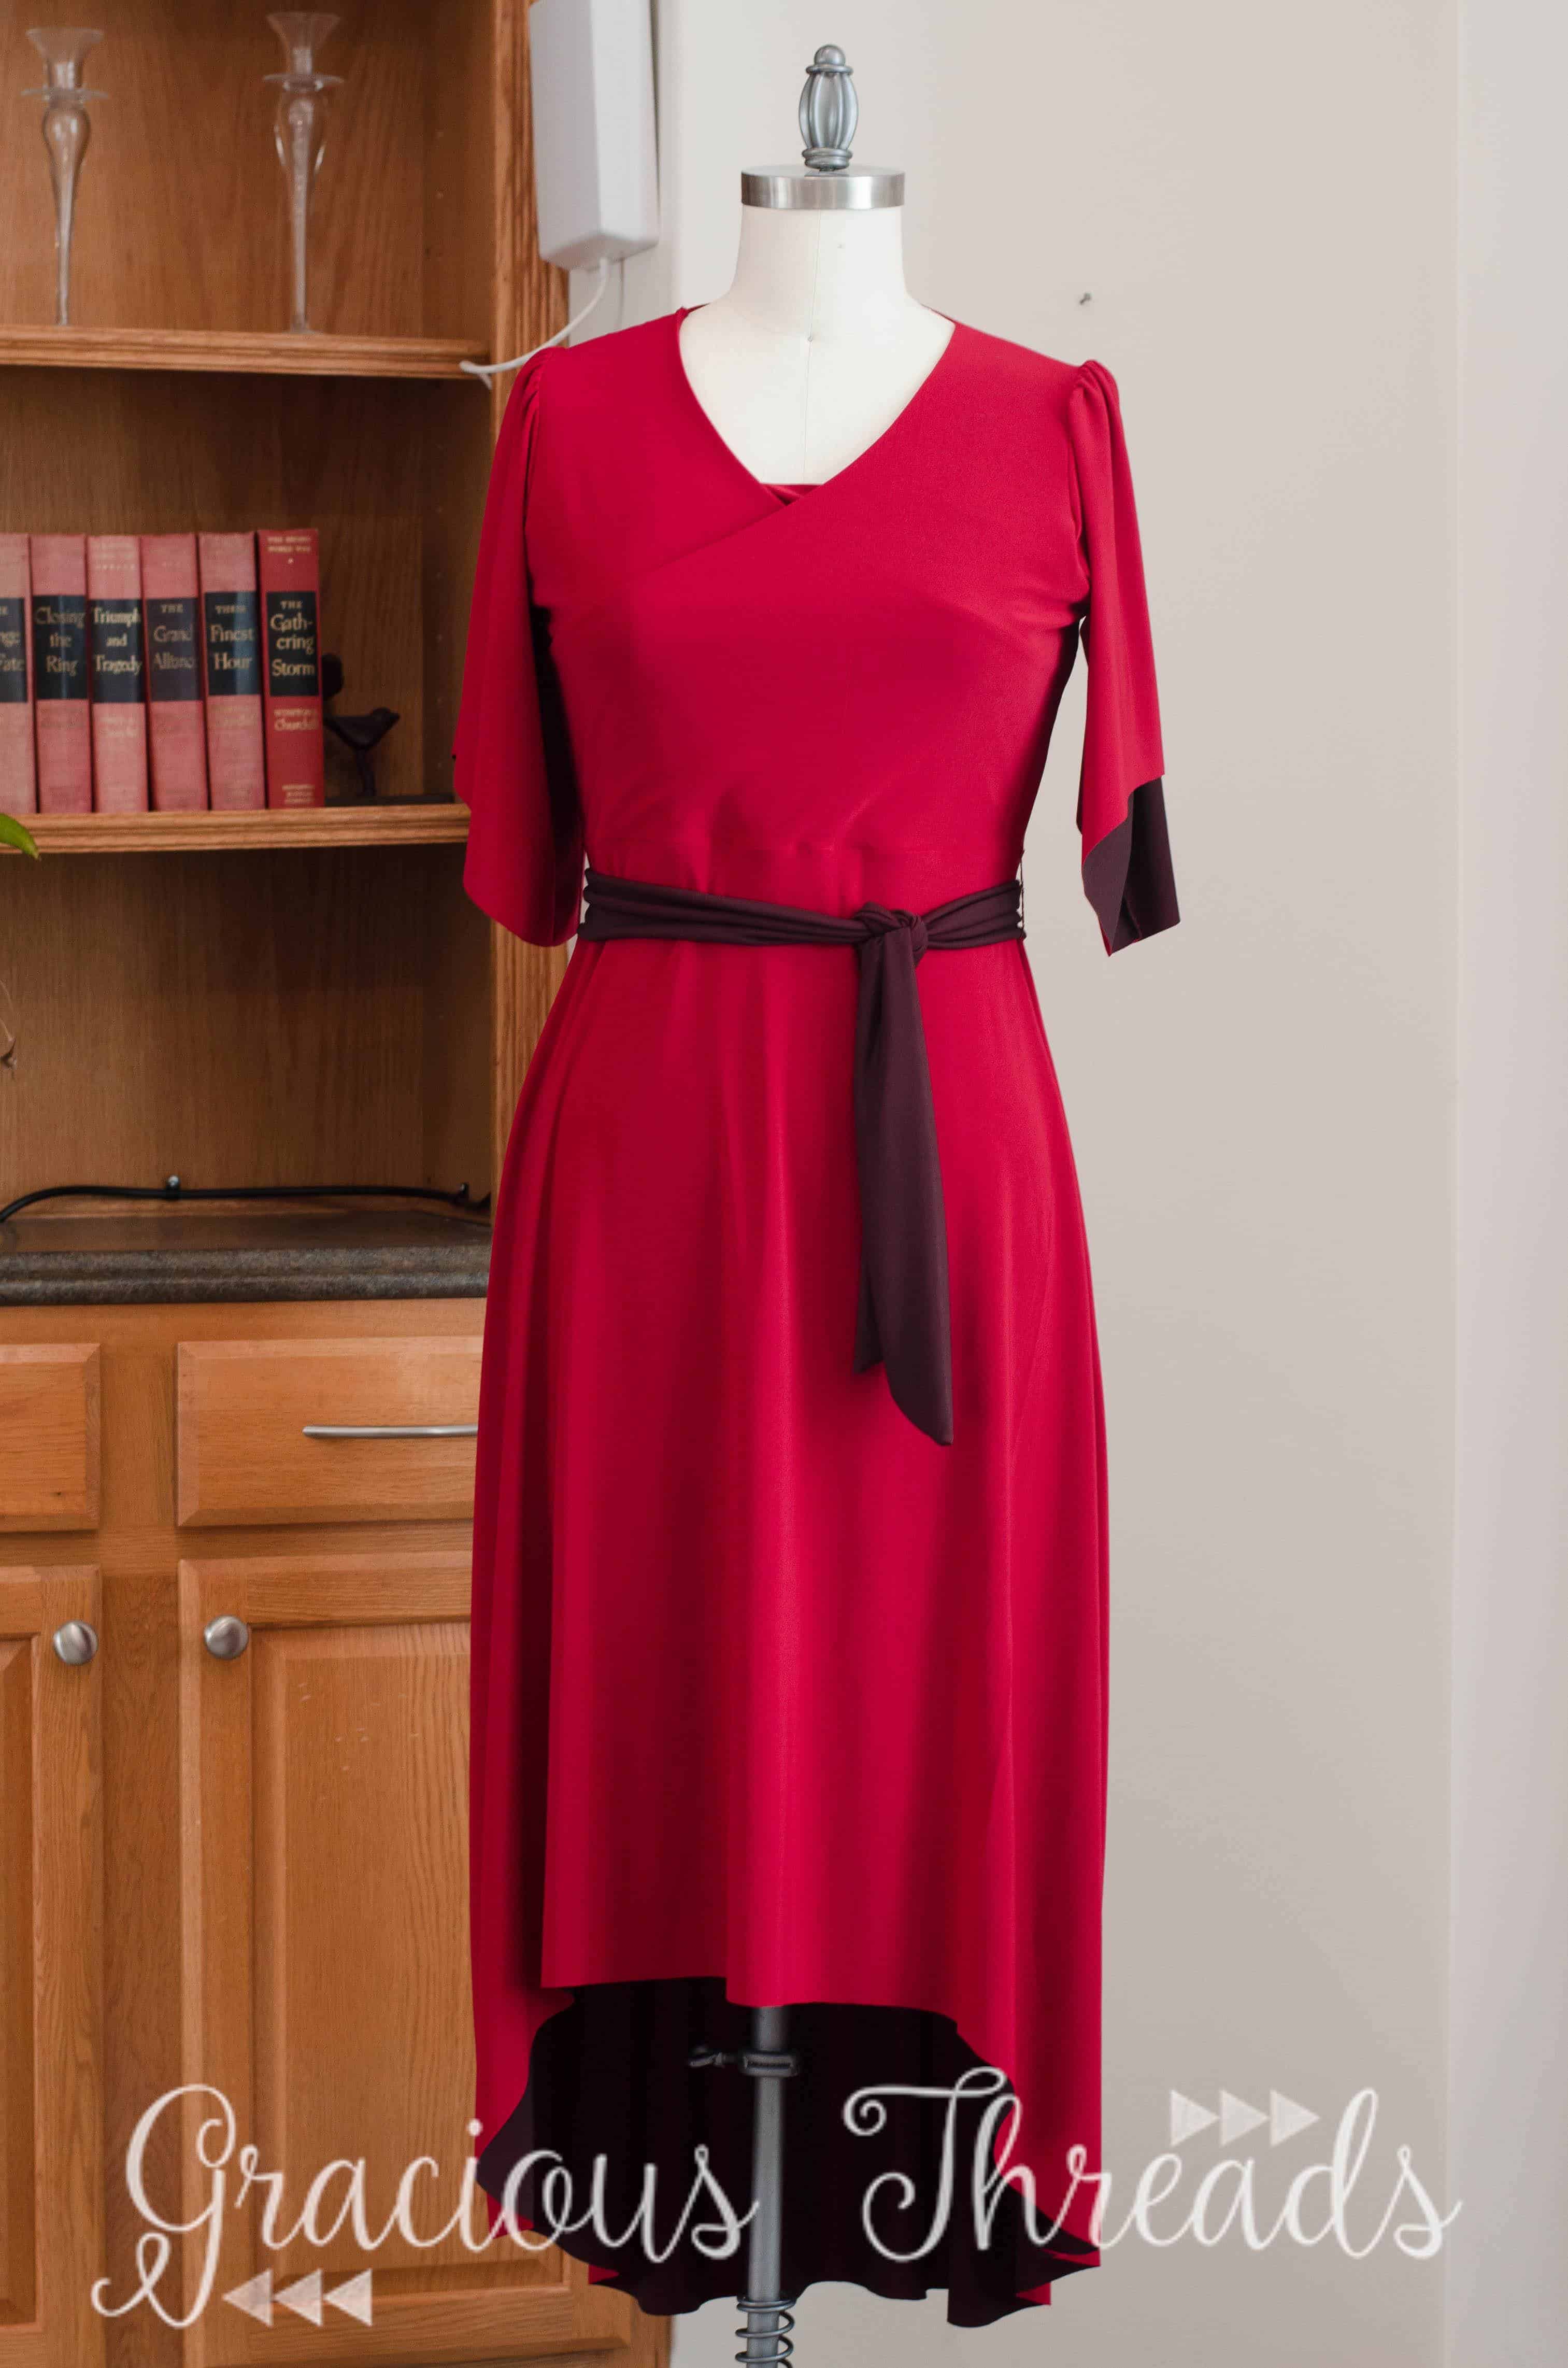
After speaking to the bride about her preferences, we came up with a design. I knew the Love Notions Willow Wrap Dress would be a perfect starting point, and I love knowing that with Love Notions’ patterns I am able to count on an accurate fit in all sizes.
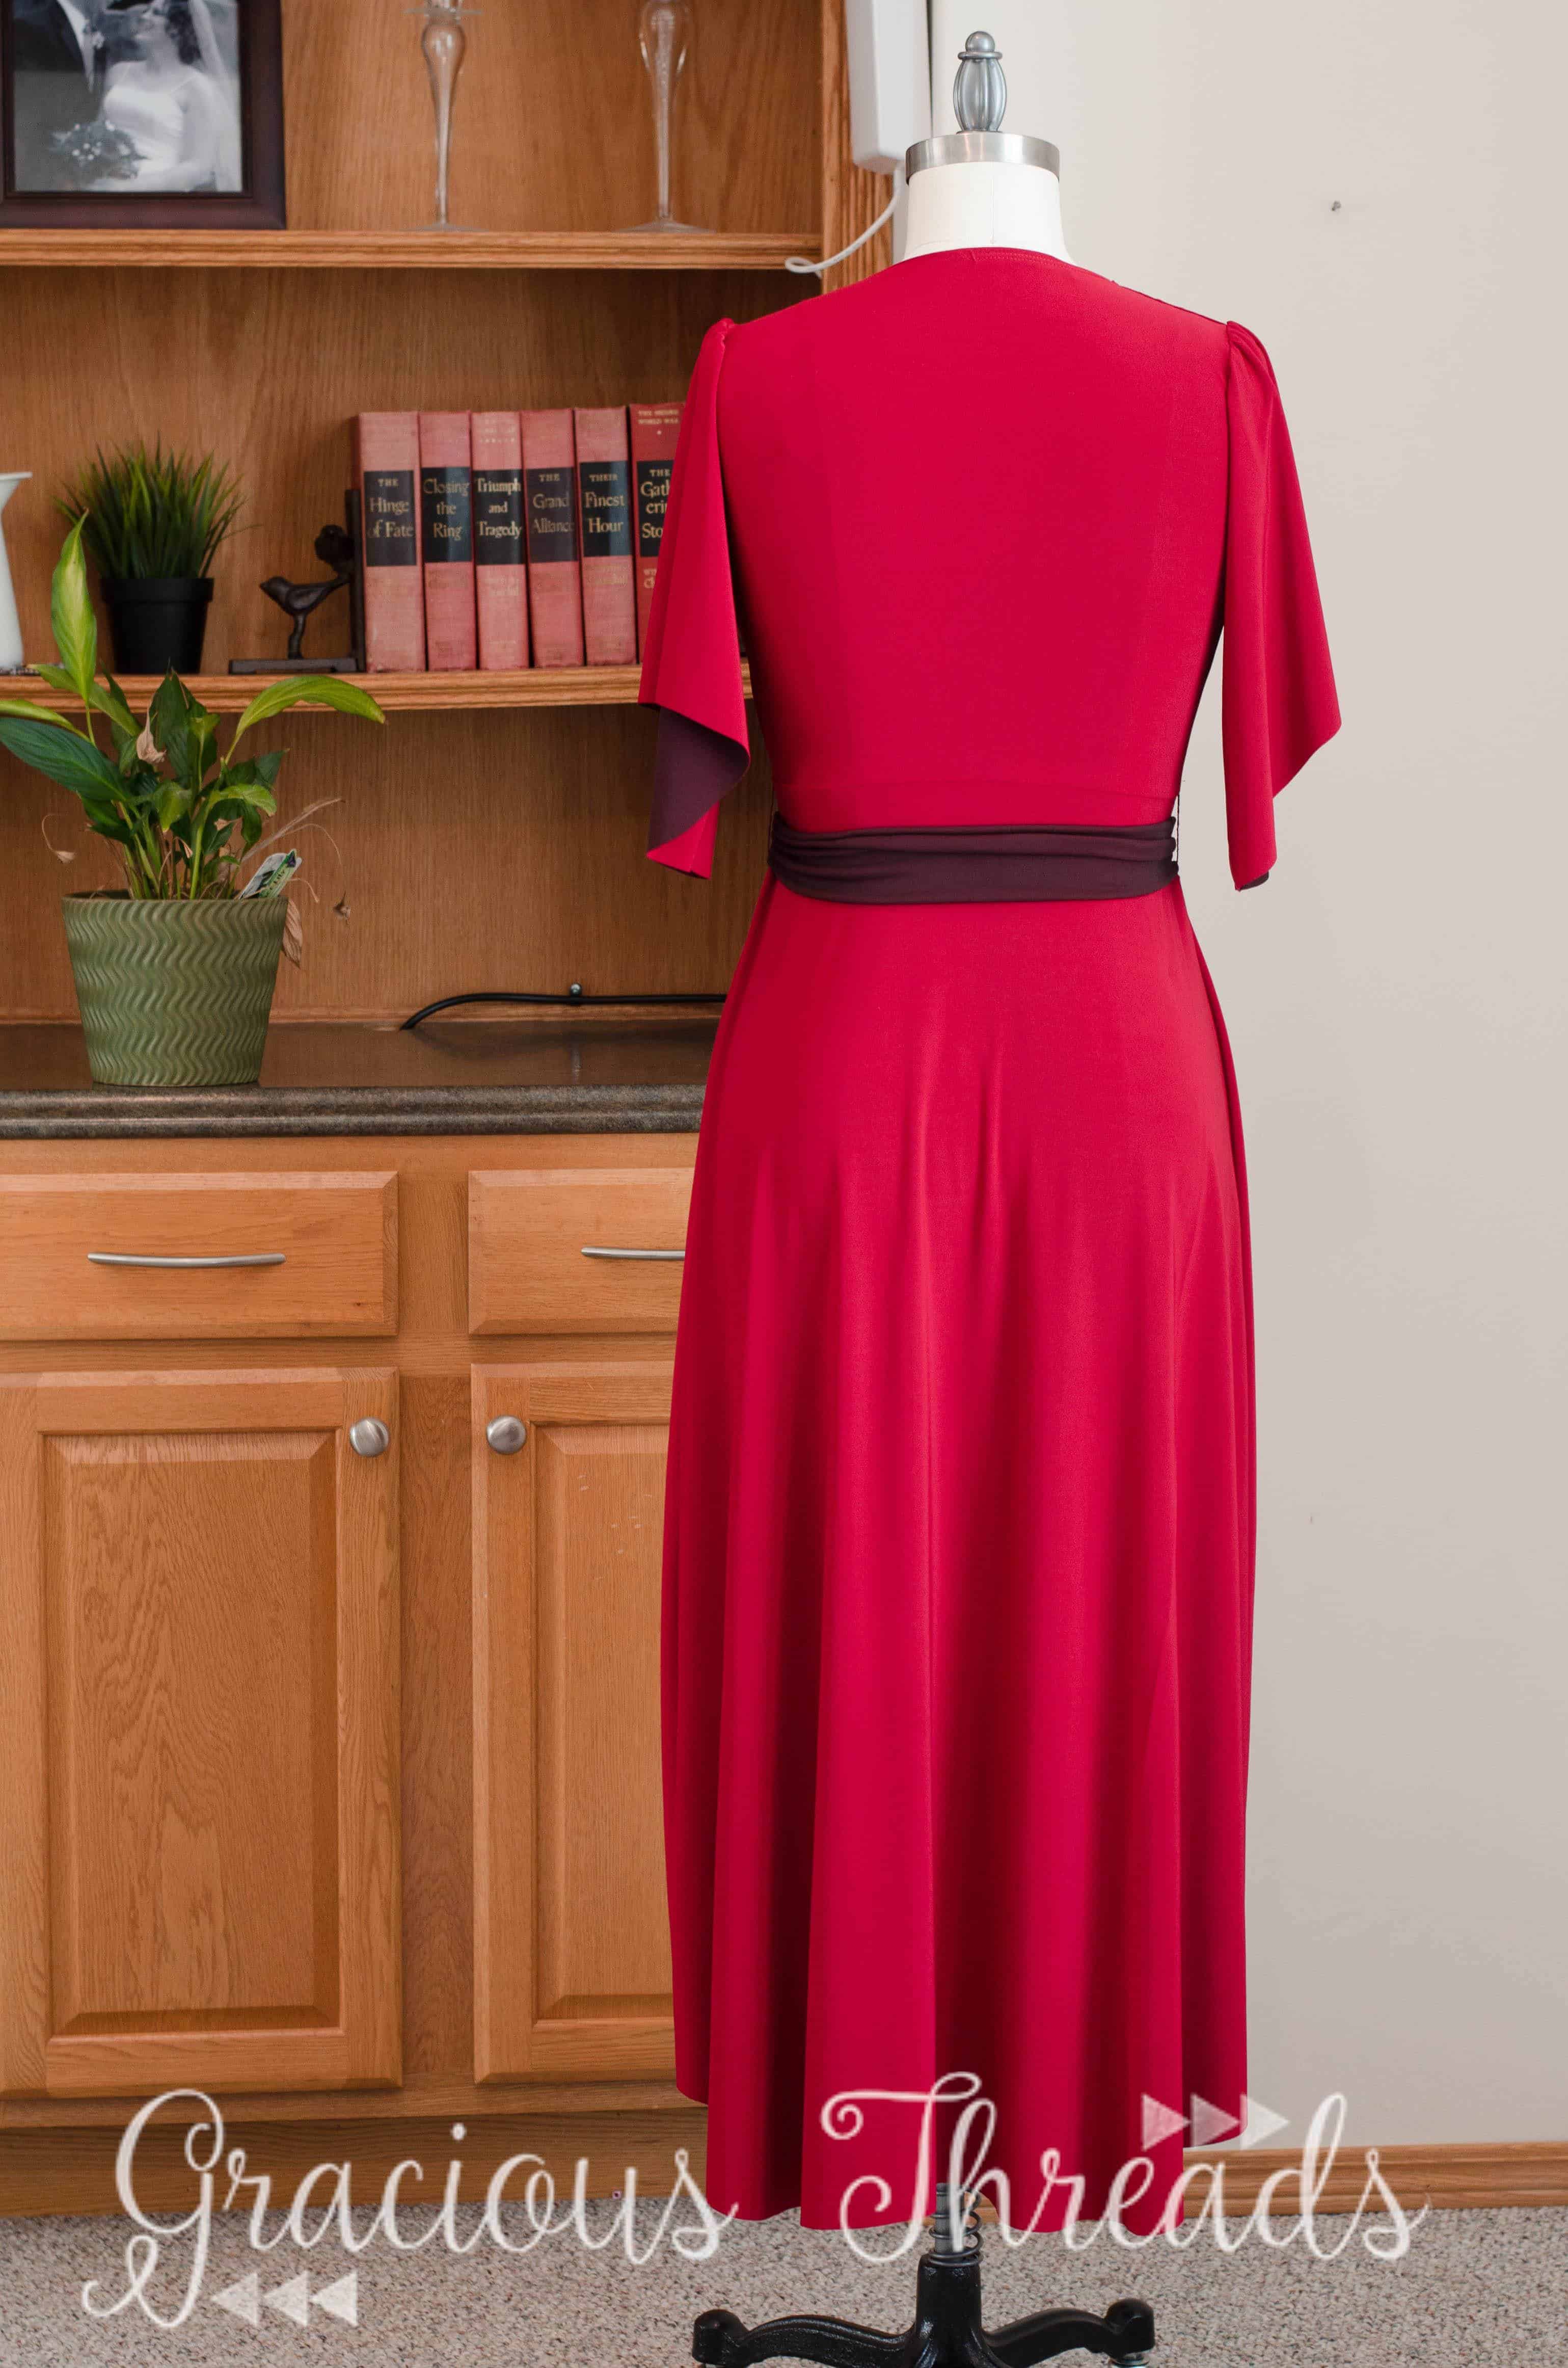
While the basic design of the dress is the same, I did make a few changes. First, I lengthened the back to create a hi-low hem (use this great tutorial Tami wrote for the Laundry Day Tee). Next, I changed the sleeves from the basic fitted sleeve into an elegant gathered flutter sleeve that also has a hi-low bottom edge. Finally, we added a sash sewn from the reverse side of the double faced ITY knit.
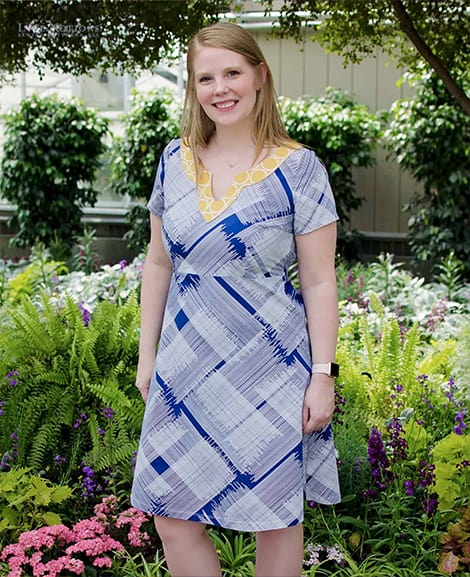
Today, I’ll be showing you how easy it is to create a flutter sleeve. The great thing about this alteration is that it can be used on nearly any pattern (I think it would look very sophisticated on the Margot Peplum!).
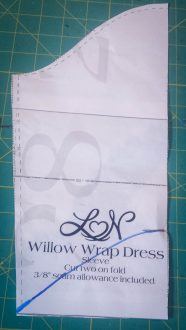
First, cut out your basic sleeve pattern and cut the pattern piece to the length you prefer. I wanted the lowest point of the flutter sleeve to be below the elbow, so I did a quick measurement on myself and cut off the lower portion of the sleeve.
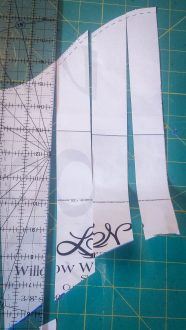
Next, decide how much of a hi-low hem you would like. I went with 4″ and measured 4″ up on the top side (the side that is placed on the fold. I drew a line; don’t worry about making it pretty since you’ll redraw it later.
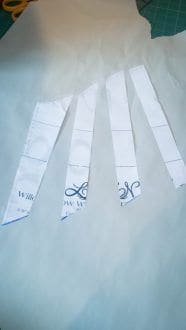
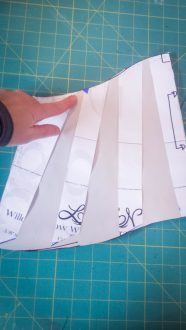
Use a ruler and draw 4 straight vertical lines through your pattern piece. Cut the pieces apart. It can be helpful to number them so they don’t get mixed up.
Now, spread the pieces apart to create your desired fullness of your flutter sleeve. I spread them apart 1/2″ at the top of the sleeve and 1 1/2″ at the lower edge.
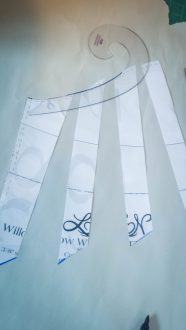
Tape the pieces to another sheet of paper.
Using a french curve, draw a gentle curve connecting the top edges (or freehand if you don’t have one). Don’t worry about cutting off small points of the pattern piece; just connect them the best that you can. Repeat with the lower edge.
One important thing to note is that you want your upper and lower edges that meet the fold line to form 90 degree corners (where the boxes are in the illustration), otherwise you’ll have an odd peak or valley in your pattern piece.
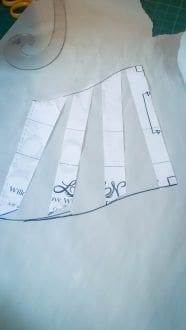
Lastly, mark a notch near your first ‘slash’ to indicate where to start gathering the sleeve cap.
When you are ready to sew, stitch two rows of basting stitches along the top of the sleeve cap, gather it to fit the armscye of your garment, and sew it in as usual!
Jess made that look so easy! Now, I want to add flutter sleeves to everything now!
Thank you so much, Jess for sharing this tutorial with us.
What else will you sew flutter sleeves onto?


[et_bloom_inline optin_id=optin_3]

