Don’t Cut Corners…Miter Them!
Hi Sewing Friends,
I’m Mary Anne from the Sew Mary Mac Blog and Instagram. I am one of the newer Love Notions Ambassadors and I’m so excited to be a guest blogger for the Love Notion’s Sewing School today!
Split Hems = Mitered Corner Possibilities
There are some great patterns out there with split hems (think Presto Tunic, Boyfriend Cardigan and Terra Tunic) and I’m here today to show you how you can get a really beautiful finish by doing a mitered corner on the Presto Tunic split hem. I just love when the inside of something I sew is just as pretty as the outside.


Will it take long?
I’ll be honest, I love the look of a mitered corner- but I often skip making one because I think it will take too long, or I can’t remember how I did it the last time. Those of you that are quilters, I am sure this is something you have down pat. But as a clothing sewist, it’s not something that I need to do very often.
My Sewing Pattern
I’m using the Presto Tunic for this tutorial. This is an awesome pattern that I don’t think gets enough love from the sewing community. Every time I see one posted, I remember how awesome this pattern really is! If you’d like to read more about the Presto Tunic and see how it sews up in various fabrics, please visit my blog post over at www.sewmarymac.com
What is a Mitered Corner?
A mitered corner is a way of finishing the corner of a fabric edge (it could be a garment, a quilt, a napkin, etc.) in a way that there is no extra bulk. Instead of the side and hem fabric being folded on top of each other and creating bulk, the mitered corner allows the fabric edges to meet at a 45 degree angle.
Why bother with a mitered corner? A mitered corner can give a handmade garment a clean professional look.
Why bother with a mitered corner? A mitered corner can give a handmade garment a clean professional look. It takes your completed garment up a notch.
This technique is considered to be a professional finish but is actually very easy to construct with just a few extra steps. Once you’ve done it a few times, you’ll never go back!
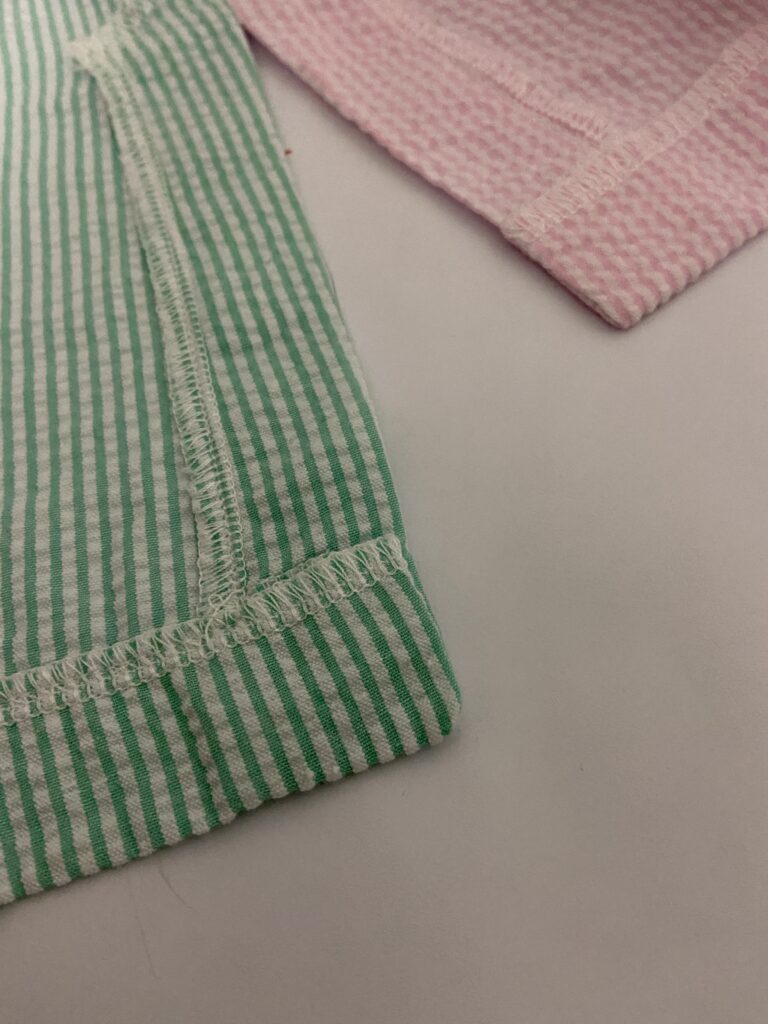
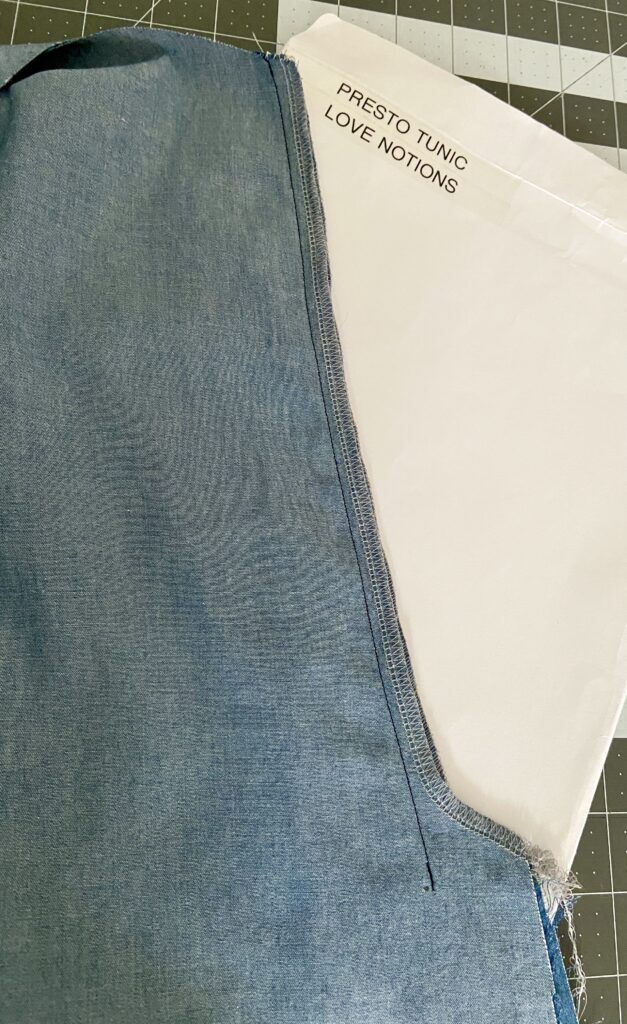
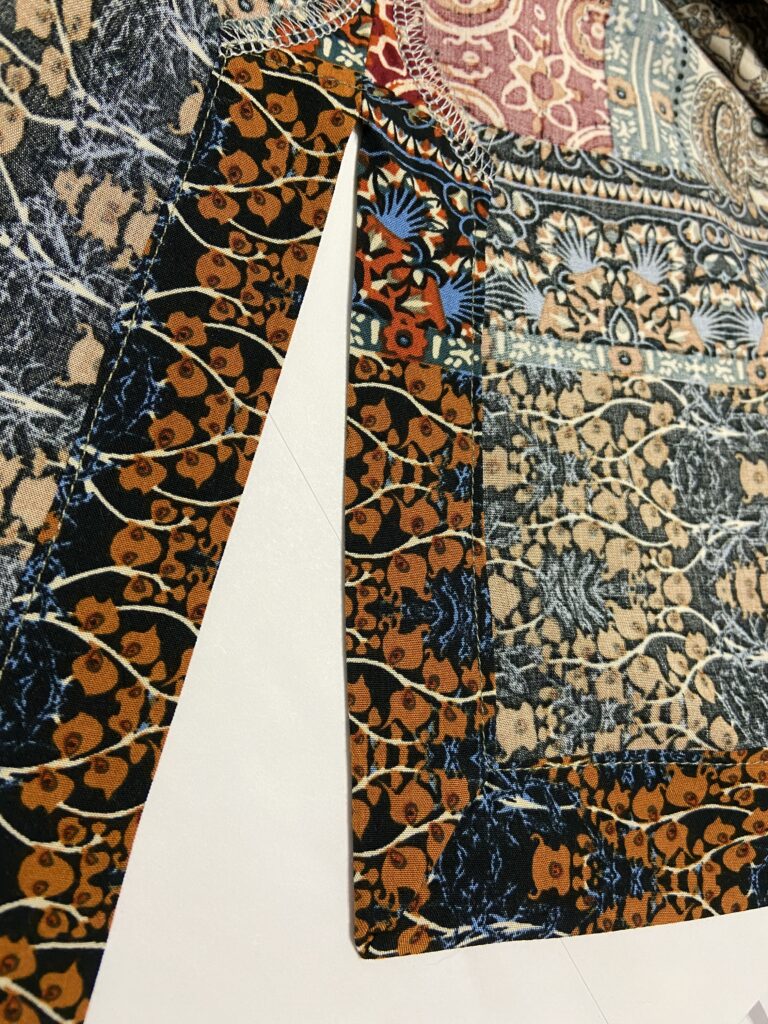
Here is an example of a split hem corner sewn without a miter.
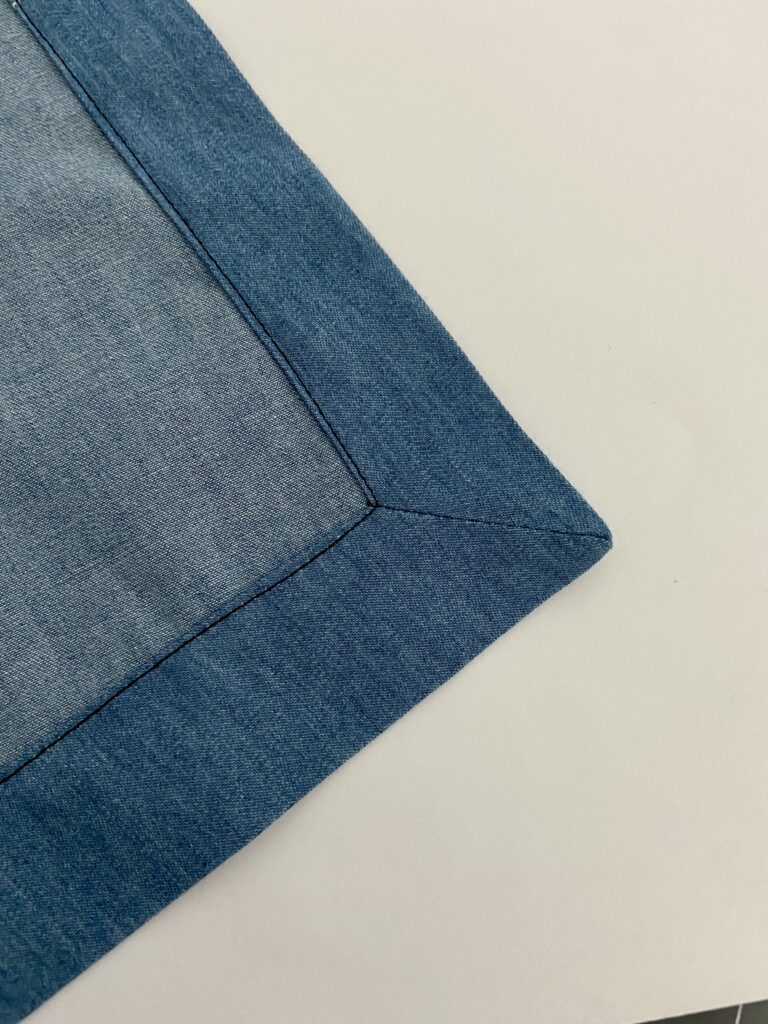
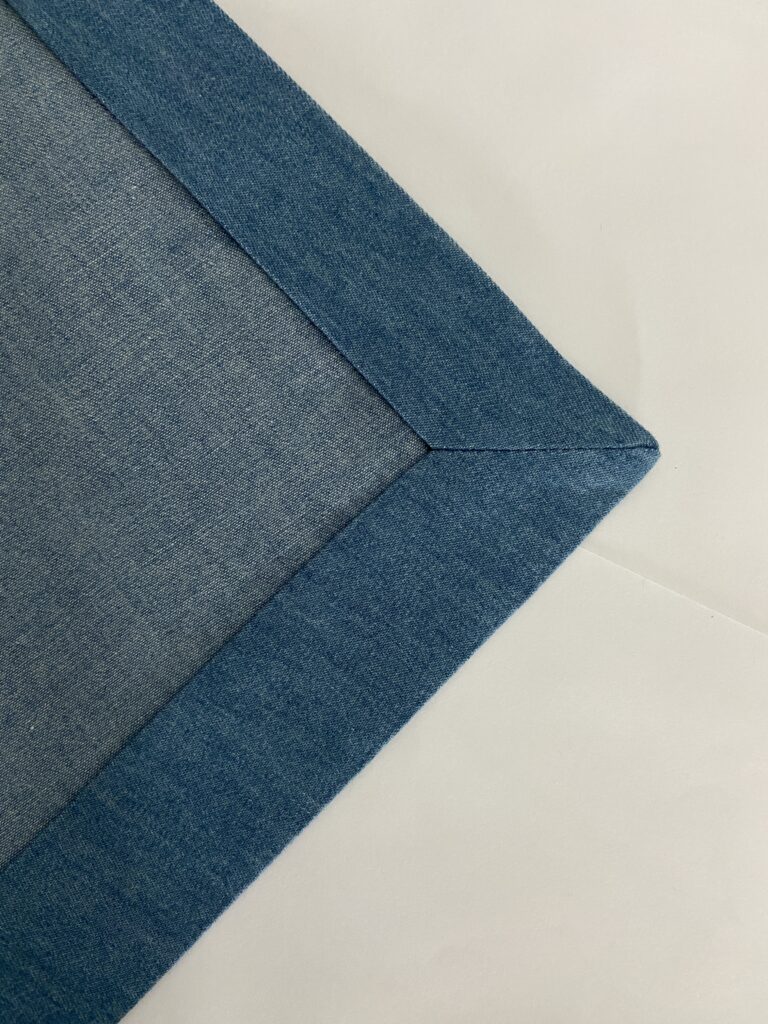
Here is a mitered corner. Not only does it create a nice square corner, look how pretty it is on the inside!
Mitered Corner: Step 1
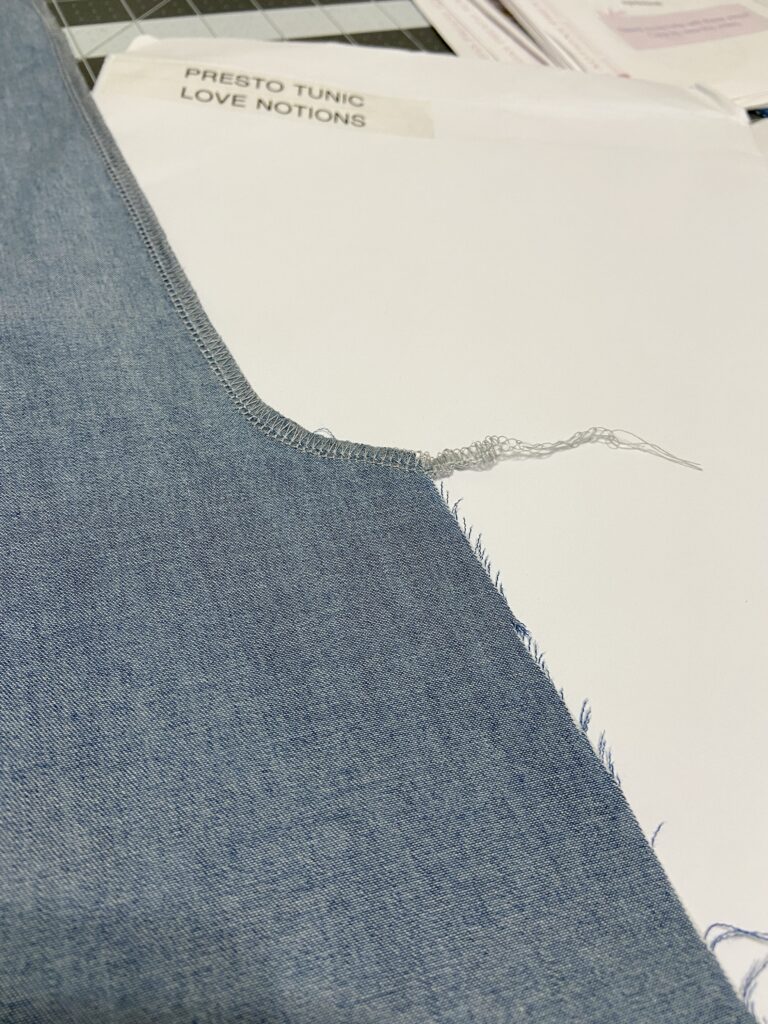
If your fabric frays(like most wovens will), make sure you finish your shoulder seam and side seams before sewing the front and back together. ONLY finish the side seam-including the diagonal portion of the vent. The rest of the vent and the bottom hem will be enclosed. Finishing them at this step will create more bulk.
[This is step 14 on the Presto tutorial]
Step 2
Sew the sides seams according to your pattern tutorial.
[For the Presto, this is Step 15]
Mitered Corner: Step 3
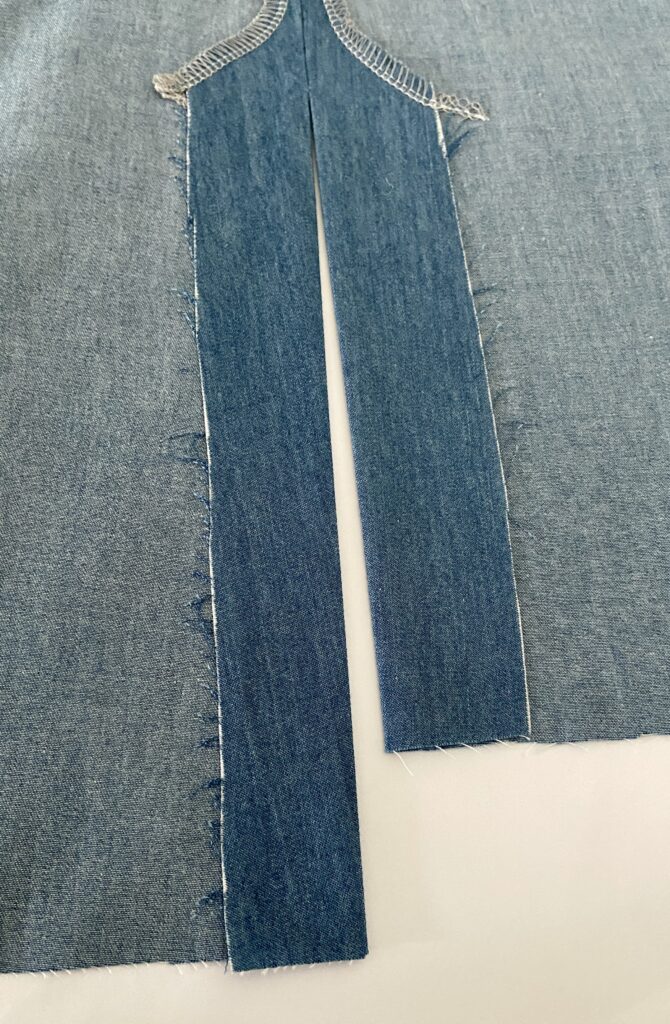
Press side seams open, pressing vents flat.
[Step 16 on the Presto tutorial]
Omit steps 17 and 18 on the Presto tutorial and continue below for mitered corners.
Since the hem allowance on the vent is 1 ¼ inches, we will use that width for the bottom hem as well. (Keep this in mind if you do any length adjustments to your tunic).
Mitered Corner: Step 4
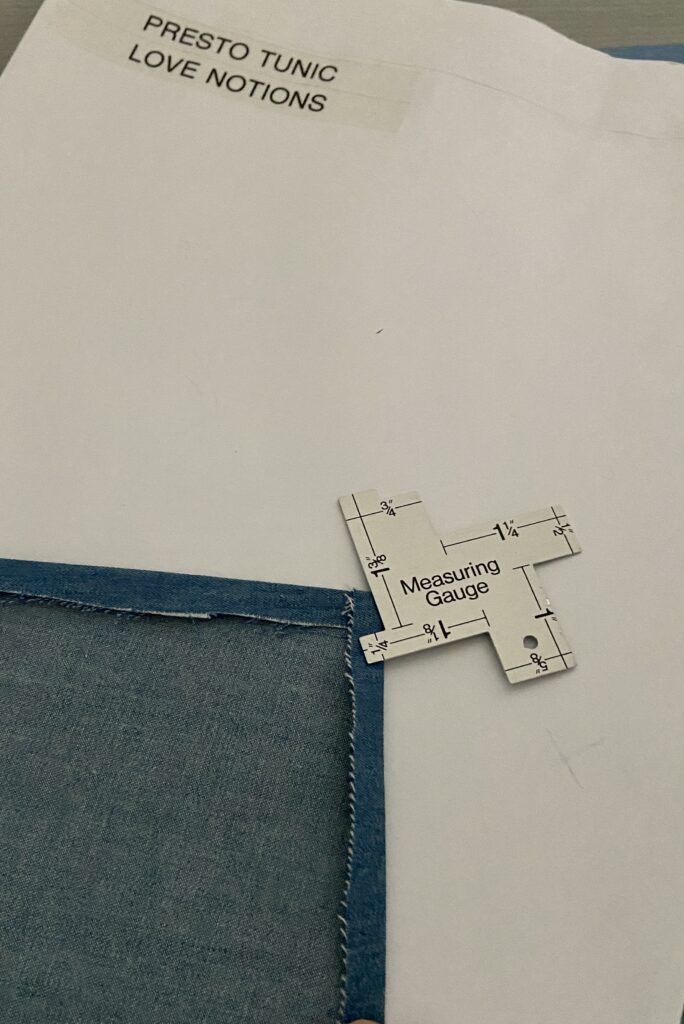
Press ¼” to the wrong side on the vent and hem.
Mitered Corner: Step 5
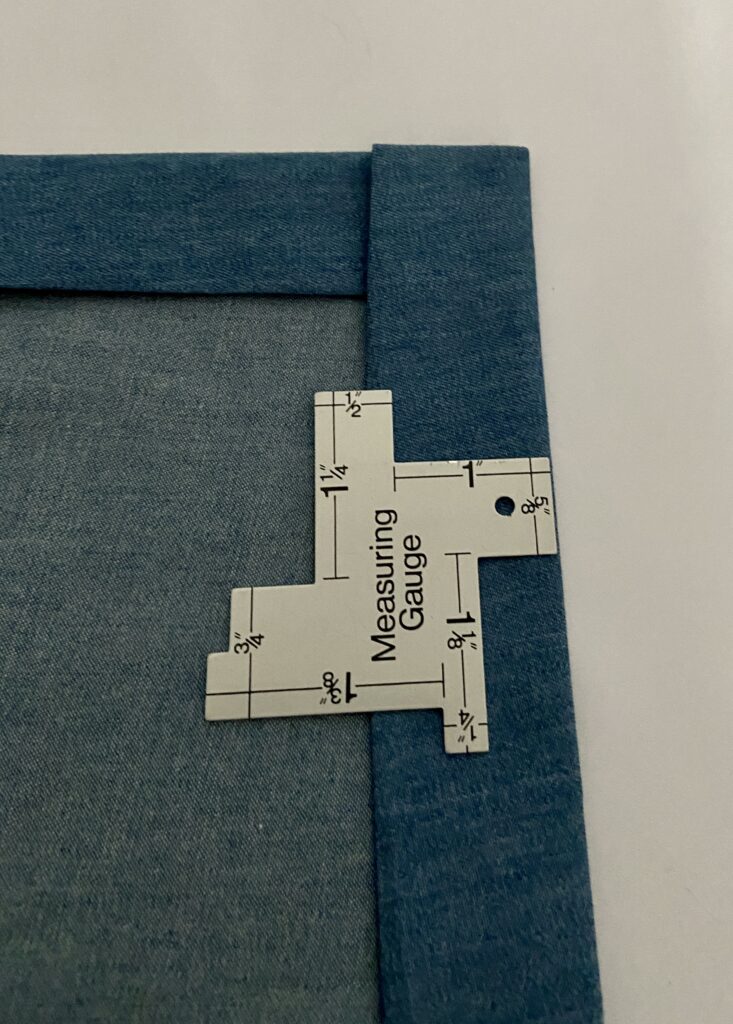
Fold again to the inside, 1 inch, and press really well. This second fold will enclose the raw edges of the vent and hem.
Mitered Corner: Step 6
Open up the last fold, making sure that there is a nice crease.
Now it’s time to Miter!
Mitered Corner: Step 7
Multiply the width of hem (1 inch) by 2.
1” X 2= 2
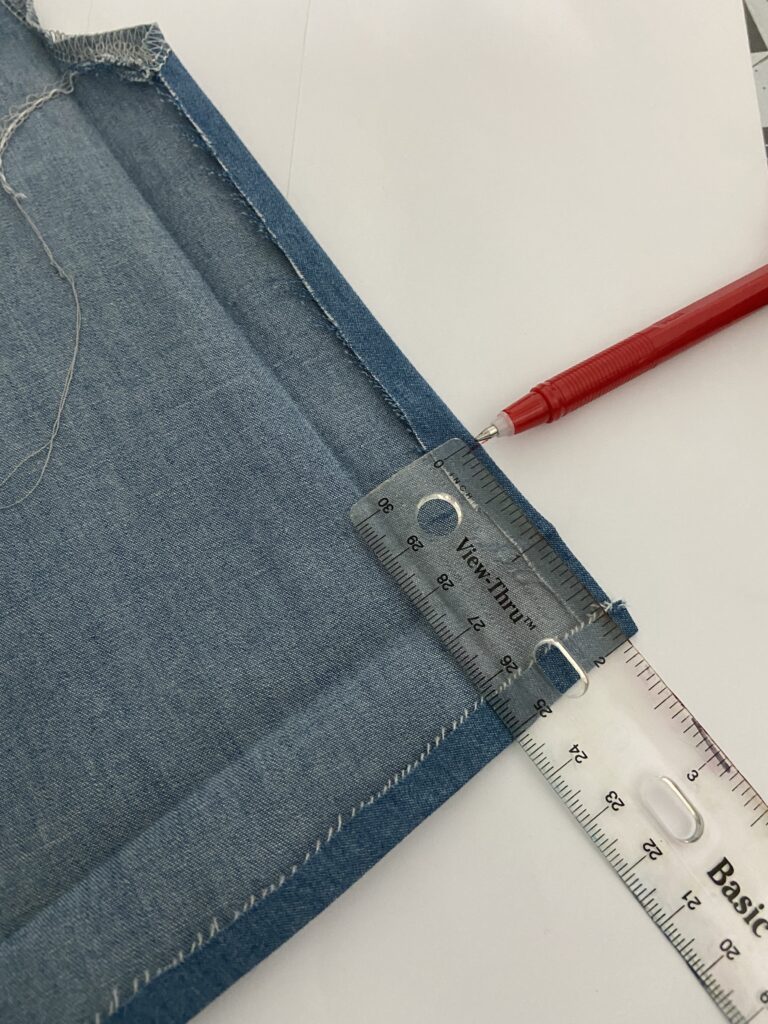
You will now use that measure to mark the corners.
Measure from the corner point 2” away in both directions. (On the vent and the hem)
Repeat this for all corners.
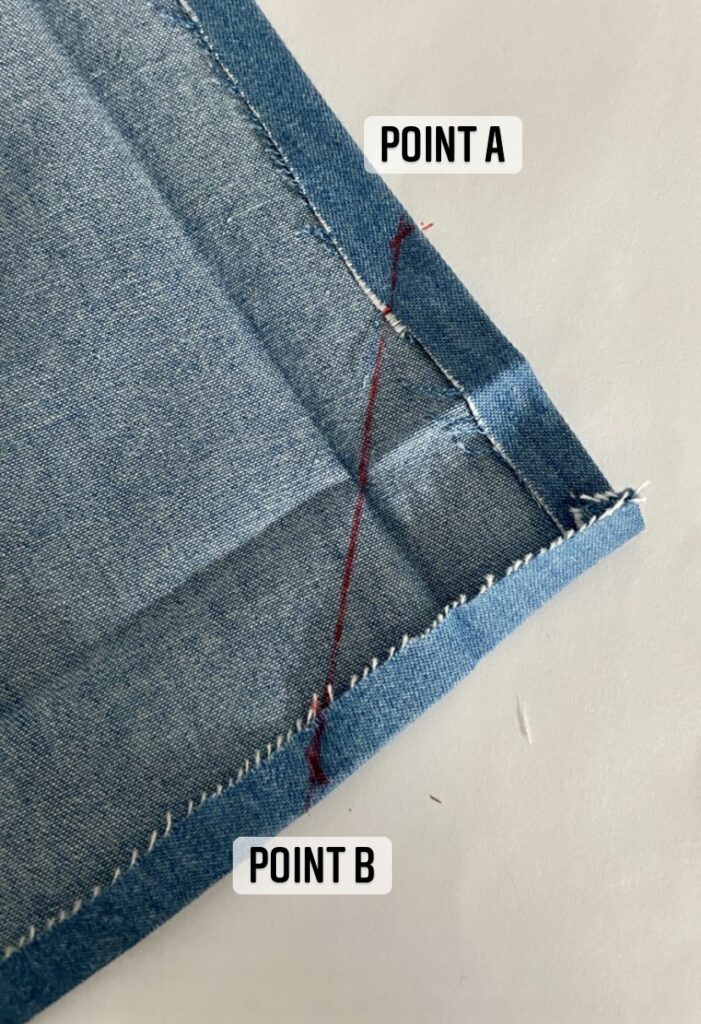
Mitered Corner: Step 8
Draw a diagonal line from Point A to Point B.
Mitered Corner: Step 9
Fold the corner of fabric (RST) in half so the line you just drew matches up.
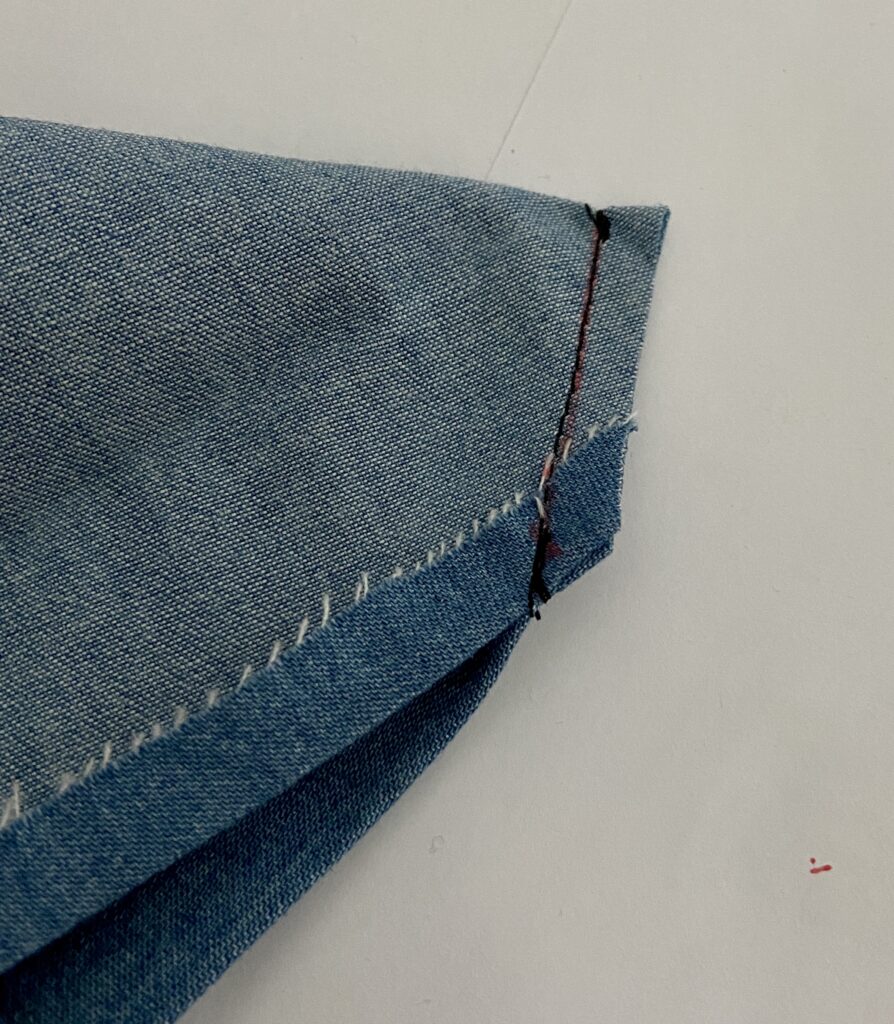
Stitch along this line- be sure to backstitch!
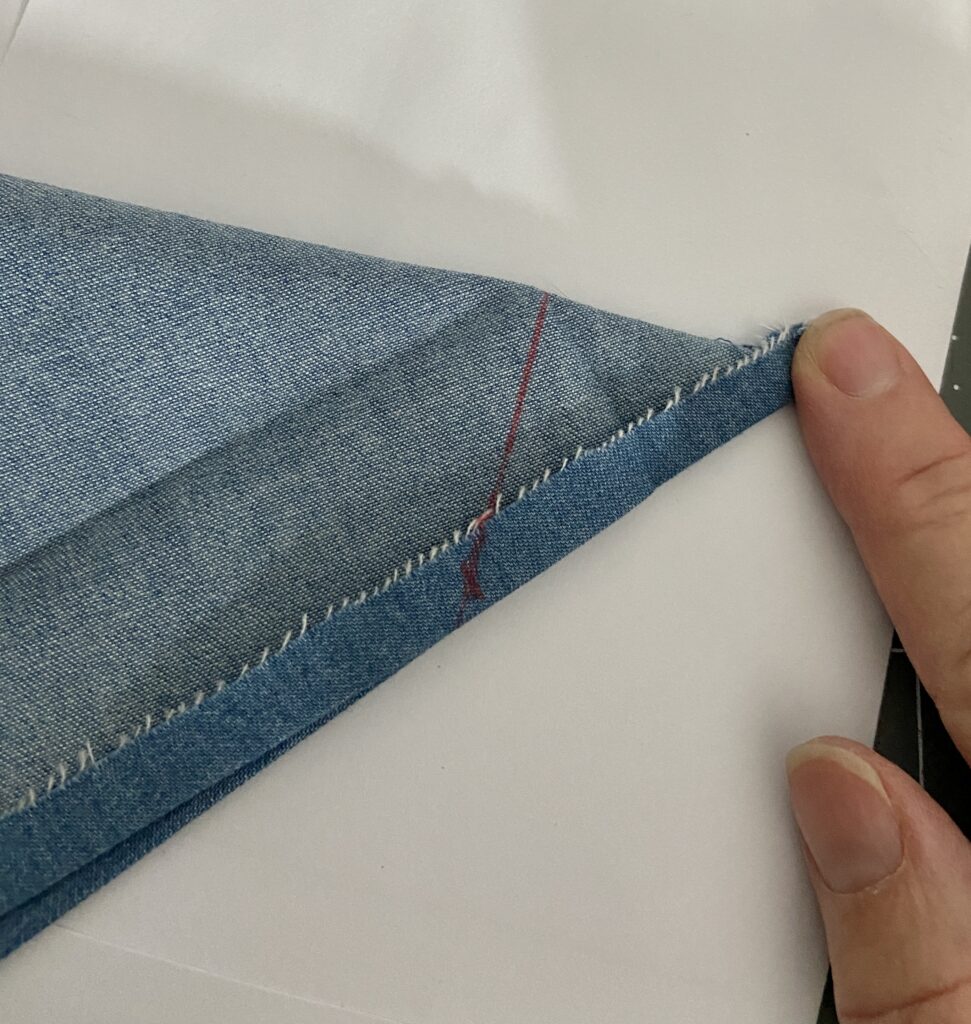
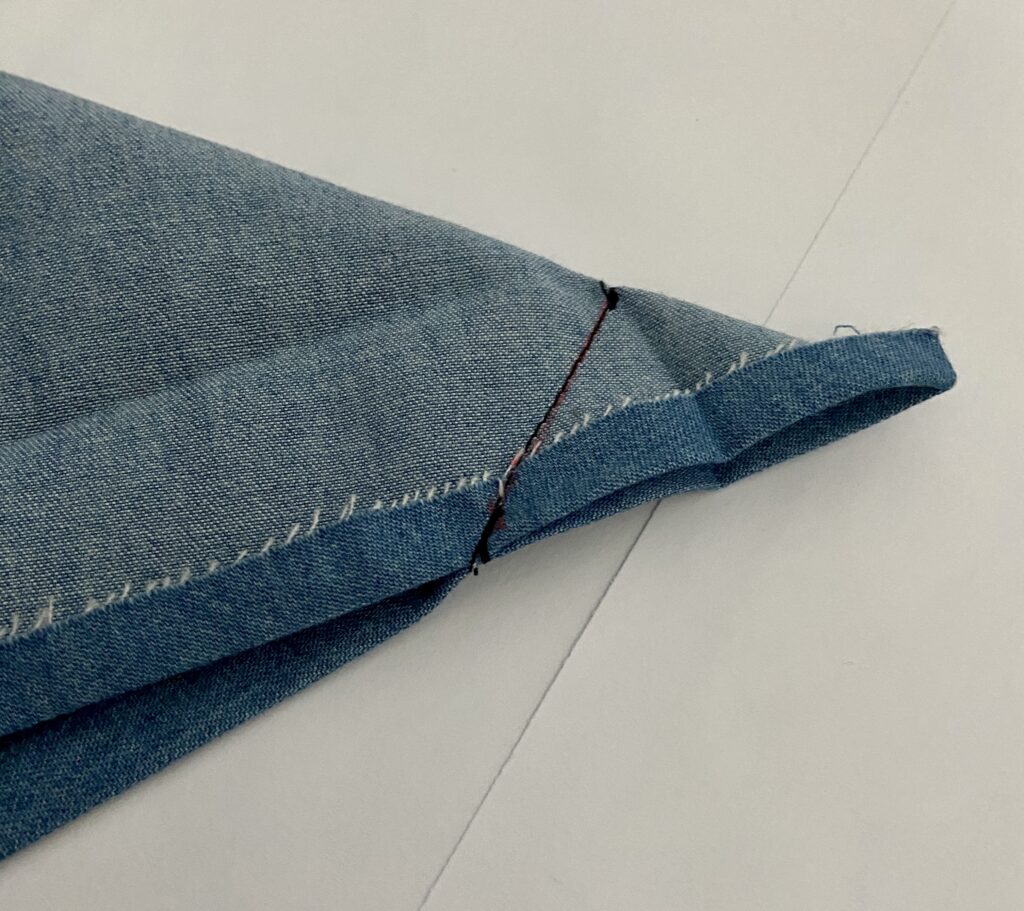
(Insert Photos 10 and 11)
Mitered Corner: Step 10
Trim the excess fabric, leaving ¼”.
Mitered Corner: Step 11
Turn the corner right side out, using your finger or a point turner. Press well.
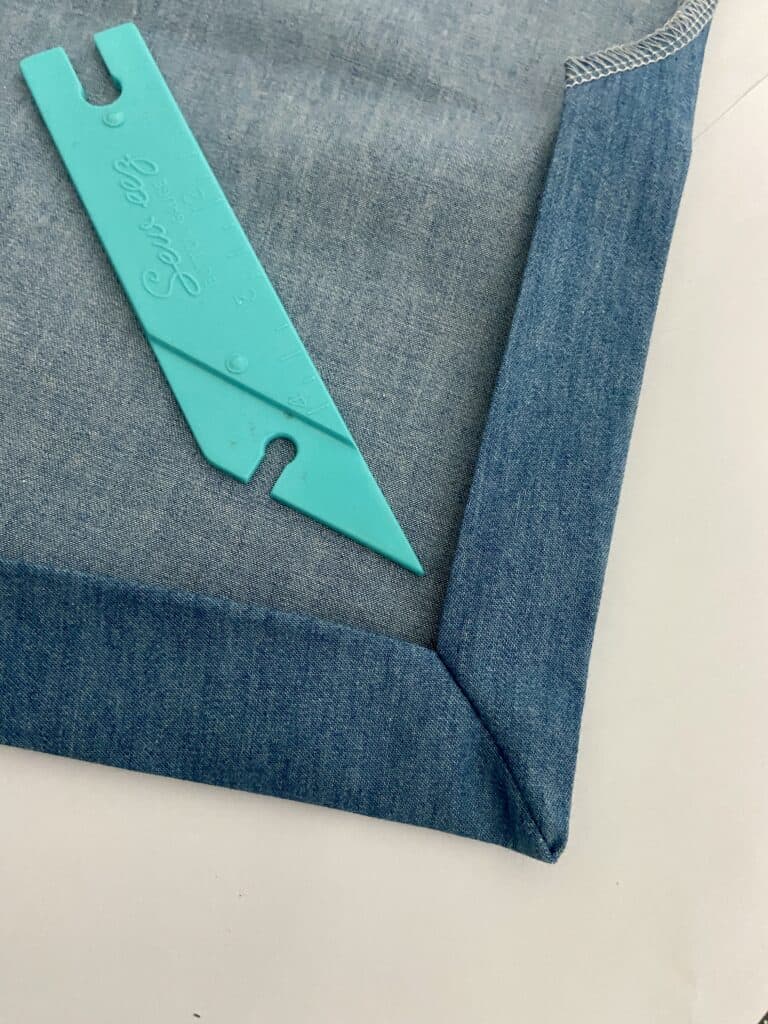
(Insert Photo 13 and 14)
Repeat this procedure for all corners.
Mitered Corner: Step 12
Topstitch hem in place with a straight stitch, going around the vents. Pivot at the corners around the vents by leaving your needle down, lifting the presser foot and then turning your garment. Once turned, lower the presser foot and continue sewing.
If you want to purchase the Presto pattern, please consider using my affiliate link,
This costs you nothing, but it does help fund my fabric addiction (and helps me test more patterns.)
To find about a special discount code, make sure to check out my blog post about the Presto Tunic here: https://sewmarymac.com/2021/12/17/presto-its-a-tunic/
If you use Instagram, follow me @sewmarymac, to learn about my additional discount on the Presto and all other Love Notions patterns!