Sonata Sew Along: Day Four
Day four of the Sonata Sew Along focuses on sewing the lining option of the Sonata Dress. The lining is a great option for any sheer fabrics you might want to use for the Sonata Dress, like chiffon or lace. Today I’m going to share some tips for sewing a beautifully finished lining. And at the end of the tutorial, you can find out how to turn your Sonata Dress into a Sonata Maxi dress!
Sewing the lining
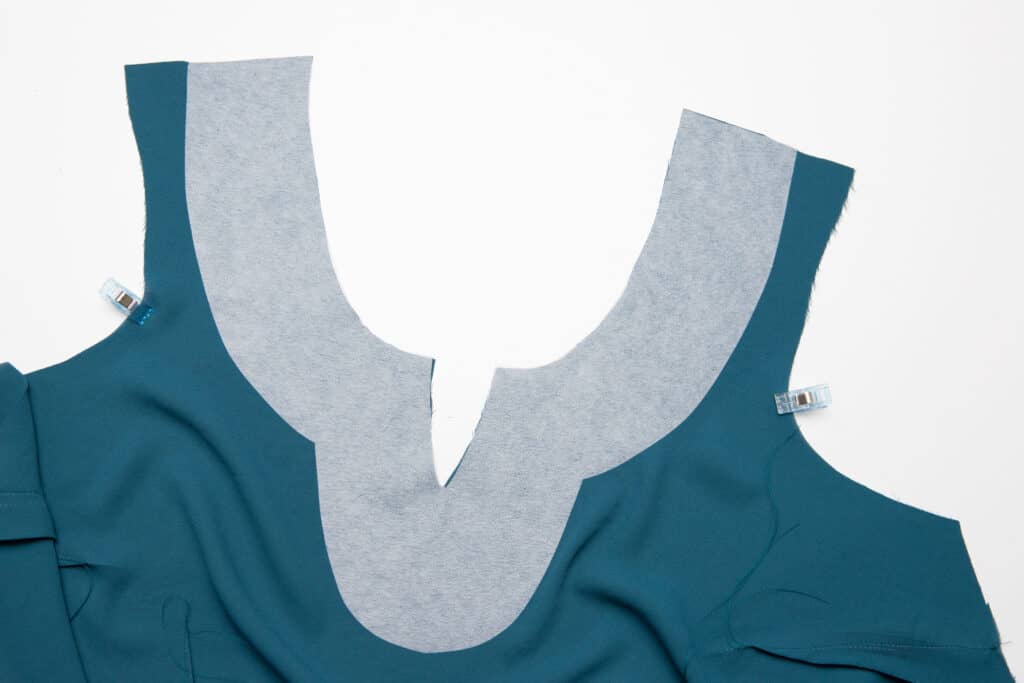
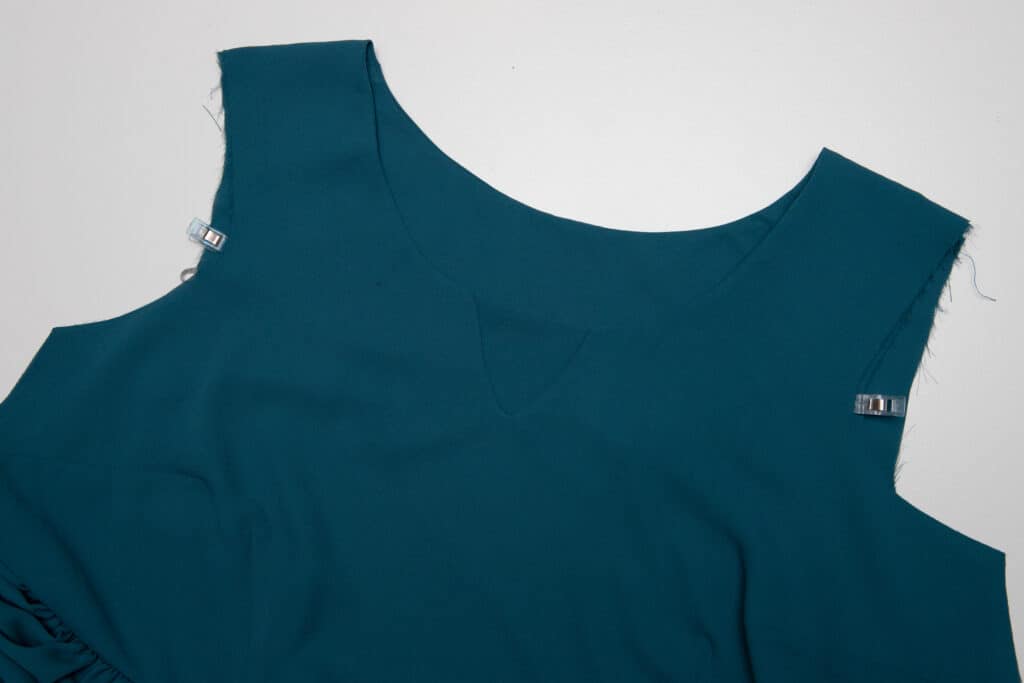
A beautiful finish is as simple as sewing a lining for your Sonata Dress. The facing we sewed yesterday is wonderful for a quicker finish, but nothing beats a lining for a clean finish. The lining allows you to enclose the raw edge of the neckline and back side of the darts for a very smooth finish inside the bodice.
If you have a really light weight fabric, you may find that using some light interfacing on the neckline will give you the best results for maintaining the shape of the neckline. Use the facing piece to cut your interfacing. Iron it on to the neckline of the lining pieces before assembling. Interface the front and back pieces of the dress.
After the lining and main bodices are assembled, sew them together around the neckline. Trim the seam allowance down with pinking sheers or clip into the seam allowance being careful to not cut into the seam. Make sure you trim the corners of the key hole and clip into the V at the bottom of it.
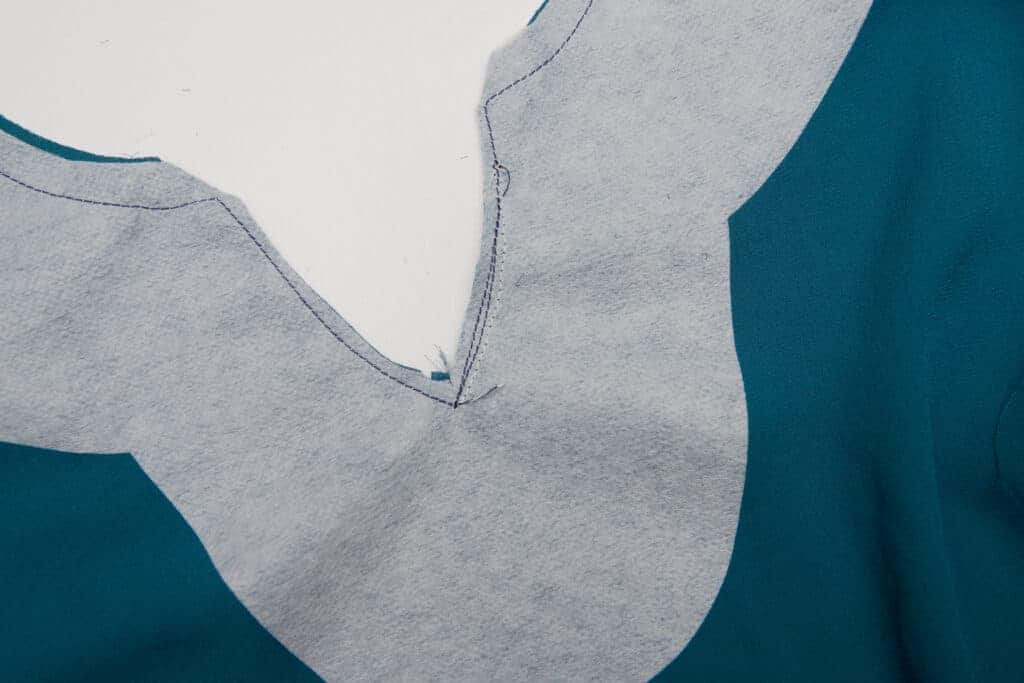
Then turn the lining to the wrong side of the bodice and press the neckline very carefully. Pressing is very important here! Take your time to make sure the corners are pushed out and the neckline is nice and flat.
Sonata Maxi Dress hack
Turning the Sonata skirt into a maxi length is a fun way to put a spin on the Sonata Dress! It creates a dramatic looking dress that is very easy to wear.
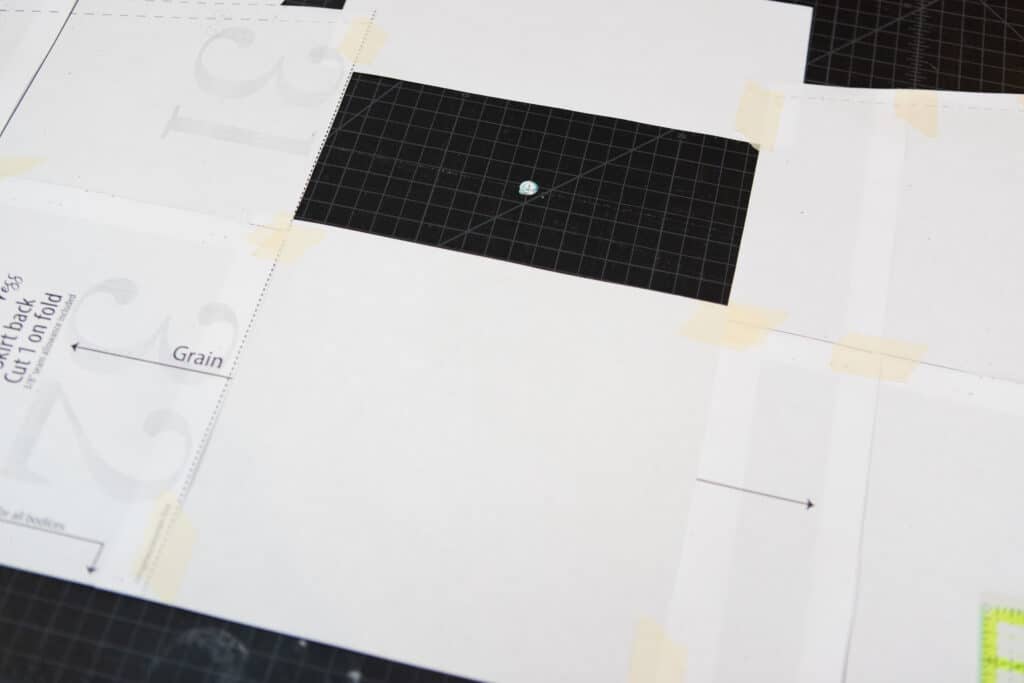
We need to add some length to the skirt, quite a bit of length. But first, we need to determine how much length to add. I held a tape measure up to my body making sure the top was at my waistline. Then I measured to where I wanted the hem of the skirt to hit. I measured to the floor since that’s easy and it gives me room for hemming. I like to measure long because it’s easier to remove length than remove the skirt and cut a new one. I found that I needed to have a skirt length of 43″. For the record, I’m 5’3″. Measuring the pattern piece and doing a little math I found I needed to add about 18″ total.
We can add length in a couple of ways. I chose to add length in two places because of how much I needed to add. First I cut the pattern at the lengthen/shorten line and spread the skirt apart 9″. Slide a piece of paper behind the pattern pieces and tape it back together. (I try to reduce how much paper I use and didn’t full in the entire area. I use just enough to hold it together.)
The second place I added length was down by the hem. To help maintain the curve, I created a line a few inches above the hem to cut and splice. I added 9″ here as well.
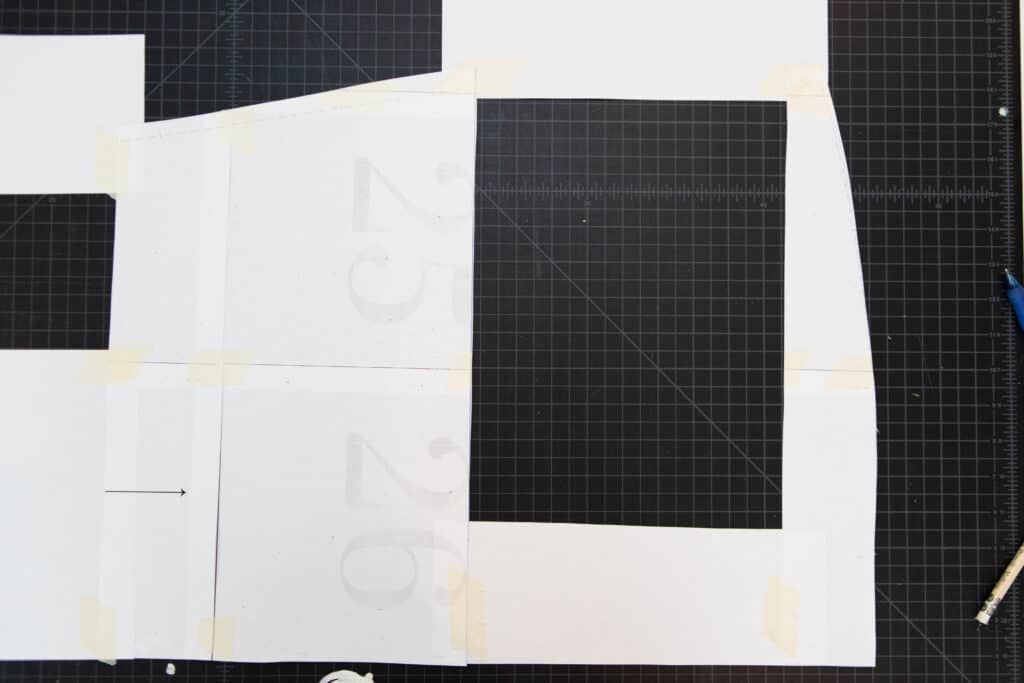
You may notice that I added paper beyond the side seam. Because this is a woven dress, I wanted just a little more room at the hem for ease of walking. Instead of blending the side seam to connect to the original hem, I extended it keeping the original angle. This added a couple inches at the hem line.

You need to remember to extend both the front and back skirt pieces. But once you do, you are on your way to a Sonata Maxi Dress! After cutting, assemble the pattern per the pattern instructions.
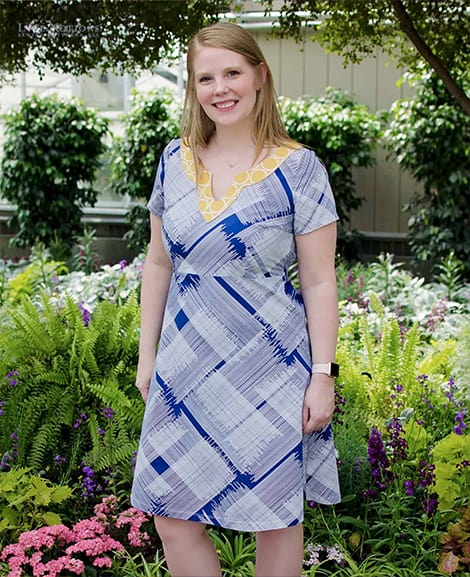
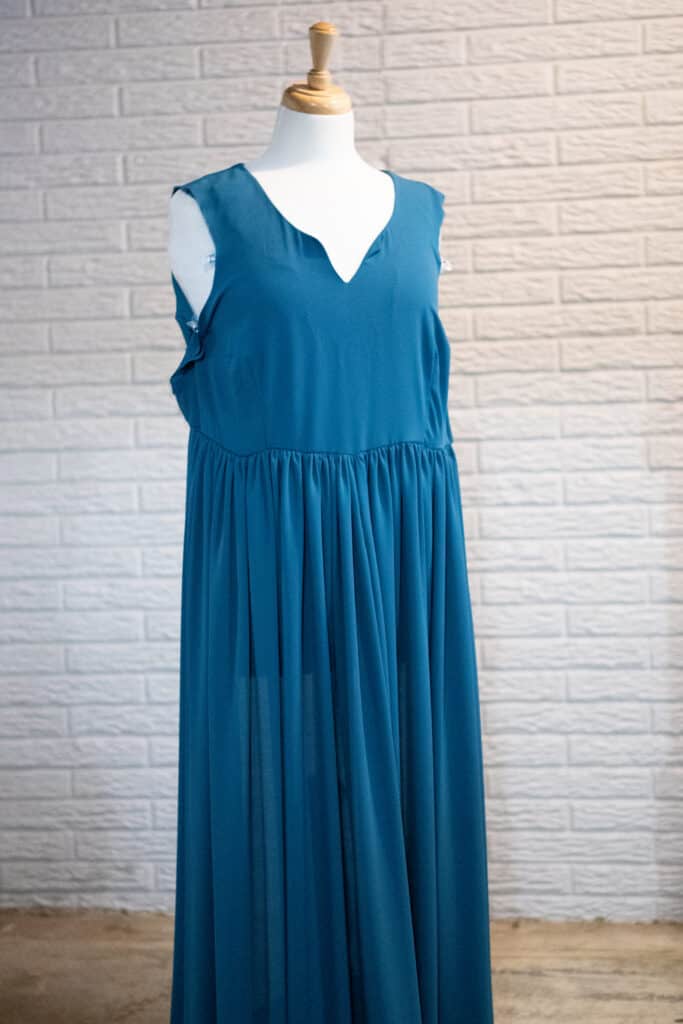
The photo below is is both yesterday’s hack with the gathered skirt and today’s maxi dress! I am LOVING how it is turning out!!! By Friday, this gorgeousness will have flutter sleeves!!

Sonata Sew Along Schedule:
- Monday: fabric choices, measuring, creating a custom fit
- Tuesday: sewing the bodice, color block skirt hack
- Wednesday: sewing the facing, gathered skirt hack
- Thursday: lined dress, maxi skirt hack
- Friday: sewing the sleeves, hemming, sleeve hack