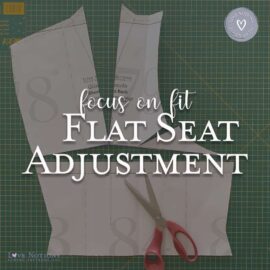
Looking for a great fit with your sewing patterns? You might need a “flat seat adjustment” — keep reading to learn how to make this alteration.
A common fitting issue
Do you know the feeling? You find the perfect pants or shorts and when you look at your butt in the mirror you see nothing else than bagginess and wrinkles under the crotch pointing up to the hips. That’s a huge bummer!
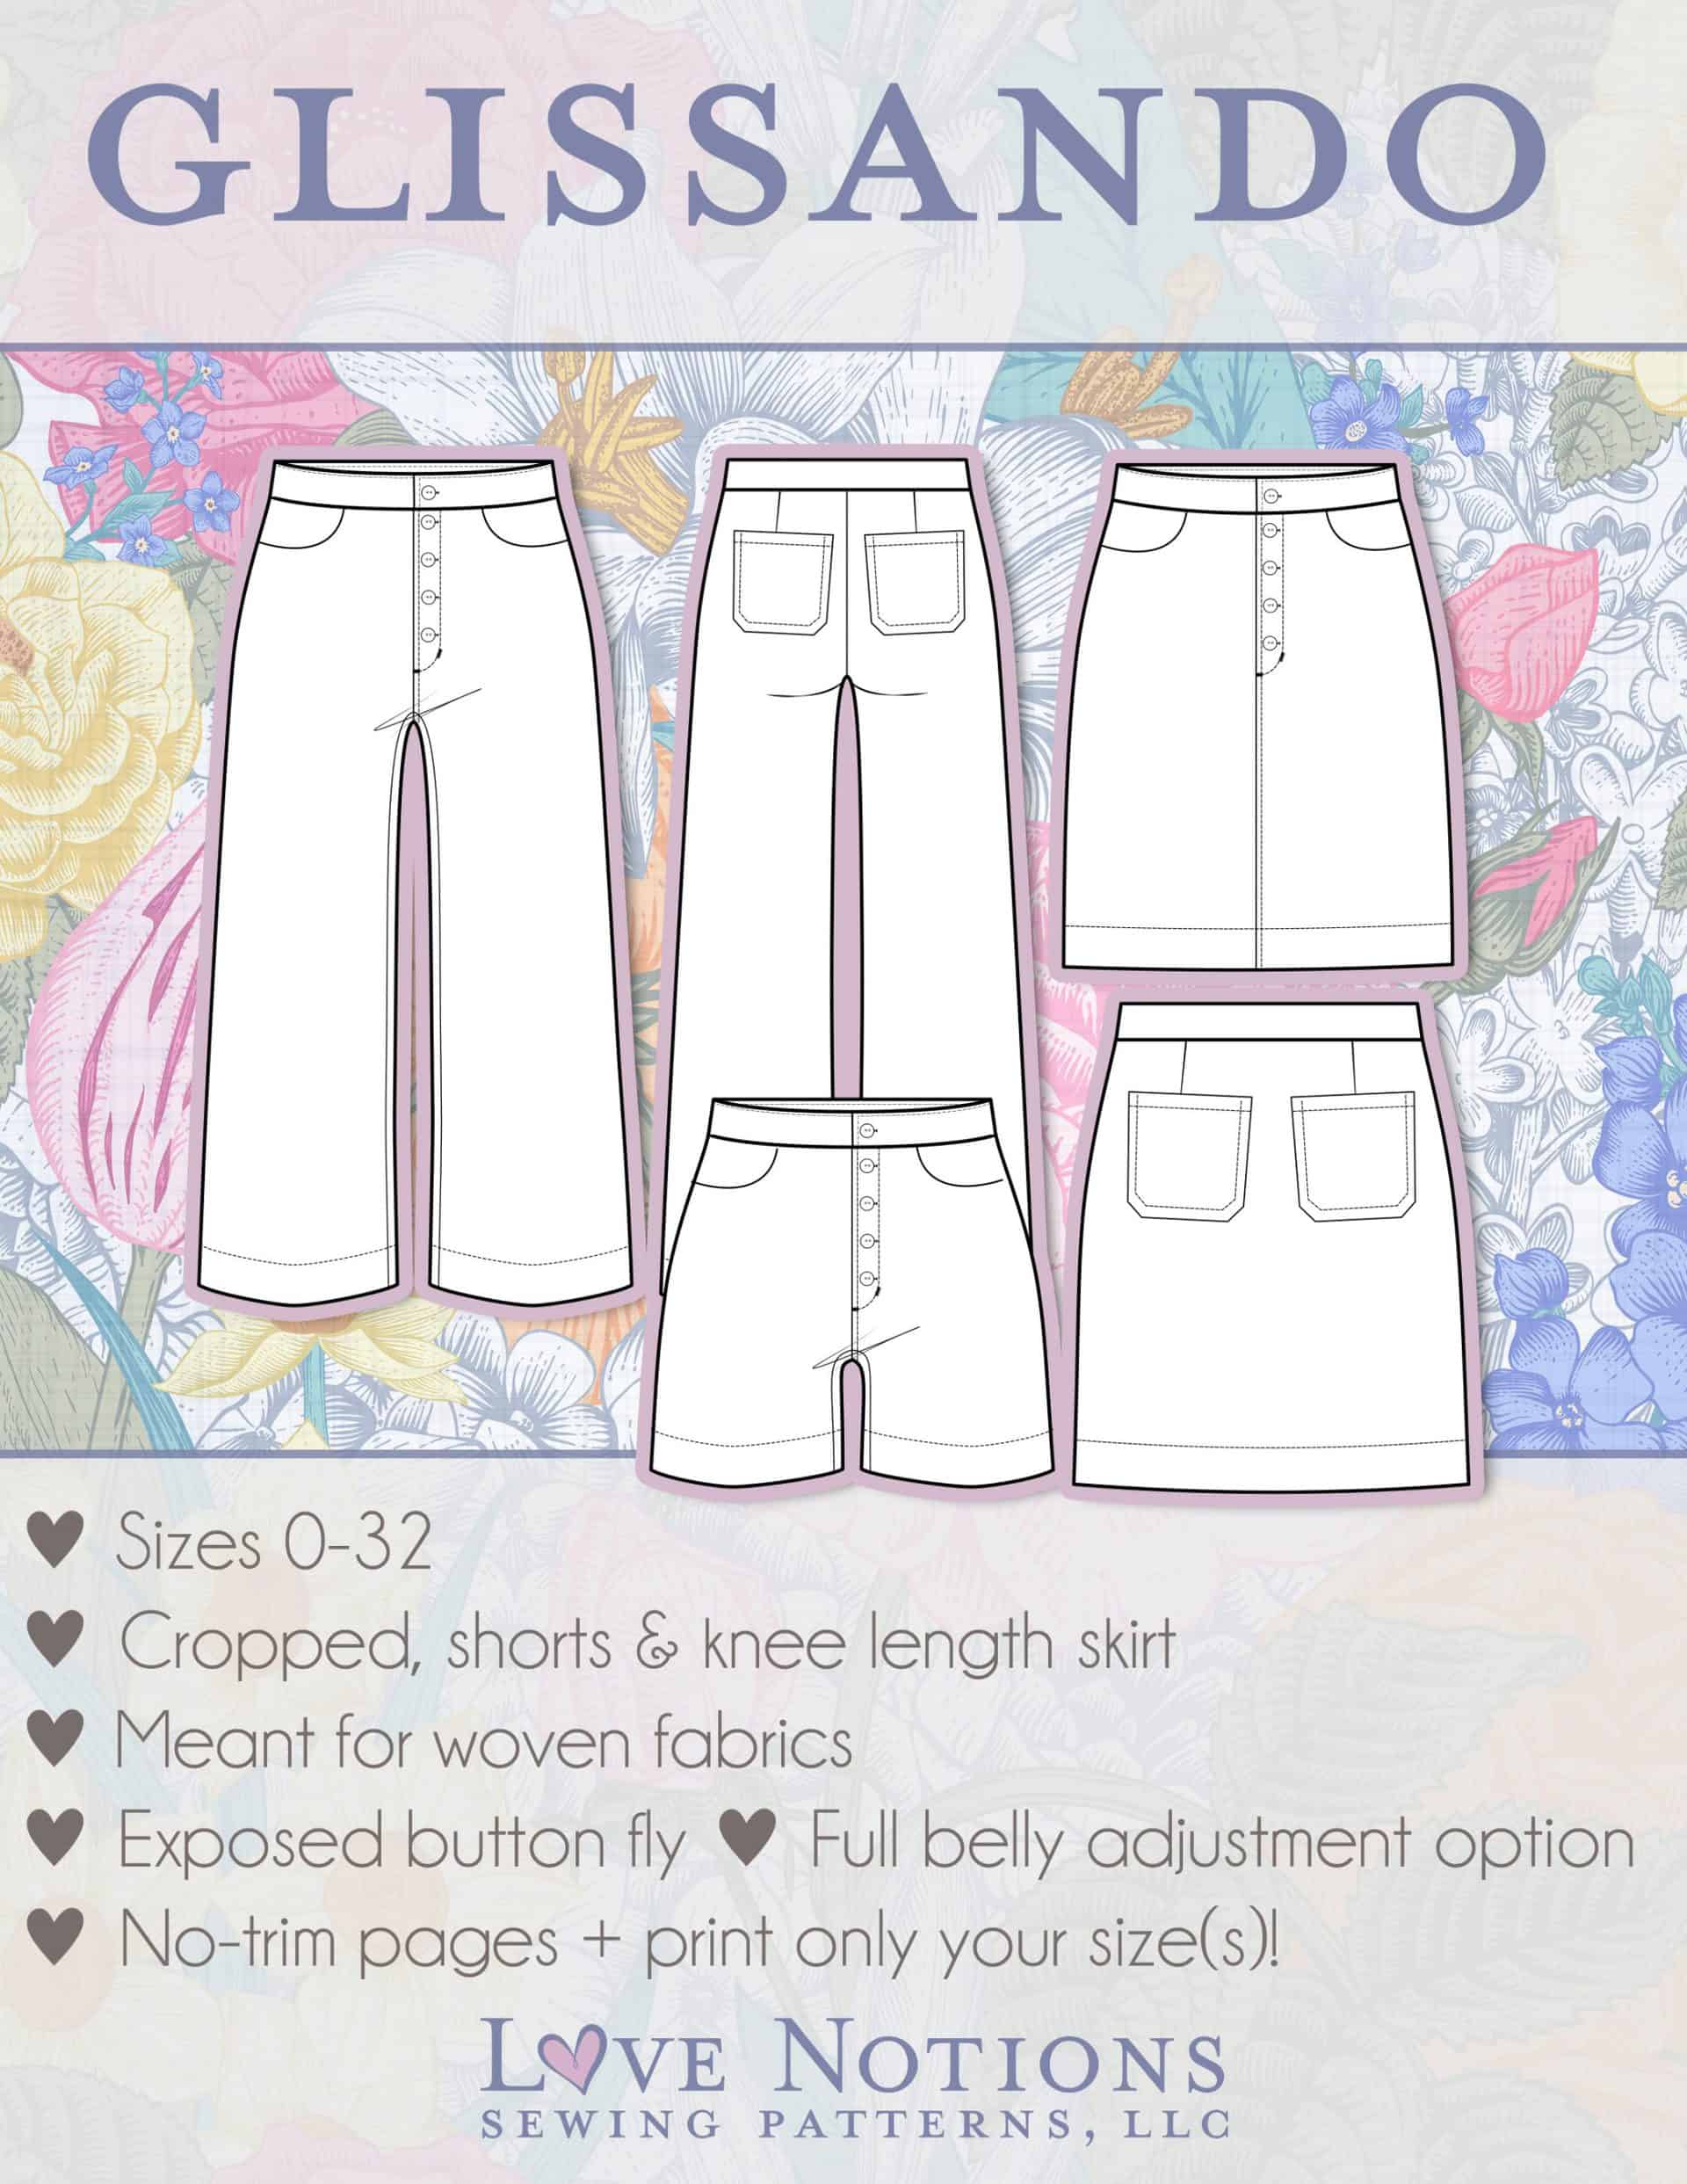
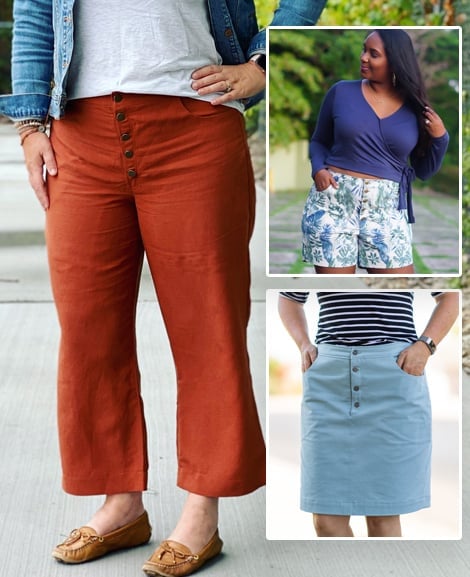
I have it all the time when I buy pants in the store! Do you have that too? Don’t worry, we can sew, can’t we? Then we can also make our own pants. I needed a good fitting short for a long time so Glissando shorts to the rescue.


Learn from your muslins
A muslin or no muslin? That’s never a question …
When you sew pants, it is wise to always sew a muslin first.
The size chart of Love Notions Patterns is very accurate, but every body is different (and that’s a good thing ????). If you want to know more about muslins then I recommended to read Nicole’s post.
So when I wanted to make the Glissando short, I decided to sew a muslin first. After all, in the past I only made the Glissando skirt.
When you sew pants, it is wise to always sew a muslin first.
You sew a muslin in a fabric similar in properties to the fabric that you want to use to sew your final garment. The good thing about a muslin is not only that you can evaluate the fit and make adjustments before you cut into your best fabric, but also that you do not have to sew full pants. You can skip a number of sewing steps.
I will guide you through my process of making the muslin for the Glissando shorts and through the adjustments I need to make to alter the pattern for my own unique body with my flat bum. If you want to sew the pants, the method is exactly the same.
How to sew the Glissando muslin?
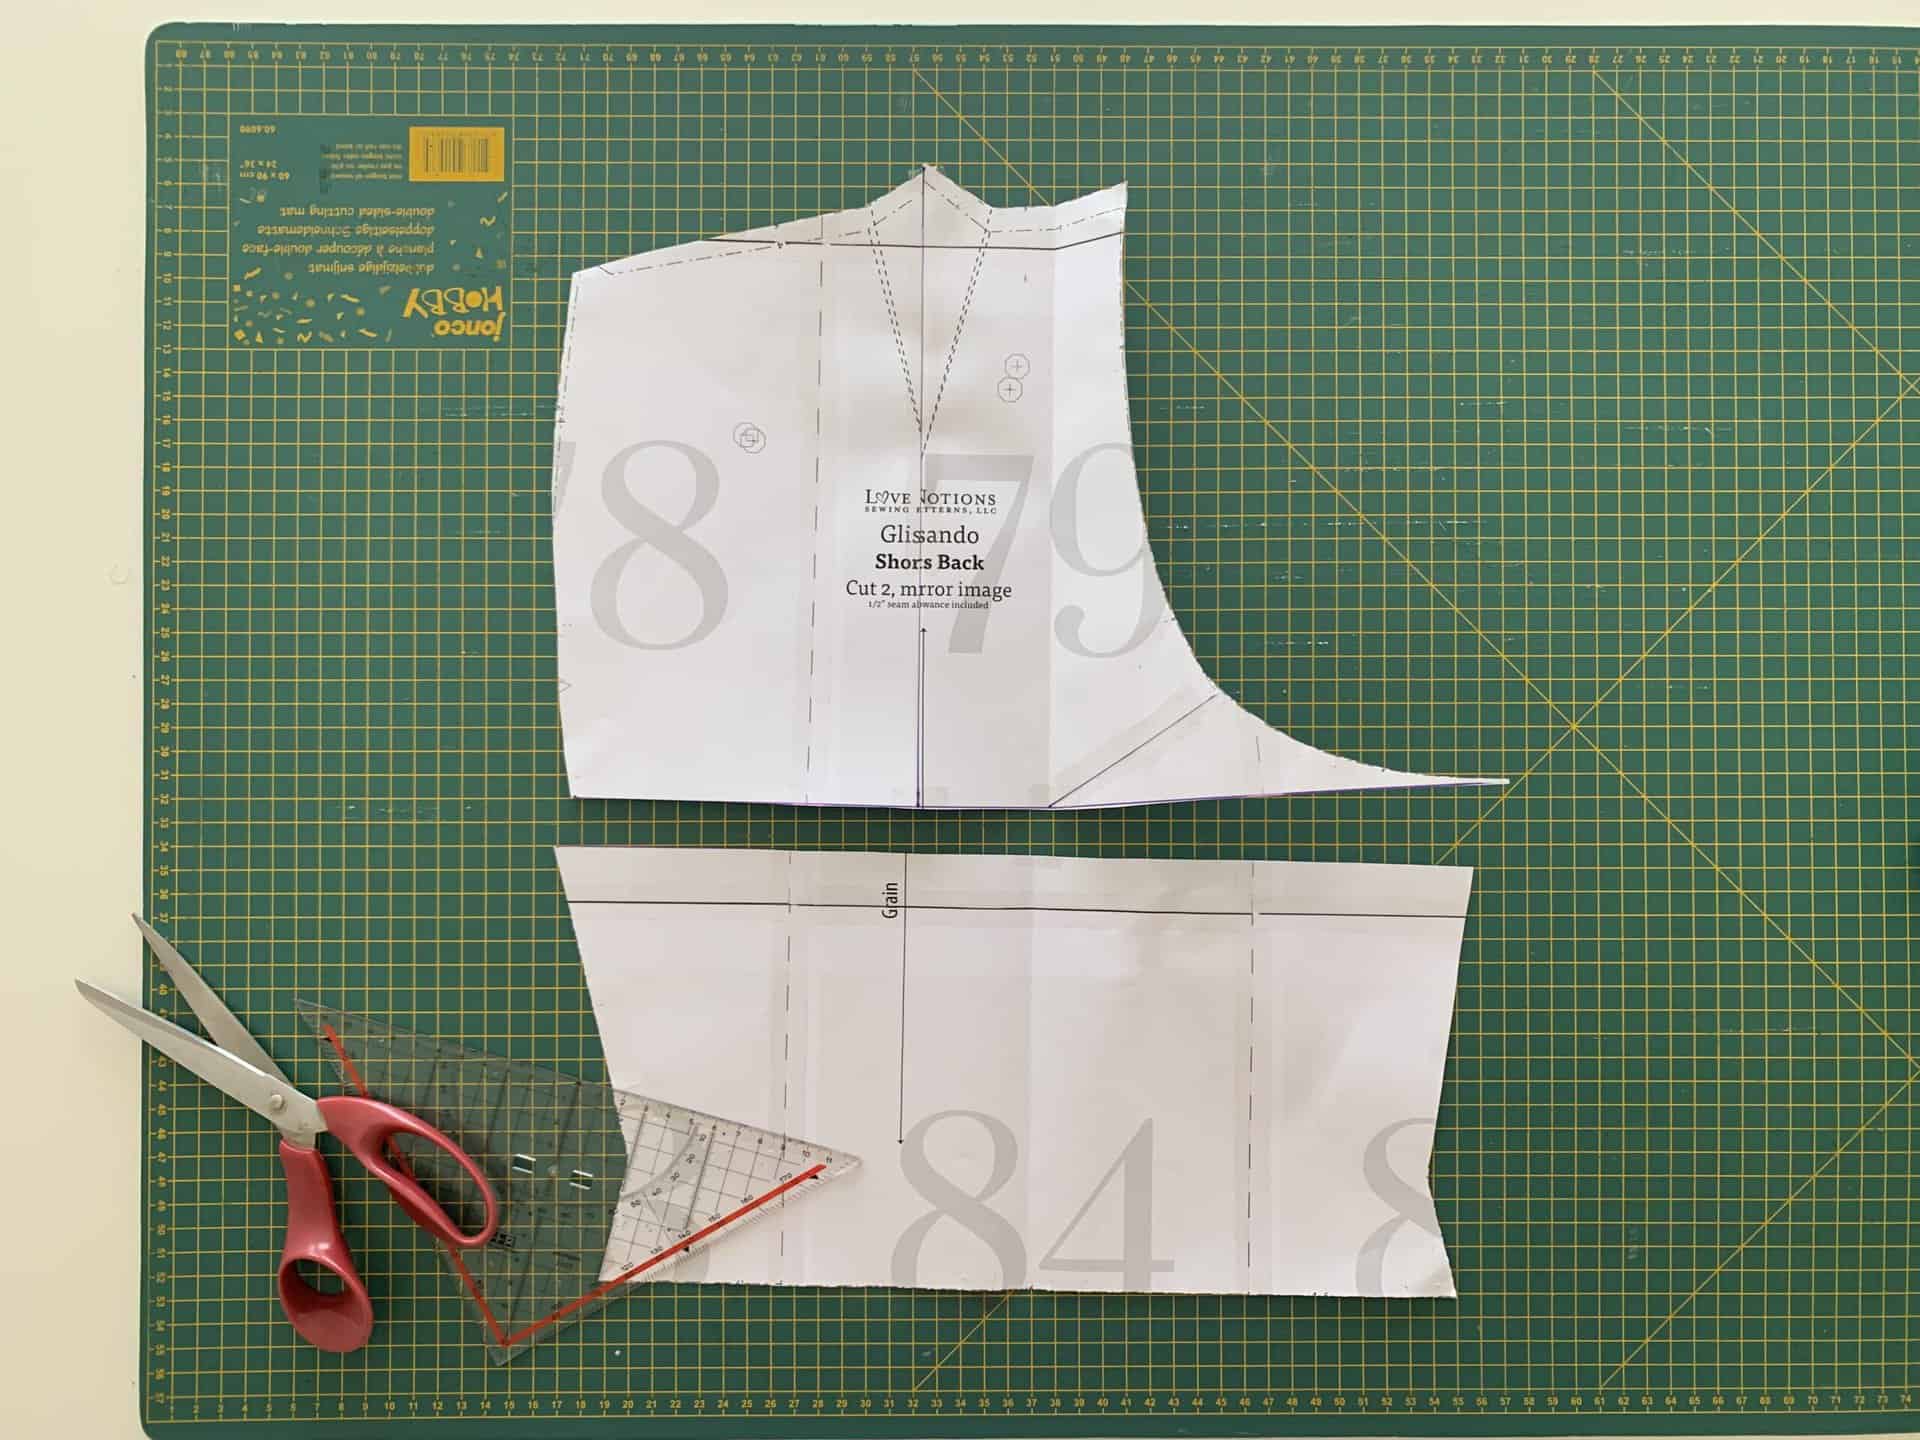
When sewing a muslin for pants, you first need to decide which pattern parts you really need to assess the fit.
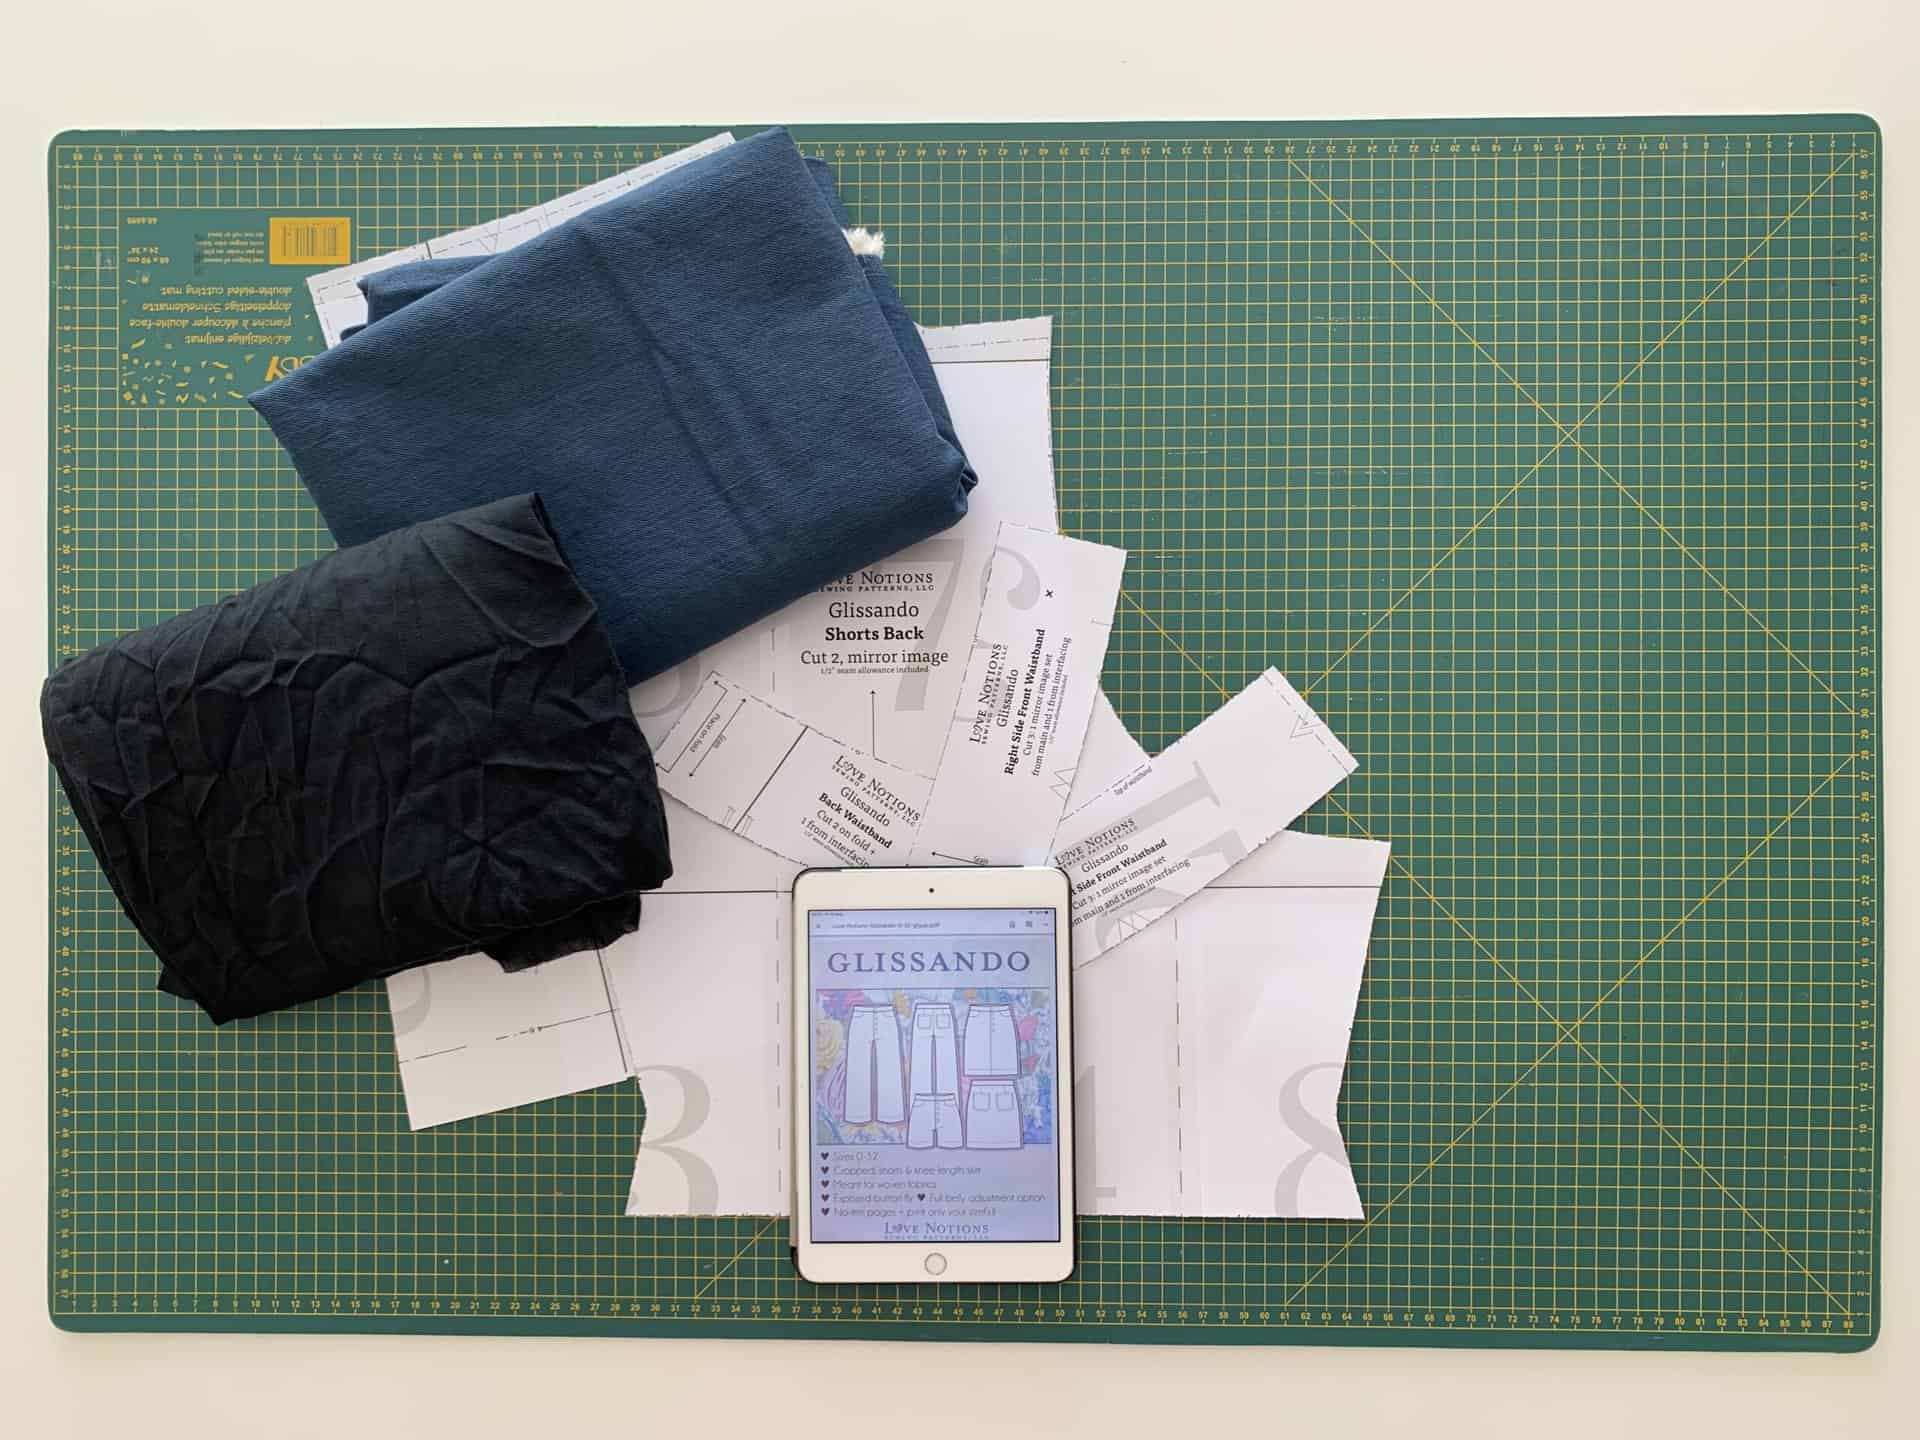
I’ve cut:
- 2 shorts fronts (I didn’t cut the pocket parts out of the pattern)
- 2 shorts back
- 2 right side waistbands (1 out of main fabric and 1 from interfacing)
- 2 left side waistbands (1 out of main fabric and 1 from interfacing)
- 2 back waistbands (1 out of main fabric and 1 from interfacing)
Sew the Glissando as stated in the pattern.
A few notes:
- You don’t have to overlock seamallowances.
- You can skip sewing all the pockets on the back and the front (that’s why you shouldn’t cut out the front pockets out of the pattern).
- You can skip sewing the fly.
- You sew successively:
- P10 step 11 and 12
- P11 with steps 1 and 2
- P13 step 1 and 2
- P14 step 4
Analyzing the Glissando muslin
You can now try on your shorts (or pants). Pin the front middle with pins.
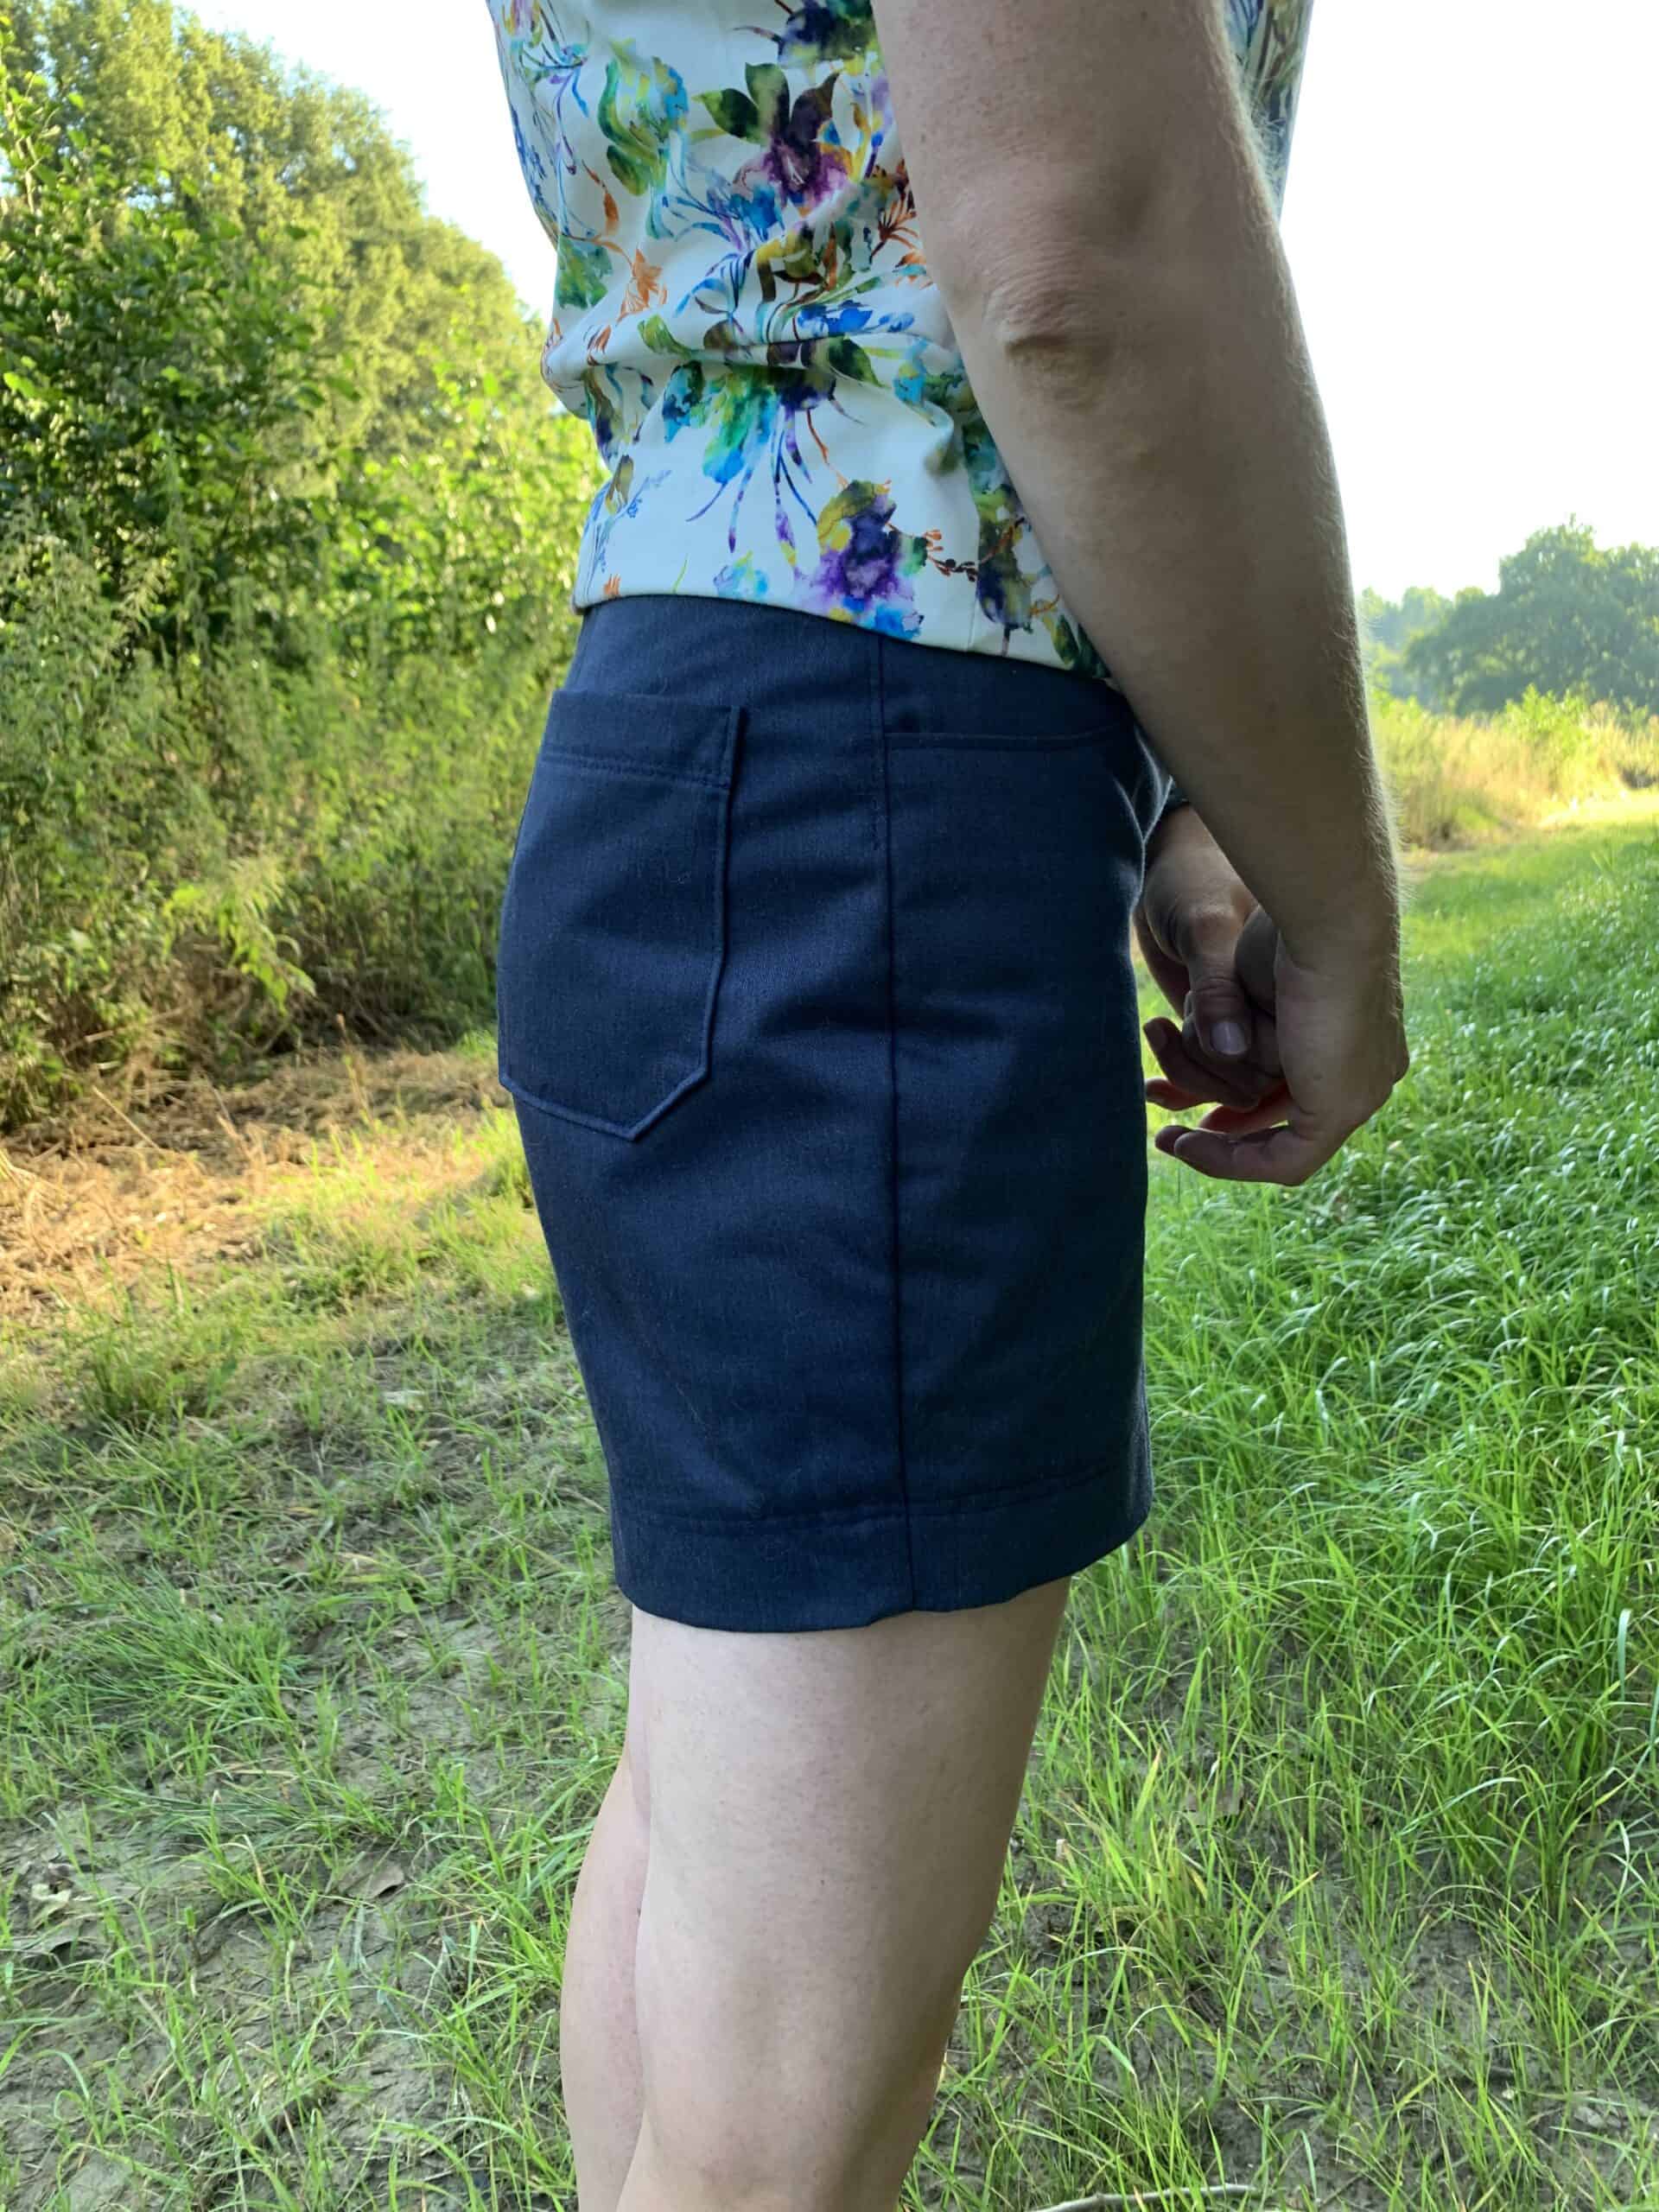
This is how my muslin looks:
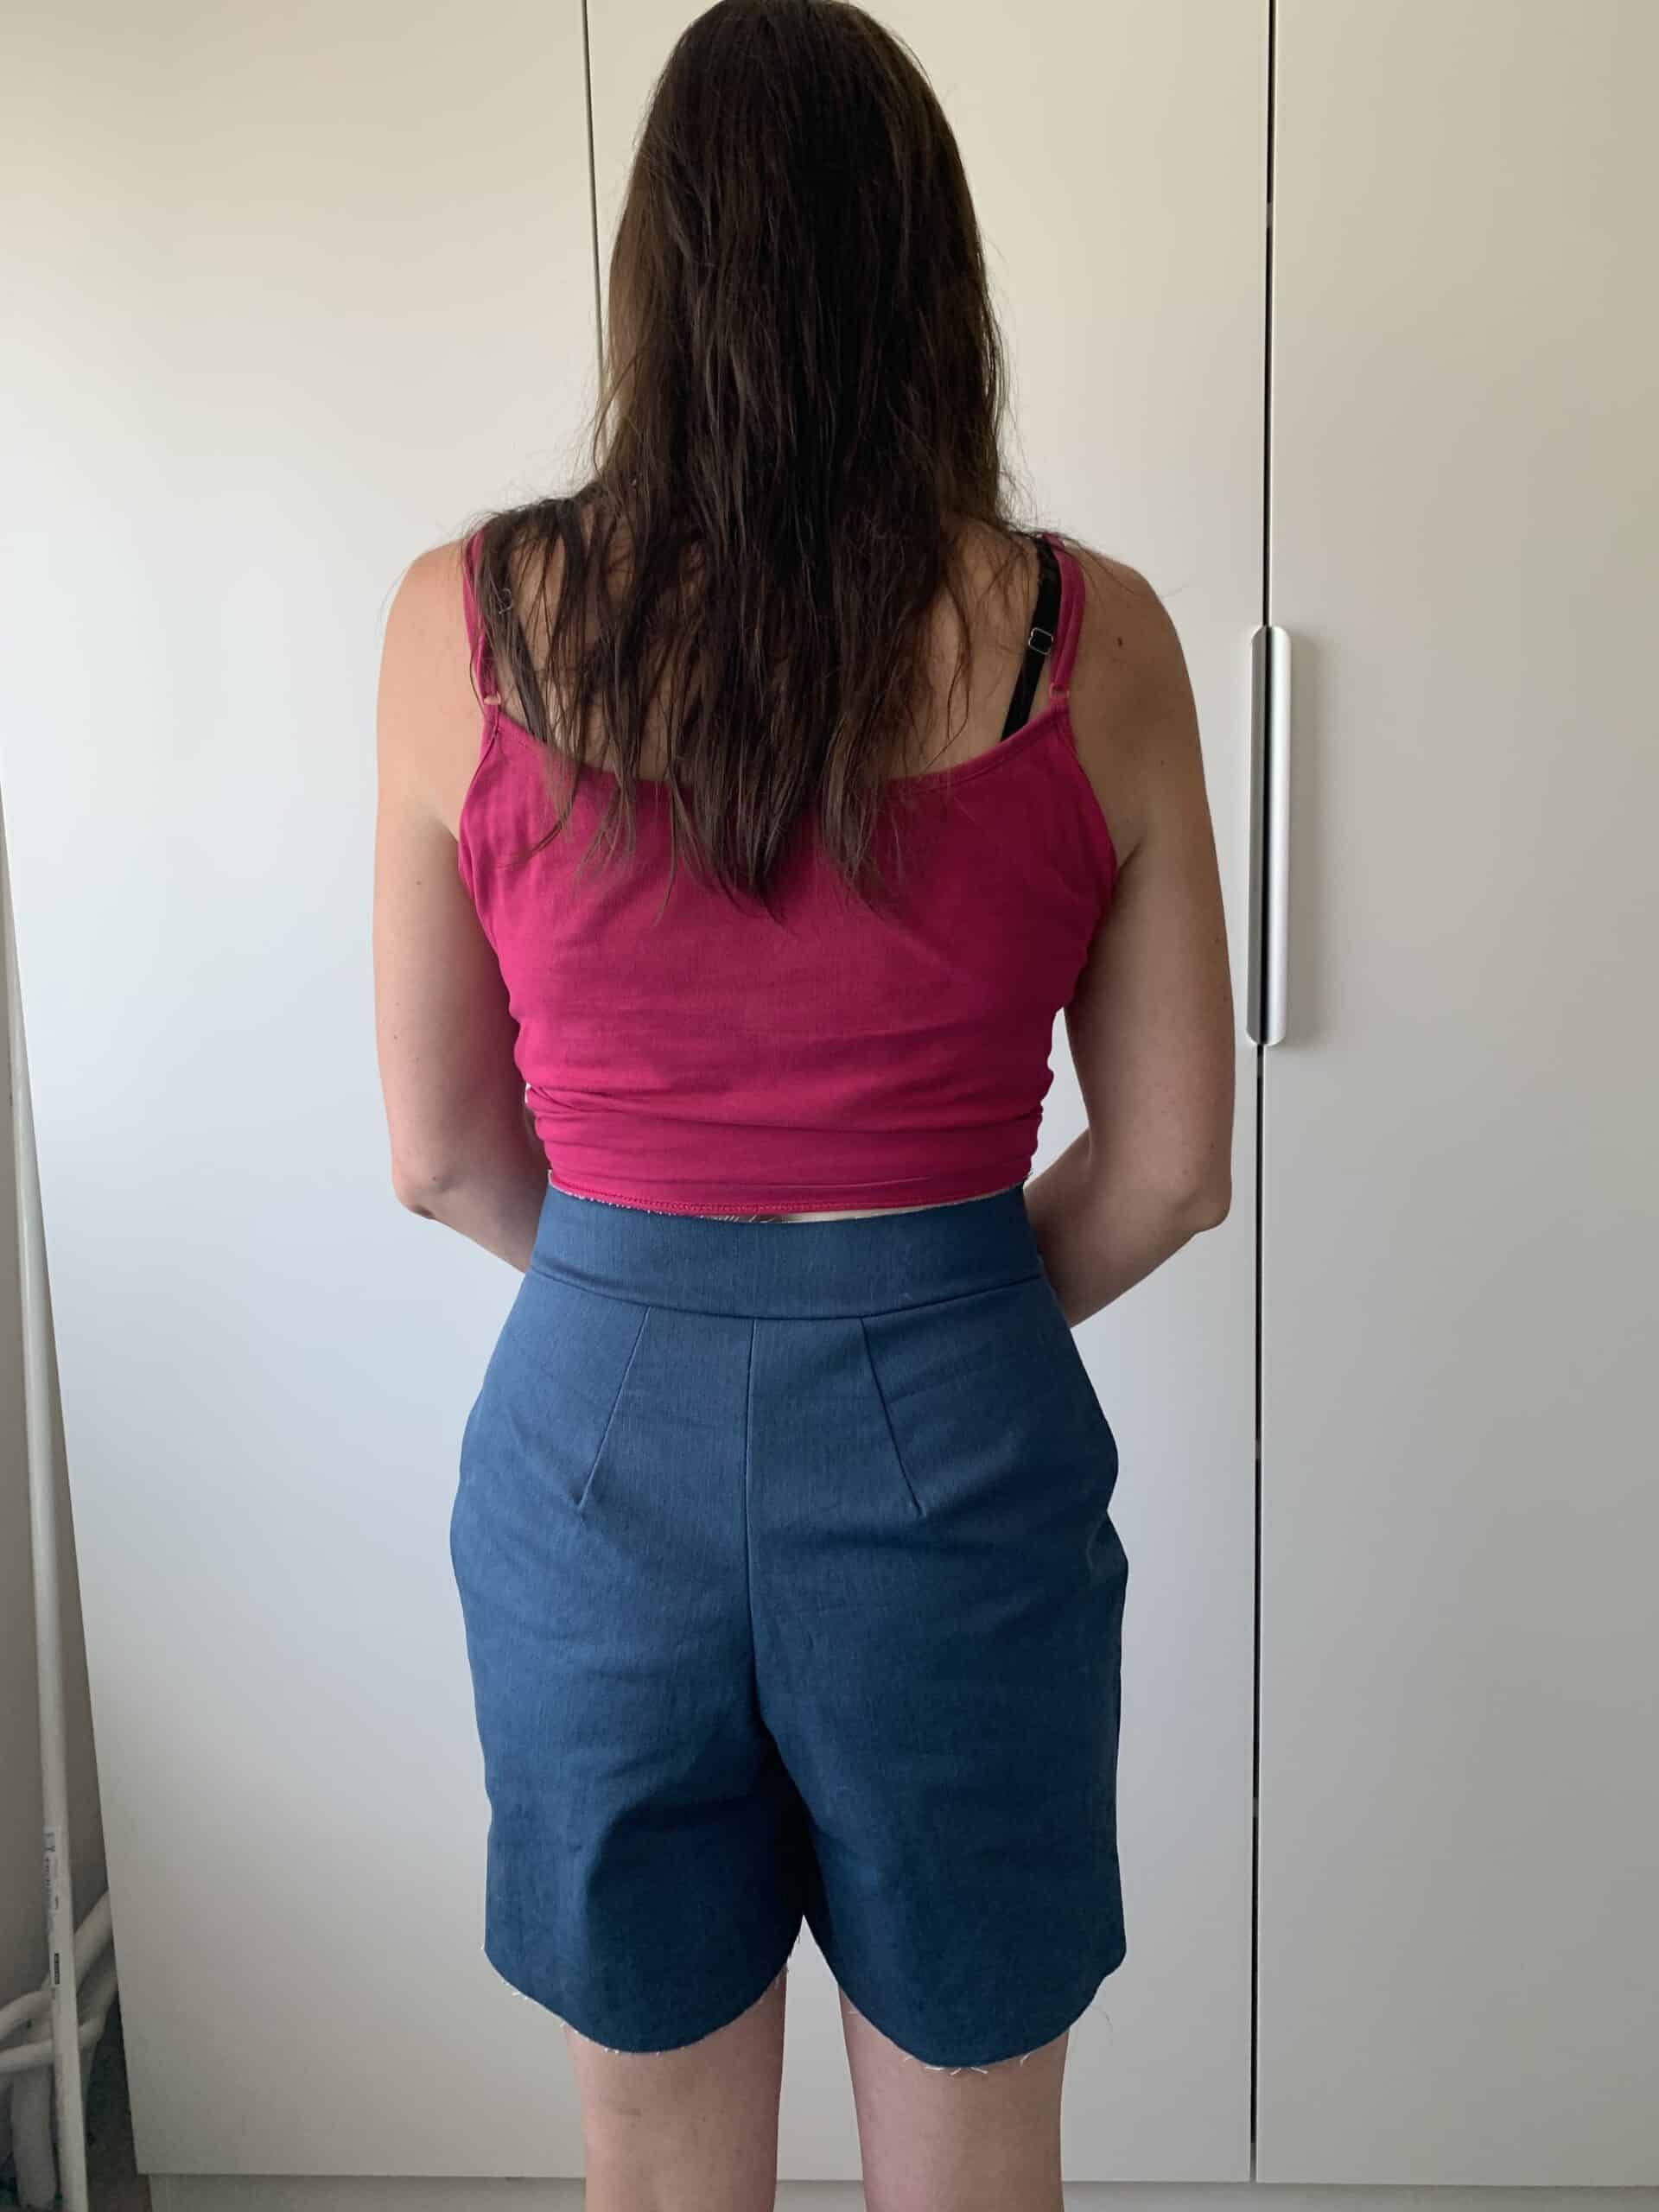
Do you see the bagginess under my bum? We are going to remove these!
Flat Seat Adjustment Directions
On to the adjustments!
To make an adjustment for a flat butt there are actually 2 common methods
Method 1 for Flat Seat Adjustment
Take in the back seam.
This is the easiest method and you can also apply it immediately to your muslin (if you want to make it a wearable muslin) by re-sewing the seam deeper.
Method 2 for Flat Seat Adjustment
I used this method. It has a little more steps and you can’t apply this method to your muslin but the result on your final garment is very satisfying. You can click and scroll through the pictures below or read on for the less condensed version.
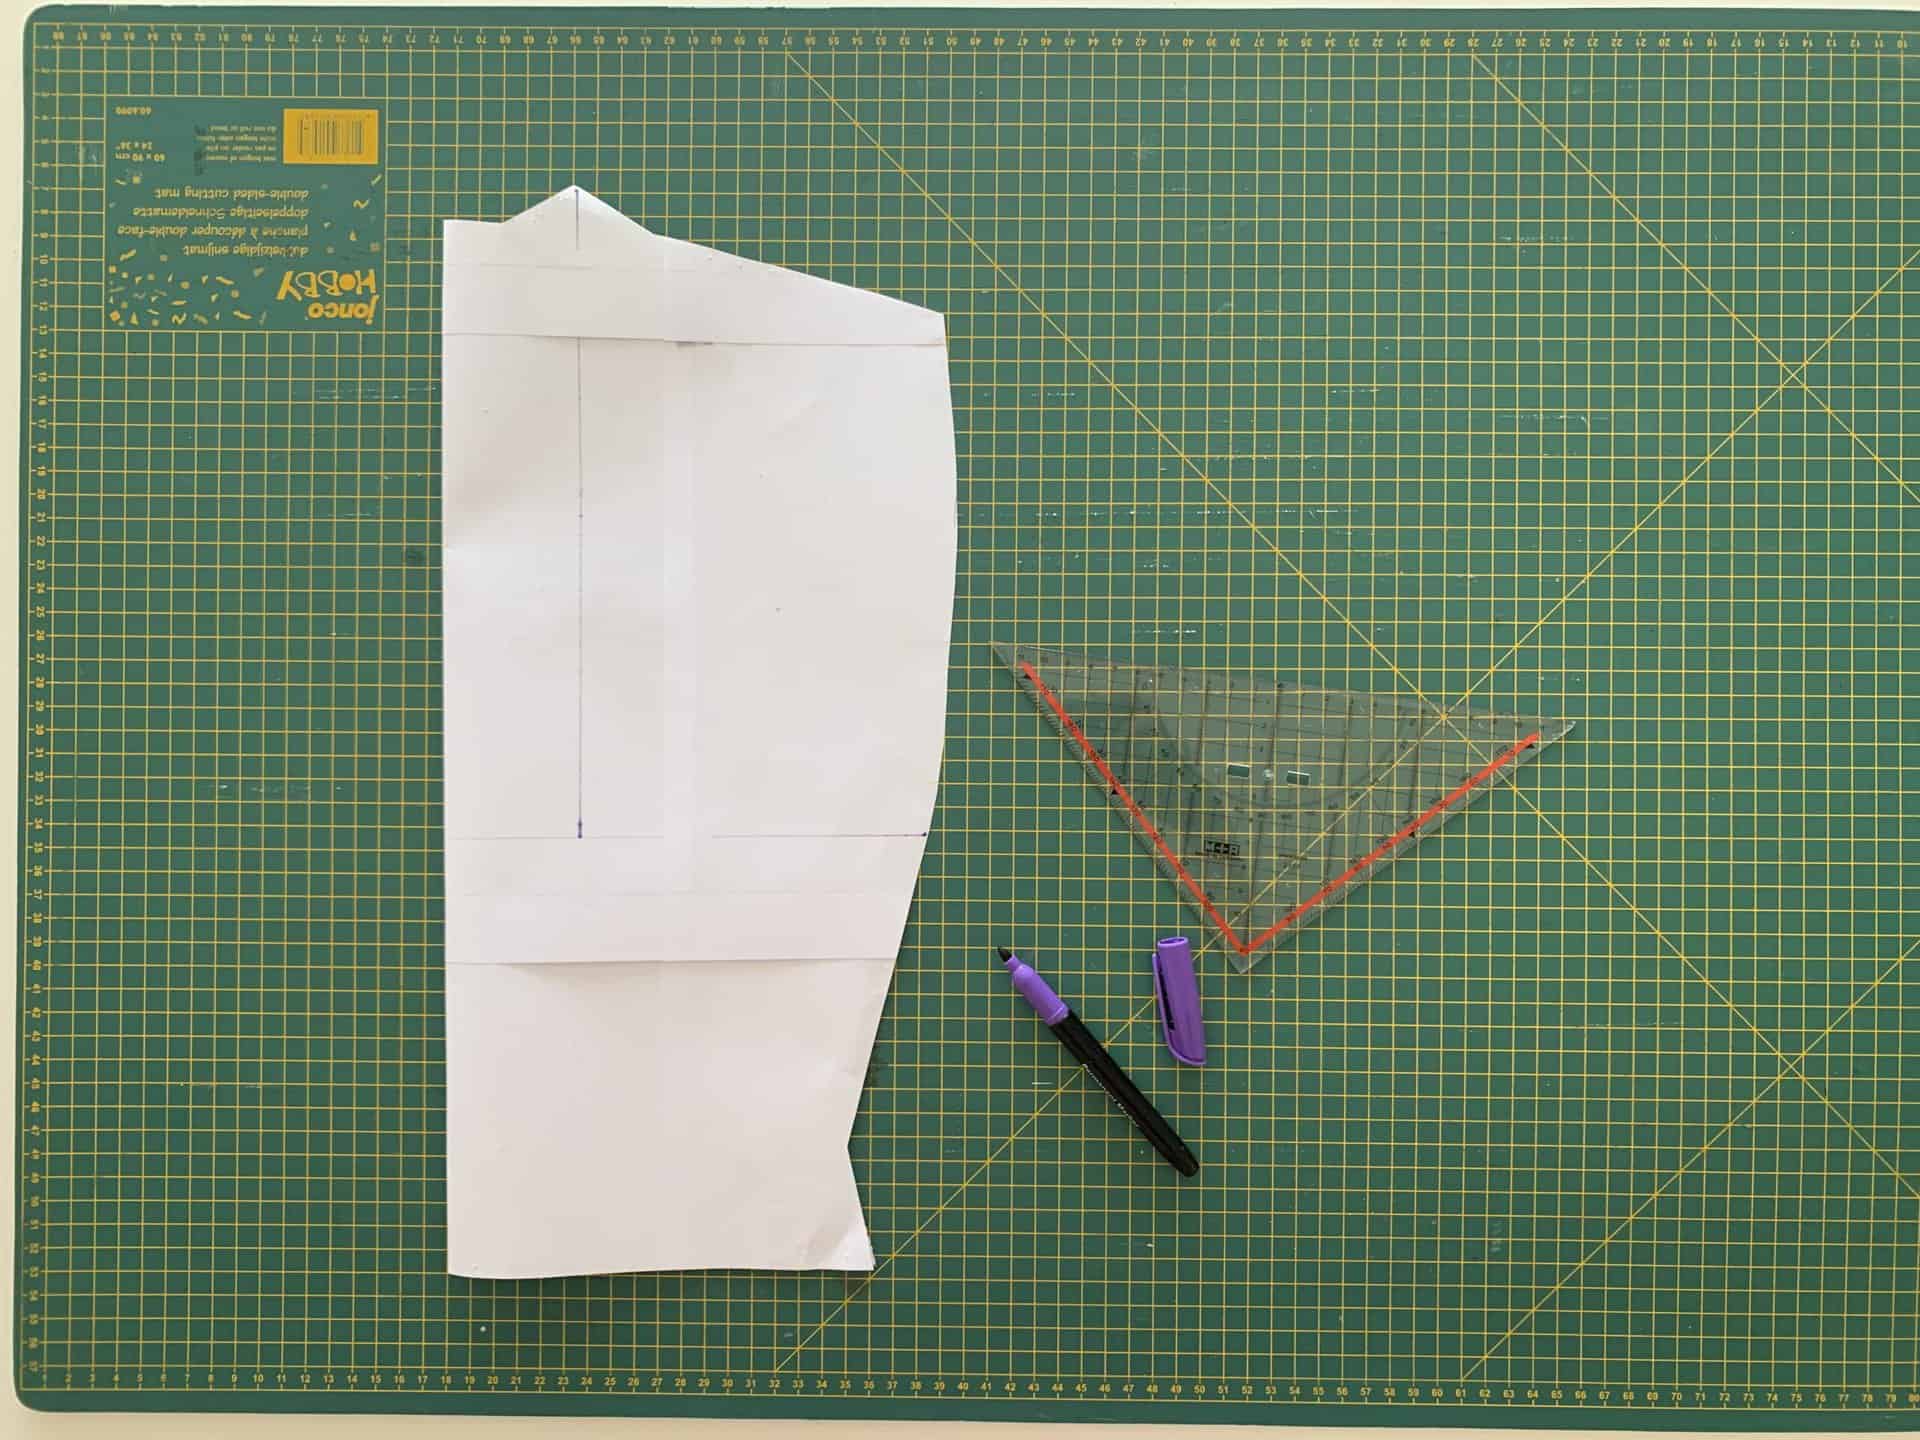
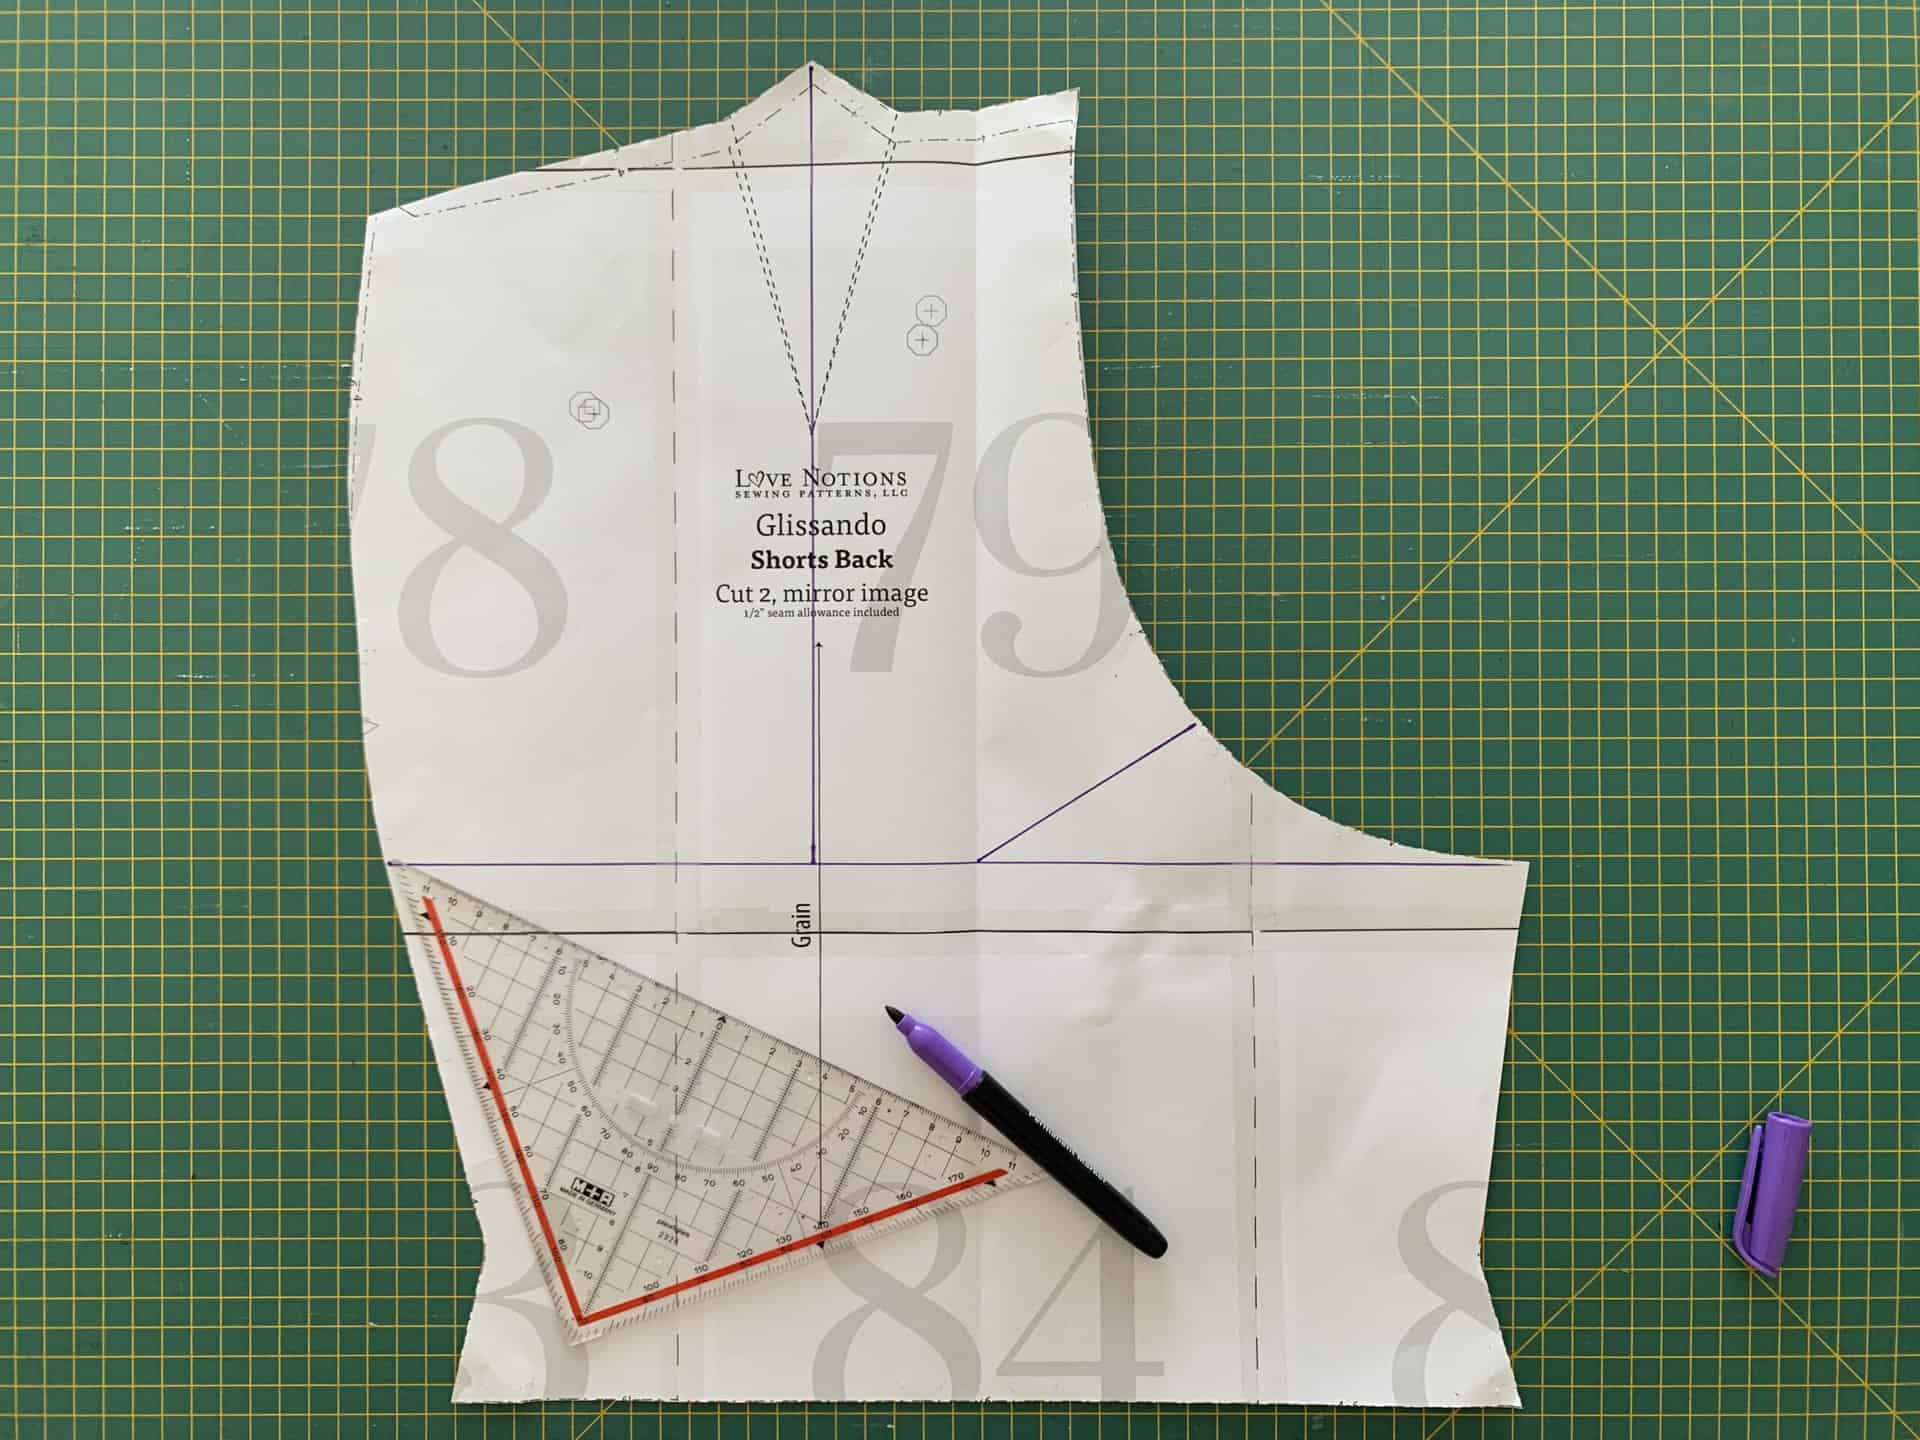
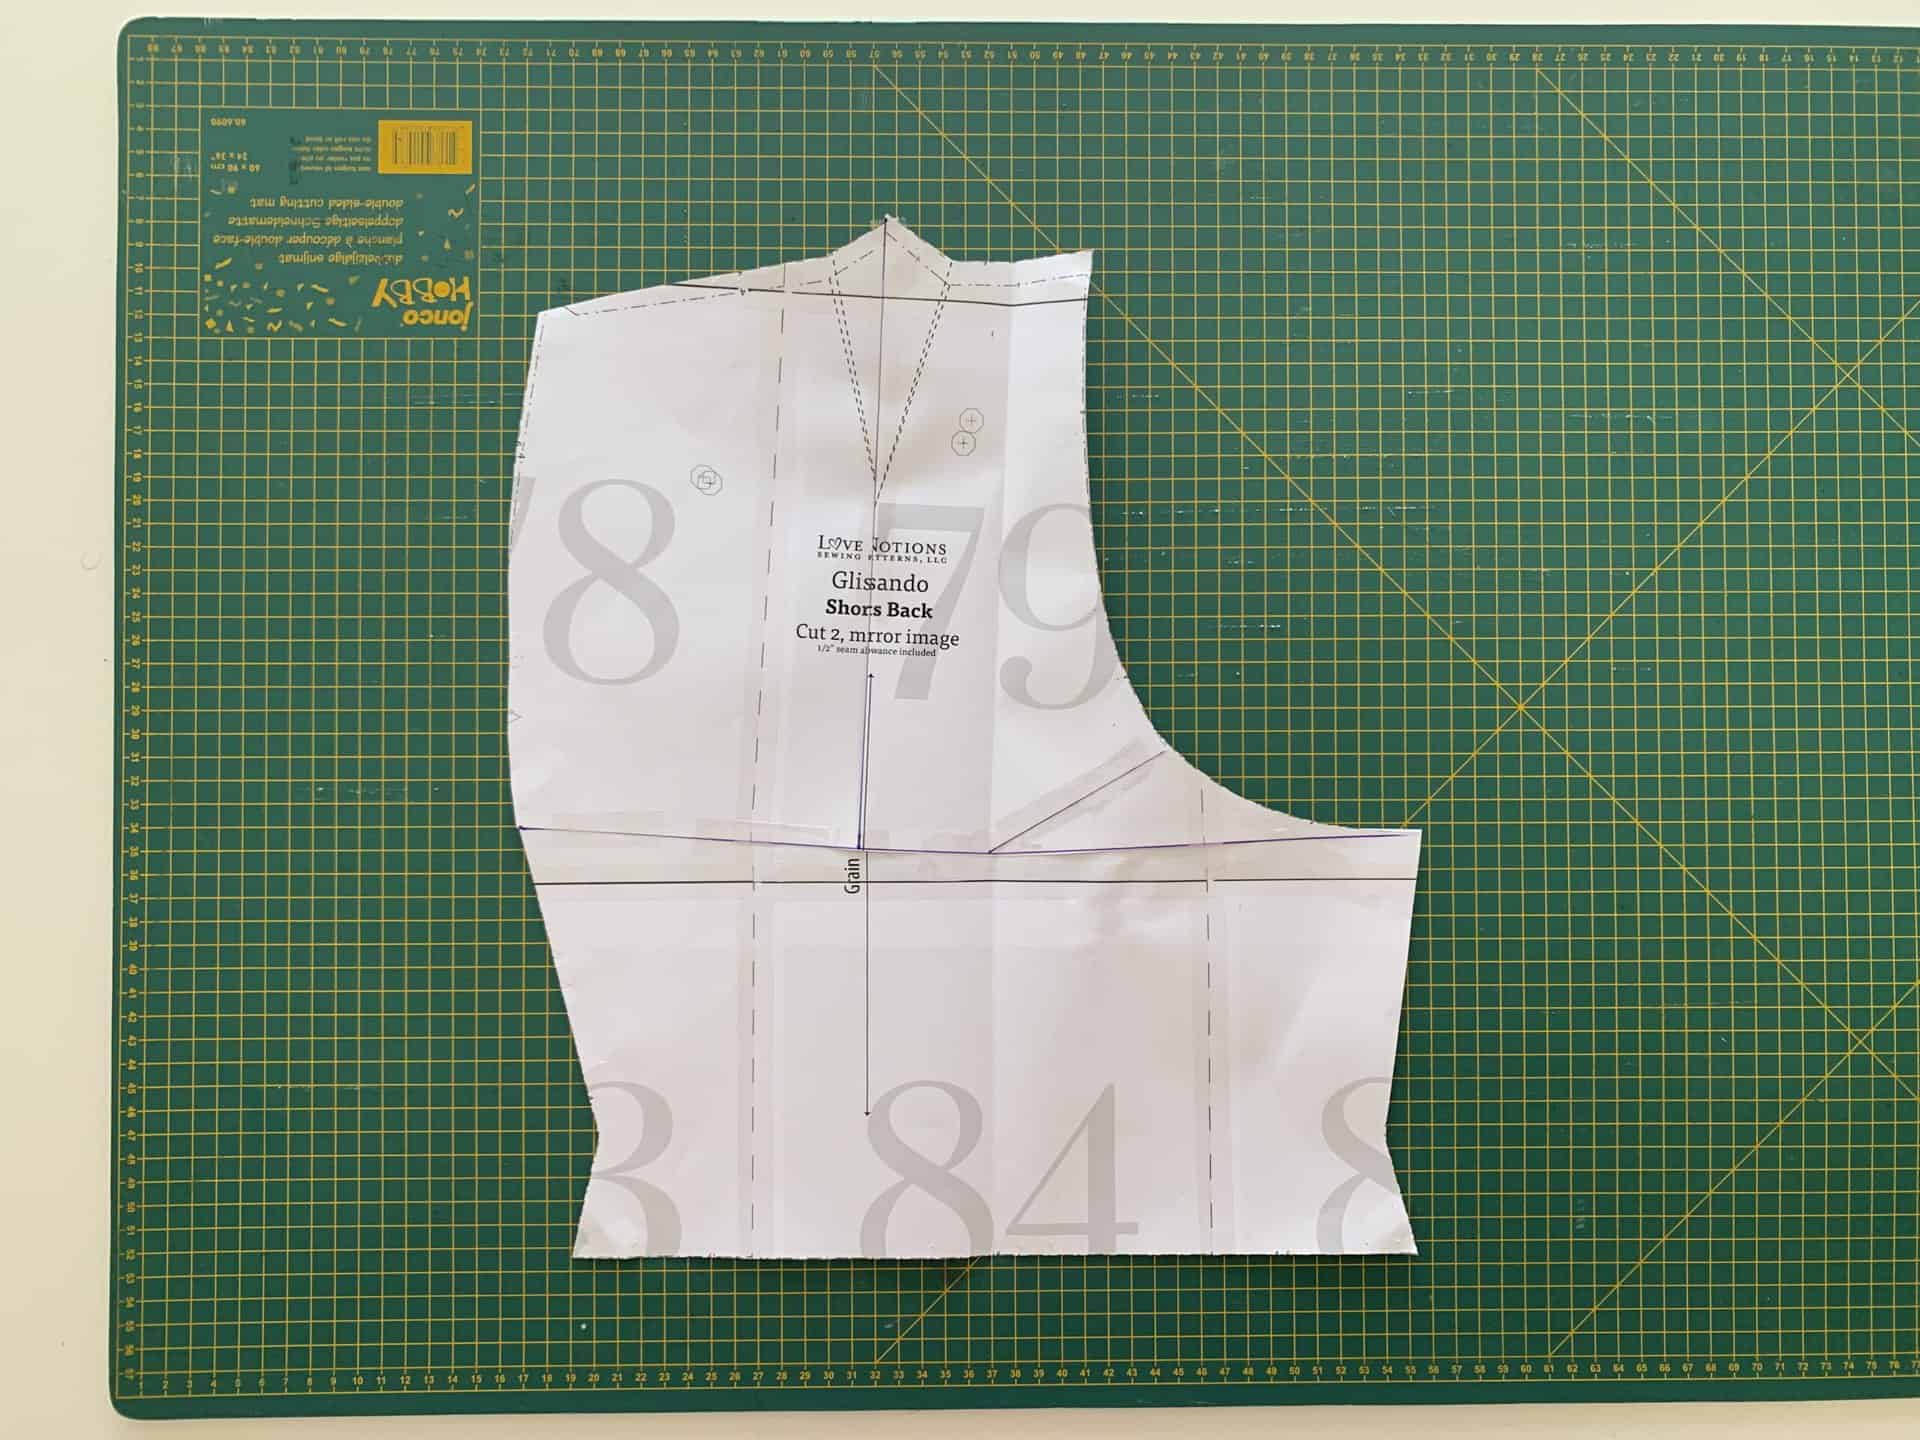

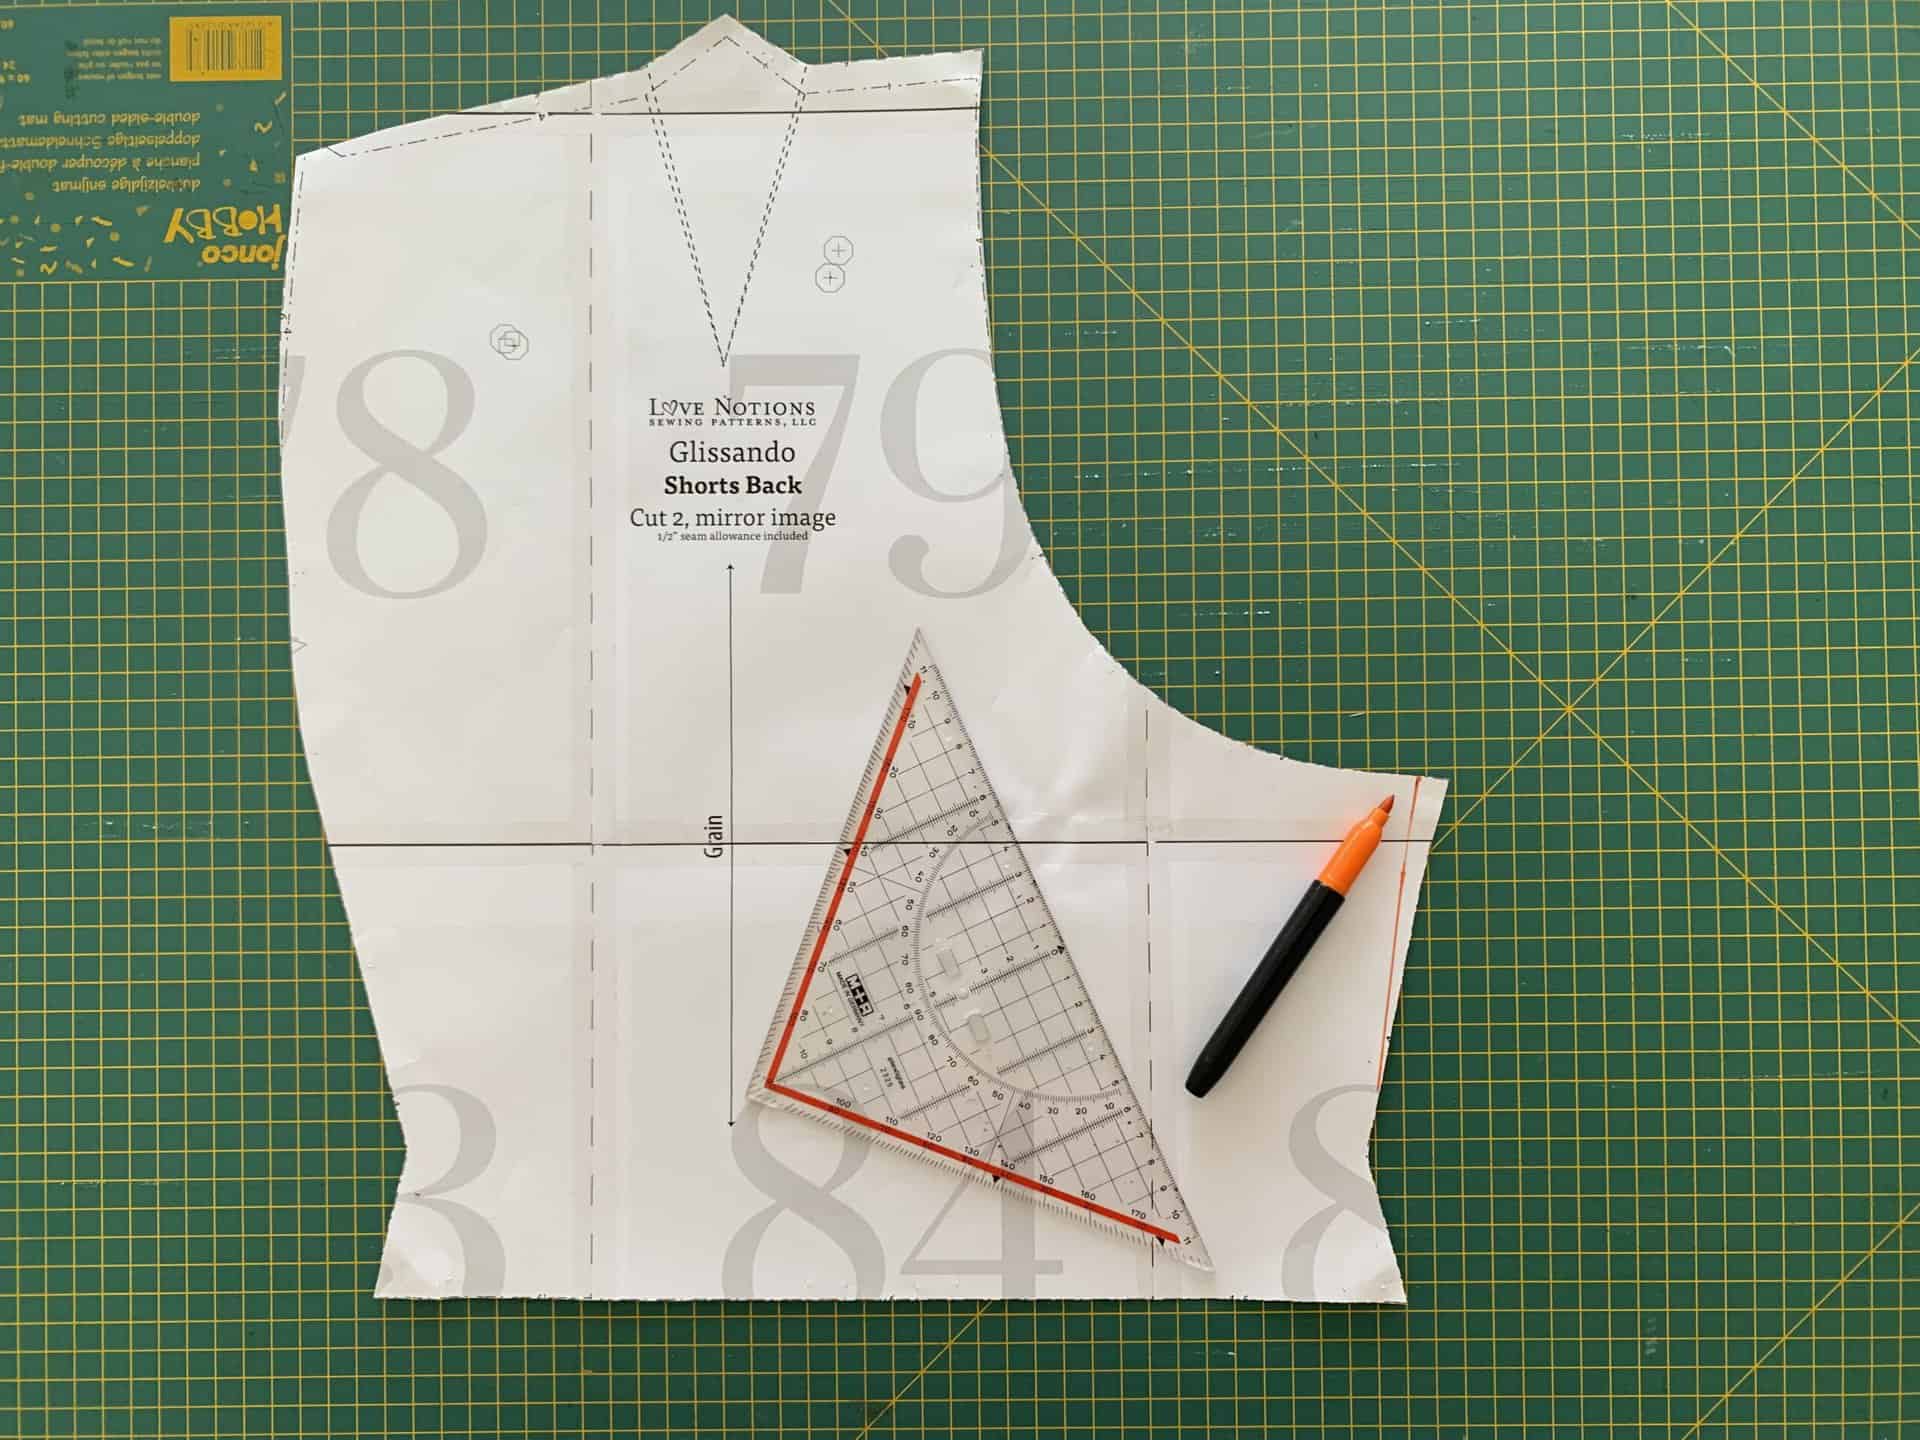
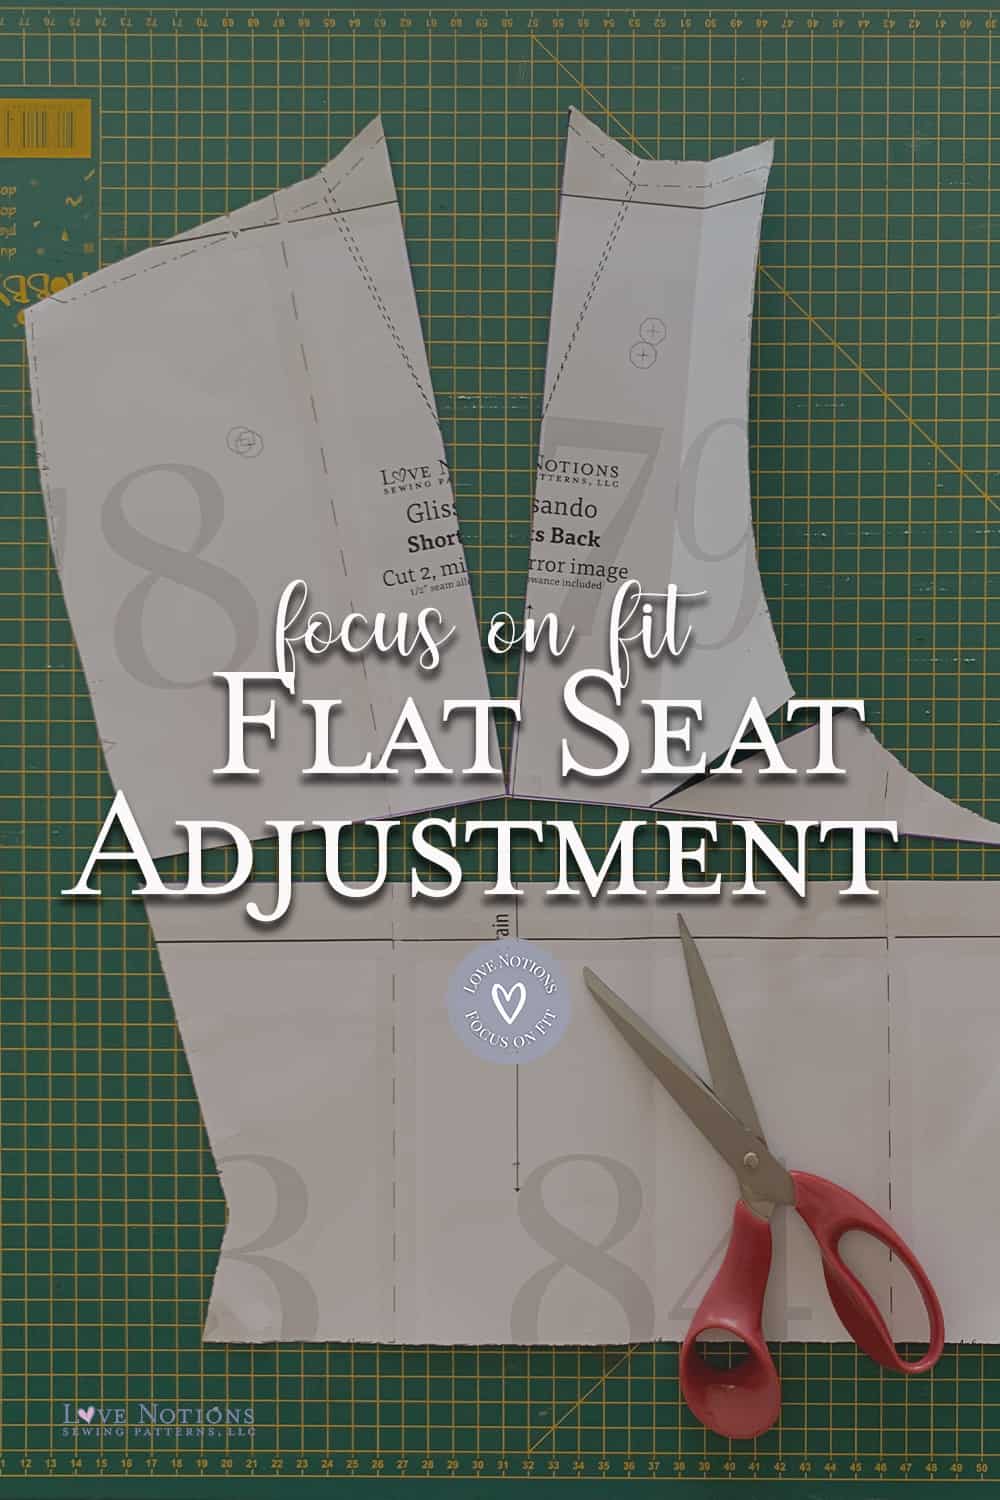
Flat Seat Adjustment – Full Length Version
- Fold the pattern part in half based on the hemline. We need this fold to draw our guidlines in the next step.
- Draw three lines in the same way as I did on my pattern part: The first line runs perpendicular on the grainline to the crotch seam. The second line goes diagonally from the cross seam to the folding line and the third line goes through the dart to the 1st line.
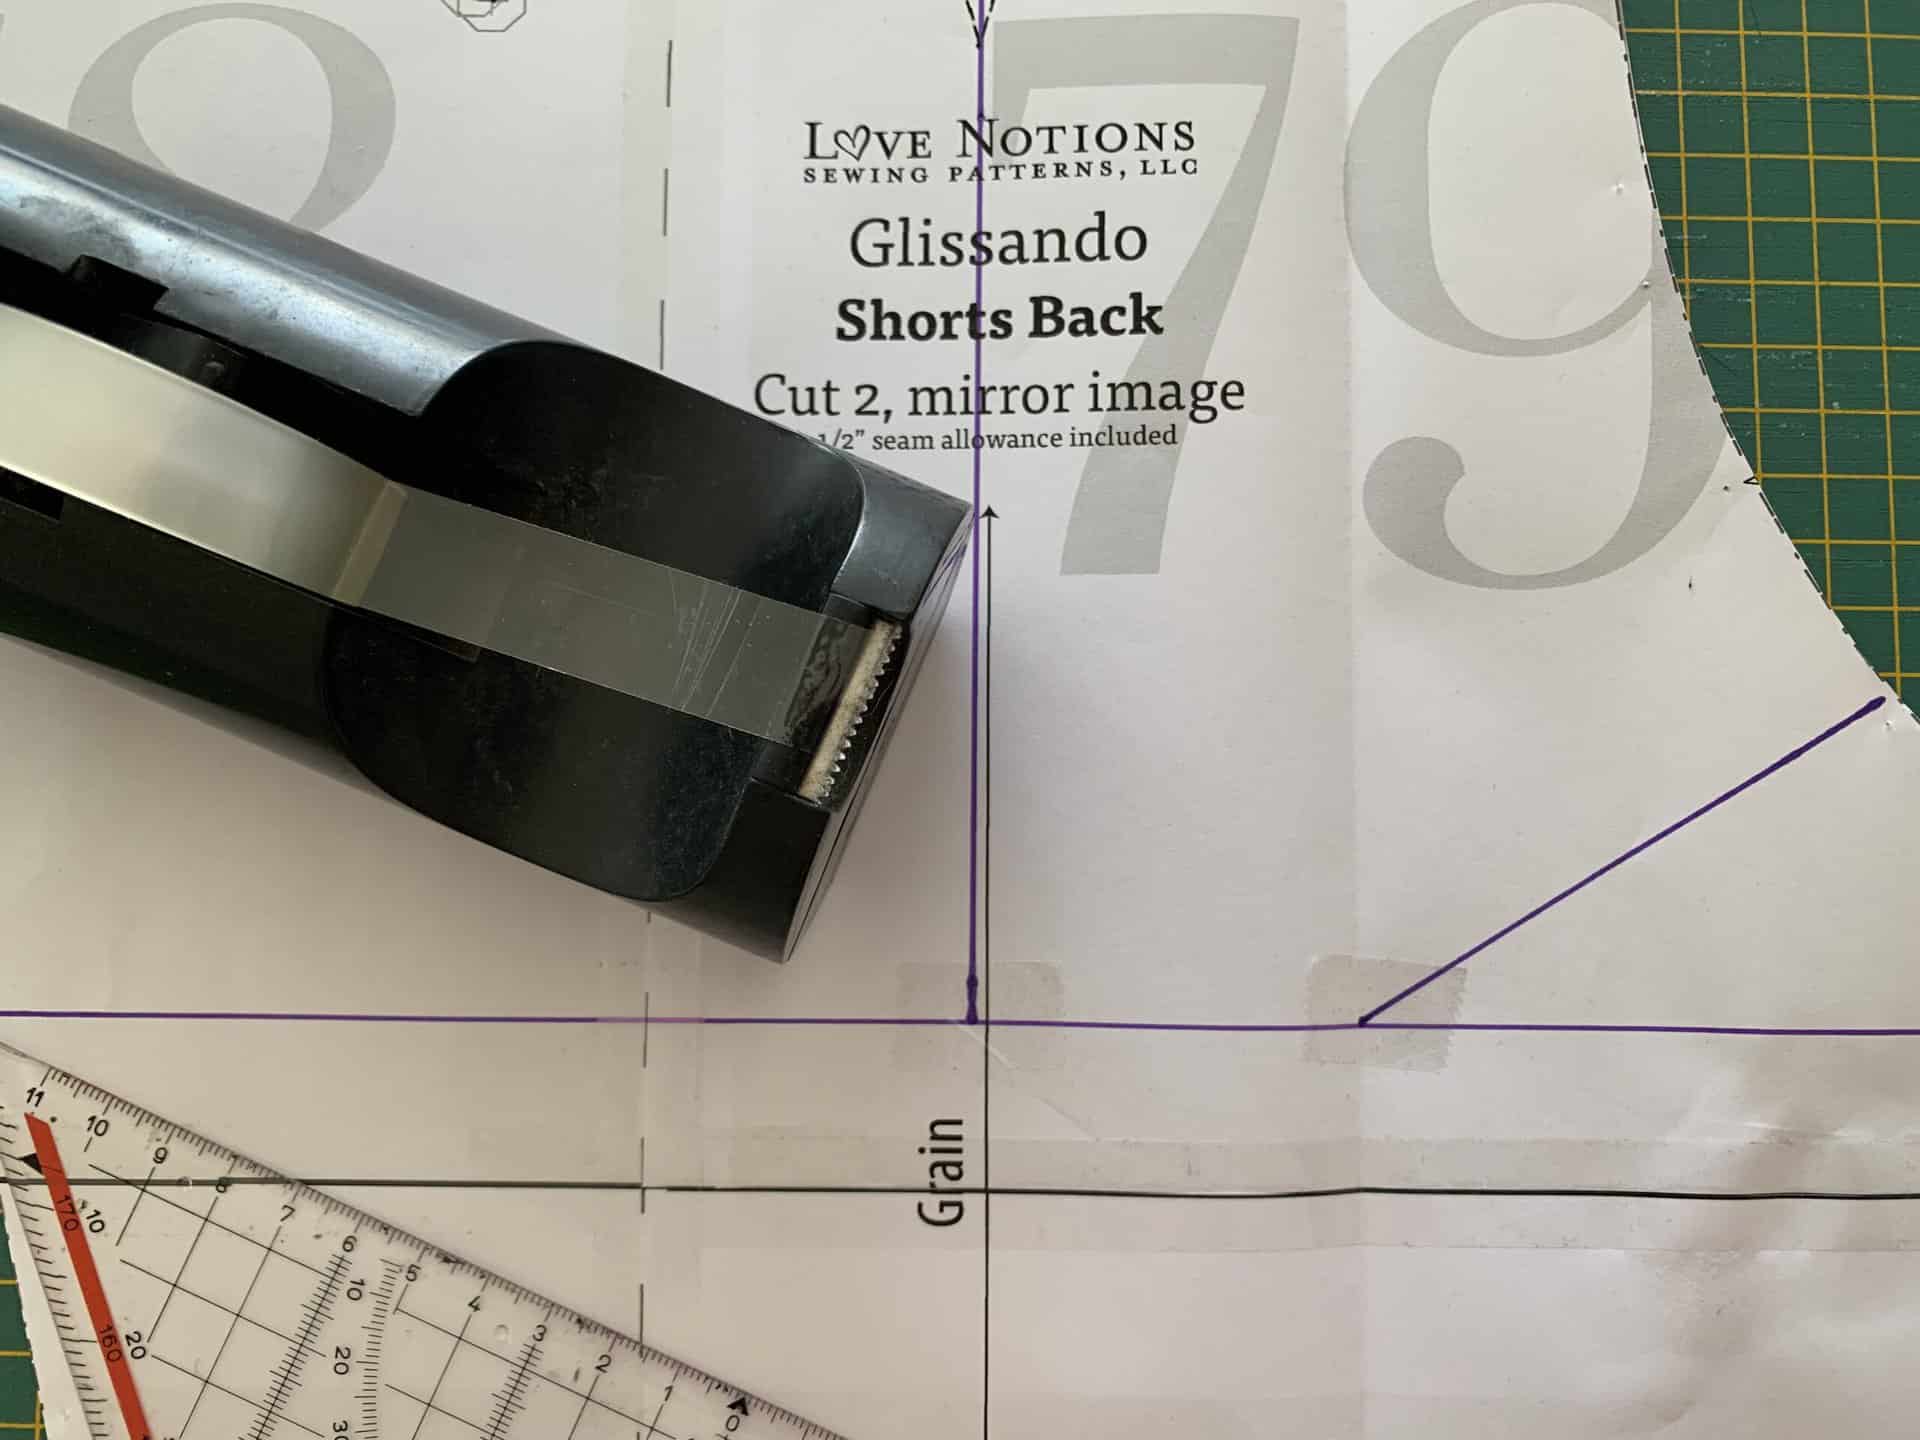
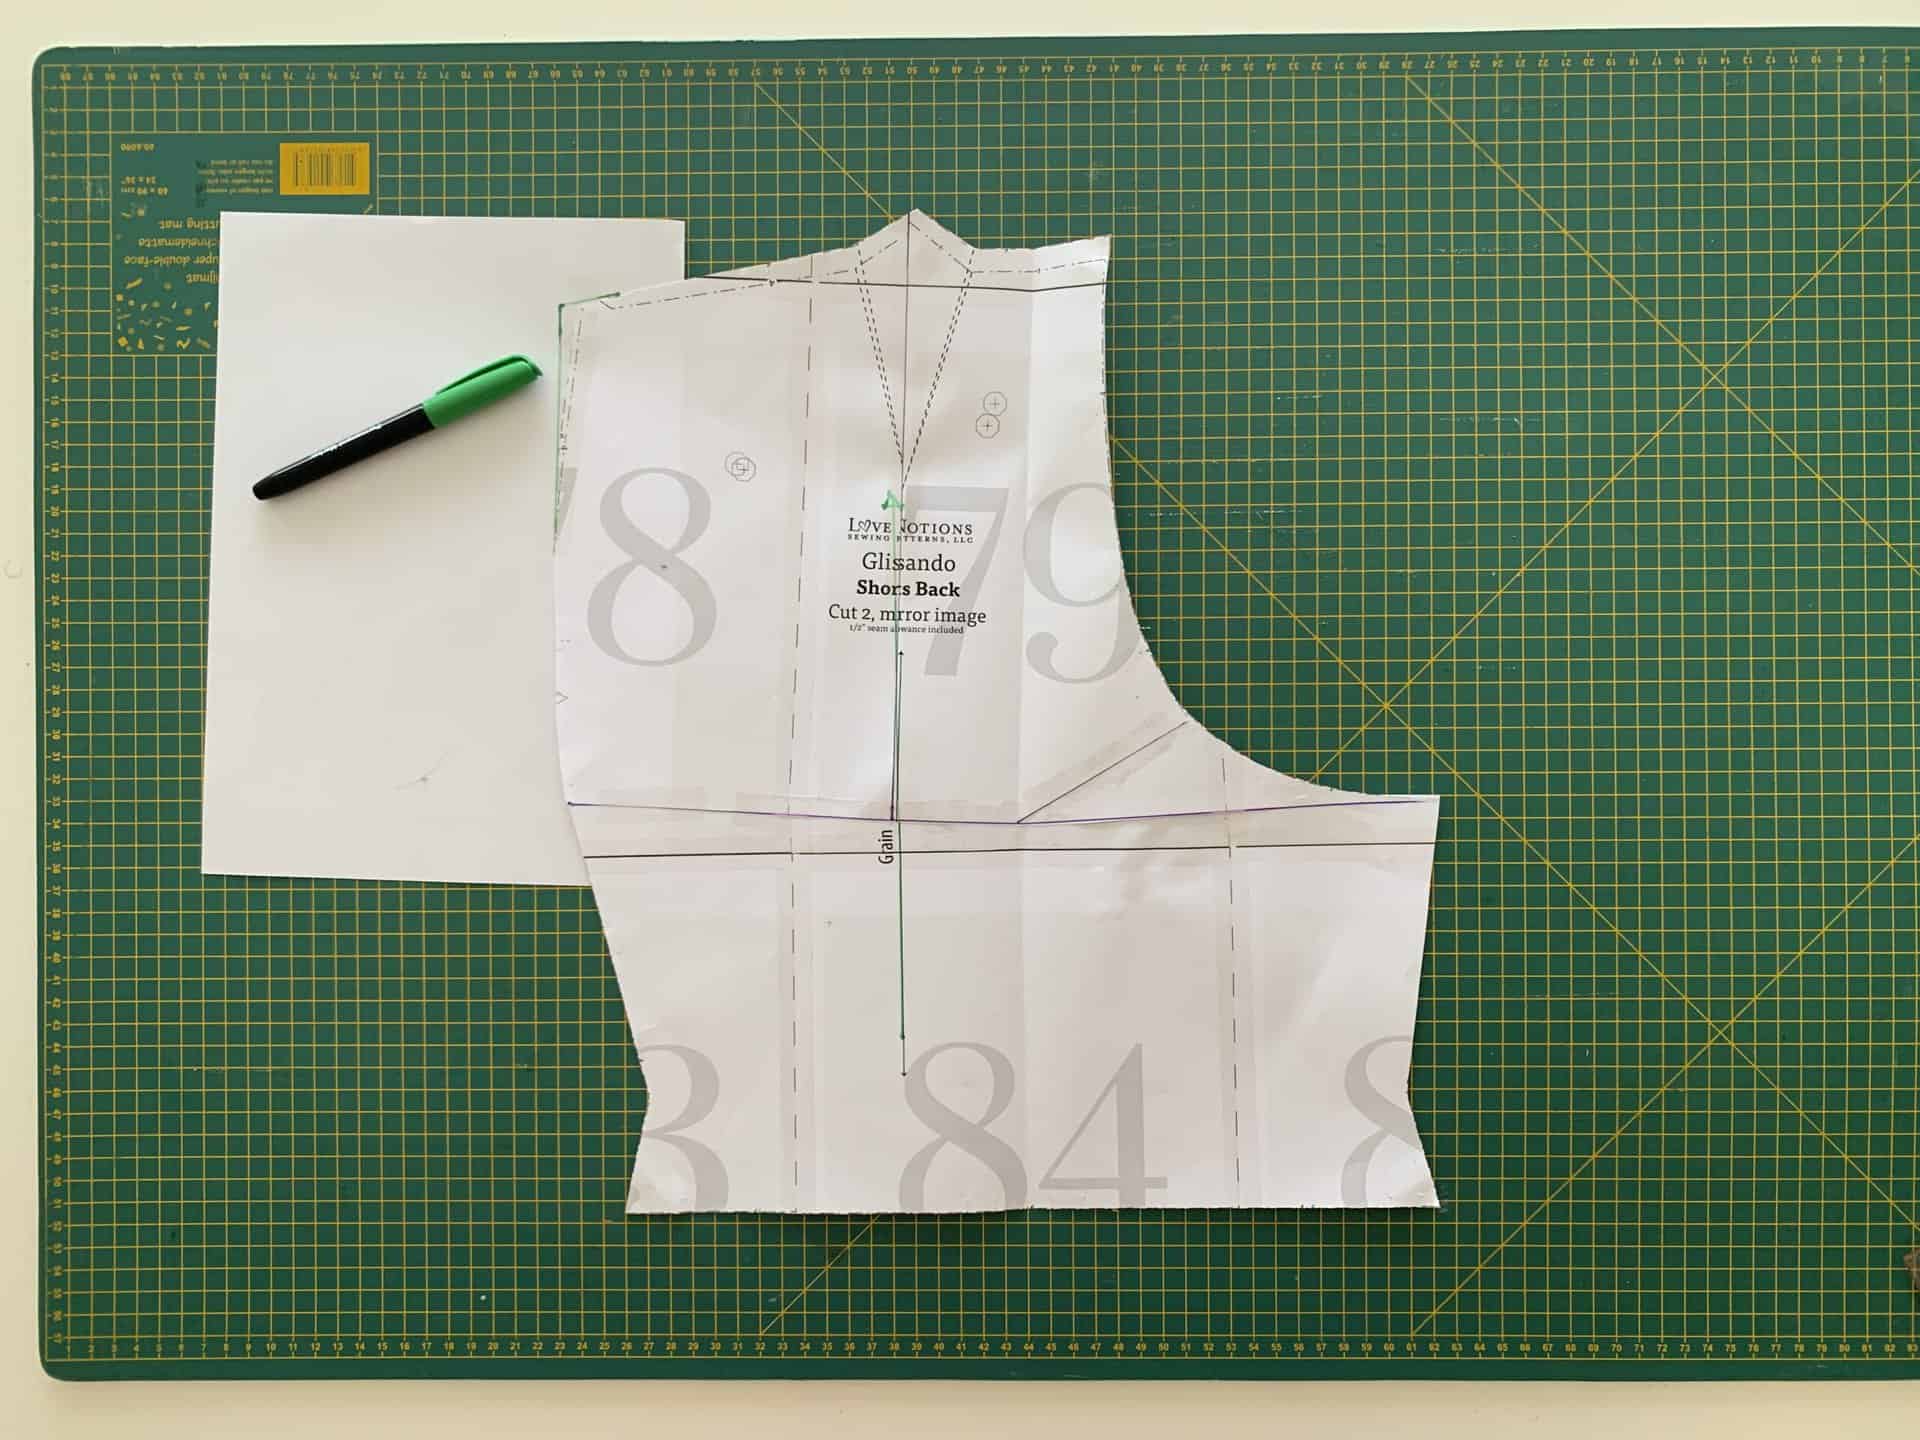
3. Stick a piece of adhesive tape on the points where the lines intersect. This will make these places stronger in the next step.
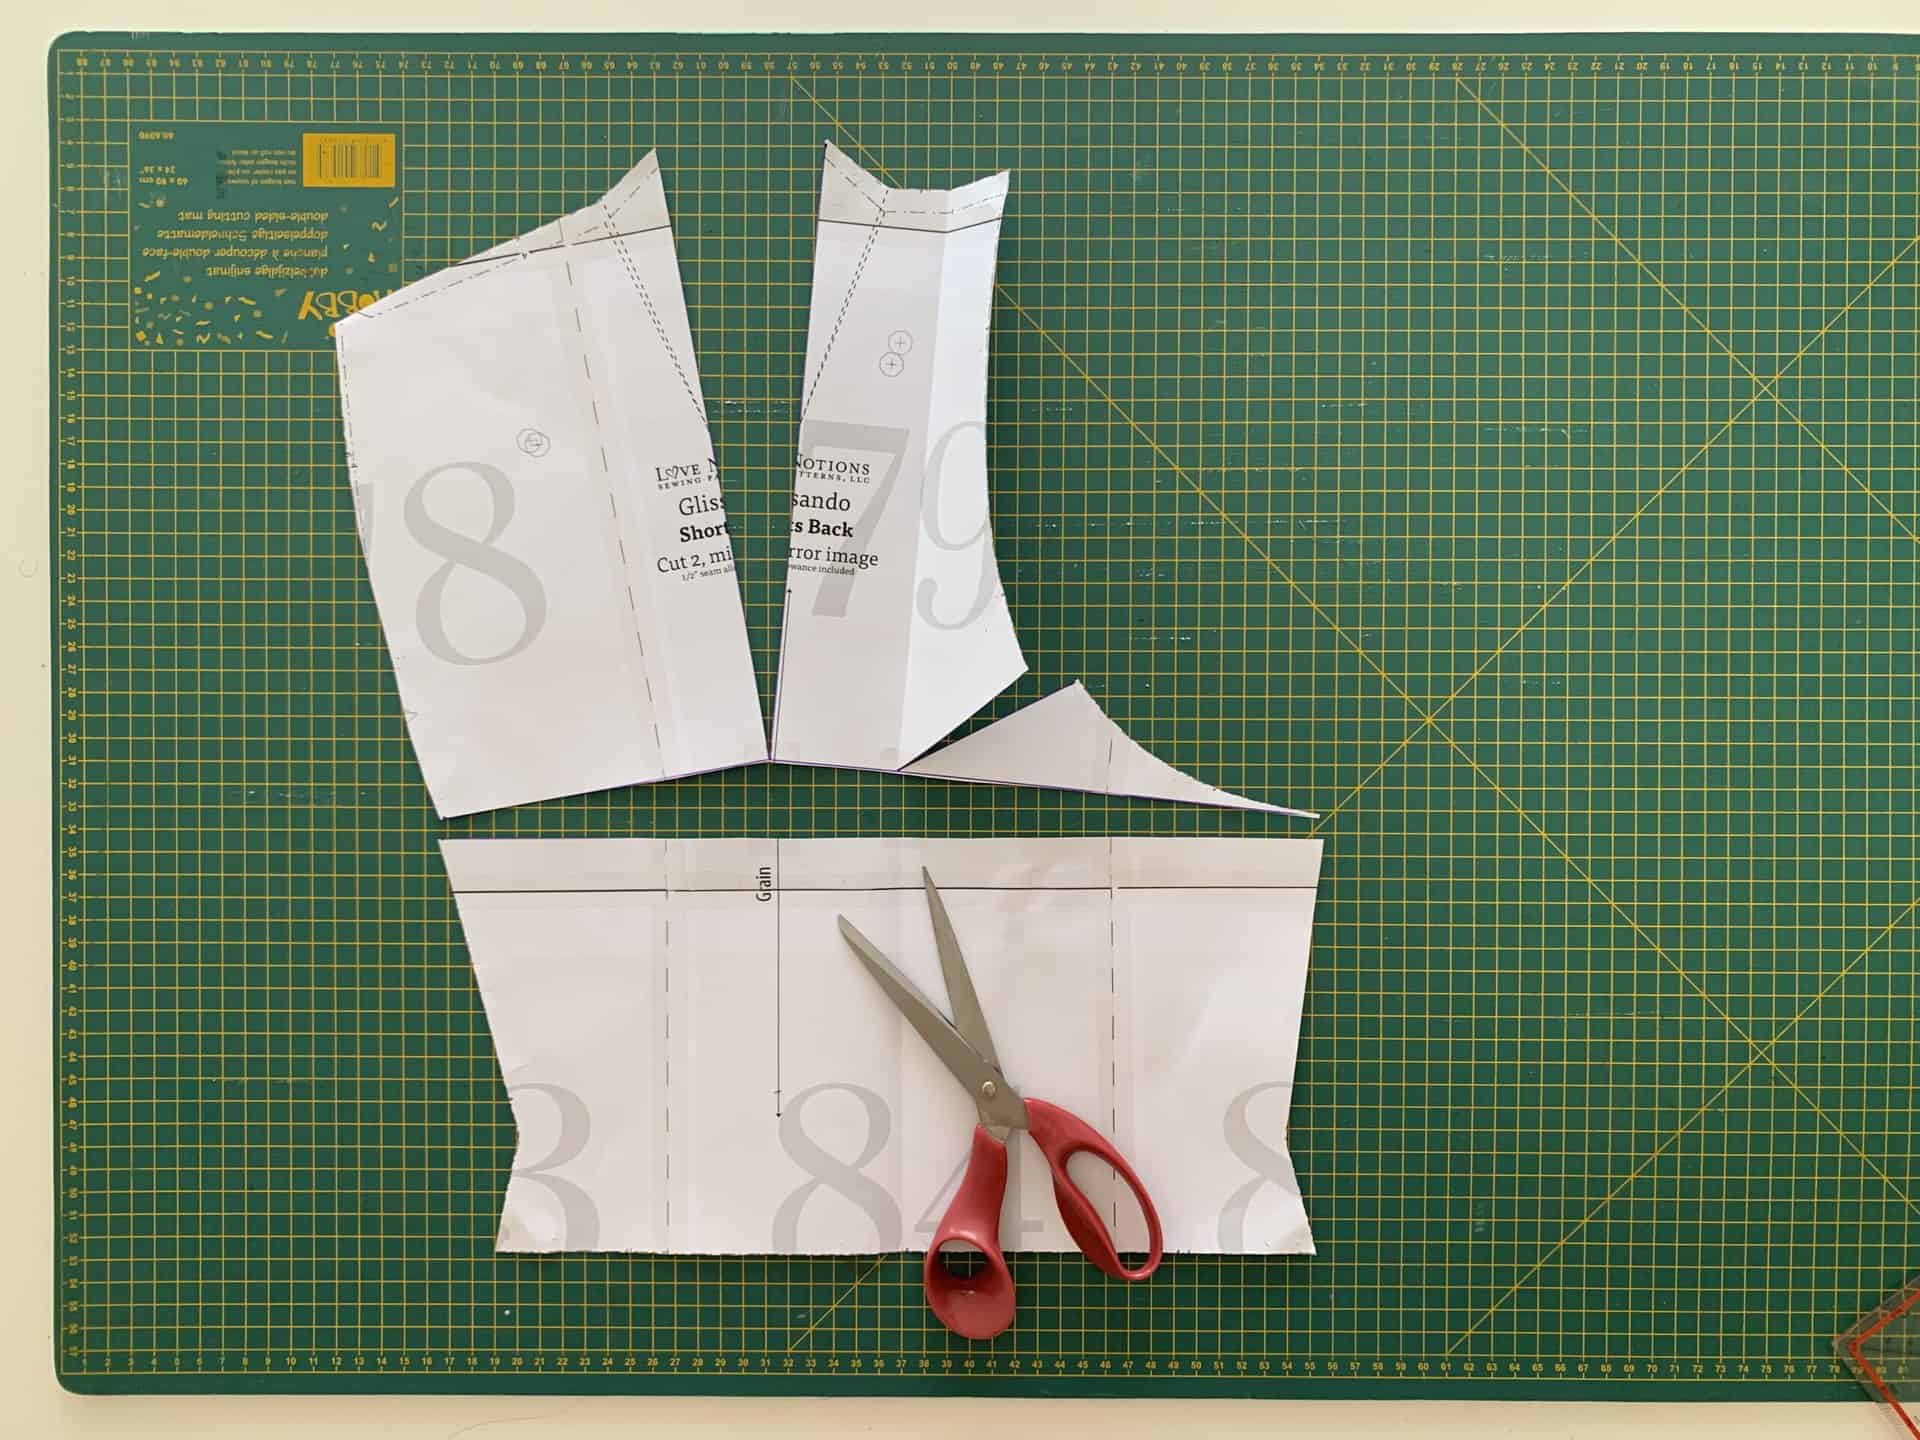
4. Cut line 1 completely. Cut lines 2 and 3 but just let them hang at the intersection where you just added the tape.
5. Slide lines 2 and 3 over each other. How much you slash out depends on the flatness of your bum. I slashed out 0.5 cm (0,2”) on line 2 and 1.5 cm (0,6”) on line 3.
6. Close the outer leg seam and the inner leg seam by putting them on each other to meet. The centre of the leg will overlap therefore.
7. Straighten the grainline.
8. Add the amount you deleted in the dart (line 3) back to the outer leg seam. This will bring your original waist measurement back.
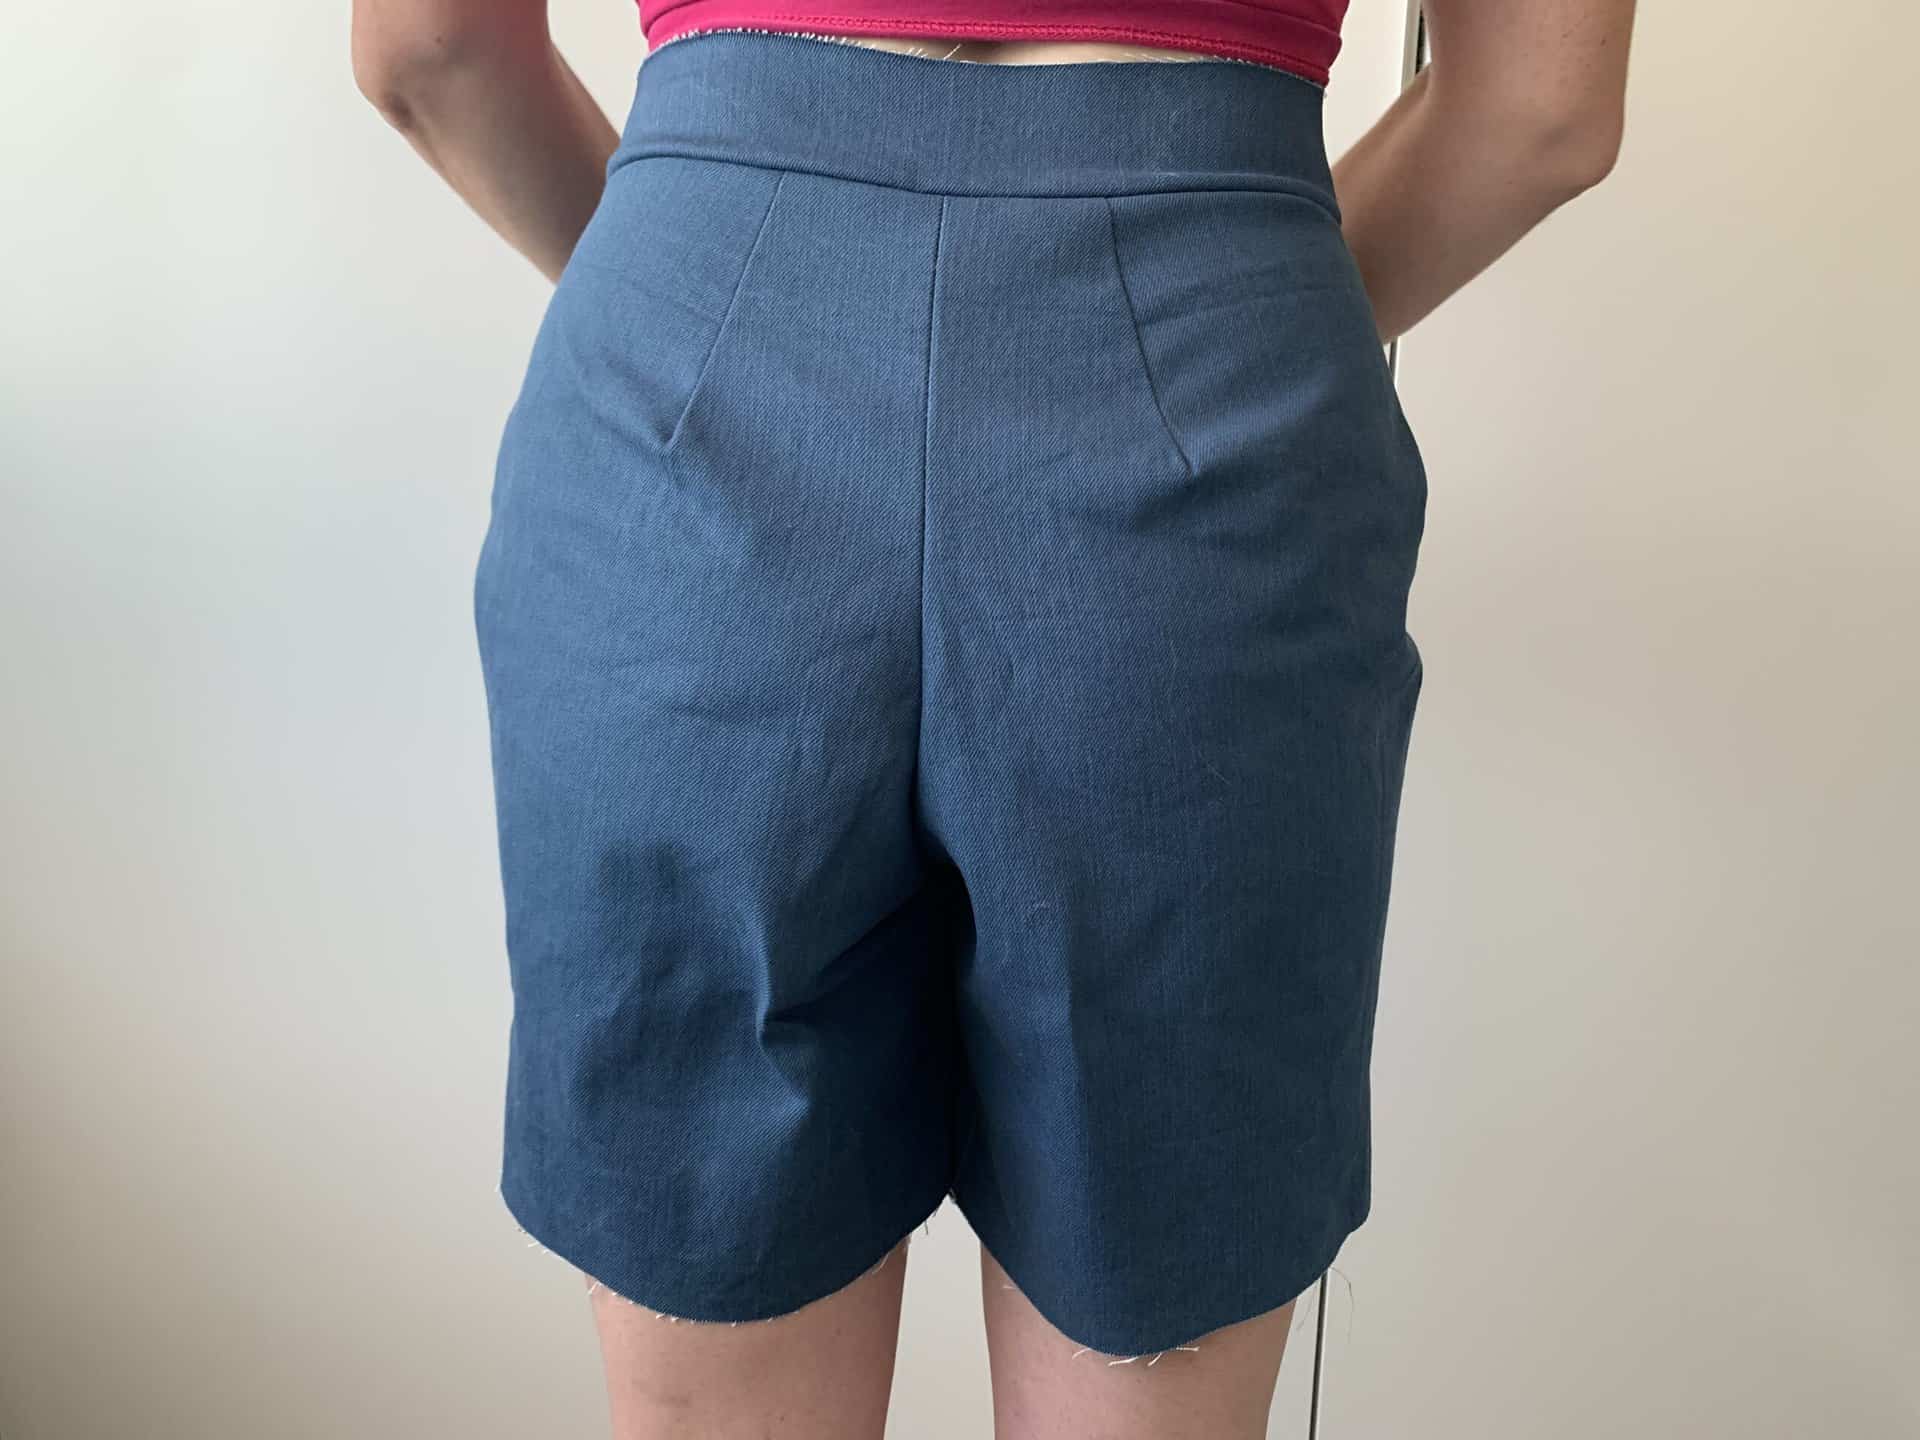
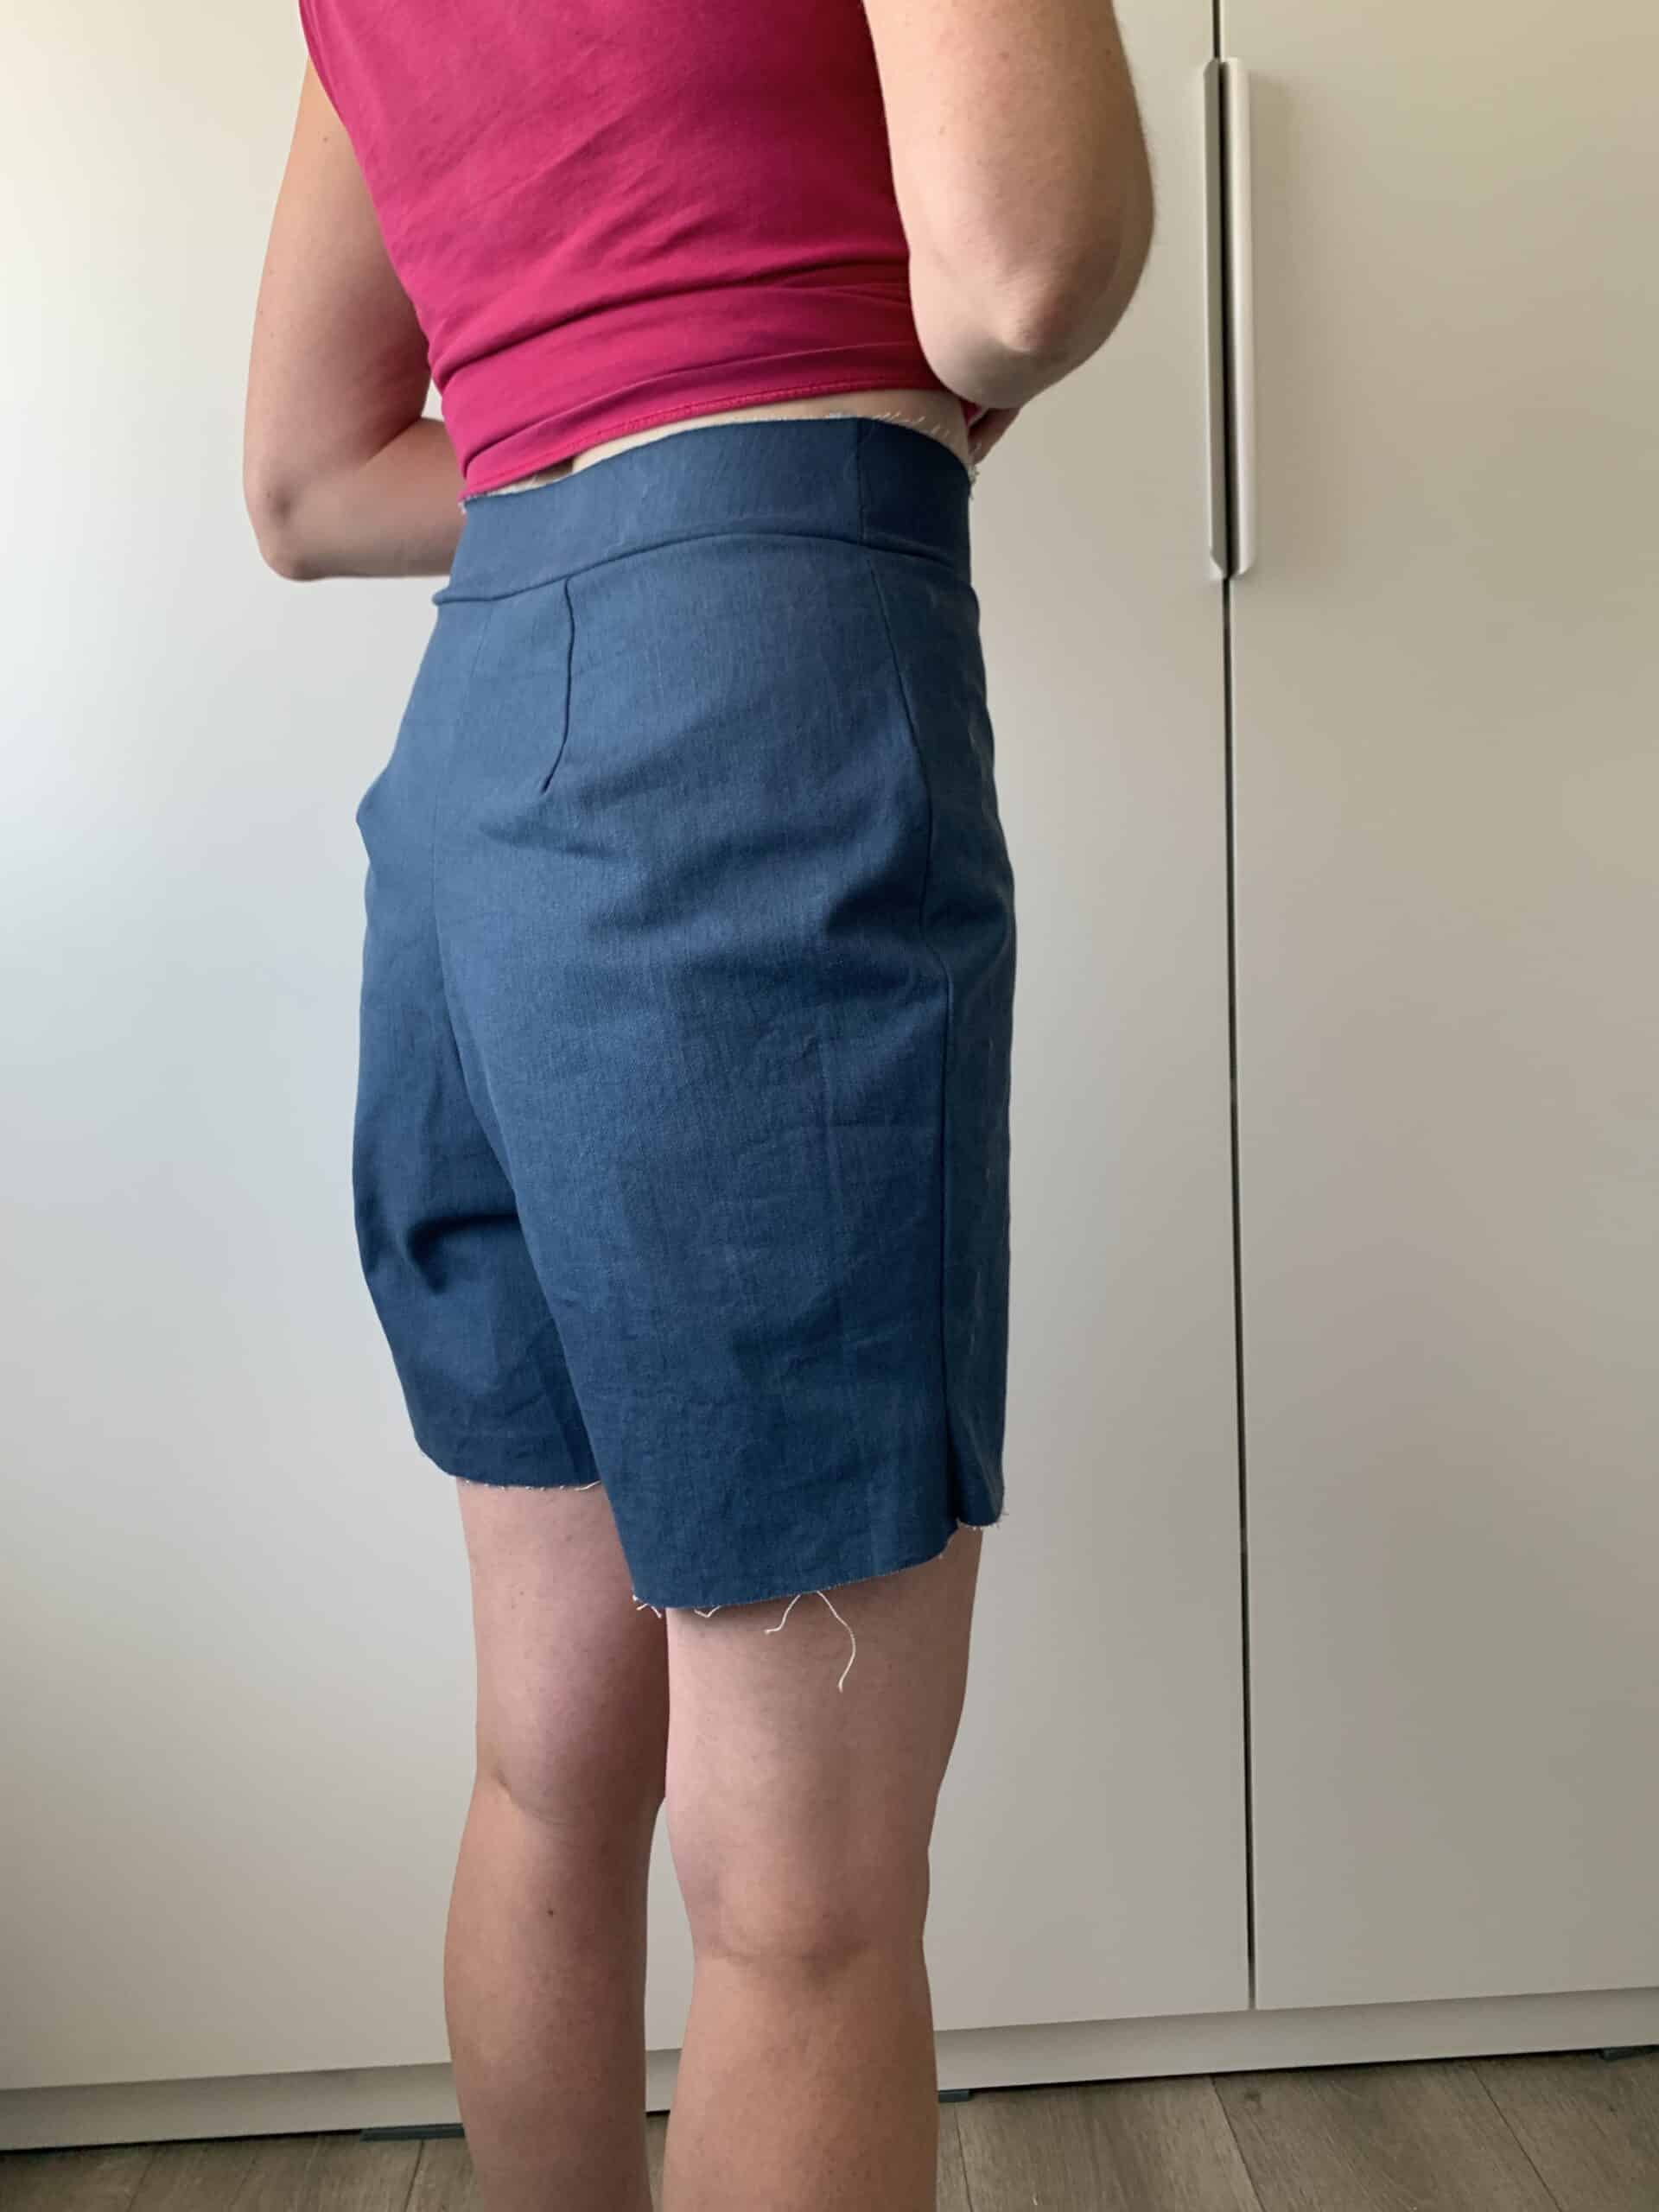
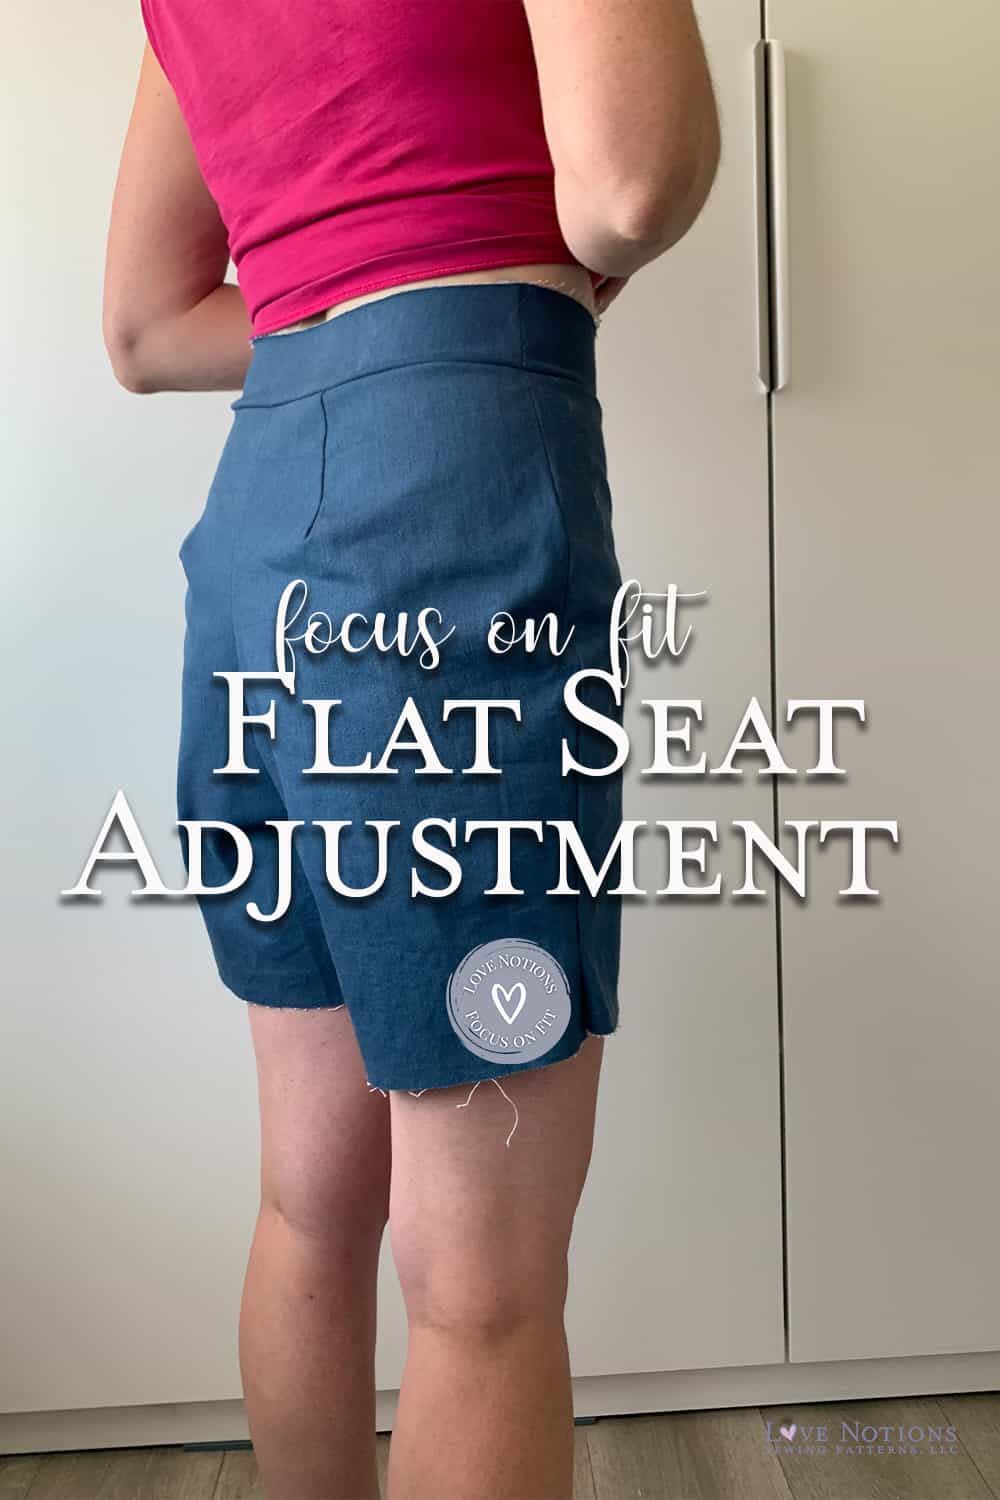
The result of my Flat Seat Adjustment:
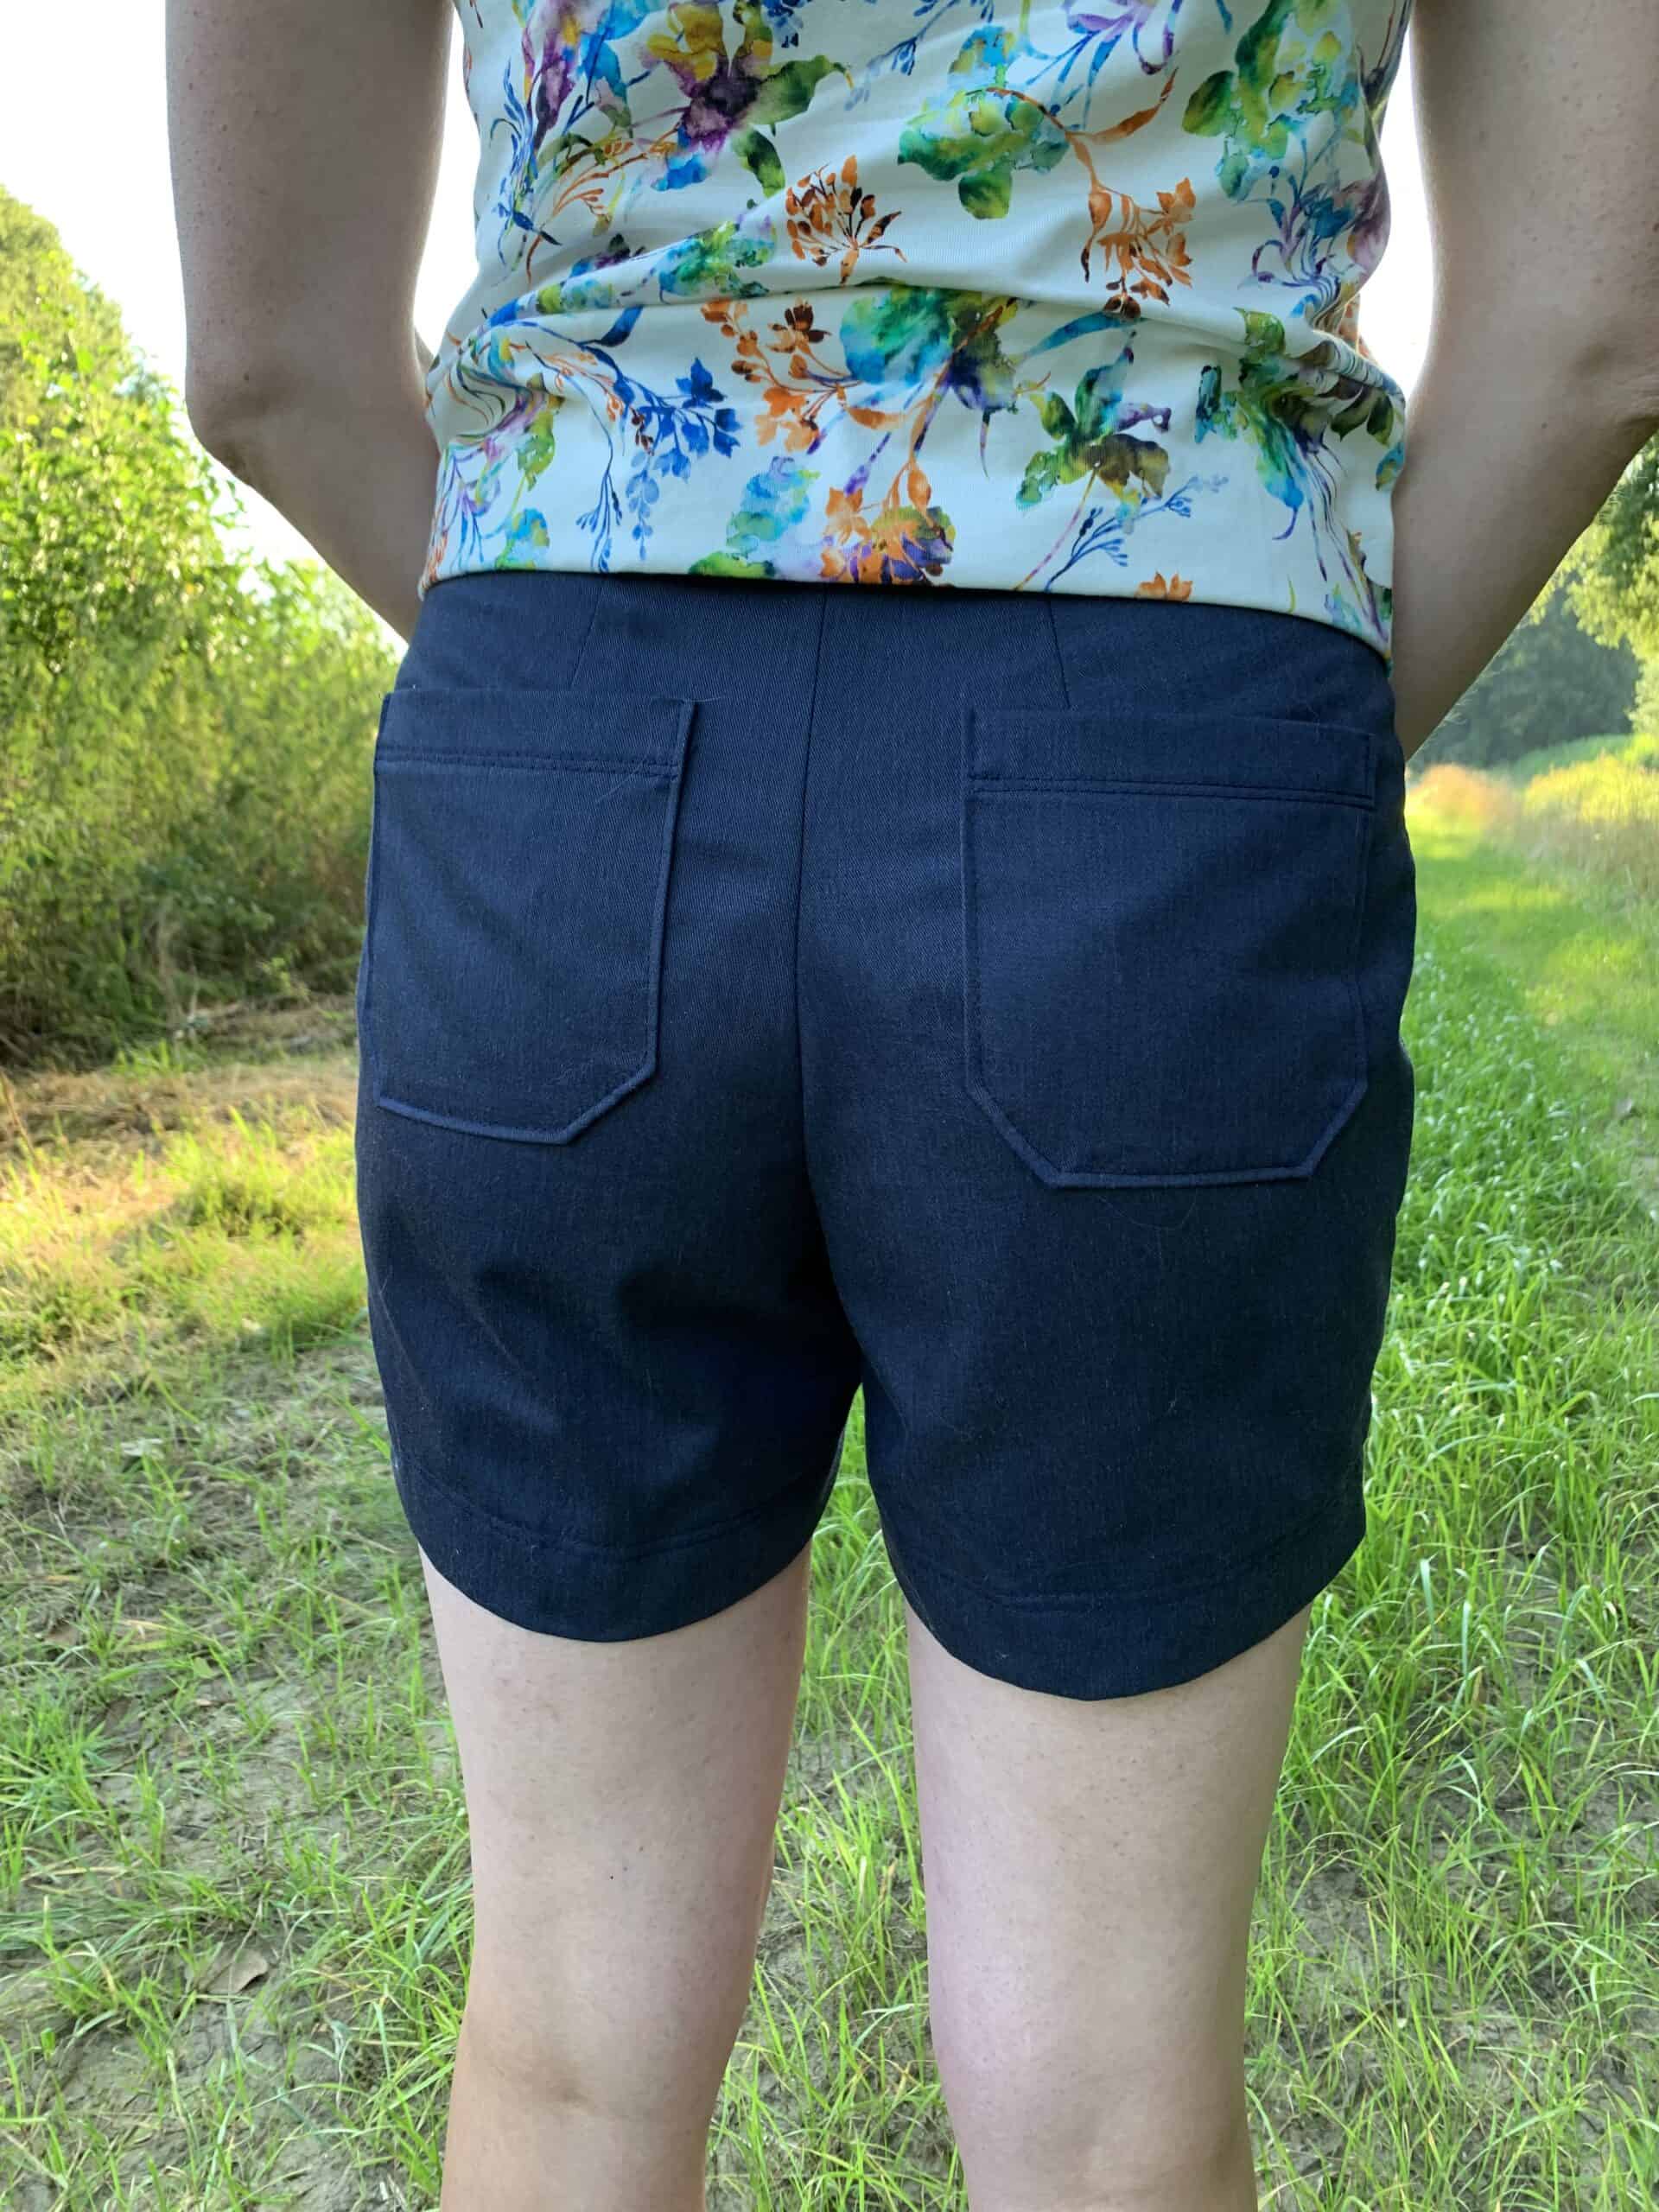
Here is the result!
Do you see the result? What a difference with the muslin! The shorts fits nicely and all the bagginess is gone. I can stroll the beach in my new Glissando shorts ????.
Happy sewing!
Xxx
Annick
Save this article to your sewing Pinterest board
Read more Focus on Fit blogs from Love Notions:
- Prominent Full Belly Adjustment

- How to add Bodice Length to Lyric Dress

- How to make a Narrow Shoulder Adjustment with the Compose Robe
- How to make a full belly adjustment – featuring Sybil Skirt

- How to Fix a Gaping Arm Scye with Presto Tunic

- Focus on Fit: How to make a Flat Seat Adjustment