


Read this post to learn how to sew knit binding. Use this technique for the Tranquil Nightwear pattern which features trim details perfect for knit binding!
Tranquil Nightwear + Knit Binding
I Love Knit Binding
Many sewists have a sewing technique that they love the most and will draw them to a pattern. For me, I love to use knit binding. I mixed a few techniques that I learned early on in my sewing journey to create a finished knit binding that looks beautiful. Maybe that’s why I am so enamored with Love Notions patterns, because there is such a prevalent use of knit binding.
Knit Binding Tutorial + Patterns that use it
In this tutorial, I’m going to explain my method and share which Love Notions patterns use this technique. I’ve also included some illustrations of a standard technique that you’ll find in most Love Notions patterns. As with most things in sewing, there are lots of techniques to accomplish the same thing, and they are all equally correct.
How to sew Knit Binding, step-by-step
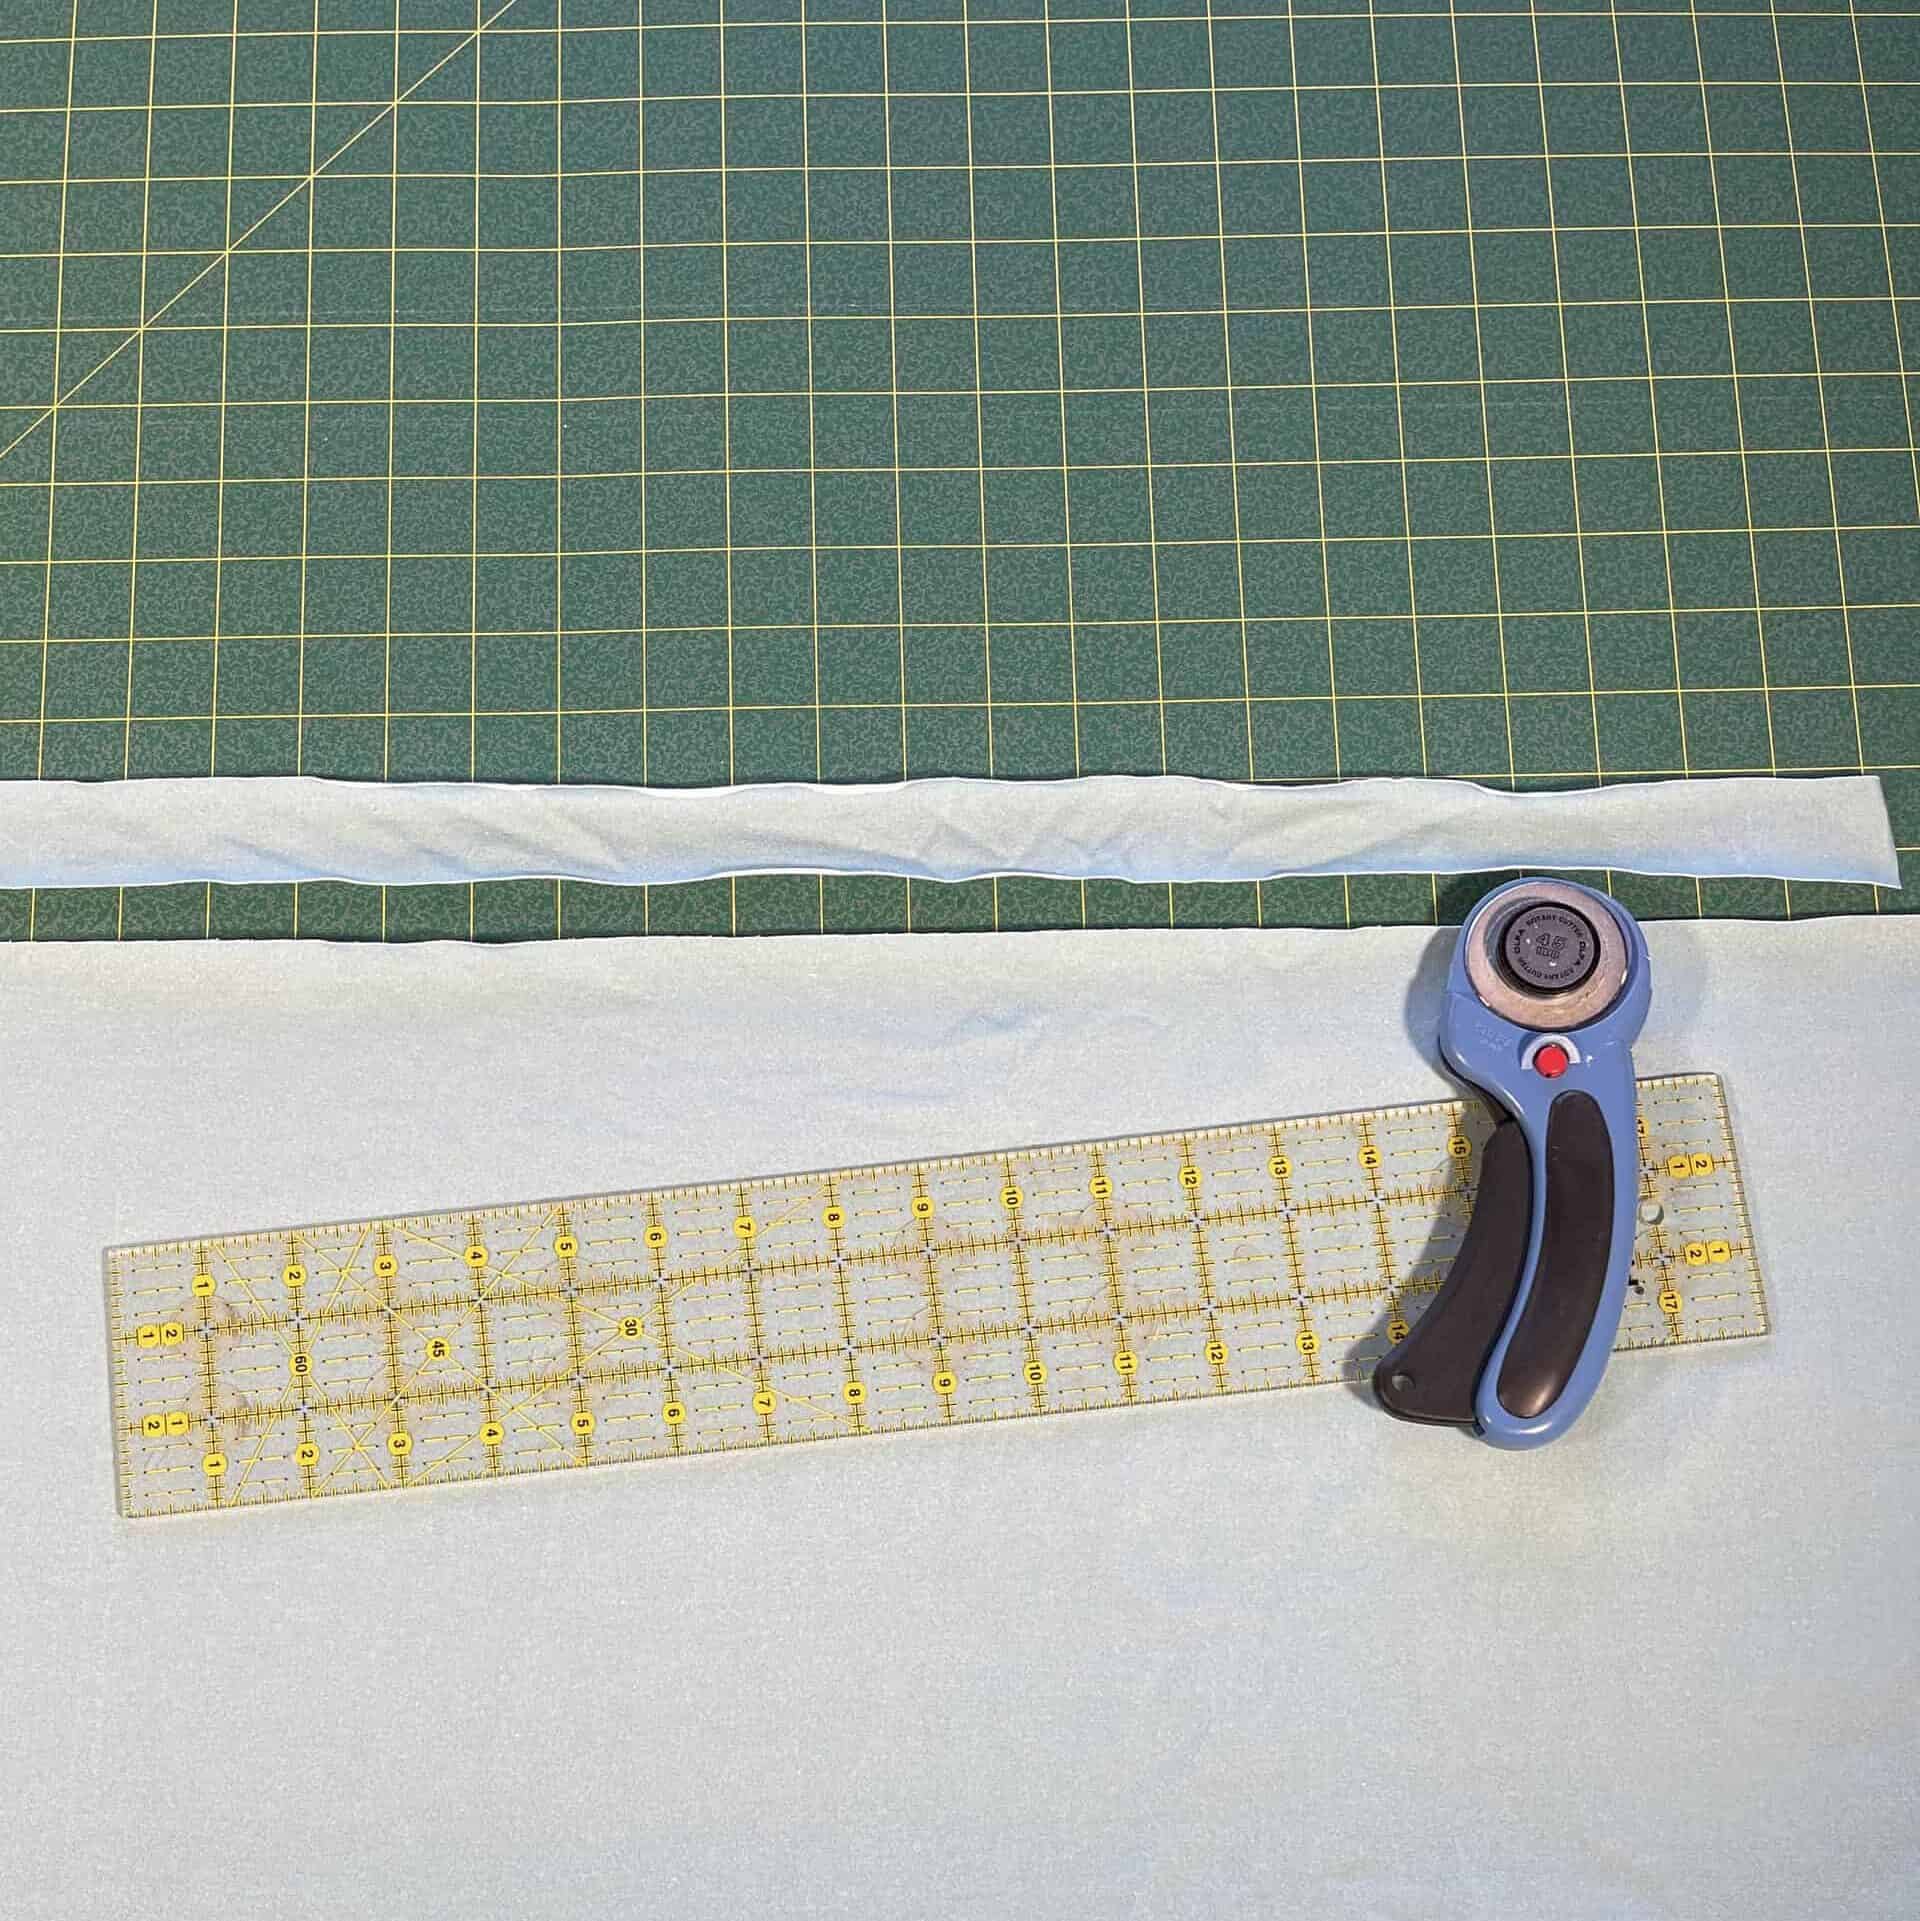
Step 1. Cut the Binding
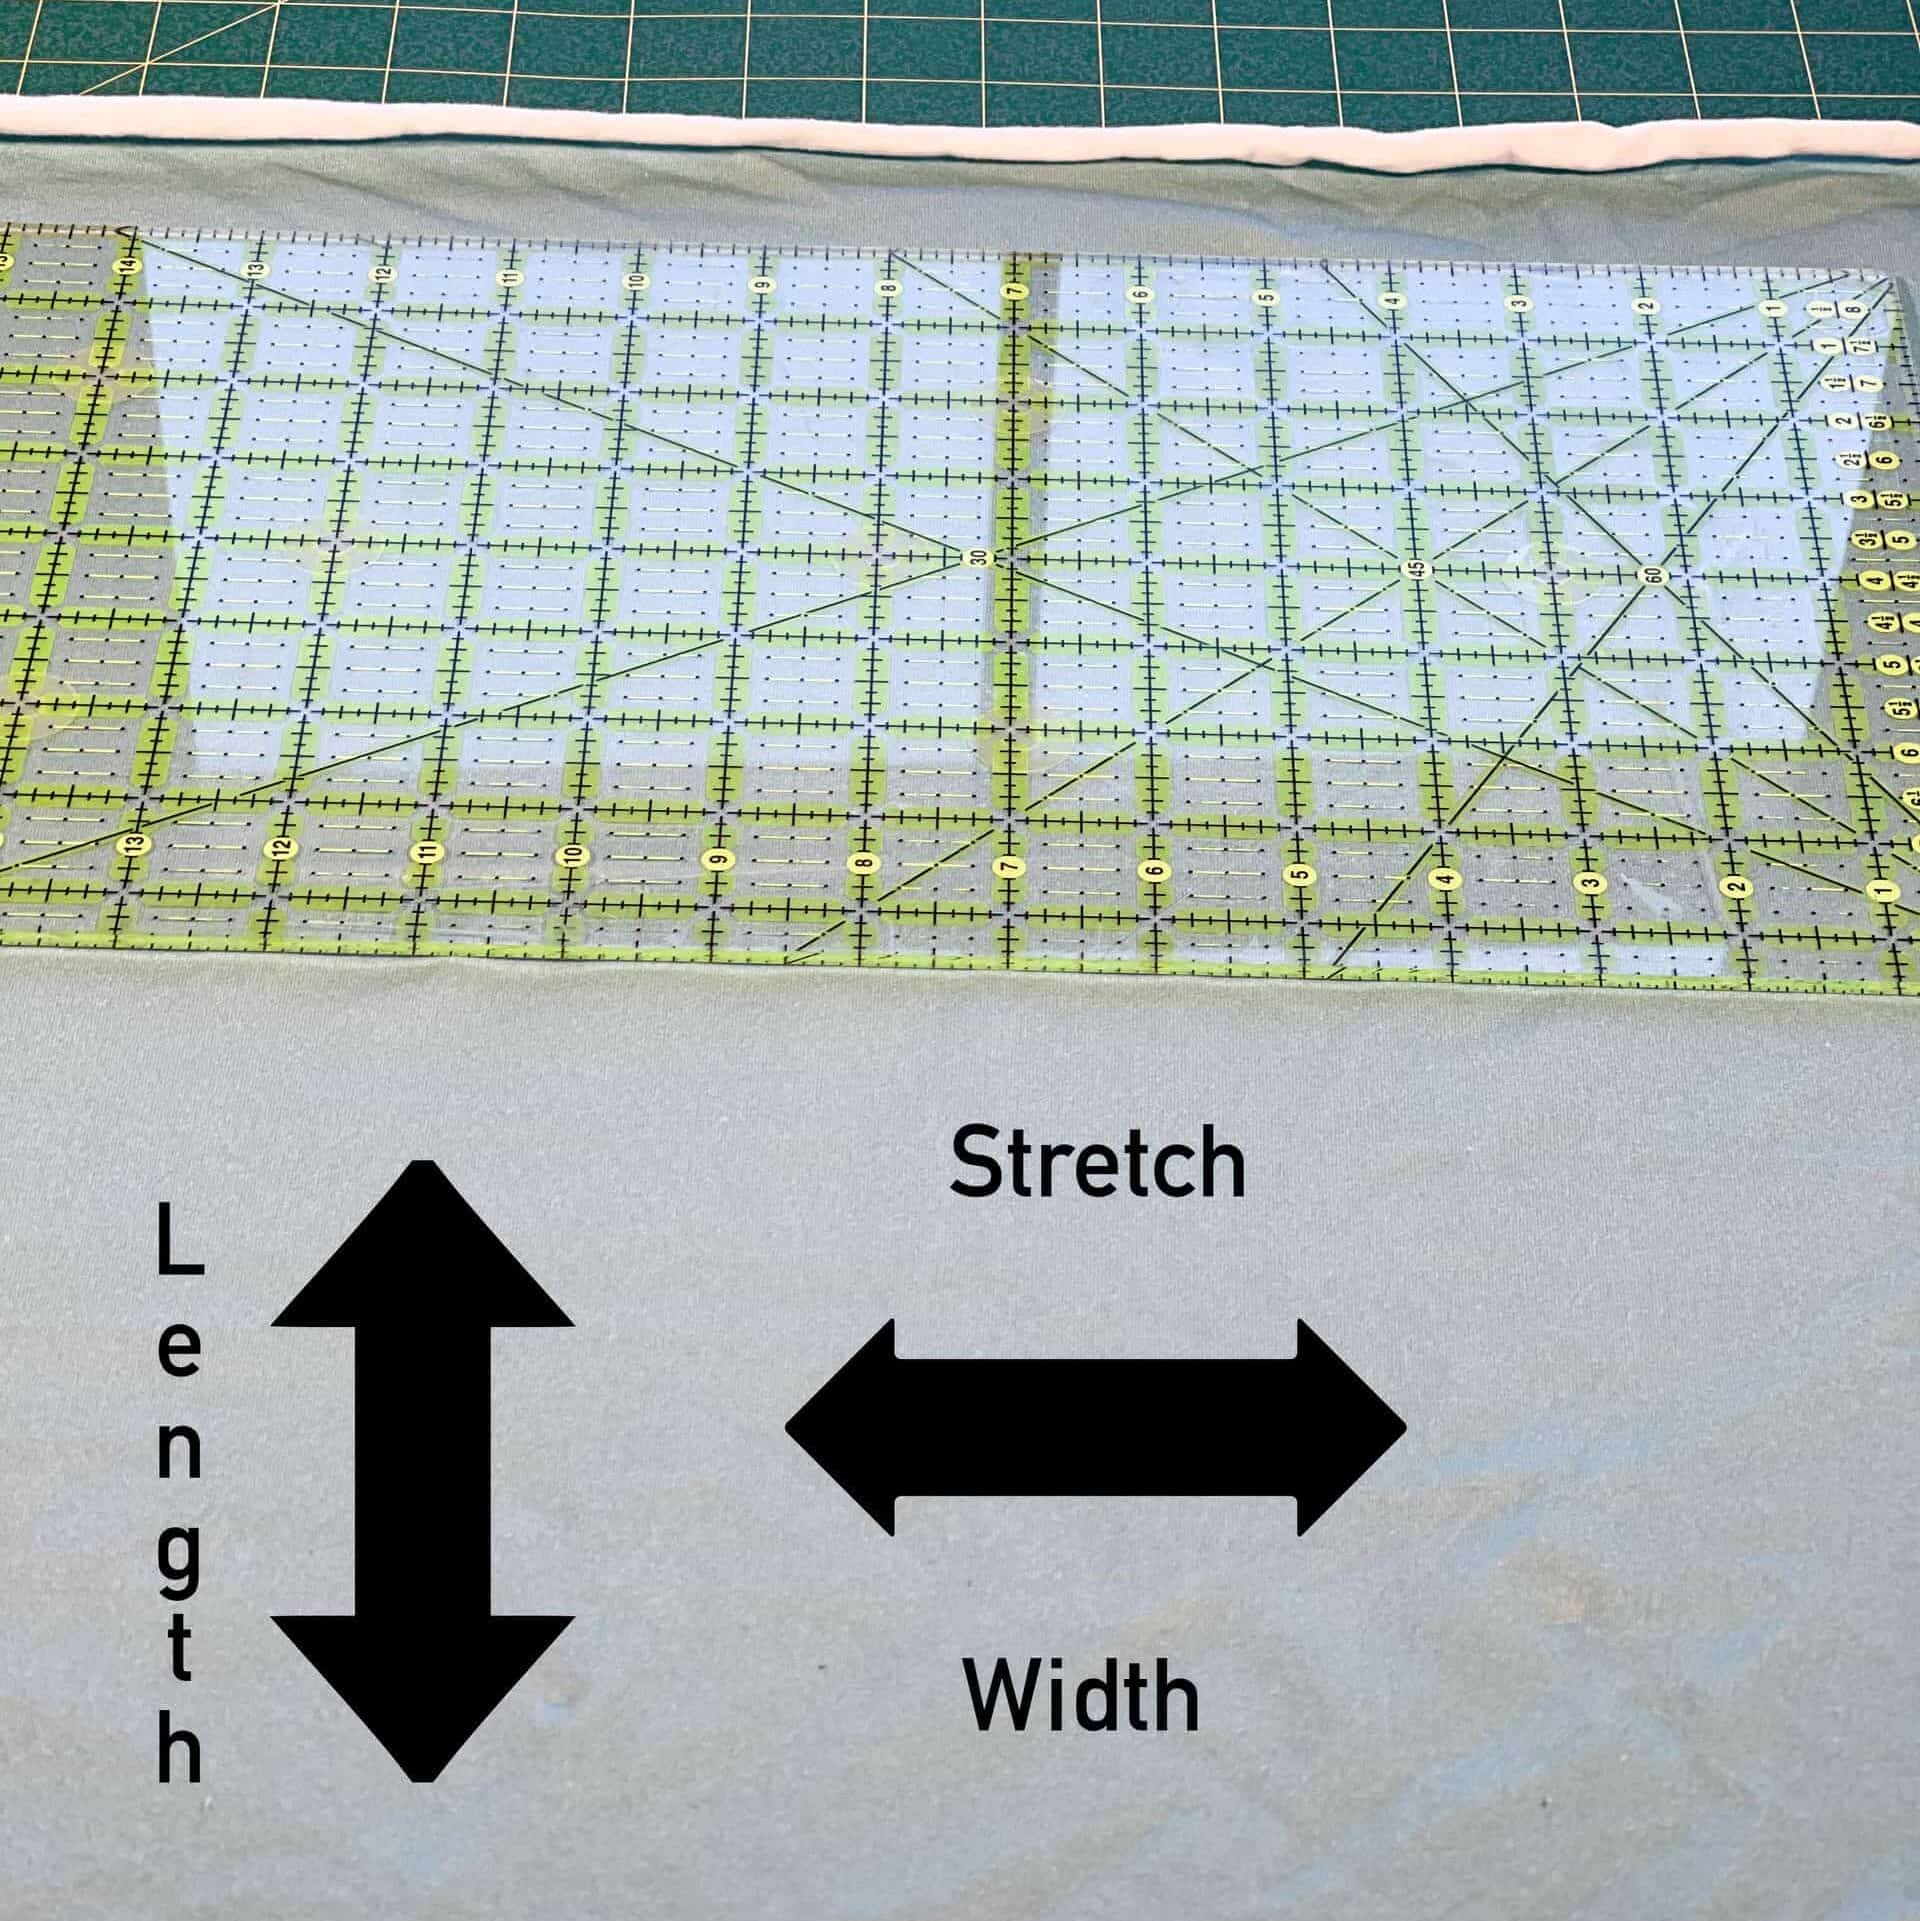
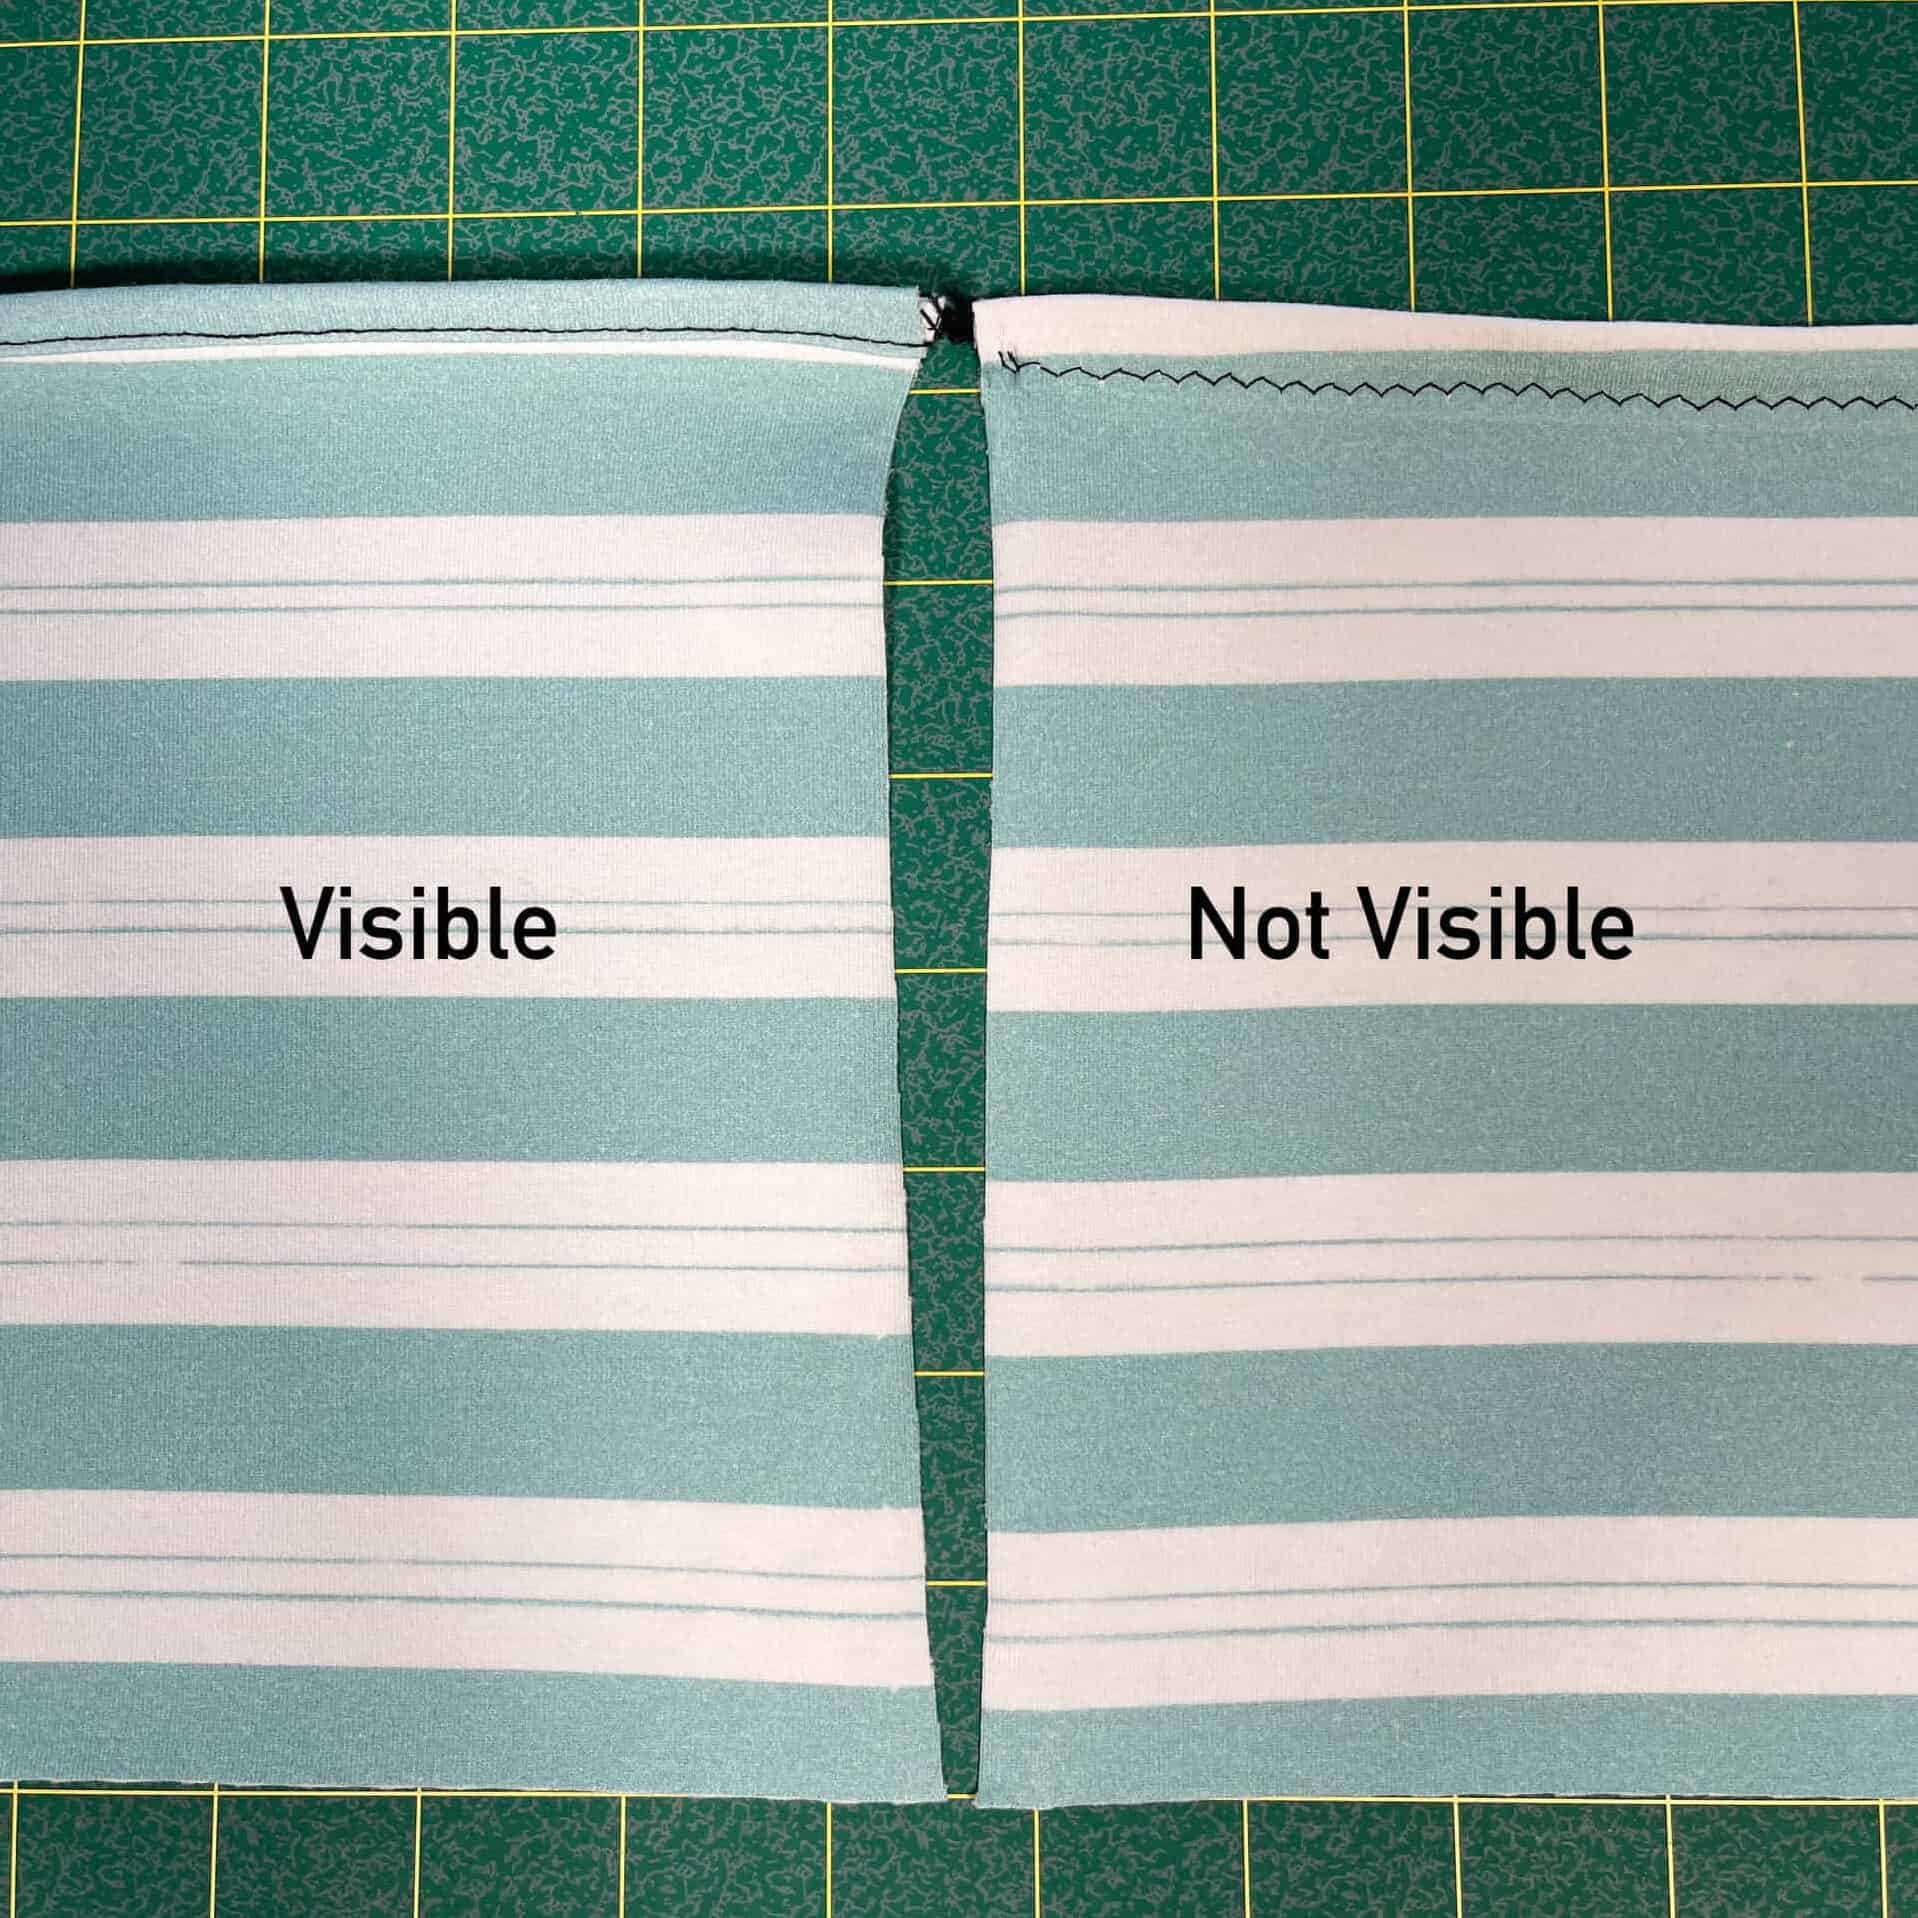
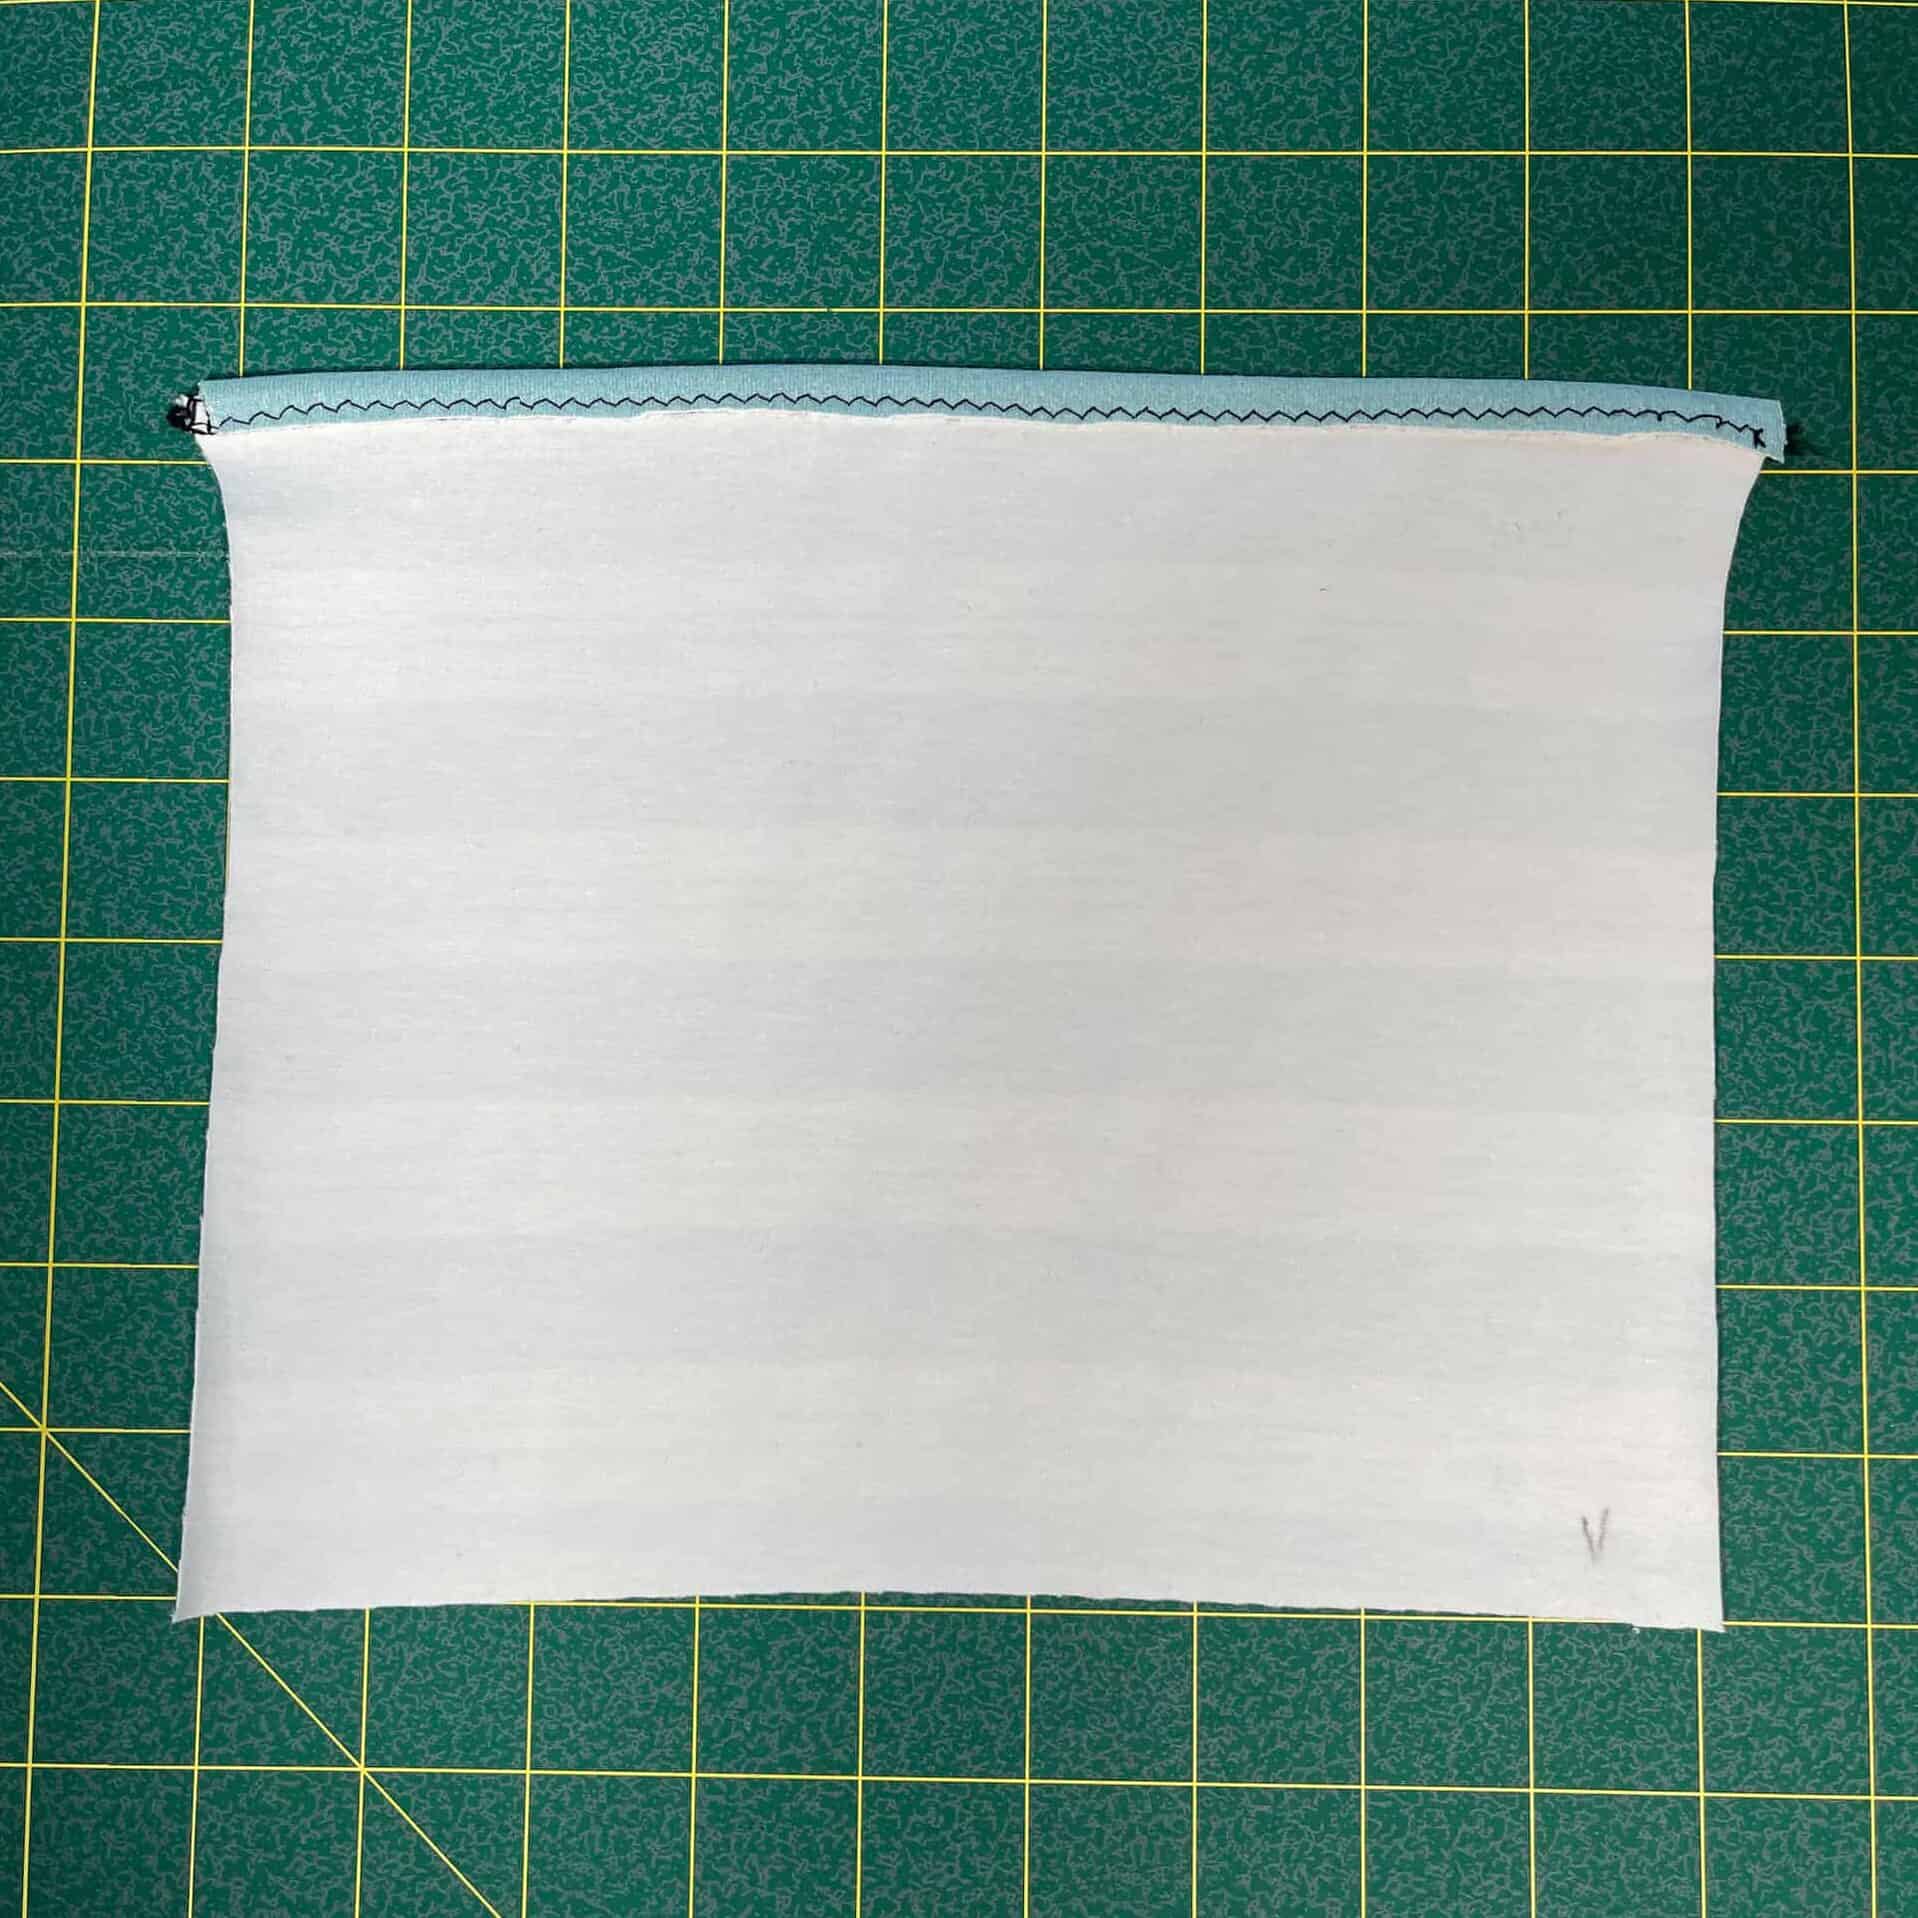
Cut the binding per the pattern instructions and ensure the stretch goes across the piece with the width. See the image below to make sure you’ve got the stretch right!
This binding fabric needs to stretch similar to a neckband. Depending on your fabric composition, you may need to remeasure and cut your own width. For my Tranquil Pajamas pictured above I cut a unique binding piece due to the fabric I was using. If you want to cut your own binding, measure the opening you plan to bind and multiply that by 80% or 85%, just like with a neckband. Then, find the quarter points on the binding and pajamas and stretch to fit.
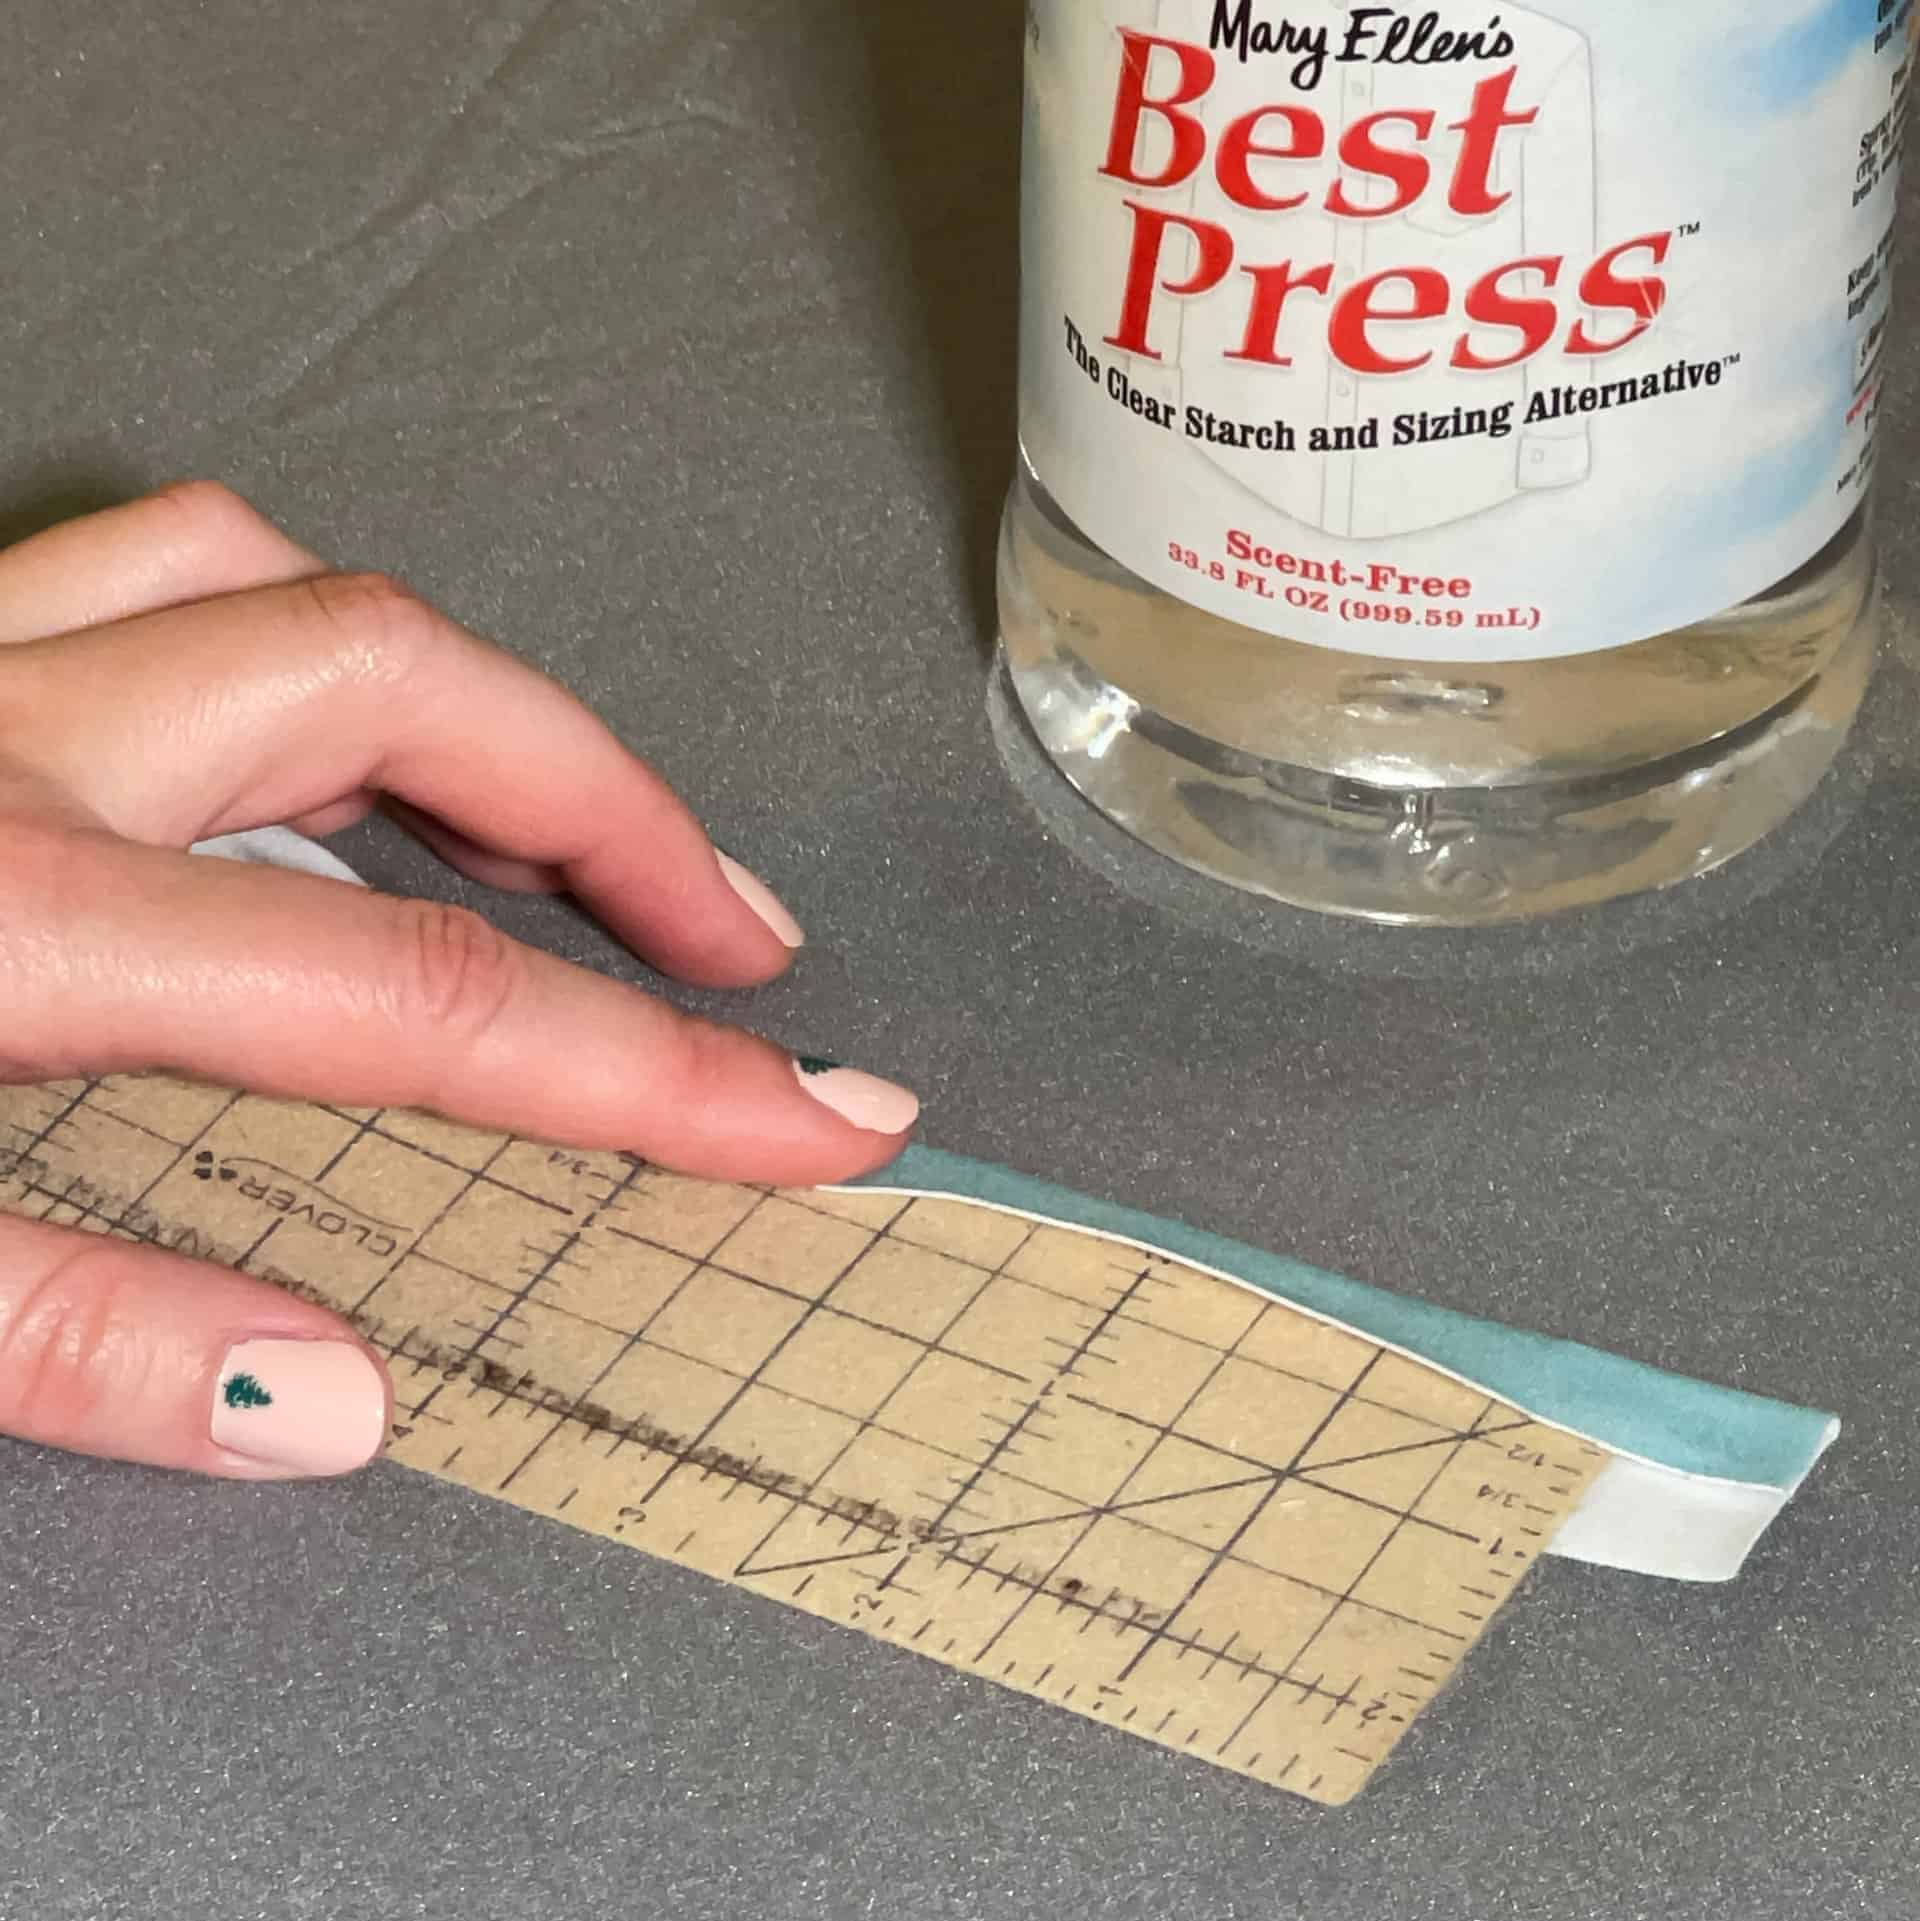
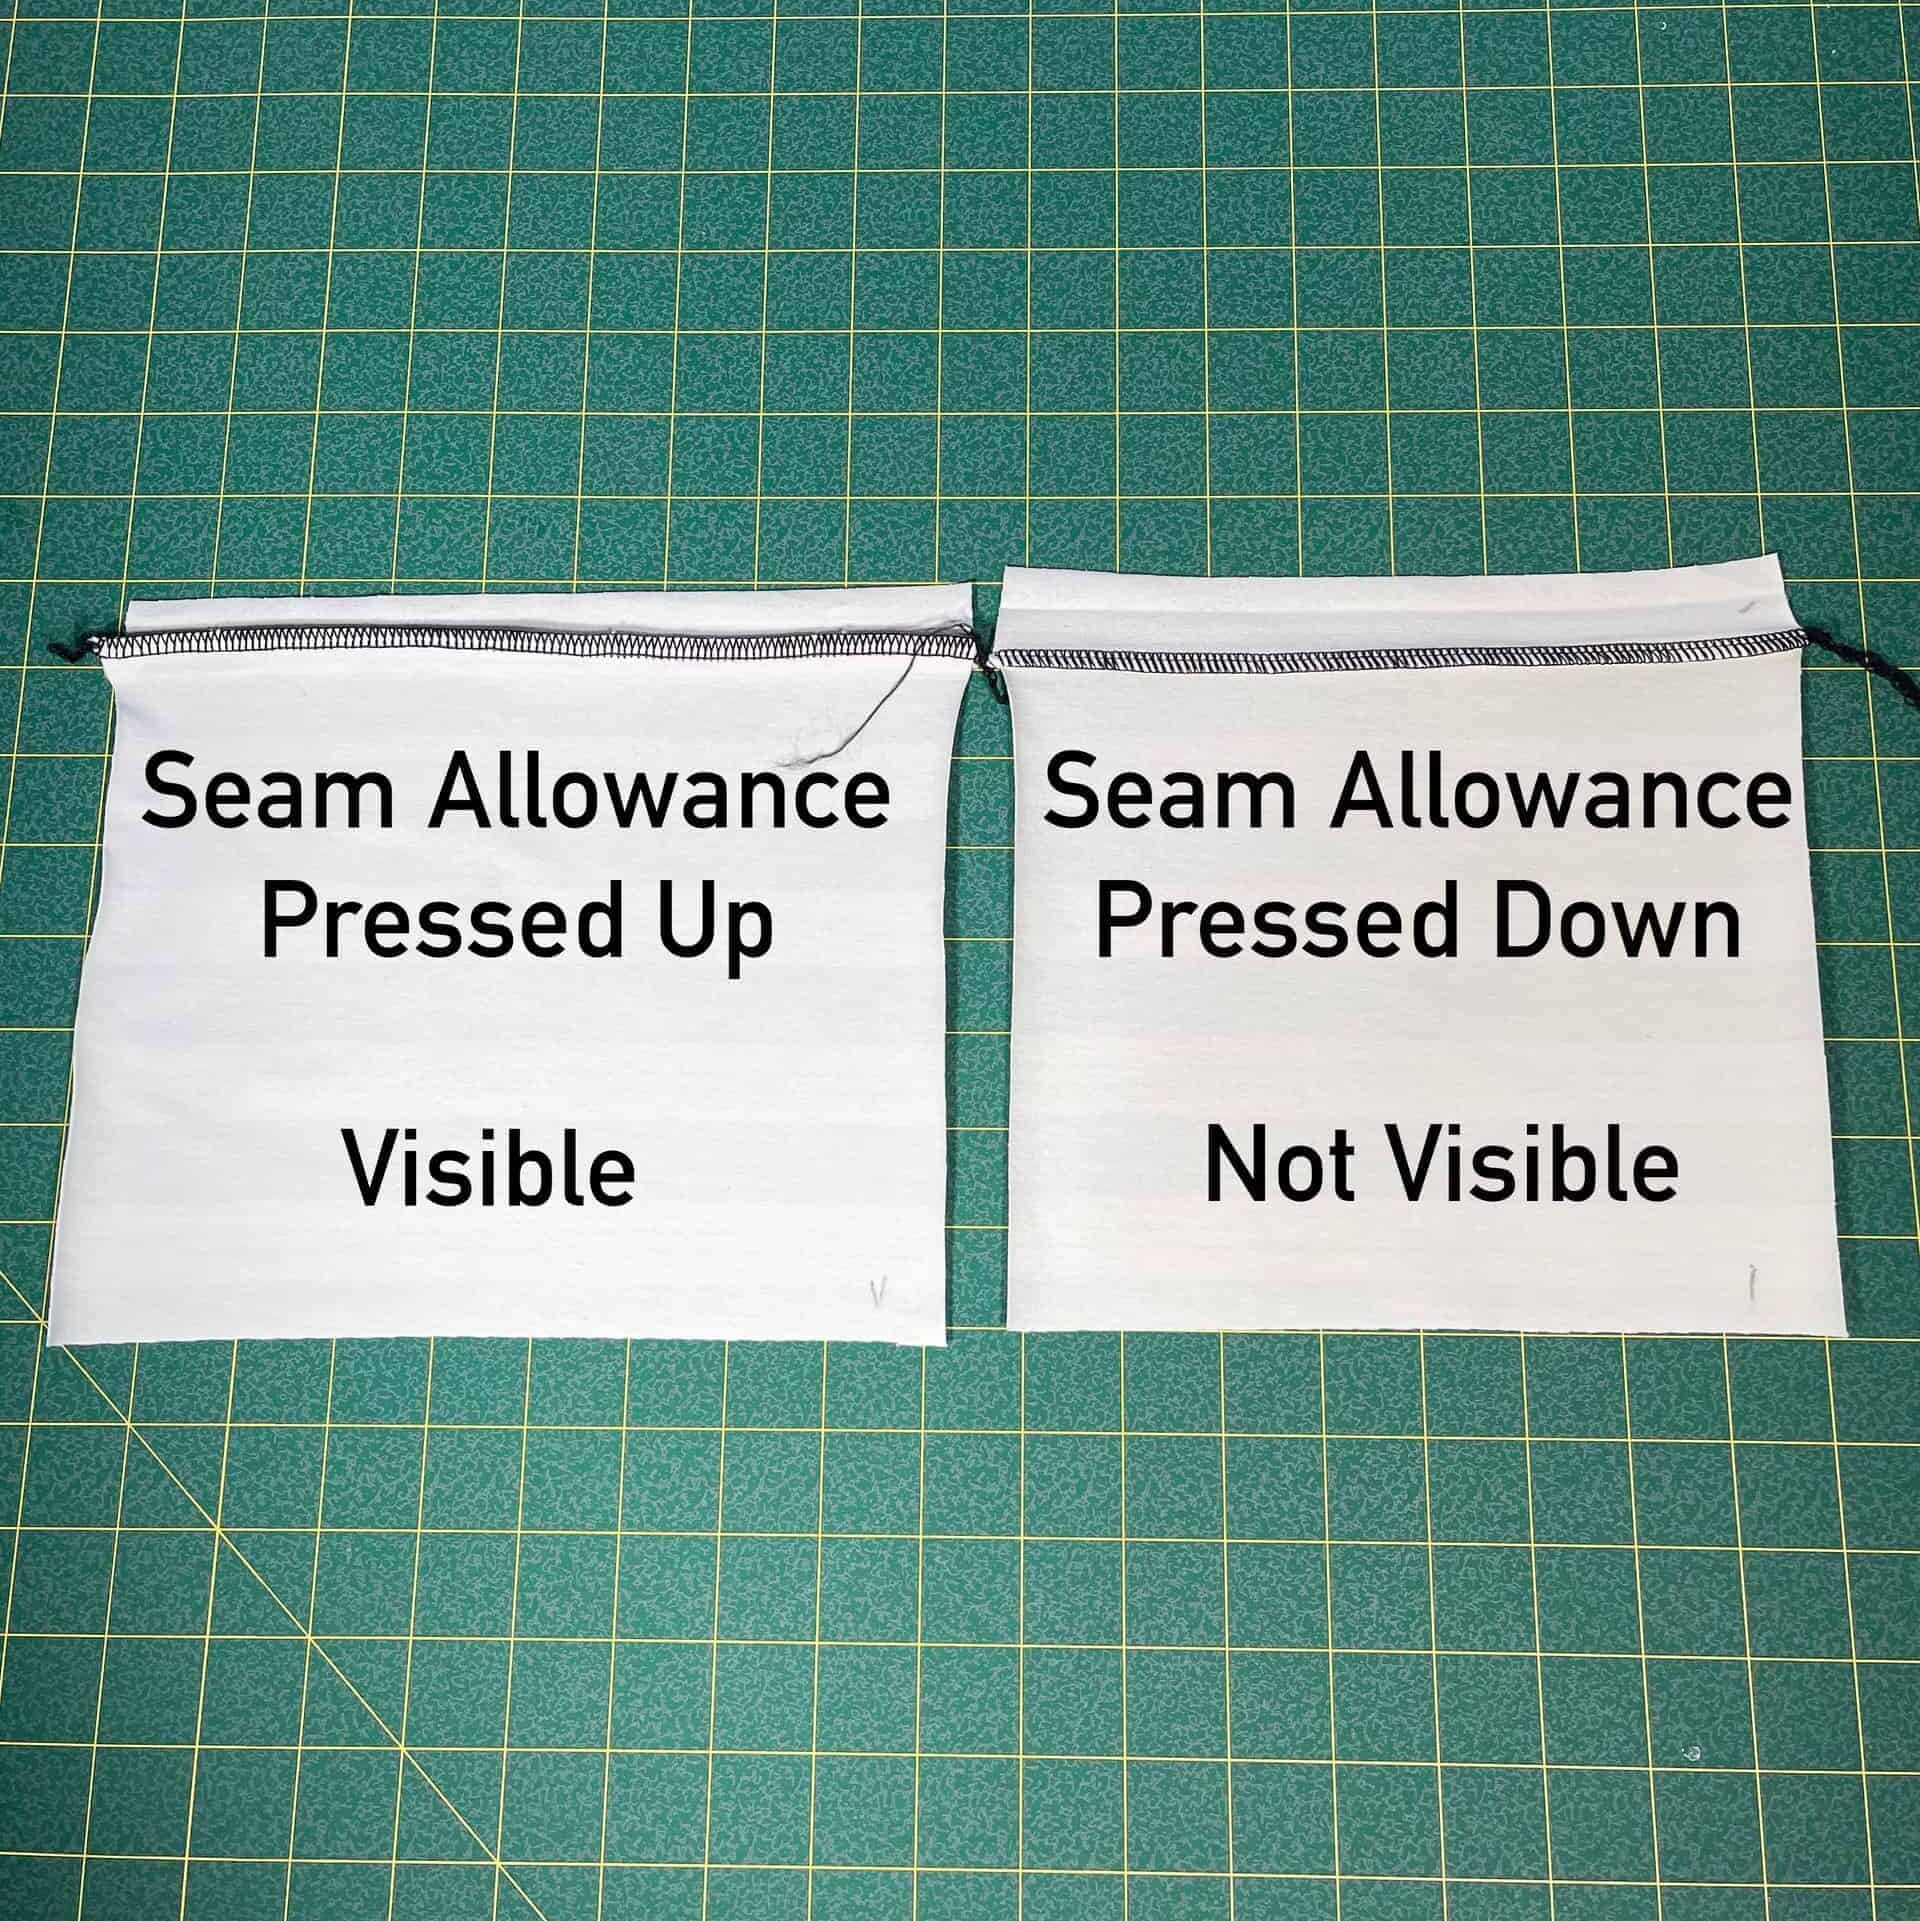
Through trial and error, I’ve found the best length for the knit binding for a ⅜” seam allowance with a visible binding is 1 ½” and not visible knit binding is 1 ⅜” . The seam allowance plays a big role in this calculation, so it would be different if you had a ¼” or ½” seam allowance. This is my preference, but you can go with what the pattern states or find what length suits you best.
What’s the best length for the binding?
I’ve found 1 ½” is best for visible knit binding with a ⅜” seam allowance.
This length measurement gives me the best amount to fold over and for the finish stitching to catch the raw edge without being leaving too much bulk. If you aren’t going to fold the raw edge in and tuck it under, you can just go with what the pattern recommends.
Step 2. Prepare the Binding
Spray liberally with Best Press or another spray starch.
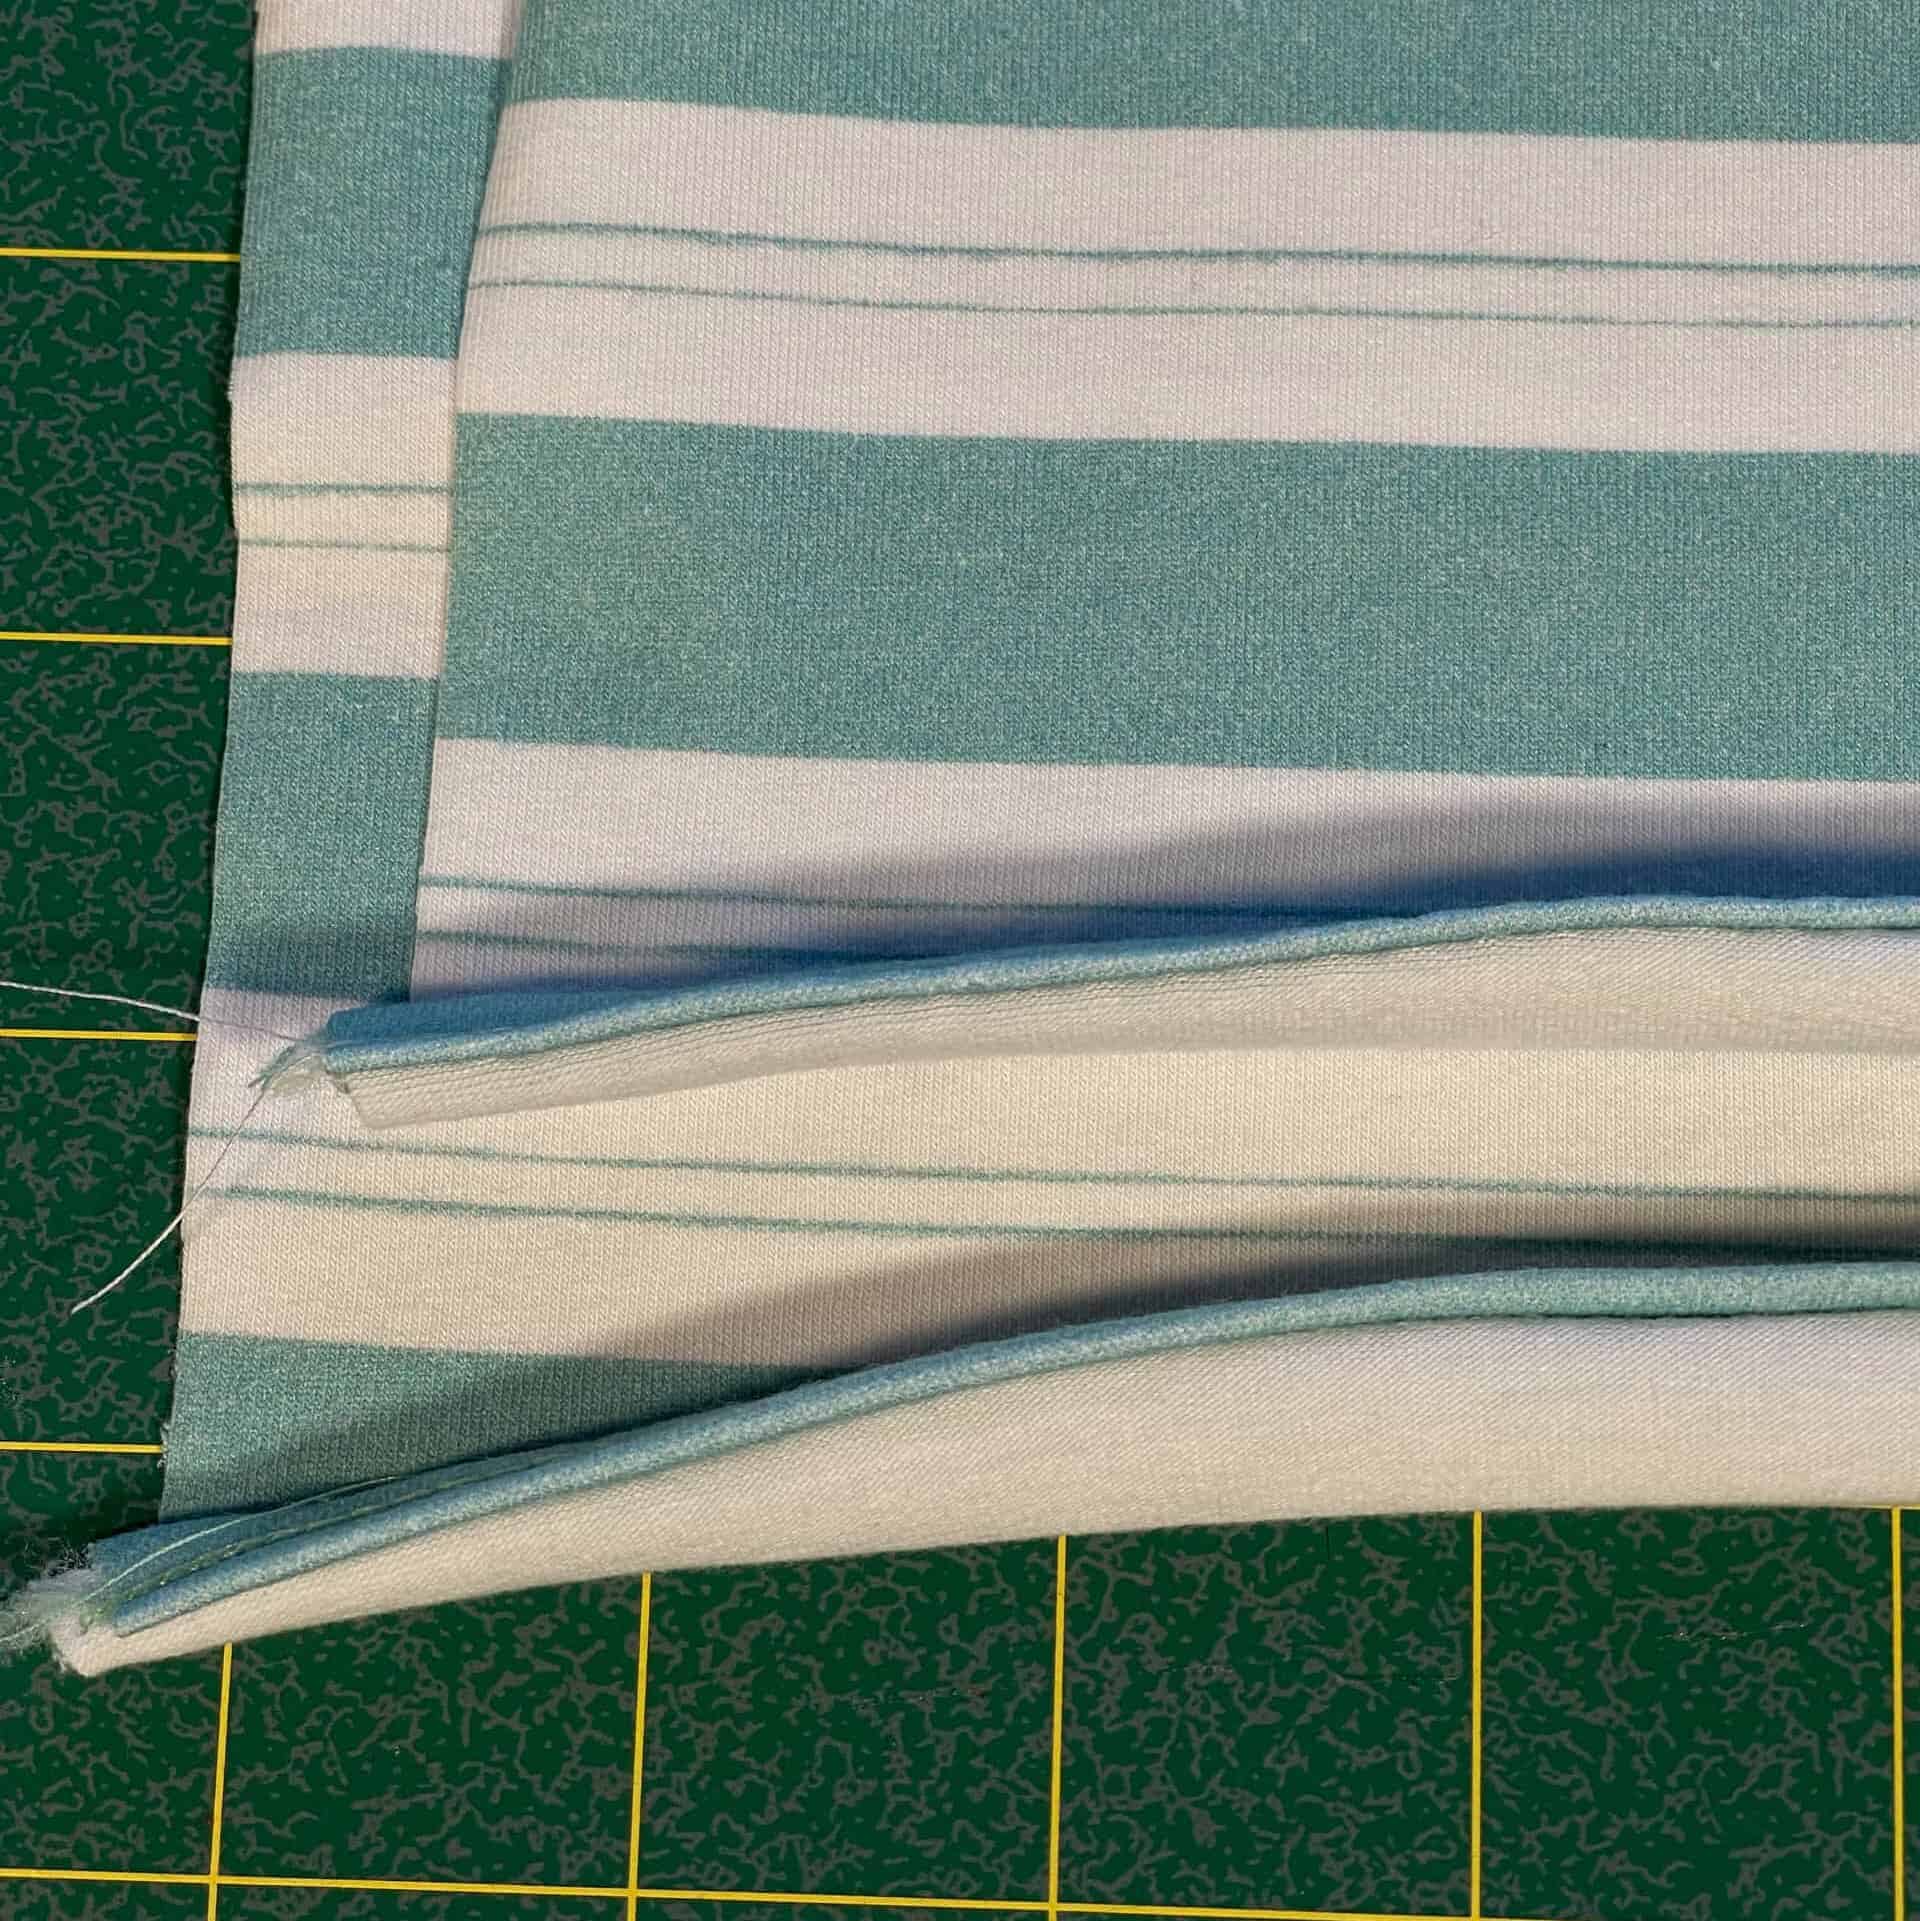
Step 3. Fold and Press
Fold and iron one long, raw edge toward the middle ⅜”, so you have a crease. Using lots of steam from your iron will help you achieve a crisp crease.
Step 4. Clip Binding to Main Fabric
Now working with the long side of the binding, that you did not iron toward the center, clip/pin the right side of your knit binding to the right side of your garment.
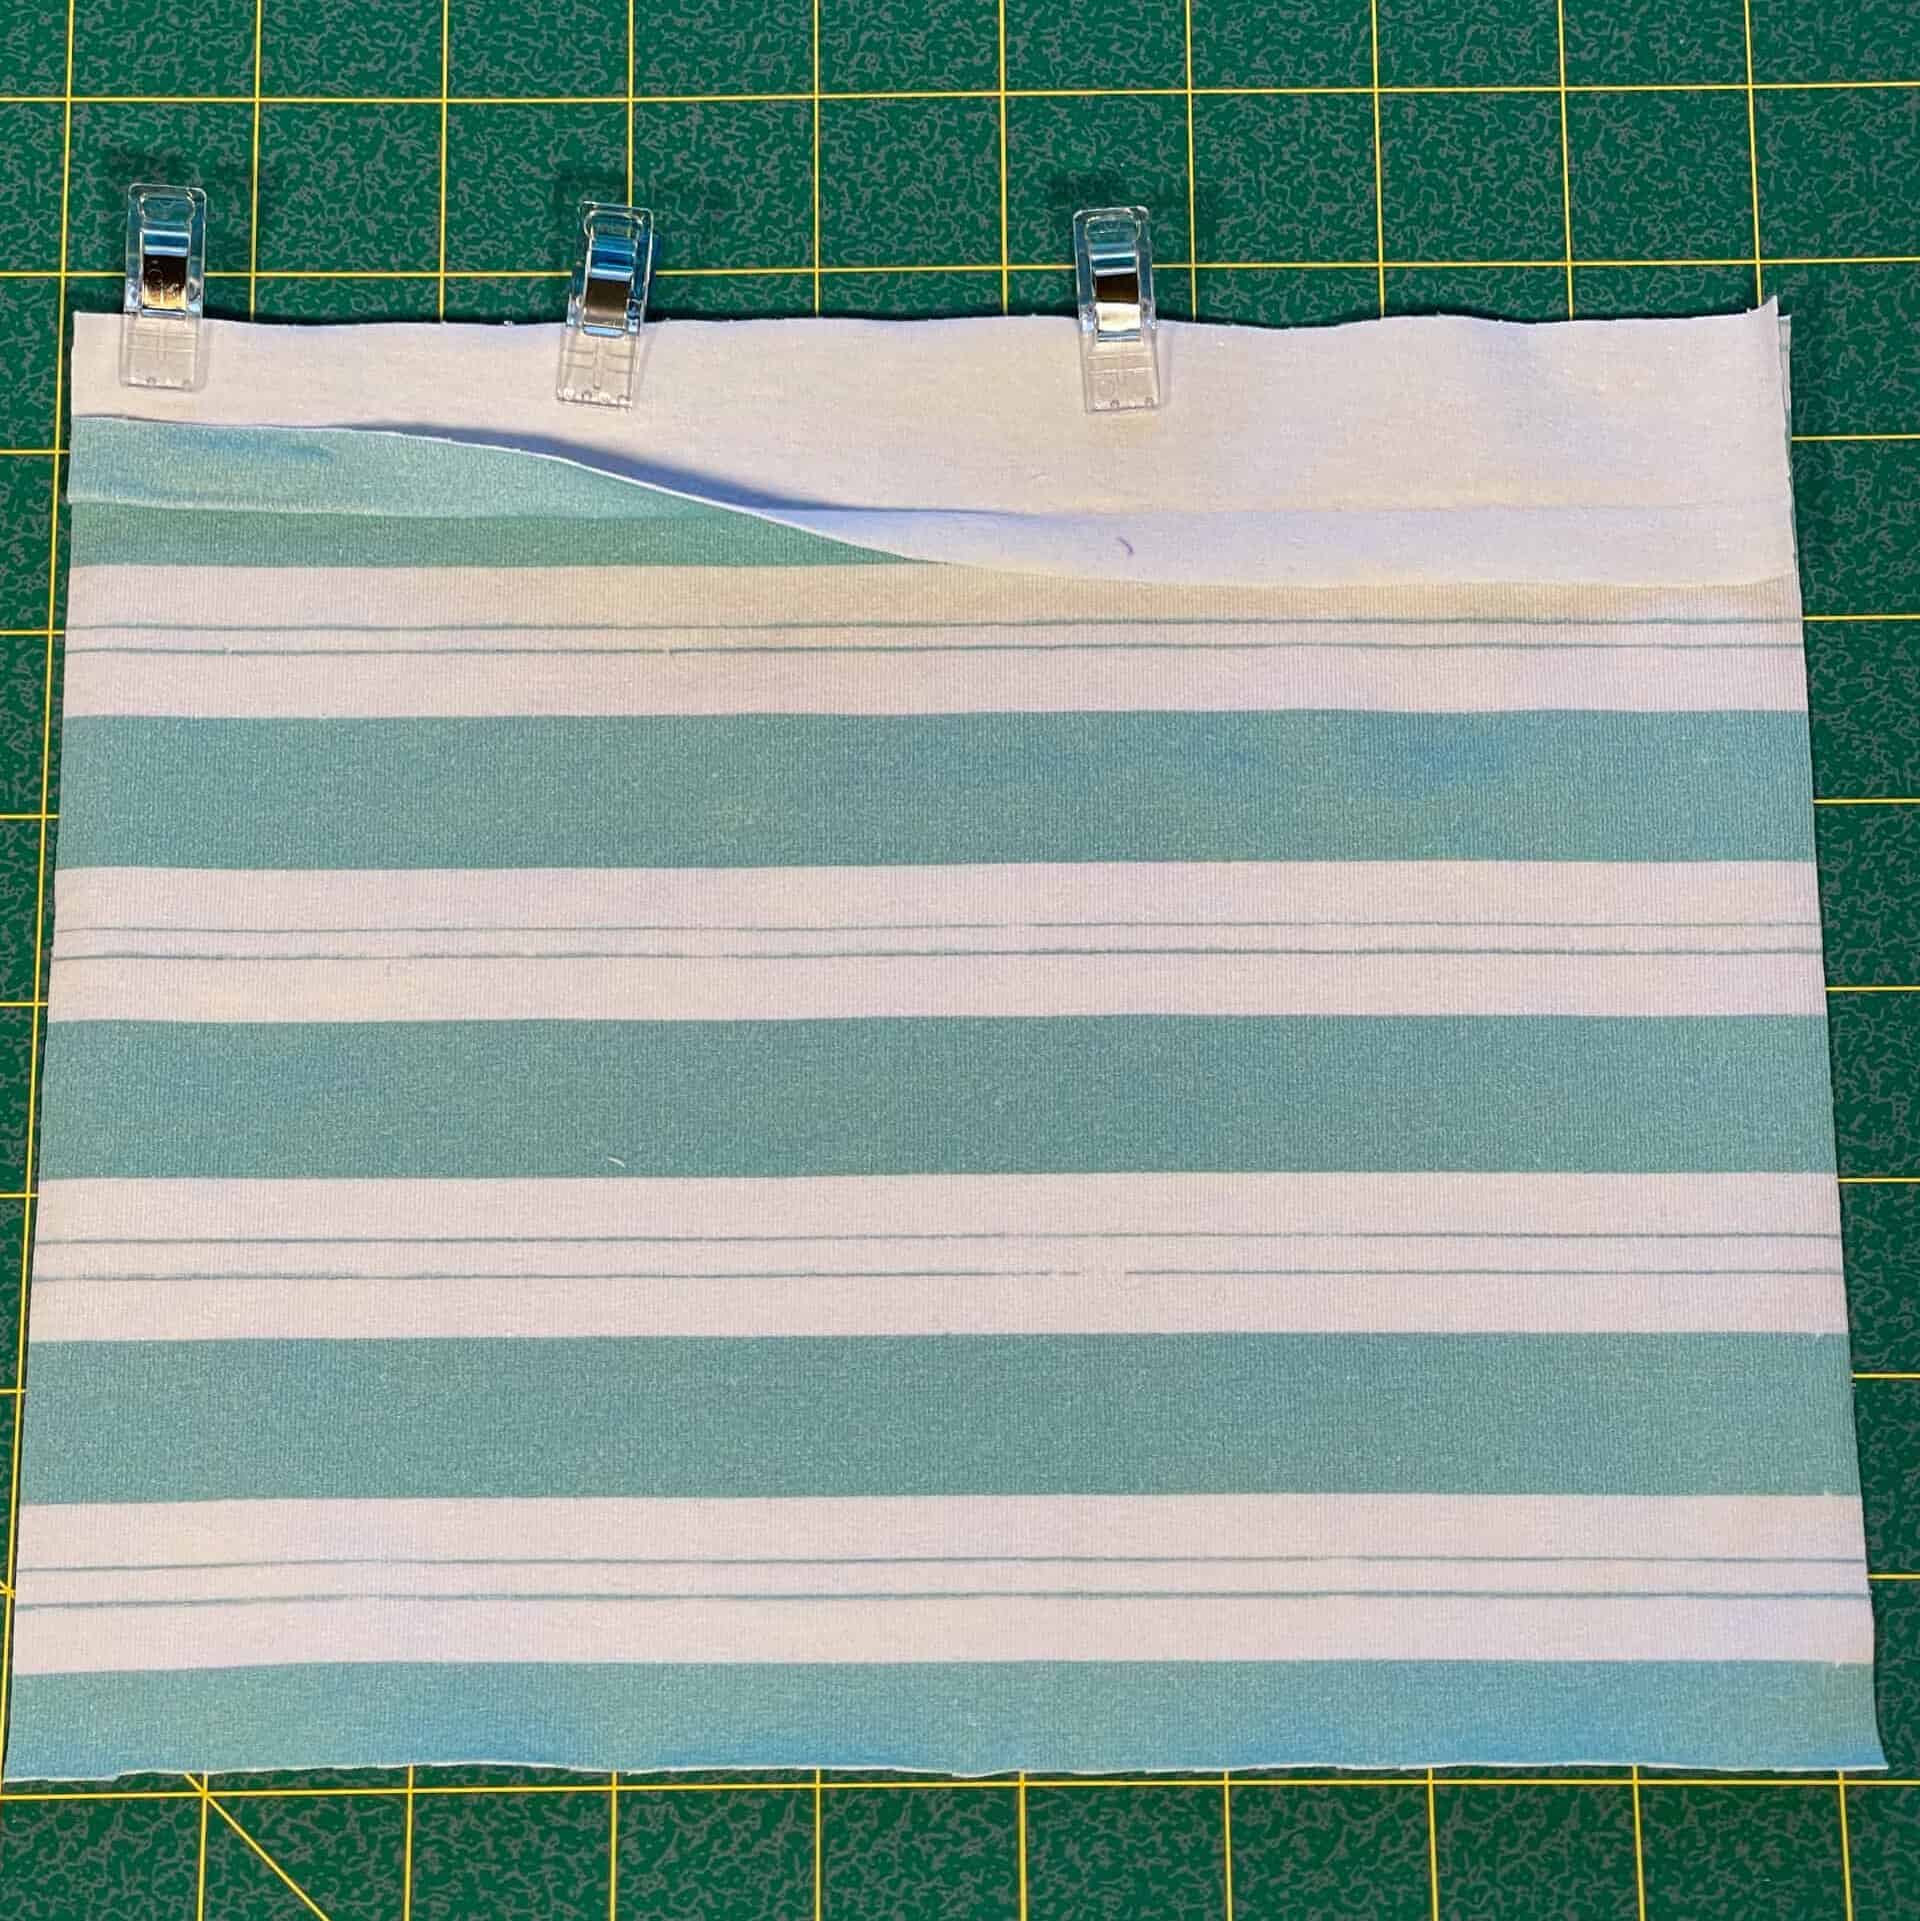
Step 5. Serge or Stitch to Garment
Serge or stitch the binding to your garment with a 3/8″ seam allowance.
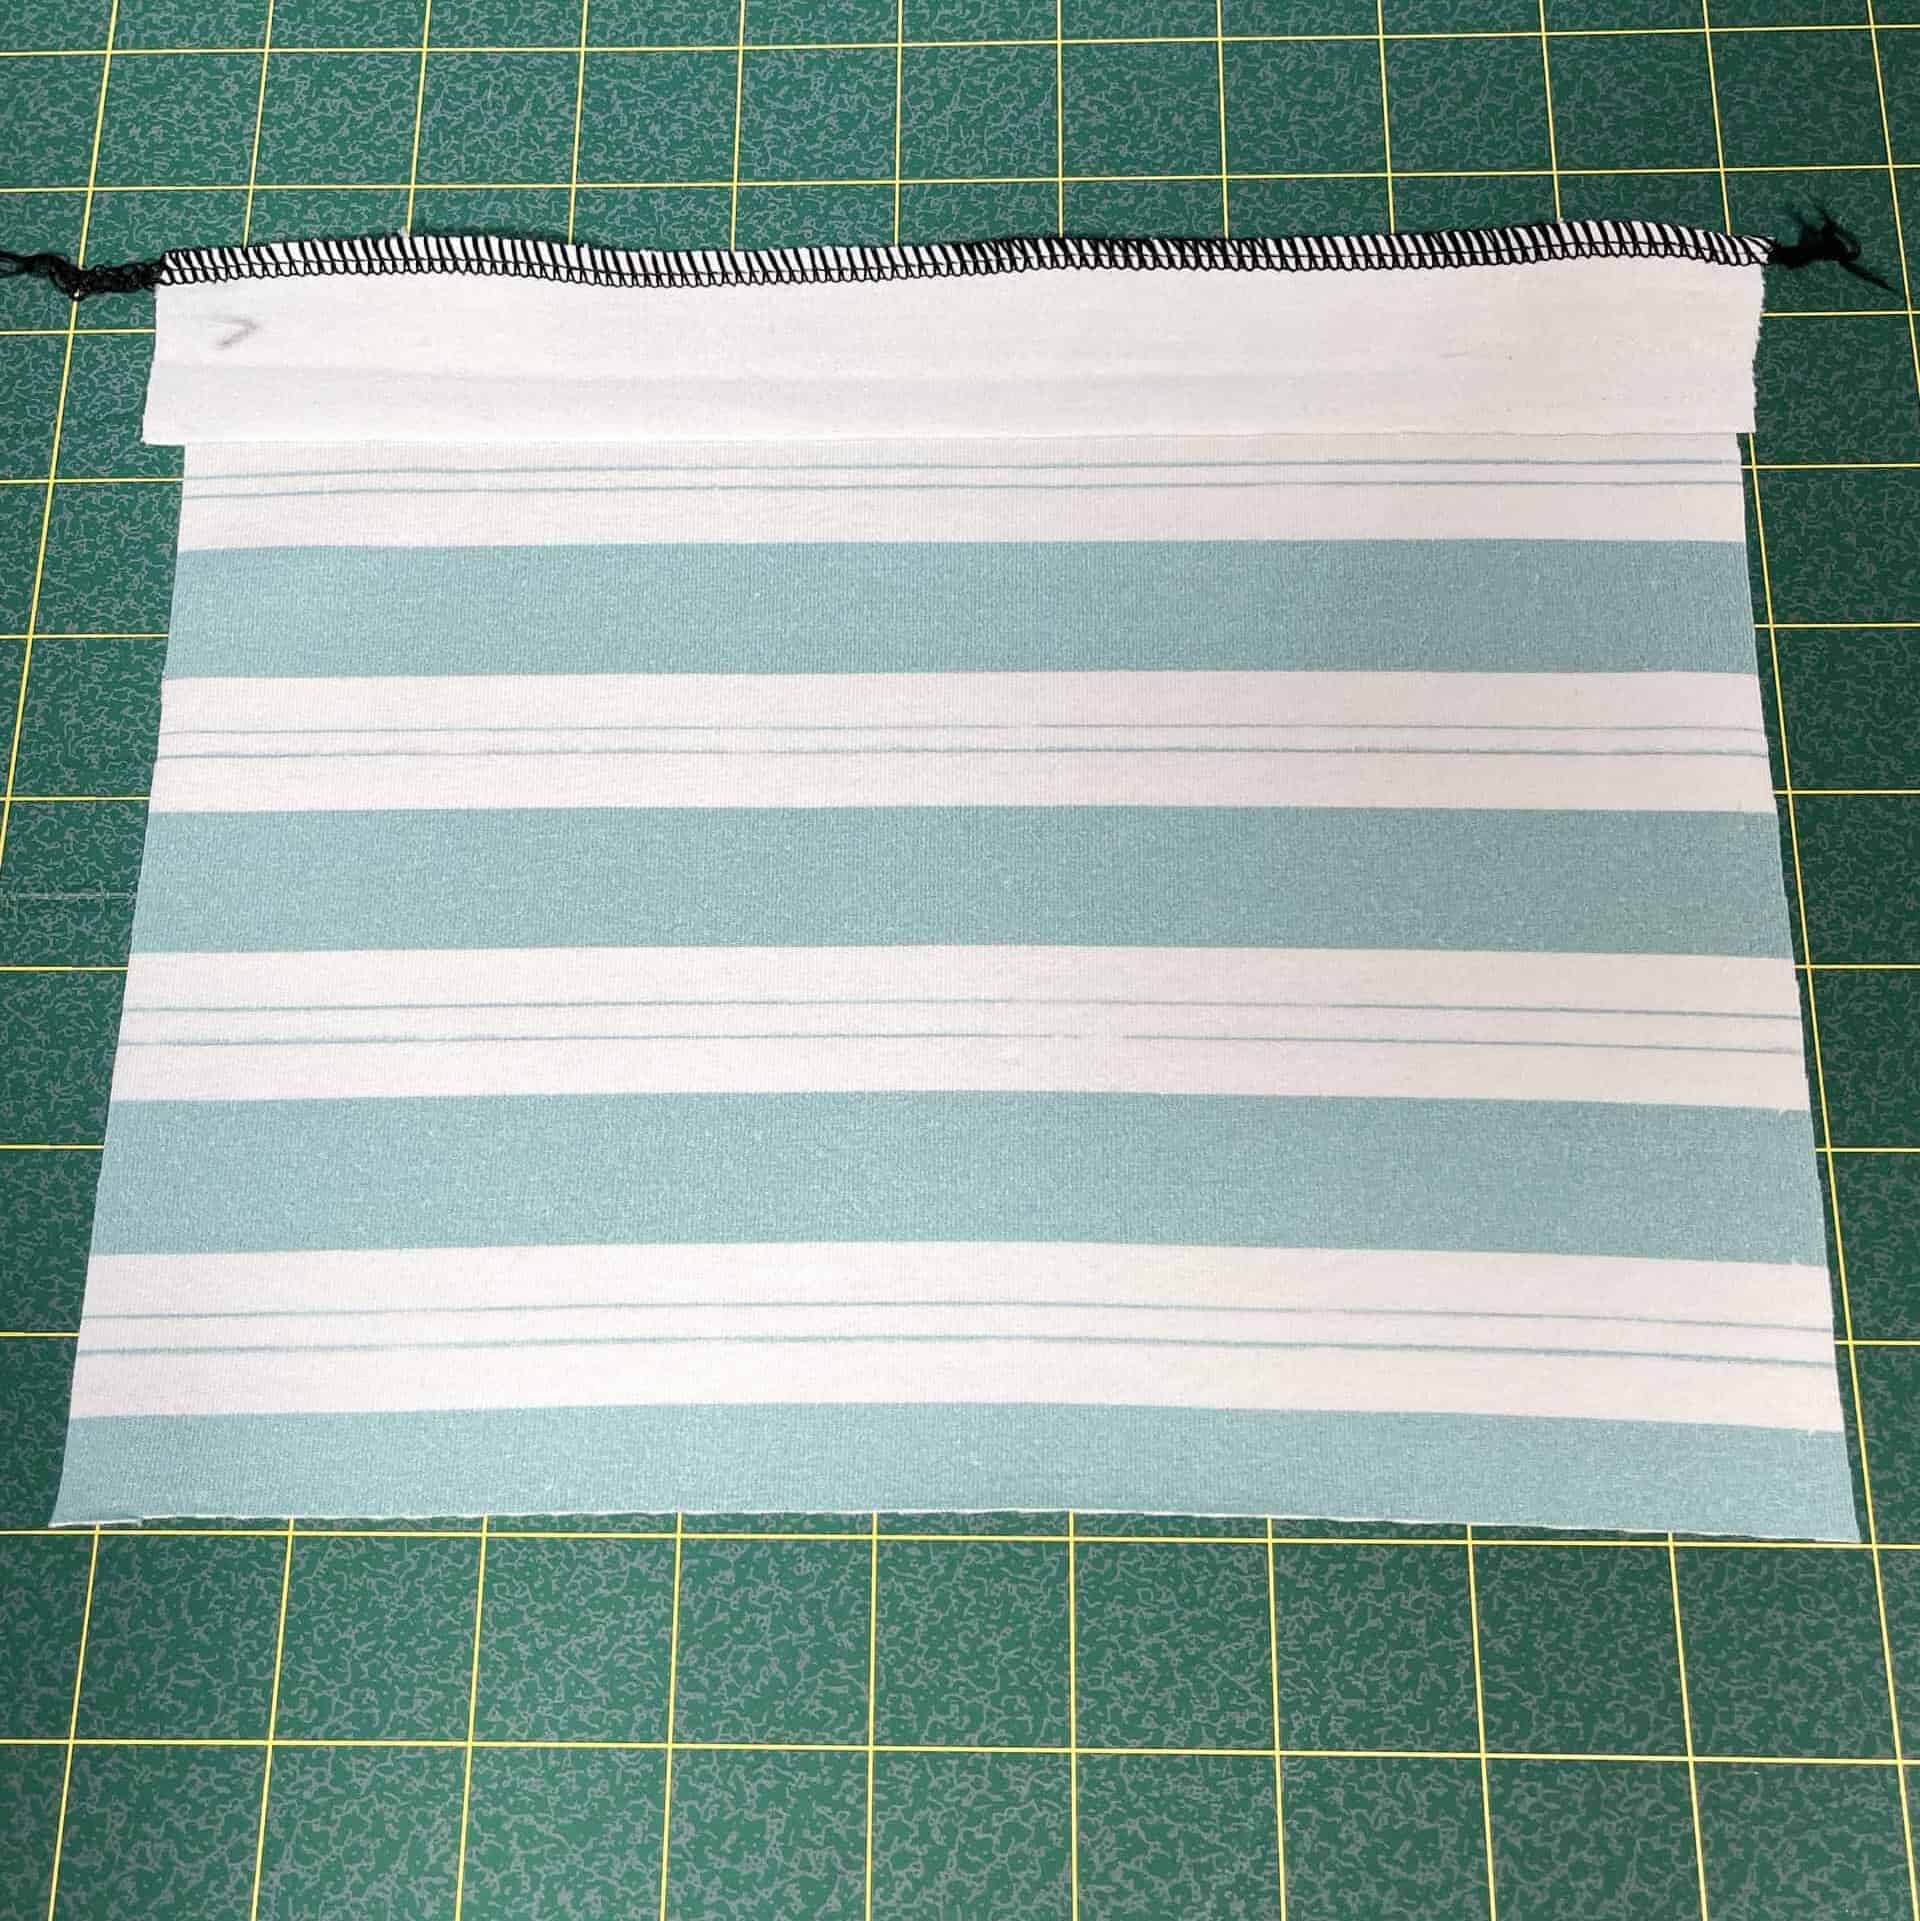
Step 6. Arrange Seam Allowance
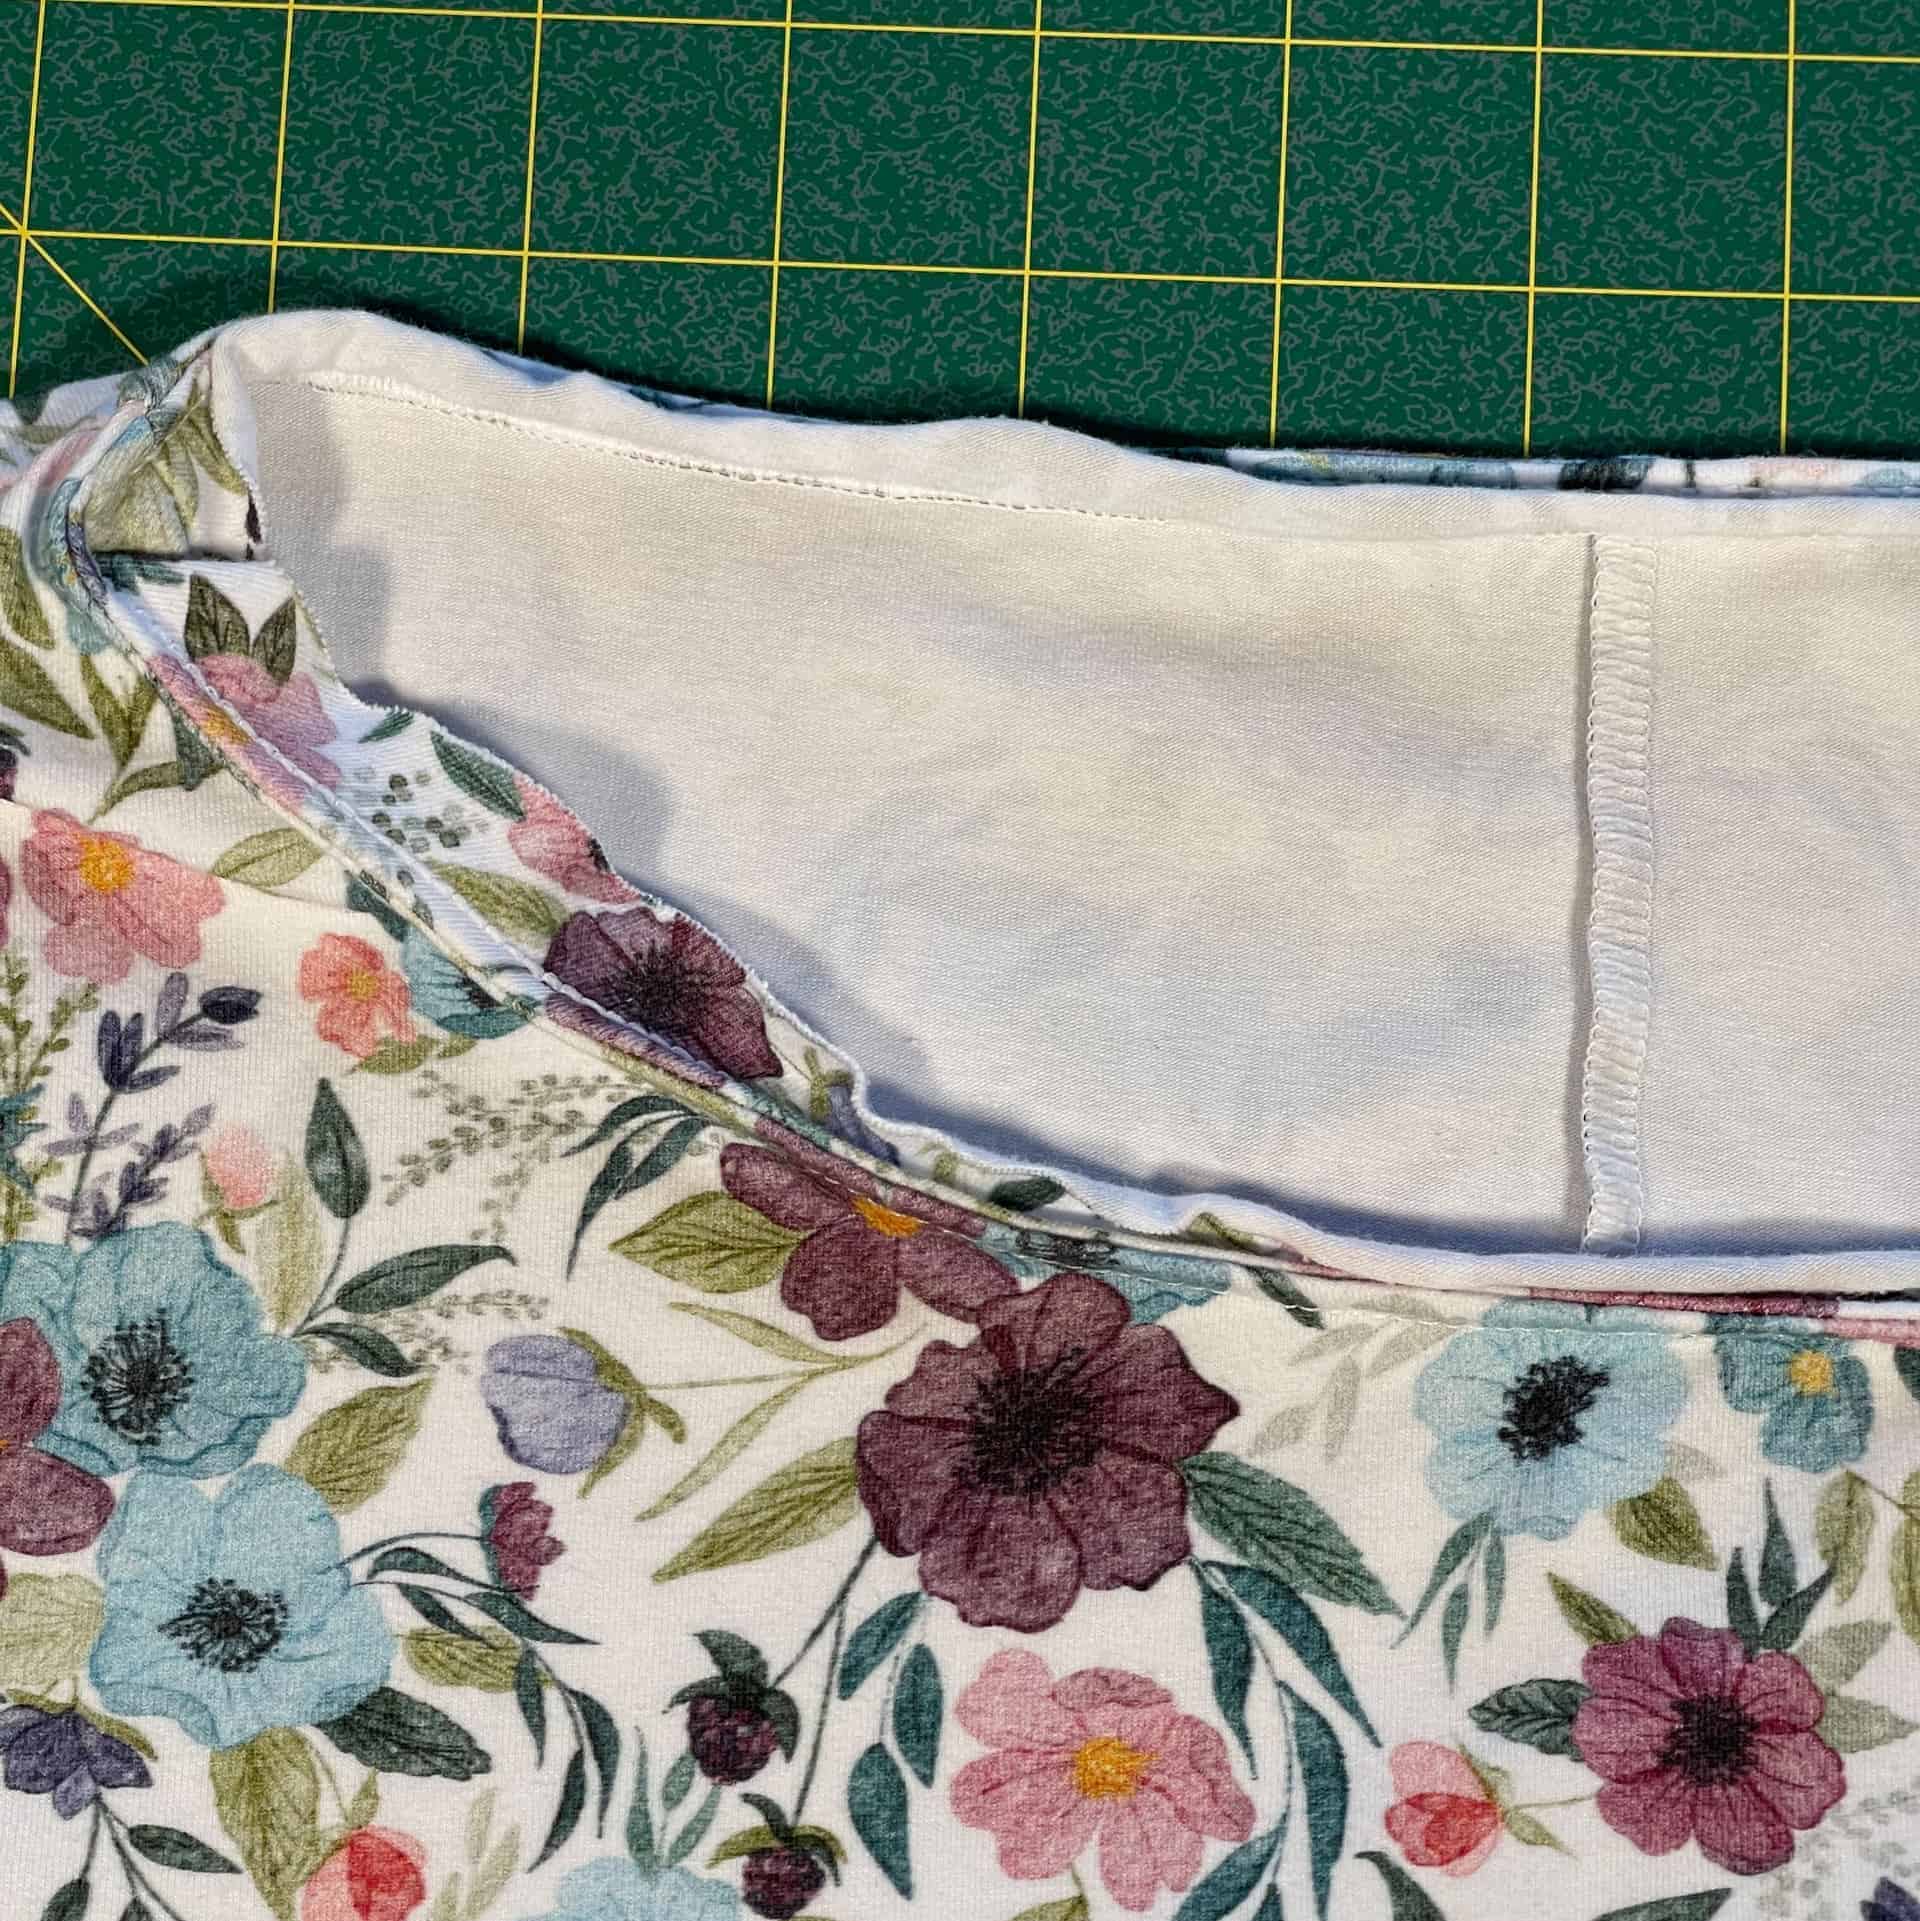
Fold the raw edge of the fabric into the crease you ironed towards the center at ⅜”. This is where the instructions deviate just a bit for visible and not visible binding. The primary difference is the position of your seam allowance and how you tuck around the binding.
You use the same process if you are just going to trim your extra binding in the back, but just fold over and pin. You will not need to fold it under, because you’ll just trim the excess.
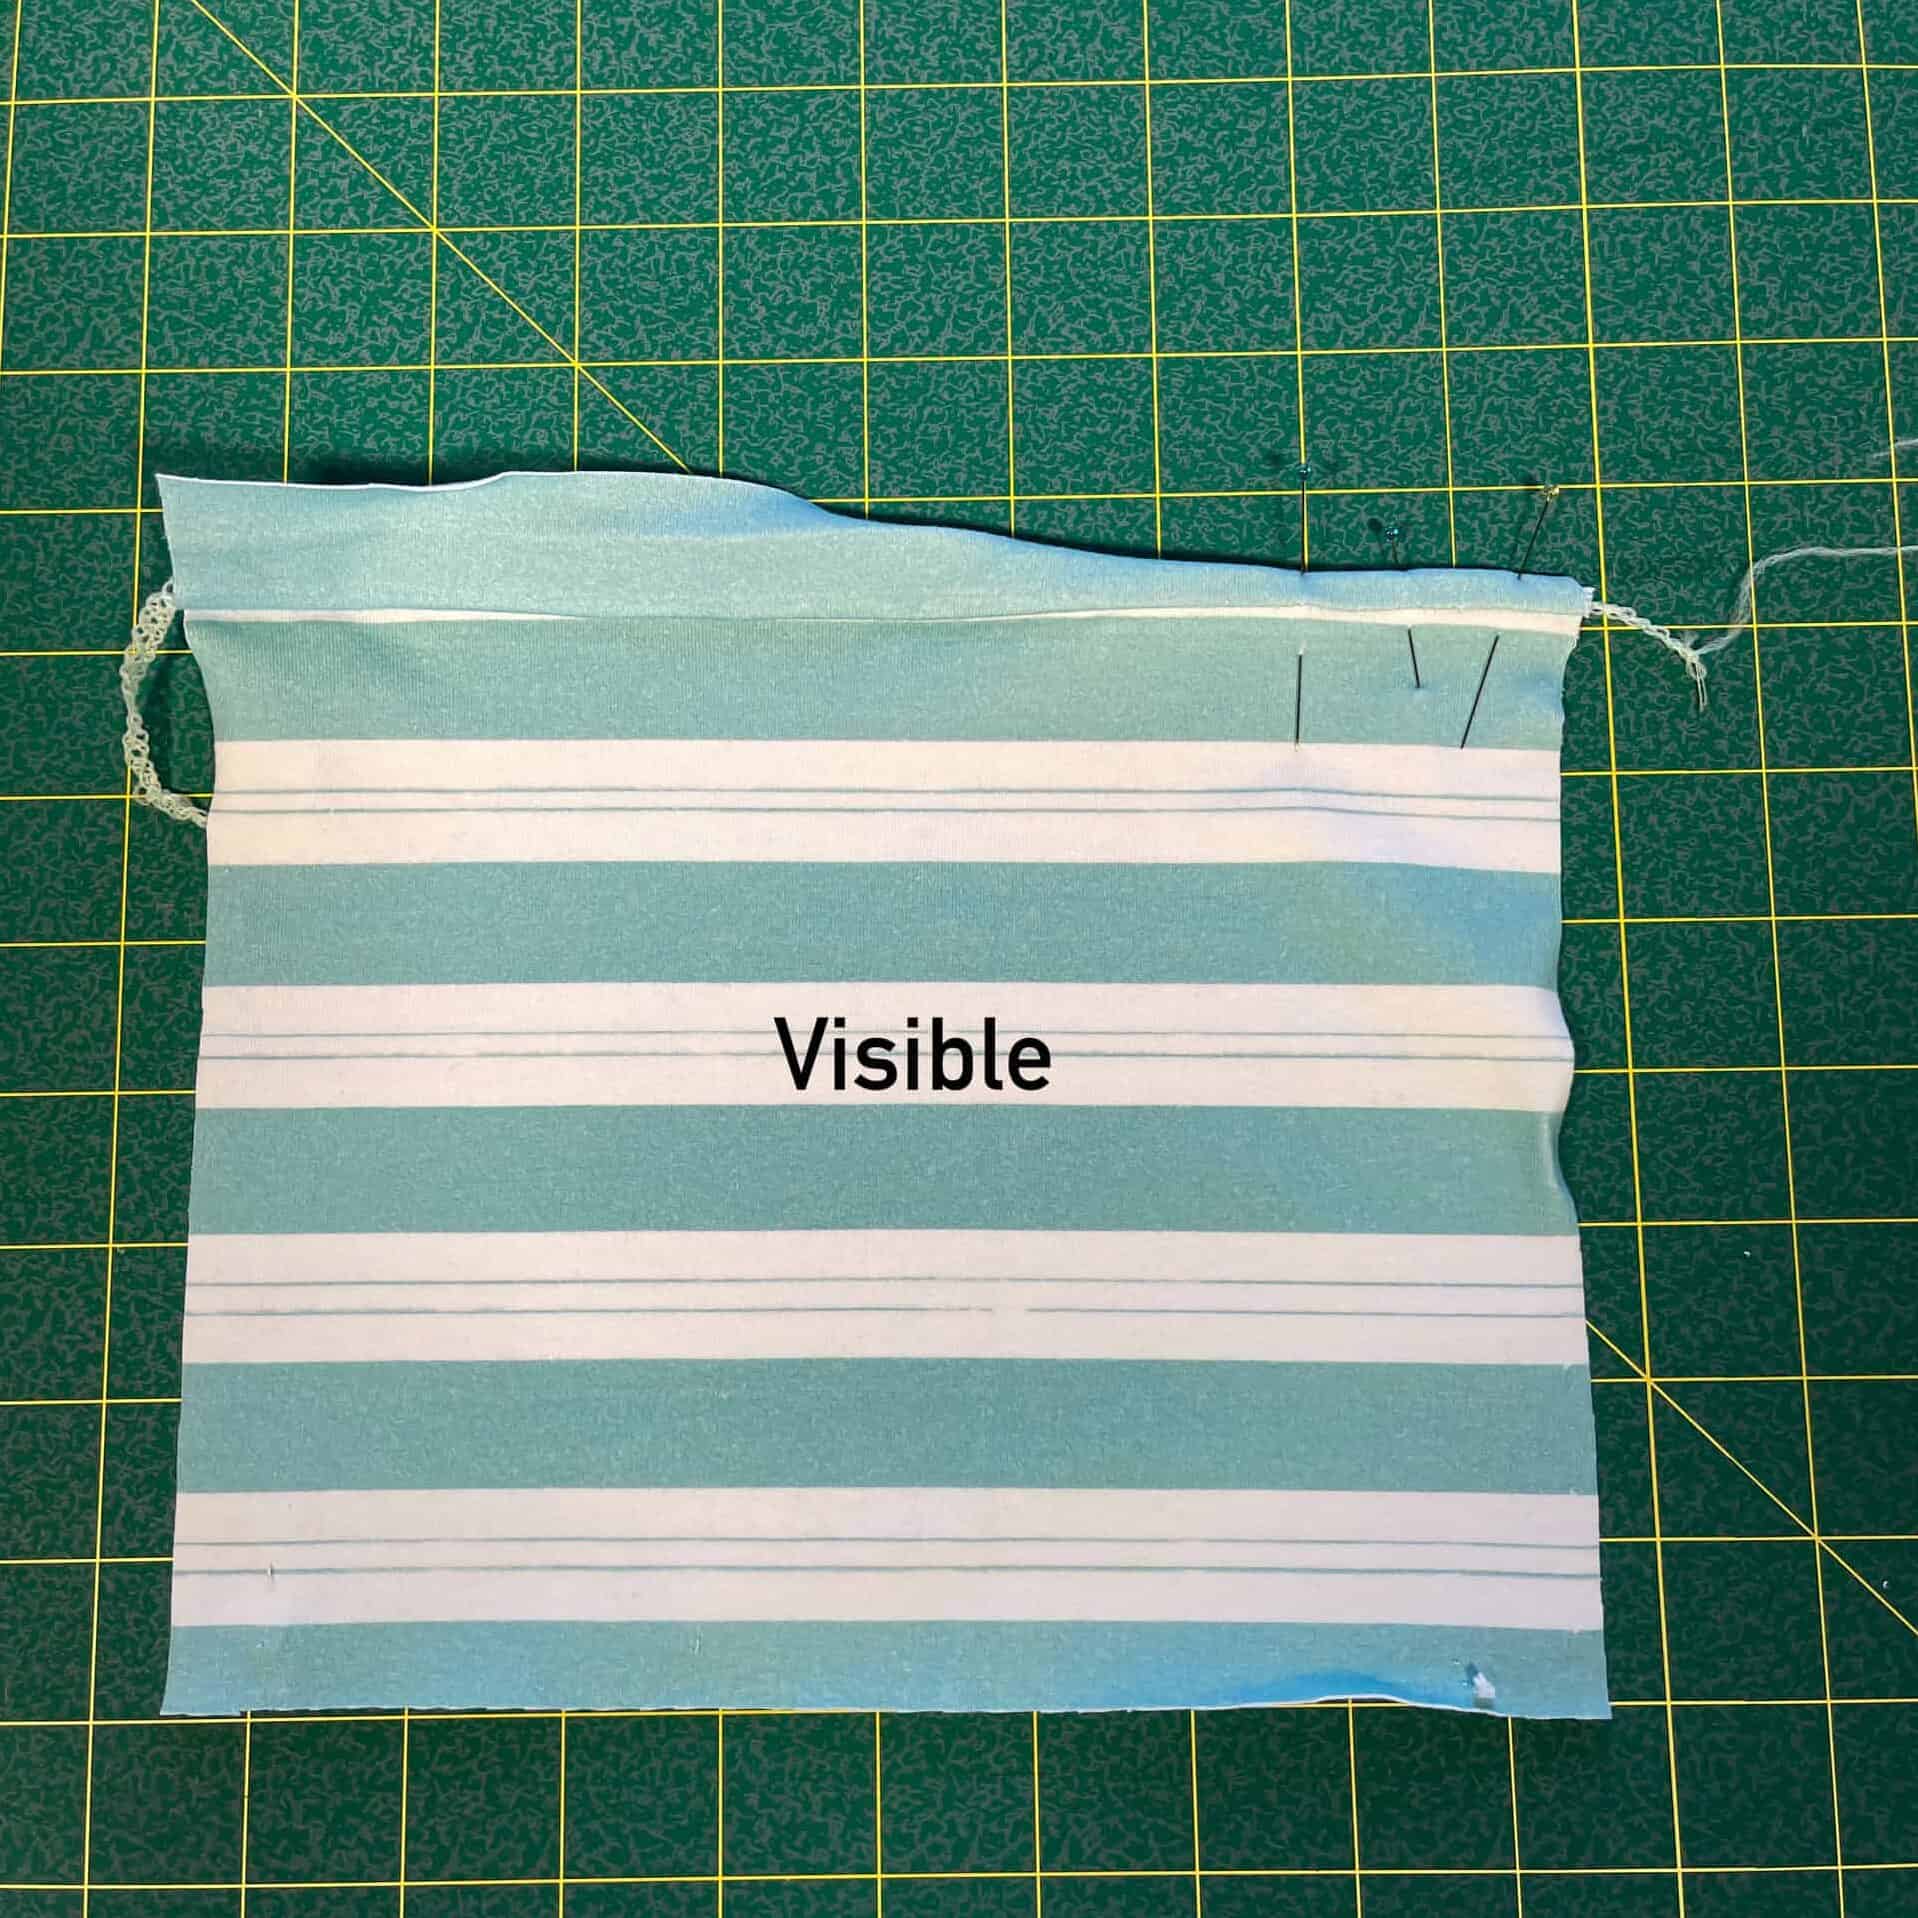
Step 7a. Wrap Binding Around Seam Allowance
For the visible binding, leave your seam allowance up and wrap the binding piece around your seam allowance to the back.
Step 8a. Clip together, raw edge tucked in
Then, clip/pin together, the raw edge should be tucked in so your stitching in the next step will catch it.
Step 7b. Fold Down and Wrap to Back
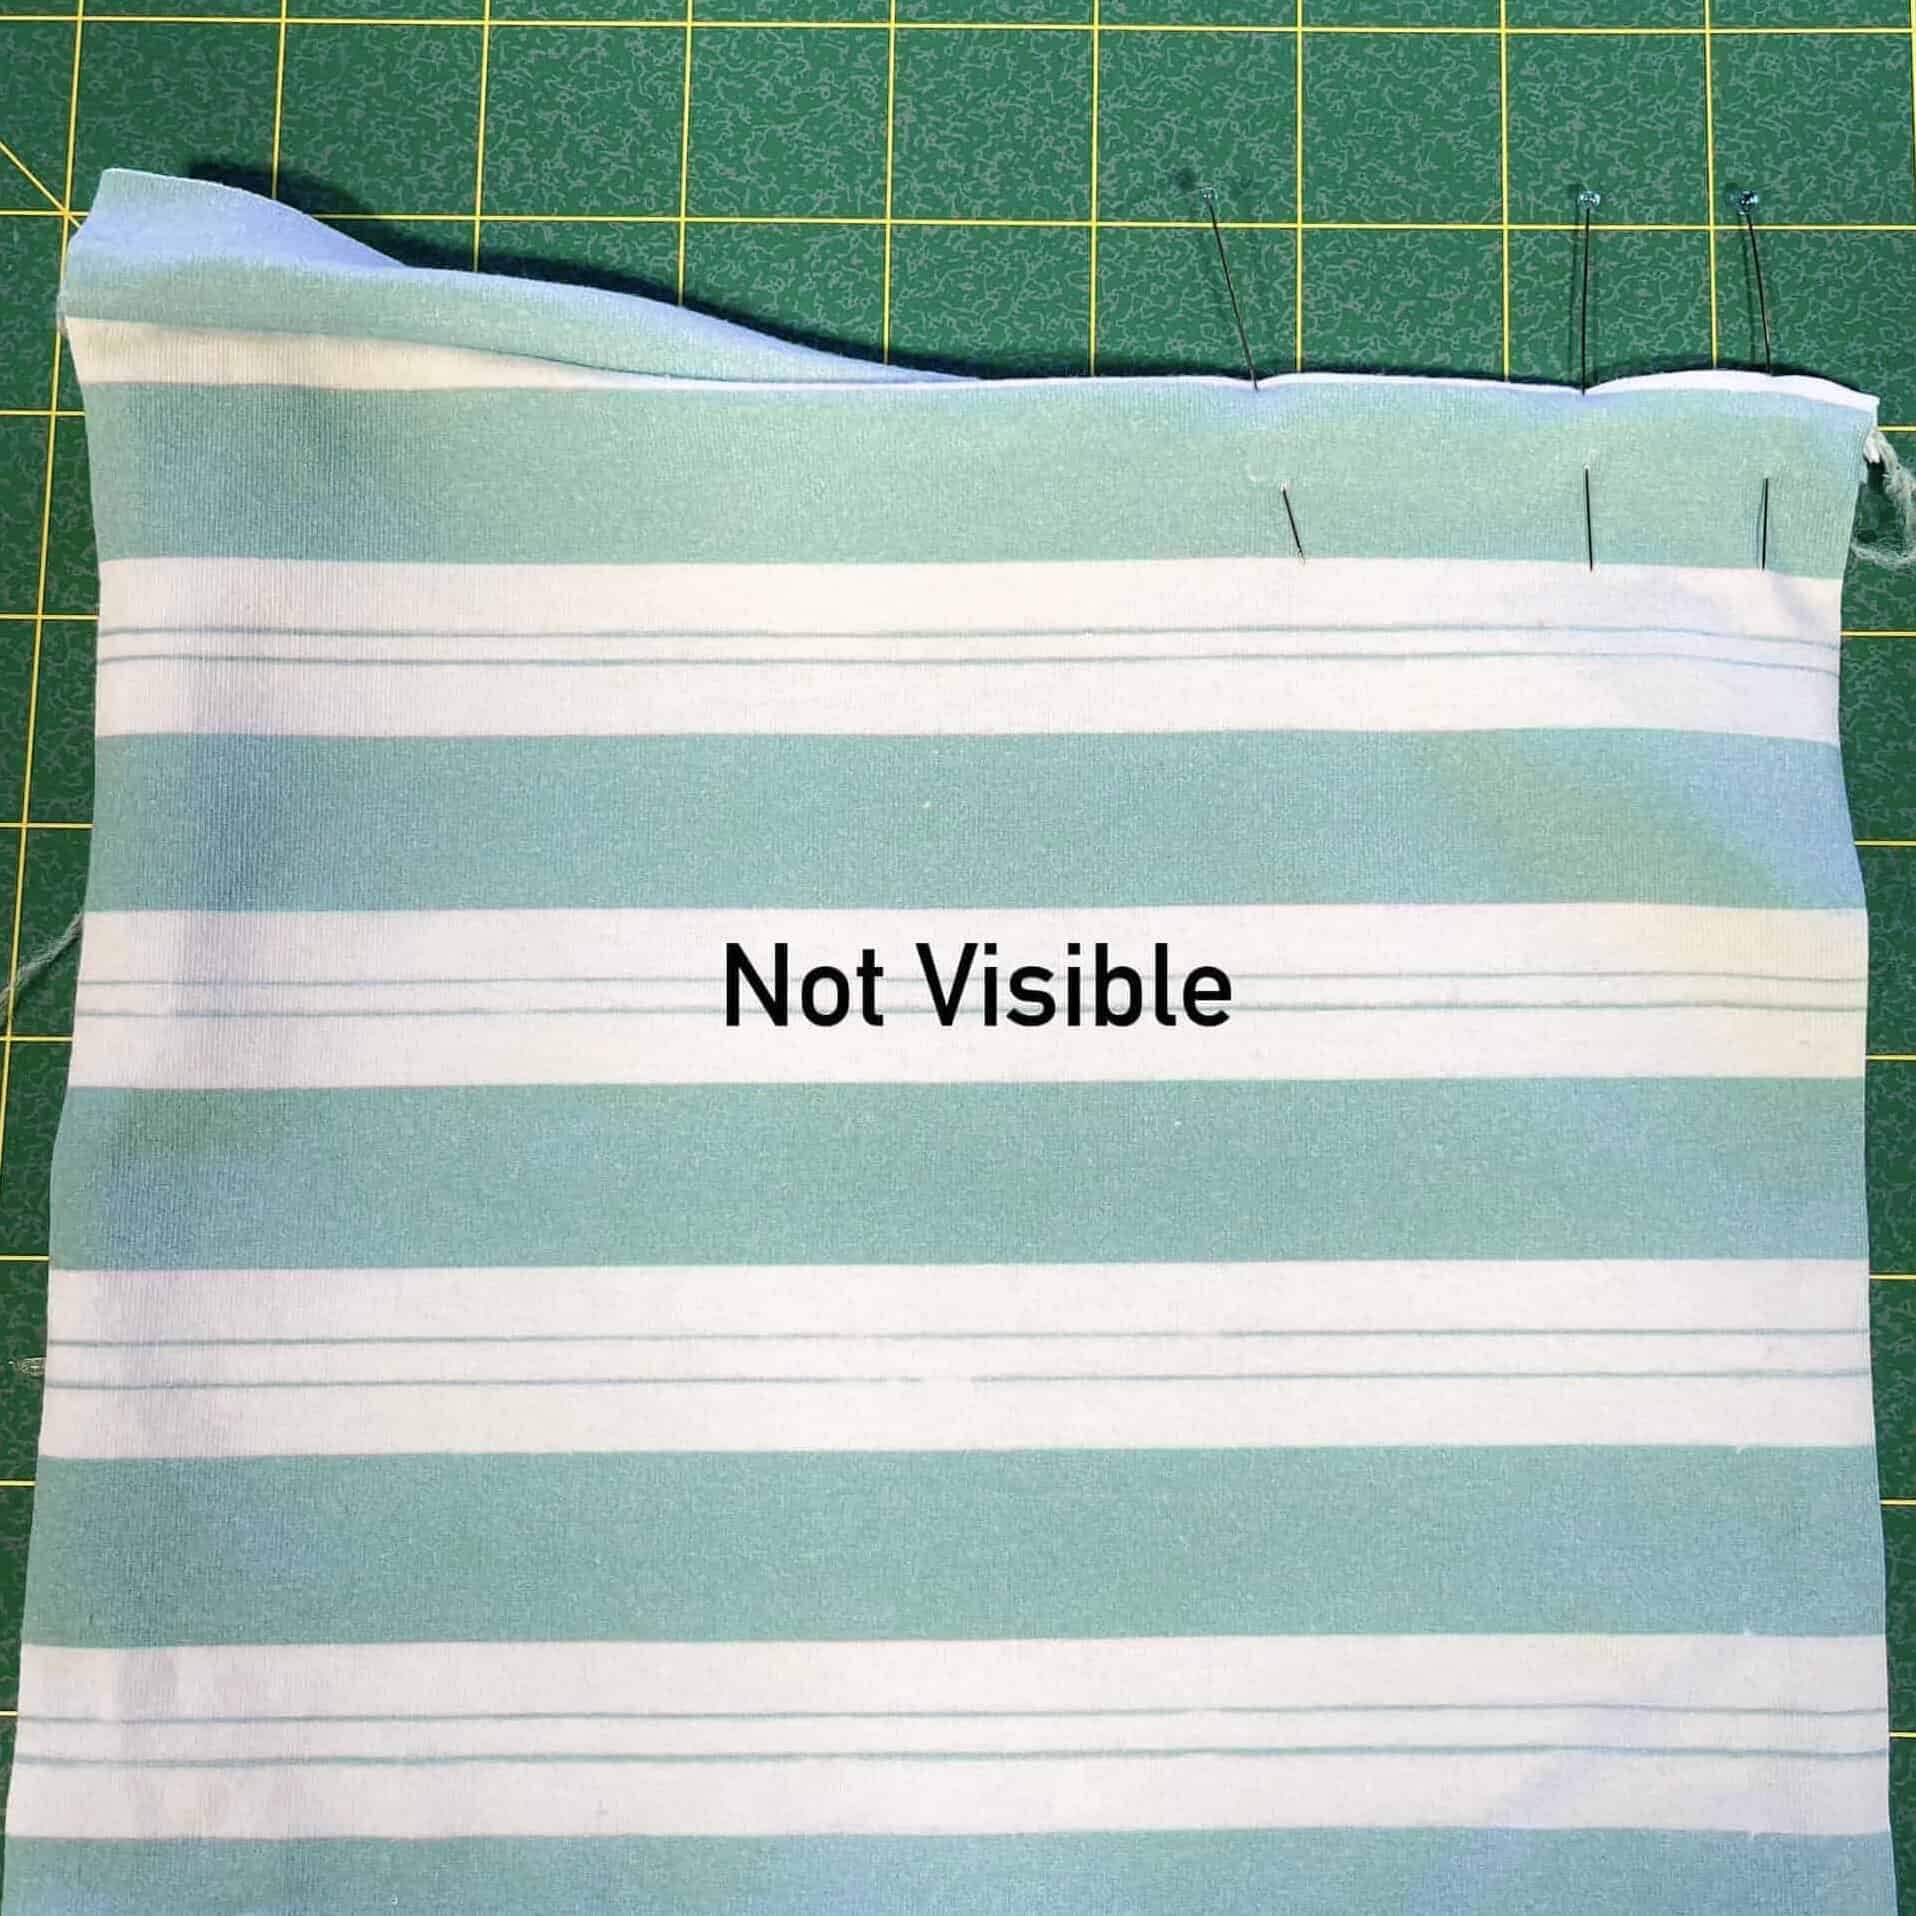
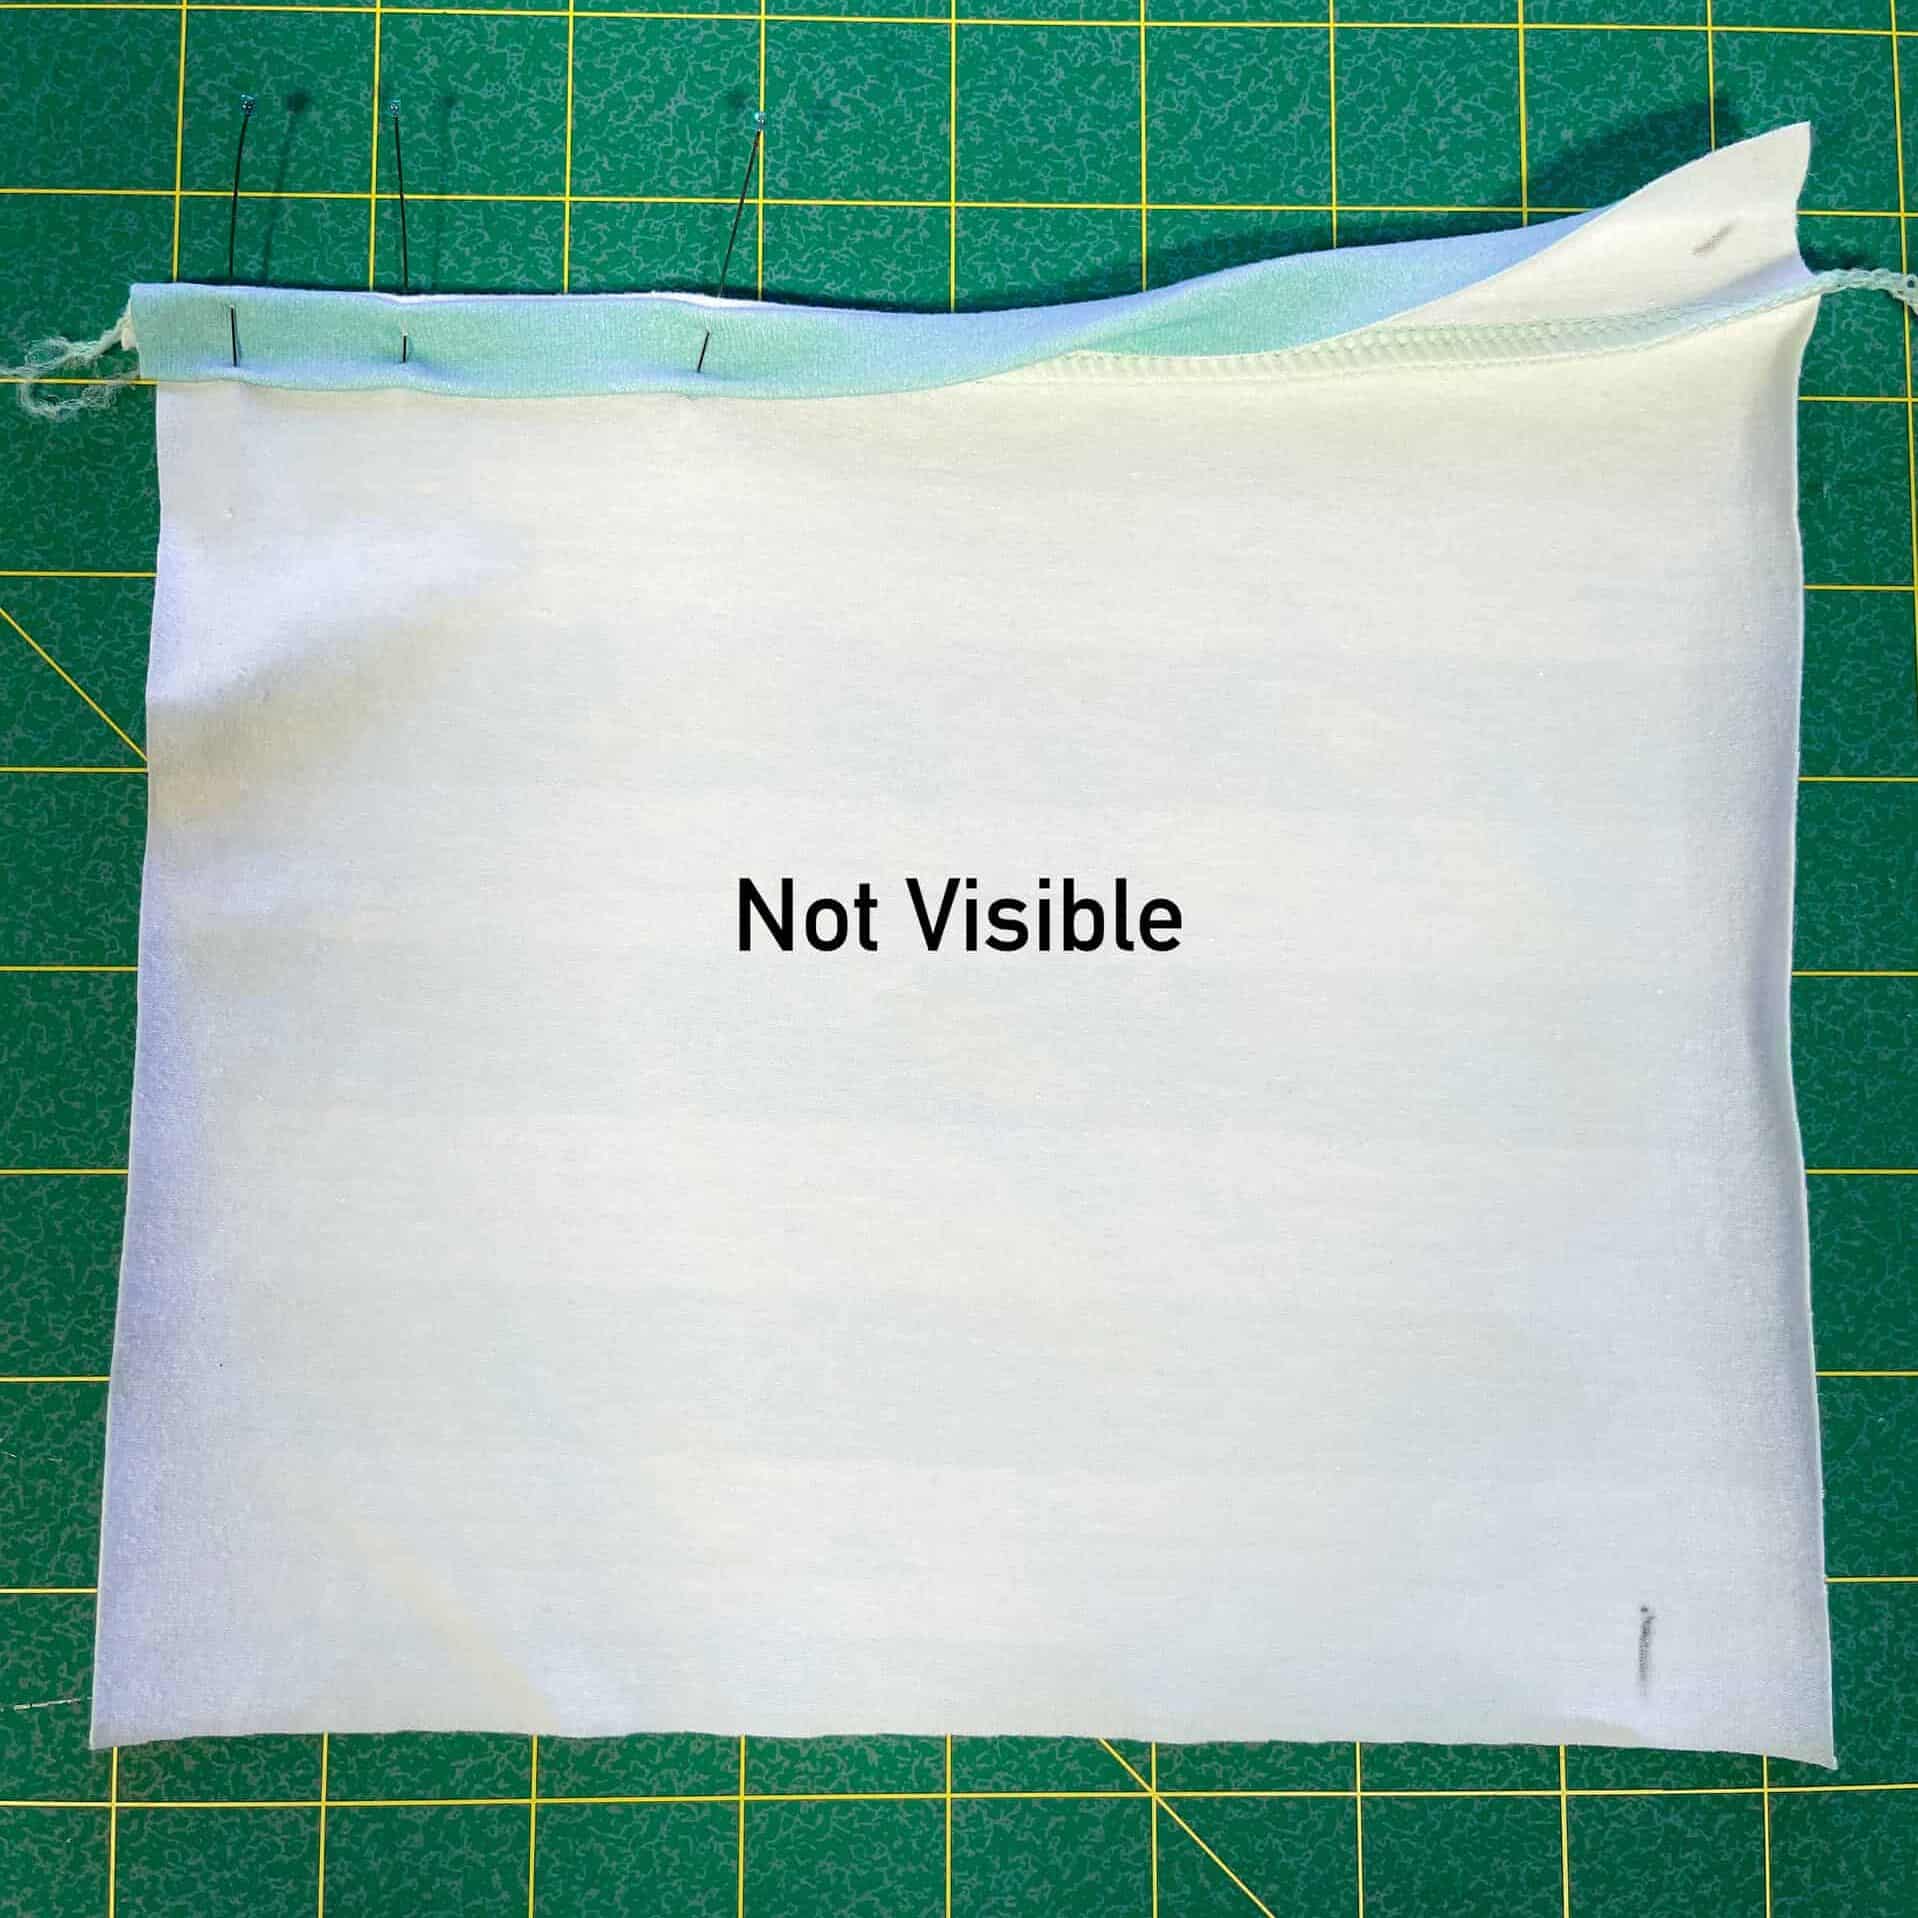
For the not visible binding, fold your seam allowance down and wrap the binding piece around your seam allowance to the back, so none of the binding is visible.
Step 8b. Clip so raw edge is tucked in.
Then, clip/pin together, the raw edge should be tucked in so your stitching in the next step will catch it.
Save this post for later.
Pin it to your sewing board now!
Step 9. Continue clipping/pinning the entire binding.
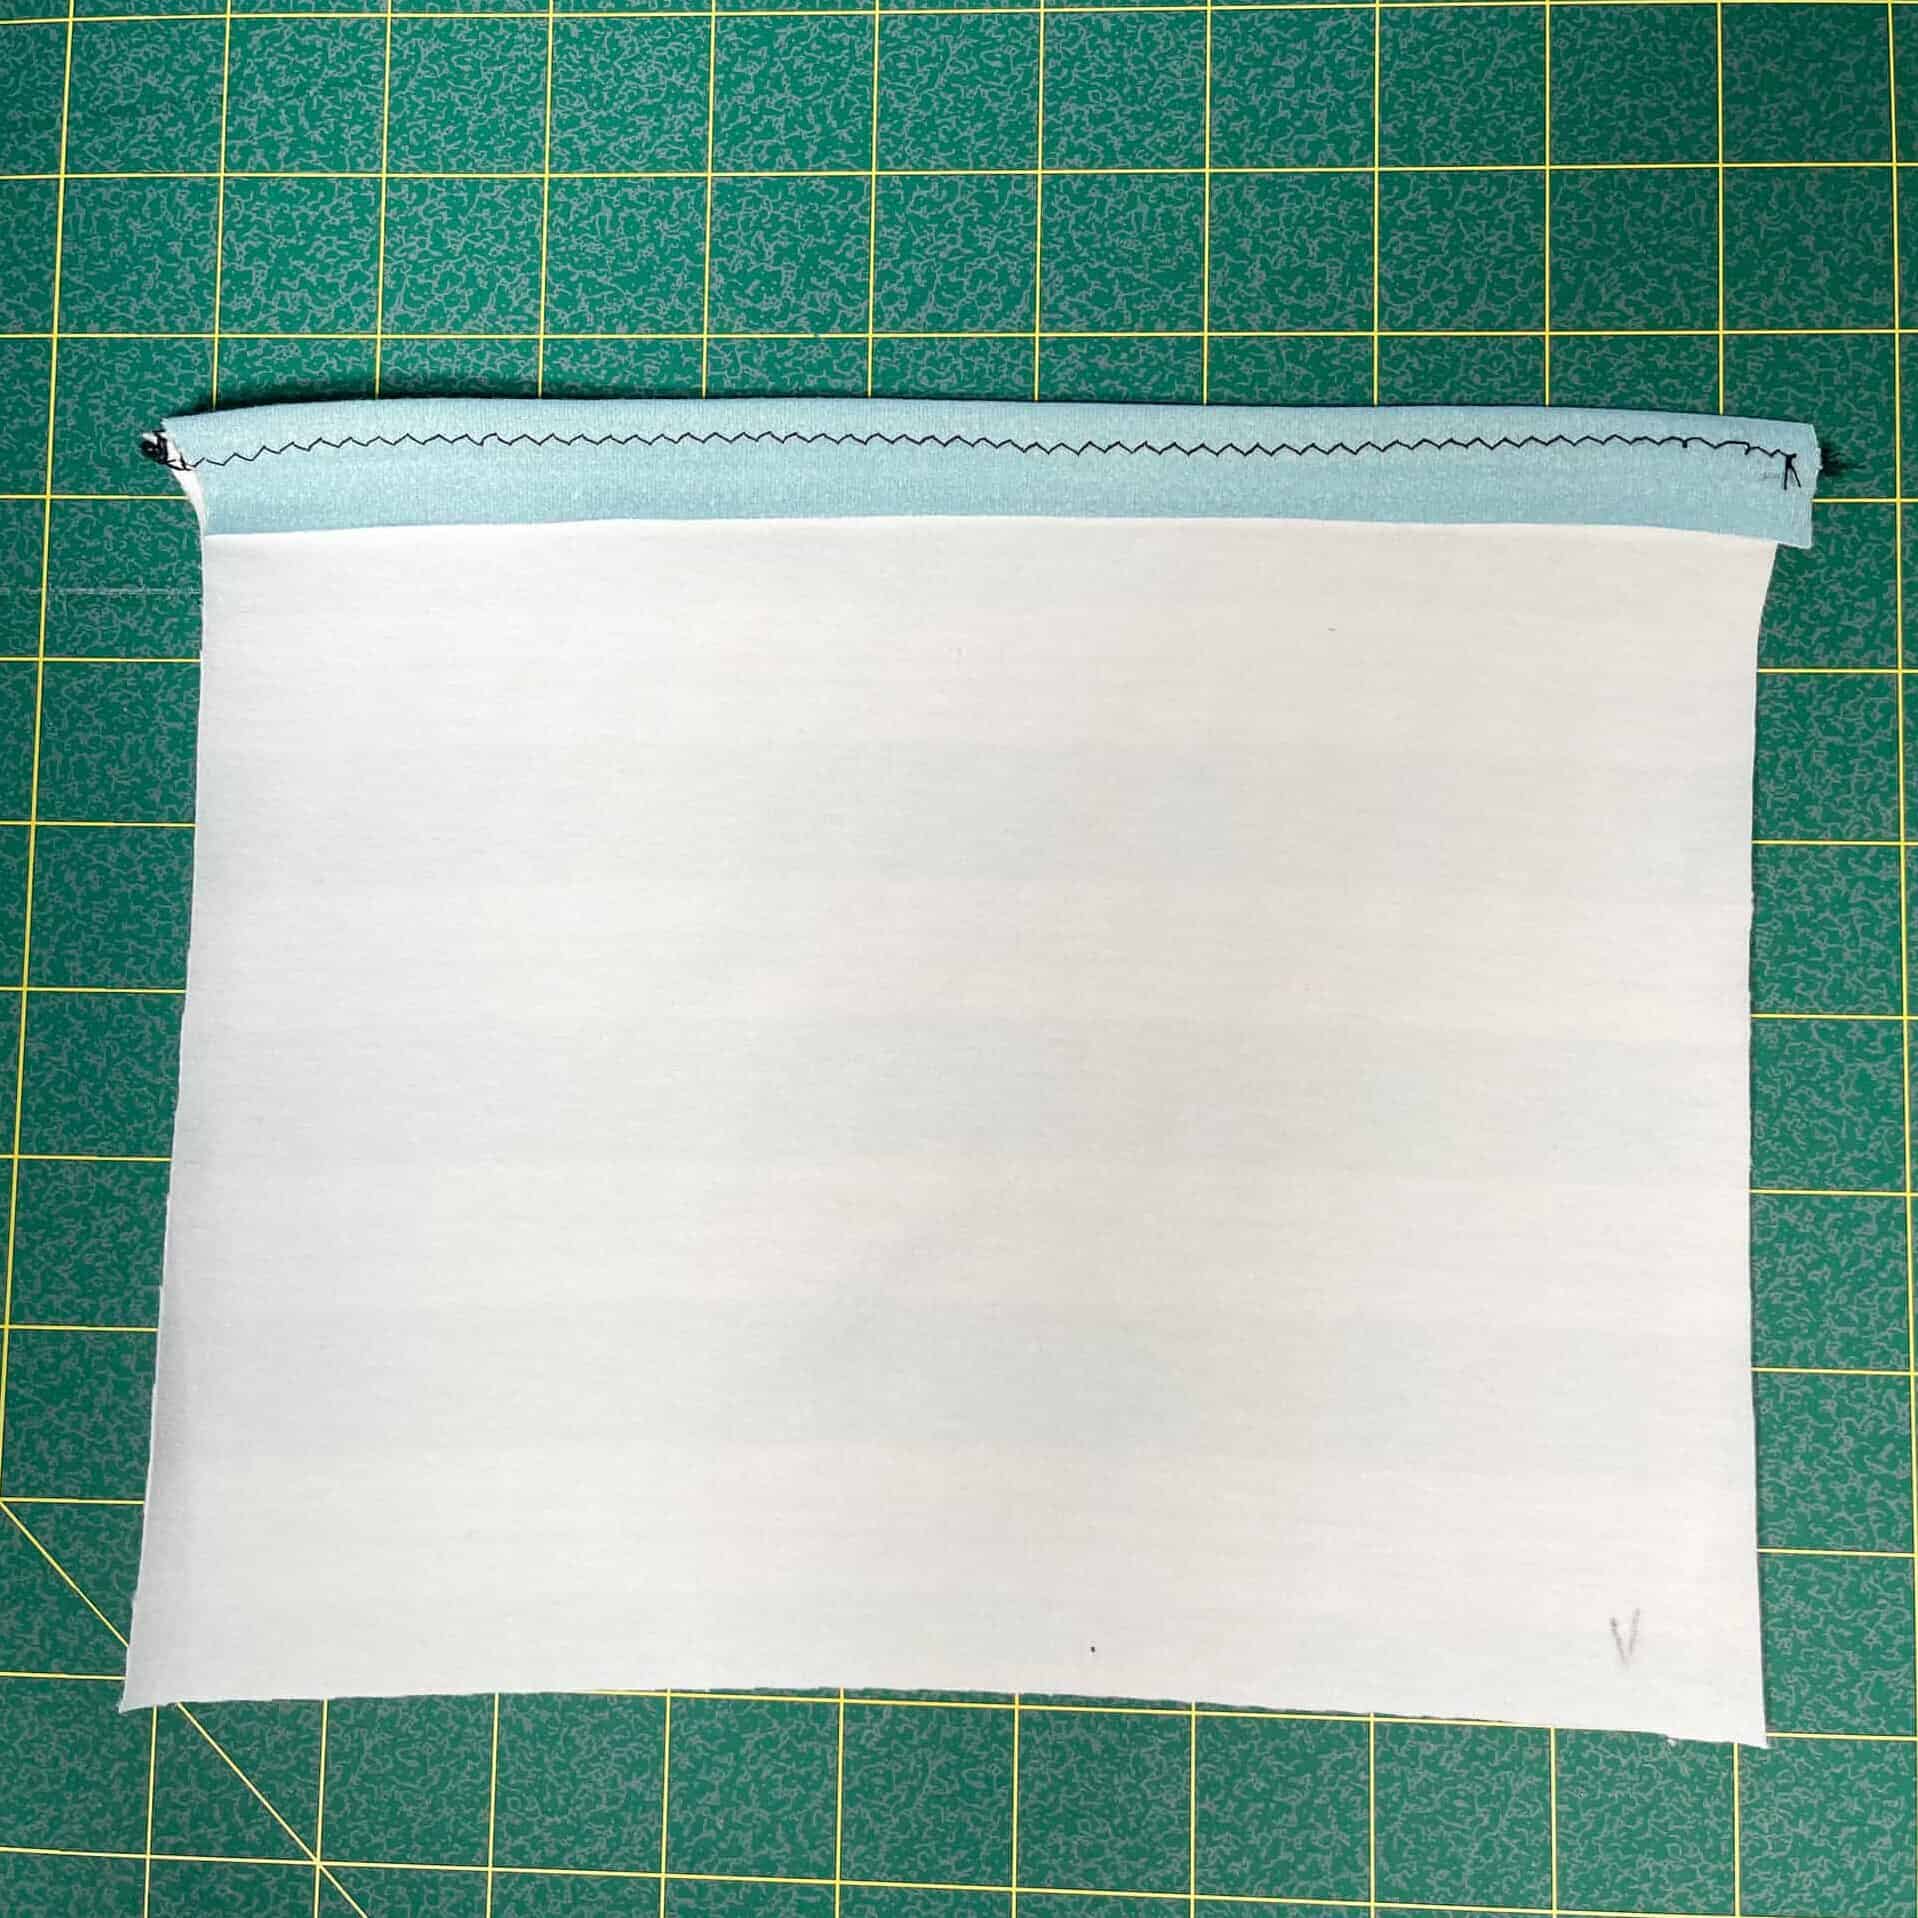
Step 10. Sew on the right side side of garment.
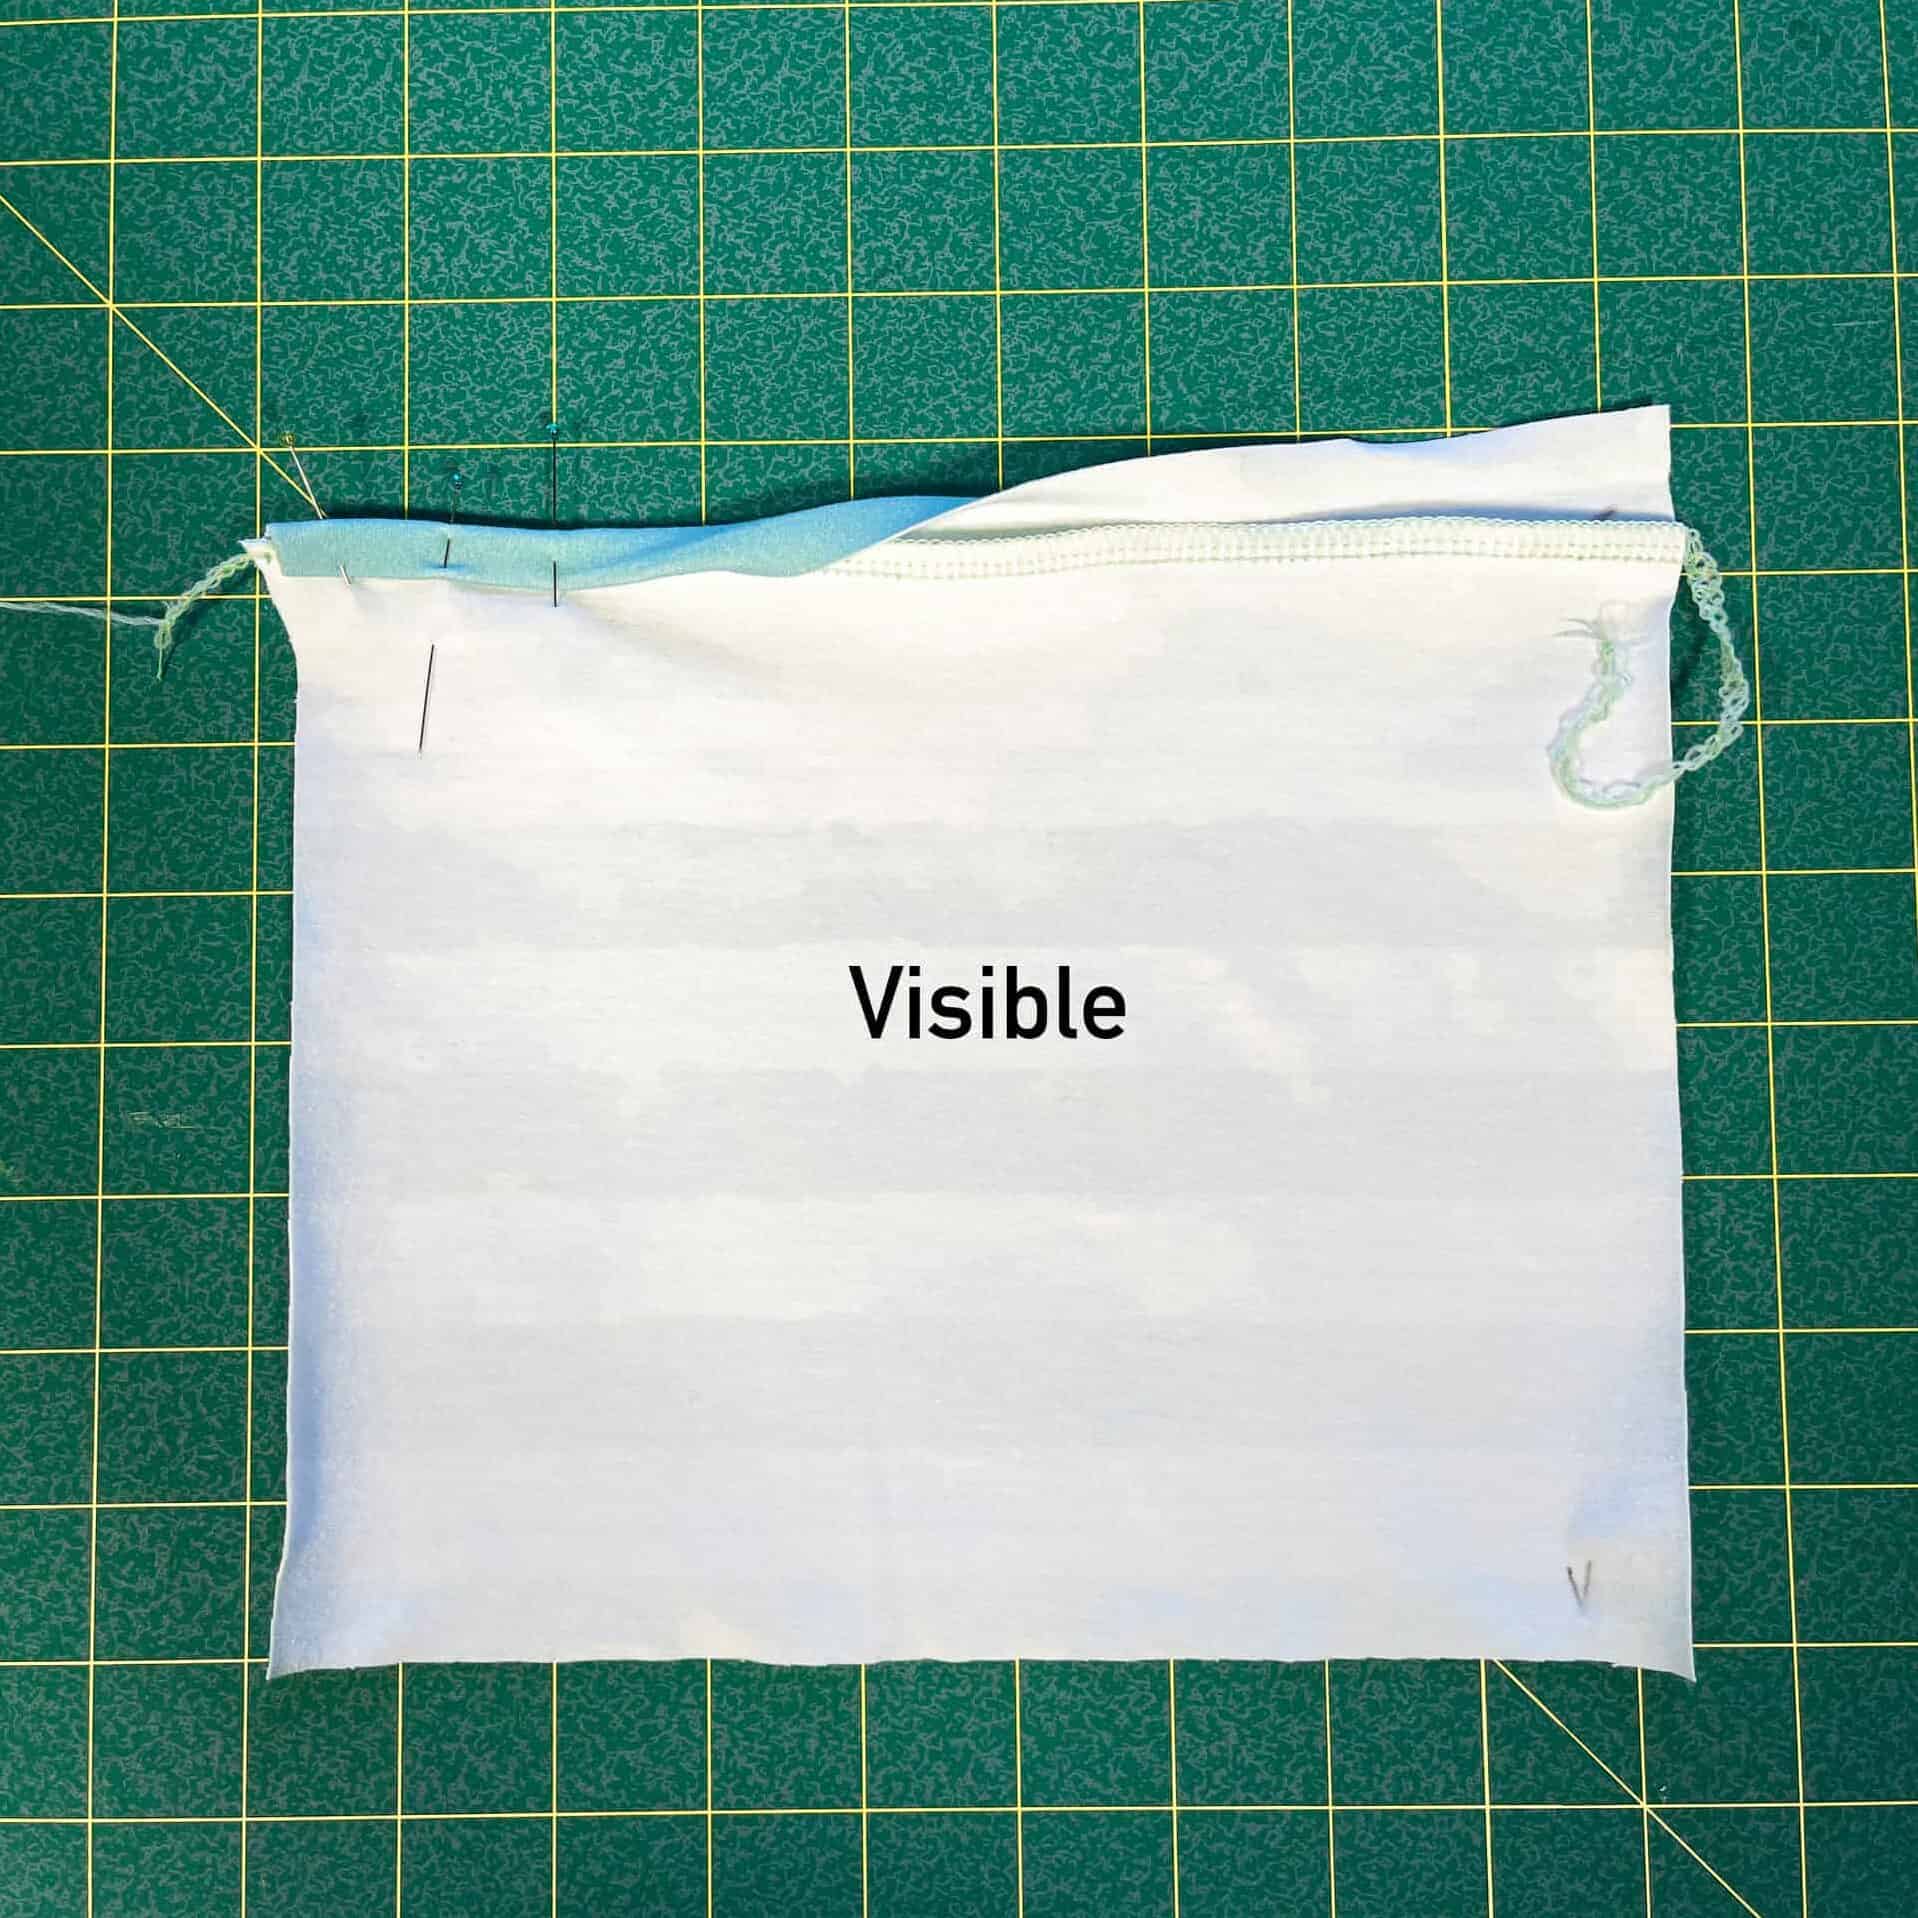
Now sew a line on the right side of your garment. For the visible binding, you are actually sewing on the bottom edge of your binding. For not visible binding, you are sewing on the right side of the garment itself, and should see no binding peeking out.
You can use a single needle on your cover stitch machine or alternately a zigzag stitch on your sewing machine to sew this down. You can also draw a straight stitching line with a frixion marker or chalk to ensure you get a straight line and also catch the raw edge folded to the back of your binding.
I usually invest some time in this to ensure it looks just right. This stitching is on the right side of your garment, so it makes a big difference if it looks straight and uniform.
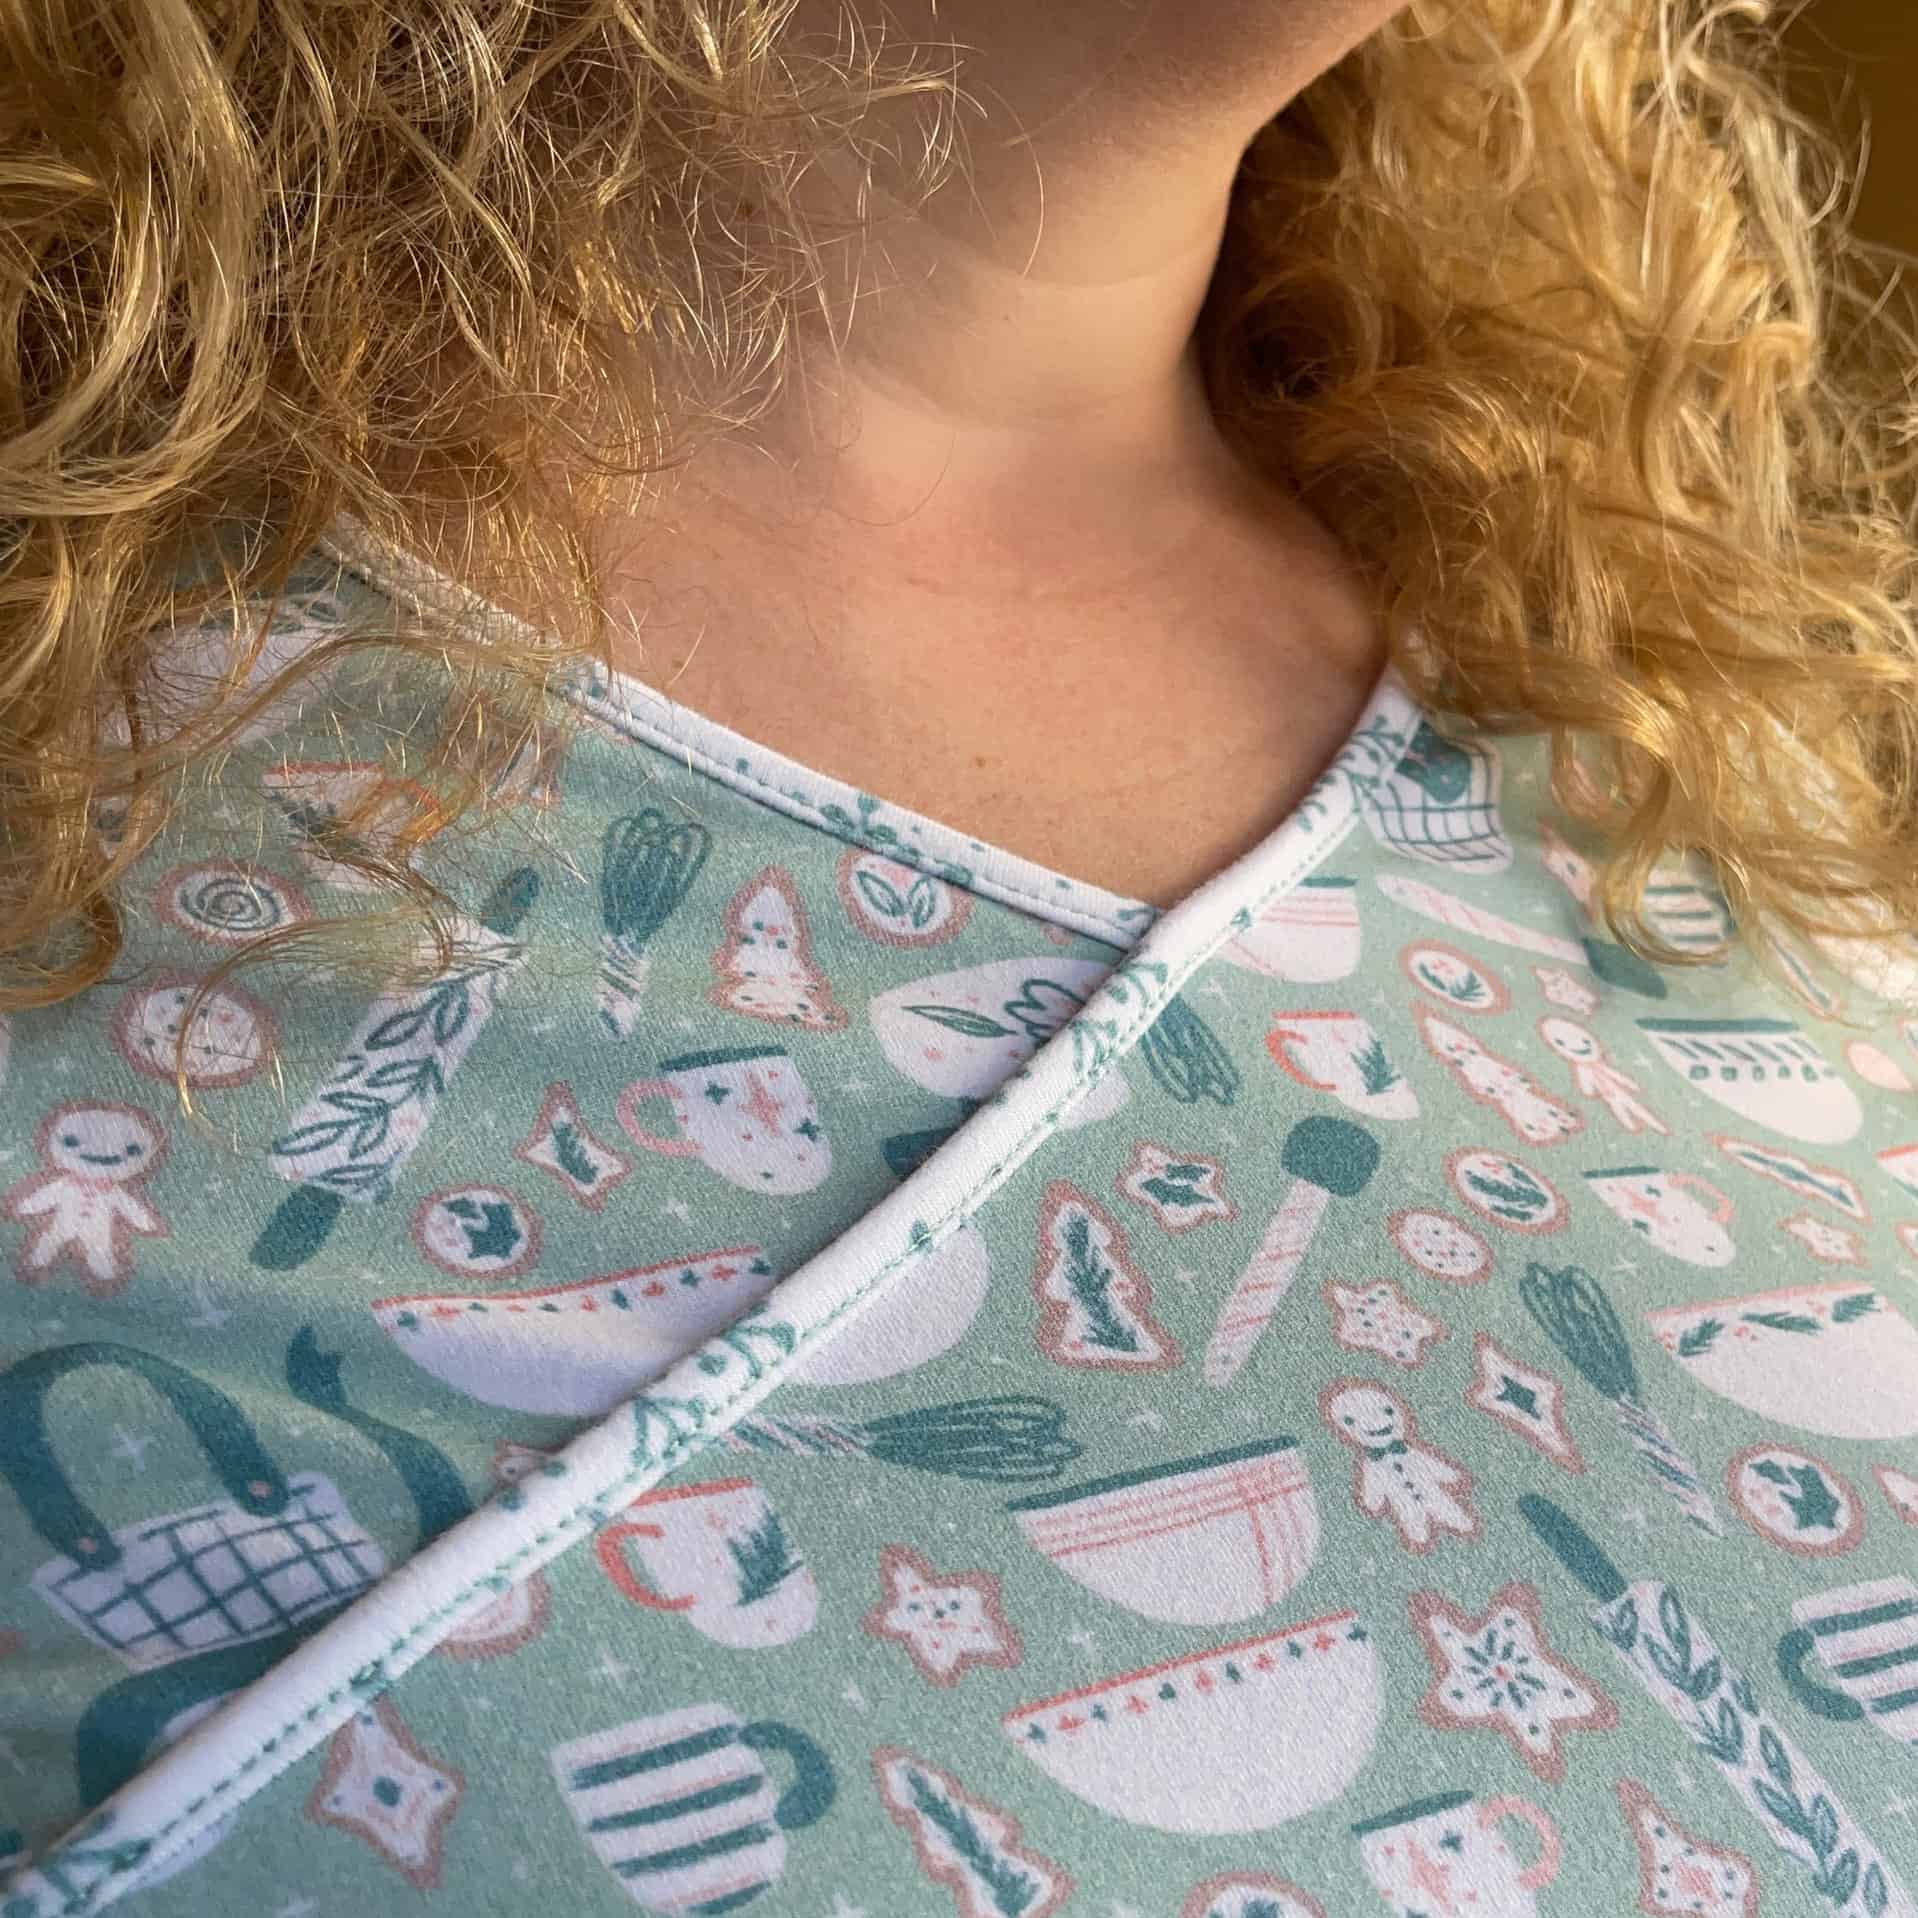
This is what your visible binding looks like when complete.
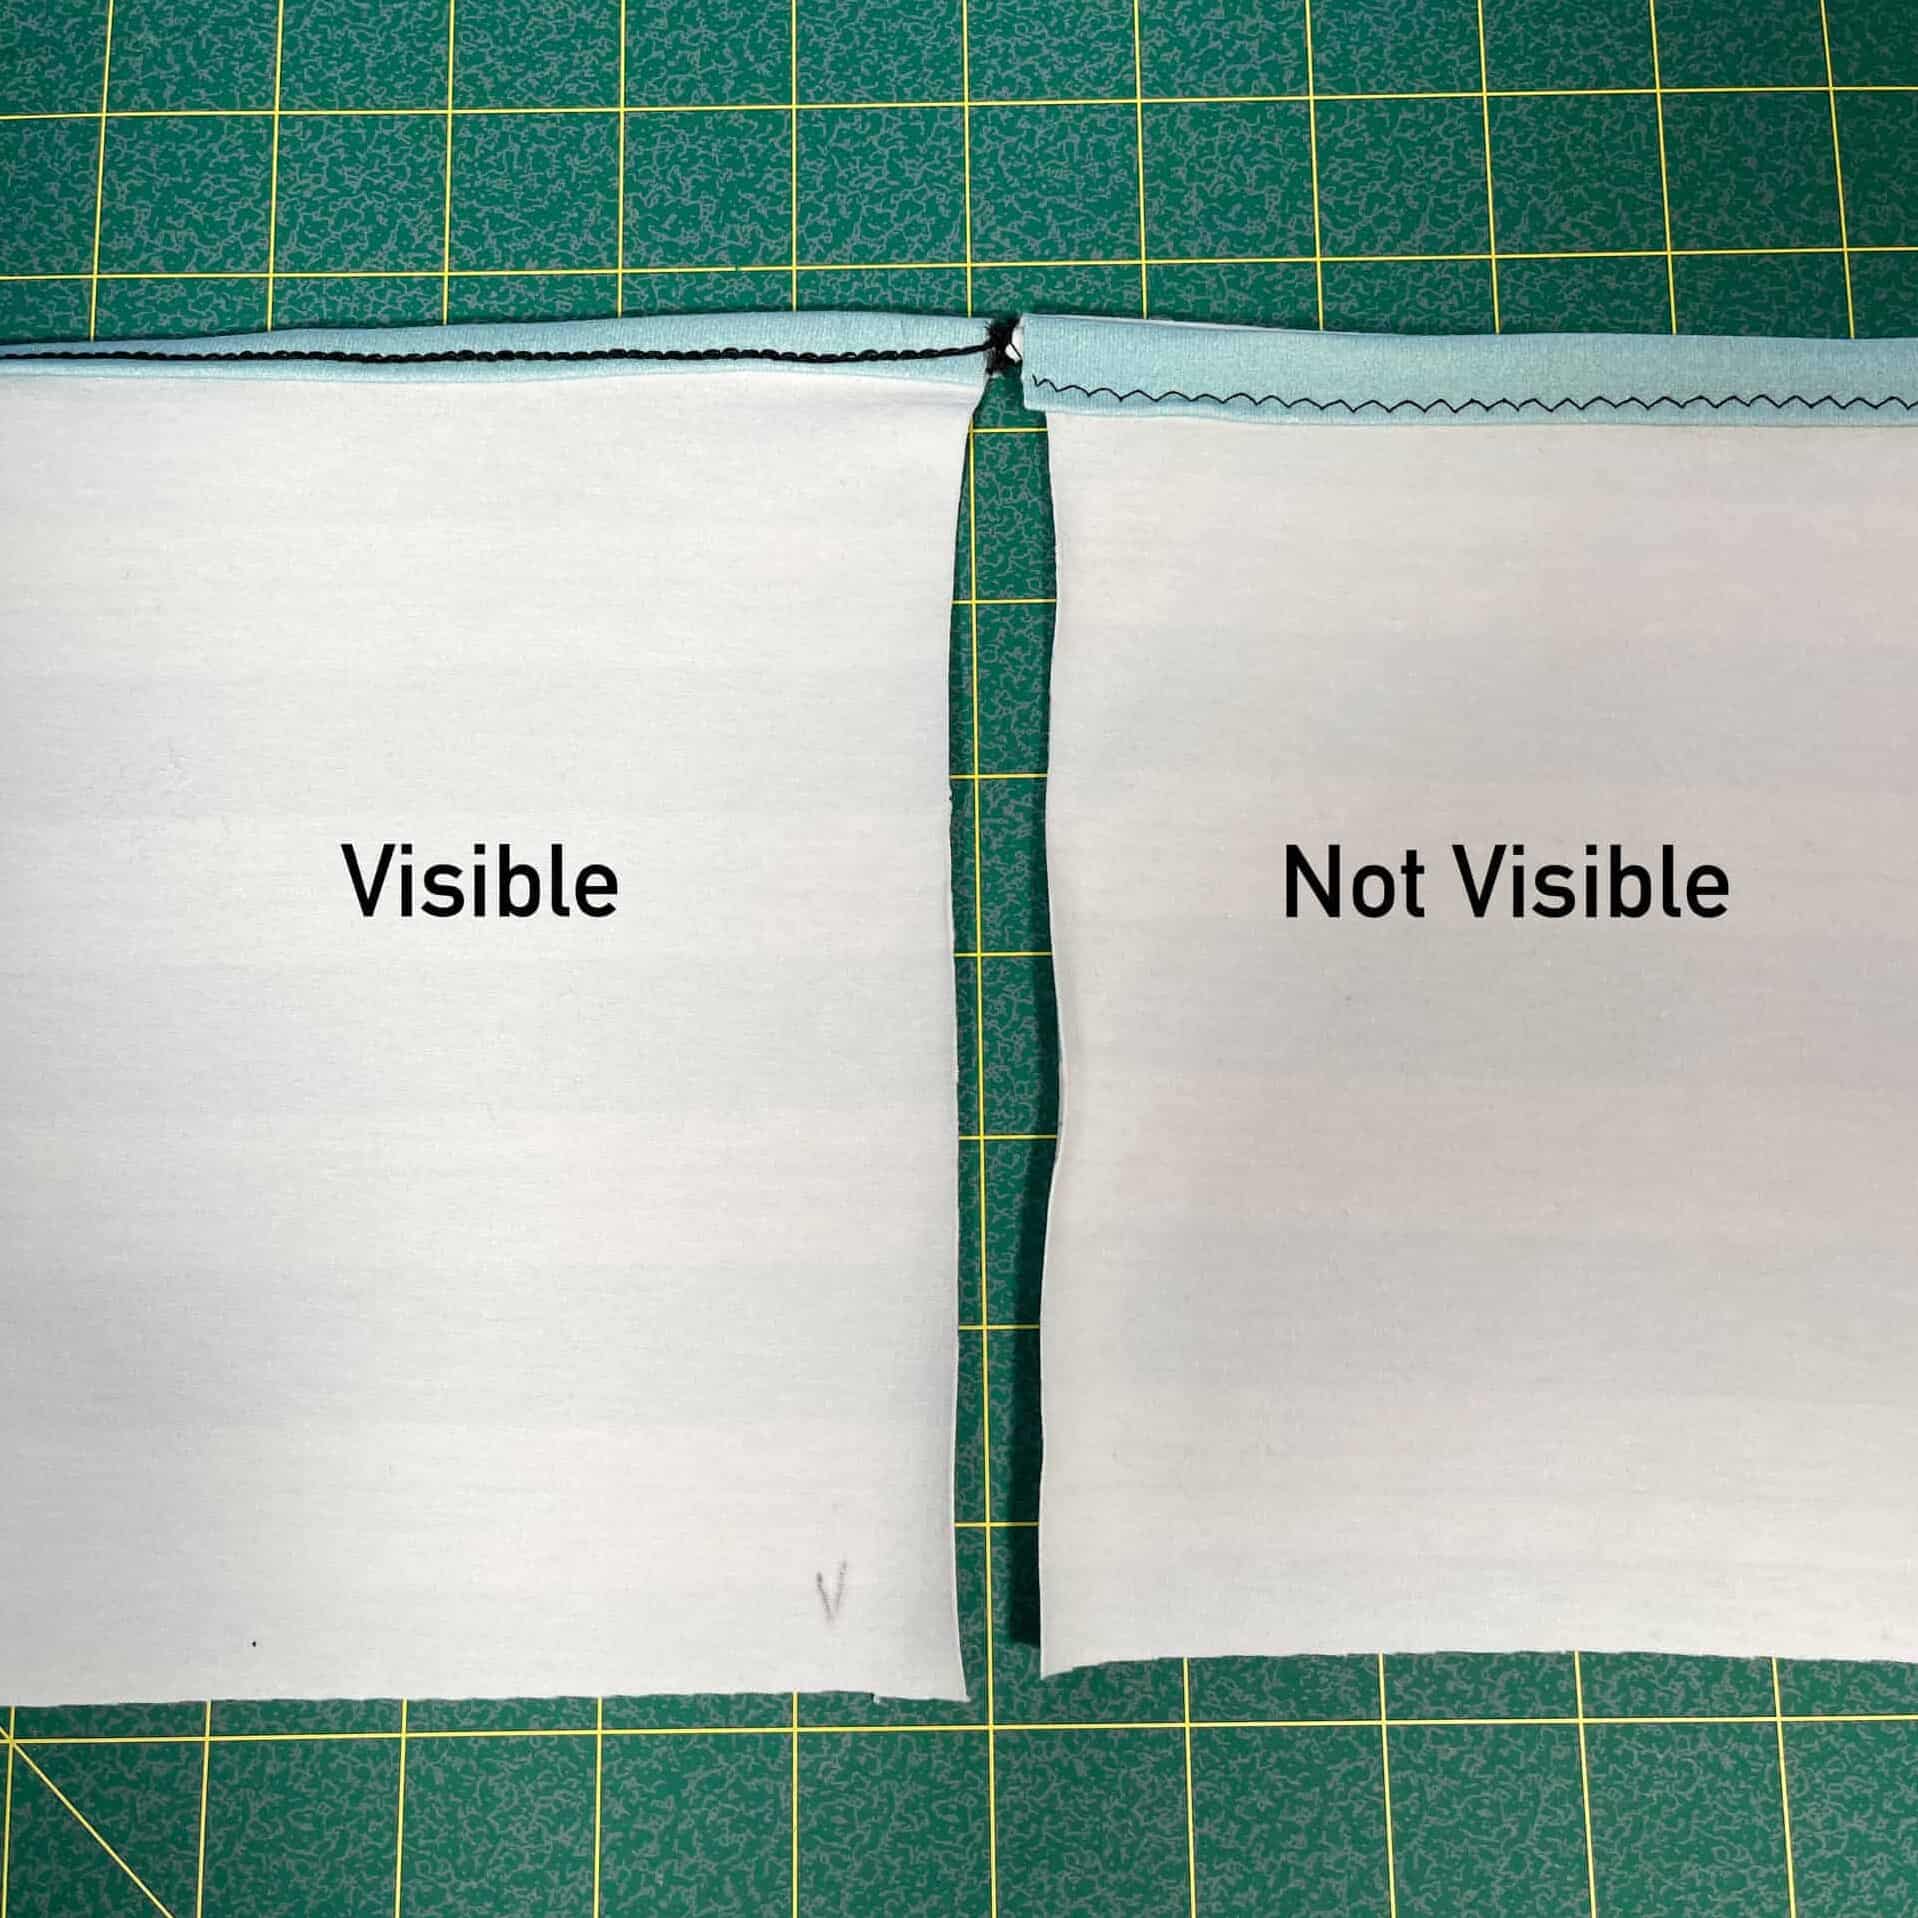
My stitching caught the folded under portions, which leaves us with a neat finish.
If you opted not to tuck in the binding, you can just trim this up to the stitching. Trim as close as you dare, but be very careful not to clip any stitches.
Knit doesn’t fray, but the closer you get to the stitching with your trimming, the less likely you are to end up with something unsightly after you wash the garment.
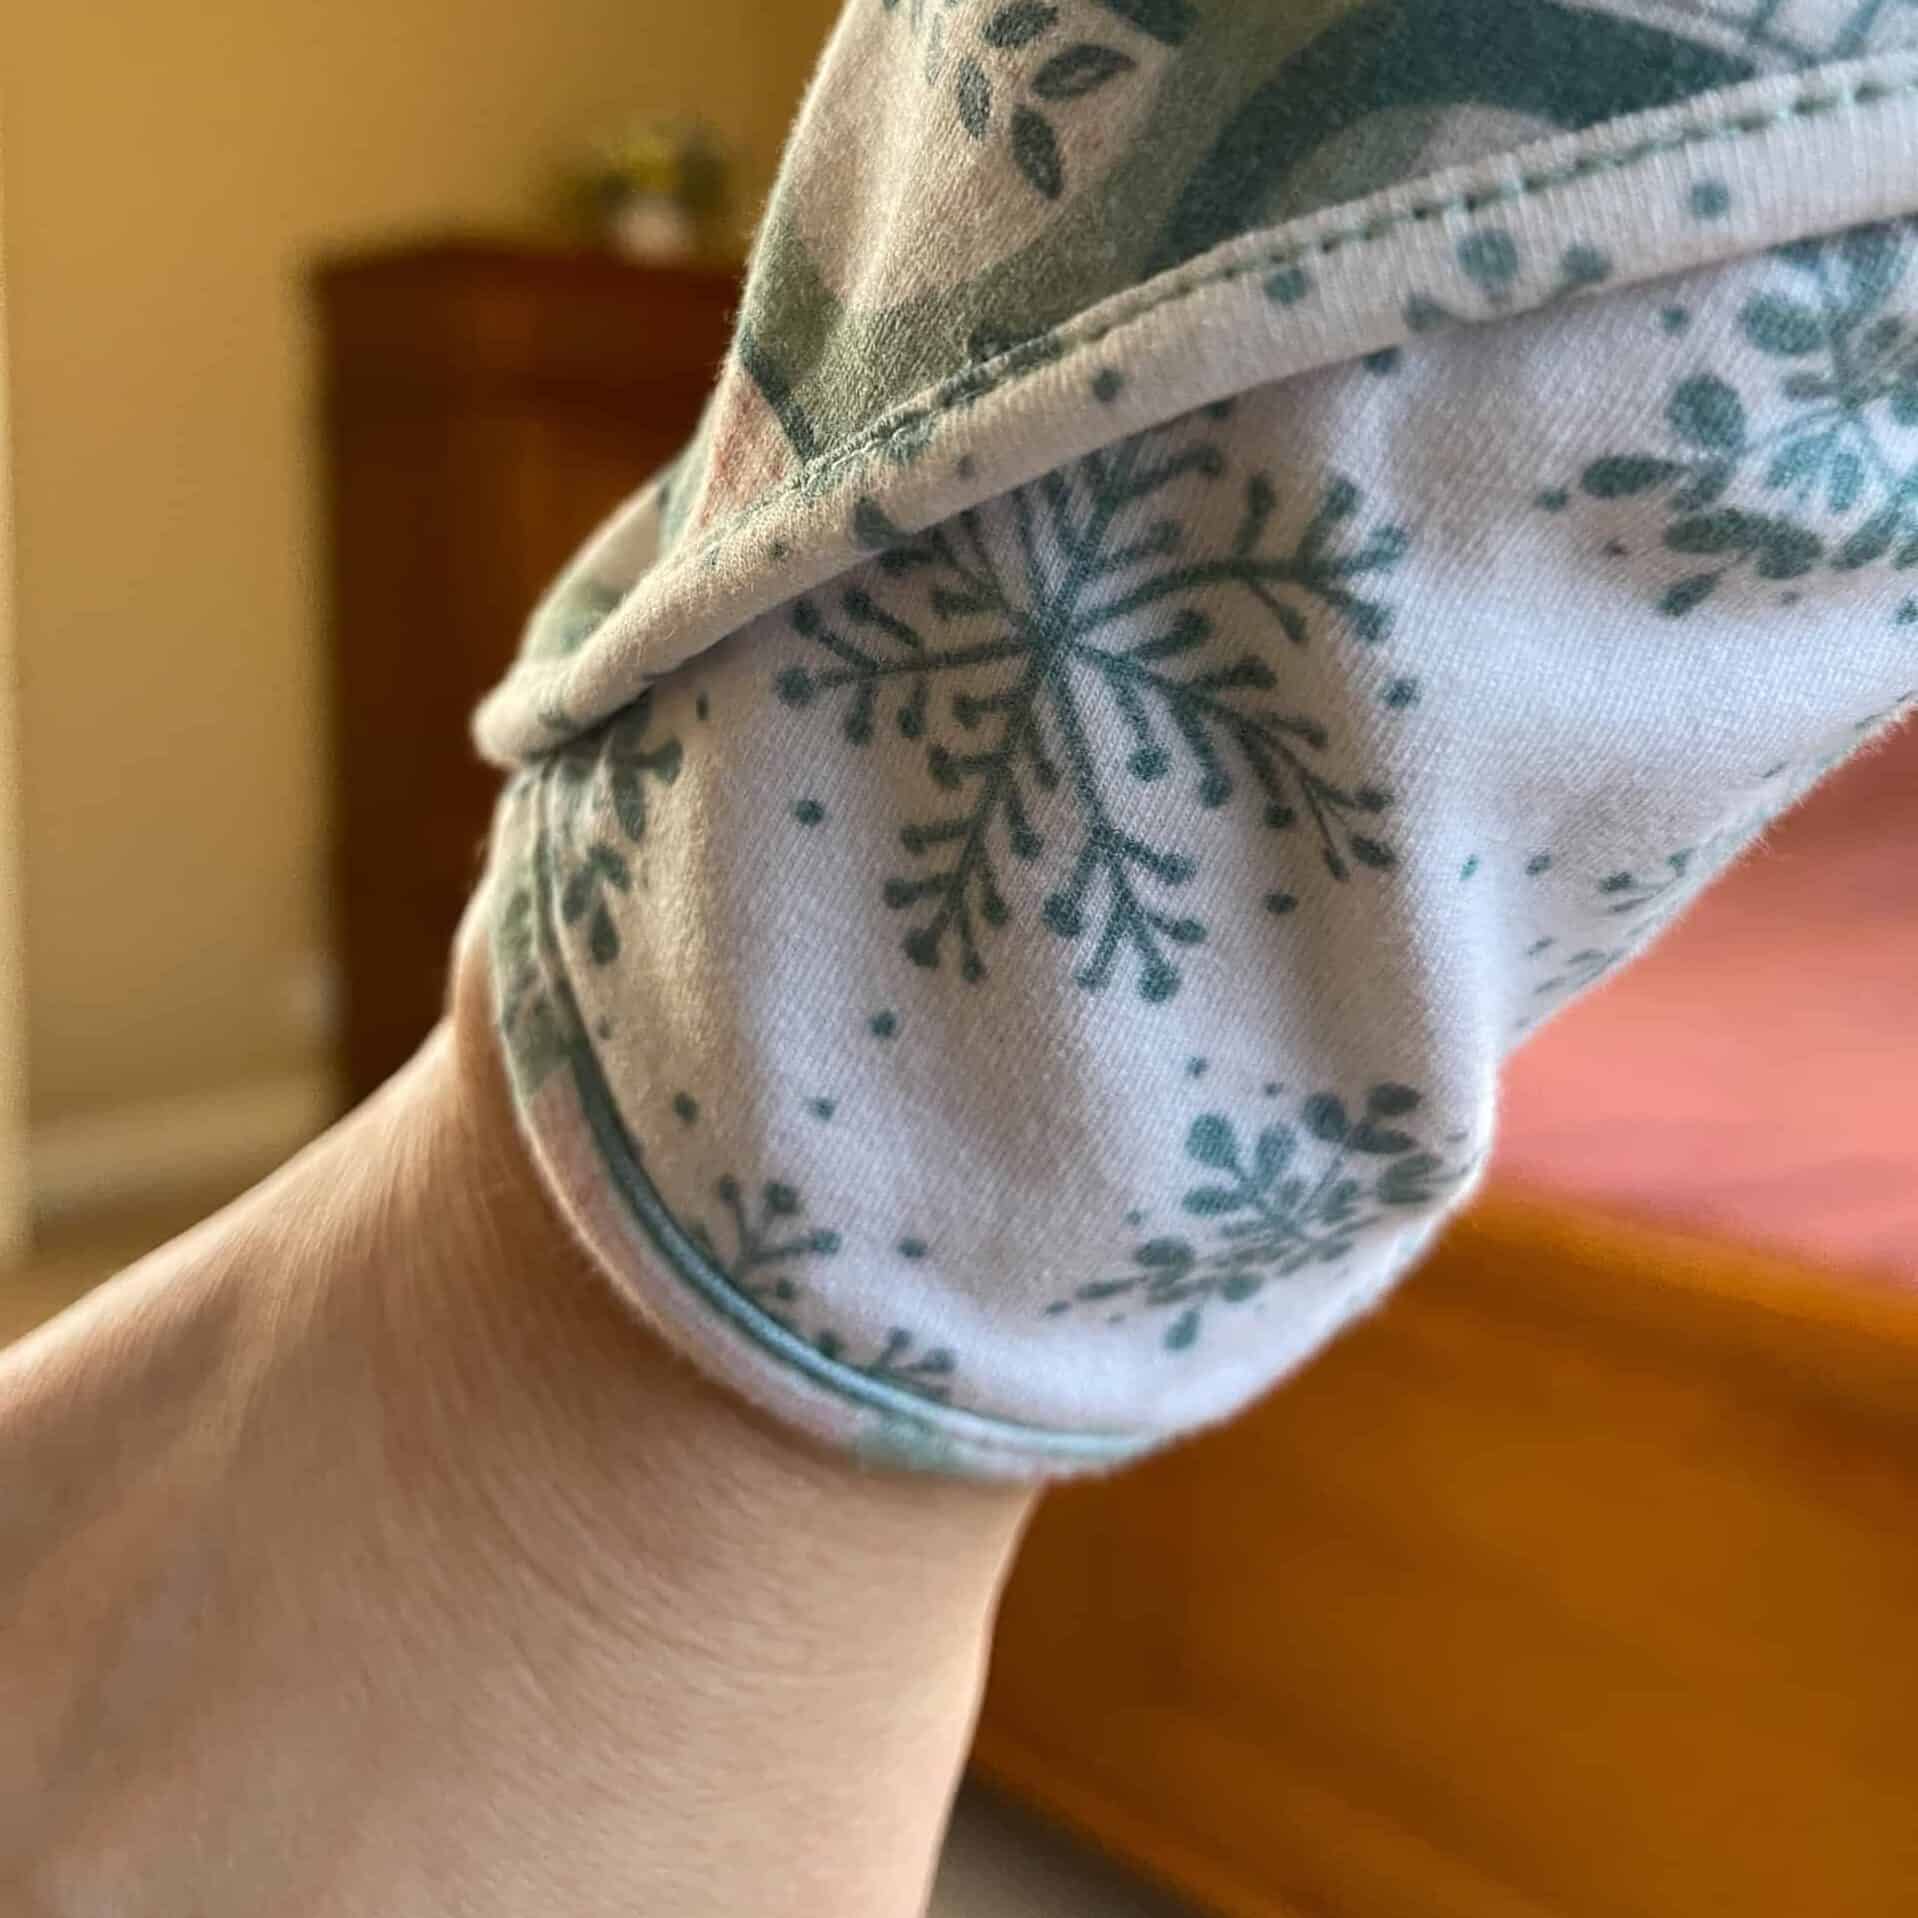
The back binding where I didn’t trim very close, so it does not look neat.
Now your knit binding is complete!
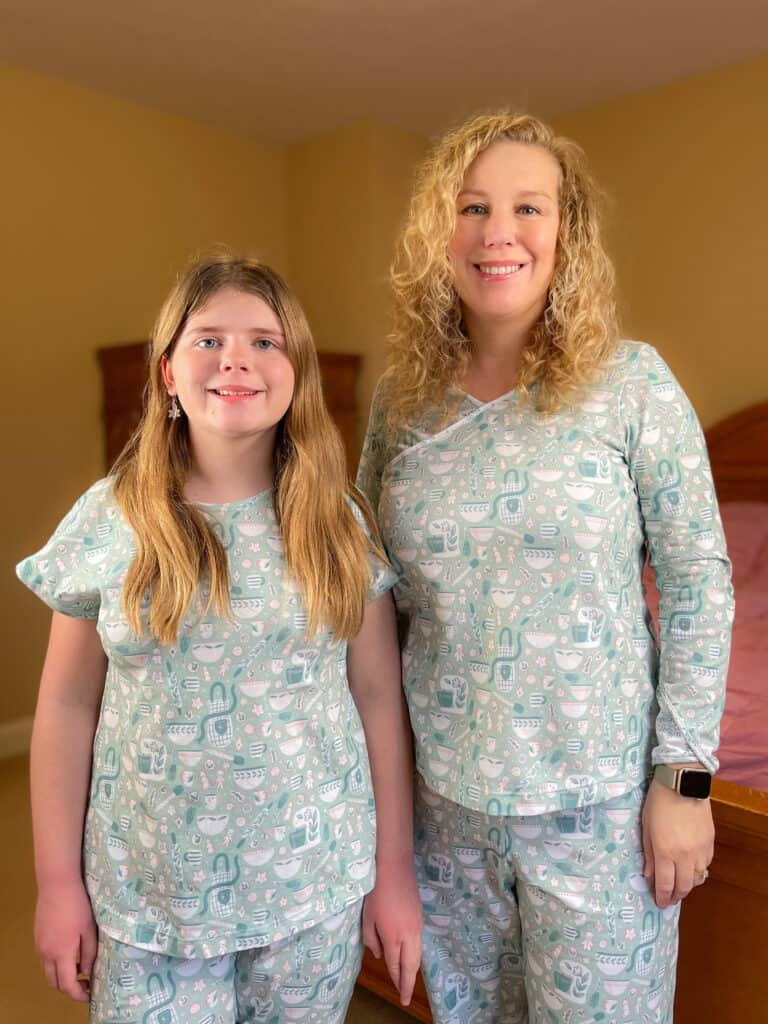
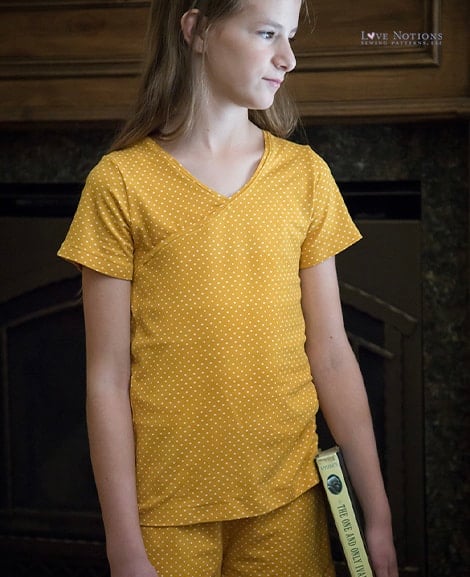
Here is my Ladies Tranquil Pajamas illustrating the visible technique. There is also a Girls Tranquil Pajamas pattern available. I made these in cotton spandex knit with the knit binding, and they are so very soft. Big thank you to Raspberry Creek Fabrics for the fabric for the pajamas and tutorials used in this blog.
Want more help sewing Tranquil Nightwear?
There is a sew-a-long for the Tranquil Pajamas if you’d like to see detailed instructions on all the construction techniques.

Plus, a make for my Tween
Now that my girl is a big tween, she understands the full power of pattern mashing. She just goes through my Love Notions patterns and decides which elements she wants. She picked the Sunday Romper bodice and a La Bella Donna neckline. The hem is a bit of a mixture of both. Her favorite joggers and leggings pattern is the Resolution Bottoms, so she requested that for the pajama bottoms. Pockets are a must for her, even with pajamas.


If you have any questions, please friend me on Facebook and send me a direct message. I’ll be glad to hear from you and help where I can. Also, please connect with me if you are on Instagram as SewHardofHearing.
Love Notions patterns that use Visible or Not Visible bindings
Visible Binding
These patterns use binding that can be seen on the exterior of the garment.
Girls Everyday Playdress (this is called binding but is applied like a neckband)
Girls Mallory Dress
- Girls Miss Mary Mac Tunic
- Ladies and Girls Luna Loungewear Cami, Nighty, and Bralette
- Ladies and Girls Tranquil Pajamas
- Ladies Summer Basics Tank/Dress
- North Star, Constellation, & Navigator Pullovers – options to use knit binding instead of woven
Not Visible Binding
These patterns use binding that is visible only on the inside of the garment.

More PJ Sewing Patterns
-
 Kids’ Compose Robe$10.50
 -
 Compose Robe$12.50
 -
 Breckenridge Henley$12.50
 -
 Ladies’ Tranquil Nightwear Collection$12.50
 -
 Girls’ Tranquil Nightwear Collection$10.50

