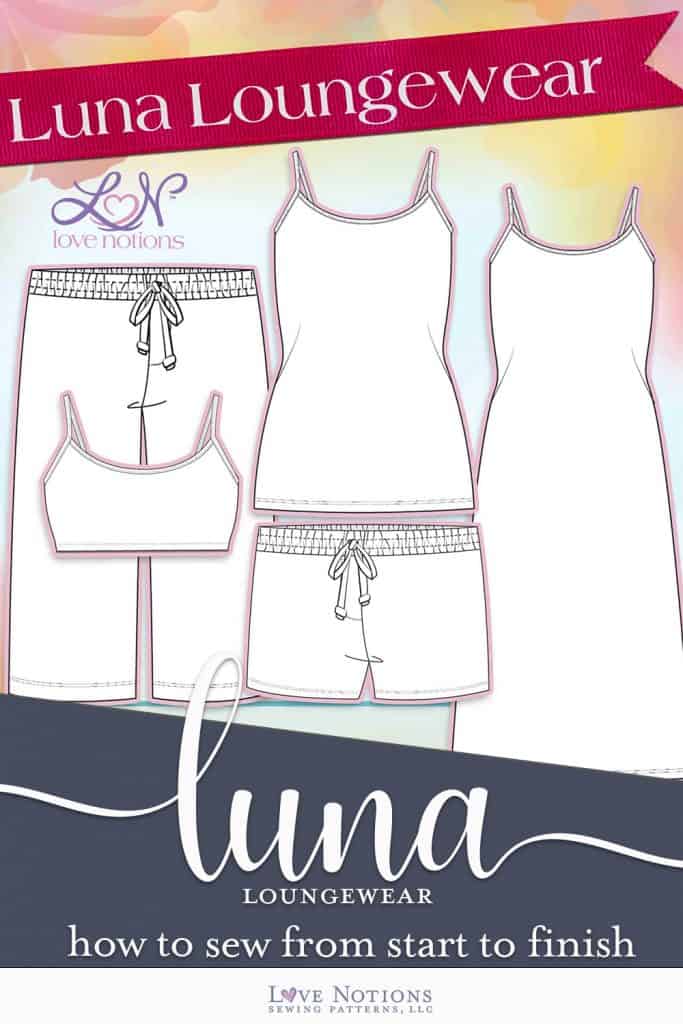
Today on the Luna Loungewear Sew Along we will be focused on bottoms. This post is all about sewing the shorts and capris. If faux flies are a tricky concept for you, you want to read on to learn how to master them and add a great detail to your next pair of lounge pants.
The first step in sewing the bottoms is constructing our pockets
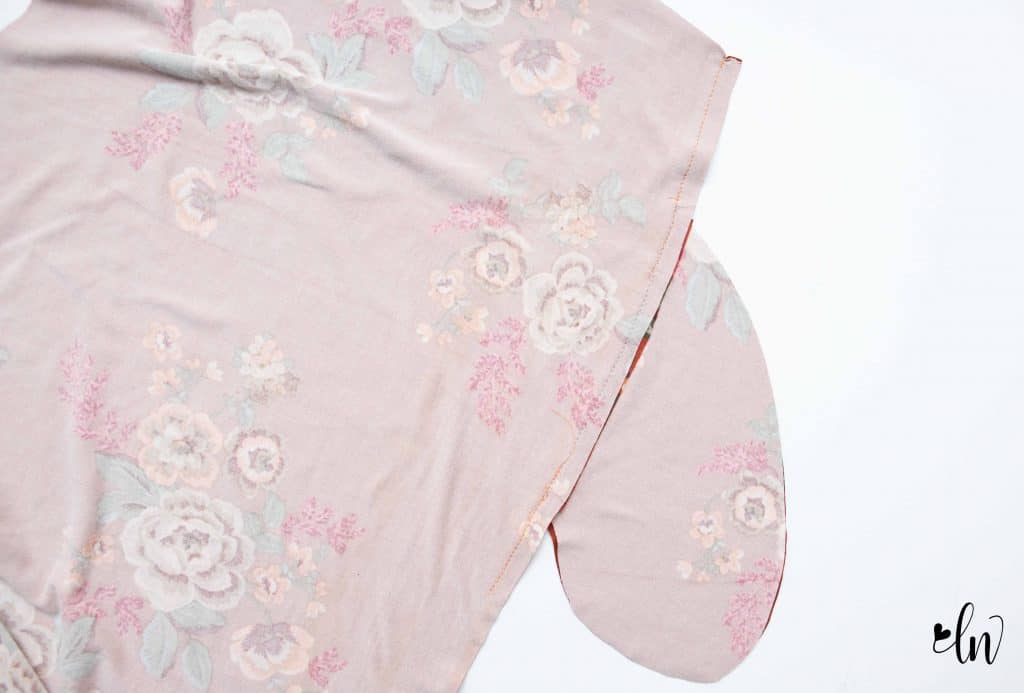
Now, of course, you can leave the pockets off, but I love pockets and they are pretty much a must for me. For the Luna Loungewear pockets, you want to make sure you transfer the markings on the pocket pieces to the fabric. Also be sure to transfer the triangle marking at the side seam of the bottoms. I used a clip to mark it. Line up the top of your pocket with the triangle marking, right sides together. Sew the pocket to the side seam using a straight stitch. The press the pocket outward.
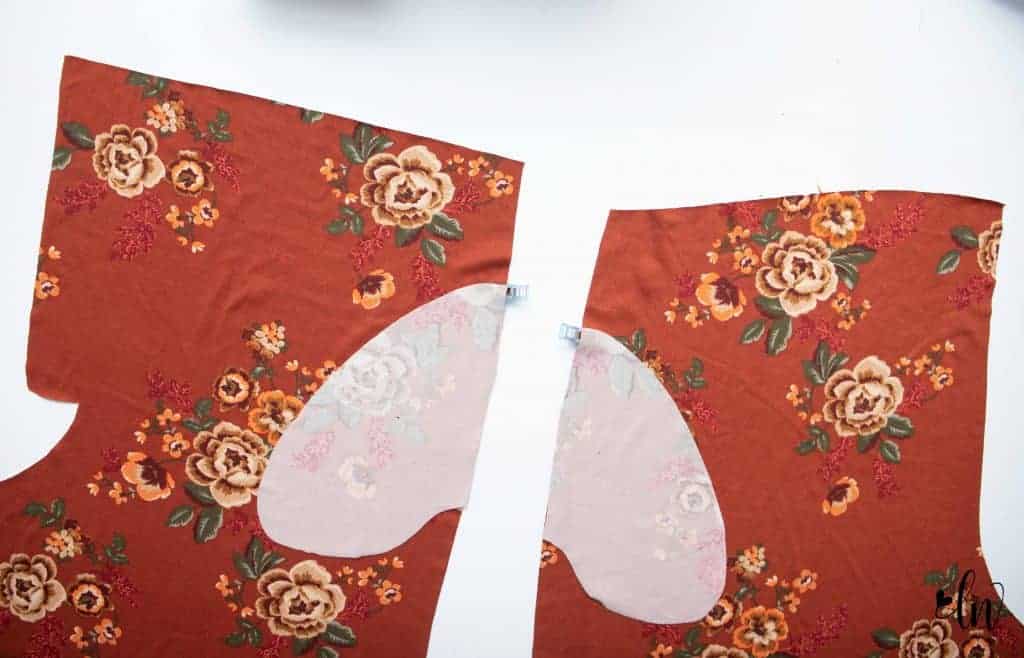
Take the front and back pieces and line them up, right sides together. Sew with a straight stitch from the top of the pants to the marking on the pocket piece. Stop and backstitch. Now restart your stitch at the marking at the bottom of the pocket. Make sure you backstitch when you start. I didn’t sew all the way down the side seam on this second seam. I only sewed for about 4″.
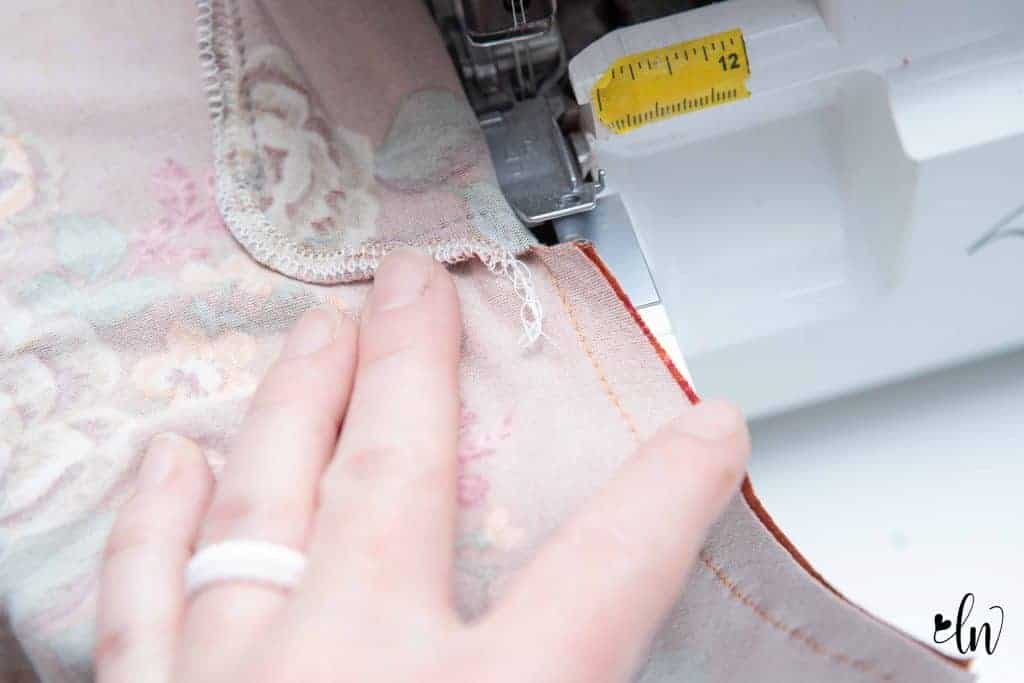
Now it’s time to sew to rest of the side seam of your Luna Loungewear bottoms. This time I took my serger and started at the top of the side seam and sewed down the seam, going around the pocket and down the remaining side seam. If you are sewing with your sewing machine, you would do the same thing. You can use a straight stitch on this step, even with a knit, because this seam does not need to stretch.
Let’s tackle that fly
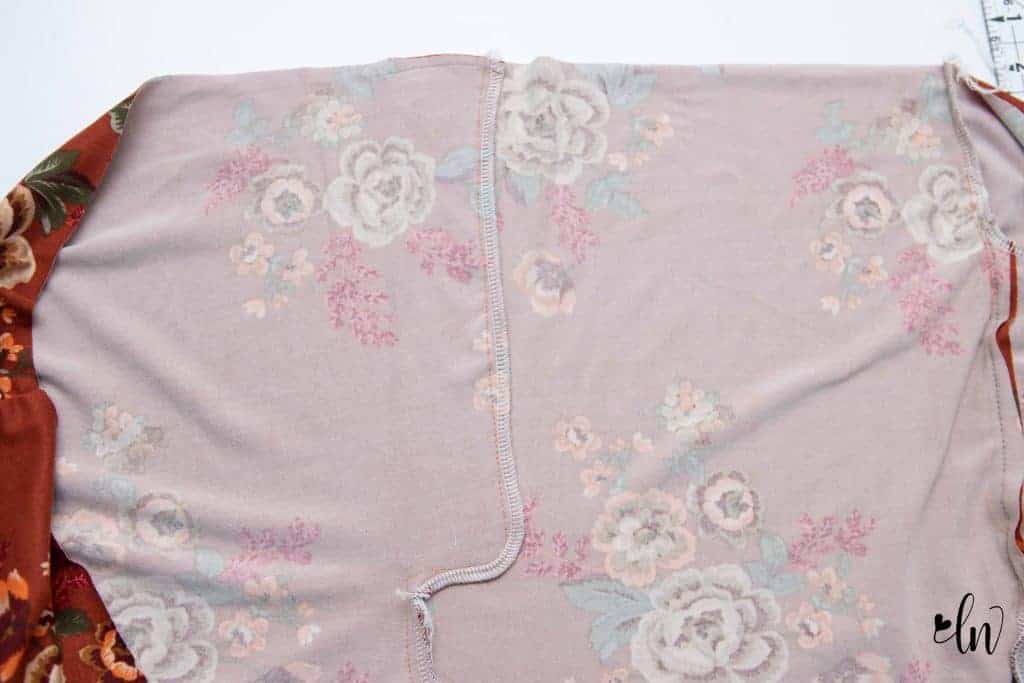
Line up the front of the pants right sides together. Sew along the curve of the faux fly. When you get to the bottom of the crotch curve, drop the needle and pivot the fabric to continue along the bottom of the curve. To finish this area off with the serger. I clip into the seam allowance at the bottom of the faux fly. Then, I serge around the fly extension. Next, I fold the fly extension back and serge down the rest of the crotch curve.
For this next step, I like to place a pin at the top of the crotch curve through both layers of fabric. You can use the pattern piece as a guide for this.
Now, open the front pants so the right side is up. Just open the front of the pants like you would a book, just turning over the top layer. The faux fly will be folded under one side. Press the fold.
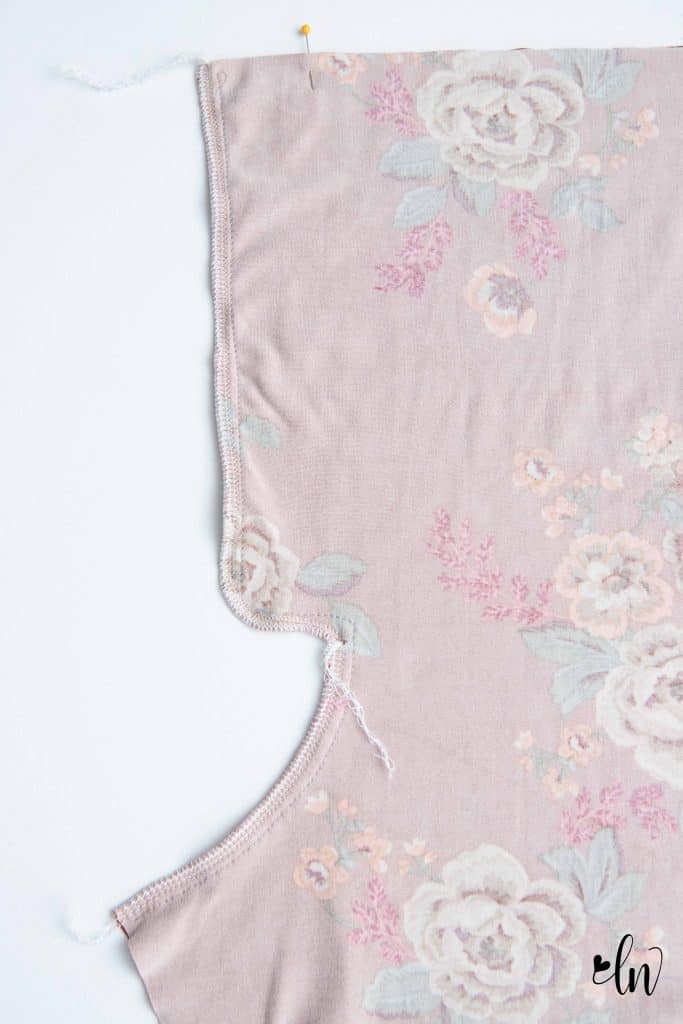
Now move the pin so that it is securing the faux fly in place. Take the pants to the machine and baste the faux fly in place. That’s it! Below is what the inside of the pants will look like.
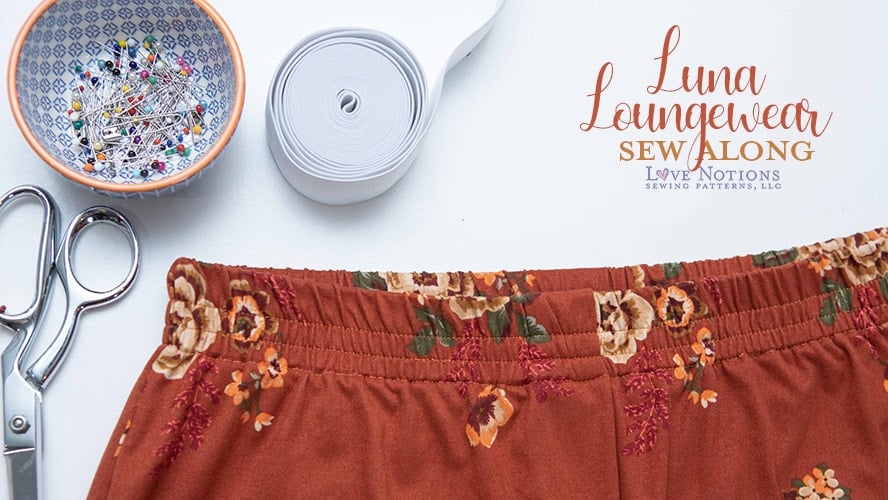
Now you are ready to construct the waistband
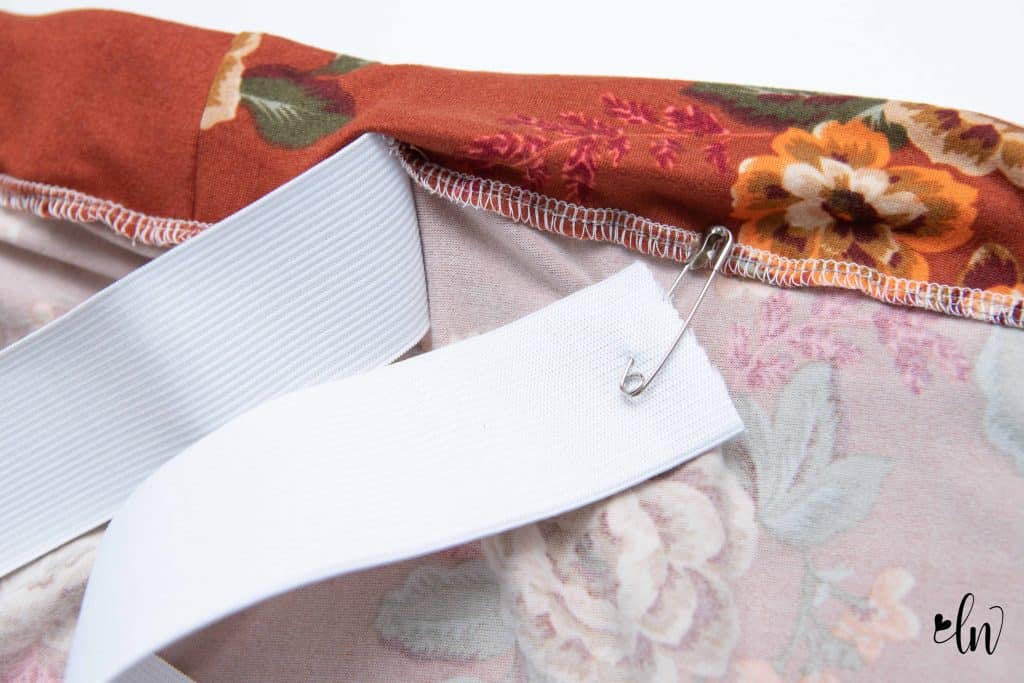
After you have the waistband folded over and topstitched in place, the trick is to get the elastic threaded through. If you joined me for the Allegro Sew Along’s Facebook live video, you know I struggled with getting my elastic into the casing. Well, I’m thrilled to report that Tami, gifted me a Clover Clip n Slide Bodkin. Life changing!!! This little gadget makes threading elastic into a casing a breeze!
Before we start, if you are sewing the option to have the draw string, check out this post for sewing a button hole. You will need to sew the button hole BEFORE constructing the waistband.
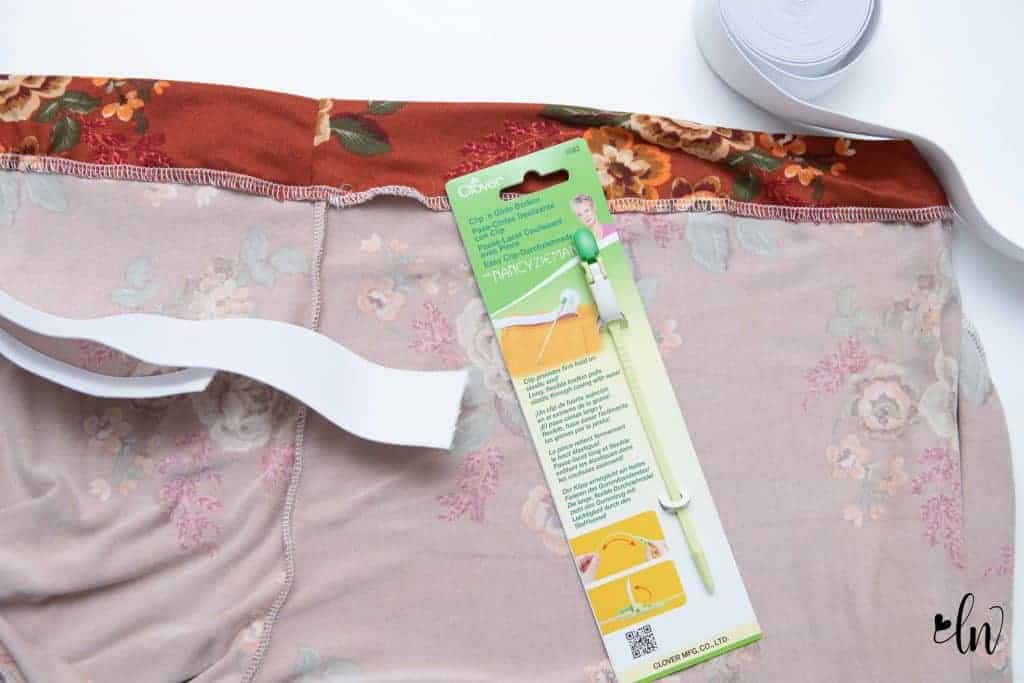
Another trick for making threading elastic a bit easier is to anchor the end of the elastic to the main portion of your fabric with a safety pin. This will prevent you from pulling the end of the elastic though the hole. Nobody likes fishing the end of the elastic back out!
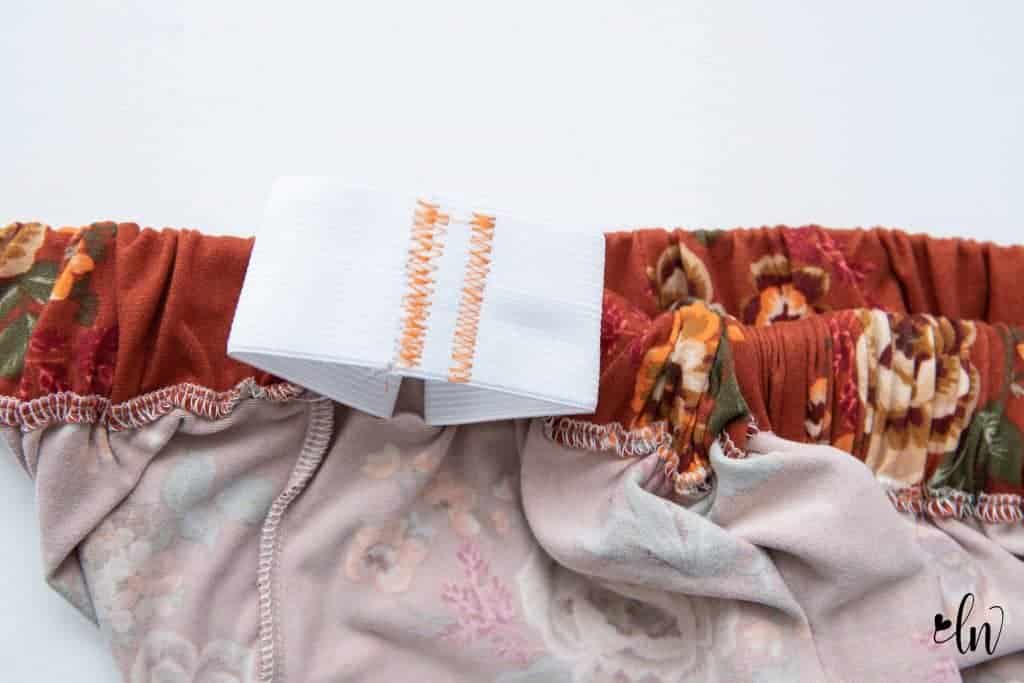
If your sewing machine makes a bird’s nest mess of the thread when you are sewing the ends of your elastic together, try switching to a stretch needle. Often times the high spandex ratio of the elastic plays havoc with a universal or even a ballpoint needle. A stretch needle is designed to handle the high spandex content like a champ.
We will handle the hemming on Friday
That’s our stopping point for today! Friday will be hemming day and we will finish off the cami, nightie and bottoms all then. We will also take care of the elastic at the bottom of our Luna Loungewear bra tomorrow!
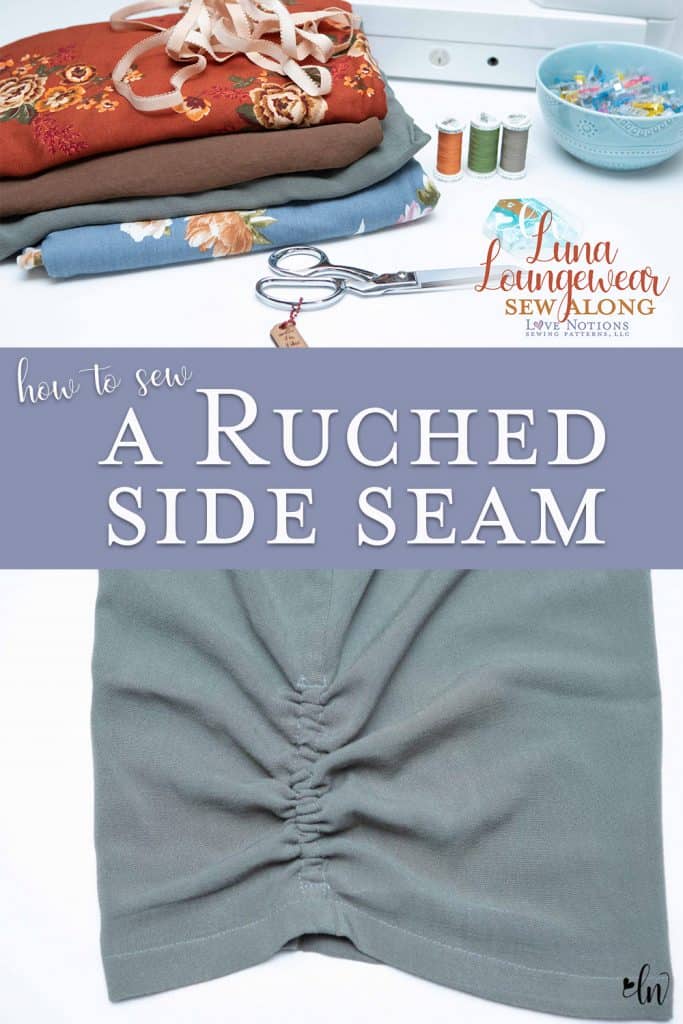
Ruched Side Seam
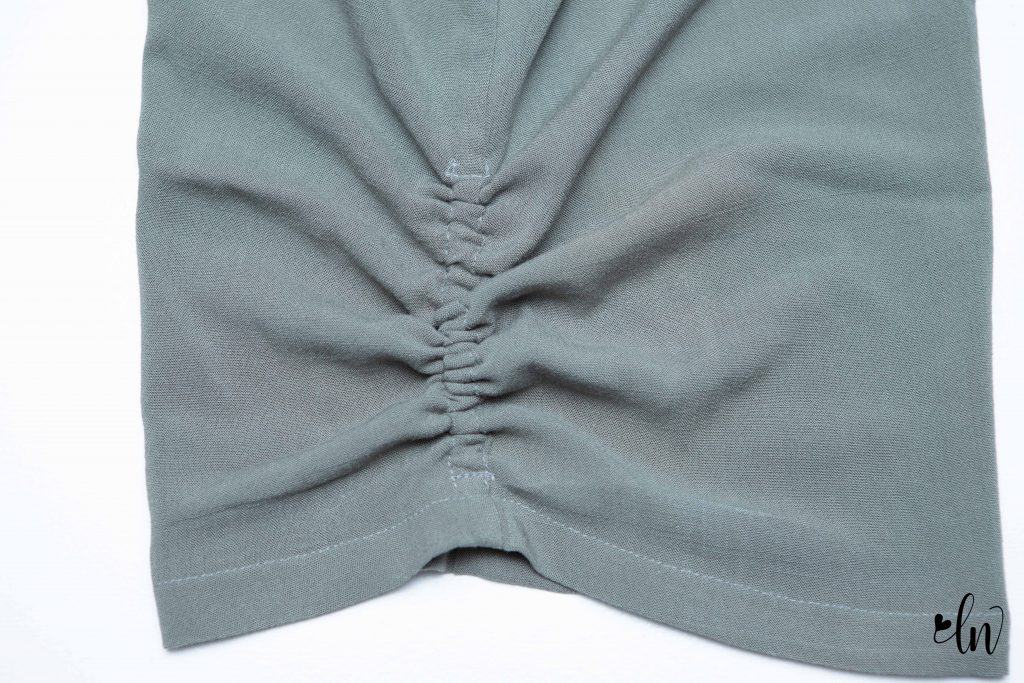
This is a pretty little detail that I’m excited to share with you today! I did this little gathered, side seam on the capris, but you can do it on the shorts, nightie, or even the cami! If doing to the cami, I do recommend adding some length first. I didn’t add length to the capri.
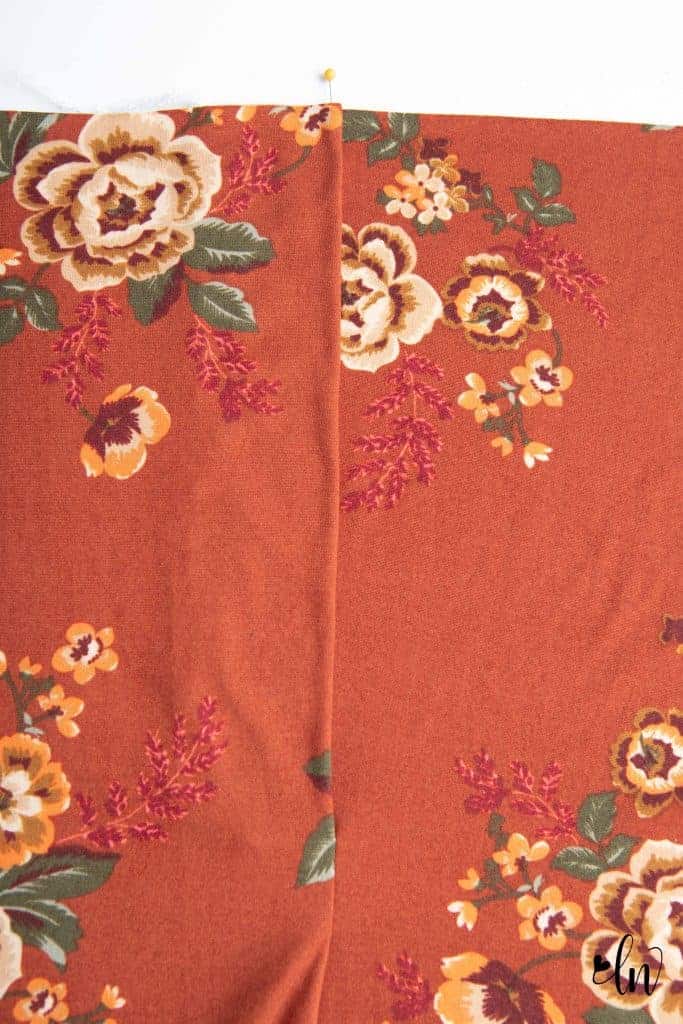
Construct the Luna Loungewear pants up to the point of sewing the side seam. After you have sewn the side seam, press the seam to the front of the pant. You are not ready to add your ruched detailing.
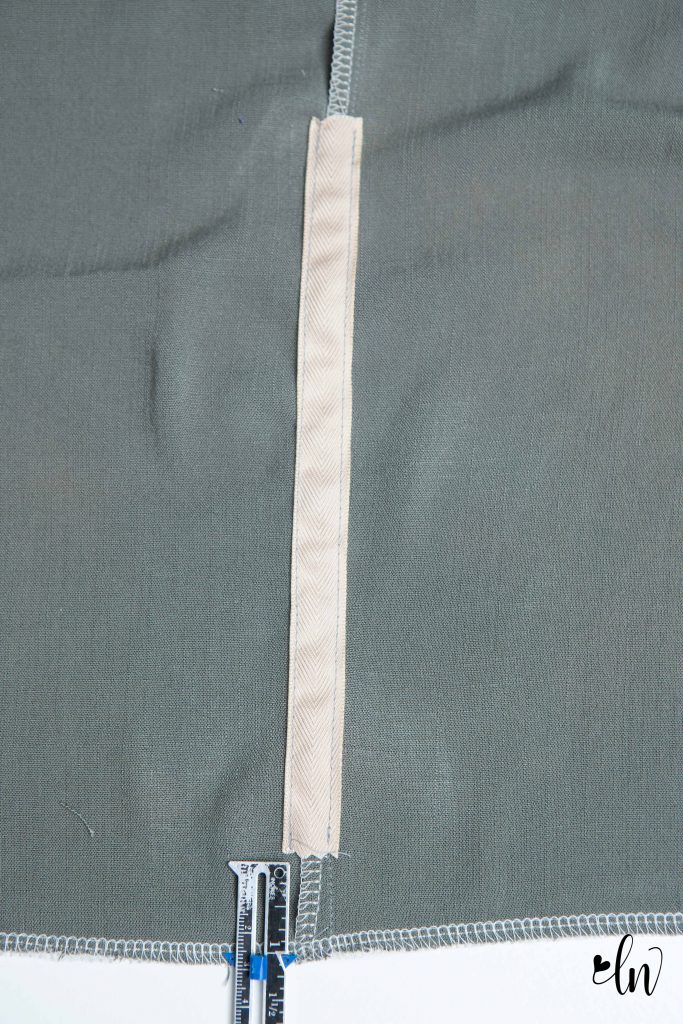
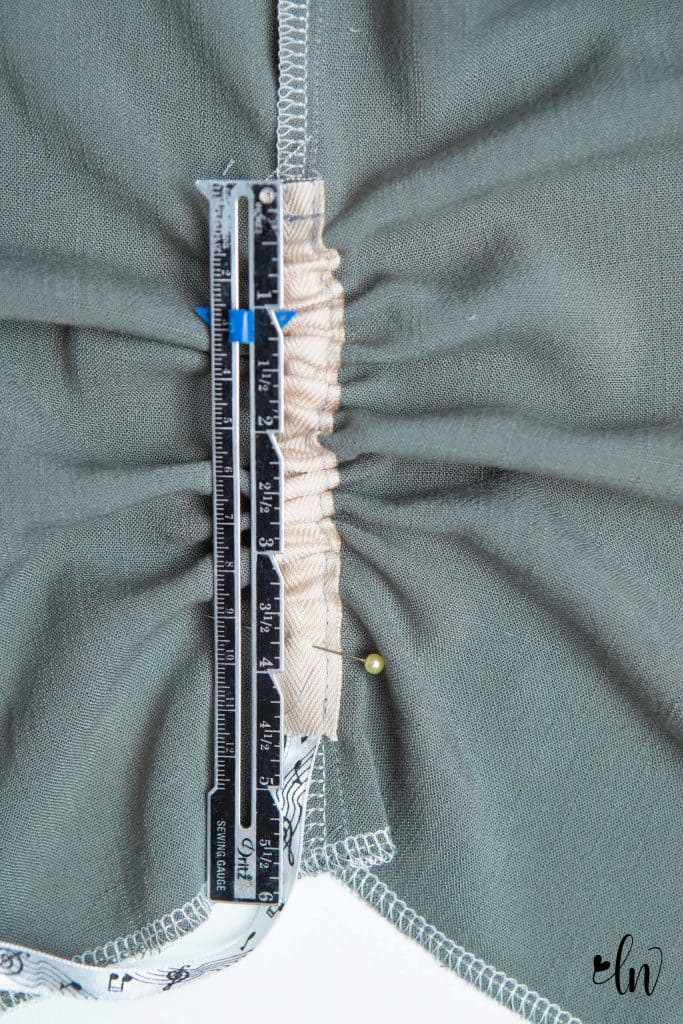
Cut a piece of 5/8″ twill tape 9″ long. Position it so that the end is an inch from the raw edge and it is over the seam on the wrong side of the pants. Sew in place down each side.
Thread 3/8″ ribbon into the casing.
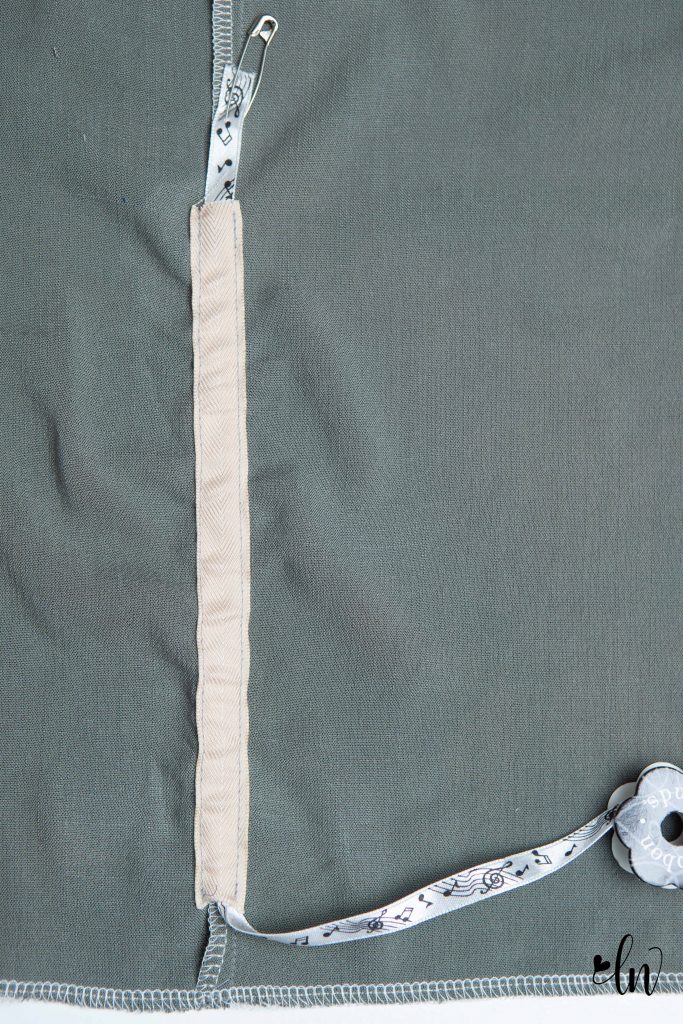
Close the top of the casing, securing the ribbon in place. I used a straight stitch for this. (The bottom is not sewn shut. That is a stray thread I missed when taking the photo.) Clip the excess ribbon from above the casing.
Pull the ribbon to gather the side seam. I gathered mine to be 4.5″.
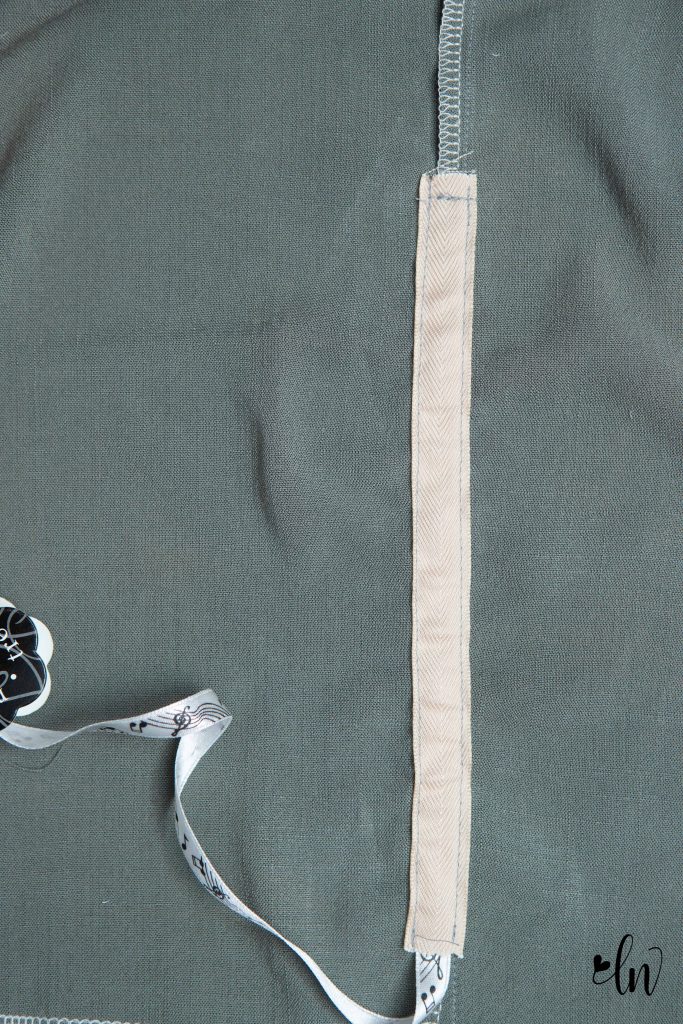
Sew the bottom of the casing closed, securing the ribbon. Clip off the excess ribbon.
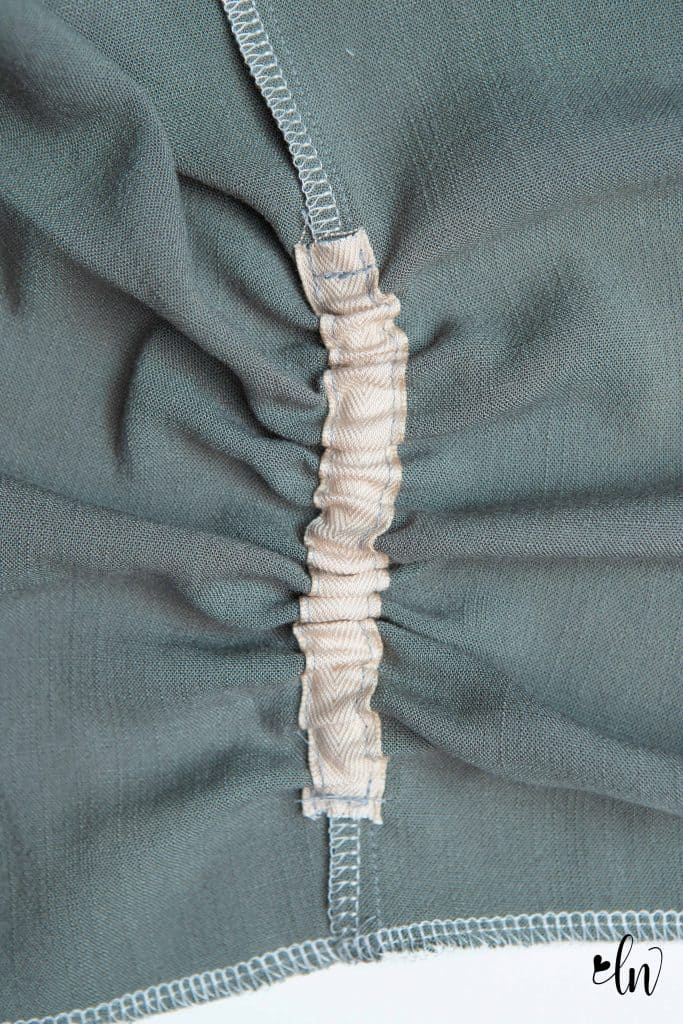
Repeat on the other pant leg and finish the construction of the pants. When you hem, the hem will cover the bottom 1″ of the casing. Just adjust the gathers so they are above the seam.
Live Sew Along
Our daily live videos for the Luna Sew Along are going on in our Facebook Support Group! Each day, I sew the steps of the day live while sharing tips and answering any questions you may have! I will be live at 1pm CST today! You will also find our give away happening in the Facebook group! One lucky winner will receive a $50 gift certificate to Love Notions Patterns (valid on pdf patterns) and a $50 gift certificate to Surge Fabric Shop!
All fabrics used in this blog post today were provided by Surge Fabric Shop. The shorts are a beautiful double brushed poly called Cynthia on Terracotta. The fabric used to demonstrate the ruched side seam is a slub stretch woven in dusty olive.
Luna Loungewear Sew Along Schedule
Monday: Fabric selection and blending sizes
Tuesday: Sewing the cami/nightie with lingerie elastic or knit binding straps and comfort band bralette hack
Wednesday: Sewing a cami/nightie with shelf bra and fold over elastic straps and gathered neckline hack
Thursday: Sewing the shorts/capris and ruched hem hack
Friday: Hemming the cami, nightie, and shorts and swim suit hack.
Pin this for later!