Whistler Sew Along: Day Five
We have reached the final steps in the Whistler Sew Along. After today, you will have a new cozy sweater to wear! And for me, it’s just in time as we are expecting some nasty winter weather today. Hooray for January! It’s perfect for sweater, hot chocolate and sewing! Let’s get those cuffs and bands on! I have some tips for you, so read on to learn how I make sewing cuffs a breeze and how I kept my hem facing in line while I sewed it in place.
Attaching the cuffs
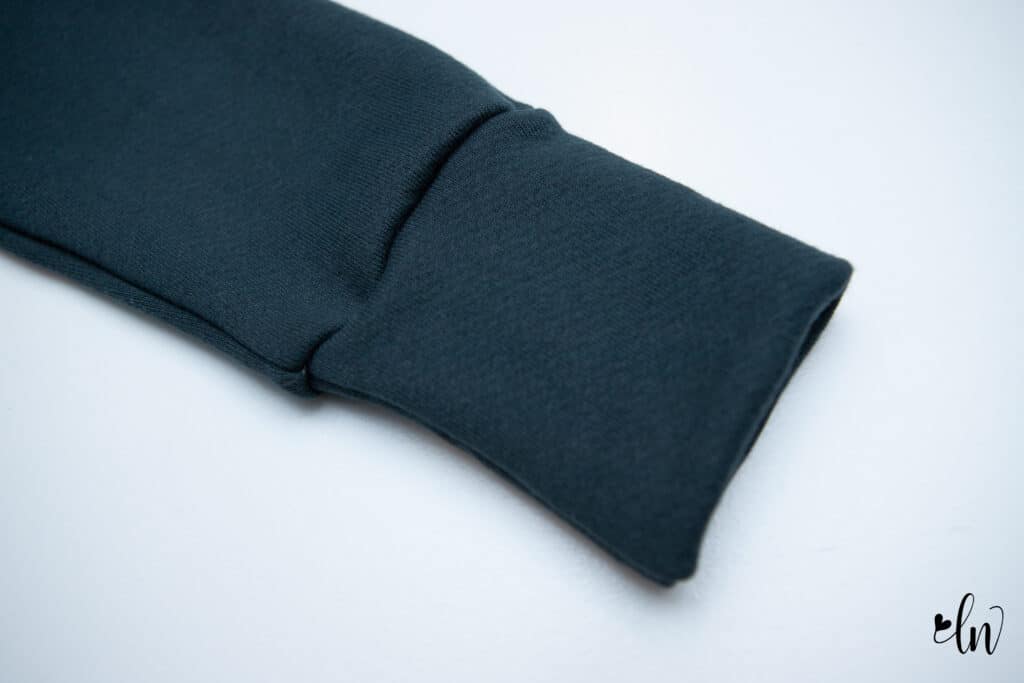
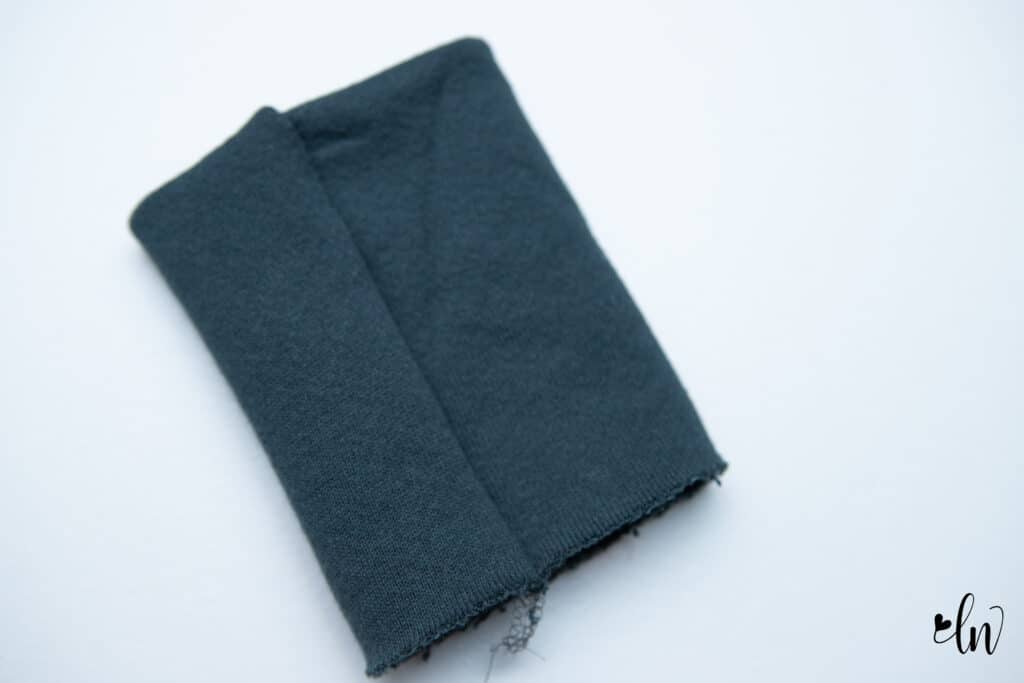
I just adore the tall cuffs that the Whistler has. They definitely help keep my sleeves in place when I push them up while cleaning or sewing, or whatever I’m doing. Sewing cuffs can be so quick! No pressing hems in place! However, sometimes it can be a bit tricky to turn the cuff right side out and get the seam lined up on the inside and outside. Well today I am sharing a trick I learned somewhere on Facebook a while back. It’s called the hotdog/hamburger method of sewing a cuff. Crazy name, right, but when you see it explained, it will make total sense!
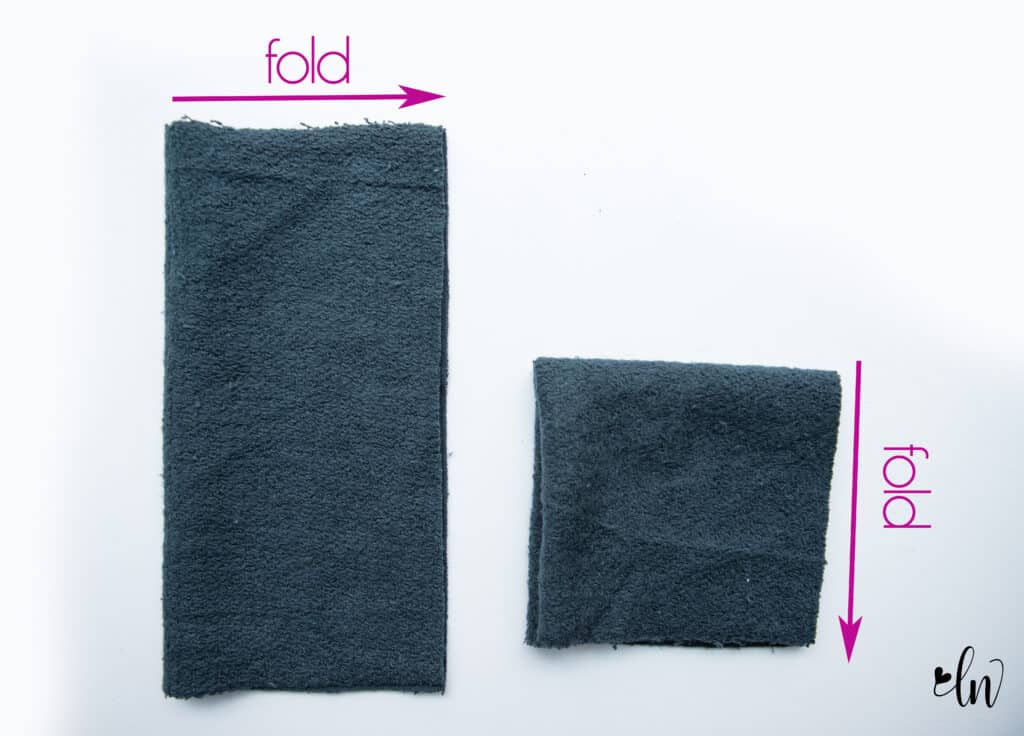
Fold your cuff right sides together with the long side lined up. (like a hotdog bun!) The stretch of the fabric will be going perpendicular to the fold. Now, fold it in half again top to bottom (like a hamburger bun!) You will have the raw edges on one side, and the fold on the other. See the photo below.
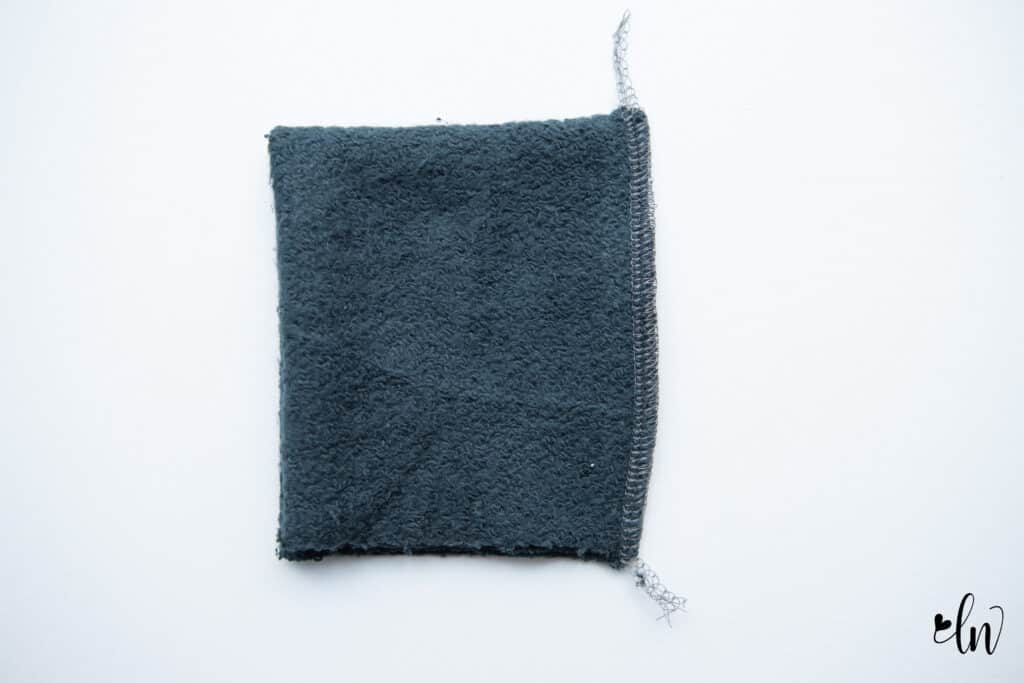
Next, we sew along the raw edge.
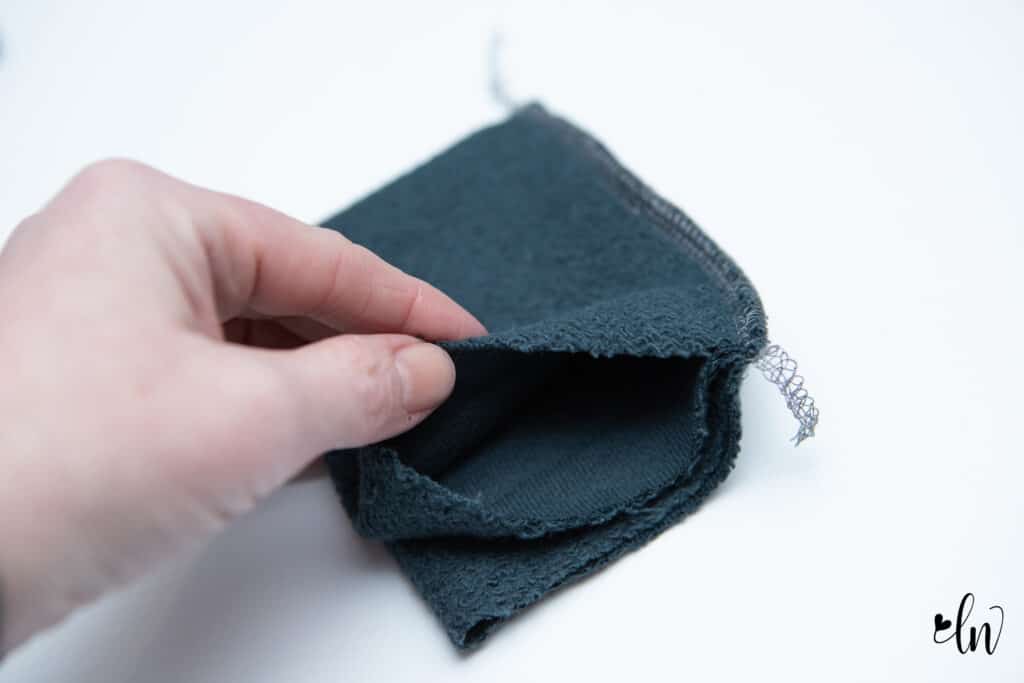
Take one layer of the cuff and turn it outside out.
And you have a cuff! It’s all lined up and ready to attach to your sleeve.
Sewing the hem facing
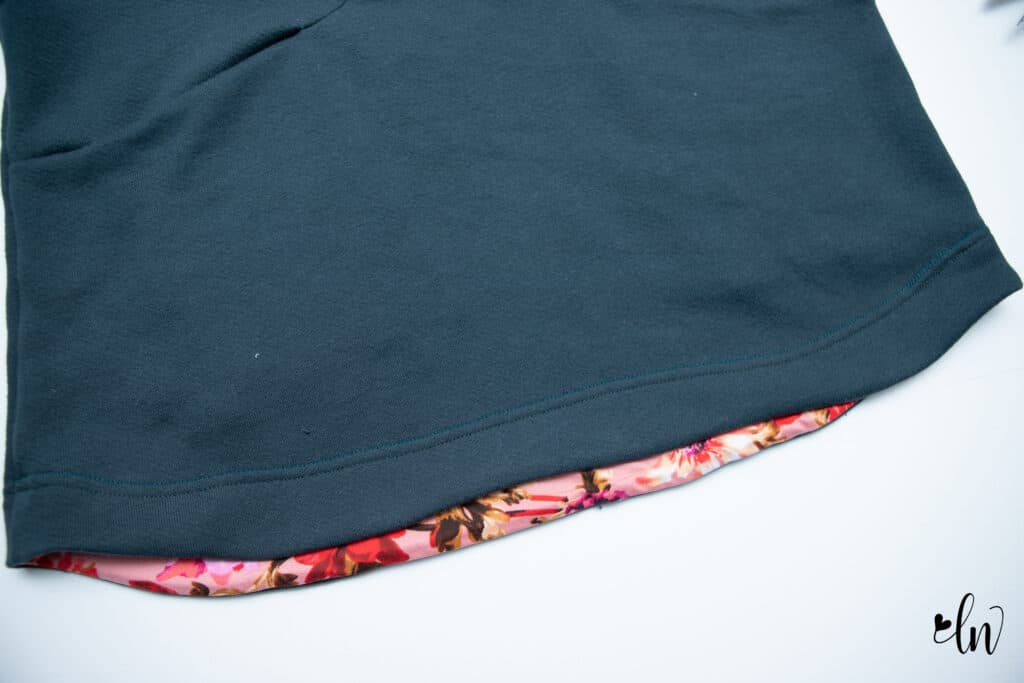
After you sew the ends of the hem facing together, line it up right sides together with the hem of the sweater. Sew in place. You can use any knit fabric for your facing. If you have an especially bulky fabric for the body of your sweater, I suggest using a lighter weight knit for your facing to reduce the amount of bulk you have. I used a brushed poly with my heavy weight cotton french terry. You can finish the top edge of the facing with a serger if you prefer, or leave it raw since knits don’t fray. (some sweater knits may though)
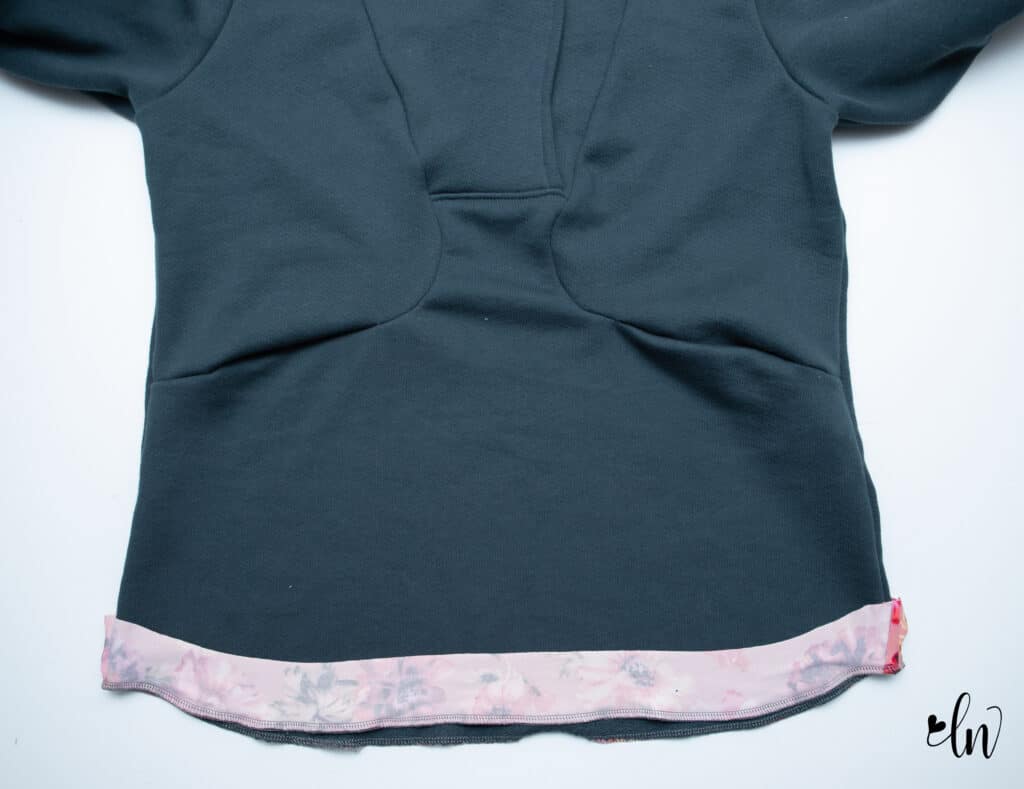
Press the facing to the wrong side of the sweater. Your fabrics will now be wrong sides together.
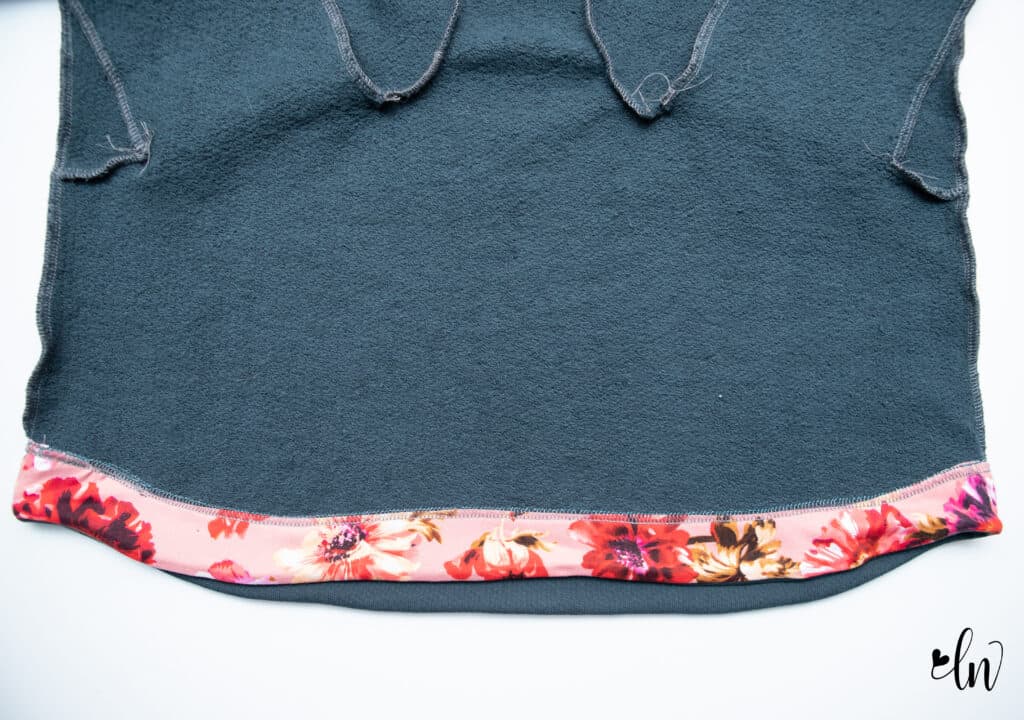
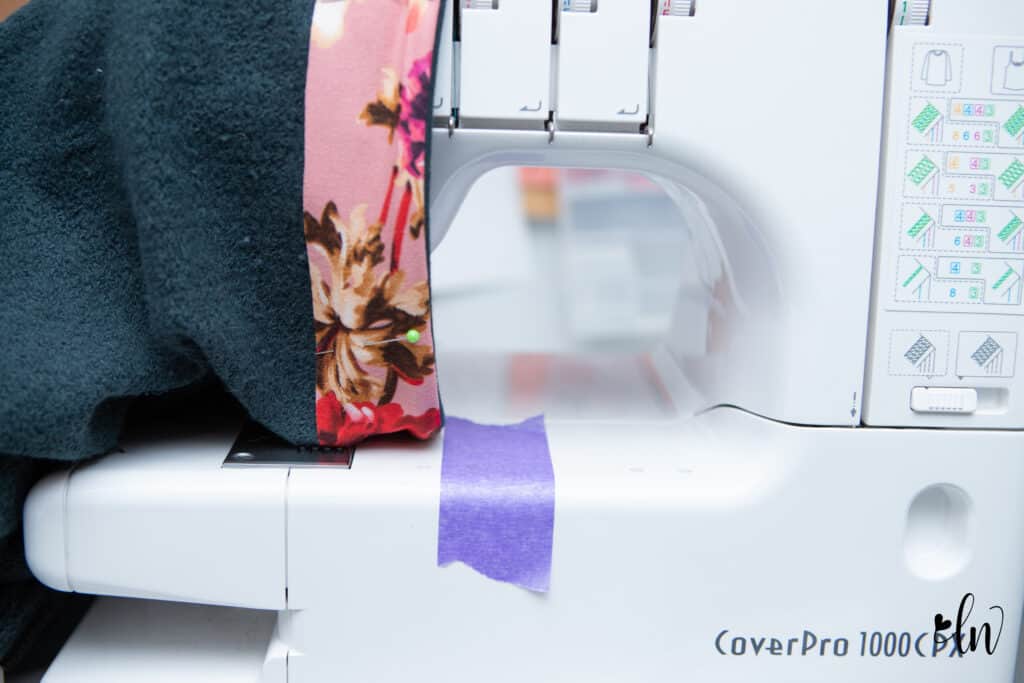
Sew the facing in place. I pinned my facing on the wrong side. Then, I lifted the hem up and watched the BOTTOM of my hem to make sure the raw edge stayed lined up in the middle of the feed dogs of my coverstitch. I was also able to watch for the pins. 😉 You can use this same trick with the sewing machine! It ensured that I caught the top of the facing in my topstitching. If you don’t like pins, you can use hem tape to keep the hem in place, or glue it in place with a fabric glue stick.
Press and you are done! Now the hard part is picking out the button!! I sew mine through both layers of the collar. It doesn’t need to unbutton to get it on. If you want a functioning button, (it makes breastfeeding a breeze!) go for it and add those button holes! Throw on your Whistler Sweater and keep cozy!
I hope you have had fun on this sew along! If you are a part of Facebook or Instagram, be sure to share your makes with us! We love to see them! Join our Facebook Group here. If you are on Instagram, hashtag your sew with #whistlersal
Sew Along Schedule
- Monday: Fabric choices, person fit adjustments, cutting fabric
- Tuesday: Shawl/hood construction. Hack: Adding a zipper
- Wednesday: Constructing the pockets and sweater front. Hack: Omitting the pockets & collar lining
- Thursday: Sewing the sleeves and side seams. Hack: Whistler Cardigan
- Friday: Cuffs, band, and facing