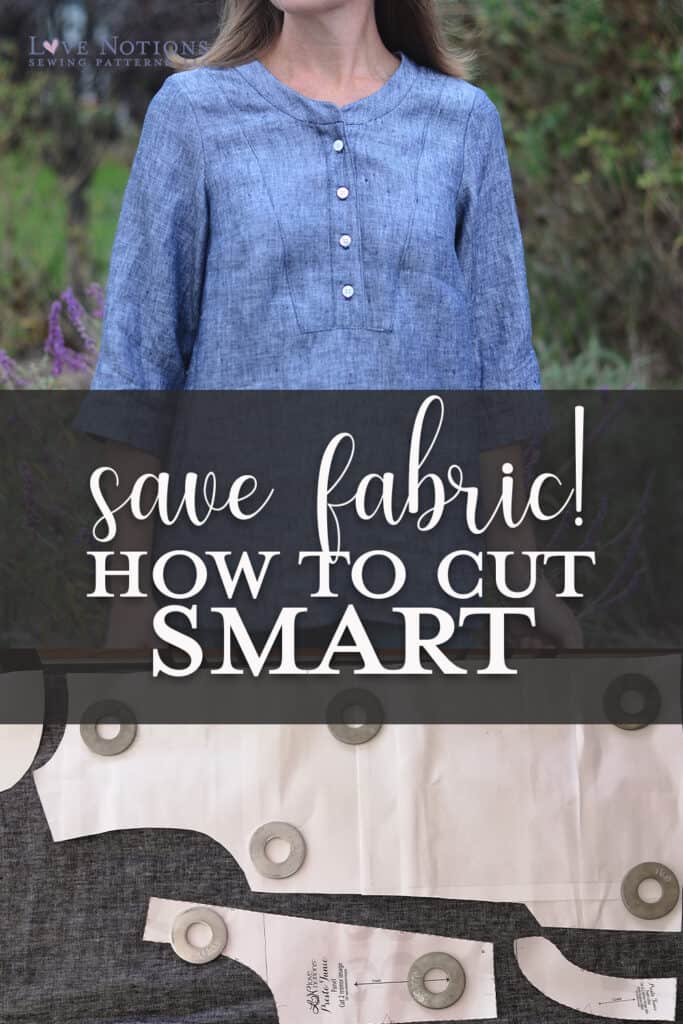
Sewing School – Options and Ideas for Economy of Fabric Cutting
Hello fellow sewing enthusiasts! I’m happy to pop into the LN blog again, this time with some tips and suggestions for how to cut your fabric and make the best use of your yardage. I’m using the Presto Tunic to show you a bunch of different ways to arrange your pattern pieces and prep for cutting.
A little bit about Today’s Feature Pattern
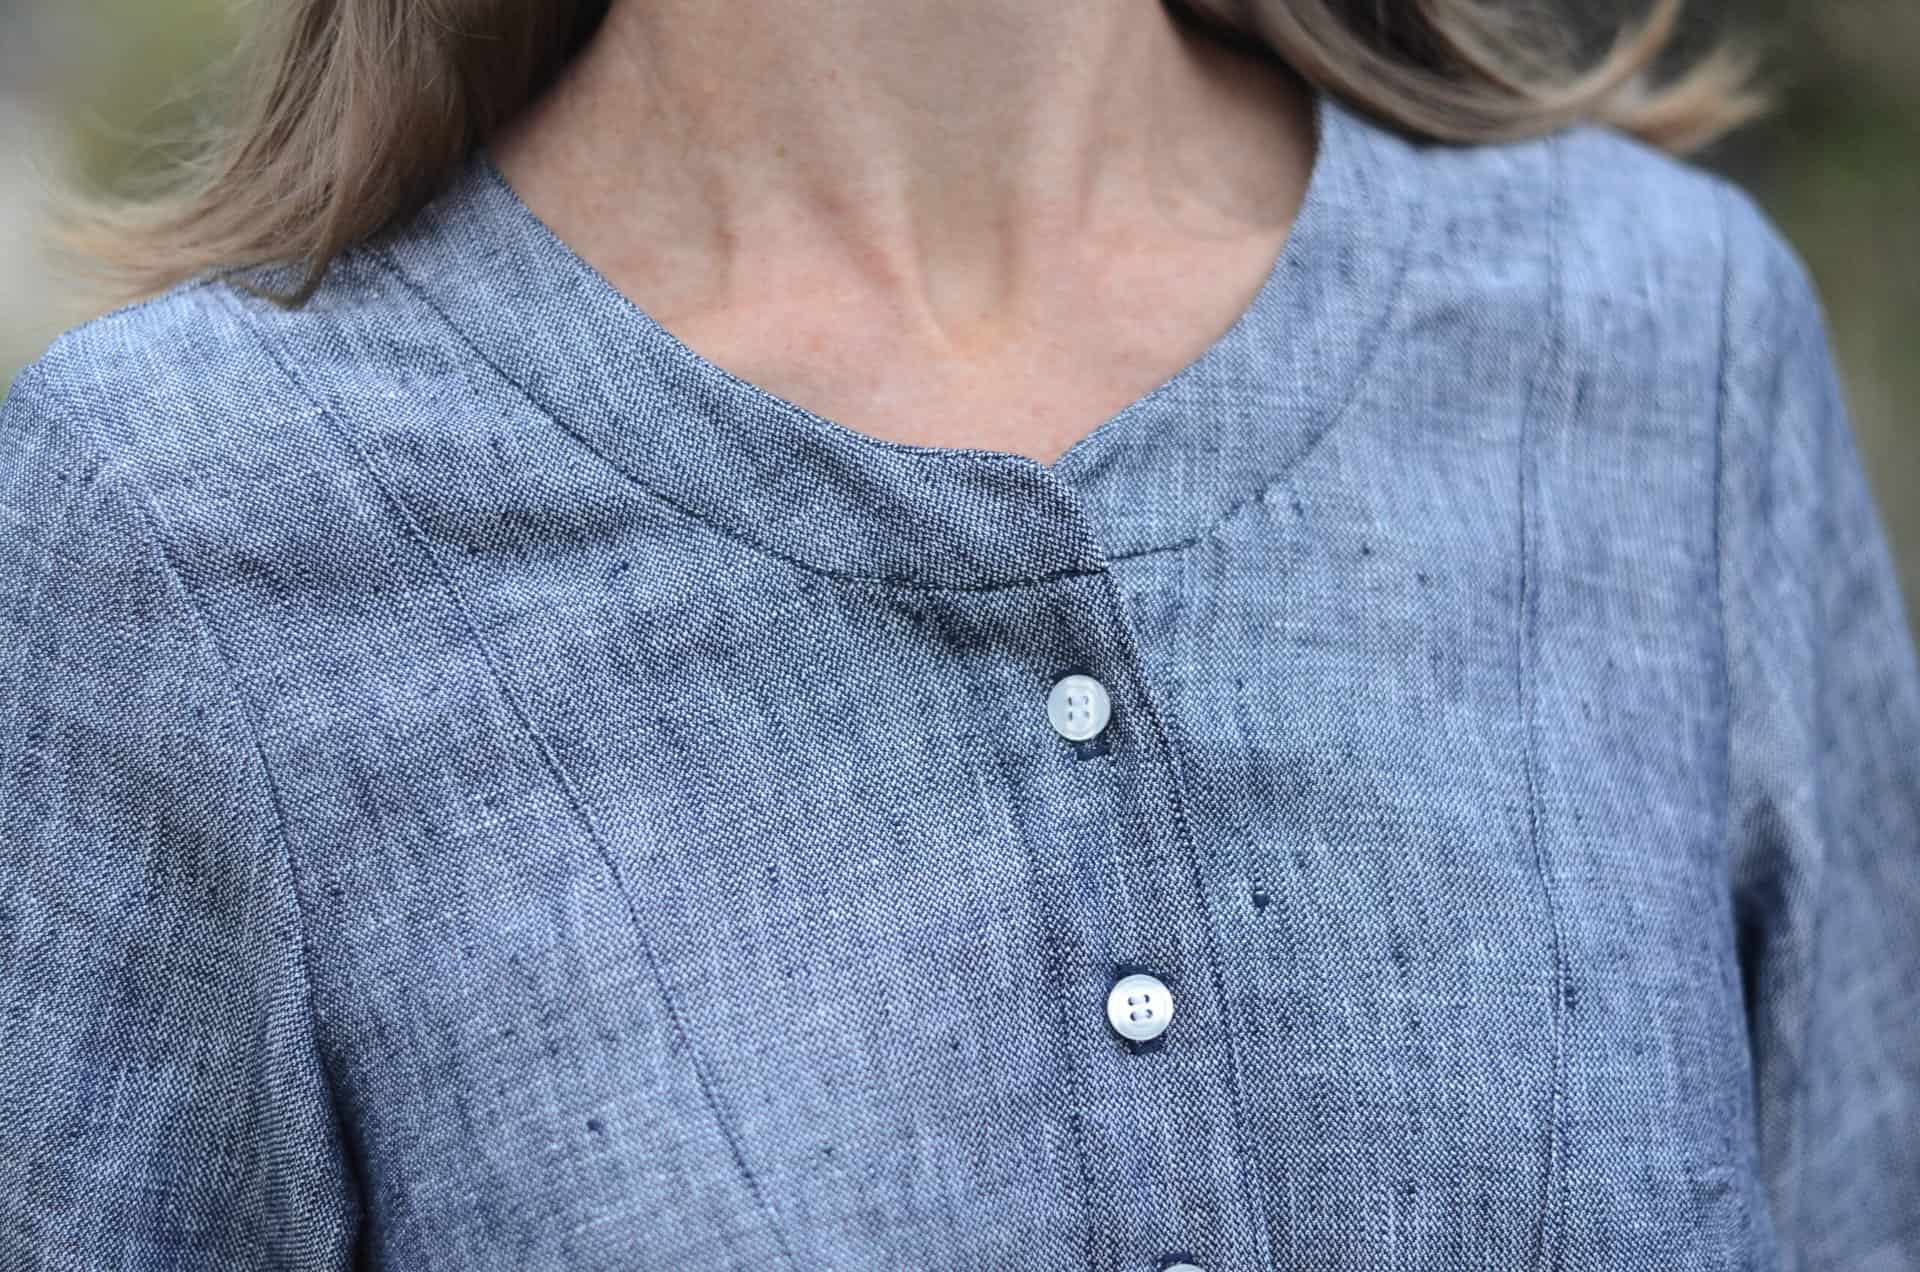
Presto is a woven tunic sewing pattern – perfect for quilting cottons, flannel, linen, and all sorts of common light to medium weight woven fabrics. It has crisp details and lines – and that button front is so professional looking! You can learn to make mitered corners here and there’s lots of other Presto sewing inspo (you can even make it a dress or add these glorious pintucks.
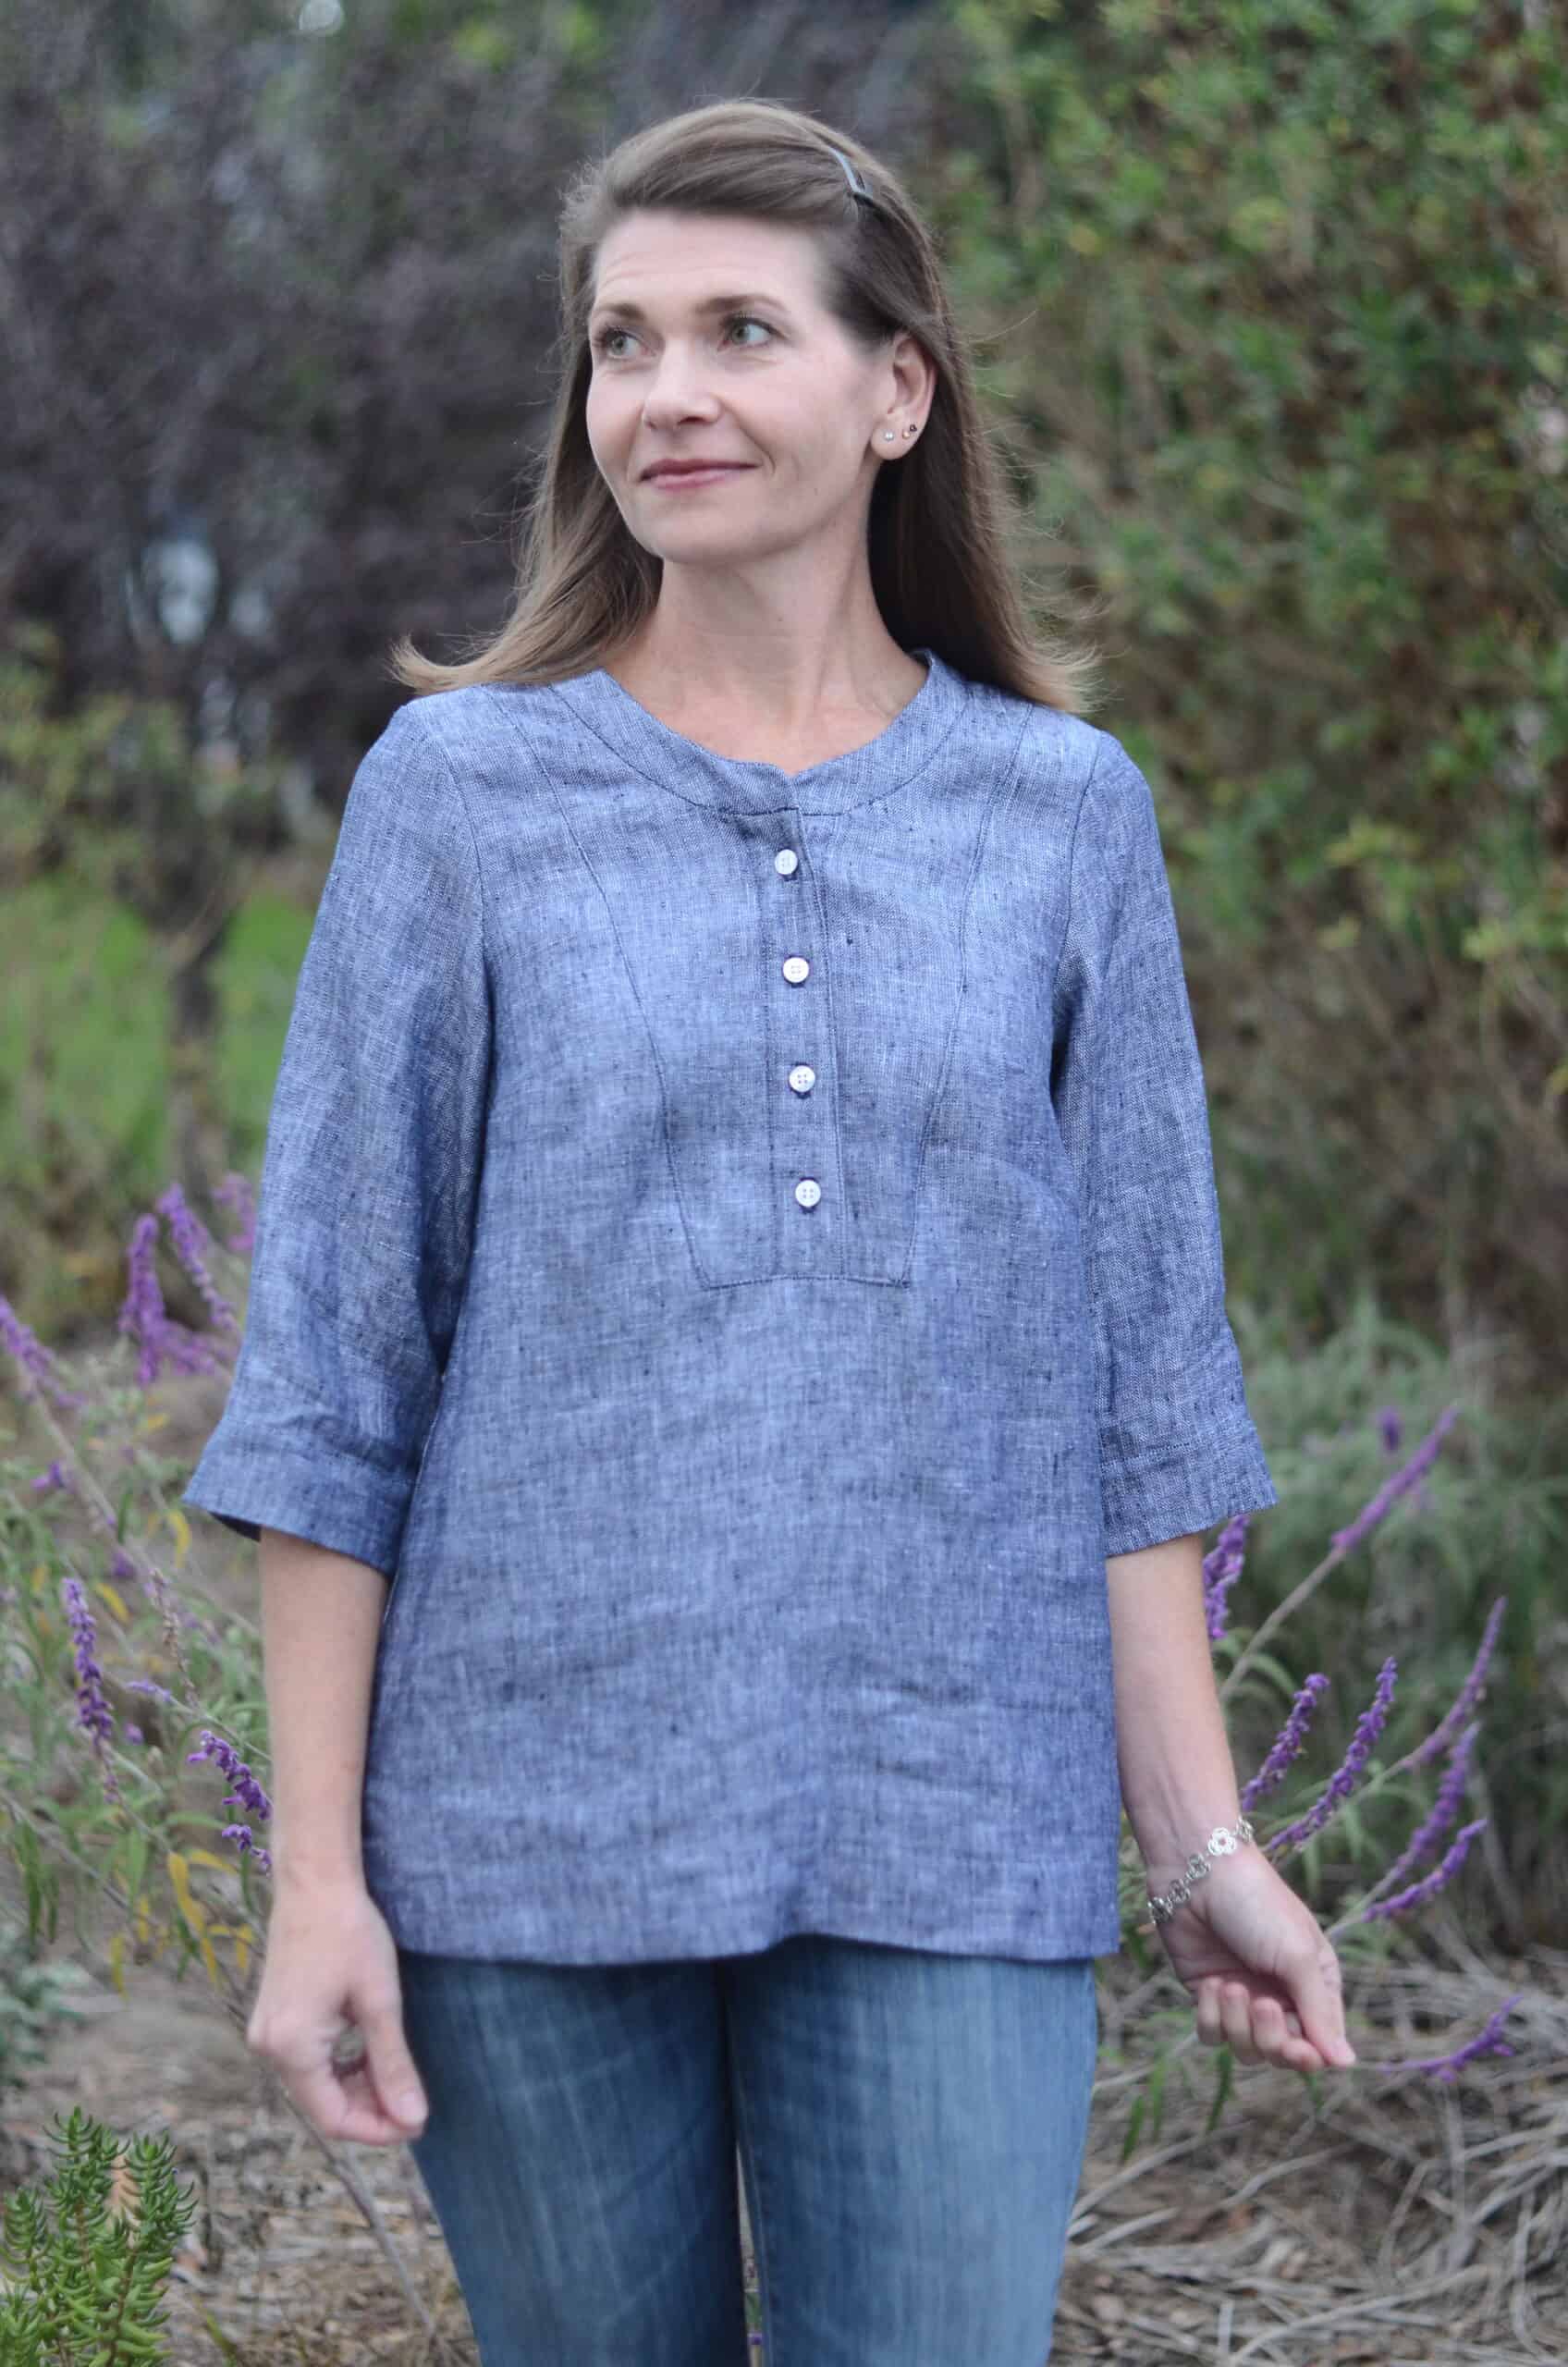
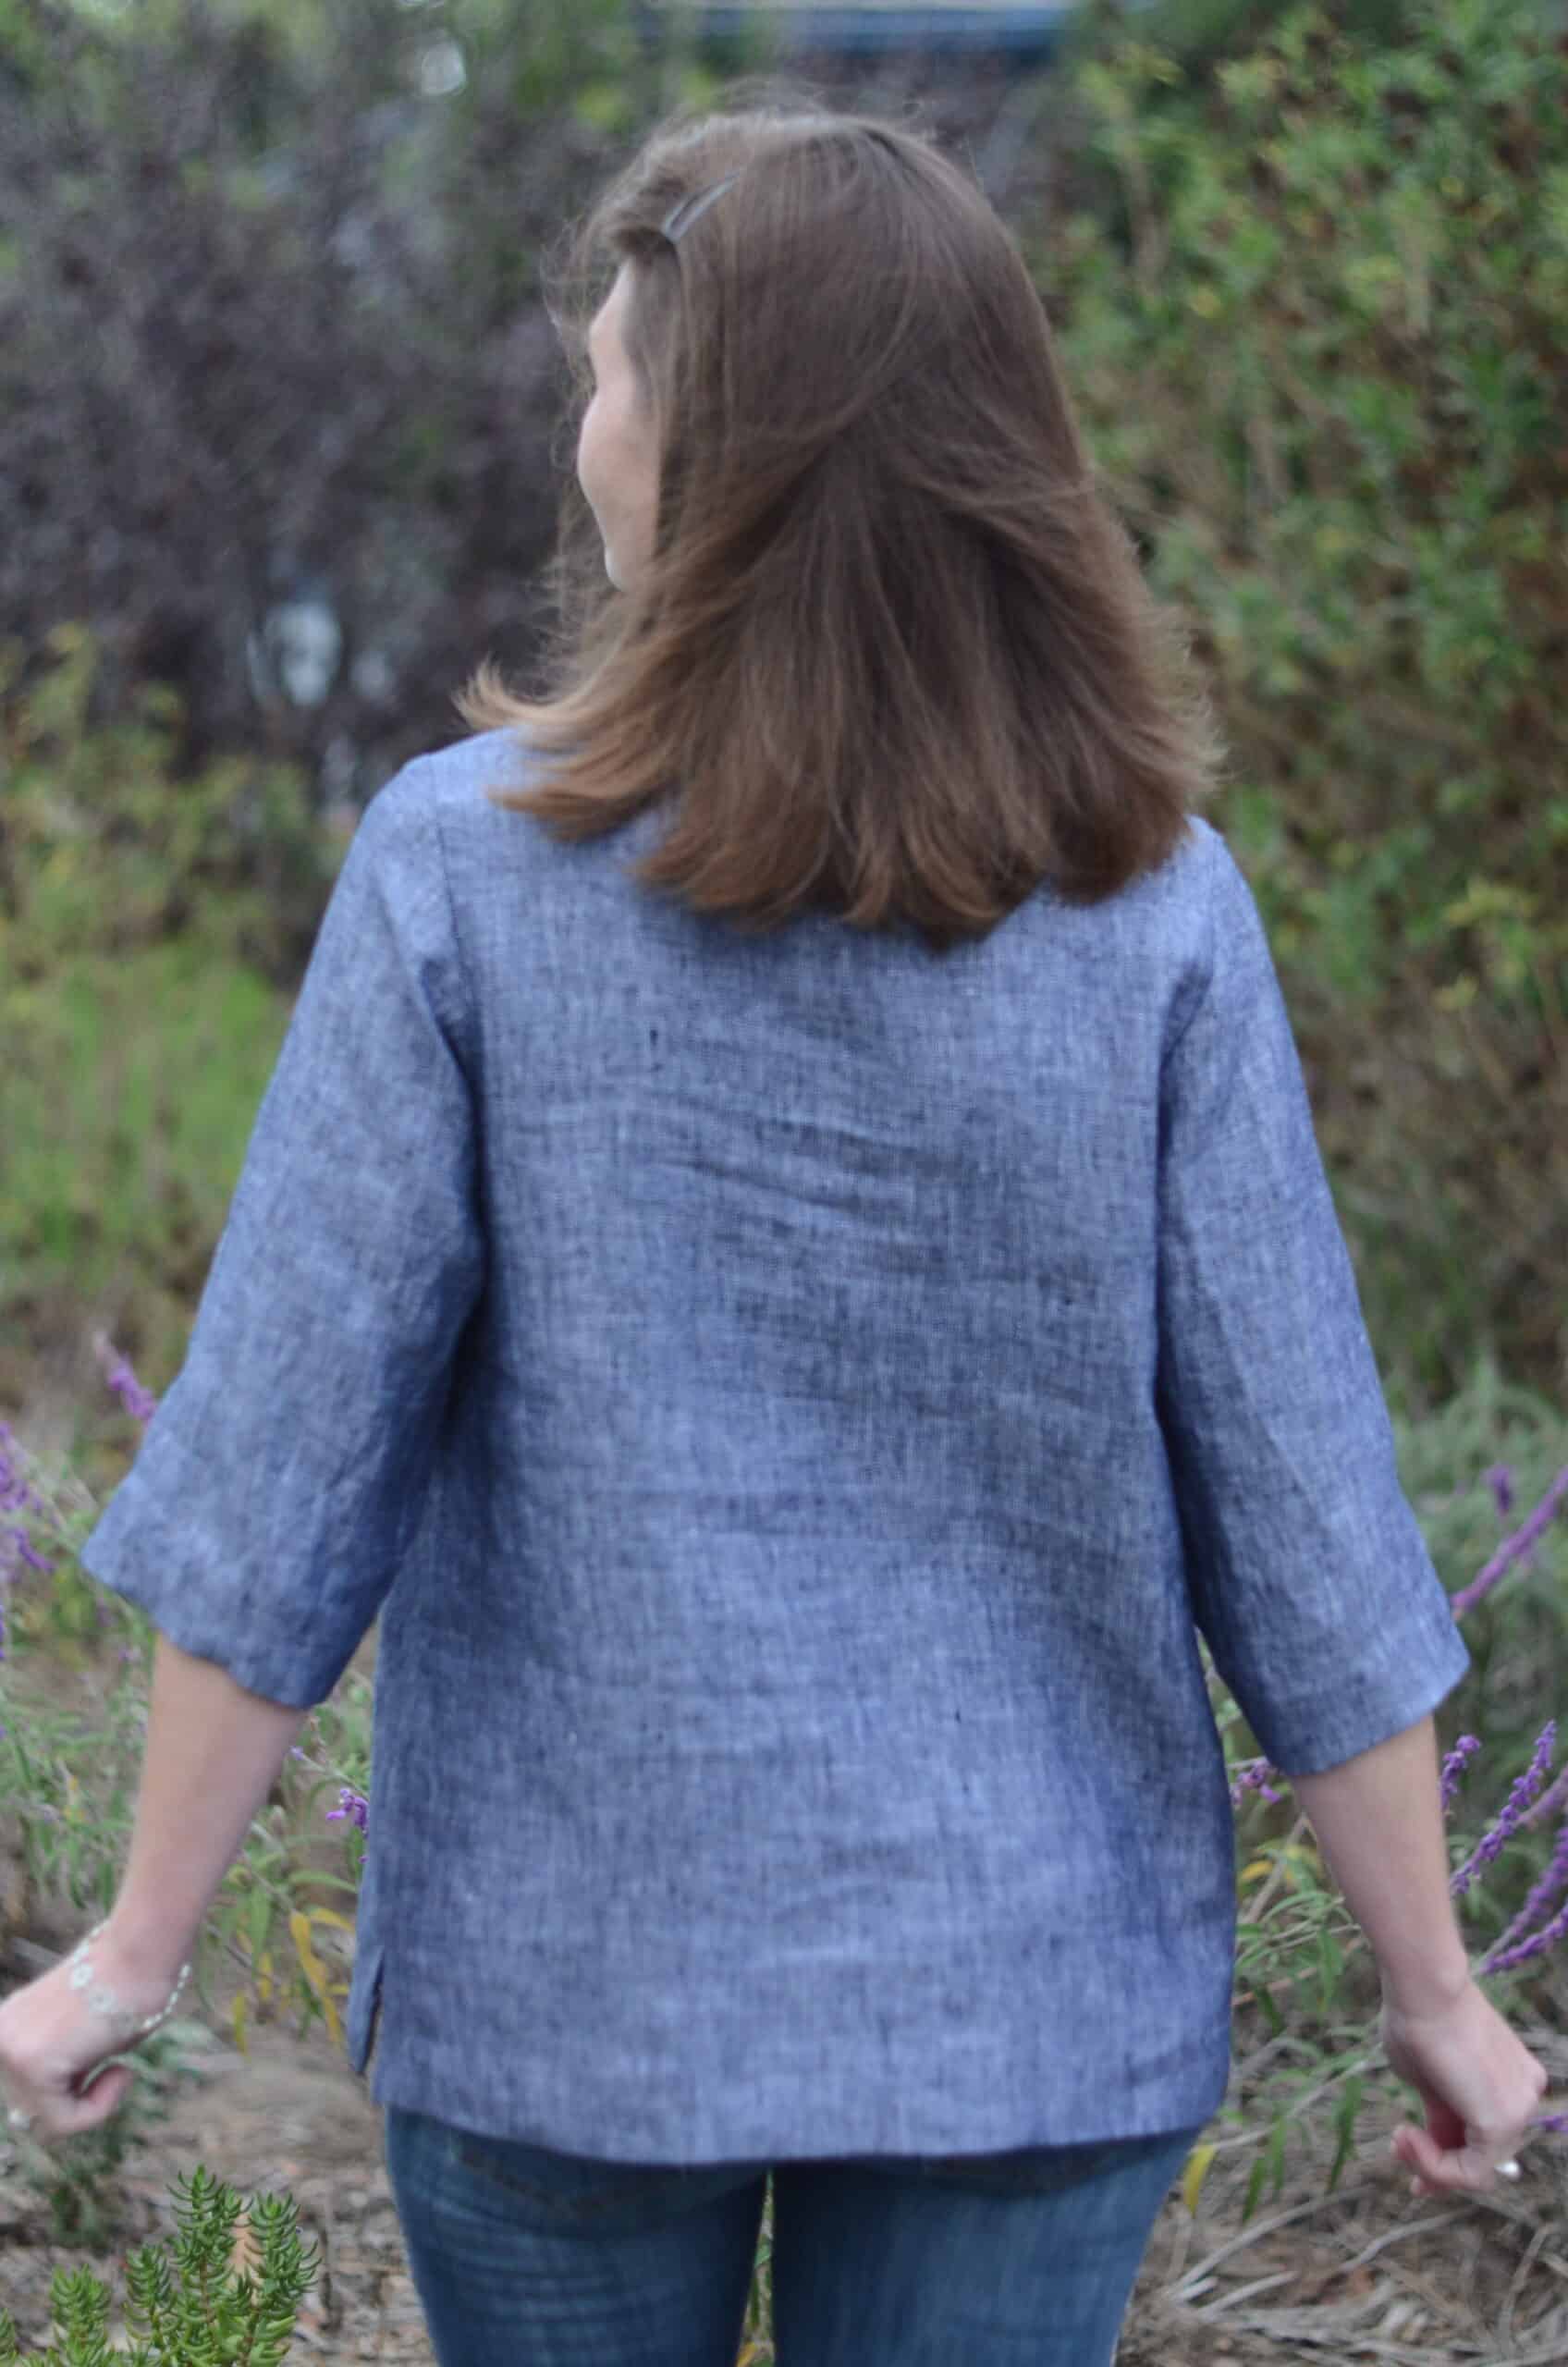
A quick FYI that I chose to shorten the bodice by one inch on my Presto version, plus I shortened the back hem to match with the front hem. I’m using the ¾ sleeves because those feel like breezy autumn to me.


Now let’s talk about cutting prep
Okay troops, your pattern alterations are completed, you’ve prewashed fabric the same way you plan to launder your garment, you’ve lightly ironed (maybe), and you’re ready to cut your pattern pieces!
Sidebar: if after washing, your beautiful rectangle of fabric ends up as some sort of random parallelogram, you can help restore the original shape. Get a pal and you each grab a hold of opposite corners and gently pull before swapping and pulling on the other two opposing corners. This is called squaring up and can cajole the weave back into its original form, or at least improve correcting the grainline.
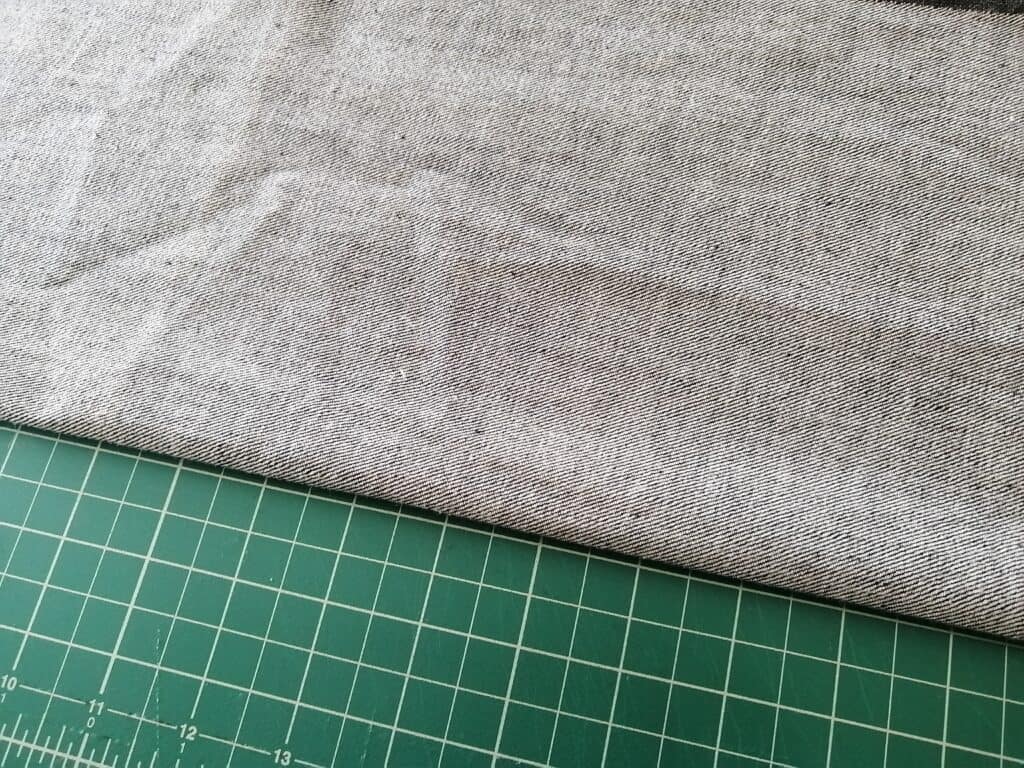
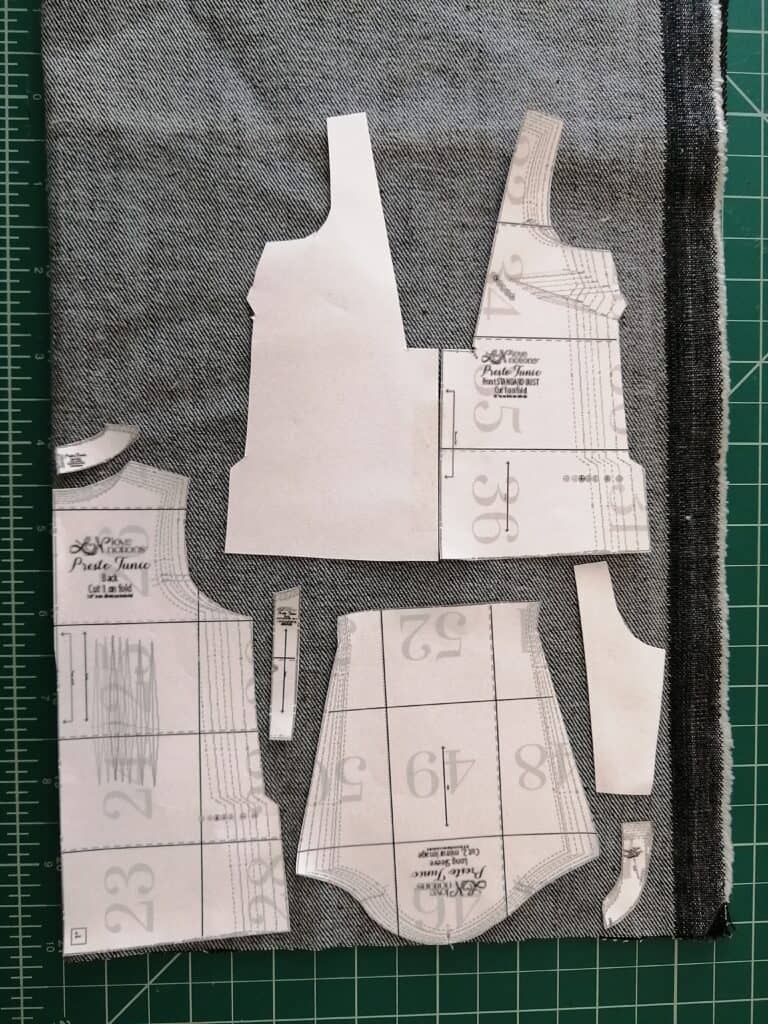
Second sidebar: a heads up that I’m using denim for example pics since it has a distinctive right and wrong side, unlike the linen that I’m actually sewing for my Presto. Likewise, I am using not-to-scale pattern pieces AND a general A-line dress shape in some cases just to easily show some layout options. Fabric comes in a huge variety of widths and wee pattern pieces are easier to photograph, so this is just to give some examples and get your creative juices flowing. Your own experience with any particular pattern size and fabric width will vary, I guarantee.
Start off on the right foot
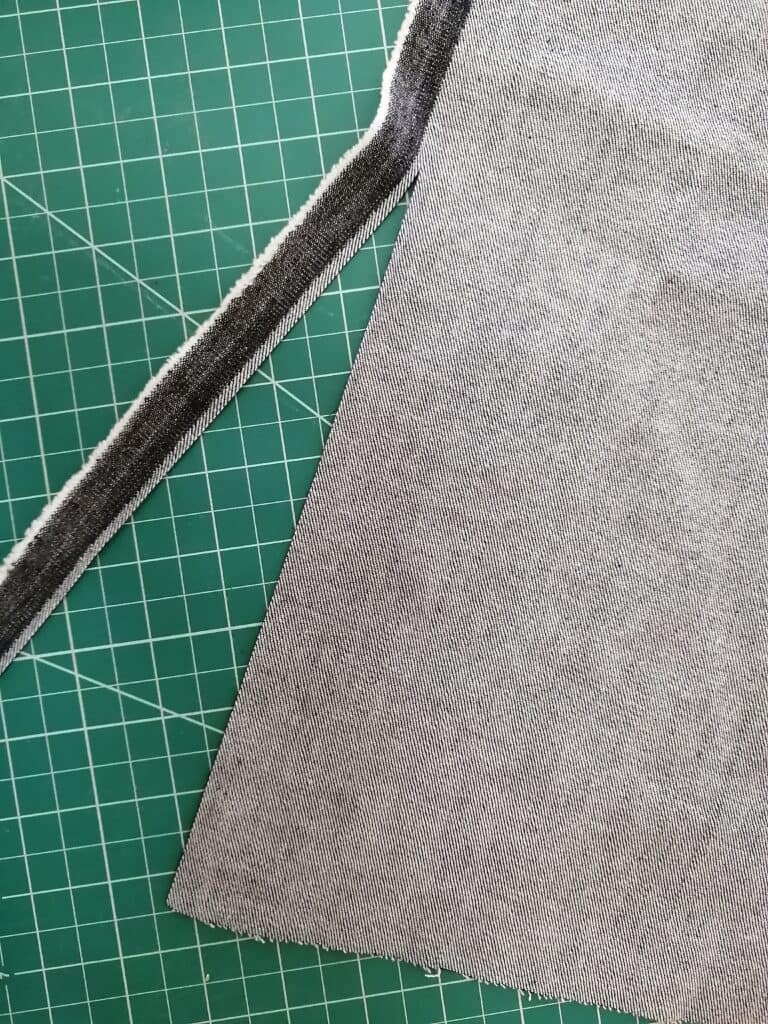
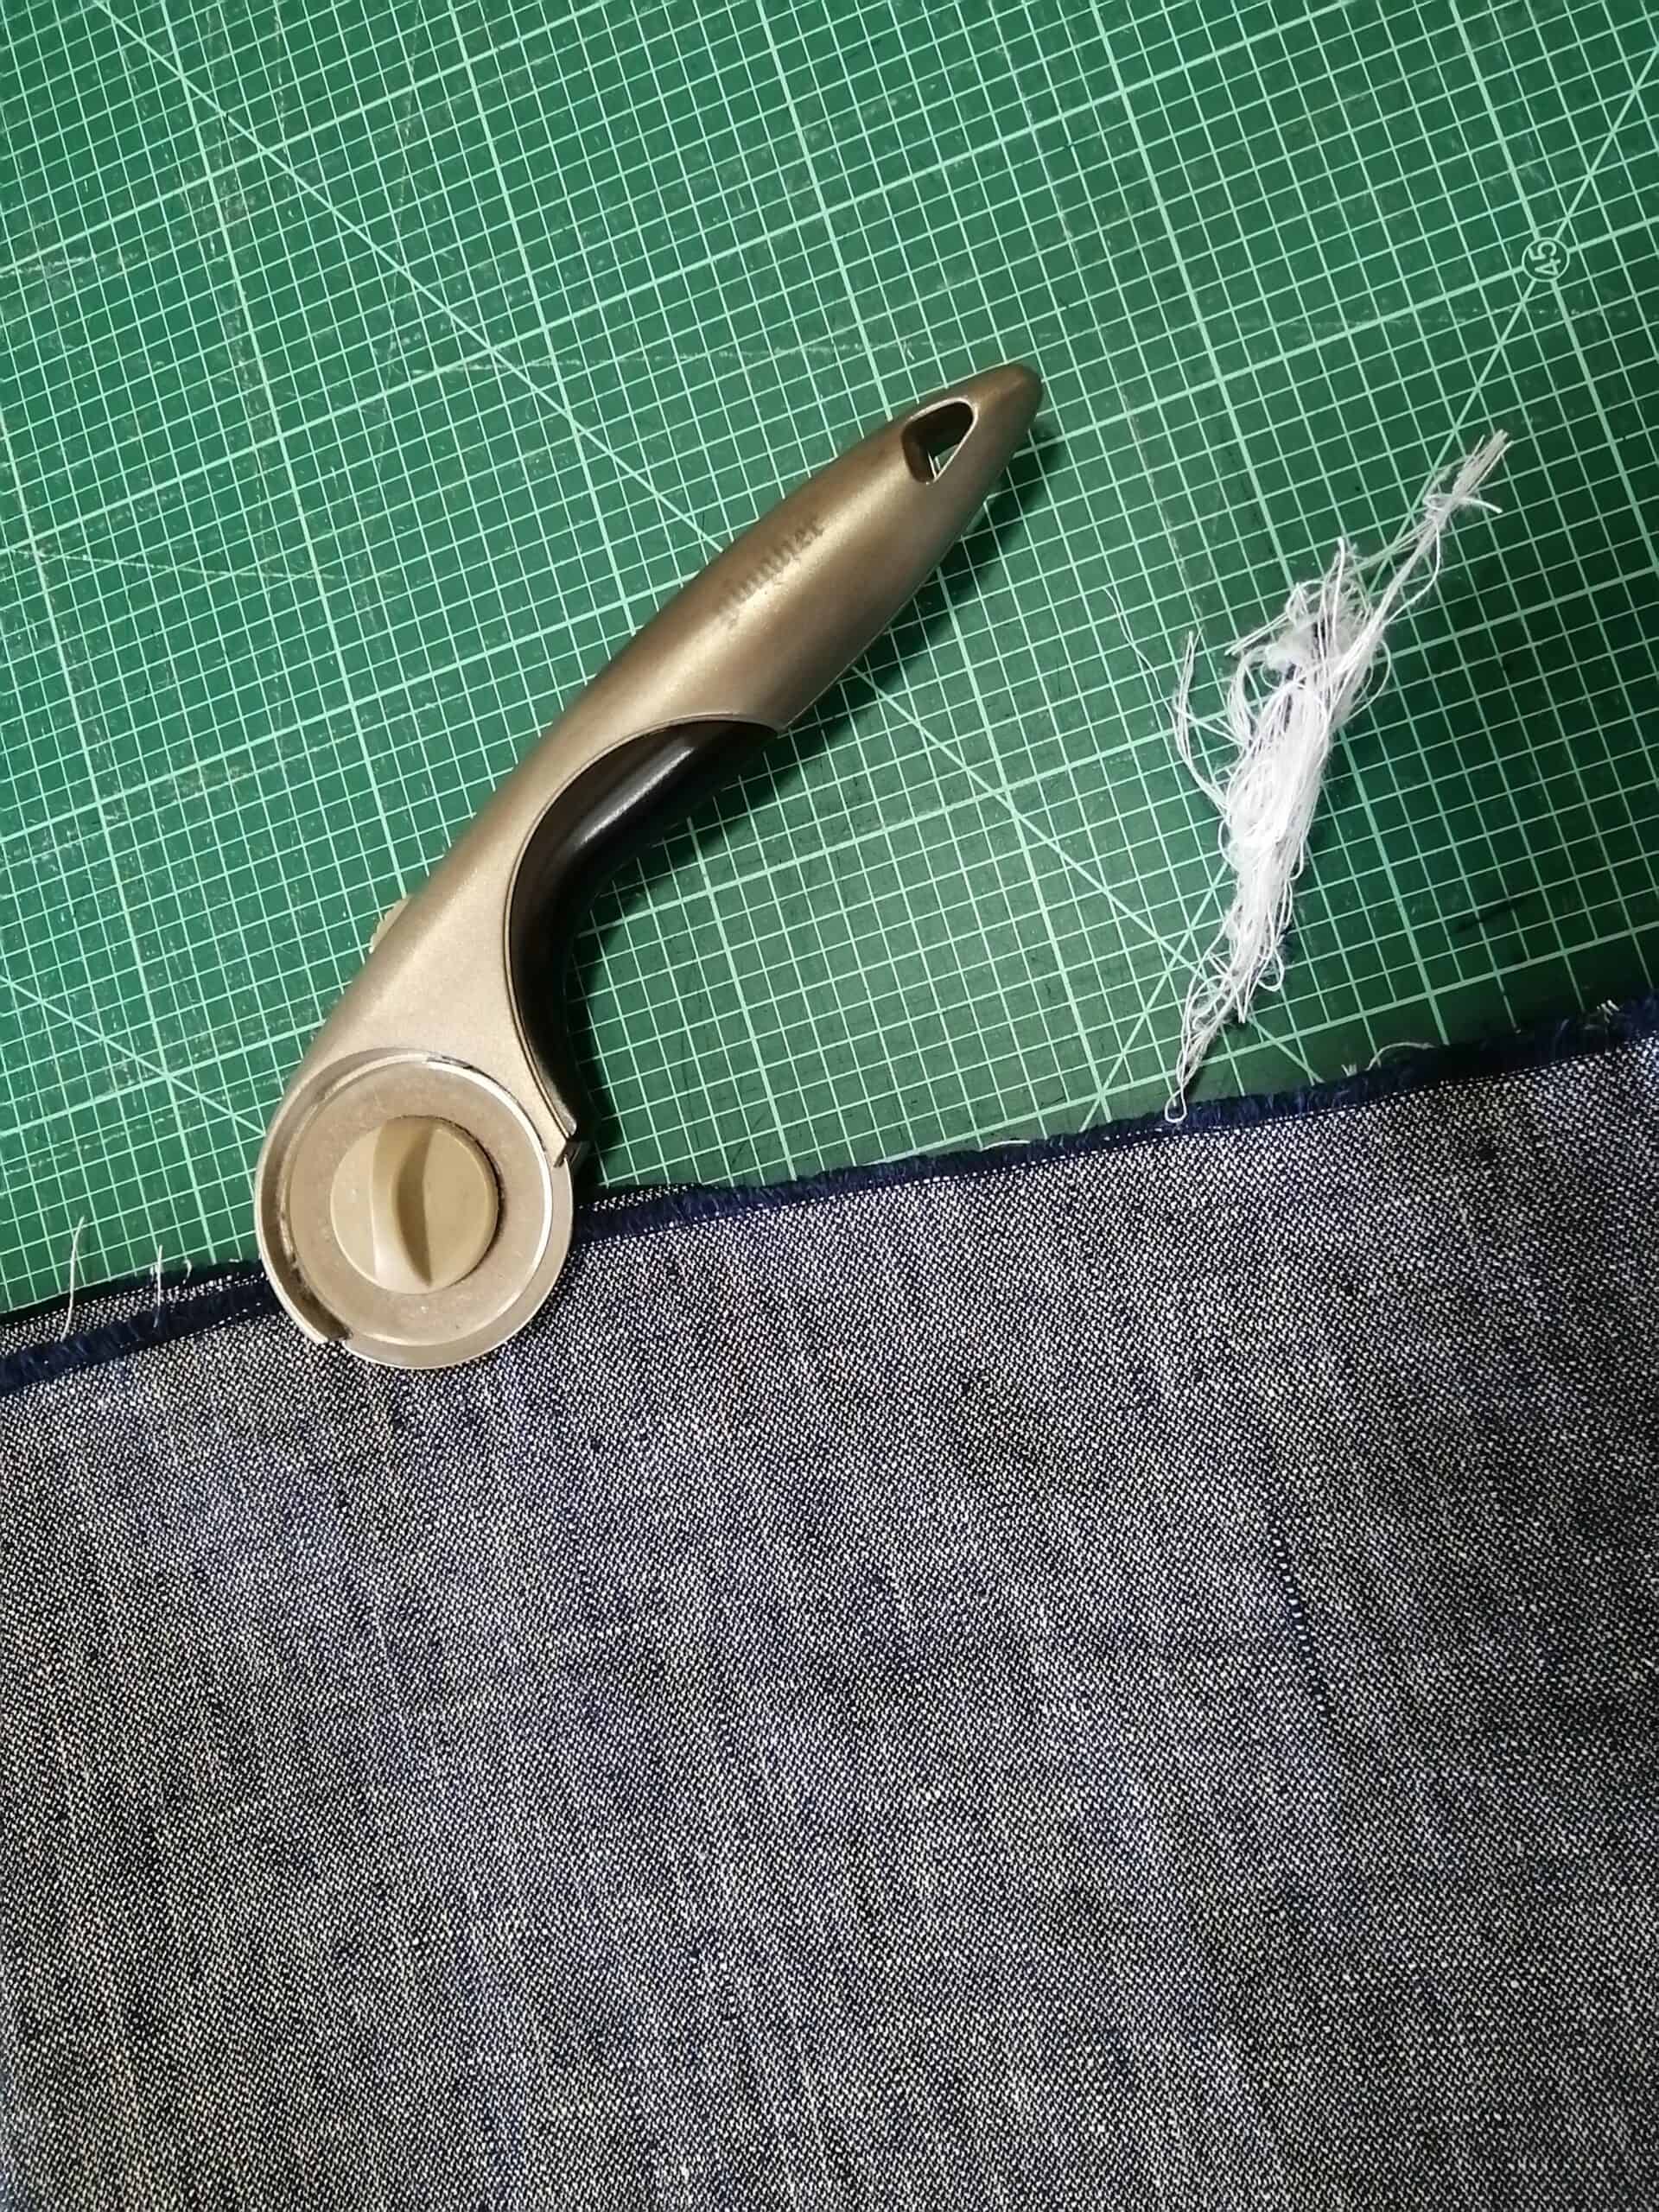
Sometimes you need to release the yardage from tight or shrunken selvages before laying out your pattern pieces. This seems to happen the most with knits like rayon spandex or even polyester rib knits, but even woven are not immune. I like to use my big long quilting ruler and just slice off the inch or so edge right along the selvage on either side. Now your fabric will cooperate and lie flat across the yardage, which is important for print matching and keeping fabric straight on the grain so it’s less likely to get twisty after being sewn.
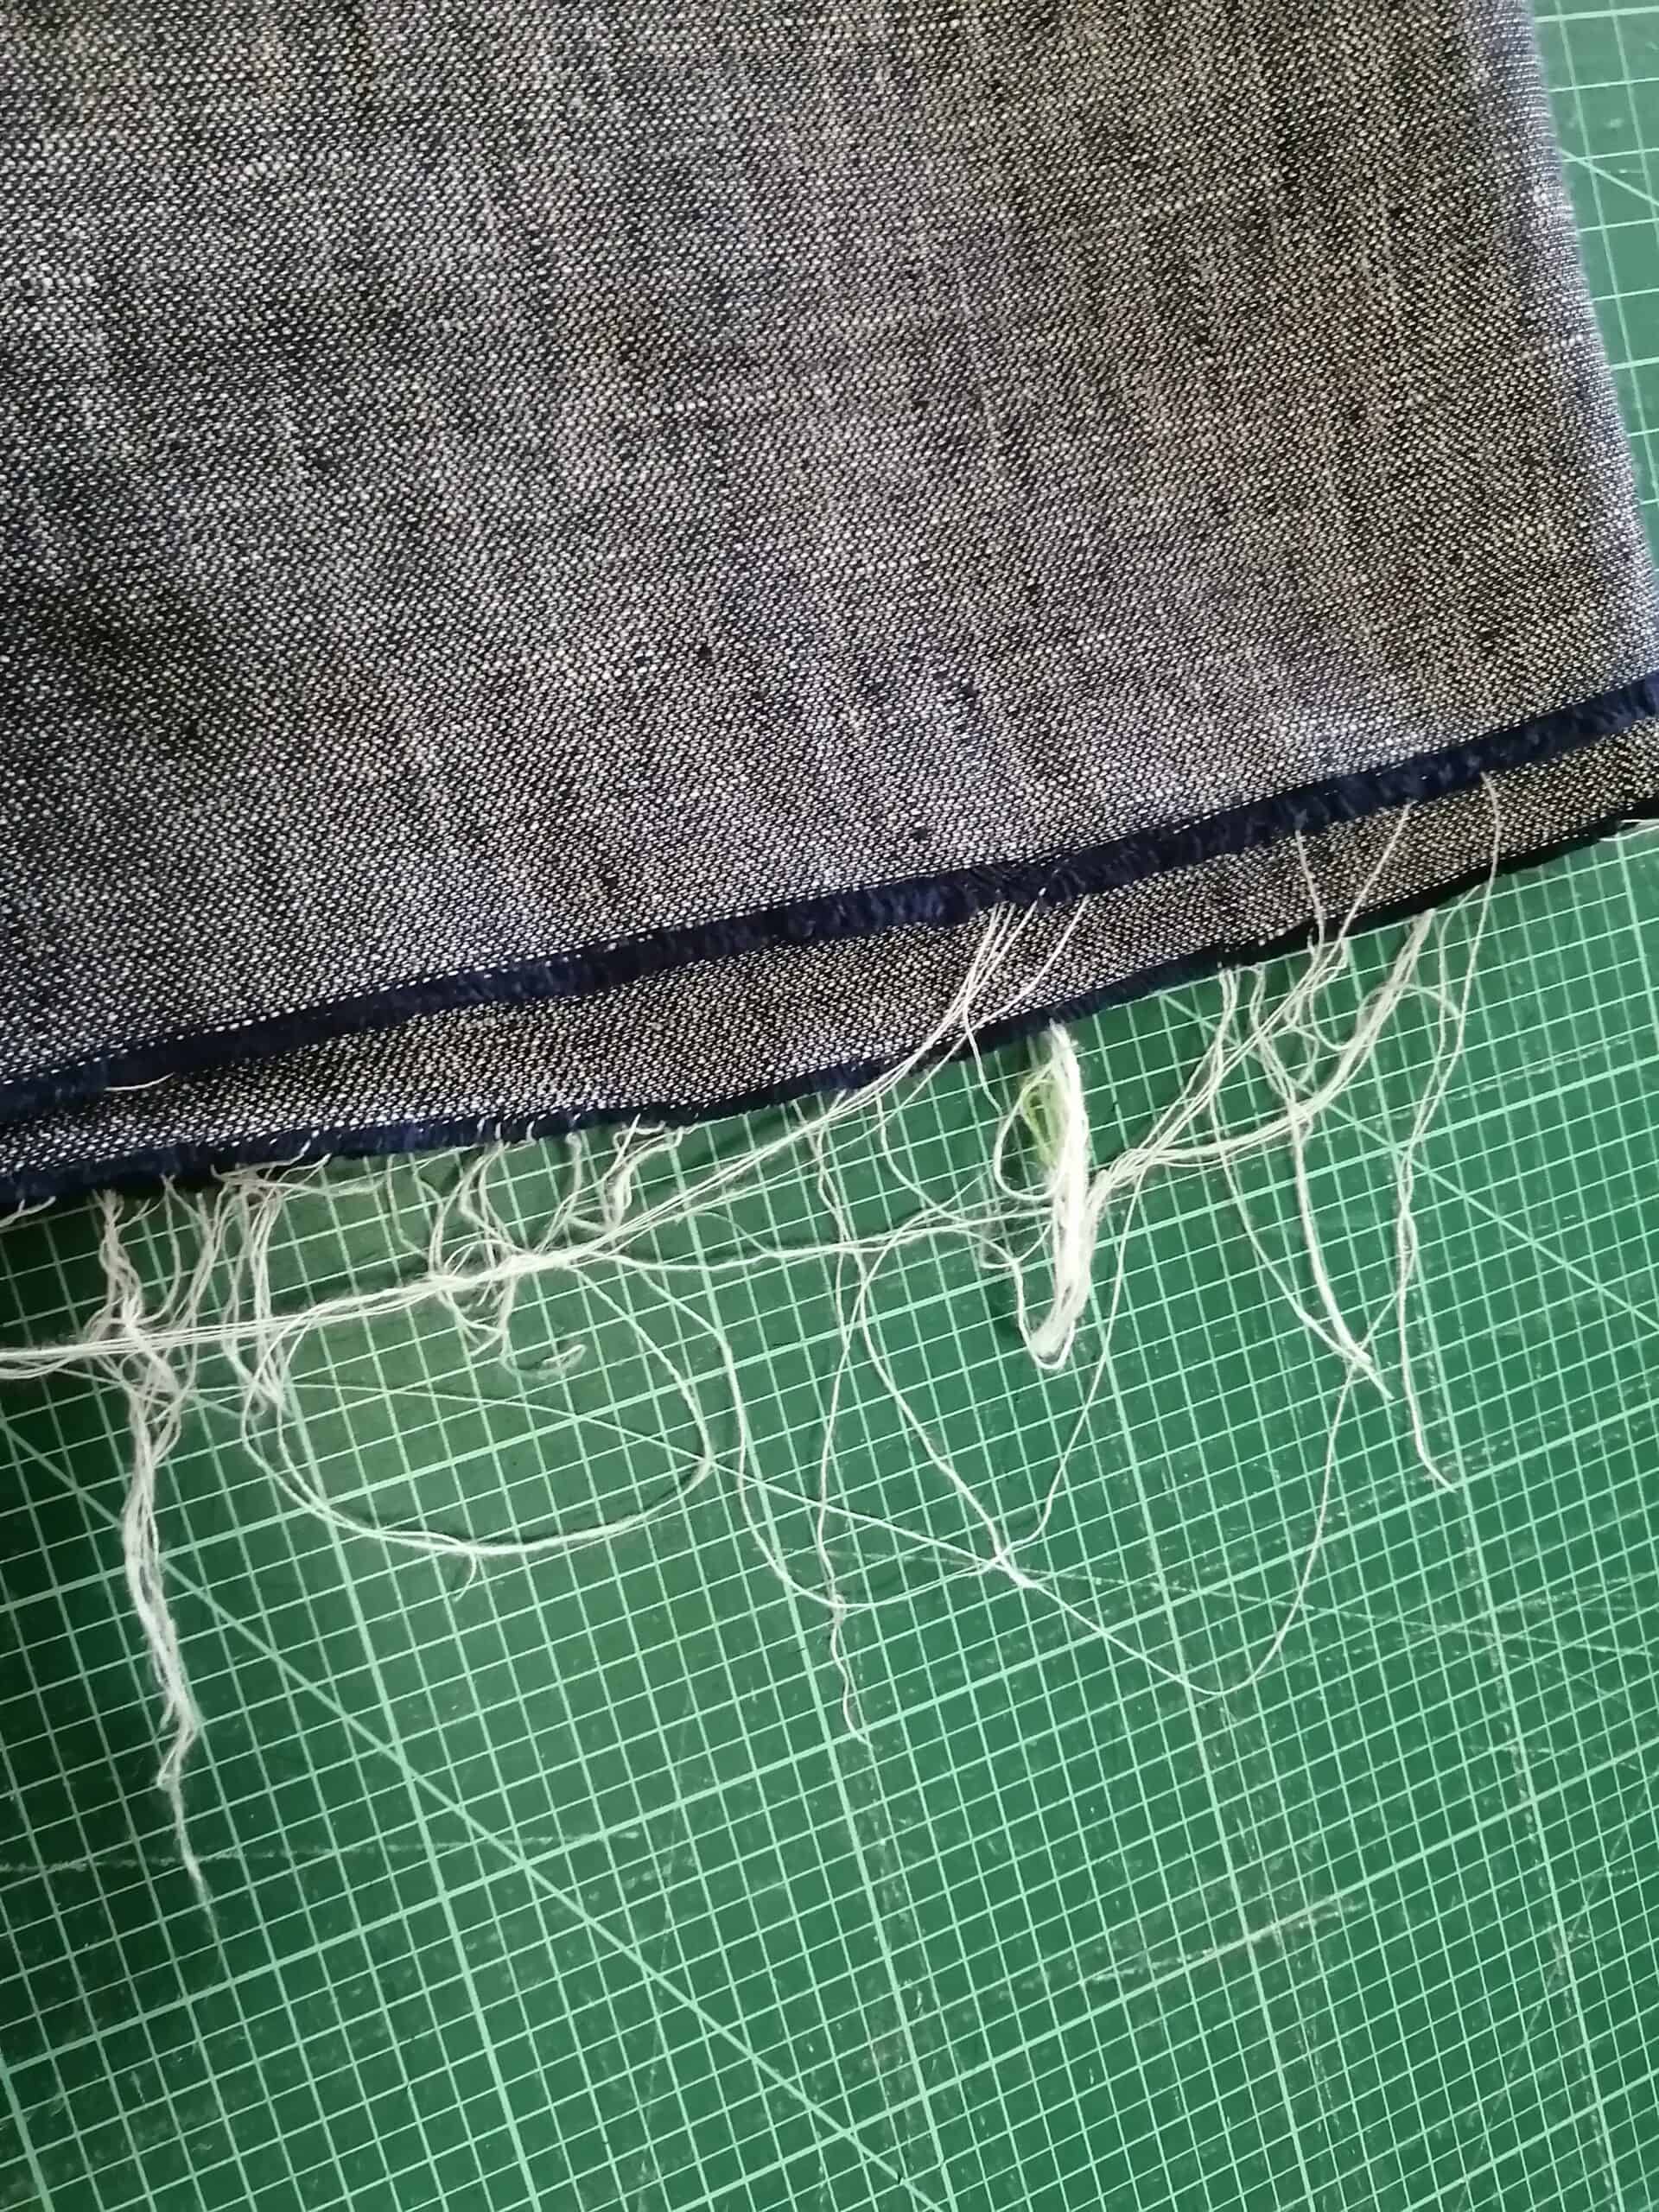
I’ll go ahead and confess that I also tend to run my rotary blade along the cut edges of my woven fabric to remove all those long tangled threads that frayed in the wash before moving on to cutting actual pattern pieces. They look scruffy and they bother me! We don’t need that kind of unkempt nonsense here.
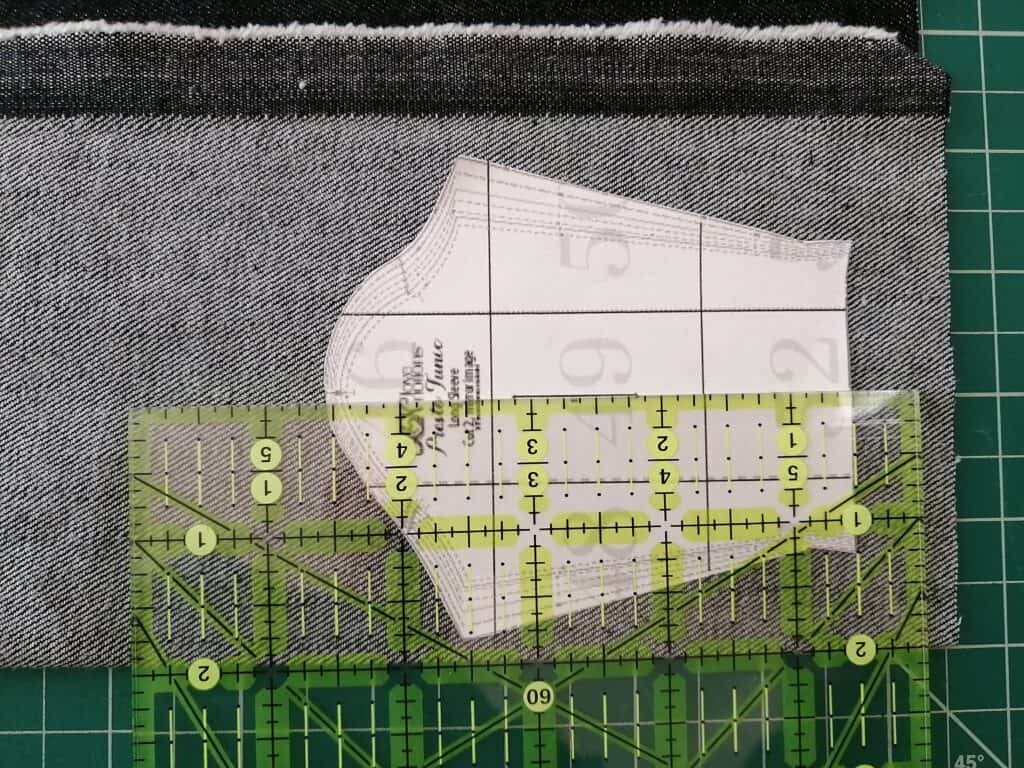
I personally am low on any designated sewing space, so I use my dining room table for cutting. First clear the space if necessary, and then put down your cutting mat(s) if you use them. For me, rotary cutters are the only way to go, so I usually pair a 24″ x 18″ mat next to a bigger 24″ x 36″ mat for most projects. I like a nice and thick healing mat, Alvin and Calibre Art are my favorite brands from Amazon. Another bonus of using a cutting mat is the grid ruler underneath. I always ensure my fabric’s folded edge is lined up exactly with one of the rows on the mat. This is particularly great for ensuring lighter-weight fabrics are evenly folded and another check that you are cutting on the grain.
Check your grainline
The straight grain runs parallel to the selvage. Be sure to double check the grainline (check this post for more on that topic) on your pattern piece to ensure you are cutting correctly, lest your piece warp when sewn. When the piece is large or I’m unsure of how well I’m lining up my pattern piece grainline with the actual fabric grainline, I like to grab a big ruler and measure along the pattern grainline from the folded edge. Line up one ruler line on the fold, and the other on the piece’s grainline arrow. This technique was especially helpful for me when cutting out the larger pieces for the Legato Jeans.
When you’ve cut away the selvage and have no edge to refer to for a straight fold, or you’re working with big leftover pieces, take a good look at your fabric along the folded edge and find the pattern repeat, if your fabric features a design. Then adjust the fold so that the amount of a particular flower or other design element is evenly showing all along the folded edge. You can be reasonably sure that your fold is now along the grainline. This is wonderfully easy with a fabric like a rib knit, simply adjust along the fold until it’s evenly folded all along the same rib line from top to bottom.
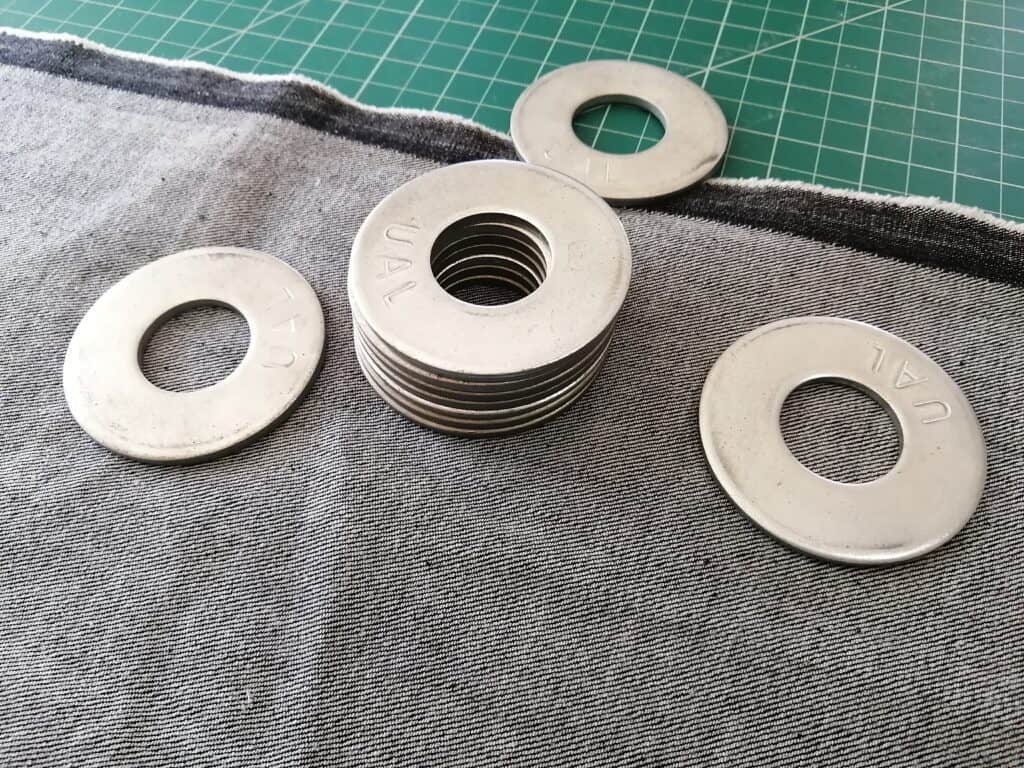
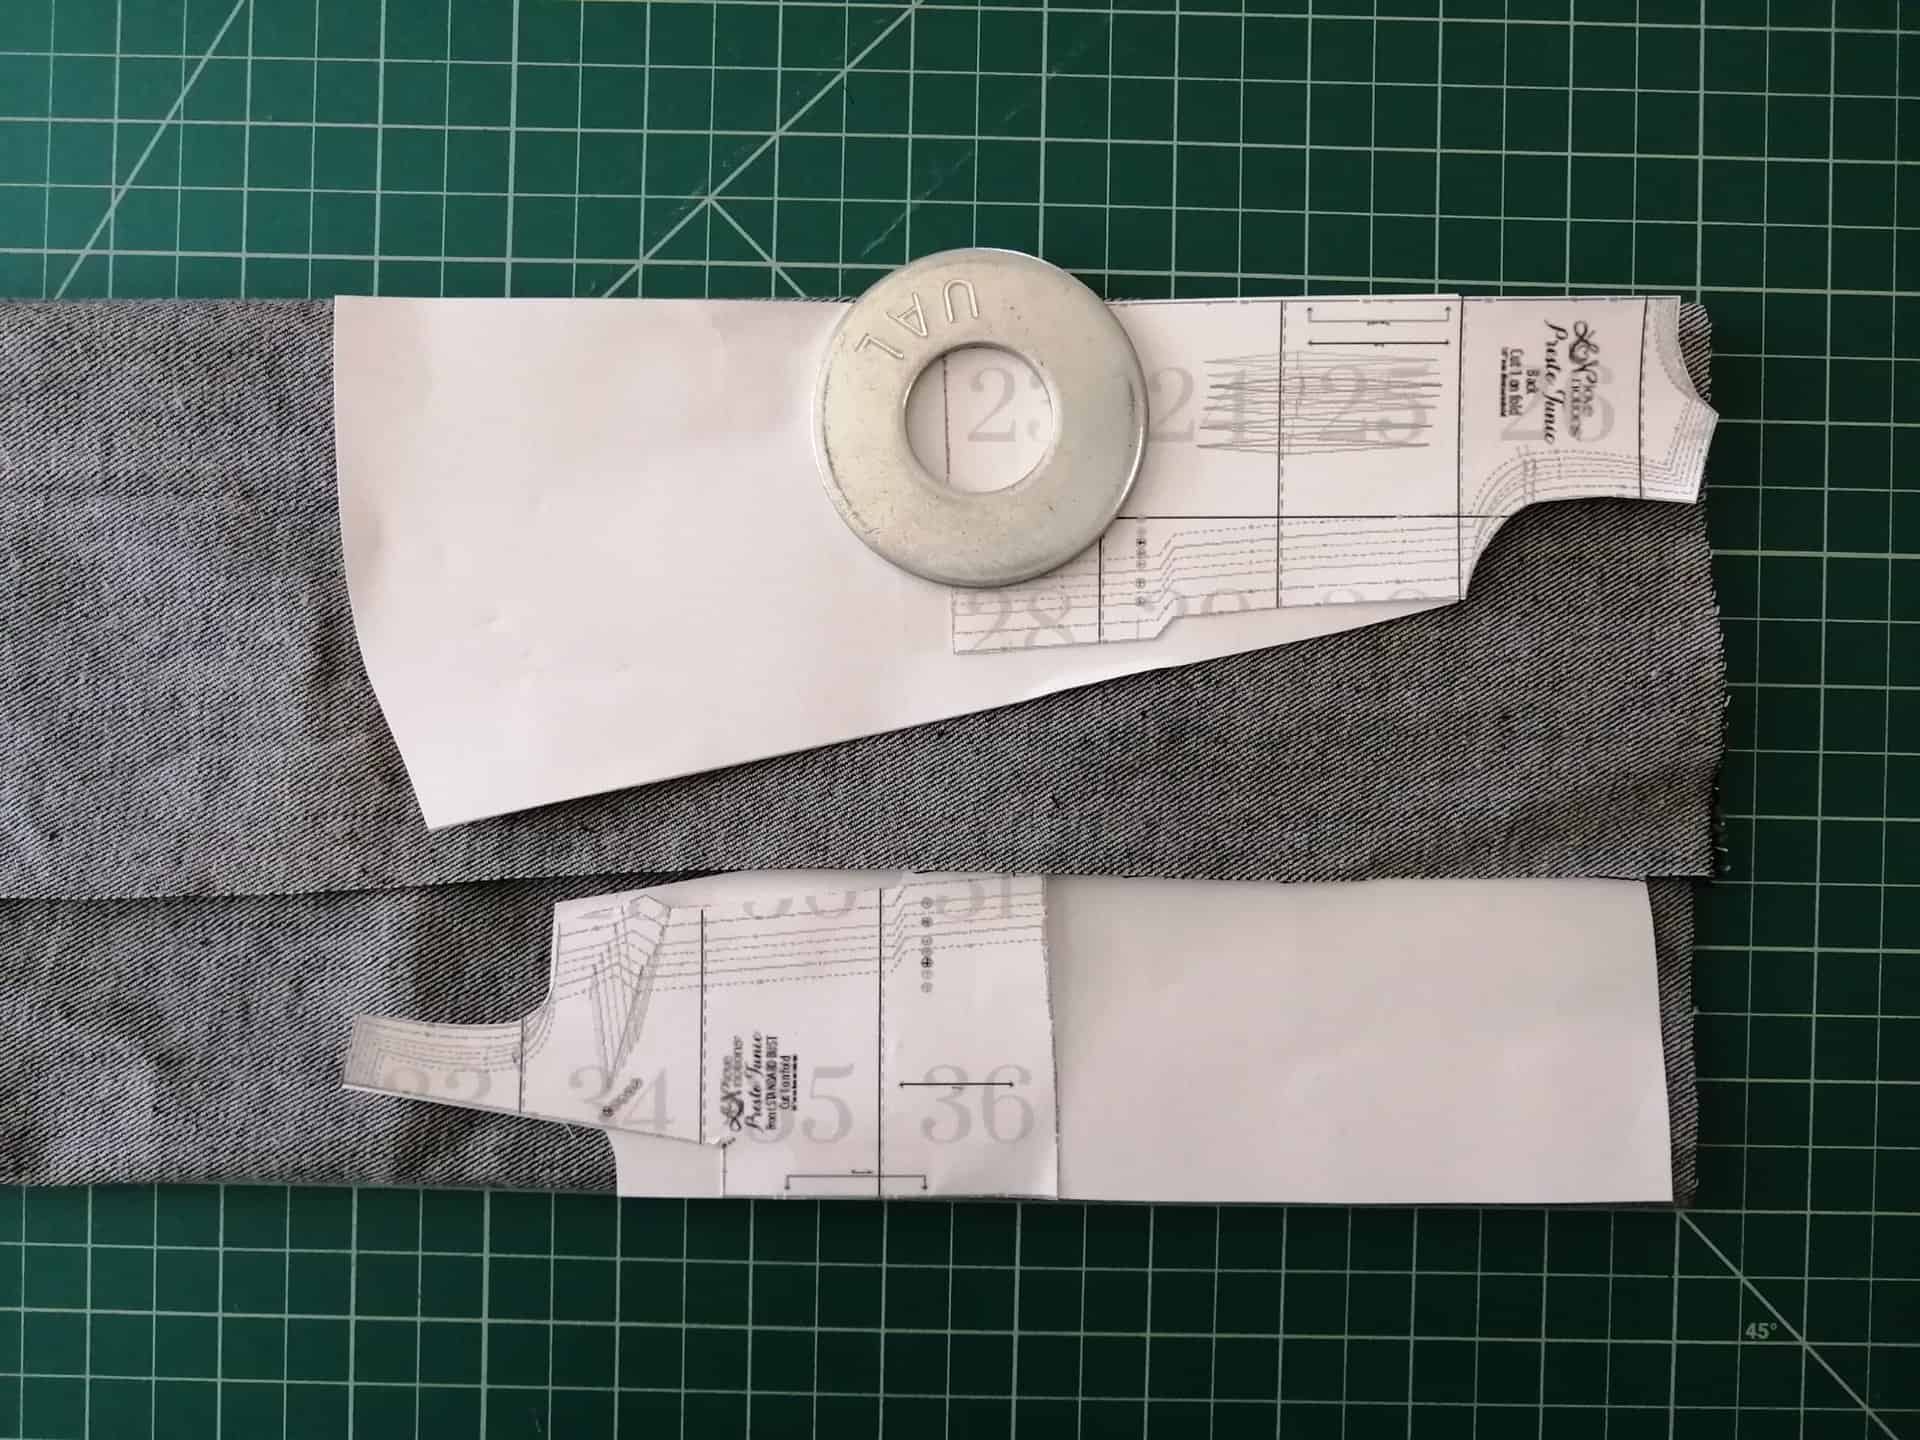
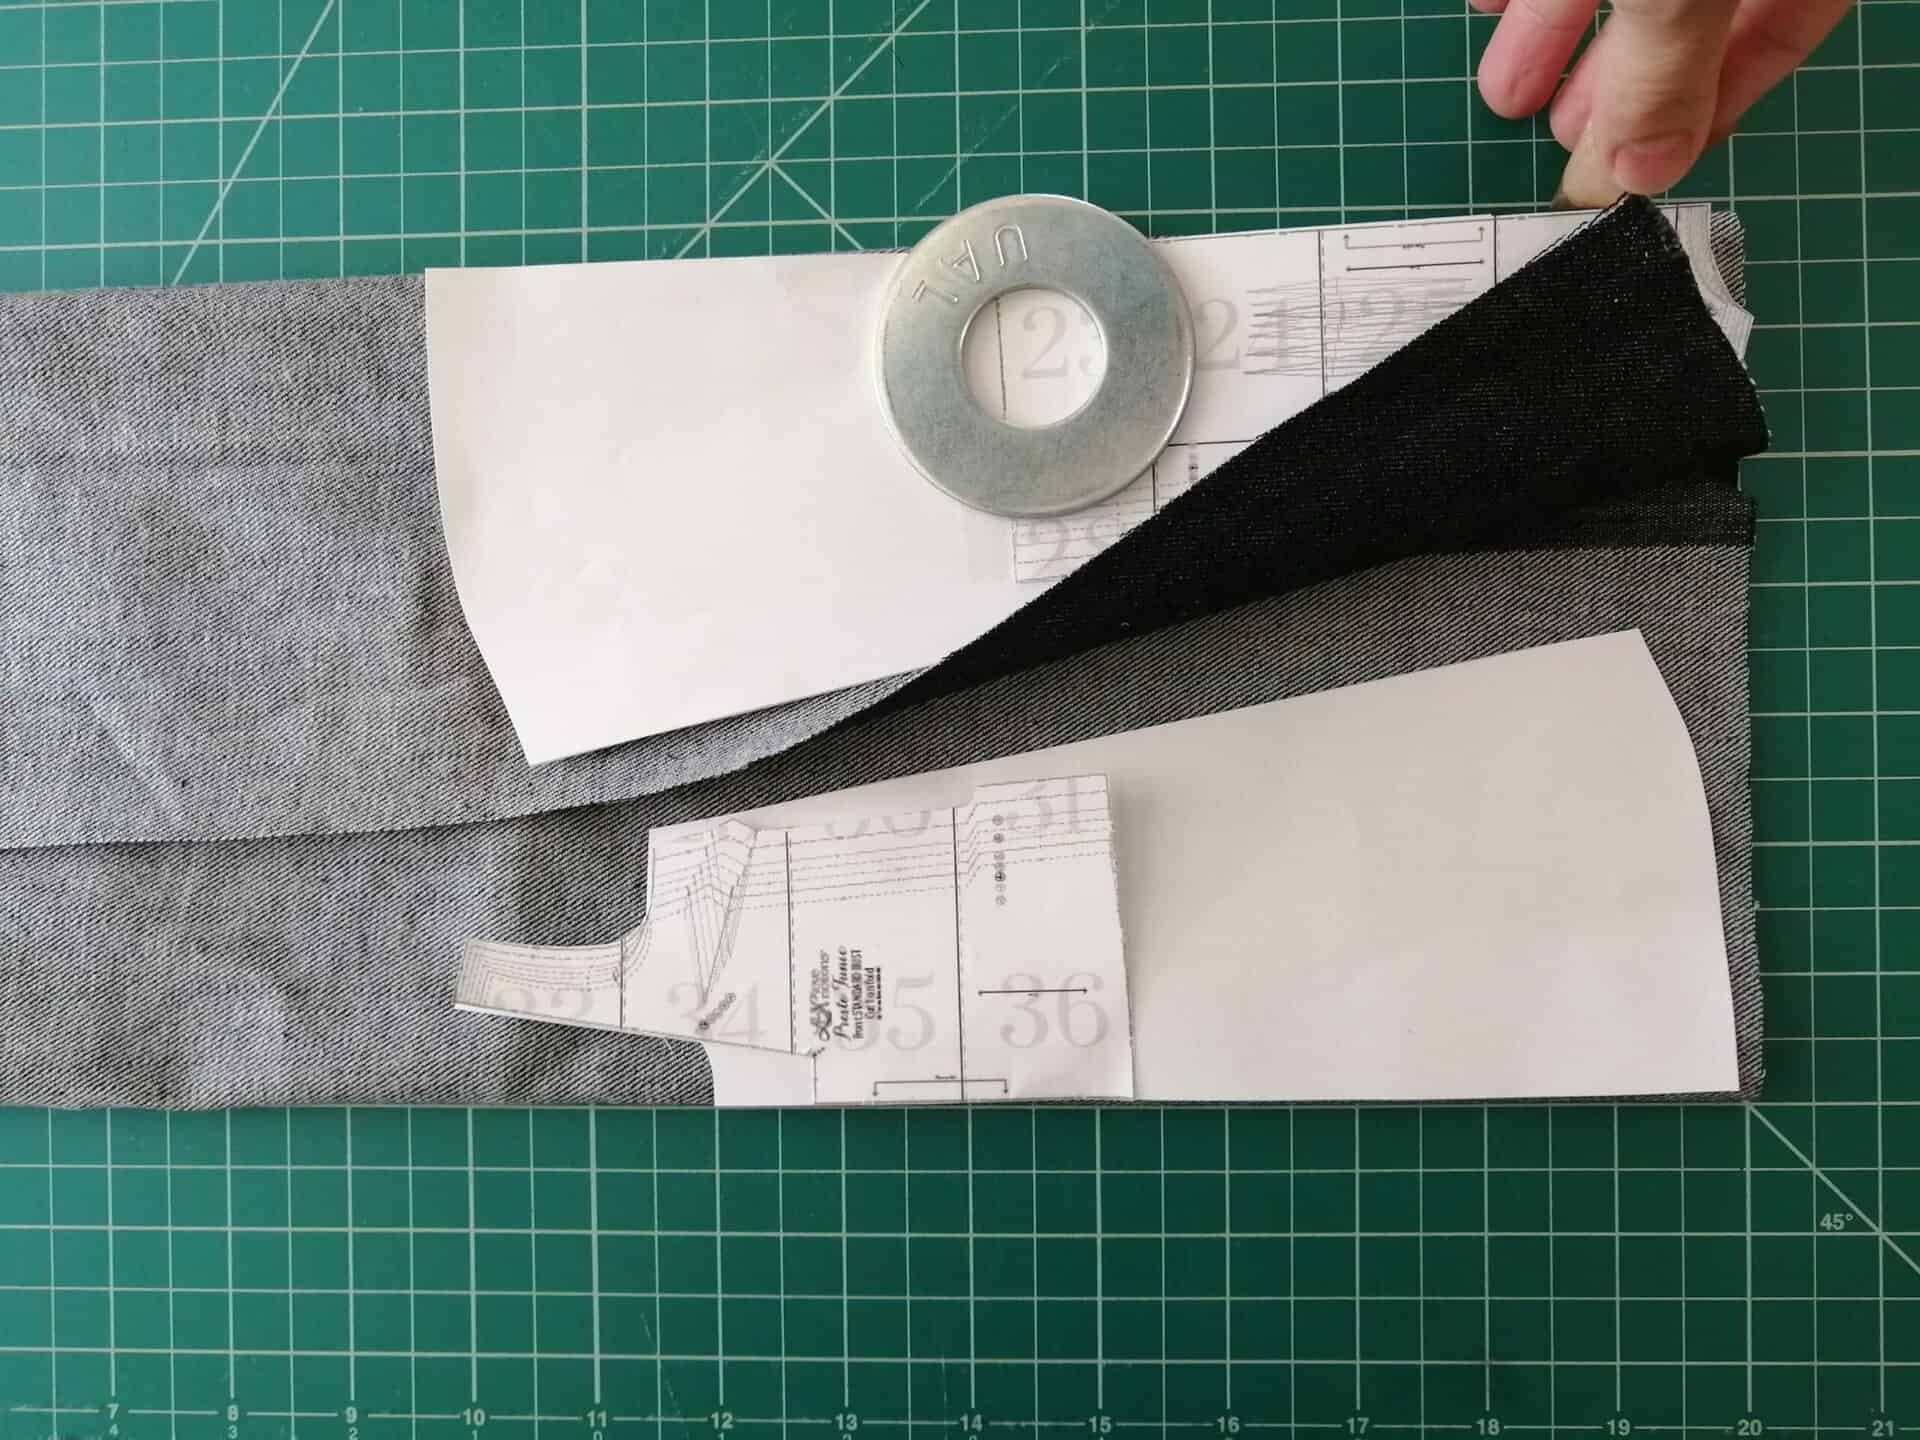
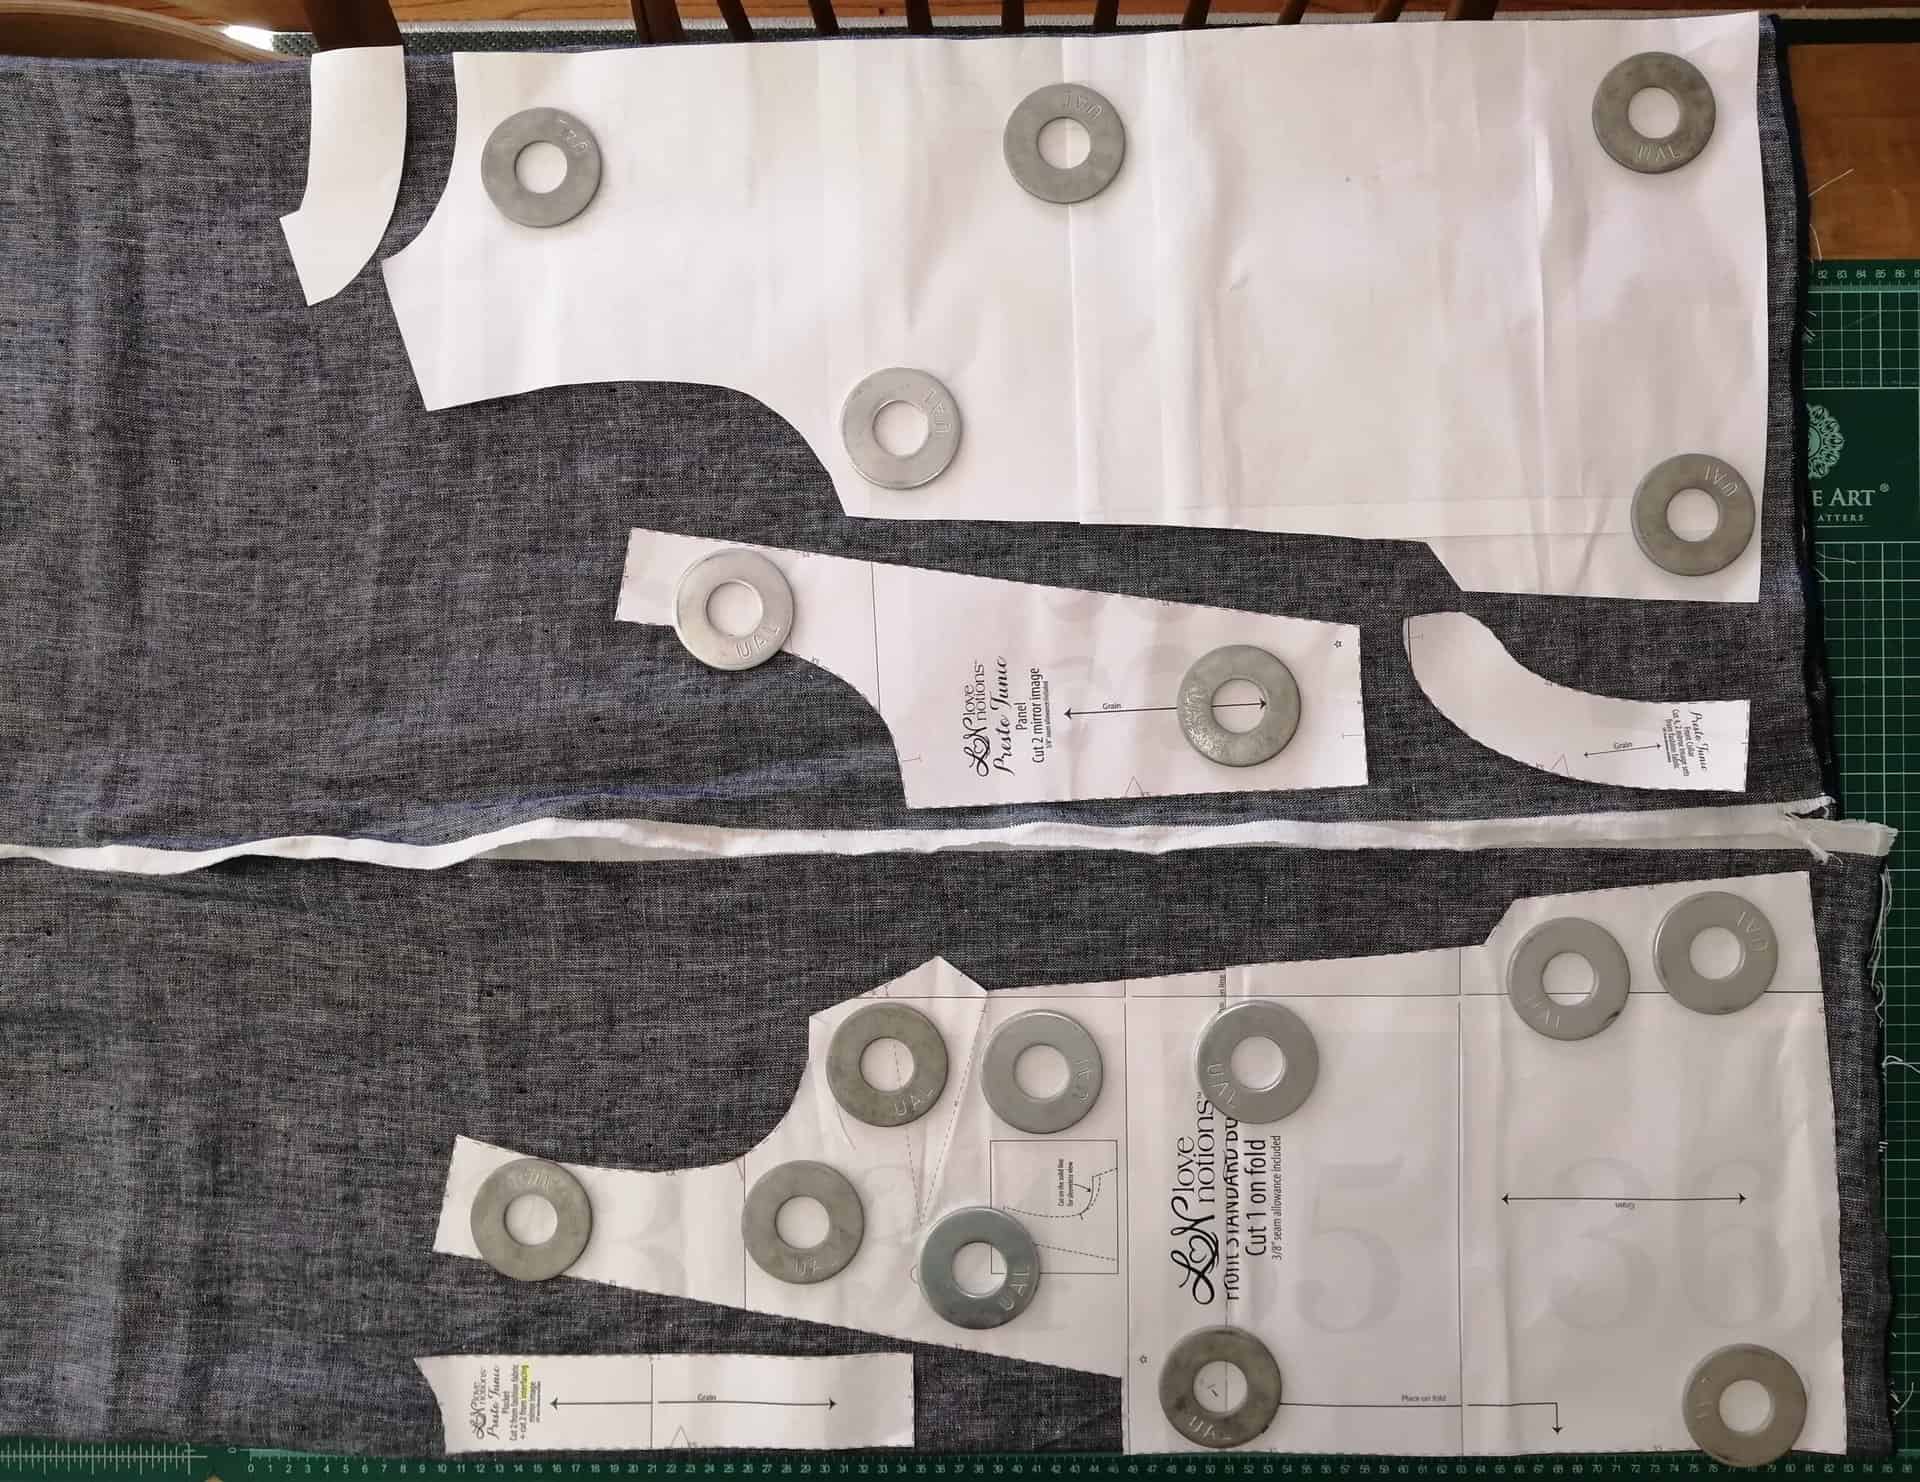
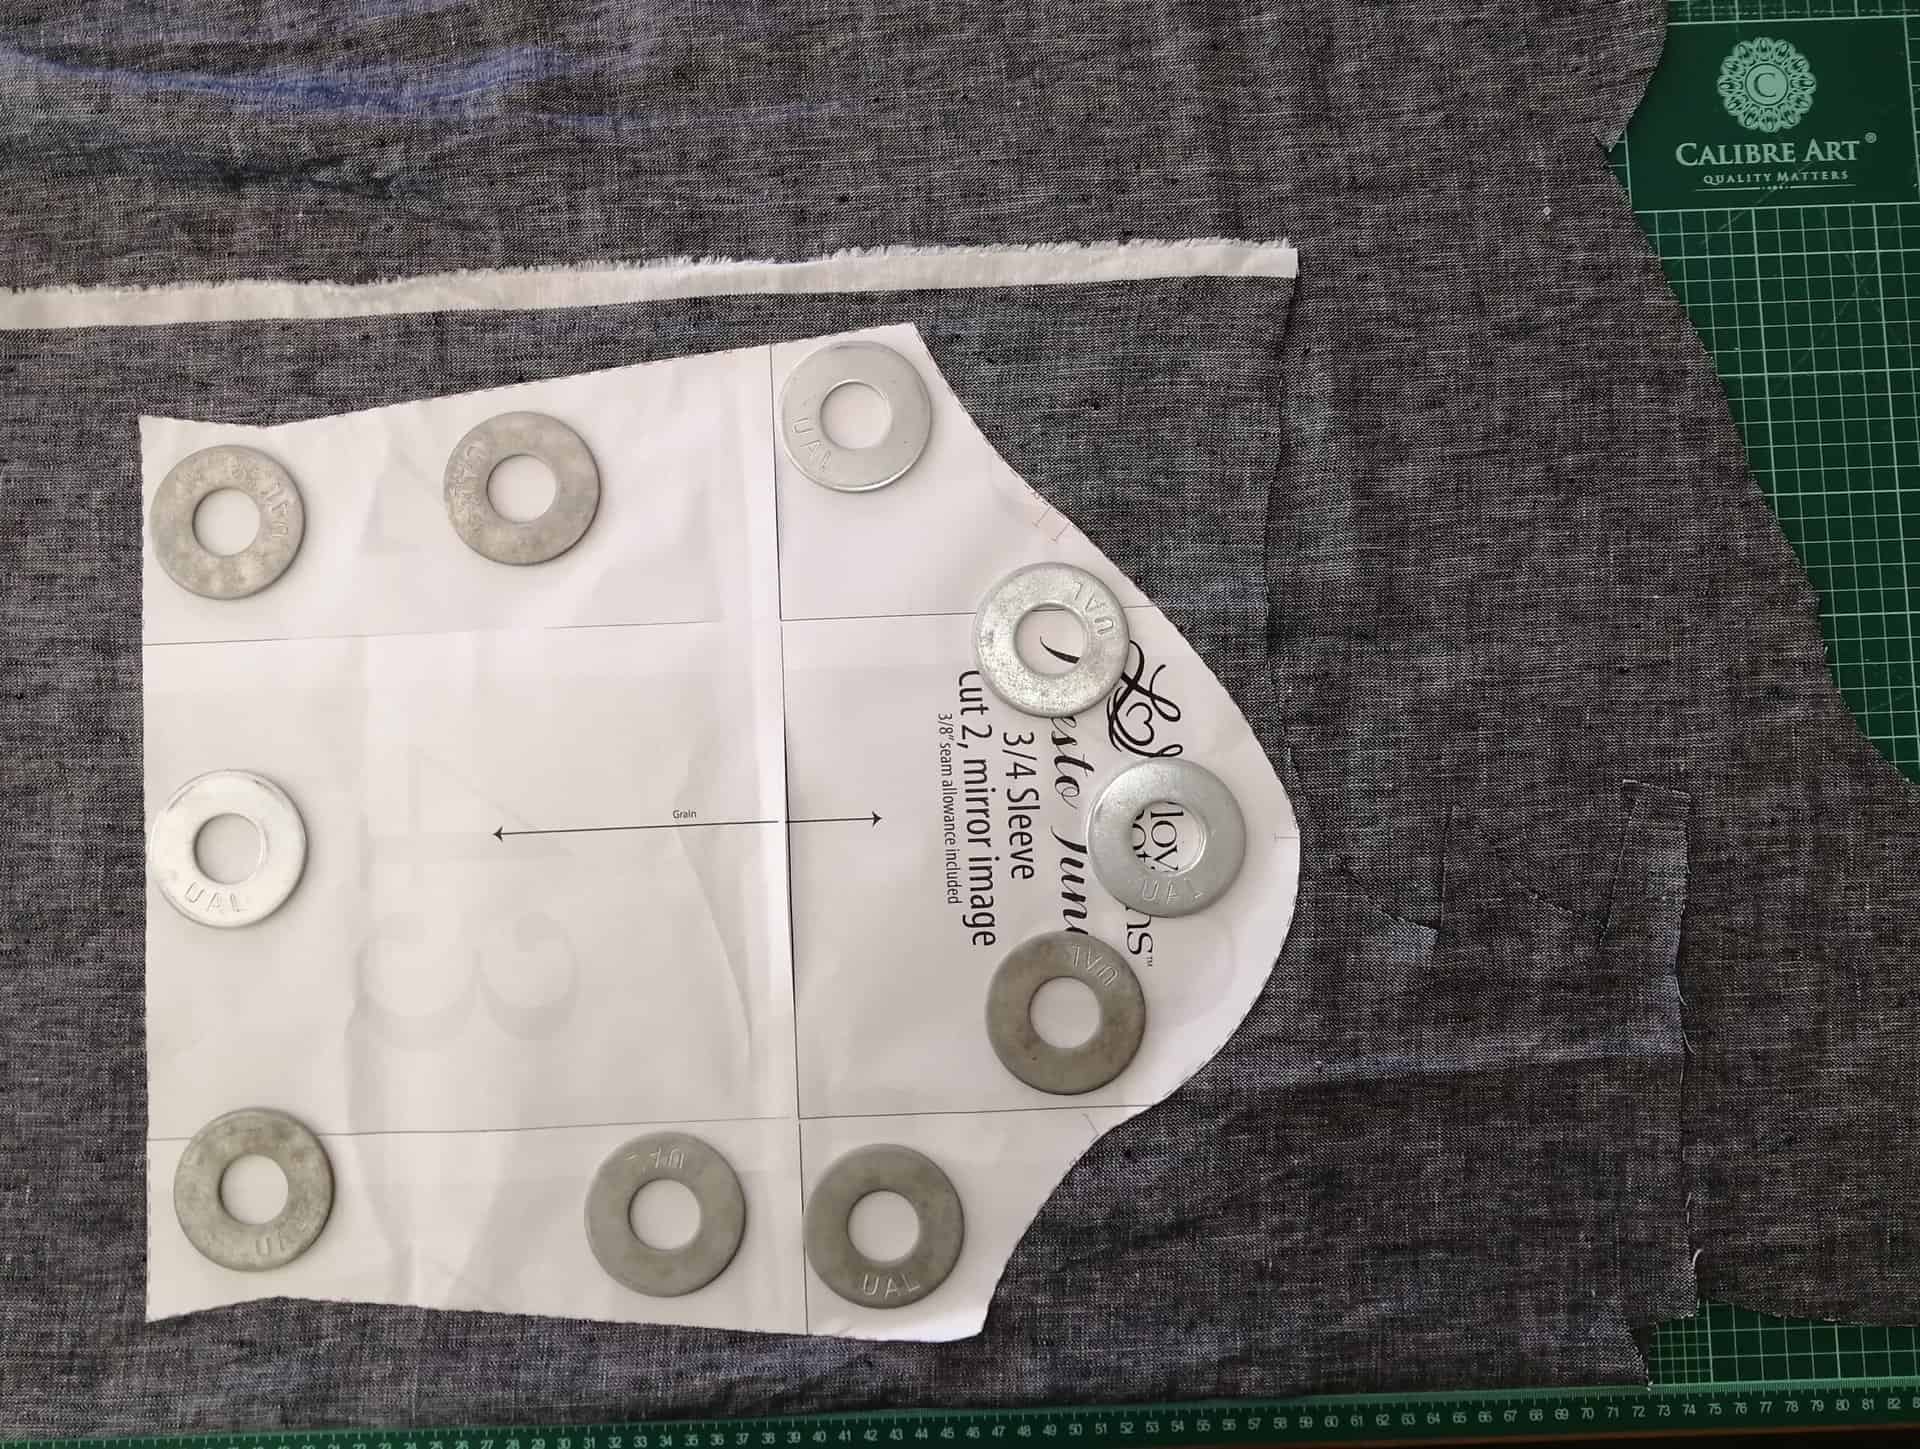
Pattern weights are an absolute must for me, and while I used to rely on tuna cans and silverware, I have graduated to using oversized metal washers that I purchased from Home Depot. They’re cheap, heavy and very flat so that I can whiz my blade right next to them if they are holding back curling fabric edges or pressing down a tight pattern corner for better precision.
Fabric Requirements (a suggestion?)
I generally take on a pattern’s fabric requirement as just a suggestion because with proper pattern piece Tetris, you can usually (not always, usually) cut it out of less. Not so much with directional prints, but solids? Challenge accepted. Now, my goal is generally to optimize fabric usage and minimize waste. Barring stripe matching or fussy-cutting for avoiding or planning certain print placement, I don’t like ending up with lots of unusable scraps.
First, Lay it All Out
Before I cut anything out, I like to lay out all my pieces for a given garment for some arranging and rearranging for both print placement and economy of cutting. I get a little cheaty with smaller bits, like facings, especially if they are to be interfaced and/or no one but me will see them. No harm done by cutting those on the opposite grain in most cases. (Also, you didn’t hear it from me, but sometimes my bias tape is not precisely at a 45 degree angle either.) Pattern pieces on a solid colored or non-directional fabric can face toward the bottom or top, so use this to your advantage to squeeze them close and personal!
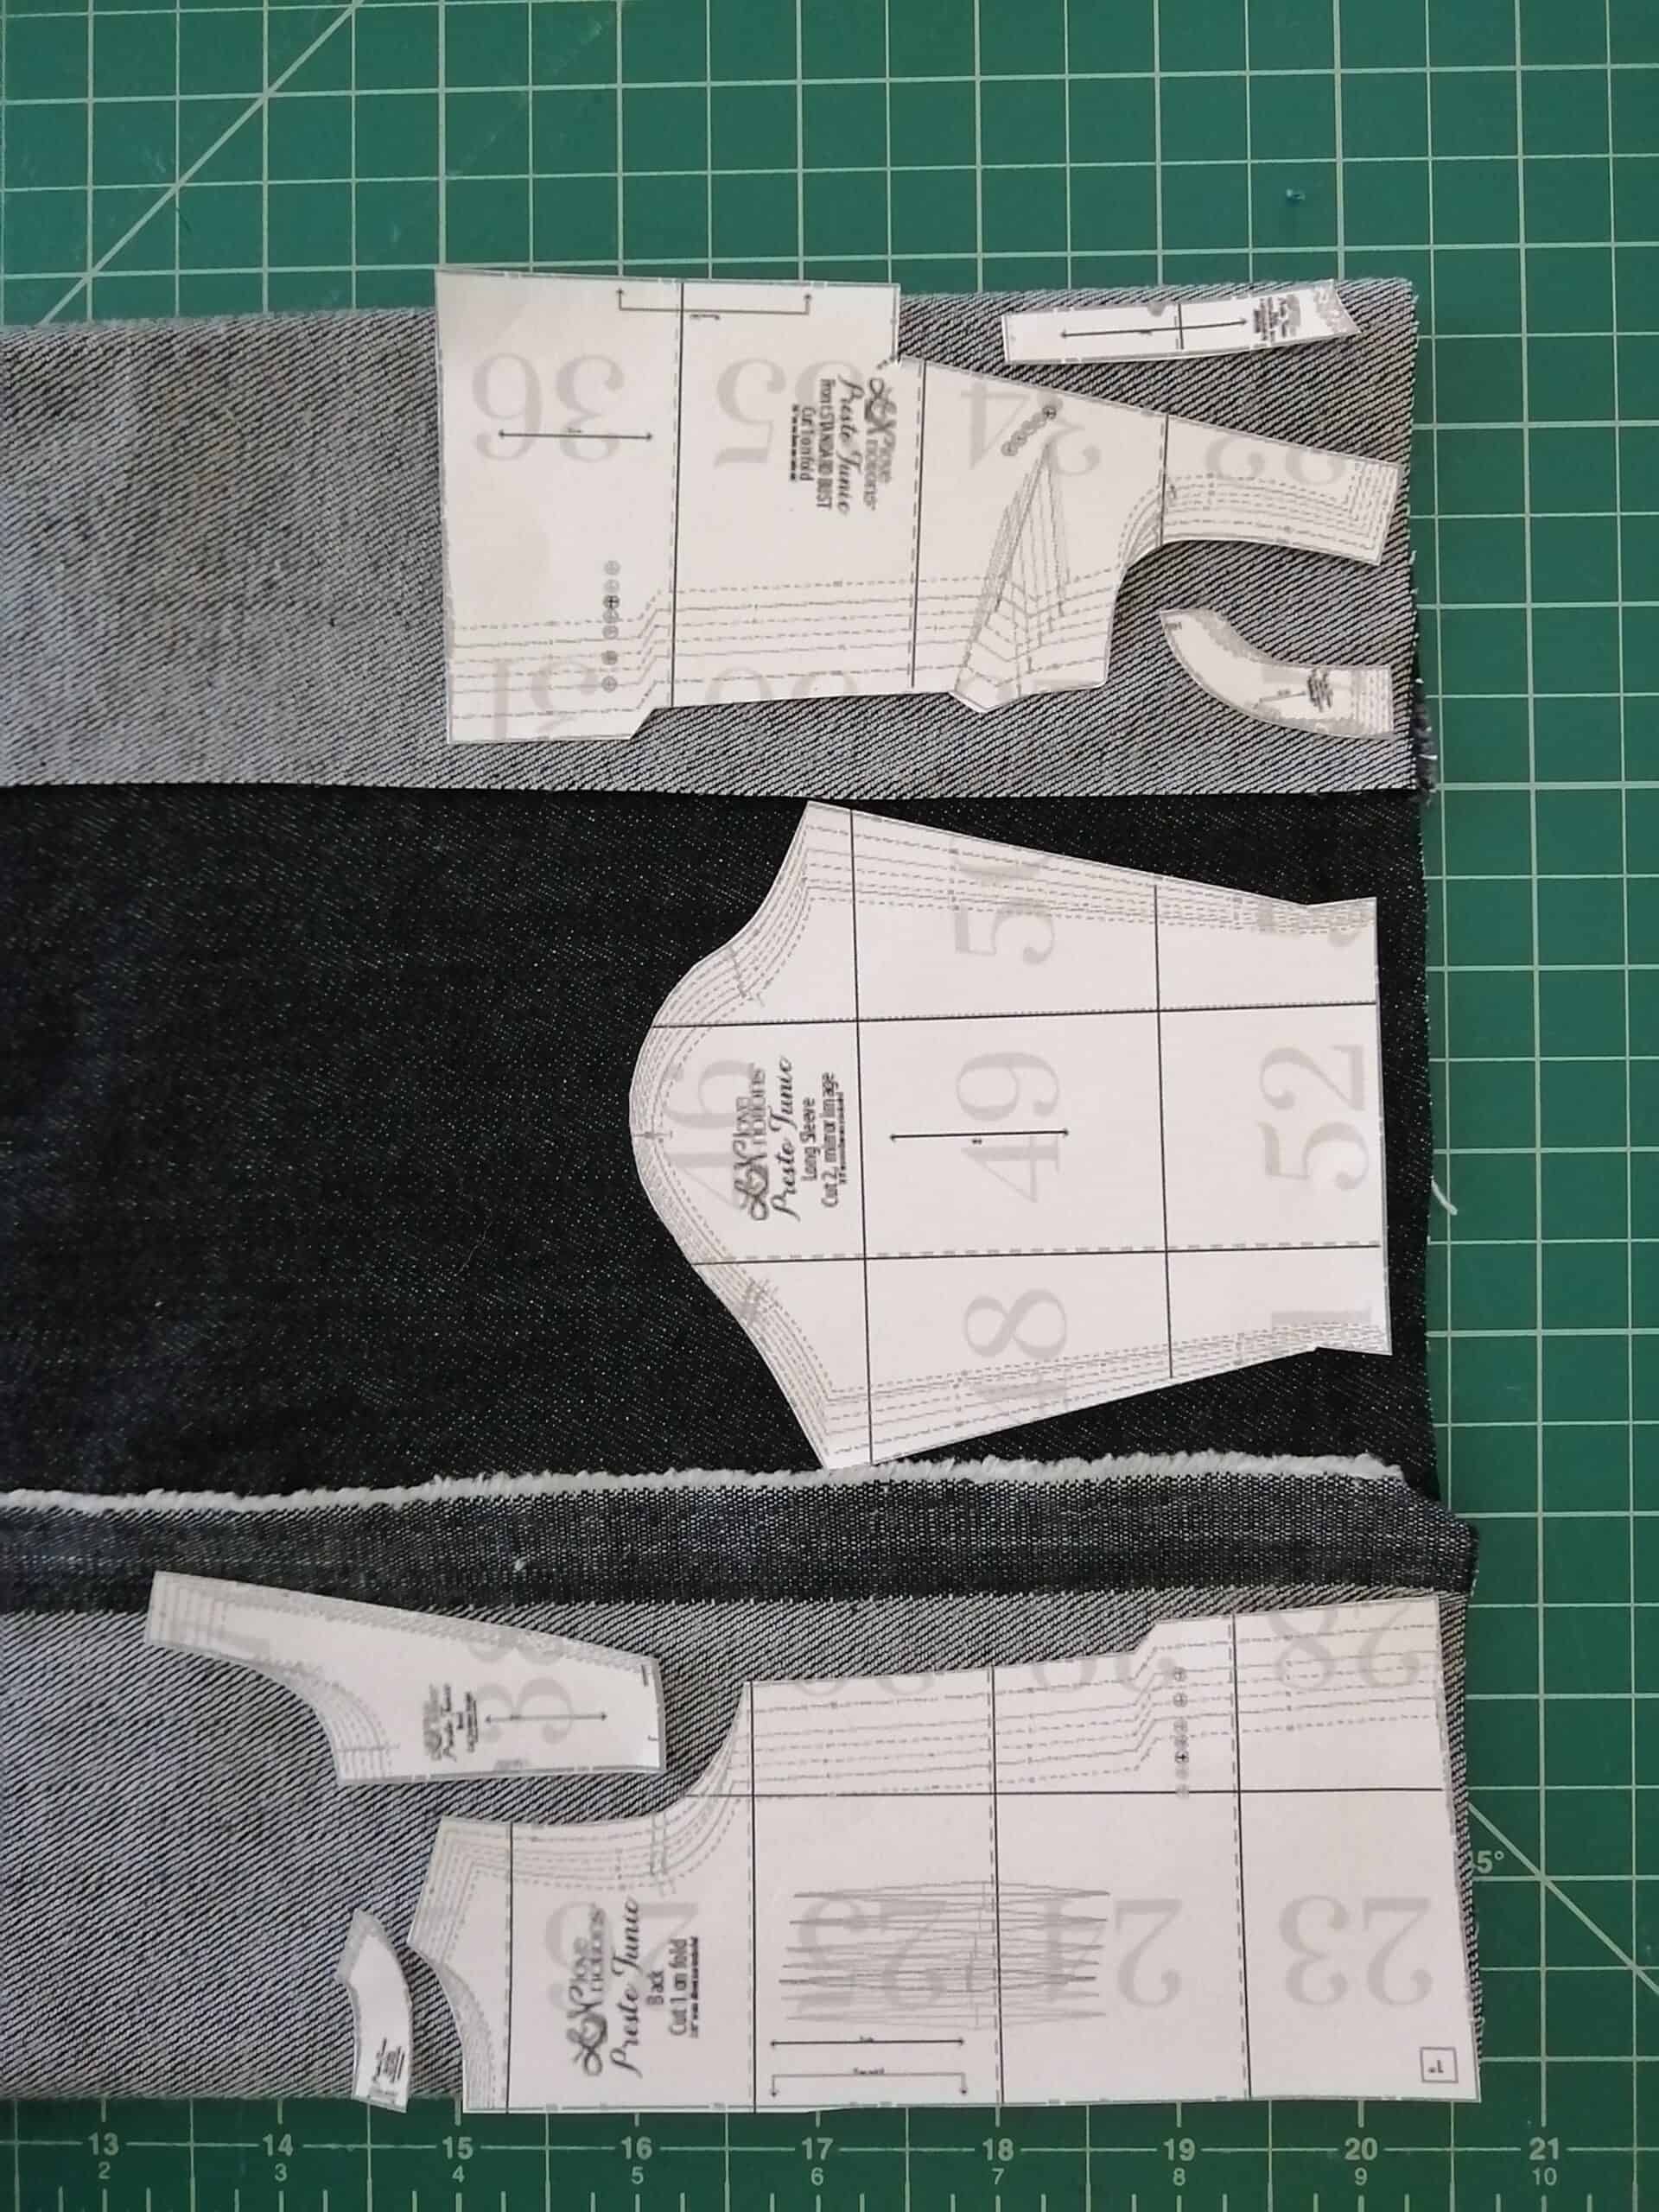
Don’t Fold your Fabric in Half
Unless I have a very wide pattern, like a sweeping A-line skirt that needs all the width available for the hem, I rarely fold my fabric in half. Instead, I fold over the selvage edge toward the center *just enough* to allow my piece to fit. (Yep, sometimes my seam allowances have secret selvages in them.)
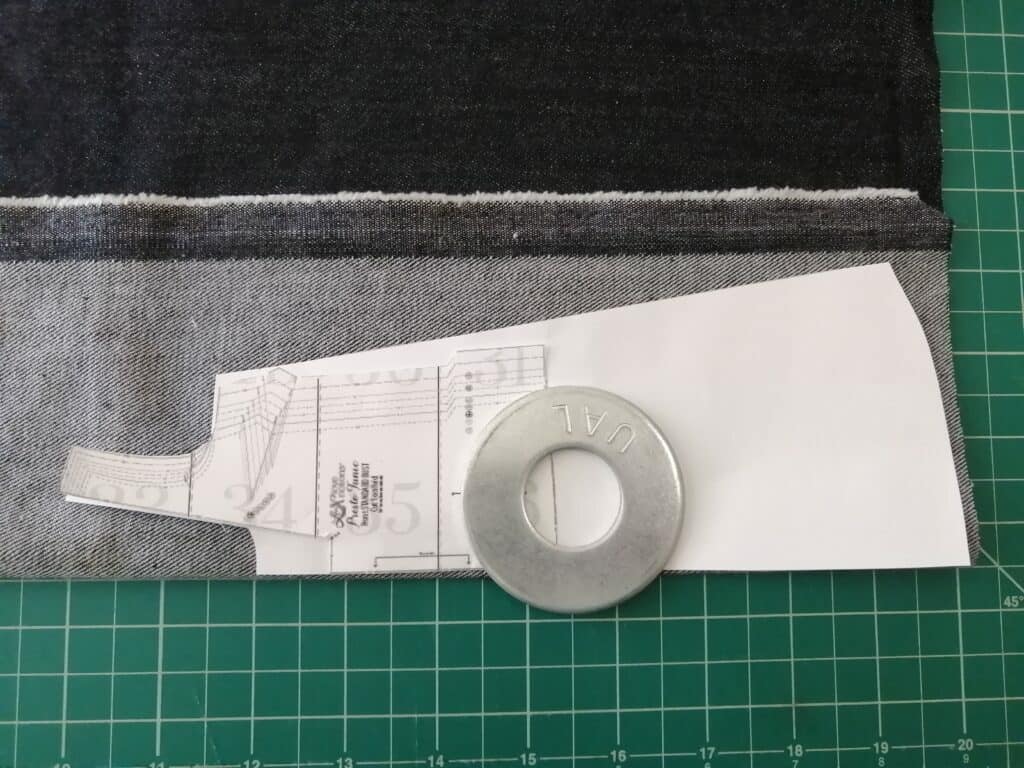
I would first try fitting my front and back bodices on the folds created by folding each selvage in toward the center just enough to fit my piece, and then check to see if I can fit a sleeve or other large piece in the center between those two. In the instance of directional print fabric, you’d just flip over your front bodice pattern piece to keep the fabric direction the same as the back bodice as shown.
Nestle Pattern Pieces
If the fabric is non-directional, I then take the opposite bodice piece and nestle it facing the other direction, basically shoulder to hip to make the best use of space. This is the most frugal use of fabric when you have a solid front bodice and a back that’s made from two pieces. Suspend your notion of reality for a moment and pretend this back piece is actually supposed to be cut at the center back seam, ala the Harmony Blouse.
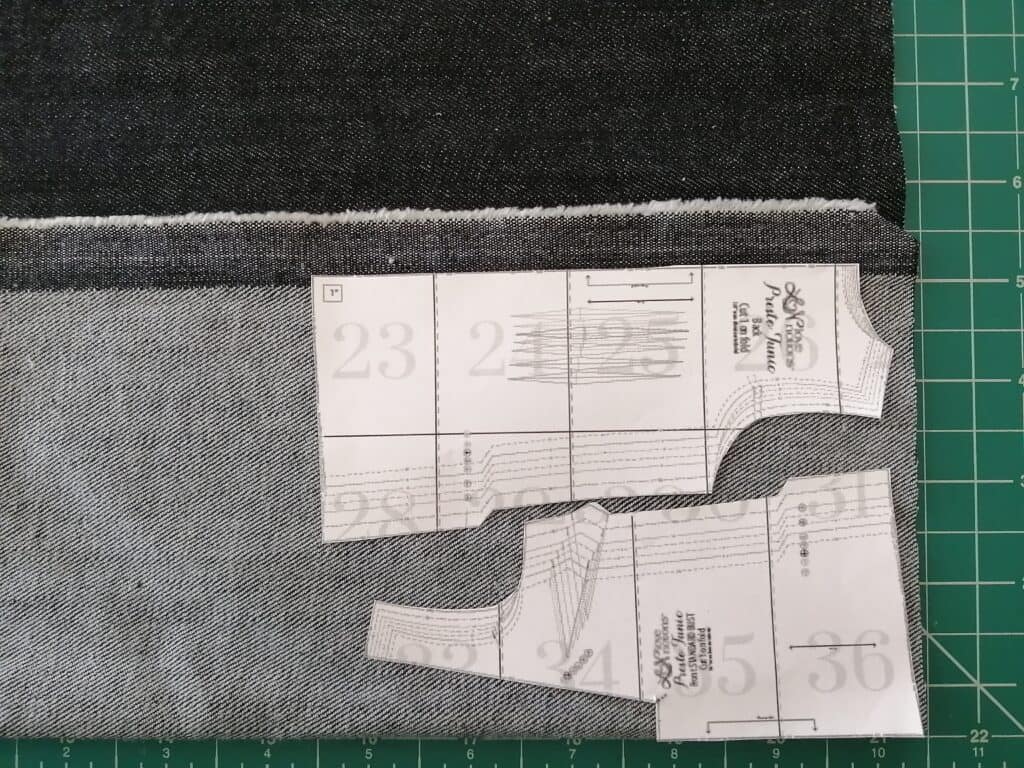
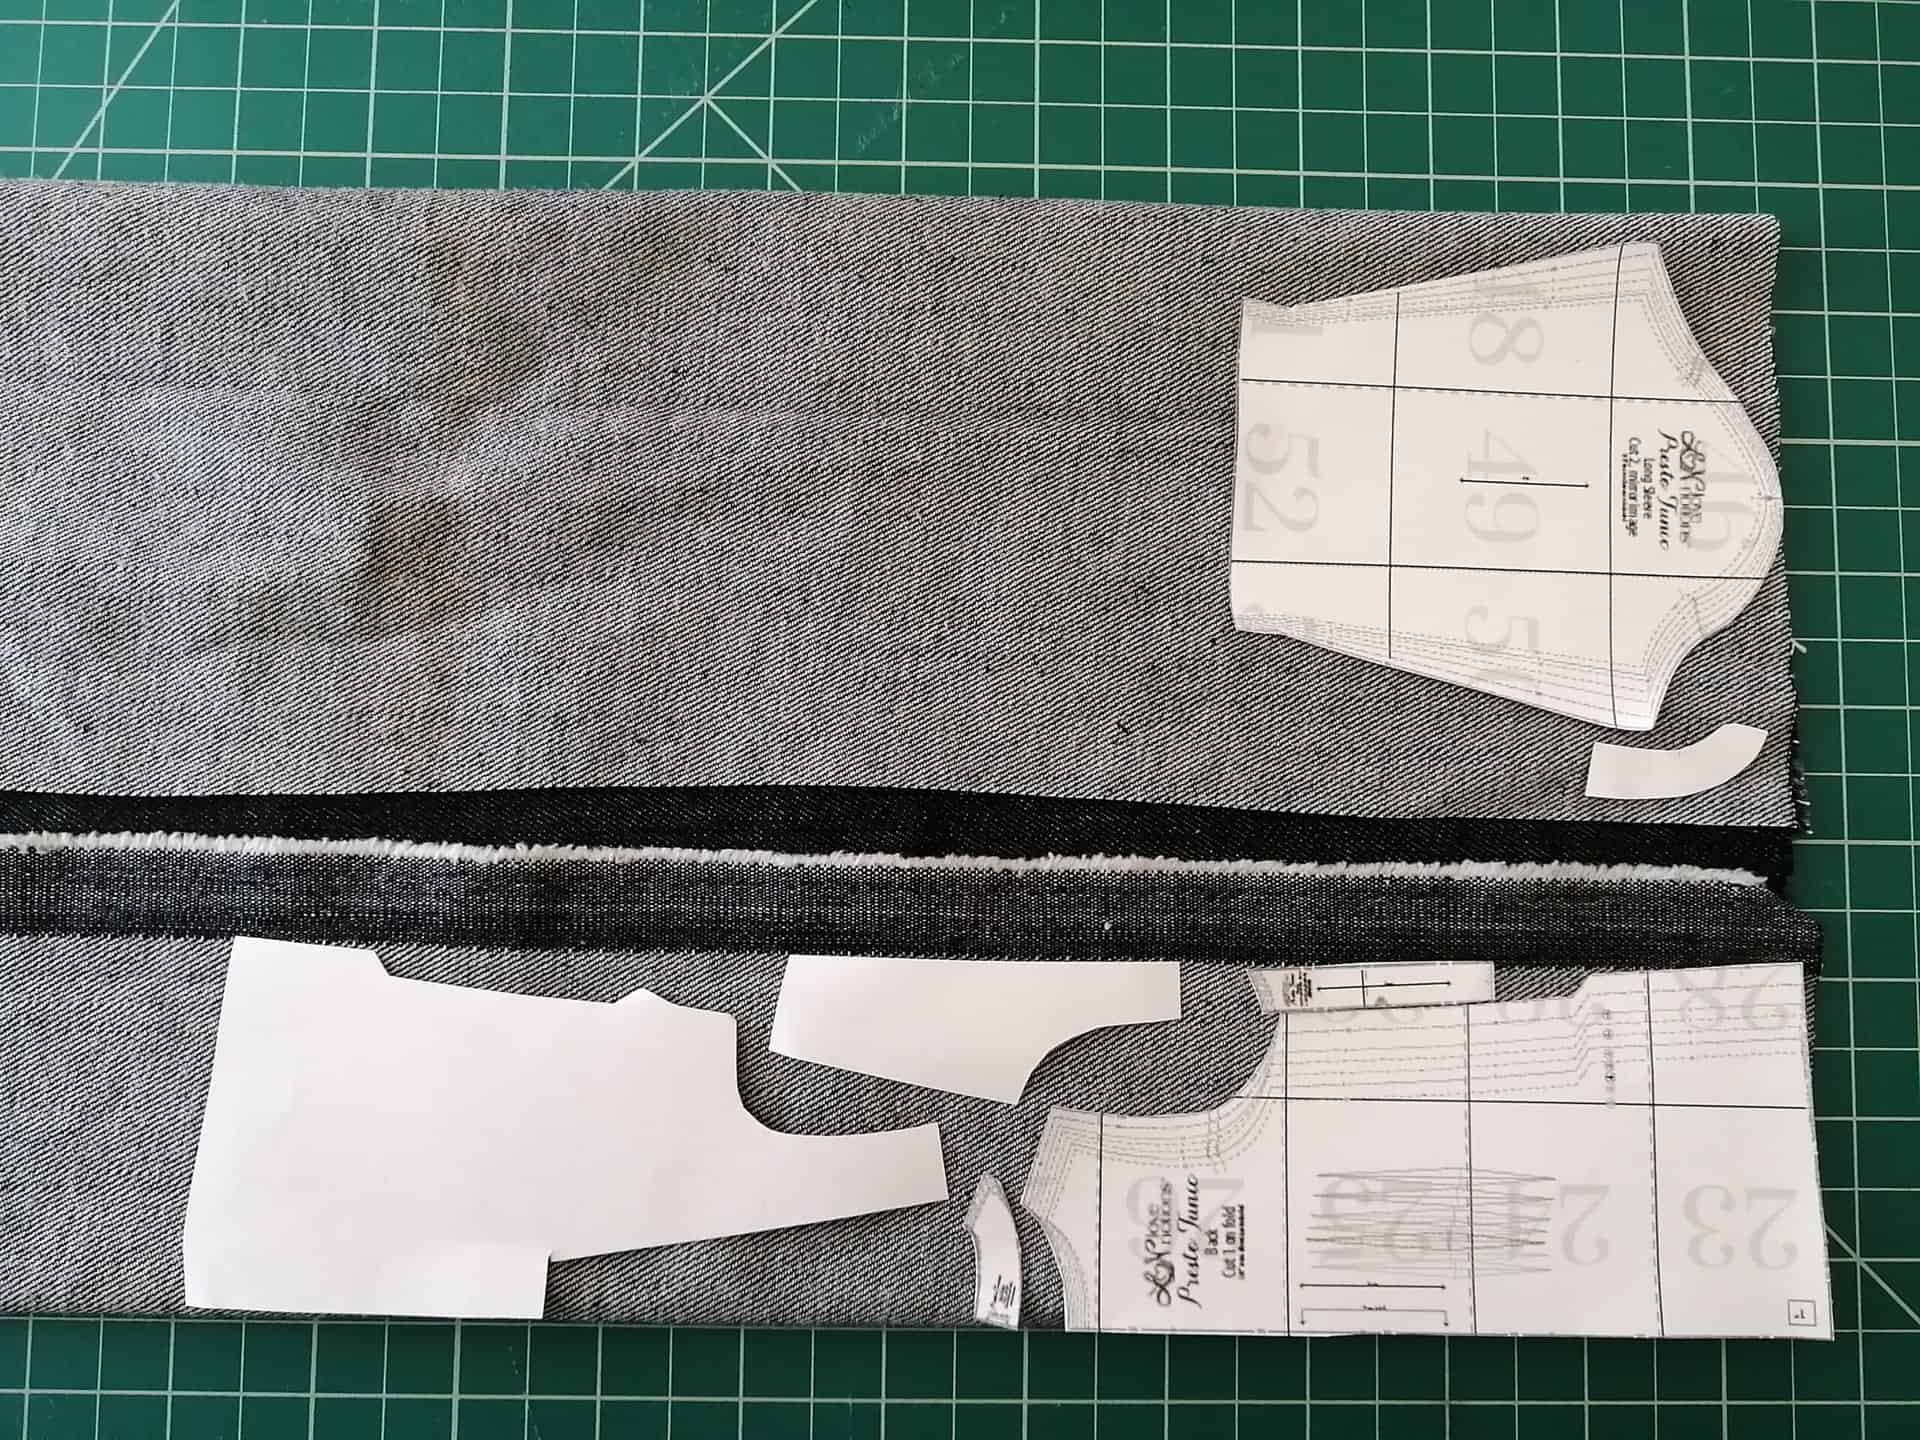
Another method I employ is to basically fold my fabric into thirds with selvages meeting in the center. I like to mark the halfway point for easy, even folding by putting a clip at the halfway fold first. Depending on how wide your fabric is, you can overlap the selvages too, so that the widest part of the pieces, say the hems, can take advantage of the triangular negative space left by the waist and shoulder area. This is a little hard to explain, and better shown in a picture. See below! This is my favorite plan of attack for cutting out shapes like the Ravinia Skirt, or Cadence or Olympia Dresses, for example.
Work with the shapes you have
You also want to work with the natural curves and straight lines of the pattern pieces themselves. Back bodice and yoke of the Sloane Sweater? Line those up so they share the same straight line, arranging the bottom of the yoke to top of the bodice. Similarly for cuffs and bands or neckbands; place them together so they can share the straight cuts and you’ll lose nothing to scrap around at least one of their edges. You can often fit the curved neckline facings very near the front neckline of a bodice to use that leftover curved portion that’s otherwise cut away.
Double Your Fun, Double Your Pattern Pieces
One more method worth mentioning is to double your pattern piece so that you can cut it in one layer rather than on the fold. This comes in handy when you have an odd-shaped remnant and need to see what you can squeeze in. (Not to mention this is great for when you’re stripe-matching or cutting on the bias.) Obviously, you would just need to cut one layer for the front bodice here, but you are assured that it will indeed fit before cutting out the rest.
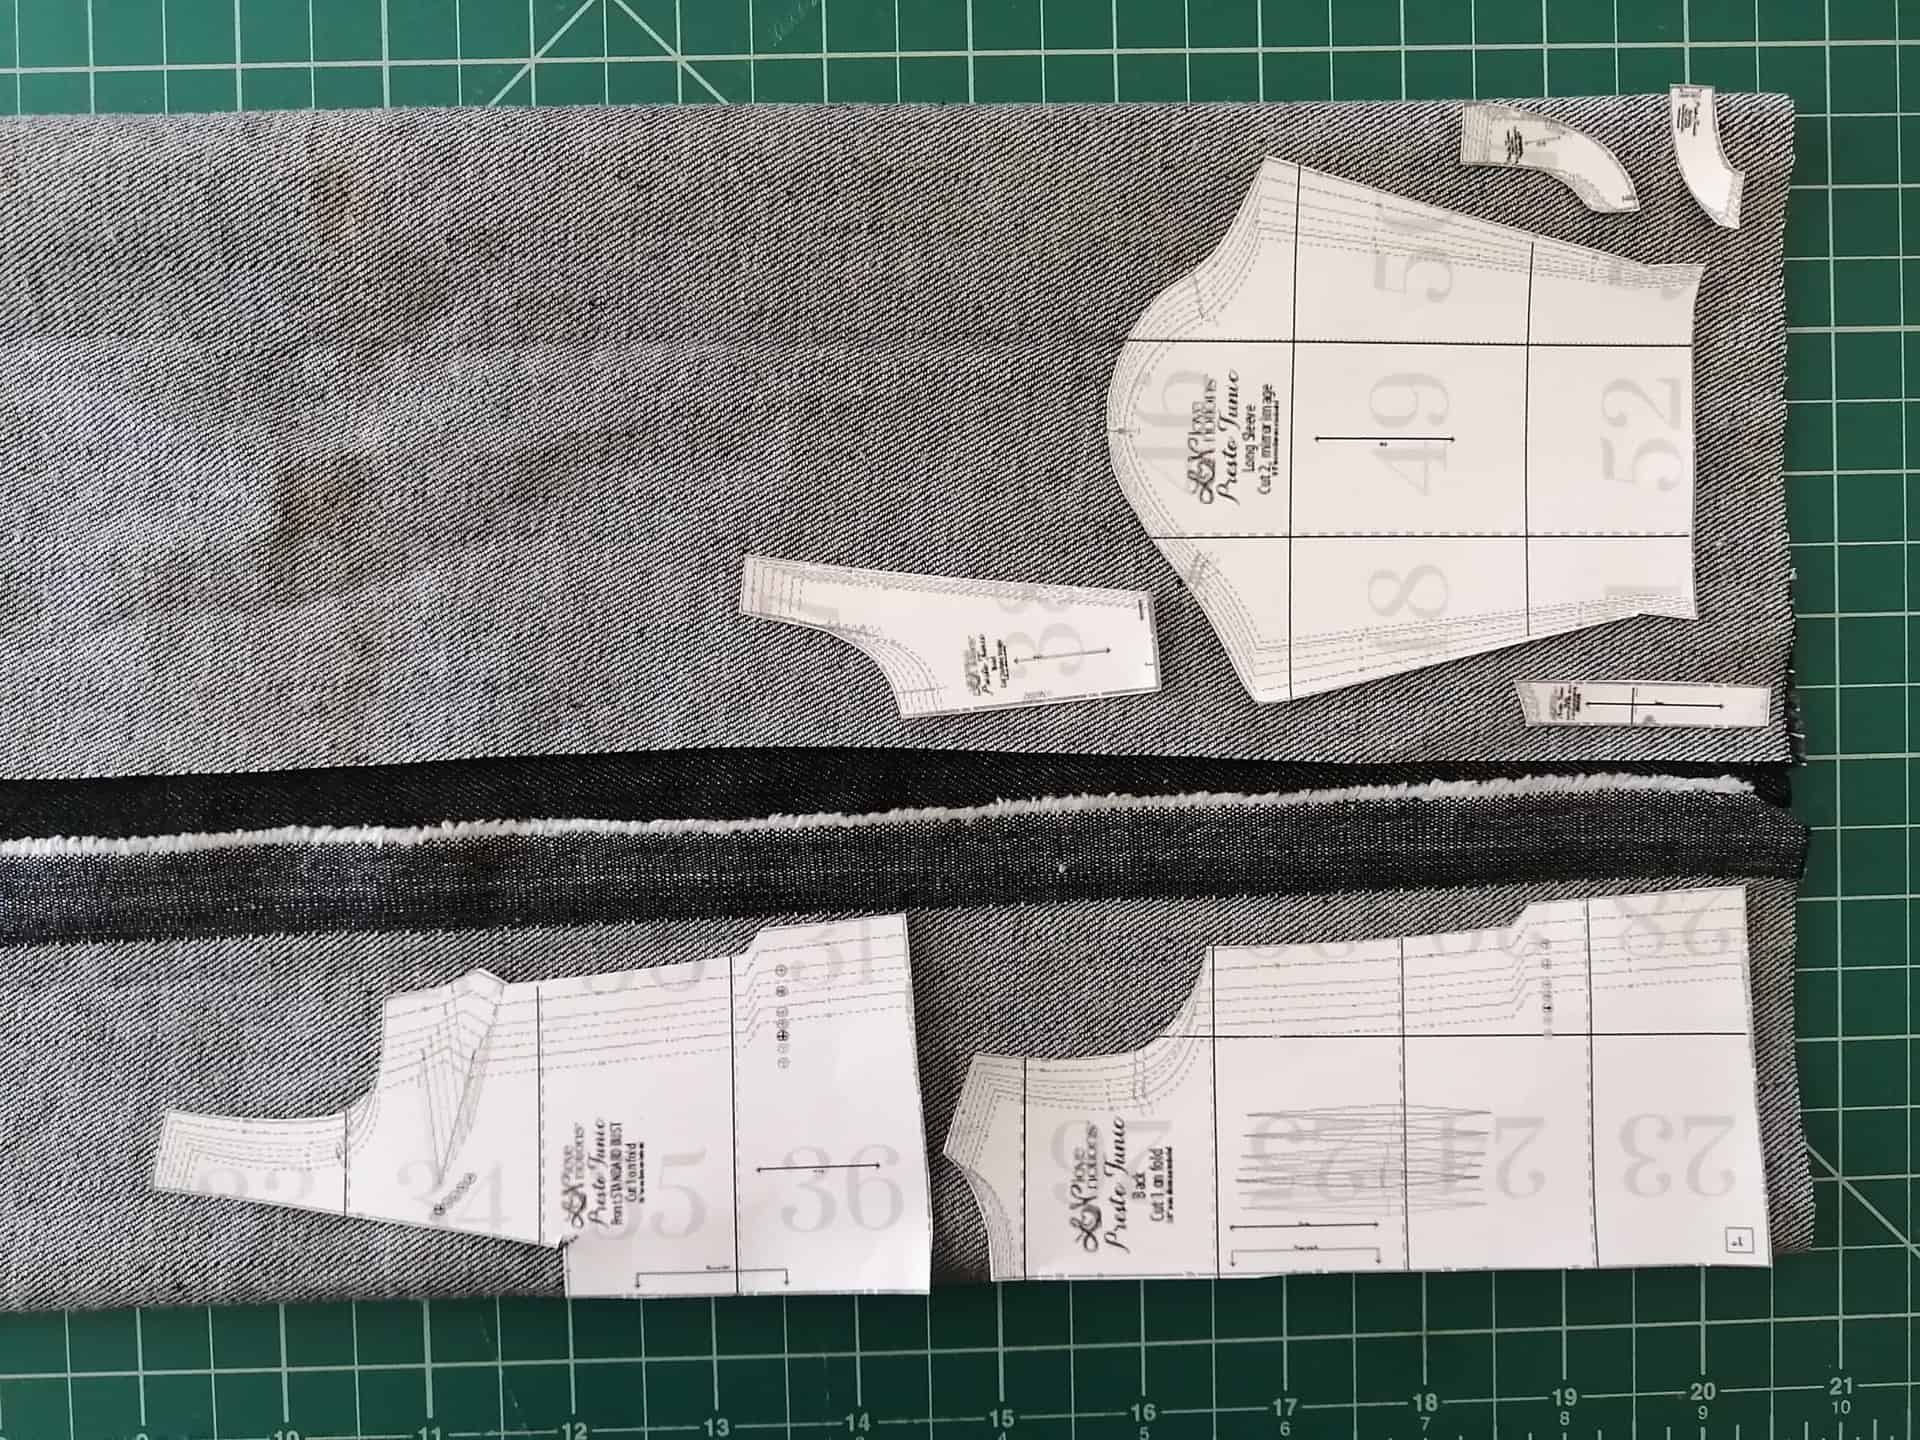
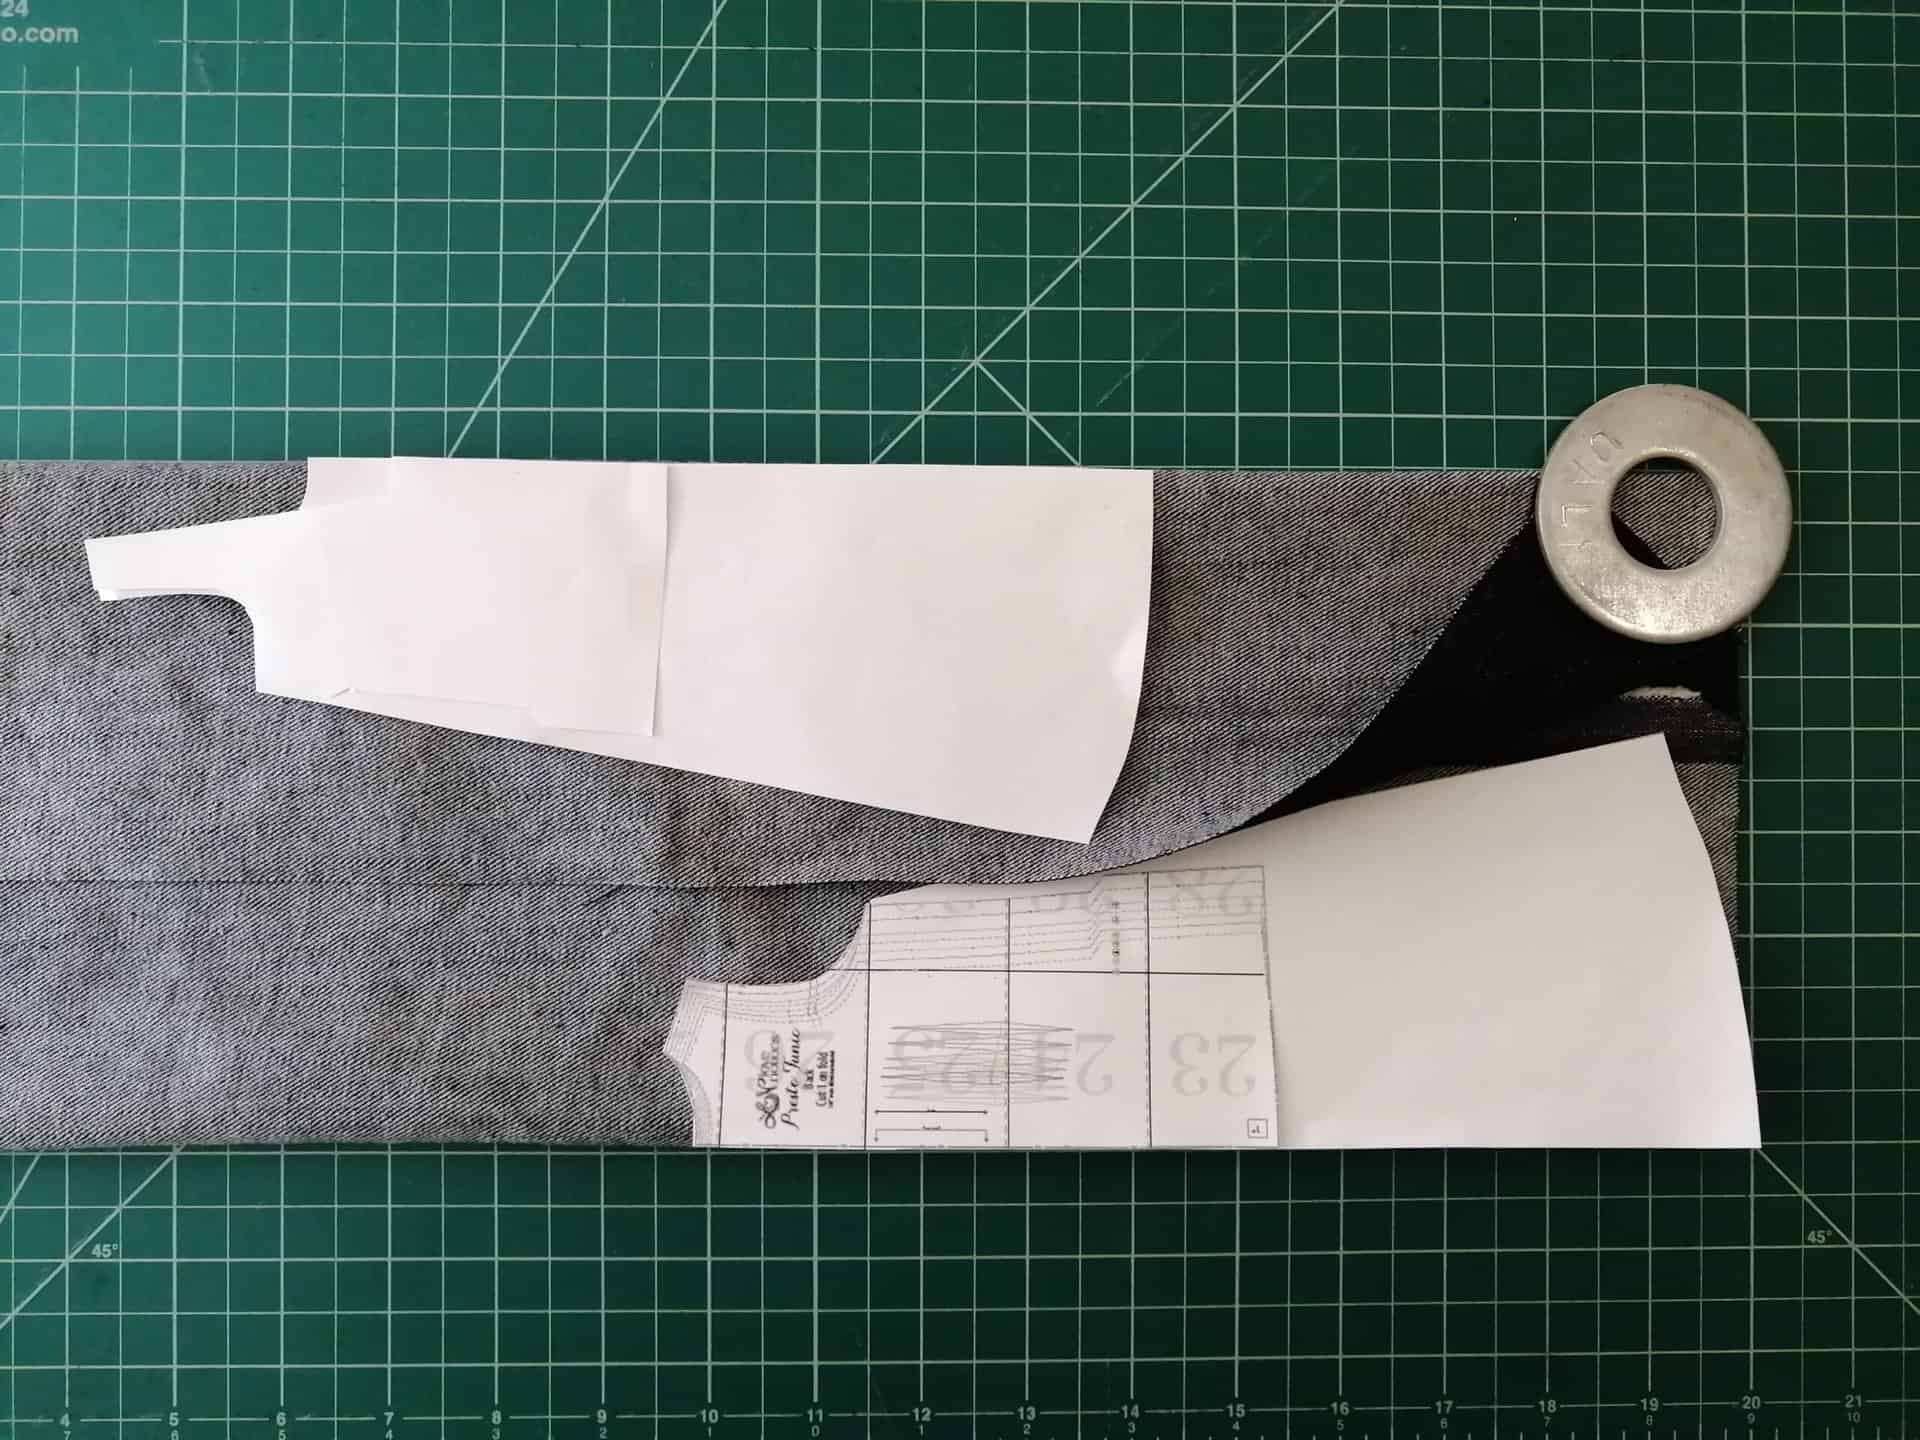
So you can see how I cut out my new Presto Tunic, here is the actual layout I used. I folded my fabric into thirds and had all my pattern pieces, save for the sleeves, arranged to fit (note that the collar pieces to be double are not pictured, but I checked for space before cutting the rest). After cutting these as shown, I scooched down my fabric from left to right as shown, and folded one side over just enough to cut a set of sleeves.
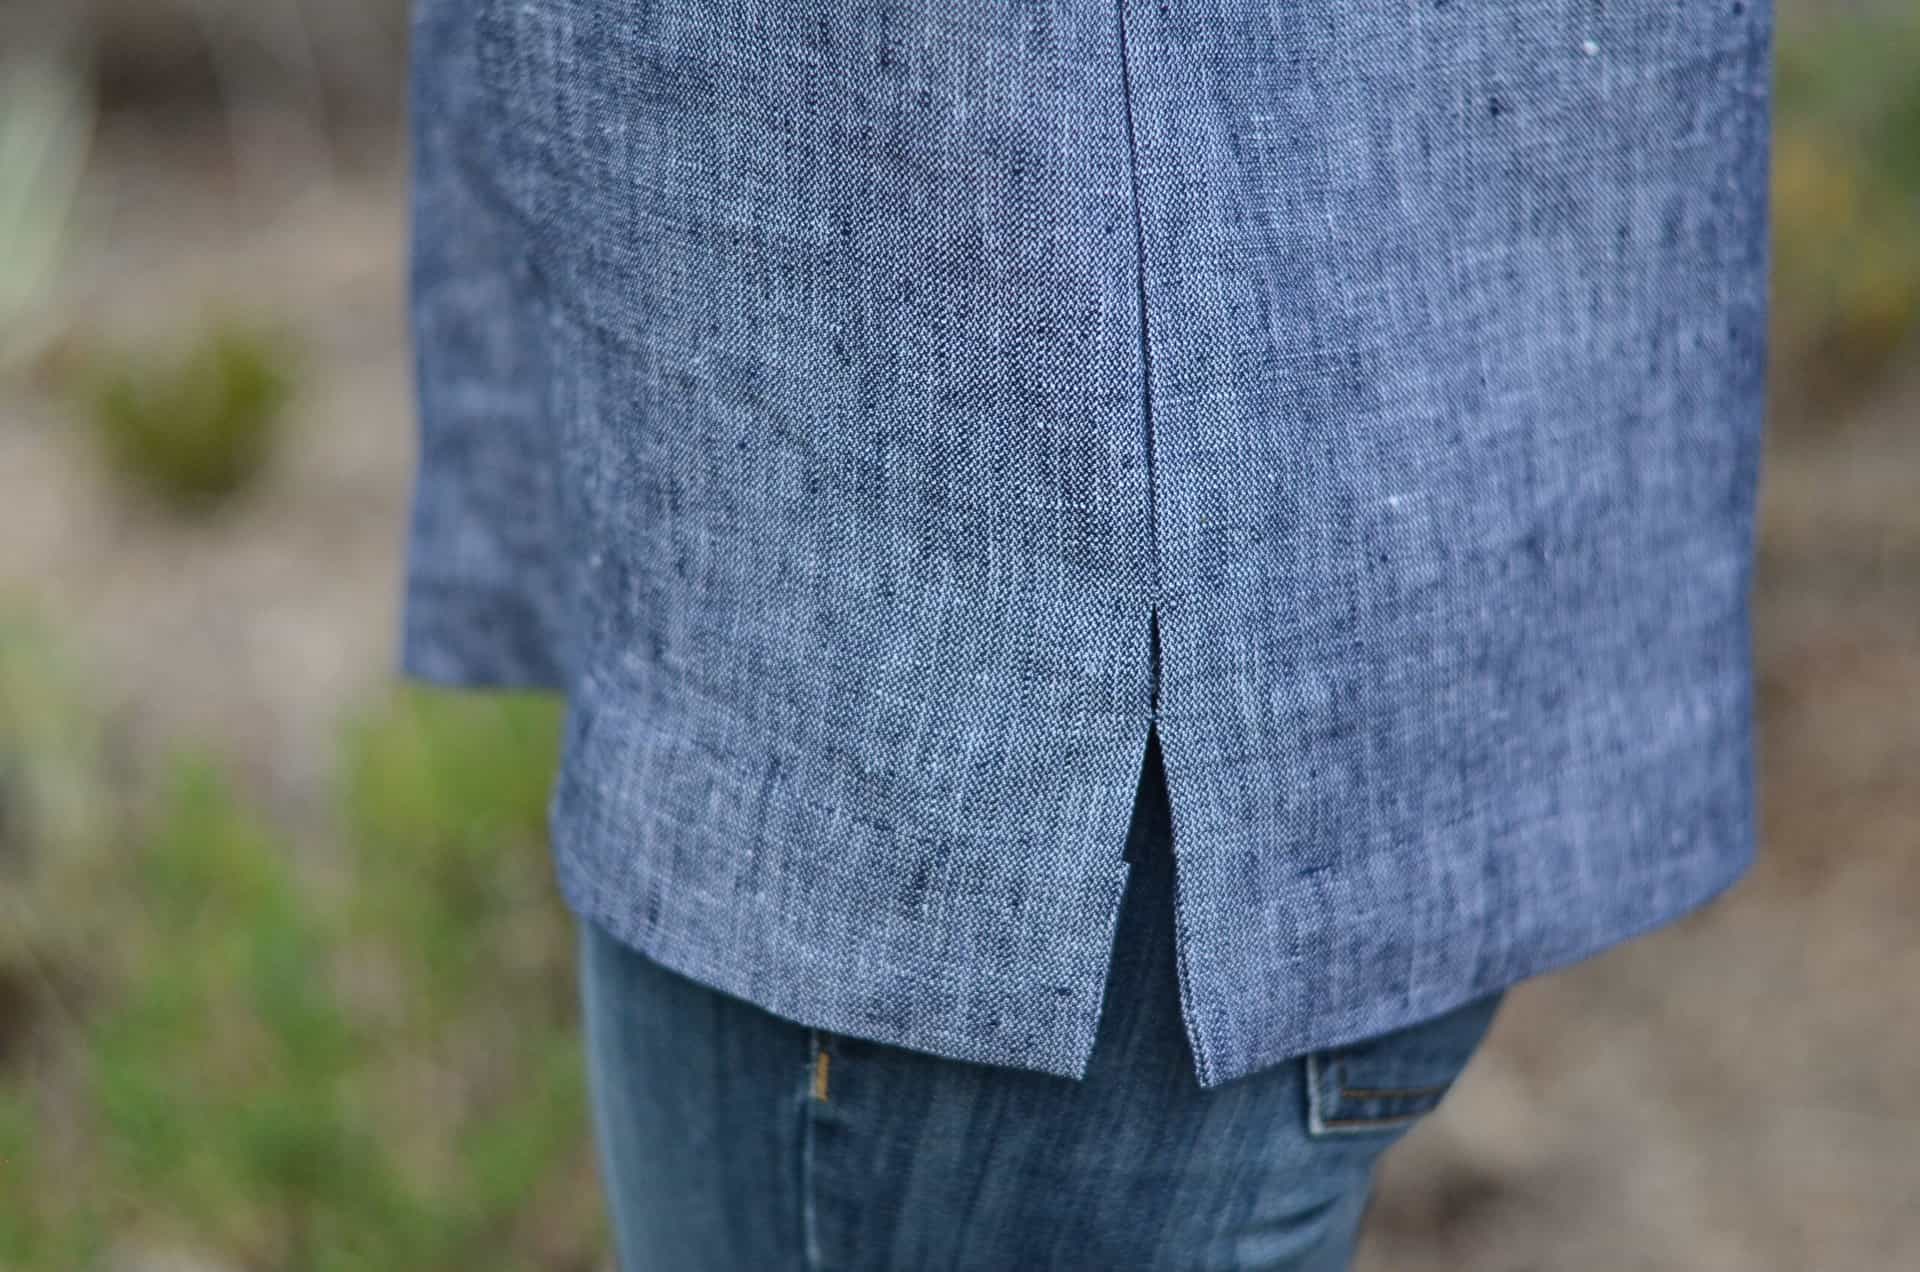
And my finished product, using as little fabric as possible!

Some Presto Details

I’d love to hear your thoughts or favorite cutting methods! Visit me on Instagram over at @kak513.
My affiliate link: https://www.lovenotions.com/product/presto-tunic-for-ladies-xs-xxxl?affiliates=150
Save this to your sewing Pinterest Board