

Hey friends! It’s Kelly here today, and we are going to talk about creating a muslin (click here to learn more about muslins) for the Sabrina Slims using our own specific sizes and shapes. We will go over how to measure, how to blend different sizes together and then we are going to cut out our patterns and fabrics. Are you ready? 🙂
Measuring
Measuring yourself accurately is the first thing you have to do to get a good fit. Do NOT go by your ready to wear size. Always go by your measurements no matter what you are sewing. (This goes for sewing for your kids, also. 😉 ) The Sabrina Slims require four different measurements to start your path to the perfect fit, natural waist, hip, thigh and ankle inseam. It’s best to take your measurements with only your undergarments on. You won’t get a very accurate measurement if you measure over your clothes unless they are very fitting like I am wearing for this tutorial.
Click here to learn how to take measurements.
You are going to need a couple simple supplies for this; a piece of paper, a pencil and a tape measure. A mirror is a great bonus.
Let’s start with the natural waist measurement. This is NOT where you wear your pants. To find your natural waist, stand with your feet together and bend over to one side, where your waist bends and you see creases, this is your natural waist.
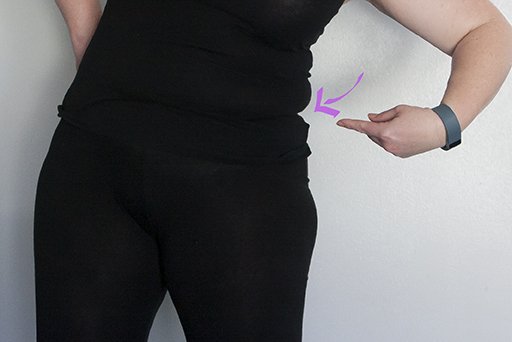
Take a tape measure and hold it around your natural waist, making certain it is level. It helps to do this in front of a mirror. Don’t pull super tight, but you don’t want any slack either. Pink dot is my belly button. Notice that my natural waist is NOT where my belly button is, it’s higher.
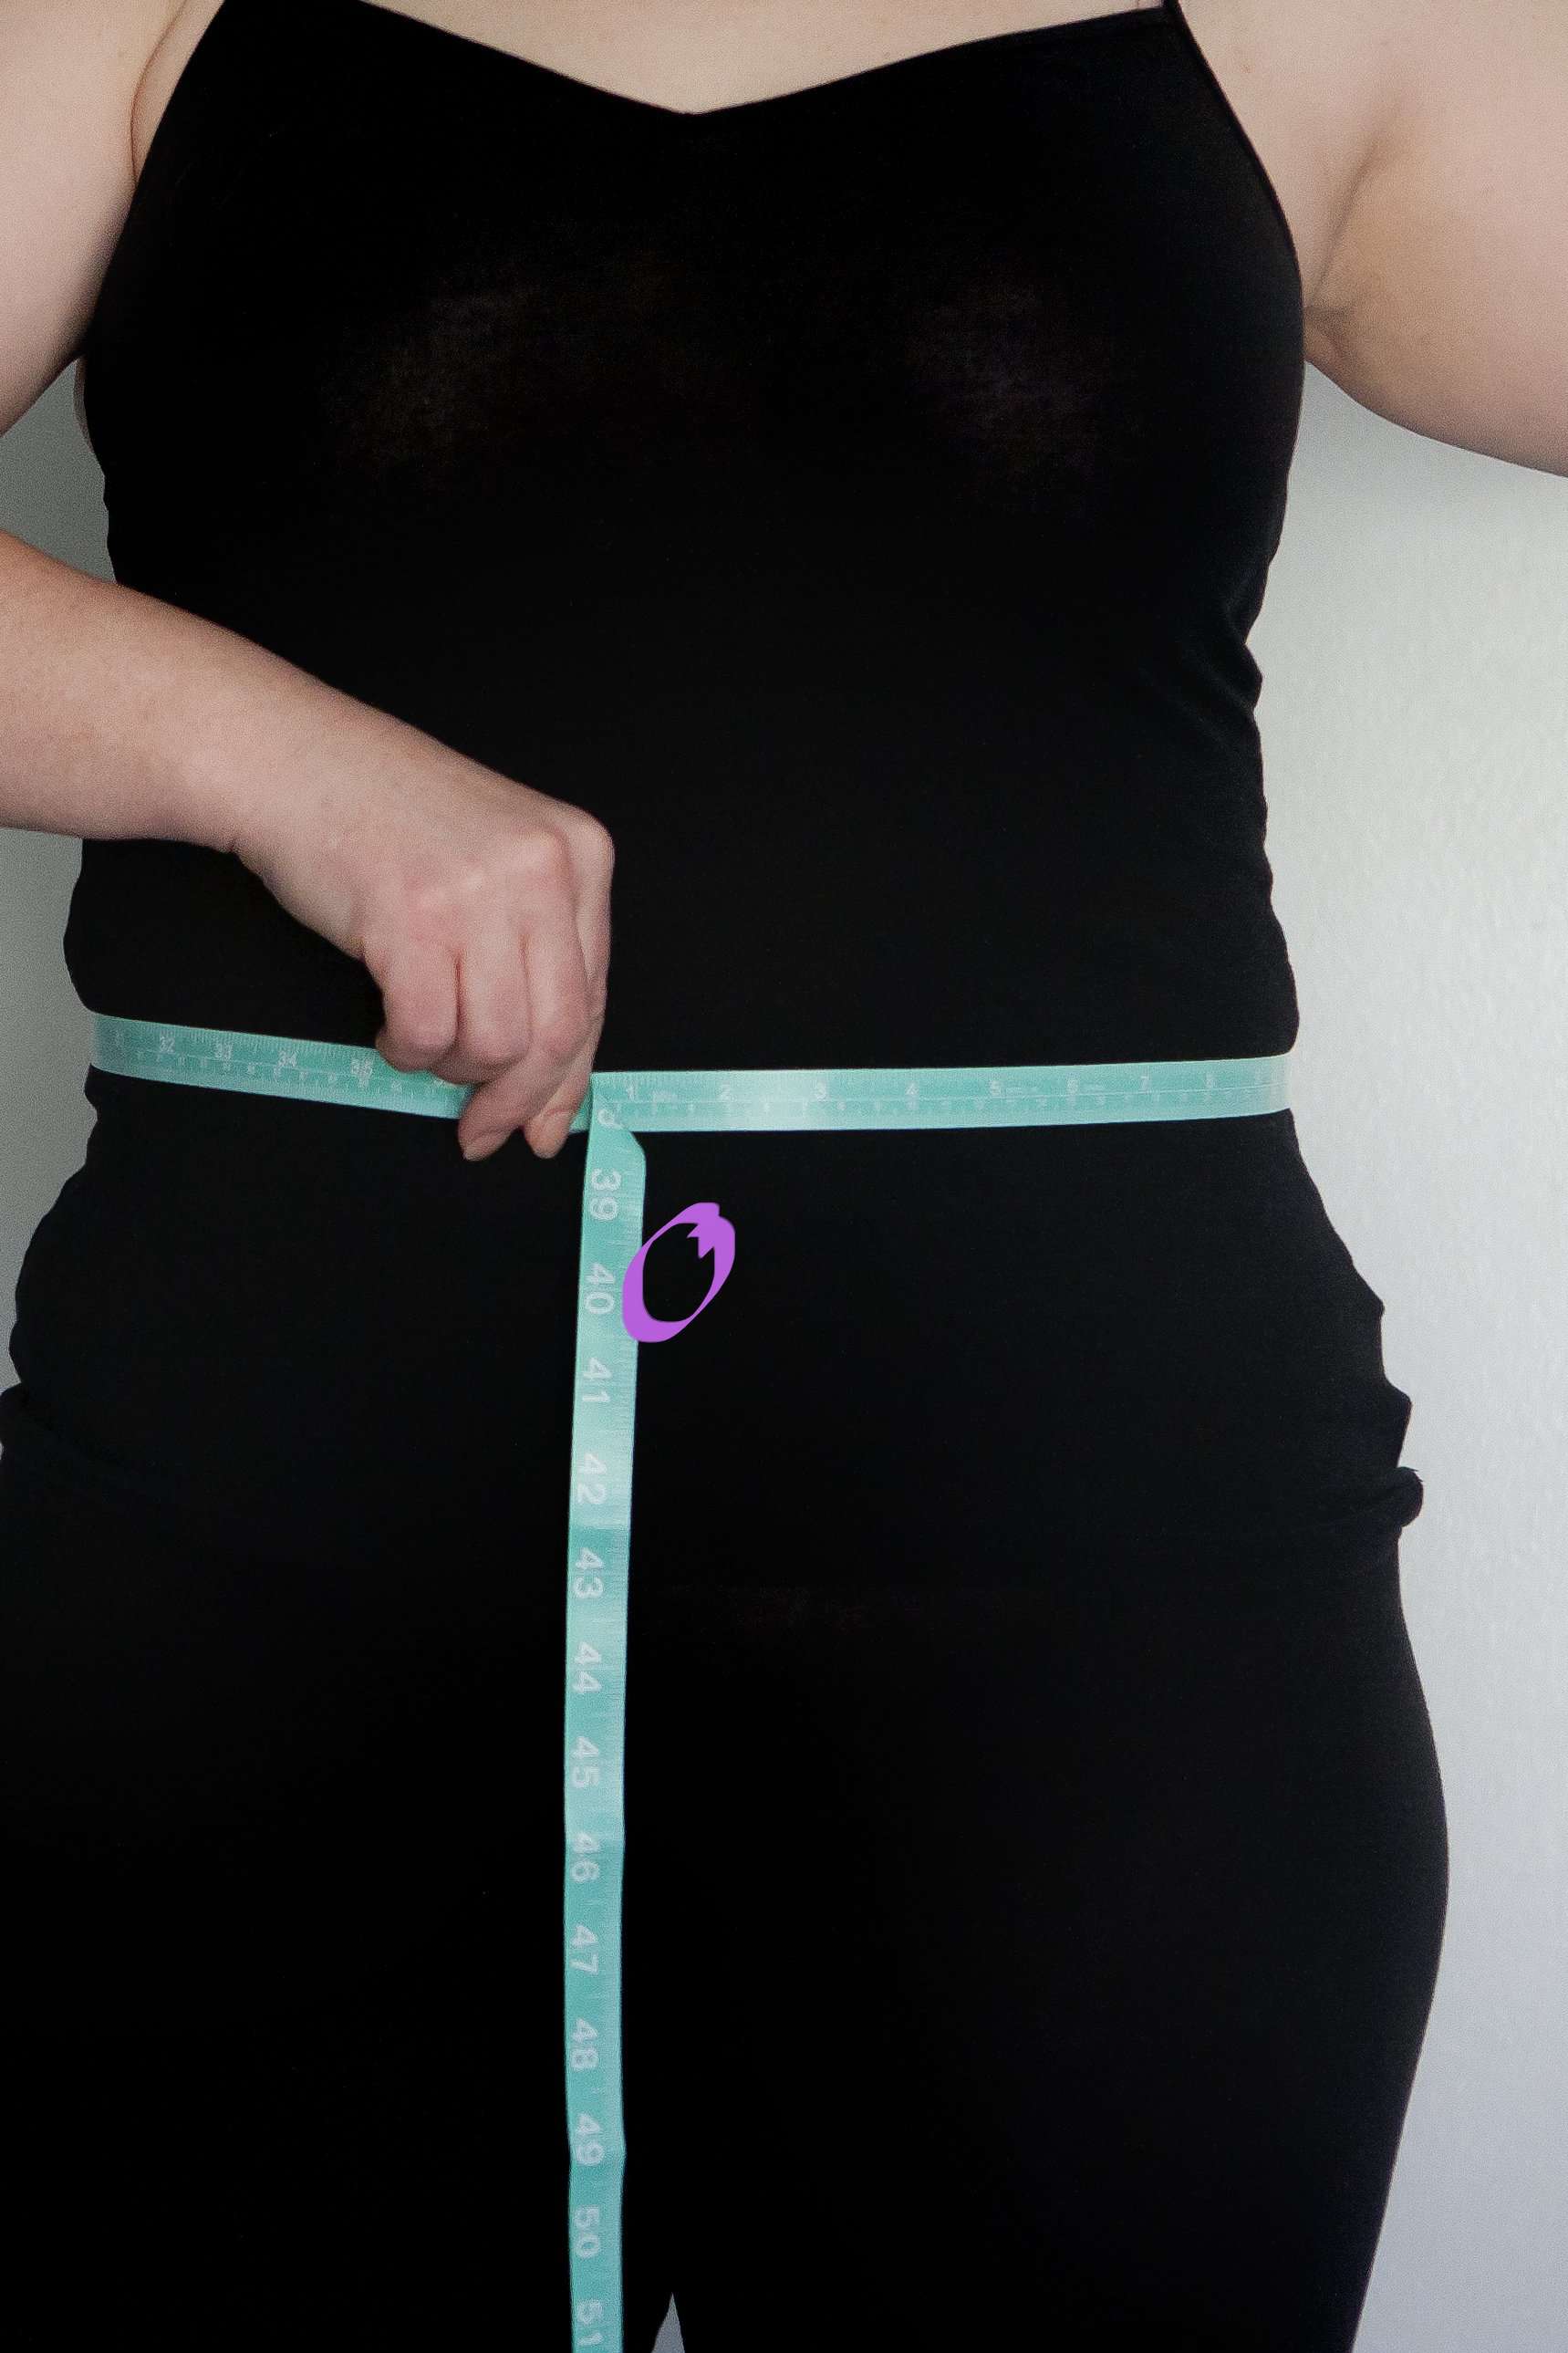
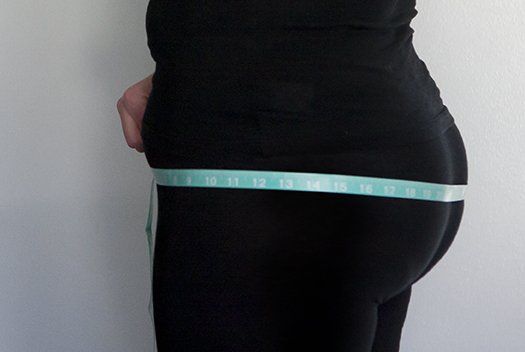
Next, let’s find the hip measurement. This is the fullest part around your hips and bum. Stand with your feet together and make sure the tape measure is level and not slack at all.
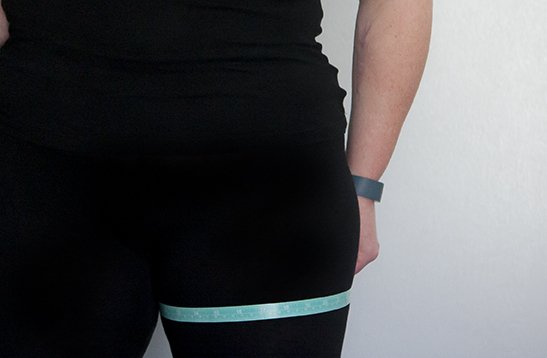
For your thigh measurement, you are going to stand with your fit just slightly apart and measure around the thickest part of your thigh. You may need somebody to help you get this measurement to get it accurate.
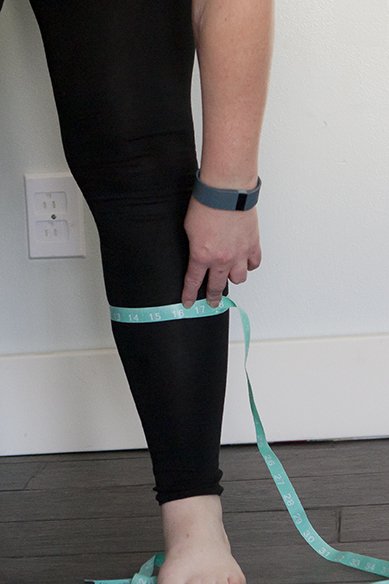
Your calf measurement is just like your thigh measurement, only down on your calf.
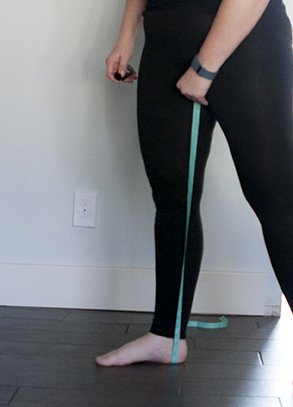
To measure your ankle inseam, start with the tape measure up where the crotch of the pants will hit and then measure straight down the inside of your leg to your ankle. Again, an extra set of hands would make getting this measurement much easier and more accurate.
Blending Sizes
Now print your pattern based off of the sizes that you measure into. If you have a waist that is a 12 and hips and calves that are a 10, select both of those sizes when you print. If you have size 6 hips, size 2 waist and size 4 calves, print all three sizes, you get the idea.
Once you have your pattern printed and taped together, you are going to blend the sizes that you need together. It isn’t nearly as scary or difficult as it sounds. Just take a pencil and draw a line connecting one size to the other in each area that you change sizes.
Now things are about to get real. And personal. These are my measurements.

These are ONLY numbers. My numbers. I wear a size 12 in most jeans from the store. Yet, I am sitting at a 16/18 for the Sabrinas. It’s only numbers. See why I said above to NOT go by your ready to wear (RTW) size? So, as you can see, I am a rather average American size.
So, I need to blend the size 16 hips with the 18 waist. Just draw a line from one size to the next on both the front and back pieces above where the hips are.
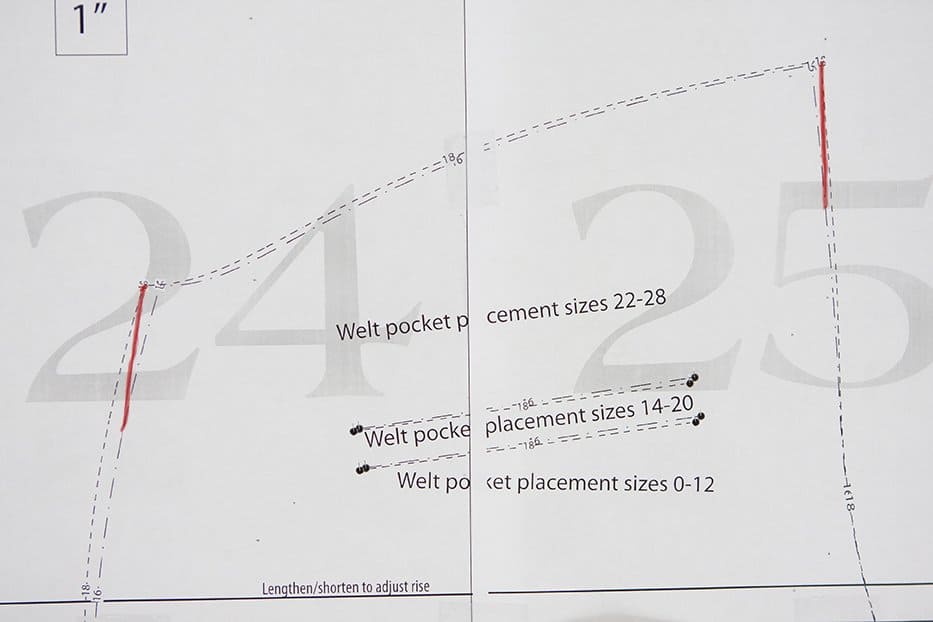
See, that wasn’t hard, was it? I only need it at the top part, you may need to start blending a bit lower for your shape.
Now, I need to blend from the size 16 hip out to the 18 thigh.
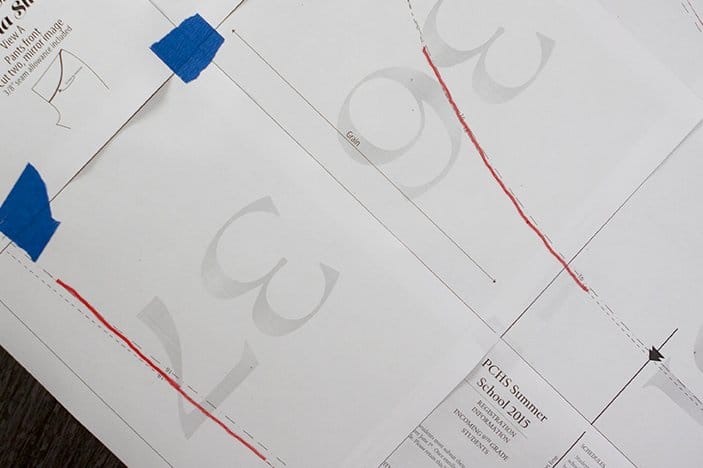
Again, pretty easy, huh. Now, I need a 16 for the calf, but, I am just going to cut an 18 and then shape the lower half of the pants to my leg.
This would also be the time that you make any other personal adjustments that you may need. Want to lower the rise, or add some length? Now is the time to do that. You can find these alterations in the pattern.
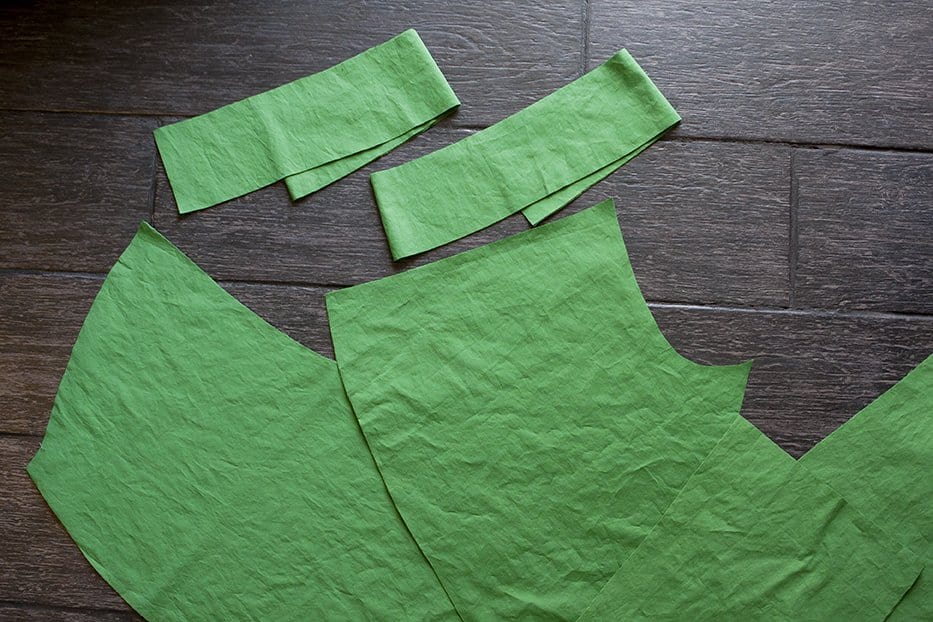
Once you have your pattern adjusted to your body, cut it out and then cut out your fabric. Be sure to have the stretch going the proper direction!! The pattern notes which direction the GRAIN is. This is perpendicular to the stretch of the fabric!! You want the stretch to wrap AROUND your body!
I am experimenting with my fabric. I’m using some light weight stretch broadcloth from Cali Fabrics in this gorgeous shade of green. I got a bit distracted by the color and didn’t pay very close attention to the type of fabric I ordered. Oooops! I’m crossing my fingers though and hoping these make for some great light weight pants for late spring and summer time. The item description for this fabric says that it has 10% stretch, but I found that it is closer to 25% which should be good for some Sabrina Slims! It’s a bit under the recommendation of 30%, but I’m feeling optimistic about it.
I am omitting the welt pockets because of how thin this fabric is. If you want welt pockets, be sure to cut them out along with your interfacing!
Feel free to ask any questions you have regarding how to blend sizes over in the Facebook group and share your fabrics that you have chosen. Tomorrow Tami is going to share those front pockets she told you about Monday and we will be sewing up the side seams and learning how to make some tweaks to the pants to really get a great custom fit.
- Sabrina Slims Sewalong Day 1– Choosing fabric
- Sabrina Slims Sewalong Day 2– Selecting your size to get a perfect fit
- Sabrina Slims Sewalong Day 3– Pockets, construction & alterations
- Sabrina Slims Sewalong Day 4– Waistband & hemming
- Sabrina Slims Sewalong Day 5– Jogger hack
- Sabrina Slims Sewalong Day 6– Style inspiration
Save this series to your Pinterest
Shop more easy sewing patterns:
-
Product on sale
 Laundry Day TeeOriginal price was: $12.50.$5.00Current price is: $5.00.
 -
Product on sale
 Leggin’sOriginal price was: $9.00.$0.00Current price is: $0.00.
 -
Product on sale
 Classic Tee ShirtOriginal price was: $10.00.$5.00Current price is: $5.00.
 -
Product on sale
 Rhapsody Blouse & DressPrice range: $5.00 through $18.00
 -
Product on sale
 Skater SkirtOriginal price was: $9.00.$0.00Current price is: $0.00.
 -
Product on sale
 Allegro BottomsOriginal price was: $12.50.$5.00Current price is: $5.00.
 -
 Sabrina Slims Pants$12.50
 -
 Cadence Dress & Top$12.50
 -
Product on sale
 Dashing VestOriginal price was: $9.00.$0.00Current price is: $0.00.

